If you have been a reader for a while now you may have noticed that while I do sometimes love smart home products and some of the cloud-based services that go along with them. I have a strong hate for anything that requires a monthly payment and I try to host as much as I can on our own rather than have potentially important data in someone else’s hands. I’ve moved things like Google Photos over to our own storage and even before all of the cloud-based camera services came out we were running our own IP cameras with a basic server running on my main PC. Eventually, to take the load off of that I used a small SFF system that I had to run Blue Iris and then stored the data on a NAS. With me trying to tidy up our server rack I have been hoping to get that server rack mounted but I have also been running into issues with our current setup in just about every way possible so it’s high time that I stop putting this off and rebuild our security server, welcome to Project Icyu.
Title: Project Icyu– Blue Iris Build Part 1
Written by: Wes Compton
Build Sponsors/Supporters: Silverstone, Intel, Noctua, Cooler Master, MSI, Kingston
Amazon Affiliate link:
Links to the rest of the project: Part 1 - Part 2 - Part 3 - Part 4
Current Setup, Issues, and Goals
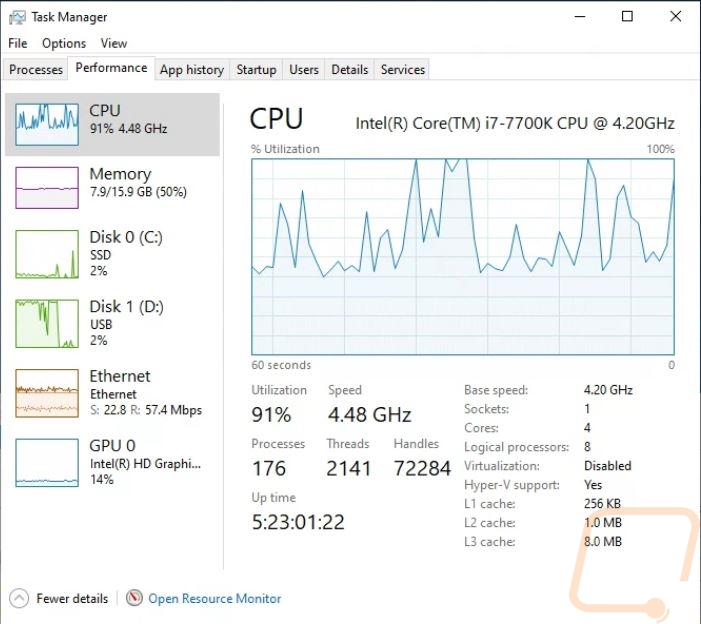
Before getting into what I’m planning on changing up let's just talk about some of the issues I’m having so we know what needs to be upgraded. Our current setup is built inside of an In Win Chopin and has an Asus ROG Strix Z270-I Gaming motherboard paired up with an Intel i7-7700K. It has 16GB of ram and a Kingston Digital SSDNow UV400 500GB SATA SSD. The original setup would back up footage to a NAS overnight but at some point, we had issues with that and as a band-aid, I added a 5TB WD Black P10 that I previously reviewed. The system itself isn’t too bad of a setup, even now but over time we have expanded the number of cameras we are running and upgraded some of the originals to higher resolutions. I also moved to AI to cut out some of the false alerts we were having and the system is constantly fighting at 100% CPU usage when there is a lot of motion. Our OS hard drive while an SSD is feeling slow compared to what is out there now and storing everything on a USB drive is holding things back as well. Even the 16GB of RAM sometimes is maxed out as well. Some of that could be an easy upgrade to get some more life out of the system but with the SFF case there isn’t any room to expand anything and cooling is a struggle as well especially now that the CPU is being pushed so hard all of the time. All of this has led to me cutting back on frame rates and even turning motion detection off on some cameras to keep things from being completely overloaded.

So what are my goals with the new system? The biggest one is to get this rack mounted in a case where I can have plenty of cooling and the room for what we need now and room to expand in the future. Getting it rack mounted should help clean up our server rack and be the push needed to clean out a few things sitting in the rack that aren’t being used anymore. The next big priority is a newer generation CPU that can get us more processing power and when doing this I’m hoping that we might be able to use a little less power by not pushing a former flagship CPU at its max all of the time. To go along with this I’m also toying with the idea of testing out adding in an Nvidia GPU because Blue Iris supports this for decoding and Deepstack AI does as well. I’ve heard that this is sometimes less power efficient so I’m not dead set on that.
With the new CPU, I can have a newer motherboard that will have more M.2 support and PCIe 4.0 for the current fastest drives. It can also get me 2.5G or 10G networking which hasn’t been a problem but will give a little more bandwidth when needed especially when you have a lot of cameras all feeding to the server and one or more streams going out as well. With my old setup, I recognize that recoding to the main SSD which has the OS installed on it is putting a lot of wear on that drive. I’m hoping to have an OS-only SSD and then a larger capacity drive for that day-to-day recording then using a spinning drive for longer-term storage. I could record right to the hard drive but I’m hoping to have fast loading times by using a fast NVMe PCIe 4.0 drive. Then for long-term storage, I am going to run one or two drives to have recordings saved for longer. When I first built this system we had 30-40 days of footage which was nice if you figure out something came up missing weeks later or if you find out later that something happened in your neighborhood. Because of having more cameras and with resolution upgrades our current setup is only capable of storing a week's worth of footage and that will only get worse when I upgrade the rest of the older cameras in the future. Because of that, I want to have more capacity than our current setup and I would like it to be easier to upgrade or swap out in the future as well. Along those same lines, I need the rack-mounted case to be easy to work on in the future as well with it having the space needed for upgrades and rails to be able to work on things on the spot.
New Case
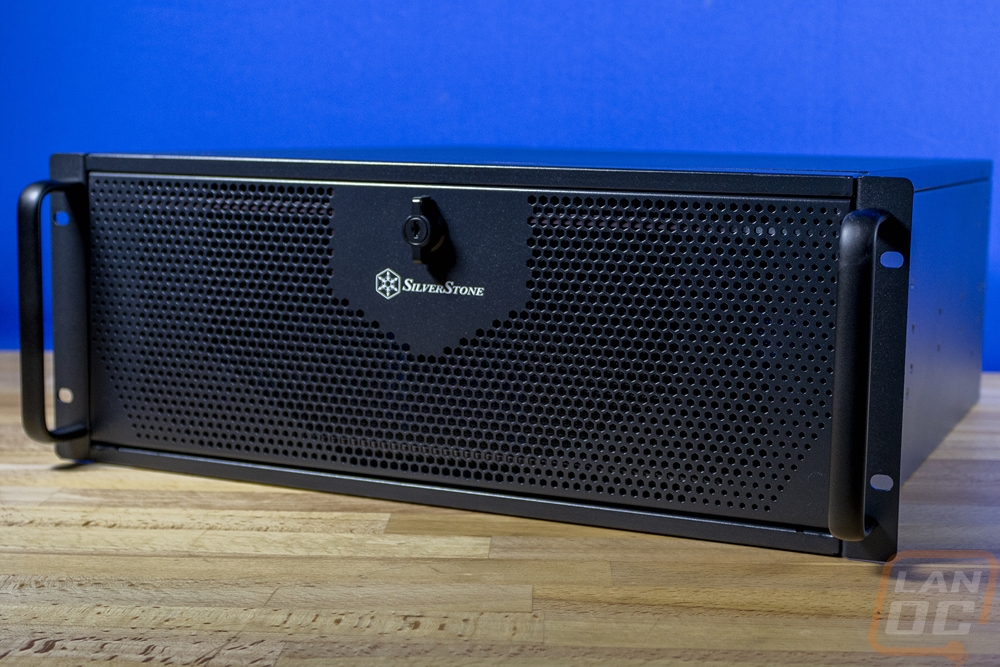
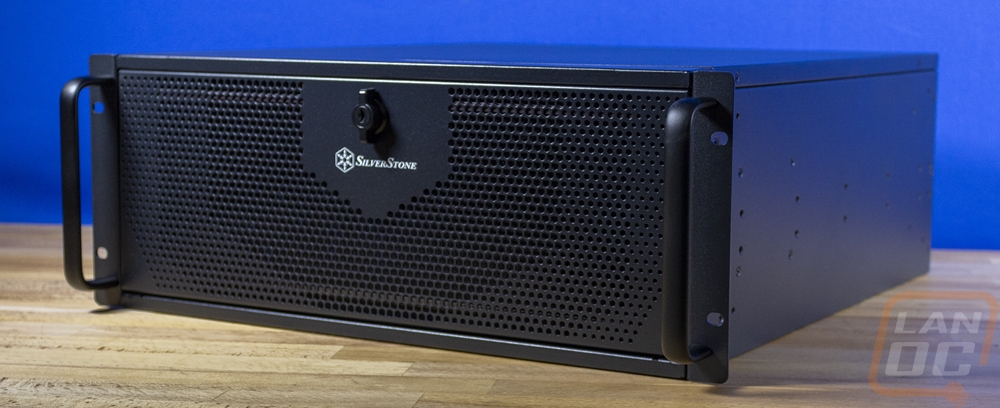
Last year with our TureNAS build I went with the Silverstone SST-RM21-308 and through that build and even over the last year I’ve been very happy with it so when planning things out for this build working with Silverstone was obviously on my radar, it just depended a lot on if they had a case that would fit what I was looking for. Initially, I was looking at really compact 2U ITX motherboard cases with a plan to stick with ITX and just have one 3.5-inch hard drive. But after giving it some thought and after coming across the RM42-502 I decided a larger 4u case would work better for cooling. The RM42-502 from Silverstone is designed to support an AIO and if needed a full gaming PC which would also leave me room for a GPU if needed and more than one drive for storage as well so that is the case I ended up going with but the recently introduced RM23-502-MINI was on my shortlist as well if I decided that AIO cooling and room for a GPU wasn’t needed.
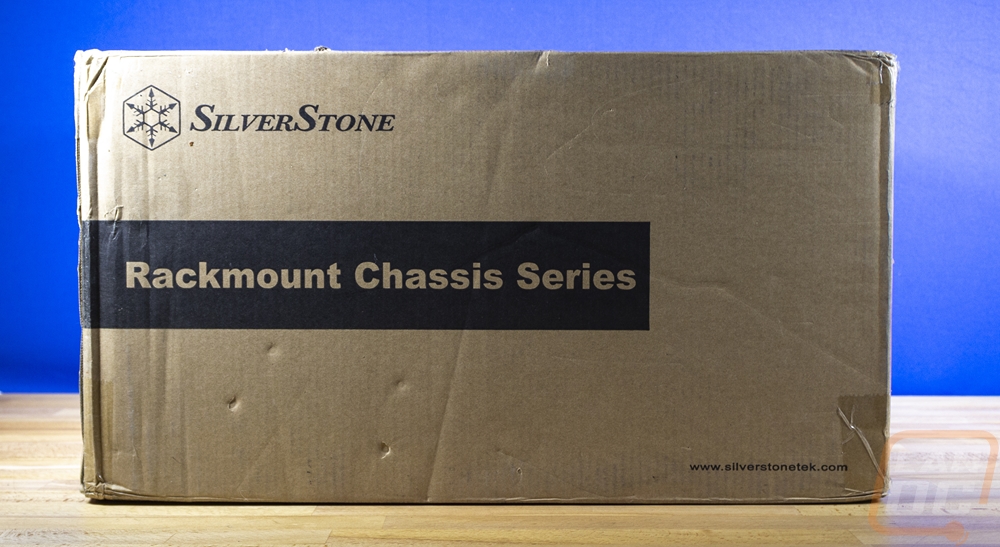
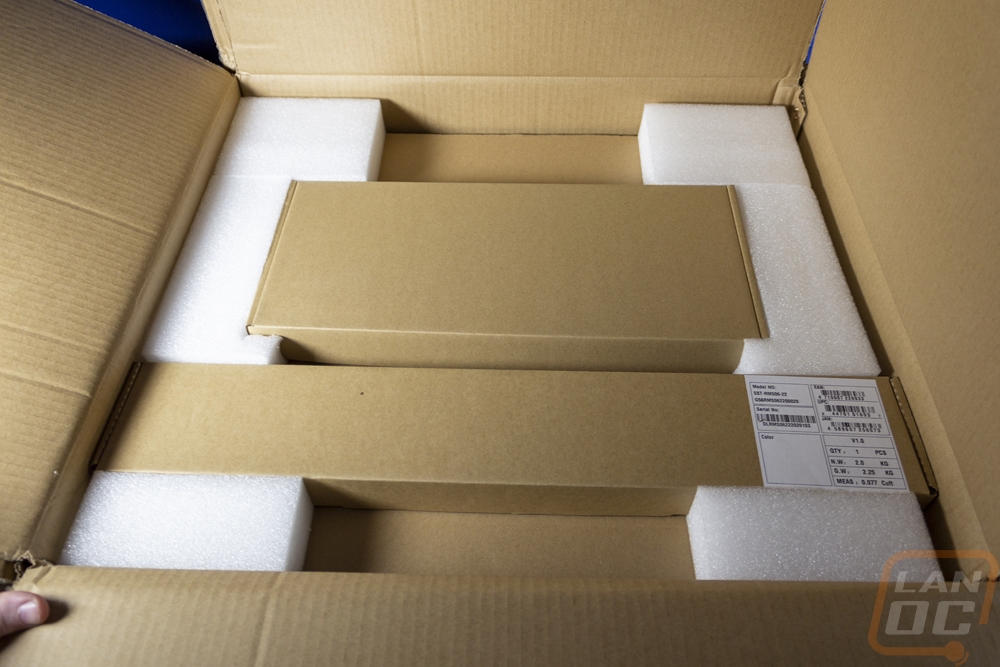
The RM42-502, like any server chassis, came in a brown box with just a few things printed in black on it. They have the Silverstone logo up in the top left corner and a big black stripe that lets you know this is from their Rackmount Chassis Series. The model information was there on a sticker but not all over the case because this isn’t a product that would be selling in a retail environment. The RM42-502’s packaging on the other hand was impressive. There were one or two more box layers that you have to dig through before getting inside, I don’t see the case getting banged up in shipping with the amount of protection just in boxes alone not to mention the foam that is also there to give a buffer. They did ship our rack rails (which sell separately) inside the box which had a spot for them. But when you open up the main box you have a tray with foam to hold the accessory box and the rails. Then below that, the case sits in its foam tray and inside a plastic bag.
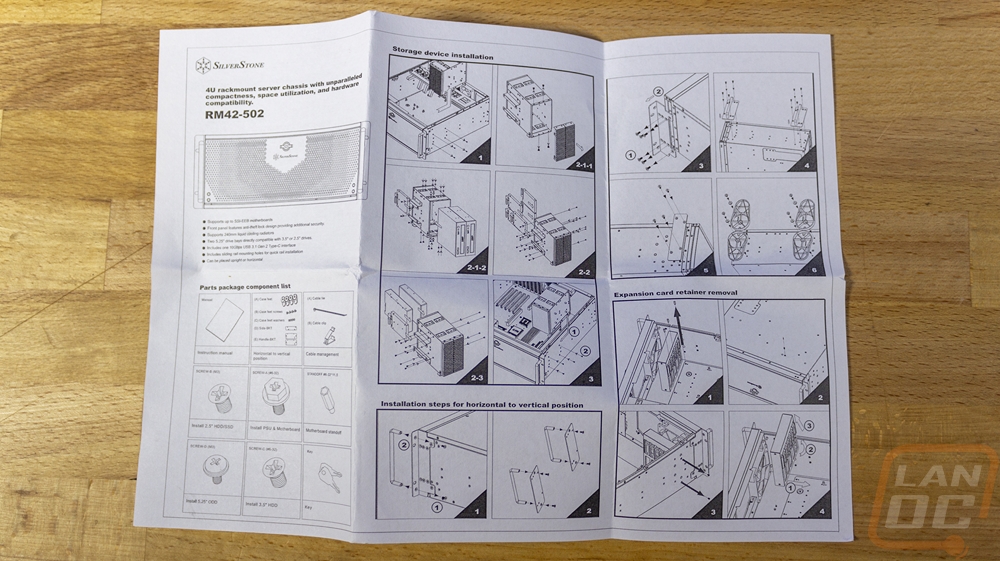
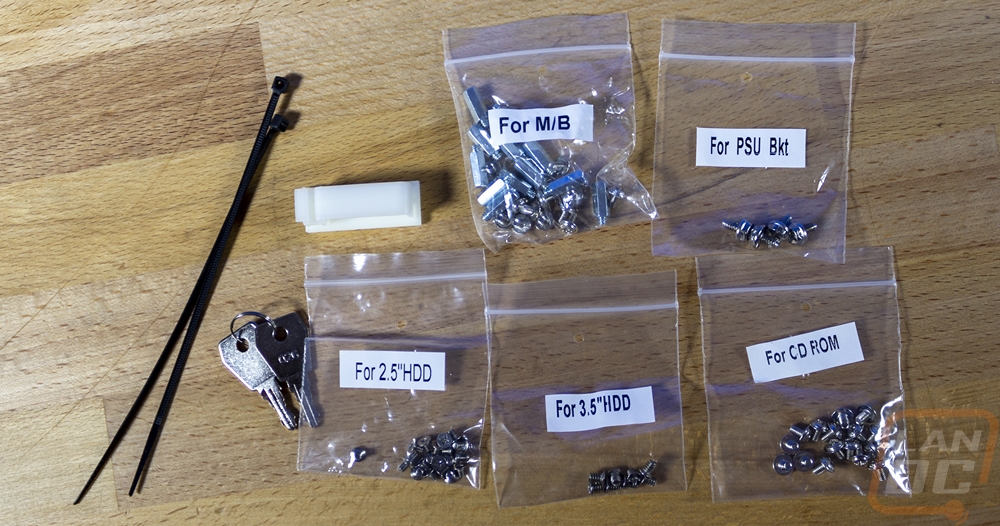
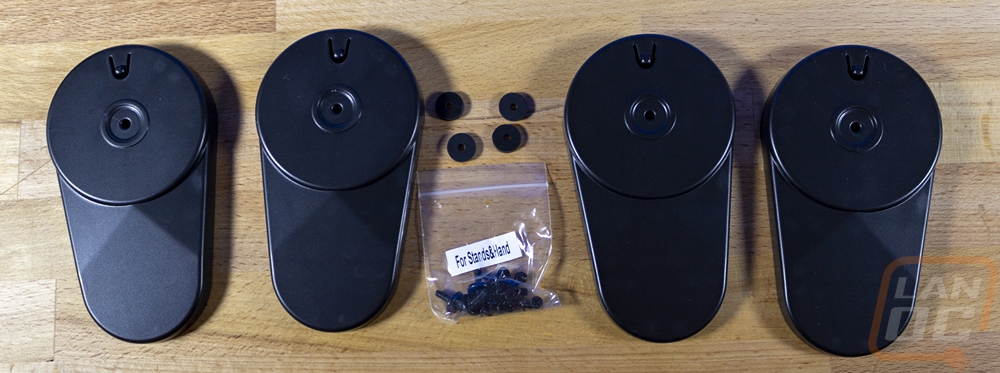
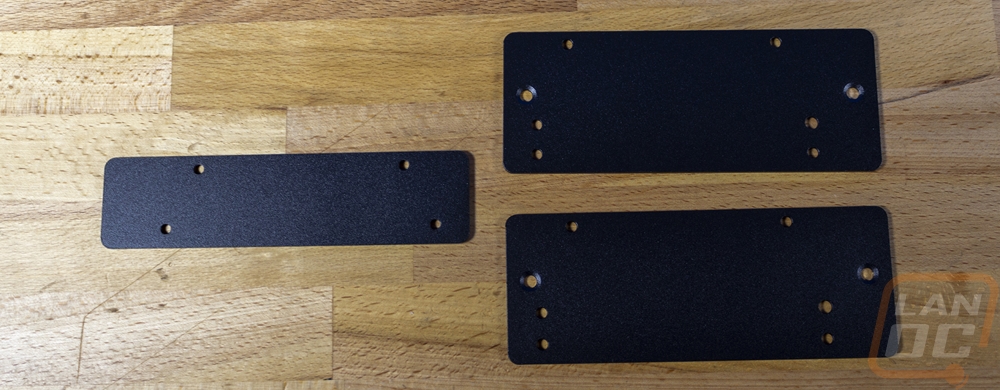
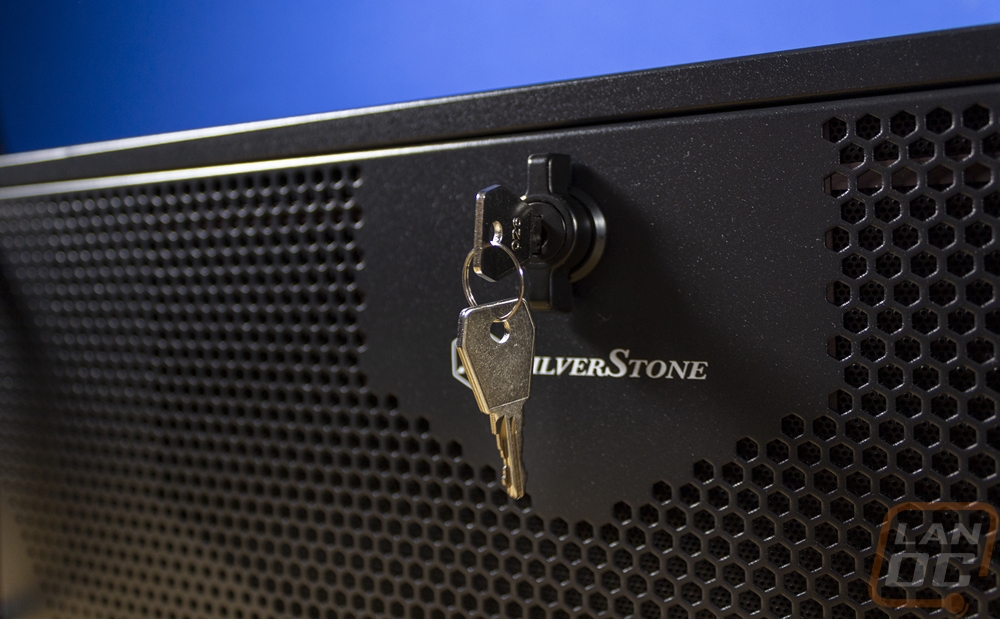
The accessory box has the instruction manual which given the professional focus is just one page folded up. You also get two large bags with these black plastic feet inside. You have four feet in total along with mounting screws and vibration pads. The feet are for if you need to set the RM42-502 up outside of a rack environment in a vertical orientation. You also get three thick steel adapter plates, these are for that vertical orientation as well, one is a bottom plate that replaces the rack mounted handle location and the two others are adapters to use the rack handles as top carrying handles. I can’t see myself needing that, but it is cool that there is an option to be able to convert the RM42-502 over to a desk case. You get a fan extension cable, then you have one large bag with all of the rest of the hardware. In that bag, you get two small zip ties and a stick-down wire management clip to help with wiring. You have a set of keys for the front door. Then you get five small baggies which are all labeled to show what screws are inside. You have motherboard screws and standoffs, screws for 2.5 and 3.5-inch hard drives. Screws for 5.25 bays, and a few for the power supply adapter bracket if you want to switch between the ATX PSU to a Mini Redundant power supply.
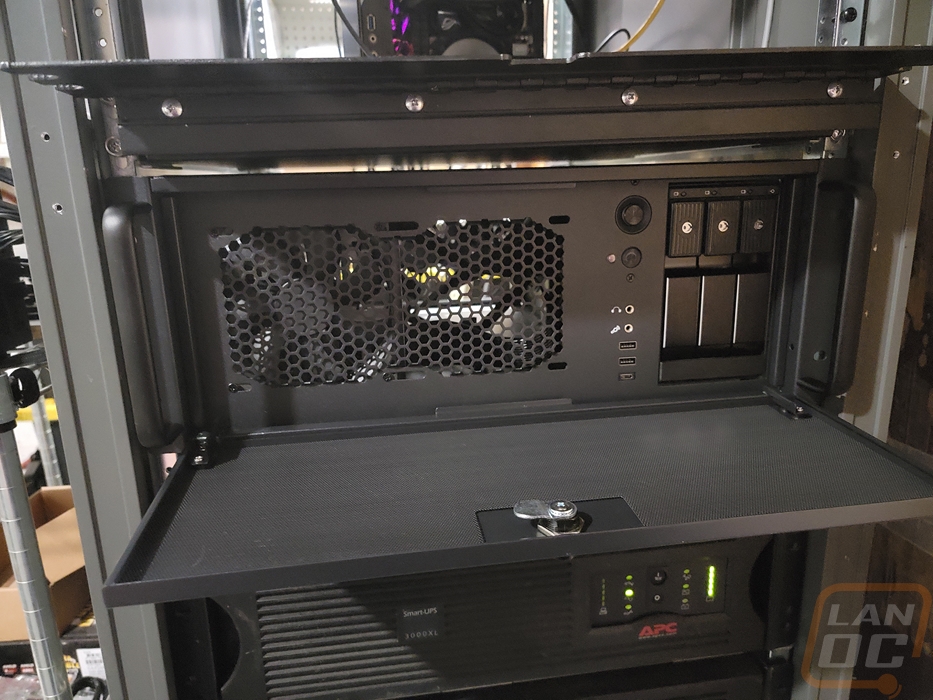
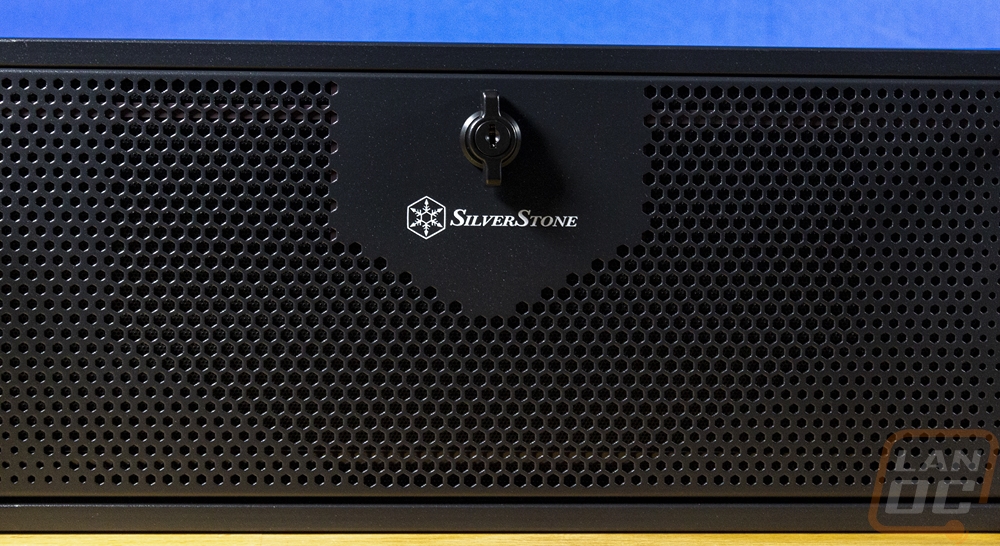
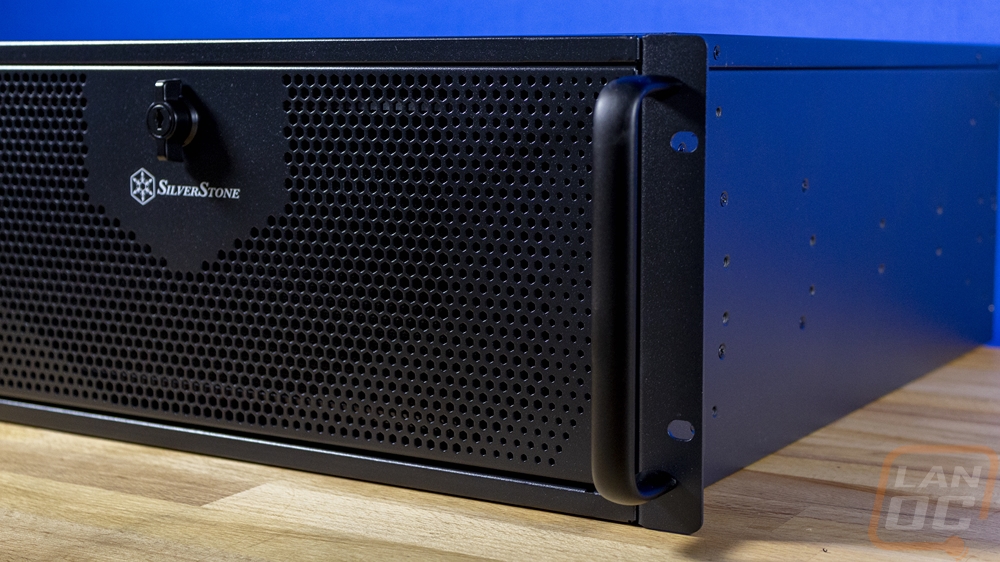
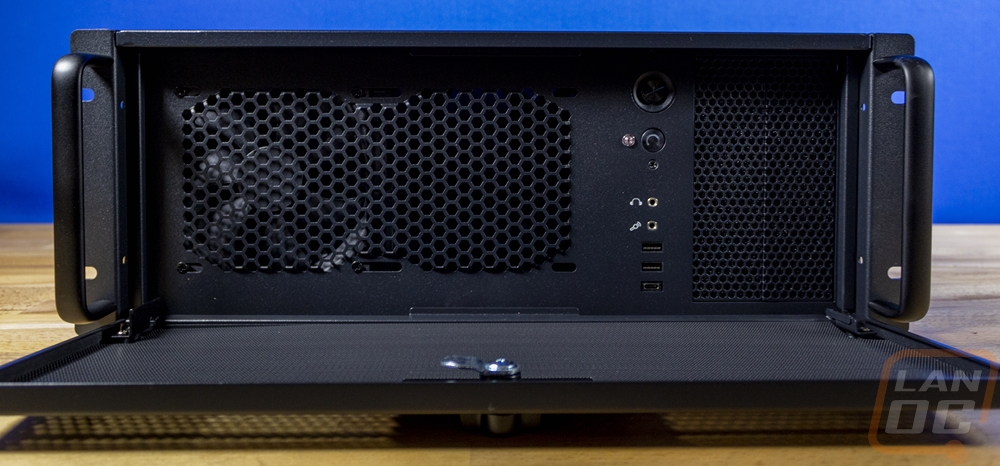
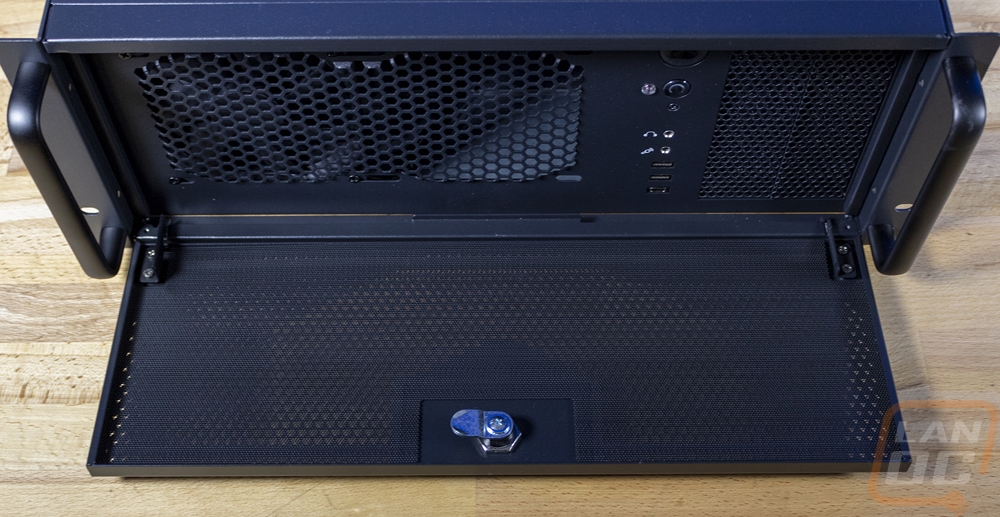
The front of the RM42-502 comes with the rack handles preinstalled on both sides and then has a ventilated door that runs the full length of the front. In the center at the top, it does have a latch that can be locked or run unlocked and the Silverstone logo is below that. Then from there, the ventilation holes start as a honeycomb design then as they expand out they switch to smaller openings, and then towards the sides turn into small holes.
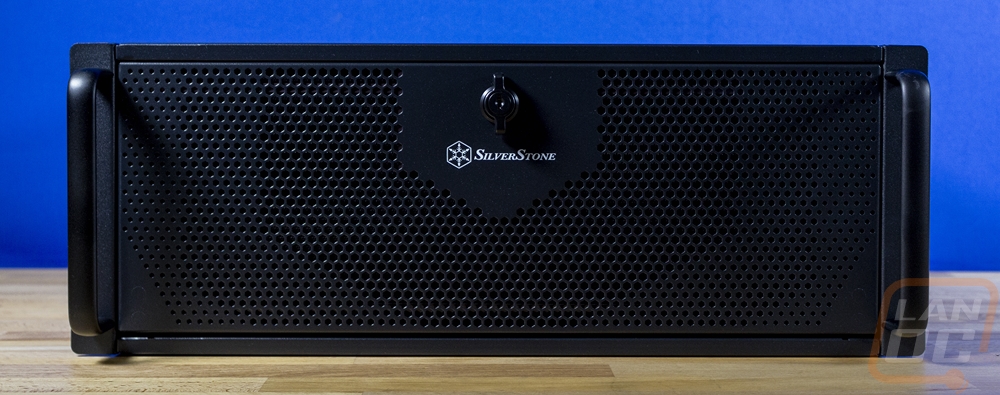
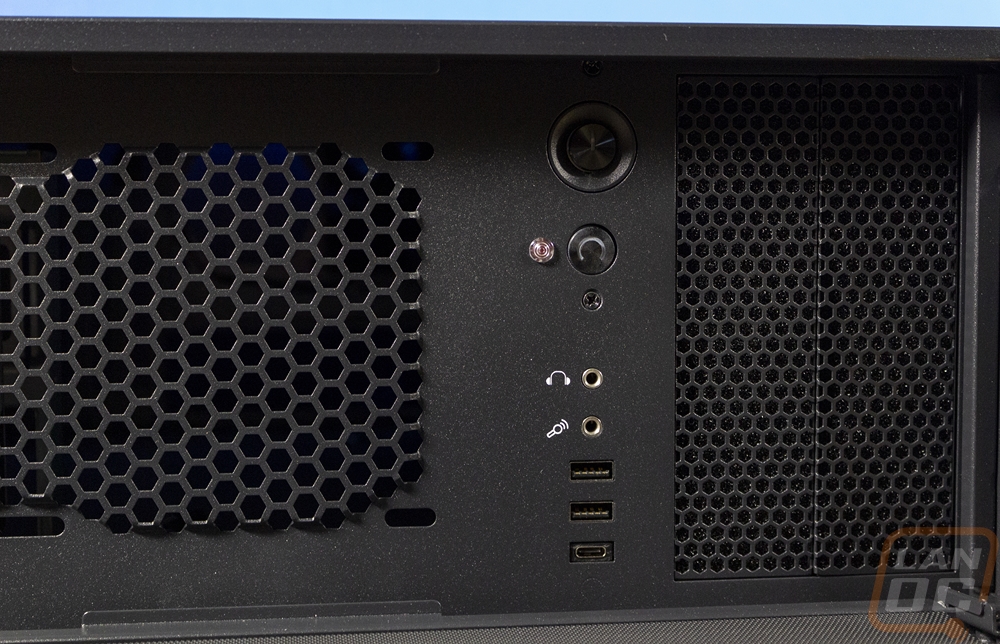
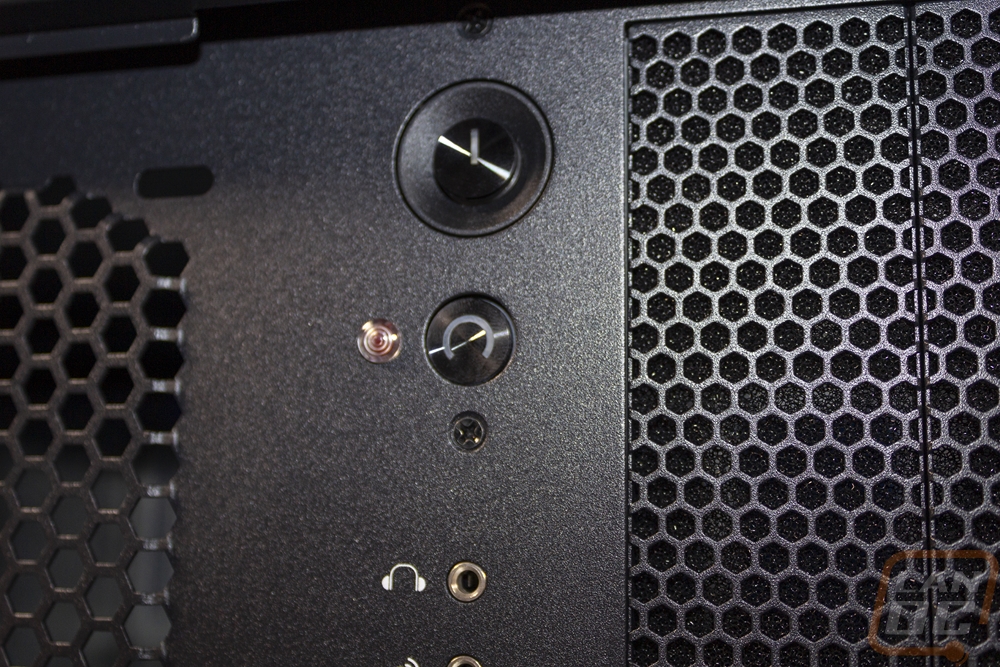
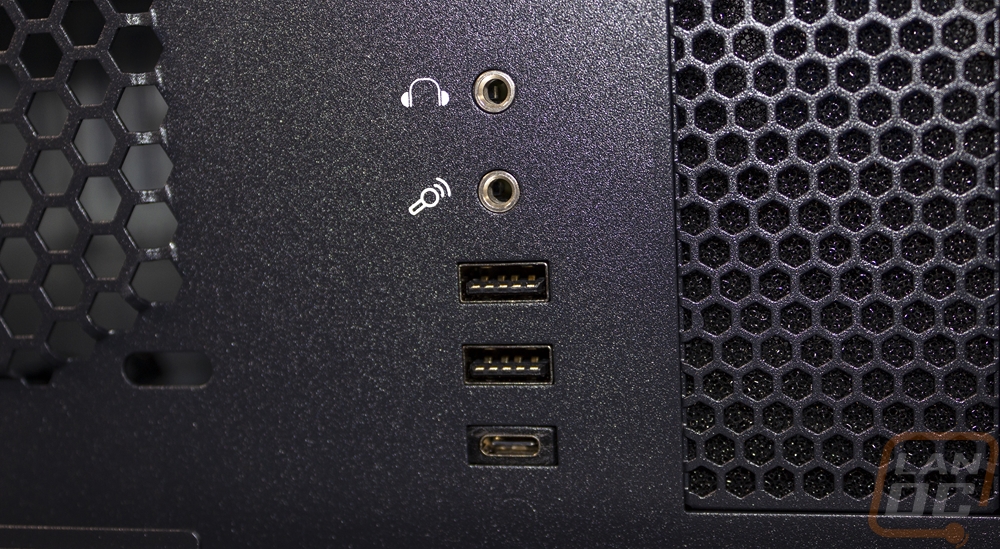
The front door when open exposes the real front of the RM42-502 which on the left half has two front-mounted 120mm fan grills. Then on the right, there are two 5.25 drive bays. In between is the front I/O which while the RM42-502 looks like an old-school design does have an updated I/O/ At the top it has a large power button and below that a smaller reset button. Then you have headphone and microphone jacks. At the bottom, there are two USB 3.0 plugs which don’t have blue inserts so they look like old 2.0 ports, and then one newer USB 3.0 Type-C connection. Type-C has been finally making it to most cases but I was surprised that the RM42-502 as a server chassis has one but it is great that you can get a high-speed connection right here on the front. It should make setup/installation easier and gives a high-speed option for any backups to a portable drive even without having to get access to the rear I/O.
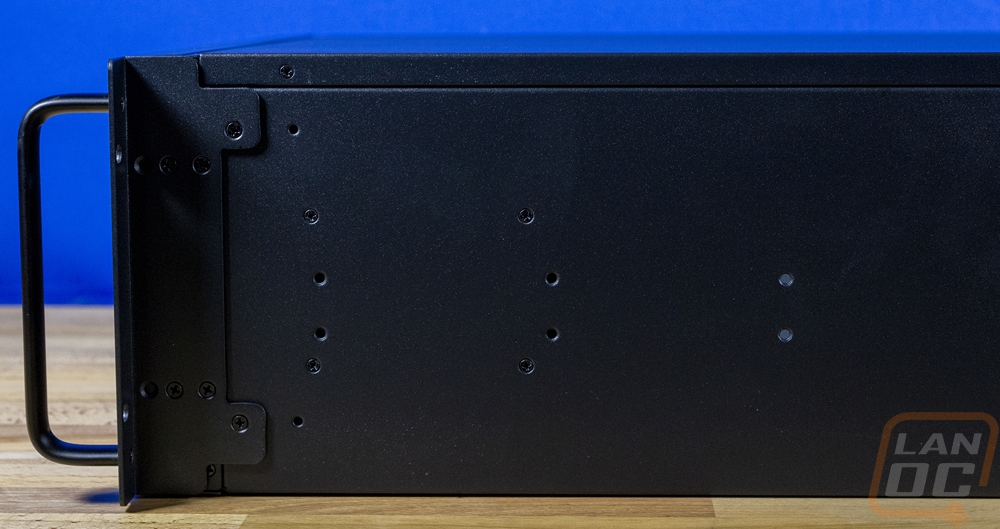
Both sides of the RM42-502 have nearly the same layout and the one area that I was surprised by is that the sides of this case are coated not just raw metal. There are two sets of rail installation screw holes that give you some flexibility and you can also see the mounting holes for the included feet for vertical orientation. The left side of the case doesn’t have the foot holes but does have a set of screws for the 5.25 bay mounting that I will show later.

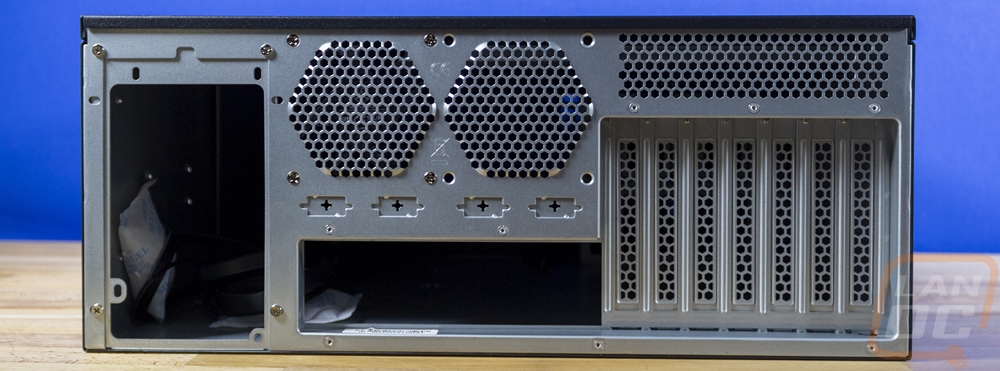
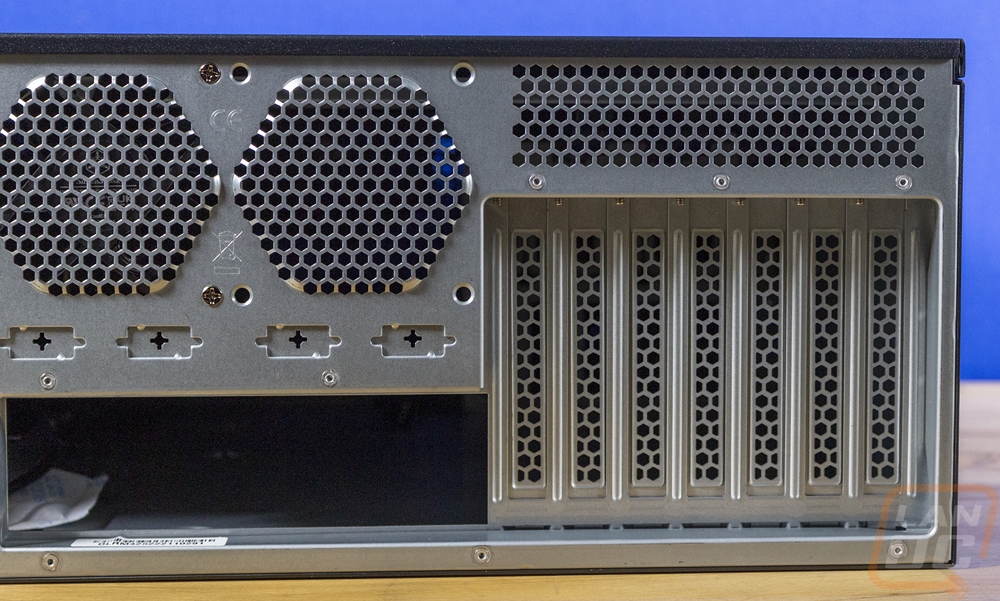
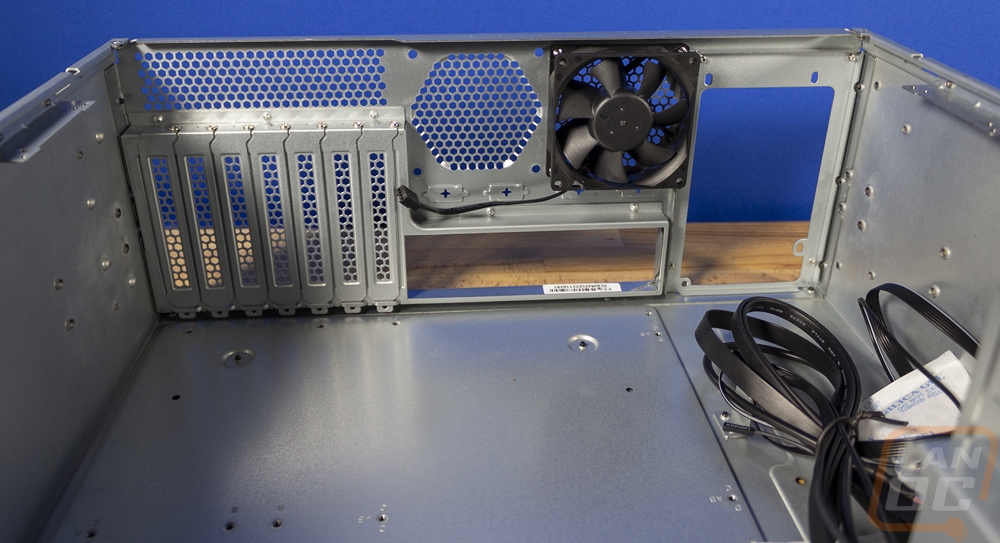
The rear of the RM42-502 goes back to the metal finish and in a lot of ways looks like a traditional PC case. On the right, you have 7 PCI brackets which for ventilation come with holes already in them. There is air ventilation above that as well but the main exhaust ventilation is above the rear I/O hole where the RM42-502 has two 80 mm fan holes. That area also has four knockouts for individual panel mount cable plugs. Then on the far left, you have the power supply mounting hole. Like with a few of Silverstone’s rack-mounted case options they recognize that some people may need a rack-mounted case but have normal PC hardware so the RM42-502 supports a normal ATX power supply or if you remove the preinstalled bracket you can put a Mini Redundant setup with dual power supplies in.

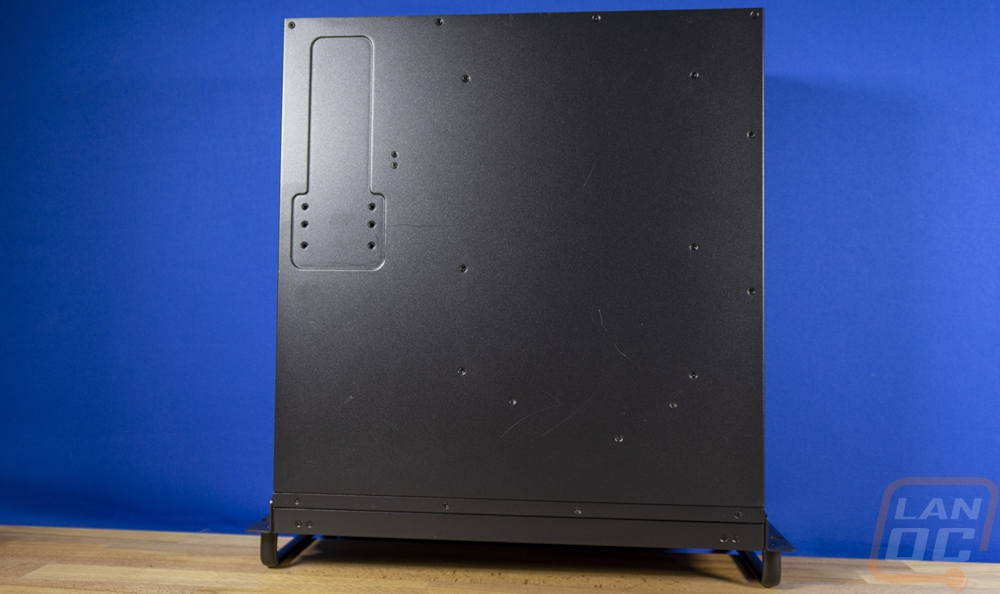
The black coated finish from the front and sides of the RM42-502 does continue to the top and bottom of the case as well. The top is a removable panel and has nothing going on. The bottom is similar but we can at least see a few of the mounting screw locations from this point of view.
With the top off of the RM42-502, we can see that most of the interior has just a bare metal finish except for the front panel. There are just a few brackets on the mostly open interior. You have the 5.25inch drive cage on the front as well as the GPU holder bracket which sits behind the front-mounted fans. Then up on top, there is an expansion card holder. The expansion card holder runs the full width of the case and comes with four black brackets that can be moved to any location on the bracket to clamp down on any PCI or PCIe device to keep it from moving around if you are transporting the server. It is removable with four screws if you don’t need them or for when you are working in the case which helps give you access to everything.
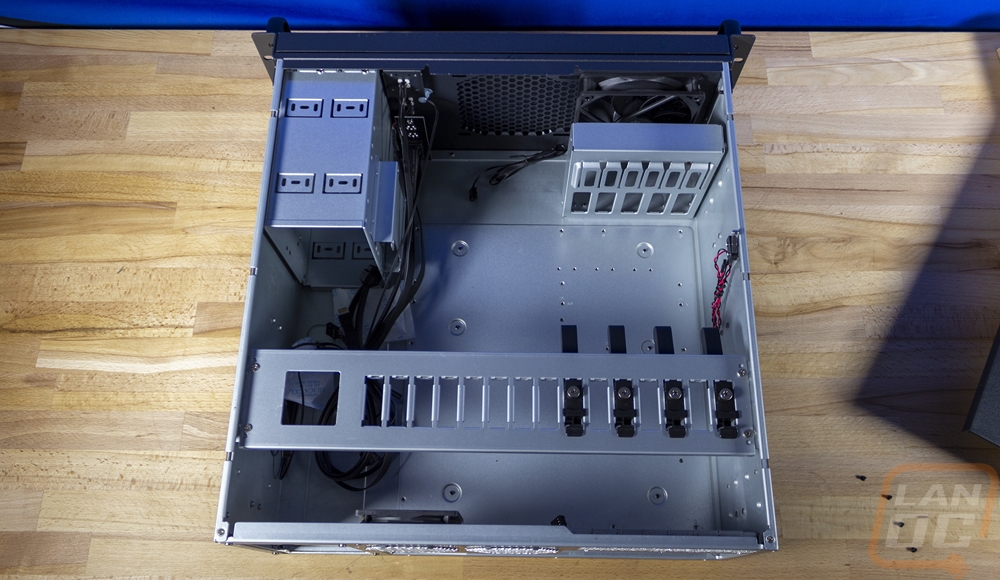
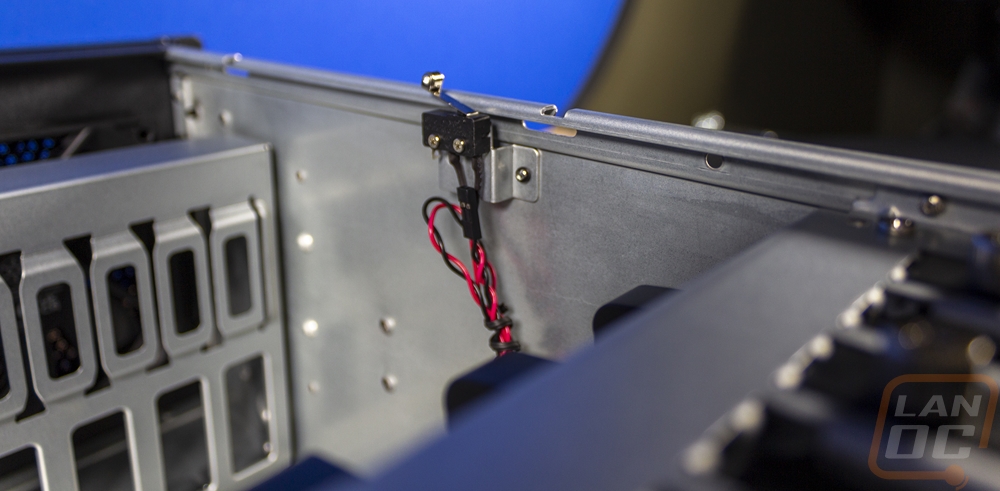
The RM42-502 does include an intrusion sensor if your motherboard supports it.
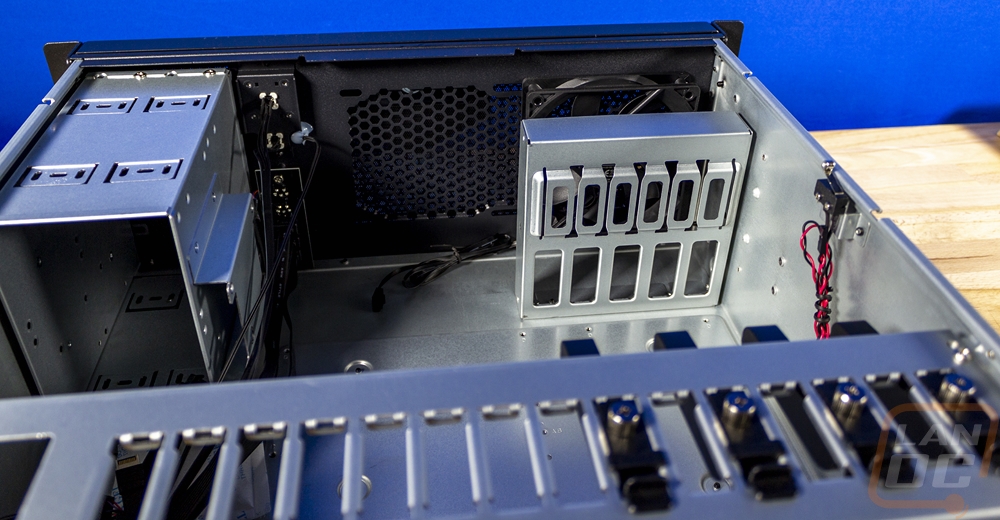
Here is a look at how much more access you have if you remove that hold-down bracket. It also allows us to better see the rear exhaust fan setup which comes with one 80 mm fan preinstalled.

As far as support, the RM42-502 can run up to an SSI-EEB motherboard which is a server motherboard and any size of traditional PC motherboard is also going to fit. With the ATX power supply support, it depends on what you have in the 5.25inch drive bays. If you aren’t using those bays they can be removed and you could have up to 442 mm of space for a power supply but with them installed you are at 262 mm from the PSU bracket to the edge of the 5.25-inch bay. Almost no ATX power supply is going to need anywhere that much so you will have room at the back if any 5.25-inch drive sticks out. Then for video cards, you have room for up to 337mm in length if you want to keep the card retainer installed and 426 mm if you go all the way to the front of the case. GPU height is limited to 116 mm if you use the top hold-down bracket and 154 mm without it. For cooling, we know that the RM42-502 supports a 120mm or 240mm radiator set up in the front but being a 4U case a tower cooler can also fit.
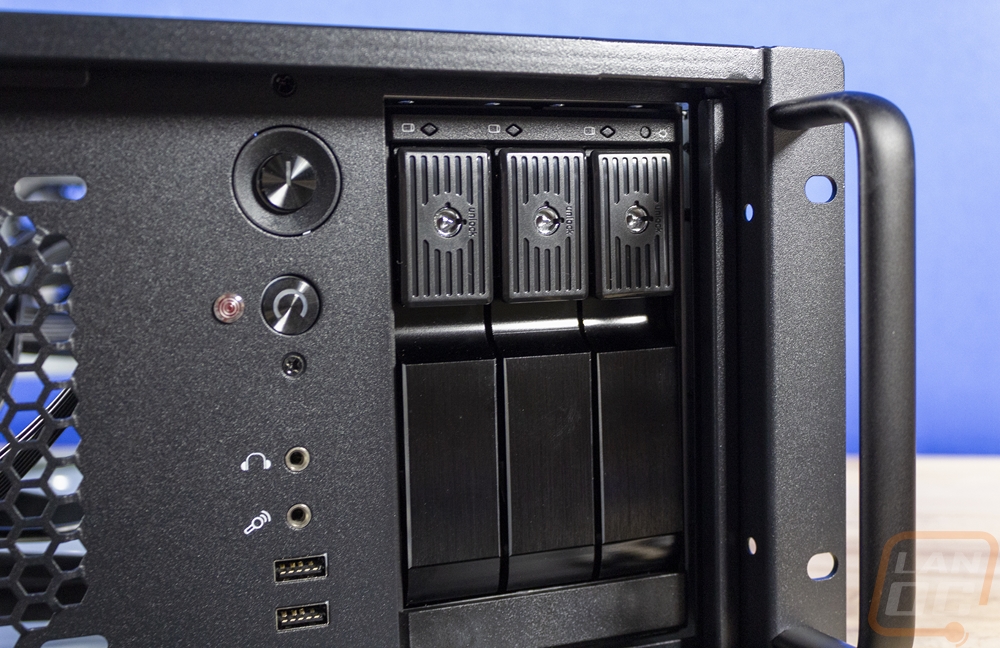
The 5.25-inch drive bay does double as all of the hard drive or SSD mounting locations. On the outside of the cage, there is this one 2.5-inch drive mount but the main cage can also mount four 2.5-inch drives or two 3.5-inch hard drives with the mounting holes built into the cage or you can get a similar setup with aftermarket drive cages that mount in the dual bays as well. For our setup, I could just mount the hard drives inside and be done, but I like having the option to swap them out later without tearing the build apart so I will be installing a hot swap cage in the RM42-502.
Easy Hard Drive Access
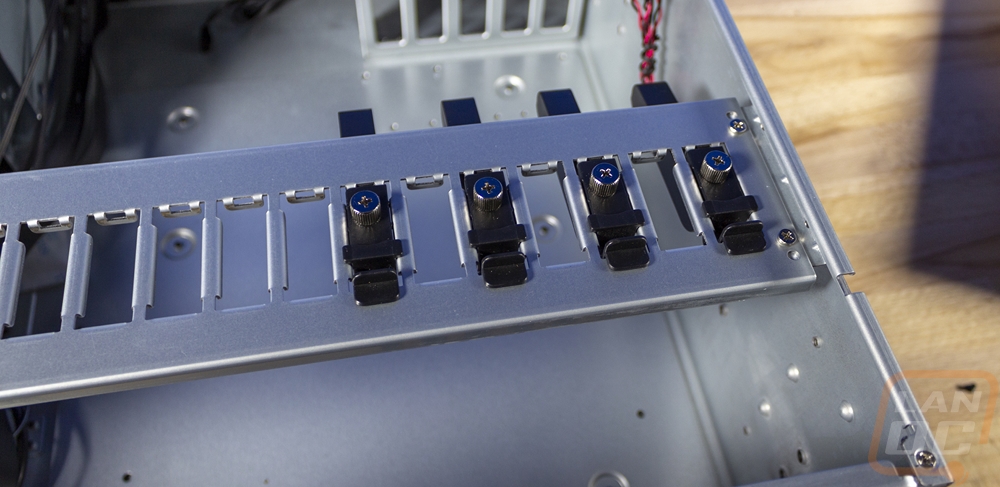
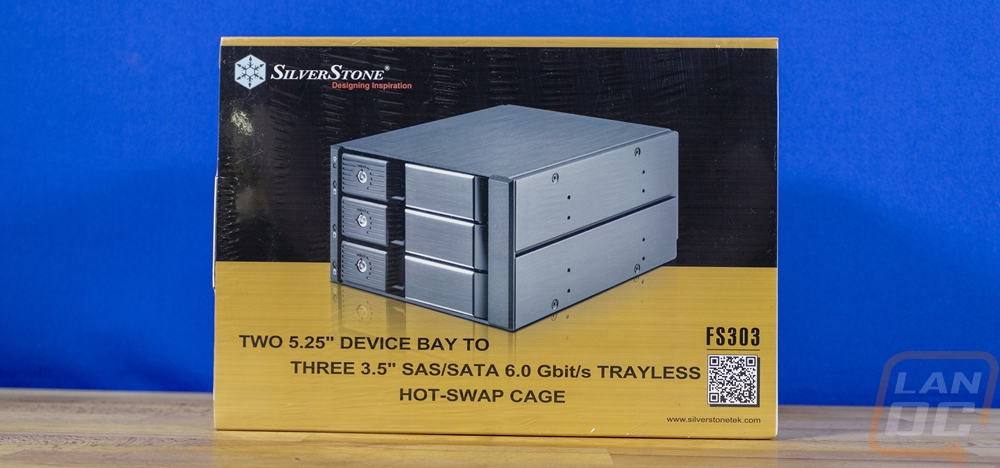
While most of Silverstone’s rack-mountable cases come with hot-swap hard drive mounts our situation didn’t require the entire front of the server to be drive bays and frankly given the cooling direction I want to go I would prefer the RM42-502 to keep the front open for airflow. So all I needed was to fill the dual 5.25-inch drive bays that the RM42-502 has with a few drive bays. Sticking with Silverstone to keep things consistent and because they were generous enough to help with our build I ended up going with the FS303. Silverstone does have a few options that would work but the FS303 fit the bill because it is also trayless which will make installing drives later easier and means I don’t need to keep all of the small drive mounting screws nearby as well which are always easy to lose.
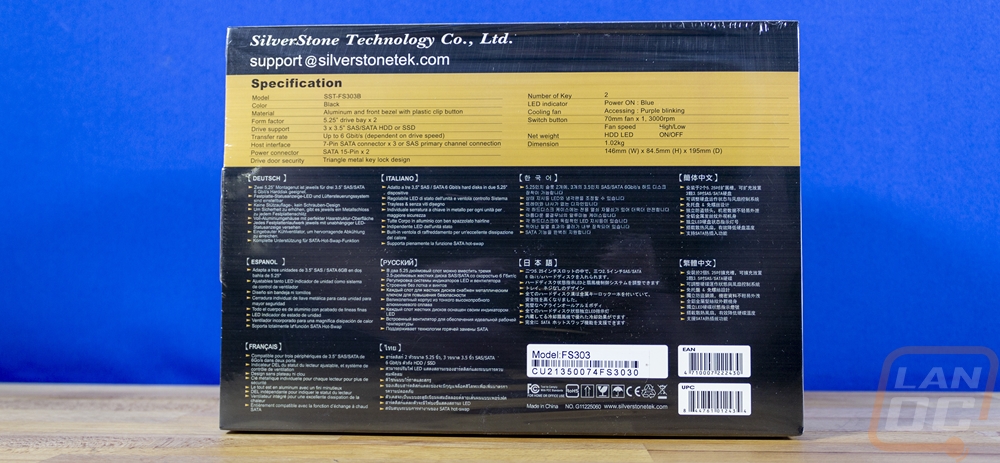
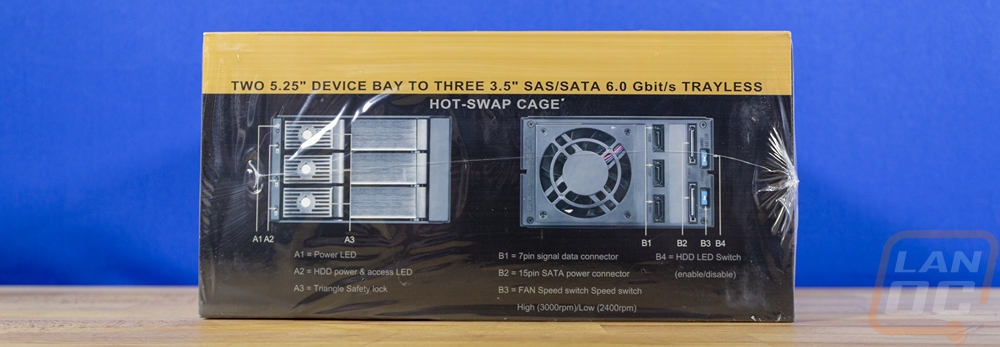
The FS303 packaging had a surprising yellow background along with a black stripe and then the front of the box has a large picture of the hot swap cage on it. They have the Silverstone logo up in the top left corner and the FS303 model number in the bottom right but the description of the FS303 takes up a majority of the space on the front. The back of the box has flipped the colors around so we have less of the yellow and more black. They have a full specification listing here and then in different languages, they have a shorter feature list repeated across the rest of the back. The bottom edge of the box does also have front and back pictures of the hot swap cage along with line drawings to all of the features and connections.
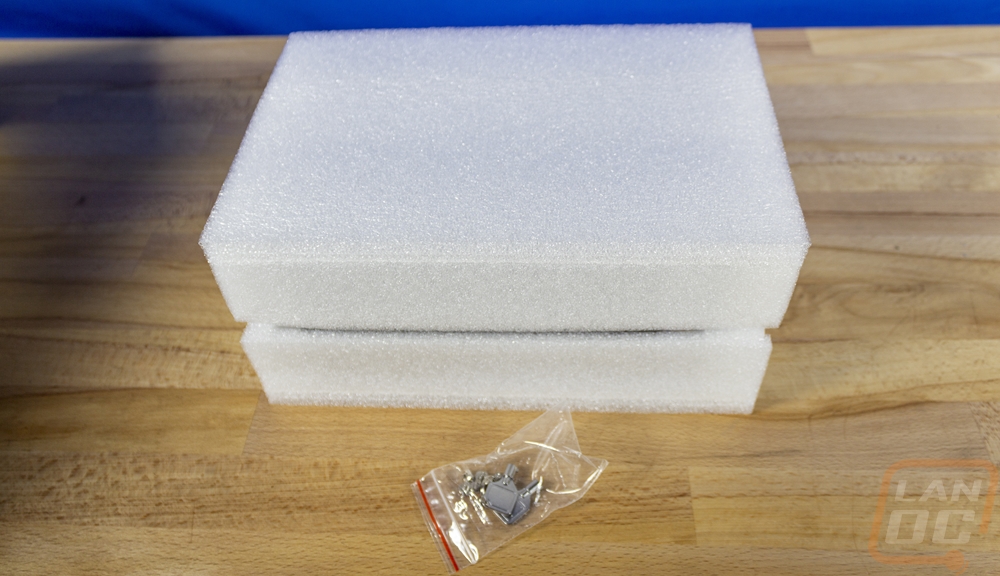
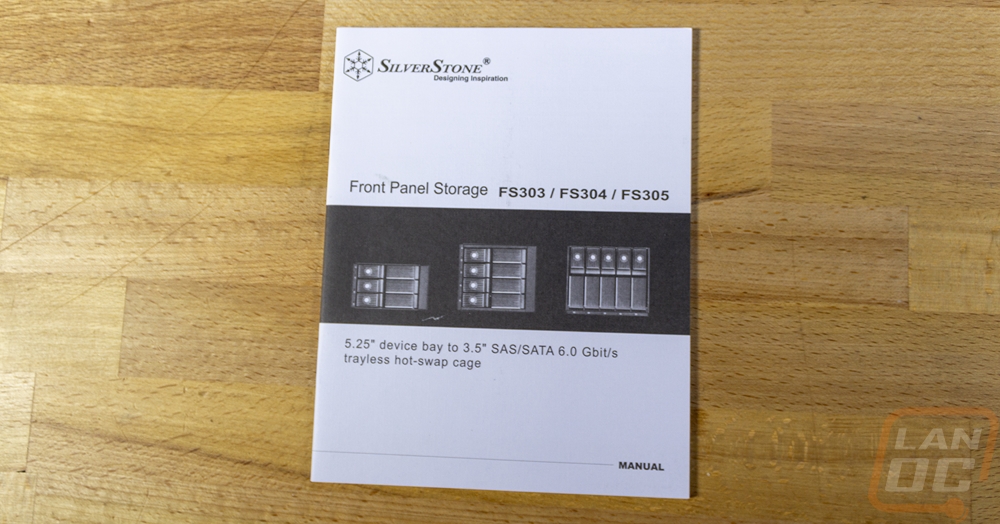
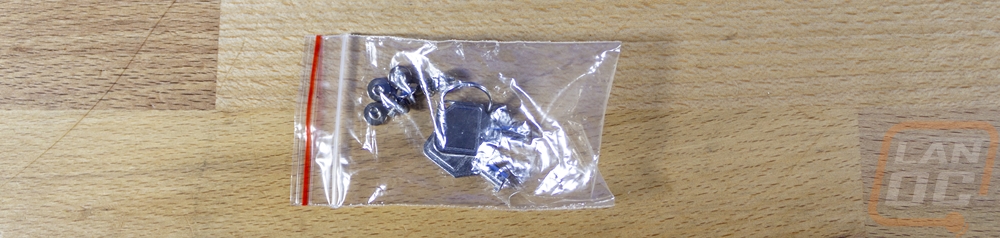
Inside the FS303 comes enclosed in foam to keep it safe and comes with its documentation and a small baggie with mounting screws and the keys for the front locks.
So if it wasn’t obvious the FS303 takes up two 5.25-inch drive bays and holds three 3.5-inch hard drives. The front of the cage has three doors, one for each hard drive, and then on the left a latch which has a keyed lock to keep you from pulling an important drive out while it is in use. The far left has status LEDs for each of the three drives and then at the top one status LED to let you know the cage has power. What I was surprised with on the FS303 however was that each of the three drive doors is almost entirely metal, a lot of hot-swap cages use a lot of plastic. These feel solid when you open and close them.
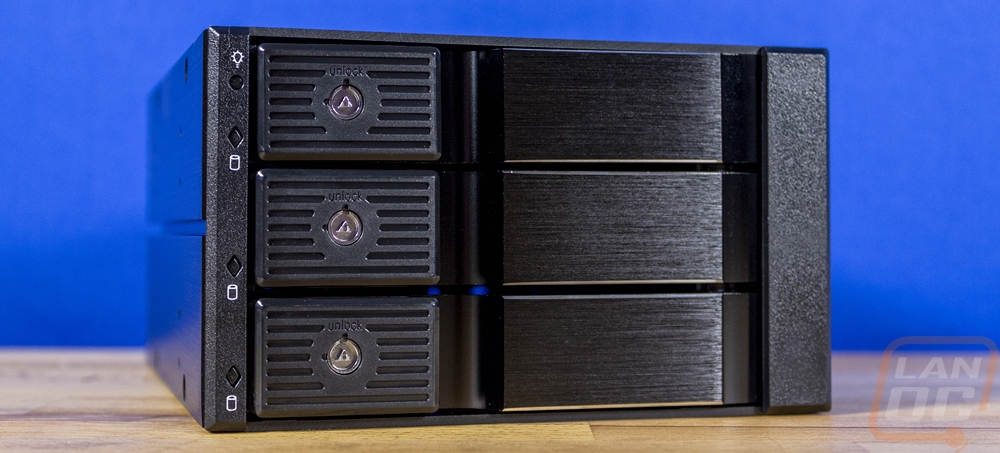
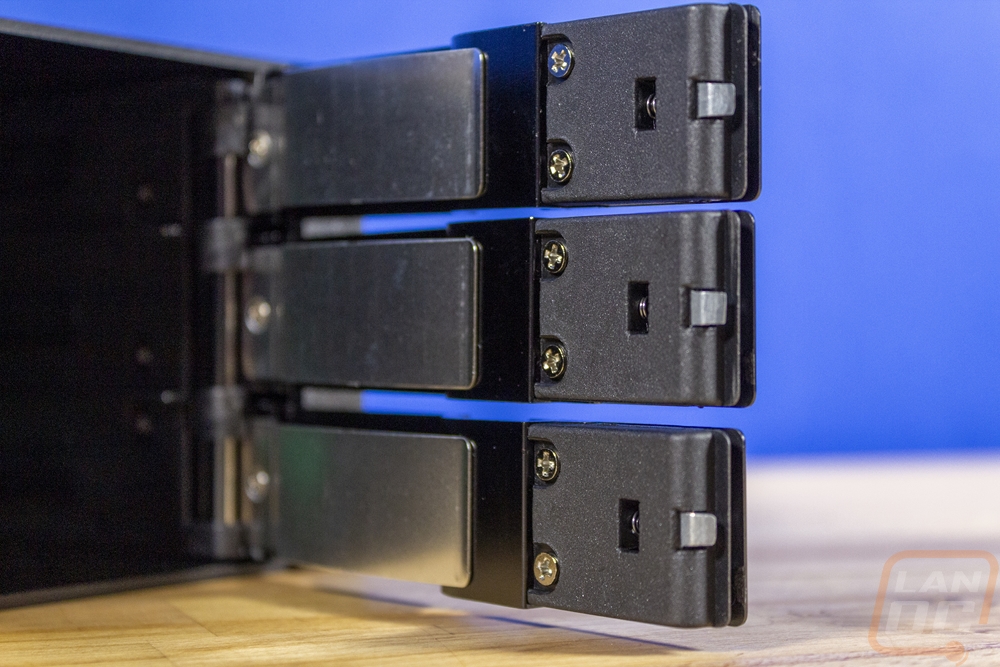

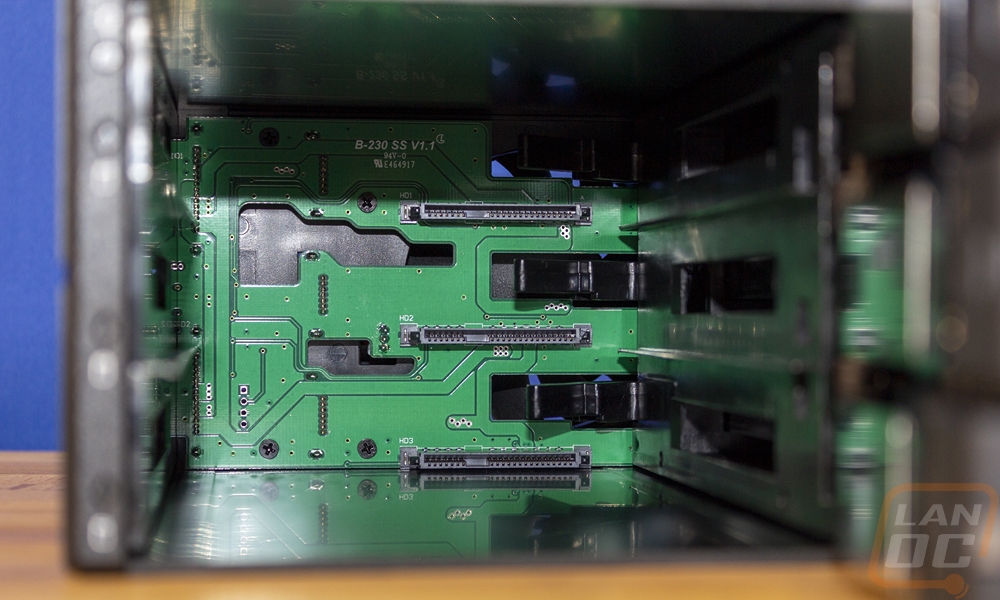
When you open the doors up each drive bay has rails on the sides to help guide it back to the PCB backplane which has power and data connections for each drive.
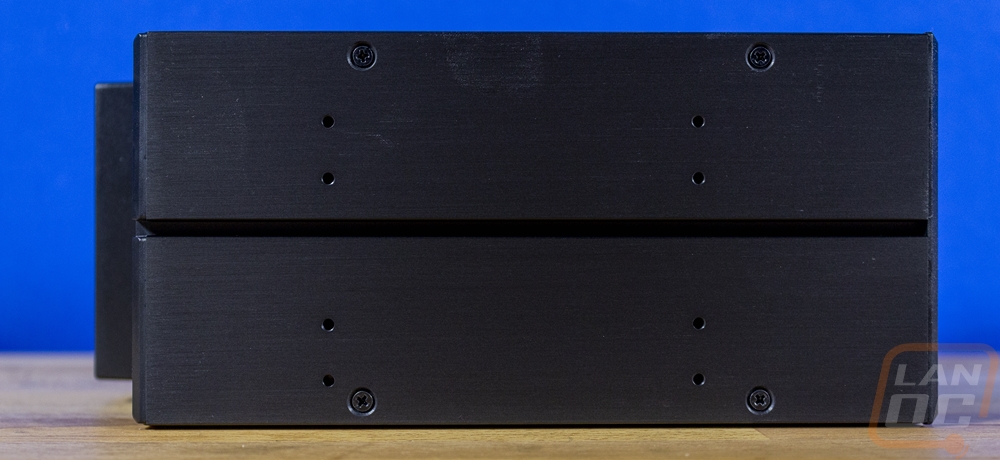
The mounting itself is all aluminum and the sides each have 8 different mounting hole locations which means you can mount this flipped in either direction in two 5.25-inch drive bays and still have the holes line up.
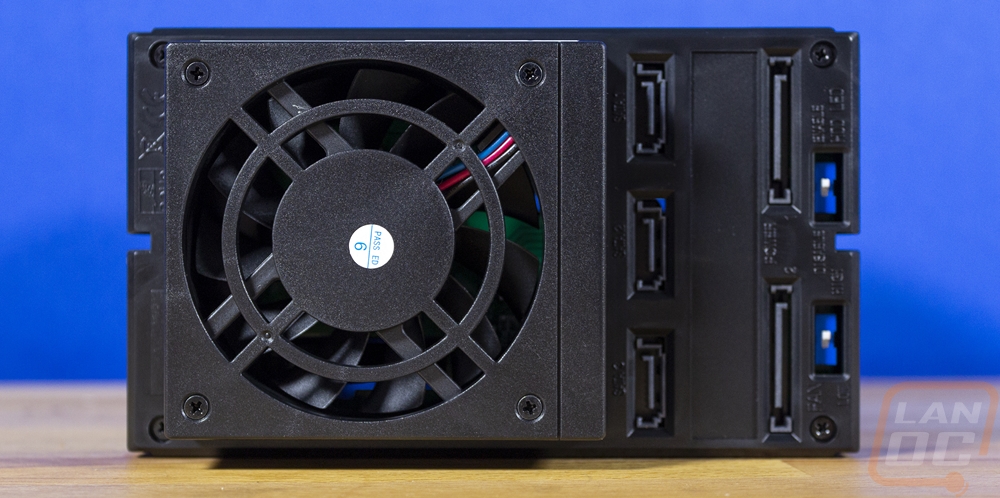
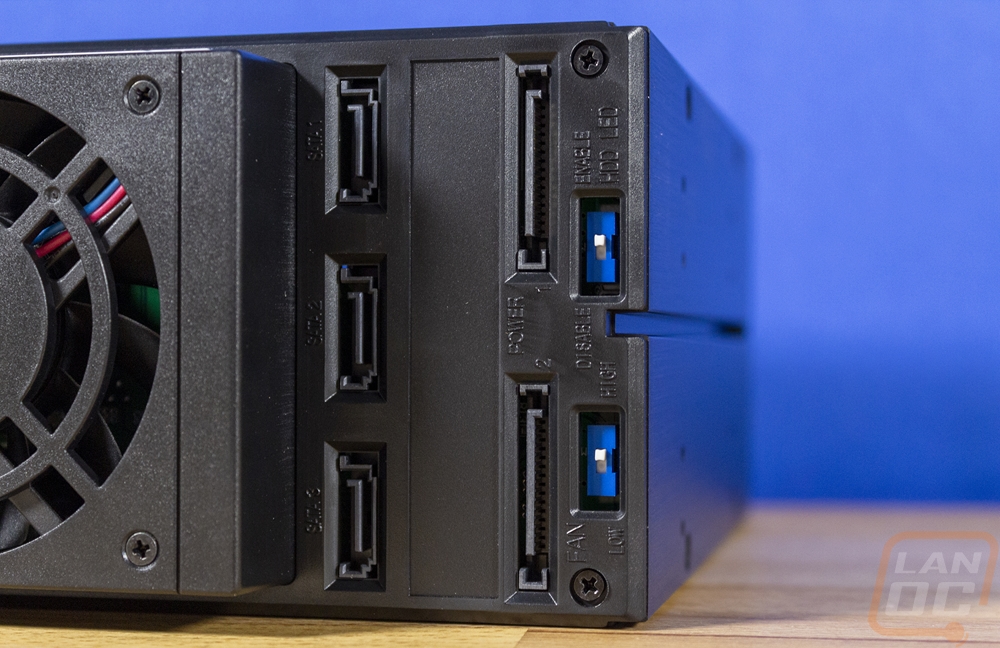
At the back of the FS303 on the left, it has a box sticking out of the back that houses the 70mm cooling fan. The fan runs at 3000 RPM and is set up to exhaust air out of the back and pull cool air in through the gaps in the front doors across your hard drives. Then on the right of the back, you have three SATA 3 data connections, one for each hard drive and two SATA power connections. They also have two dip switches which was a nice surprise. The top one will let you turn the hard drive status LEDs off and the bottom controls the fan speed between high and low speed. The specifications list the fan's RPM at 3000 so I assume that is the high setting but I don’t know what speed that may be. It's nice to have the option and given that I want to keep the noise down at least somewhat, I may have to revisit that switch once I have things up and running.
Power
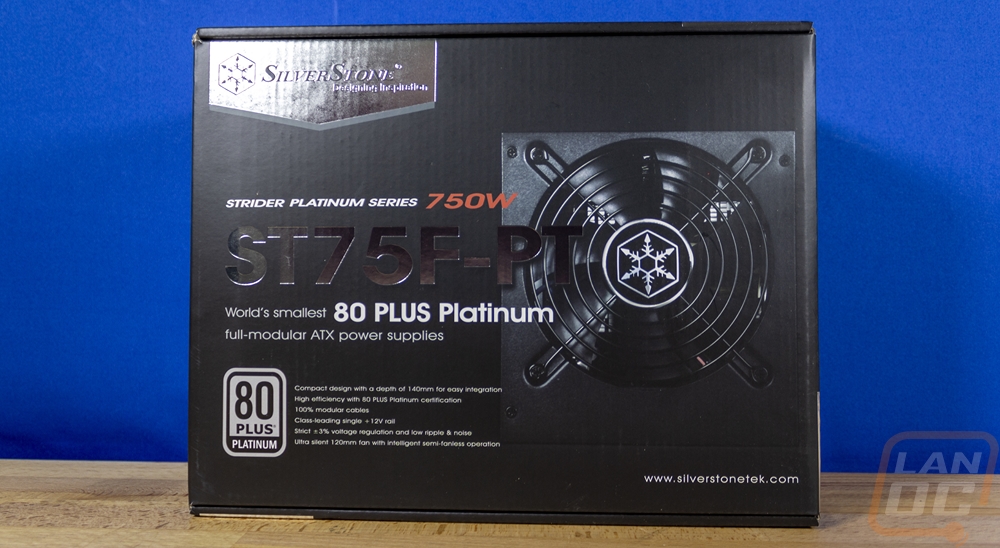
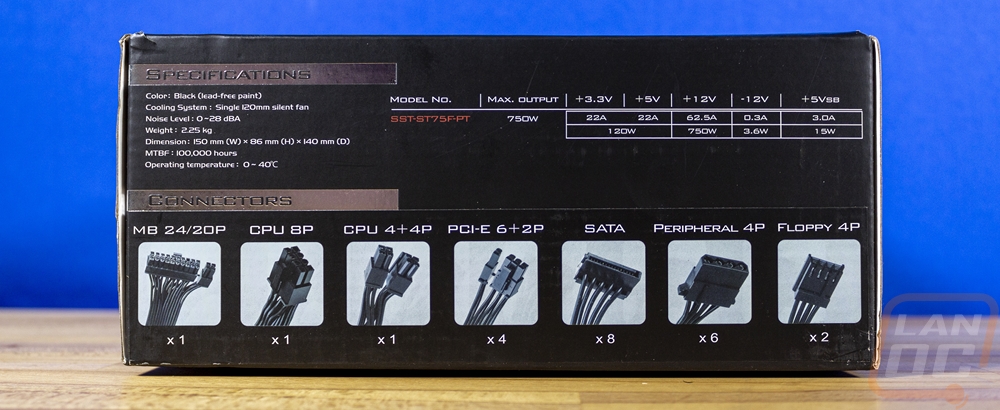
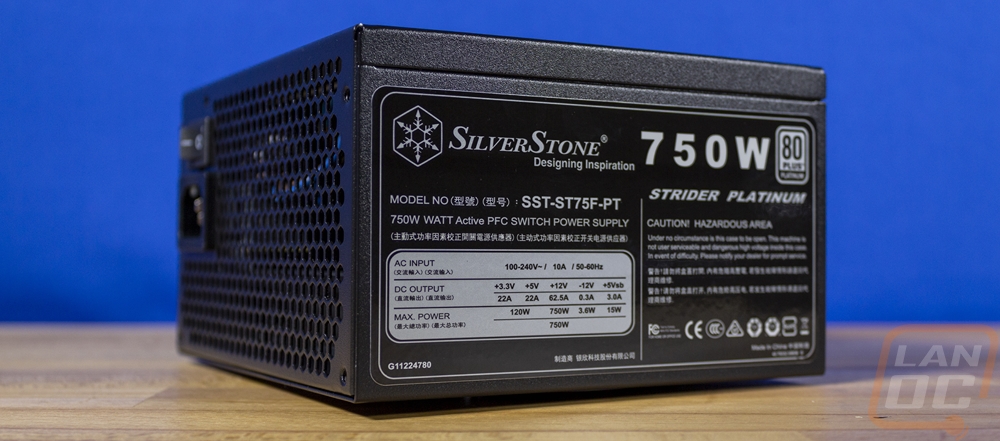
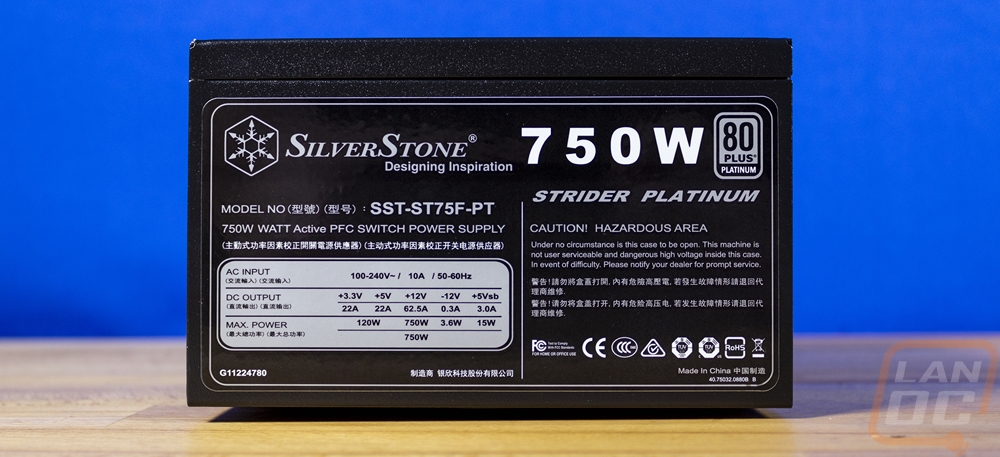
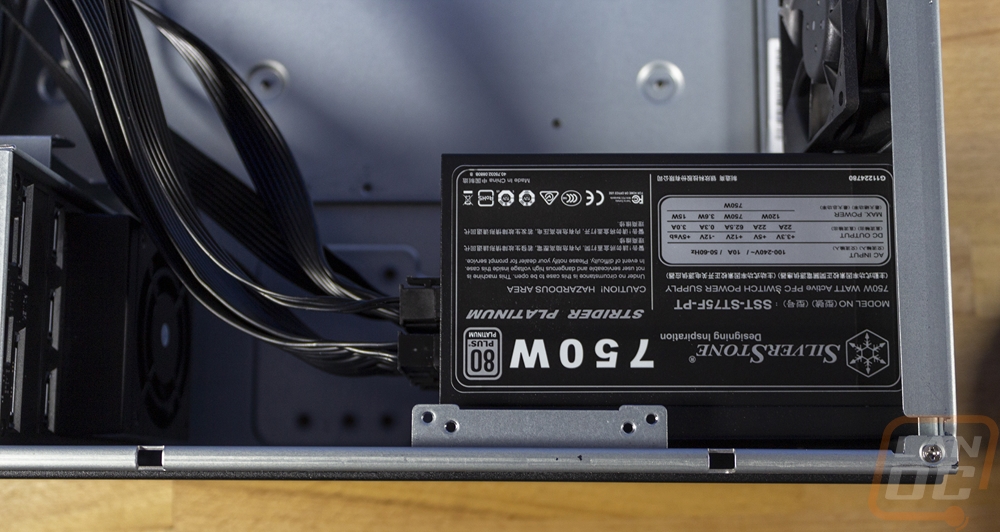
The power needs for the Icyu build are obviously going to be more than what the small power supply in our previous SFF build would provide. But because part of the idea behind this build is to not lock the build into a corner like I did before with it being ITX I also wanted to leave headroom with a power supply and also leave room for powering a GPU if we end up going that direction to add more processing power. Because the system will always be running I also want to make sure that the power supply is efficient as well. I stuck with Silverstone here as well keeping things consistent with the case and because the RM42-502 supports a traditional ATX power supply it made finding something that fits our needs easy and should also make a replacement easy to get if I ever need one in the future. Silverstone sent over their ST75F-PT which is 80 Plus Platinum rated for the efficiency and is way overkill on the wattage side of things at 750 wats. It is also modular which will keep the wiring clean in our build and is a compact design that will help with room as well even though our case has plenty of room.
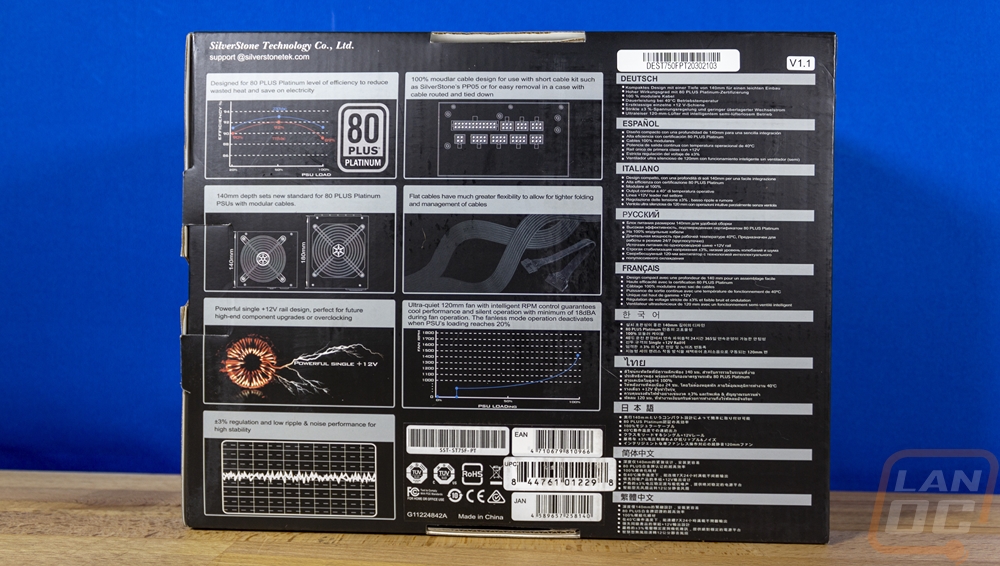
The ST75F-PT came in a blacked-out box with a picture of the fan side of the ST75F-PT in the background. They used a reflective finish for the Silverstone logo in the top left corner as well as the ST75F-PT model name across the middle. They also have a huge 80 Plus Platinum logo on there as well as a few features in a tiny font. The back of the box has graphs to show the efficiency curve, its ripple and noise regulation, and how the fan speed works which stays off until 20% load which is 150 watts which for our use may stay off in lower demand if I’m not using a GPU. They have a picture of the flexible cables and a line drawing that shows the modular connections and the overall size of the ST75F-PT compared to other similar platinum rated PSUs. The bottom edge also has the specifications, pictures, and quantities of each of the plugs provided.
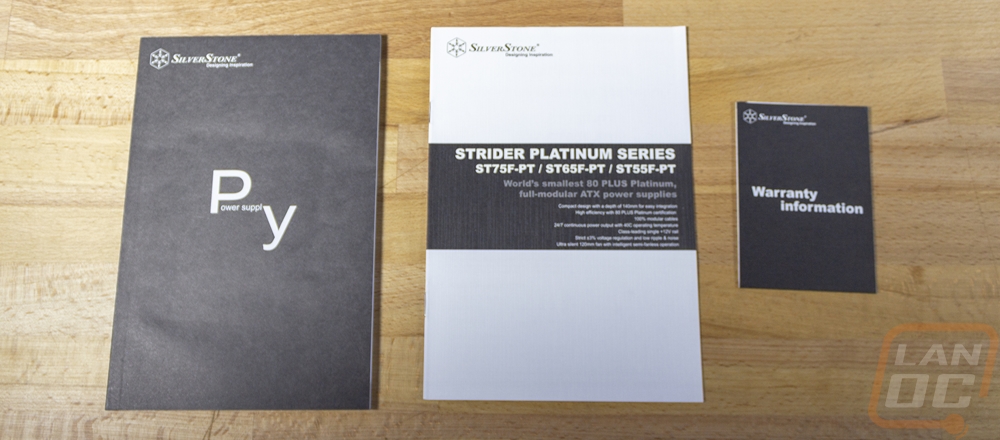
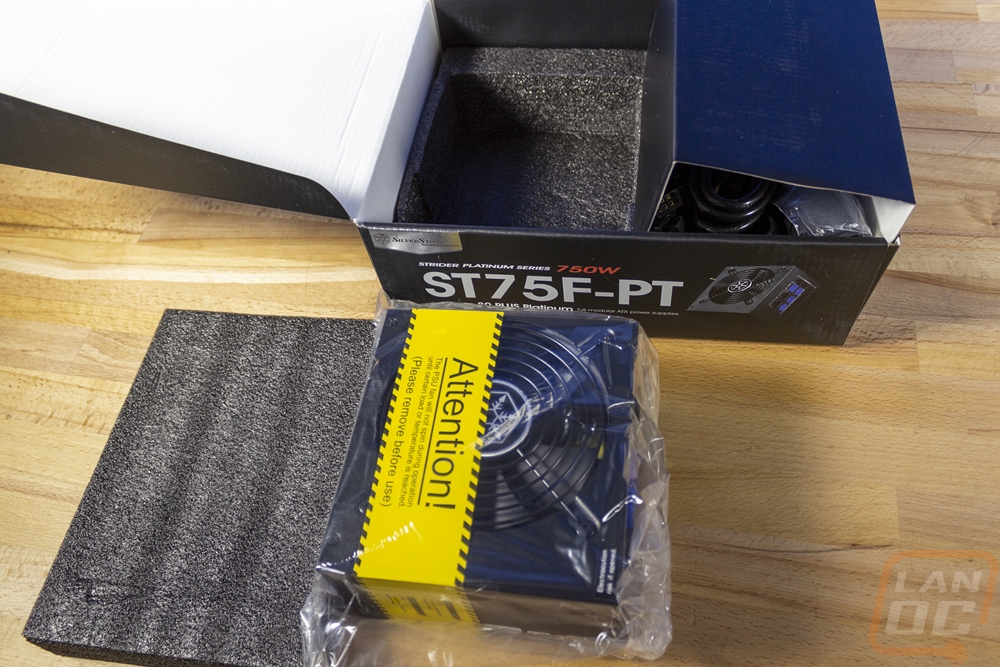
Inside the box, the ST75F-PT comes wrapped in a plastic bag and sandwiched between foam panels. It also has a warning that the fan won’t turn on at lower wattages because some people look to that to see if their PC is turned on and will freak out. All of the cables are partitioned off in their own section with cardboard but don’t come in a bag or anything for storage. Then for documentation, the ST75F-PT comes with a small warranty information book, a standard power supply instruction book that all Silverstone PSUs come with, and a user guide specific to the Strider Platinum Series of power supplies.
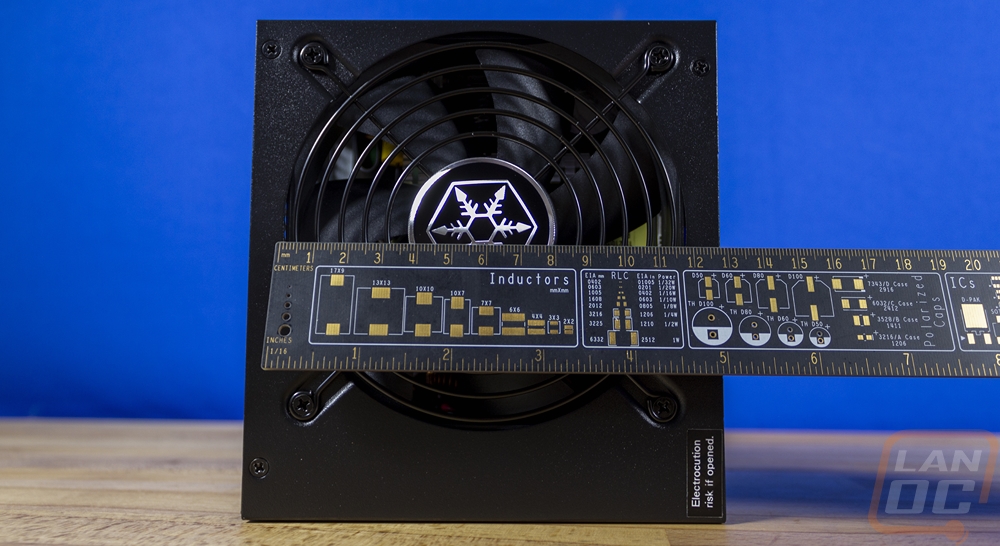
Silverstone spent a lot of time on the packaging pushing the fact that the ST75F-PT is smaller than other 750-watt Platinum rated power supplies and with that, I expected it would be the standard squared ATX size which is 150mm by 150mm. I was surprised that the ST75F-PT looks more like an SFX power supply with it still having the standard ATX width and height but it is shorter than it is wide at just 140mm.
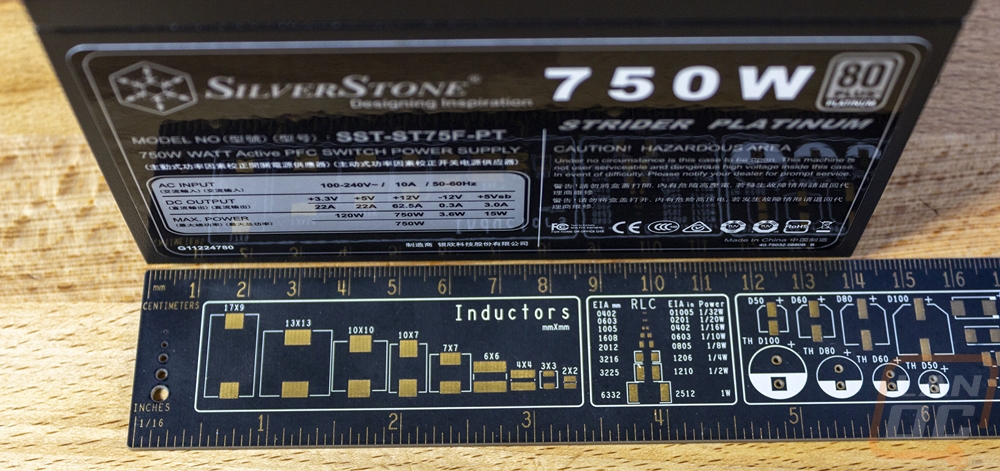
Other than the smaller length the ST75F-PT does have a standard housing style and doesn’t take on any of the “fancy” features some PSUs have been doing like RGB lighting or display screens or unique stamped shapes. It is a traditional steel housing with a heavy texture in its slightly glossy black finish. For the sides, one side has almost nothing going on other than the revision sticker, your serial number, and a sticker from the testing. Given that some cases will need your PSU to be flipped around I don’t know why both sides don’t have the branding. The other side then has one large sticker that covers the entire side. This is black with silver trim and has the wattage, model, and the Silverstone branding. It also has the basic wattage breakdown and the certification logos as well.
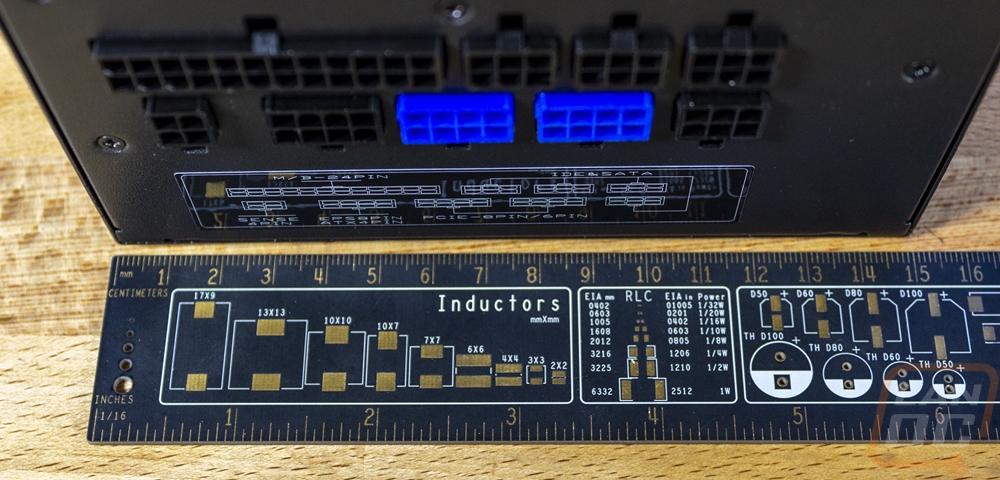
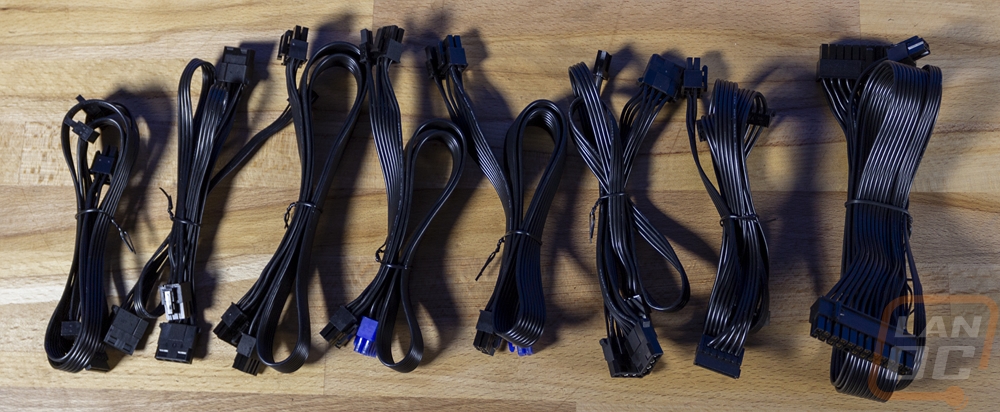
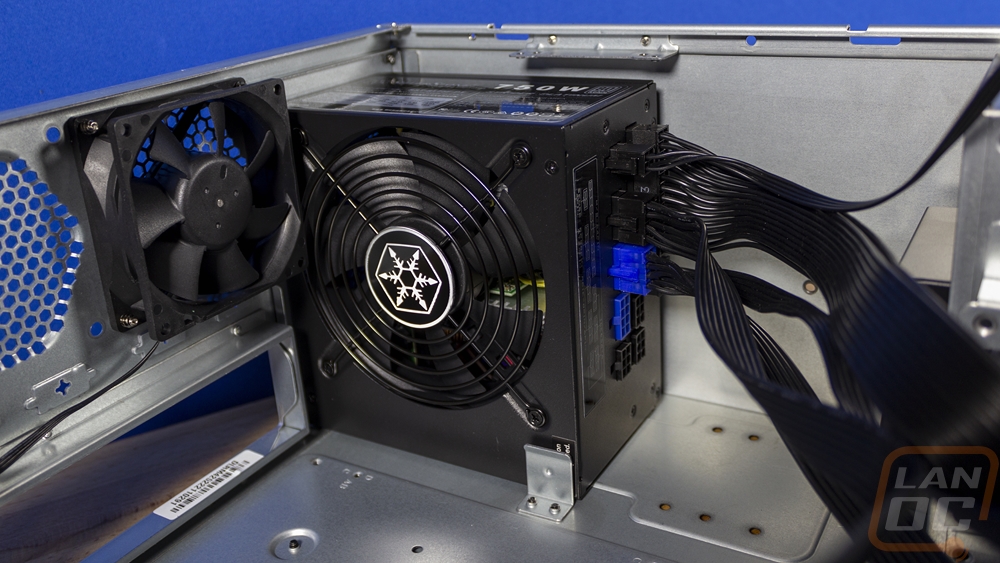
The inside facing end is where you will find all of the modular power connections. The ST75F-PT has nine connections in total. Two are for the 24-pin, the two blue plugs are for the VGA cables, one is for the CPU power cable, and the other four 6-pin plugs are all for the peripheral power cables so you can hook all of the included cables up at once if needed. It does have a legend sticker but it was shockingly hard to read with a weird font and it being stretched out. I don’t know why the legends aren’t printed on the housing or at least an easier to read sticker is used. Thankfully the plugs are all easy to figure out and the CPU power and VGA which are the only connections with the same 8-pin count are color coded.

The outside facing end of the ST75F-PT had a honeycomb design for the ventilation holes to help exhaust the 120mm fan inside. Then in the top left corner, they have the C12 plug and a power switch right next to it.
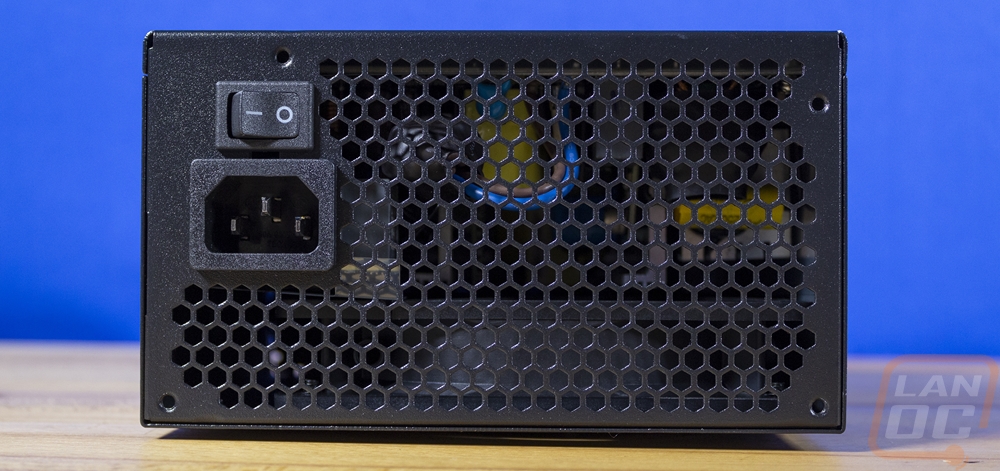
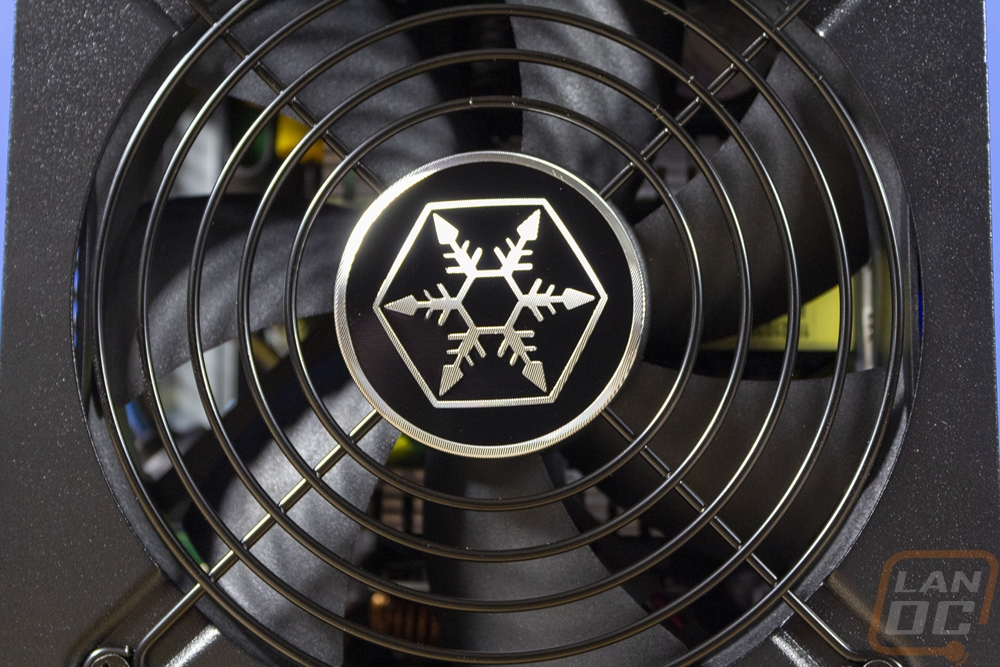
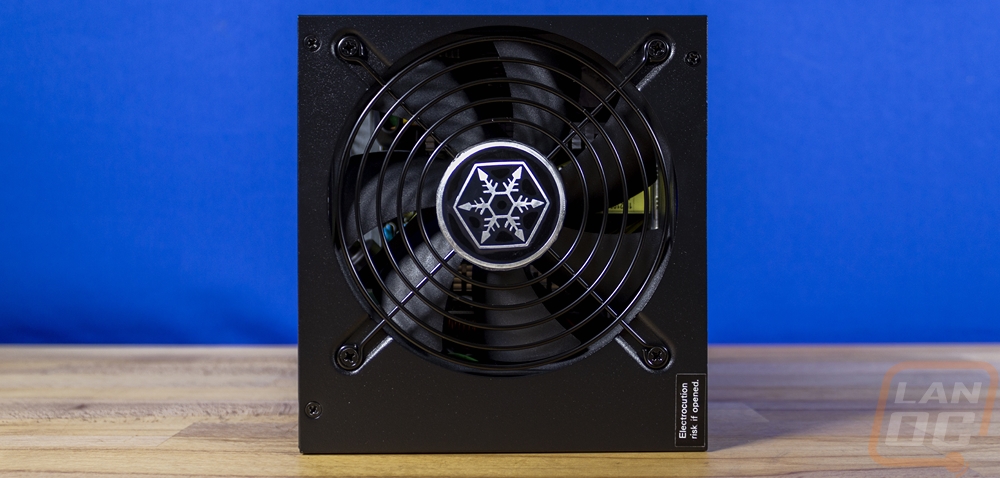
The top of the ST75F-PT shows off the textured glossy black finish and beyond that only has the Silverstone logo stamped into the metal. On the flip side, we have the fan which because of the not completely squared shape of the ST75F-PT looks a little offset. The fan has a traditional wire fan grill and in the center, it has the Silverstone snowflake logo. The fan is 120mm which is a little smaller than some ATX power supplies have but because of the short design, they wouldn’t be able to fit a larger 140mm fan.
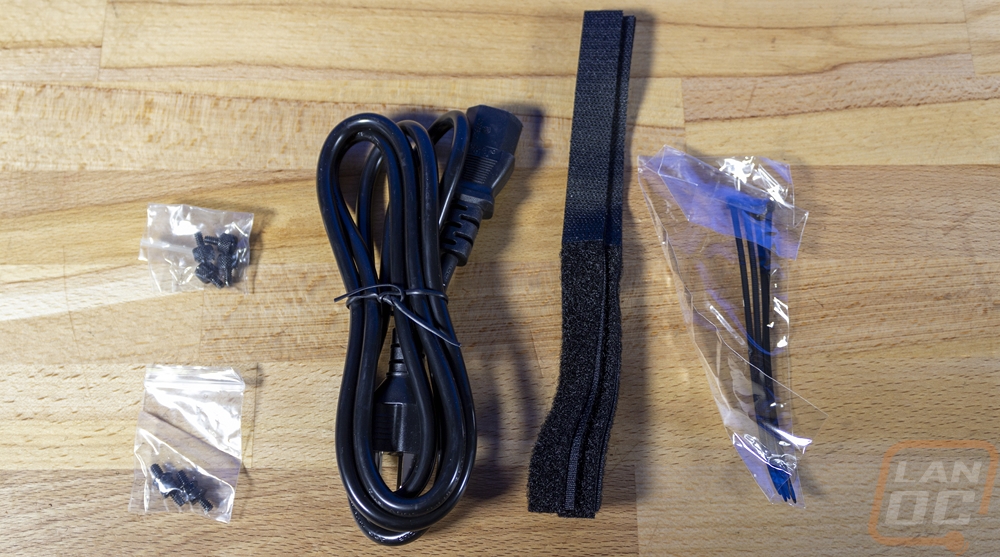
The ST75F-PT does come with a small bag of accessories. You get four black zip ties to clean up some of your wiring and four Velcro reusable ties. You have a standard C13 power cable and then two small baggies with black screws. One set of screws are standard PSU screws and the other bag gets you thumbscrews if you prefer that and have space for them.
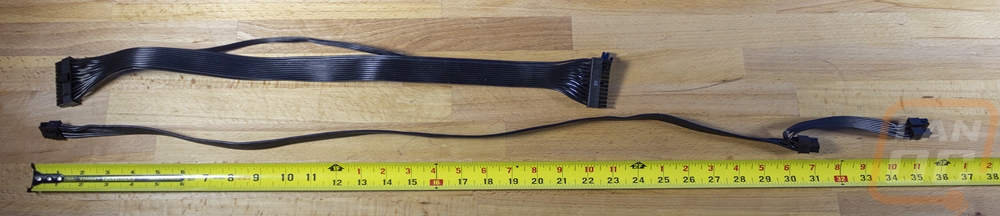
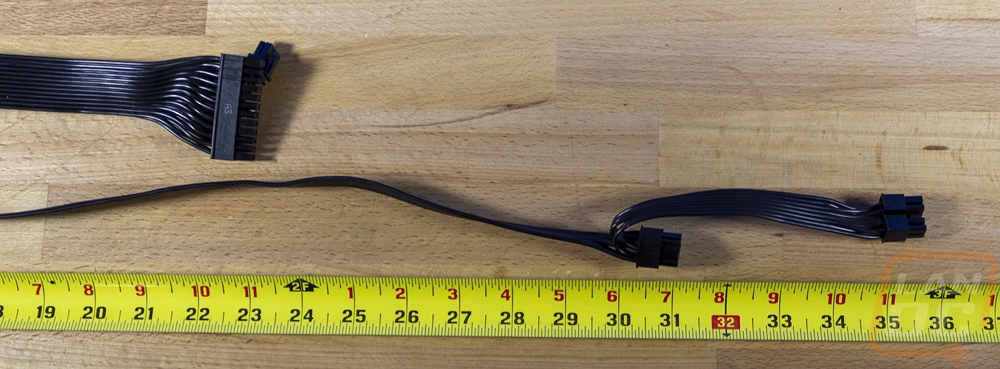
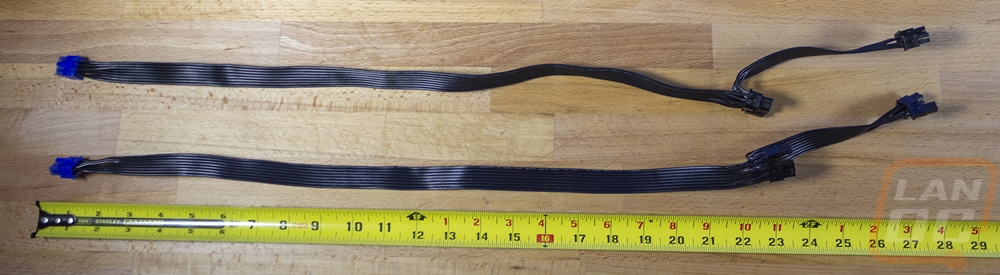
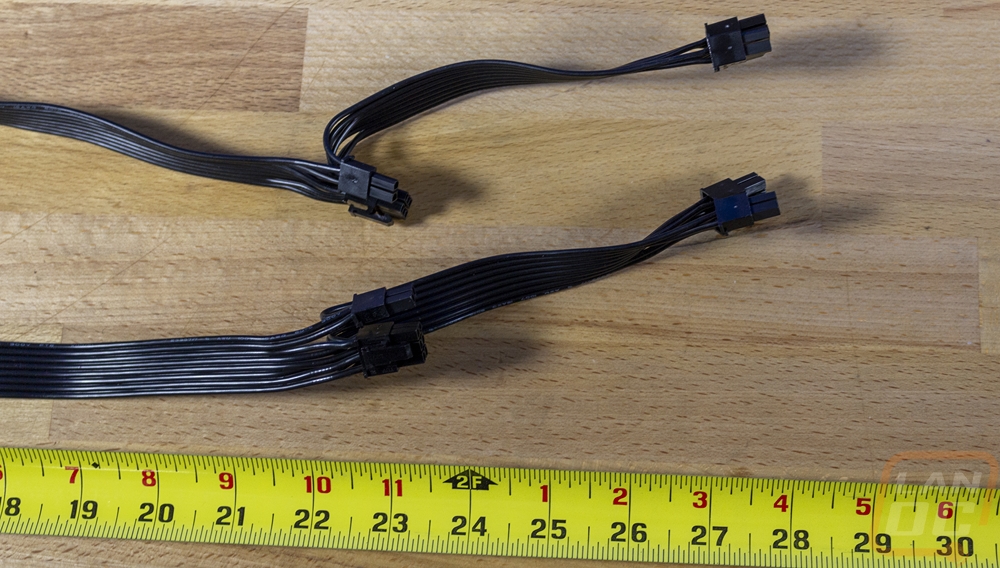
As I mentioned before the power cables for the ST75F-PT don’t come with a bag where you can store any extras so you will need to keep them in the original box or find your own storage for any extra cables. All of the cables are at least the nice black flexible style which always looks good and is easier to bundle up to clean up your wiring and flat to fit behind things. The 24-pin motherboard power cable is 22 inches long and on the PSU side does have two plugs, one full-sized plug and then one with the sensor wires. I found it interesting that for the CPU power cable you only get one cable, normally we always see two cables for this. This is longer at 35 inches in total length and like some VGA cables has two connections at the end, one 8-pin and one 4+4 to cover different CPU power options and to force you to use both CPU plugs on your motherboard. The two PCIe or VGA cables have blue connections on the ends so they are easy to spot. Both are dual plug cables which are both 6+2 to cover any configuration. One plug is at 23 inches and the second is just past that at 27 inches. Then you have four peripheral power cables. These cover SATA, Molex, and Floppy power connections, and all four are the same length in total at 41 inches. Two of the cables are SATA only with four plugs each. Then the other two are Molex with 3 Molex connections and then one floppy plug at the end which have I said today how I wish that would just go away, is anyone even using them?


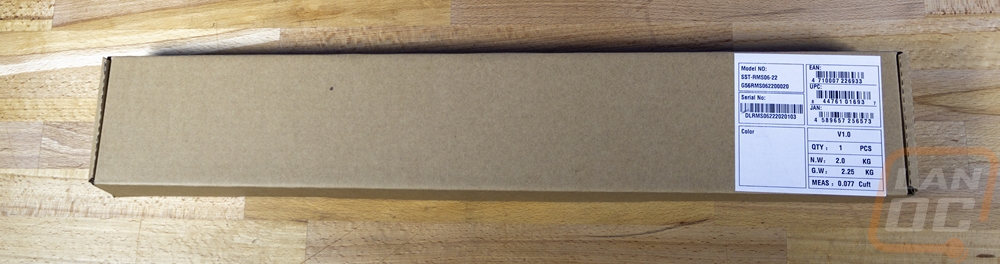
Rack Rails/Installation
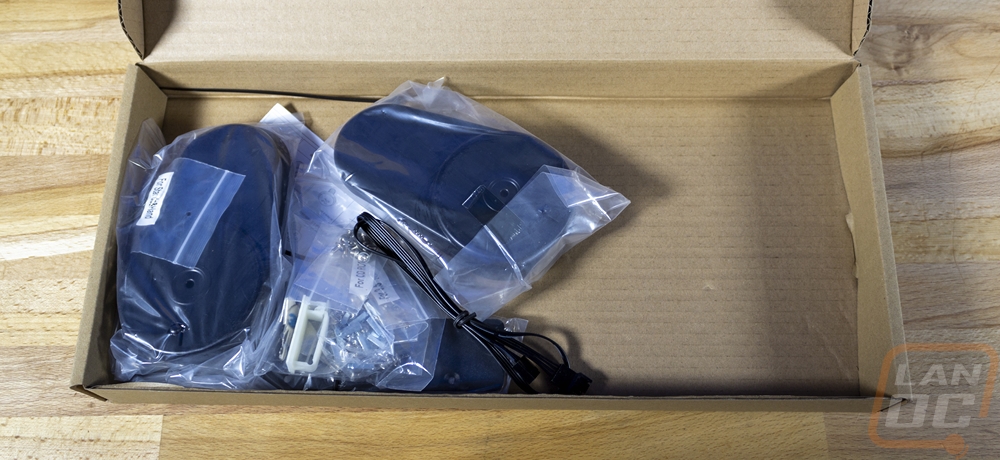
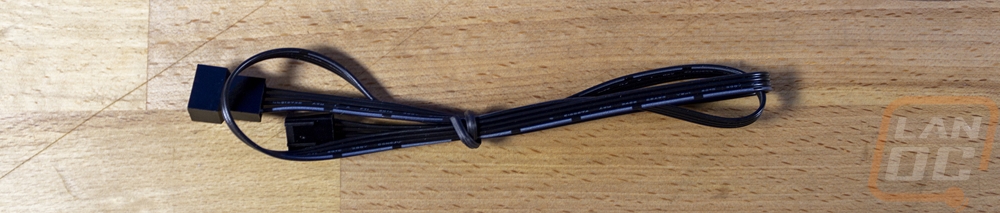
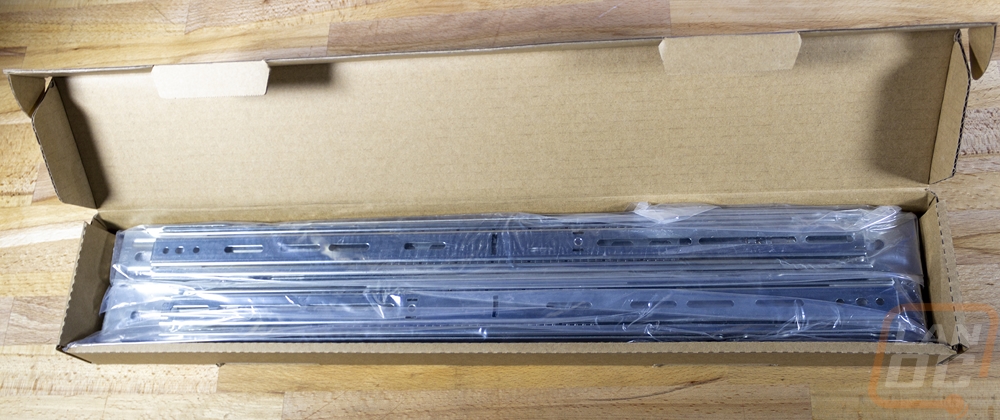
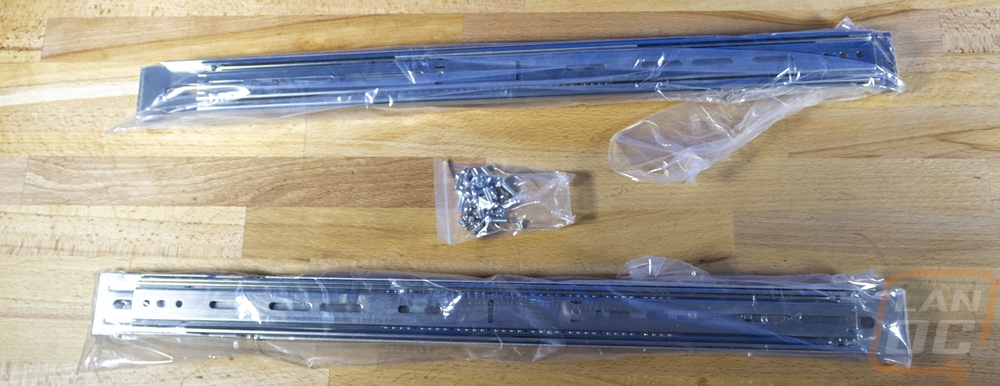
Like with our last build I did need rails to pair up with the RM42-502 so I could get it installed in our case and Silverstone has a recommended set that goes with the RM42-502. They are on the recommended accessories list on their website or you can find them under the model number RMS06-22. I was especially happy to see that this rail setup is designed for the newer square rack mount or the round hole rack style by having brackets than can flip around and support either style. They have a maximum load rating of 99.2 pounds and support a few of Silverstone’s 4U rack-mountable cases. They come with each rail wrapped up in plastic and in one box along with a bag full of screws which give you the mounting screws for the rail to the case itself as well as a few varieties of screws for mounting to your rack as well. They have bearings as well as a clip built in to take the rail apart.
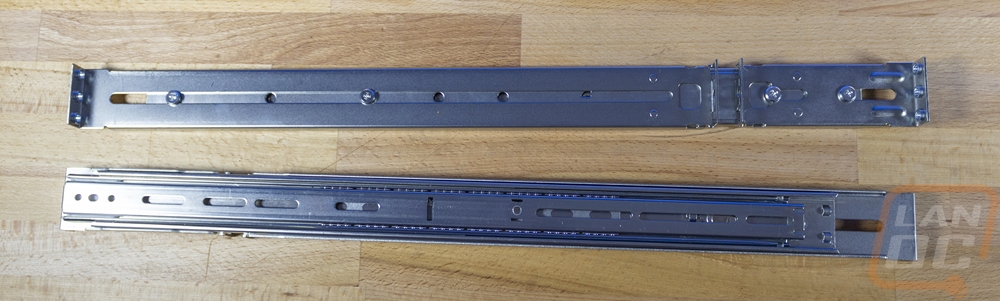
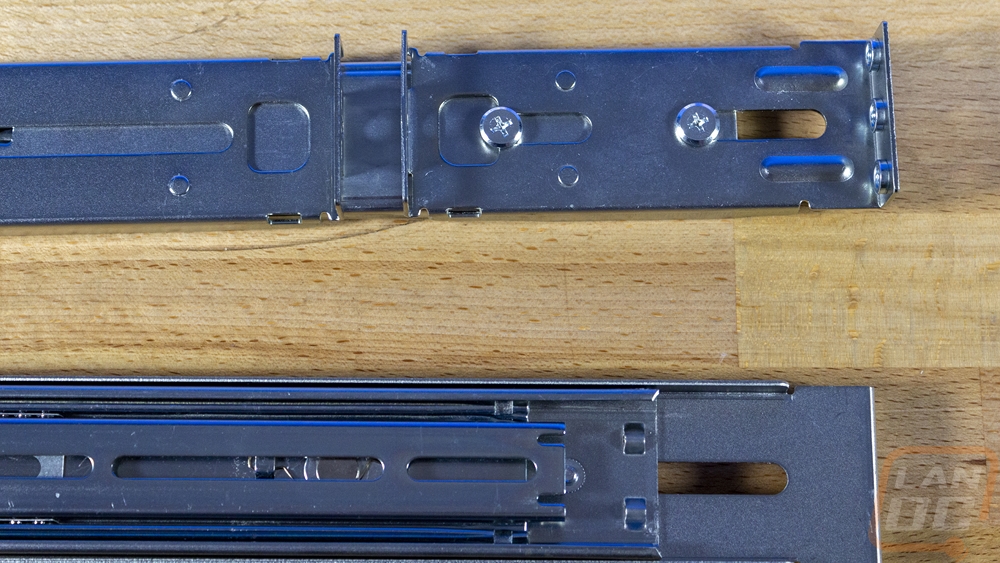
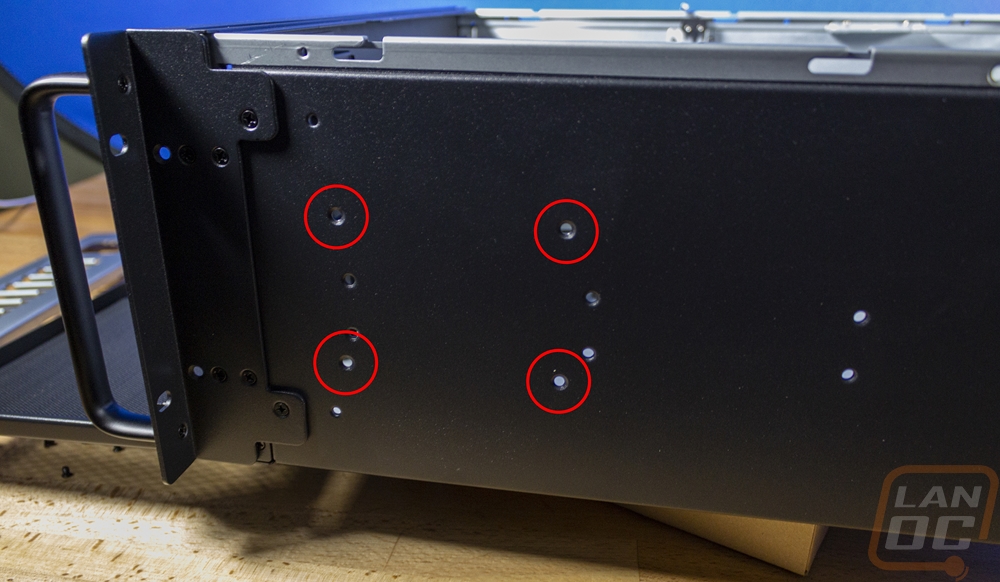
I did go ahead and get the rails installed in our case right away. As I mentioned earlier the RM42-502 does have two sets of mounting holes for rails you just need to make sure you have both rails in the same set. The bottom row puts the case in a positive U position and should keep the holes on the front brackets lined up but as you can see I went with the top mounts which was a mistake.
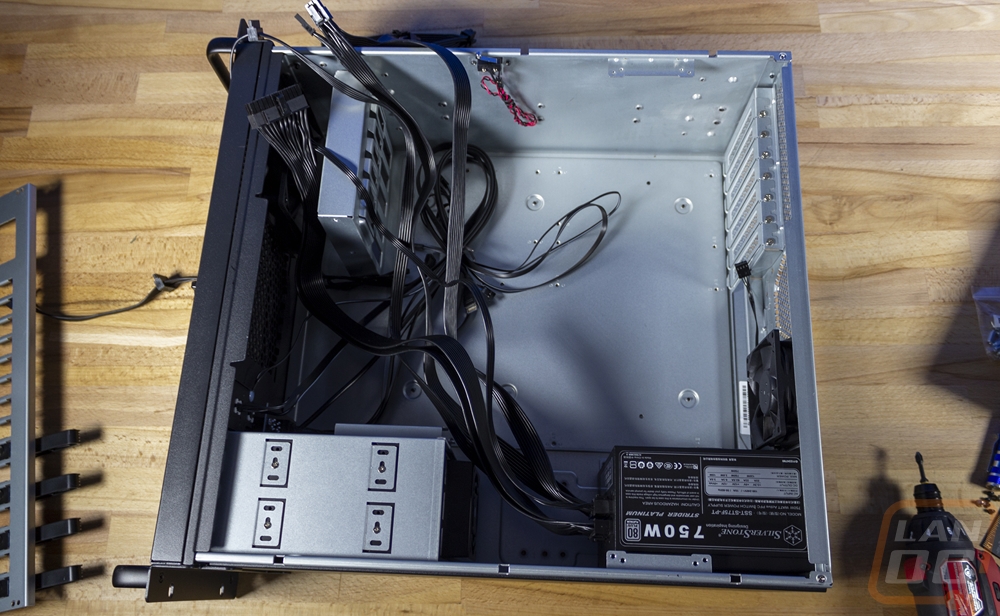
While getting the rails installed I did go ahead and prep the other Silverstone components of our build. For the Silverstone ST75F-PT that meant making sure I had all of the modular cables that I would need and plugging those in and then installing it into the RM42-502. One thing to keep in mind when doing this is that the power supply fan does need to be facing the inside of the case. Being a rack-mounted case there isn’t ventilation on the top, bottom, or sides so you have to pull air in from inside and then exhaust it out of the back. Thankfully the PSU bracket comes preinstalled so that was easy and getting the PSU installed was just using the four screws included with the power supply and then getting all of our wires inside of the case.
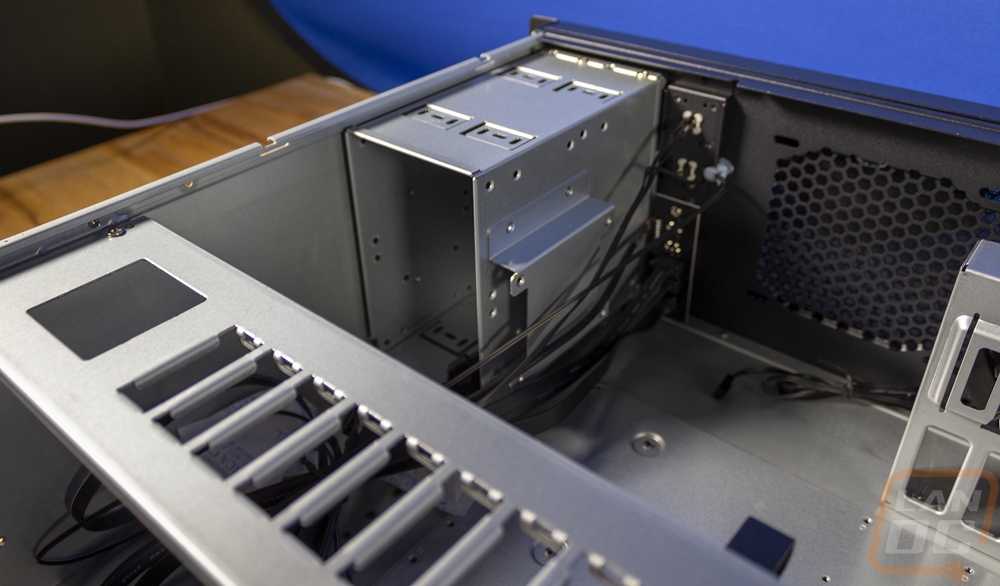
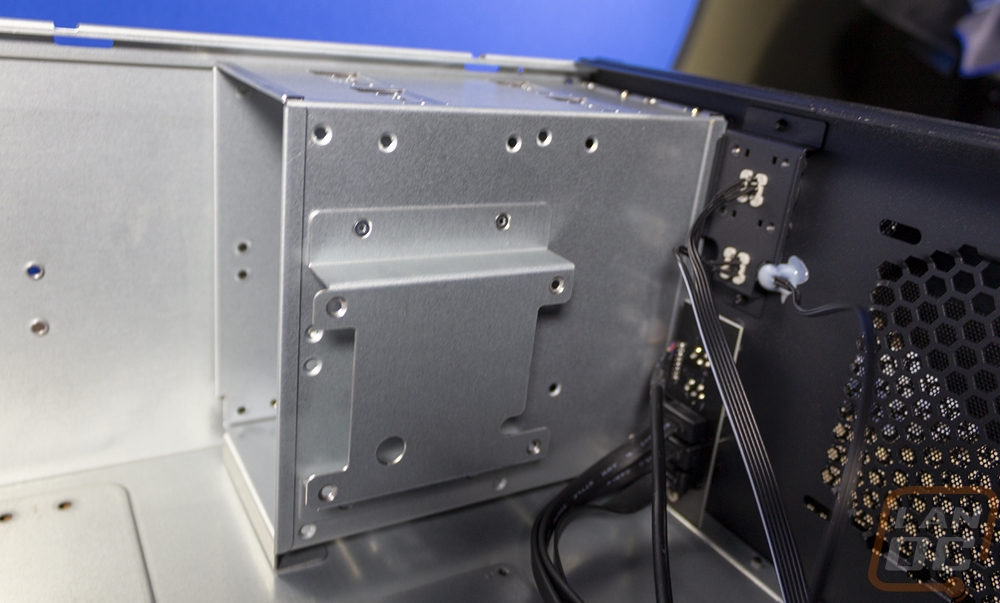
Next up was the Silverstone FS303 3-bay hot-swap that I’m adding into the case. This installs in the 5.25-inch bays and to be able to install it into that cage we do need to remove it. I’ve circled the screw holes in the picture below that you need to remove. Once you remove those four screws from the side of the case the drive cage will slide out and come out.
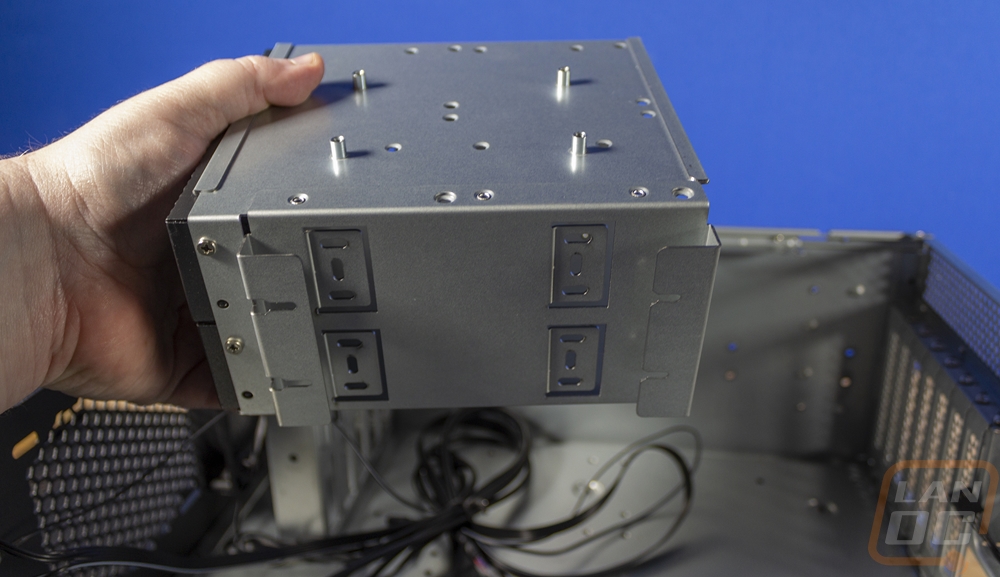
Once the cage is out you can remove the mesh drive bay covers. They are installed with two screws on each side for each cover and you can’t get at the bottom screws without removing the cage. I was surprised when I took a closer look that these do have thin foam filters in them as well which is nice.

The FS303 then slides into the cage where you can line up the mounting holes and mount it to the cage. This would be a good time to also install a 2.5-inch drive with the cage out if you are using one but our build doesn’t. You do want to reinstall the cage and line up the FS303 before putting the screws in to get it lined up perfectly but once it is installed you can reinstall the four cage screws on the side of the case and it is all together. We just need to hook up the two SATA power plugs and the three SATA cables which I will do later when I install the other components.

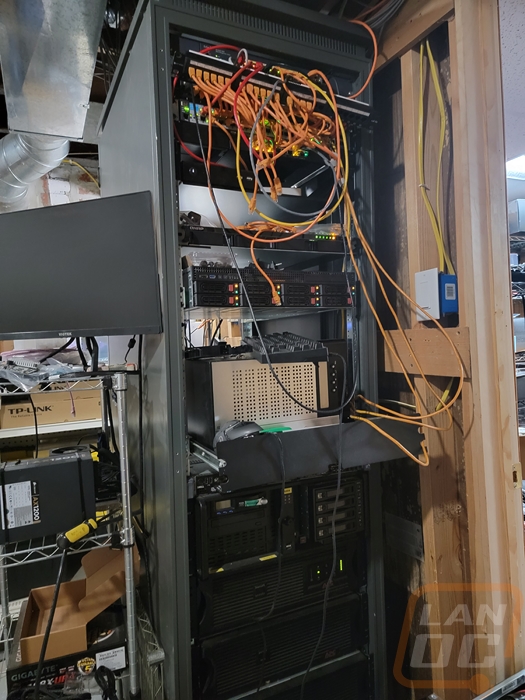
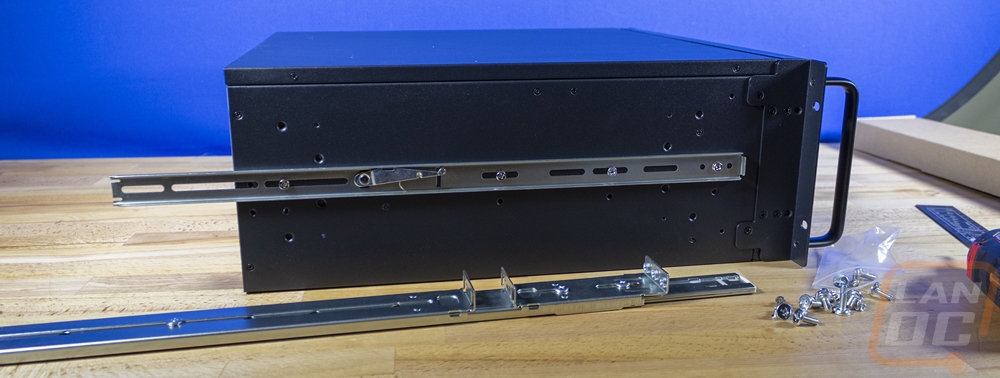
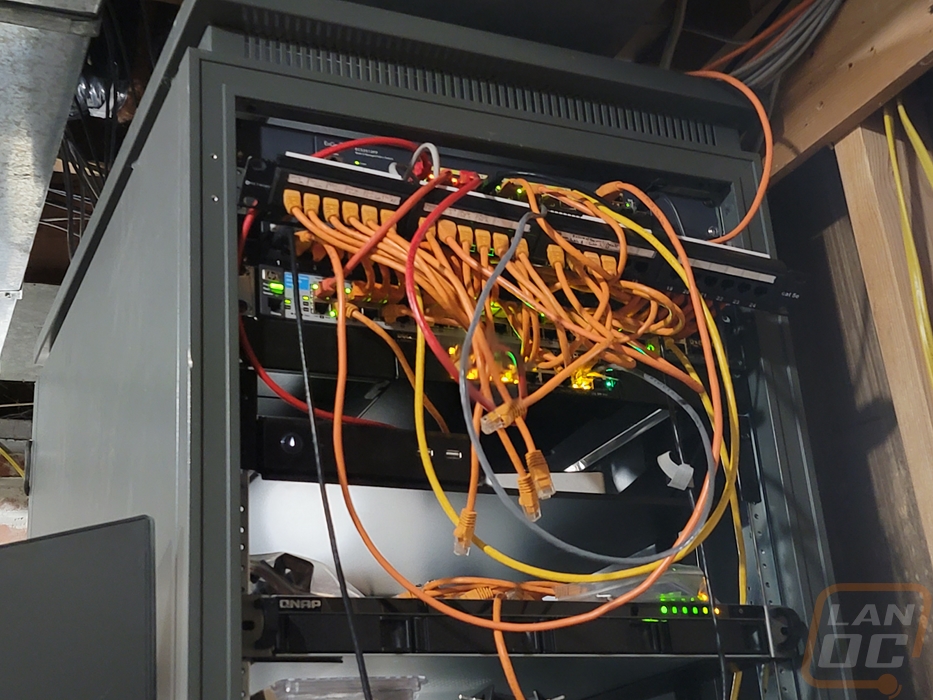
After I had those things installed those components I did take the entire build down into our basement where our rack is installed. I learned a big lesson on our TrueNAS build where fighting with getting the rails installed was significantly harder once I had the entire system together so I wanted to get the rails installed in our rack now before getting the rest of the heavy components installed. I really should have done this even before putting the PSU and the hot swap in, but it is better than nothing. Before I could do this I did have to do some cleaning up. Our rack when I bought it came with a random old server installed in it and over the years I had also filled the rest of the rack up. This included multiple NAS and our current security camera server which are all sitting on a slide-out shelf and things like one of our LAN servers and an Intel NUC that in the past has been used as a tiny server and for our LAN events but hasn’t been in use. The wiring on the rack has been ignored for a while as well with patch cables being swapped out multiple times and one patch panel hanging out after I replaced a bad cable and had issues (so I thought) with my punch-down not working. I cleaned the old NAS out of the rack as well as the old server but saved the patch panel issues for another time where I could spend more time cleaning it up but here is a look at that mess currently.
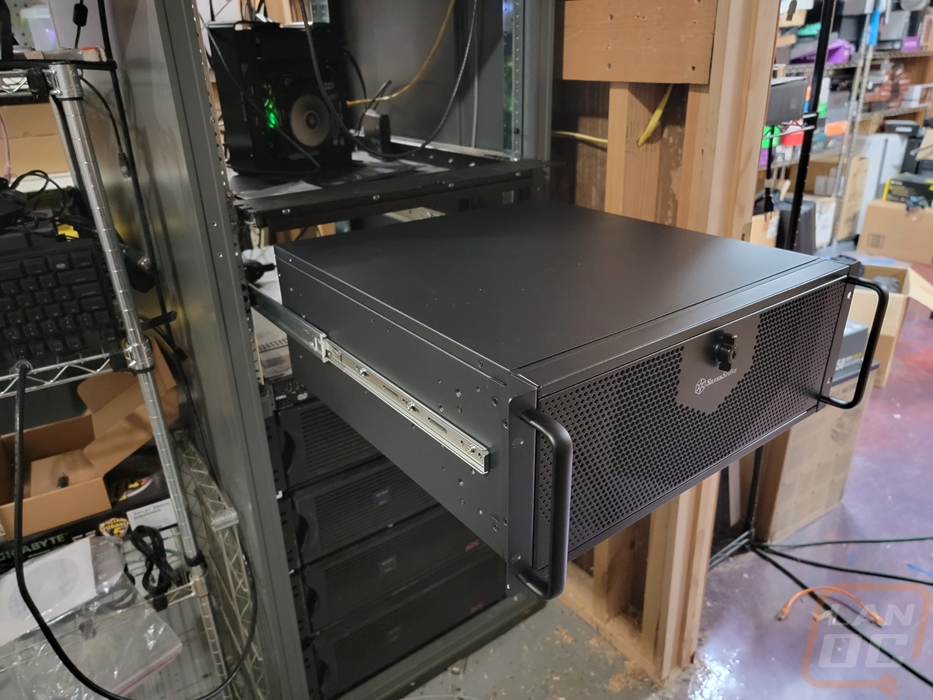
With some room made I decided that I wanted to put the case down below the slide-out shelf so I set the case up in that spot but without the outer rails attached so I could mark where our rails need to install. From there I just needed to install three screws at each end of the rails which expand out to adjust for your rack depth.
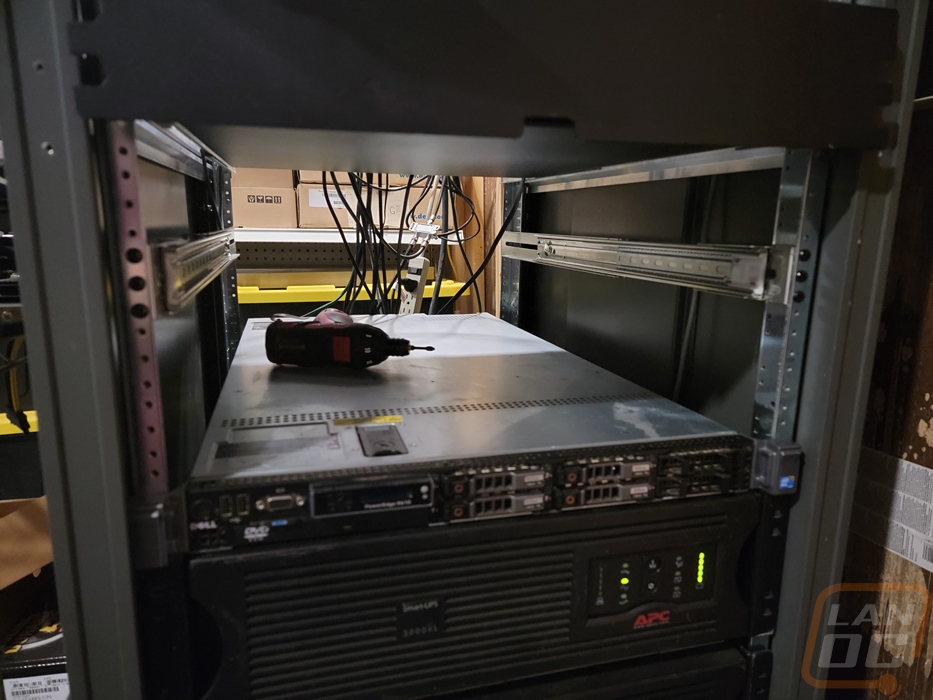
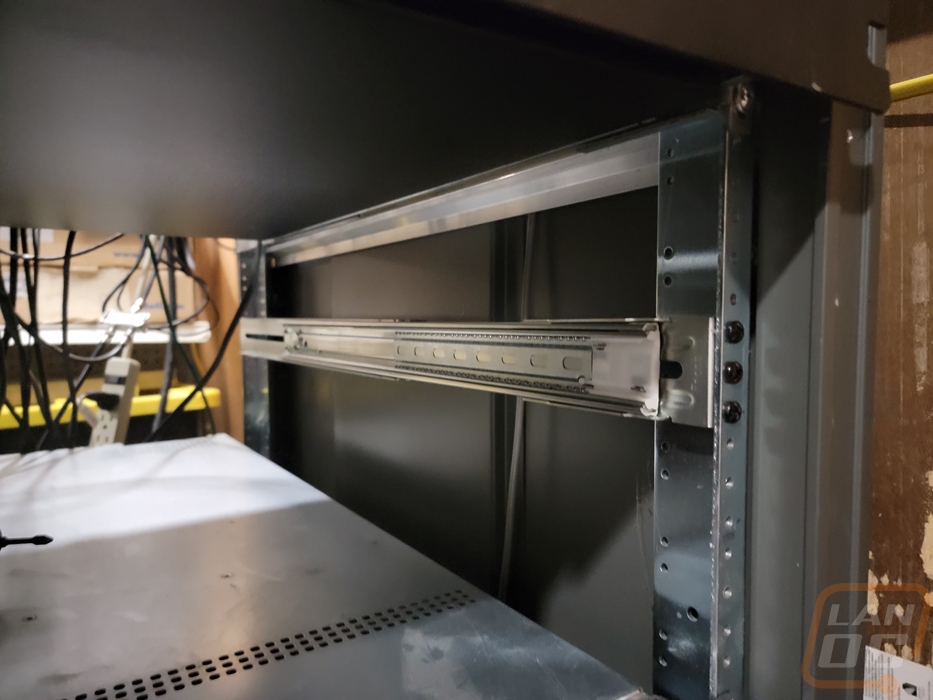
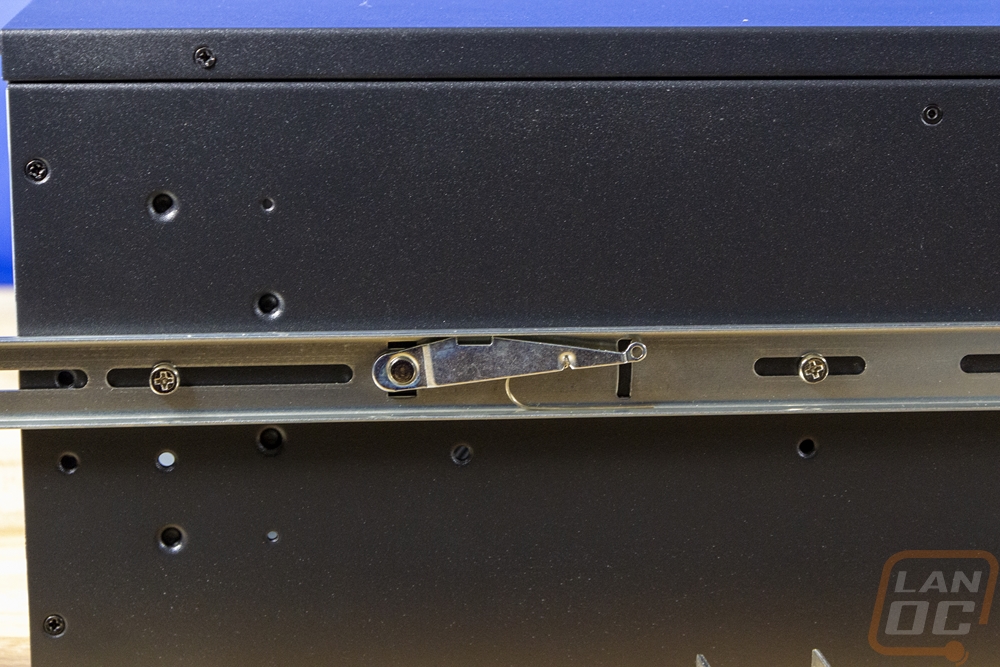
The two rails went in quickly and once installed the RM42-502 slid in and latched. I can now remove it to finish the rest of the build or if I want because of the rains I can finish installing everything into the case right here on the rack. Because I mounted our rails in the wrong spot on the side of the case the front holes didn’t line up with our rack but the case stays in place perfectly so I’m not too worried about it.