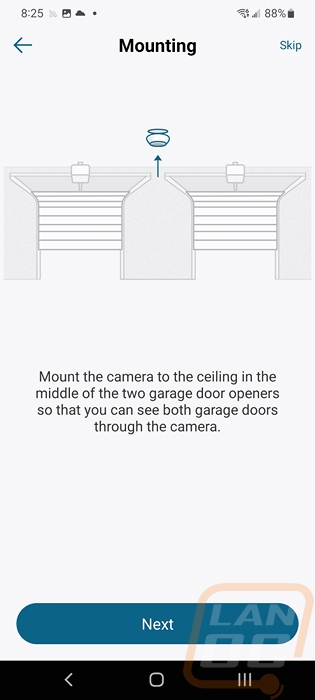
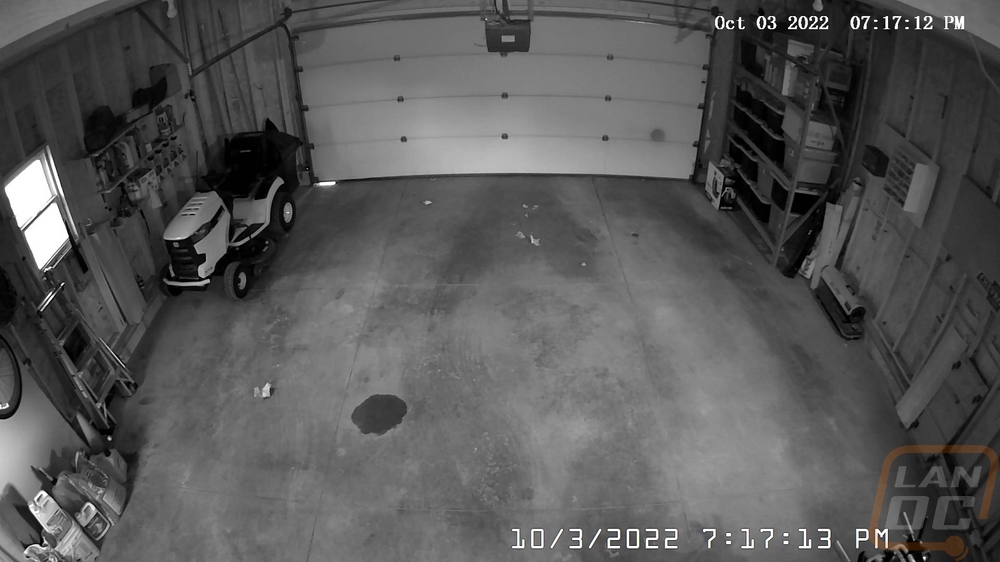
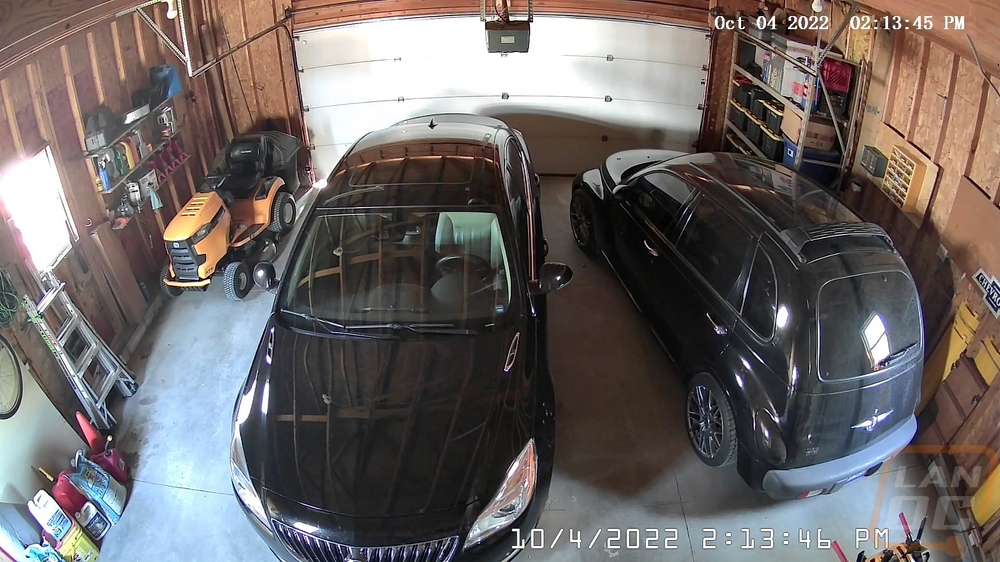
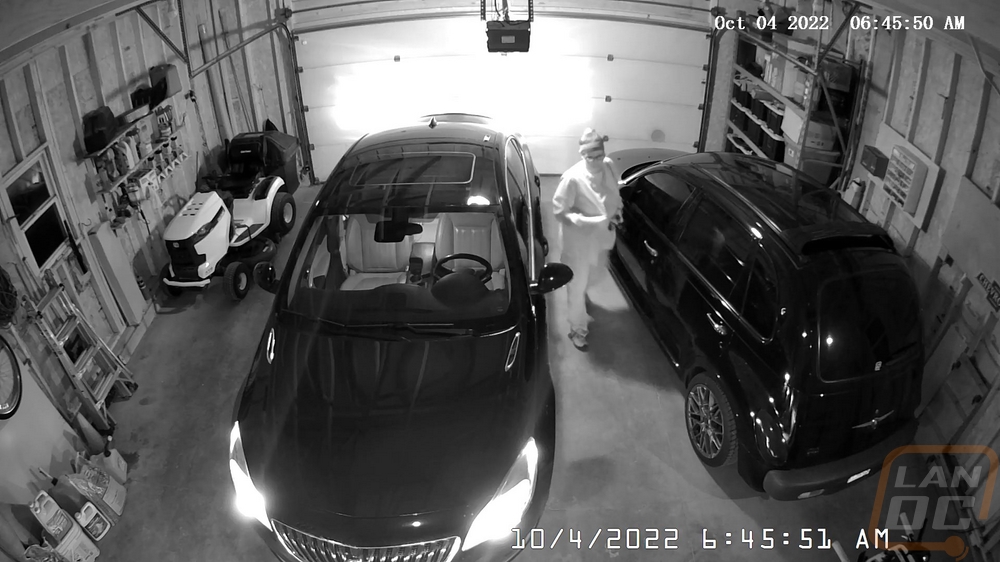
When we moved into our house and moved our camera system over getting a camera inside of our detached garage was one of the key locations. We had previously had an attached garage where I felt like I would at least be able to hear if someone was in there. But being detached just about anything could be going on in there without us knowing it and with our cars, lawn equipment, and a lot of tools inside being able to keep an eye inside was important. It also turned out to be a great indication of when my wife and I were home. I later added an app-based garage door controller as well but both were tied into two different systems meaning more than one app. Eufy Security recently introduced a new camera that combines both of these. They aren’t the first to have a similar product, but if you are already in the eufy ecosystem having it all together is a big benefit. They have two models of the eufy Security Garage Control Cam, one for a single door setup and a second that can handle two garage doors. Today I’m going to check out the Garage Control Cam Plus and see how eufy’s attempt at garage control and surveillance works out.
Product Name: eufy Security Garage-Control Cam Plus
Review Sample Provided by: Anker/eufy
Written by: Wes Compton
Amazon Affiliate Link: HERE
|
Specifications |
|
|
Size |
211mm*95mm*140mm |
|
Weight |
640g |
|
Compatibility |
Compatible with the Google Assistant and Amazon Alexa, HomeKit not compatible. |
|
Power |
5V/1A AC power |
|
Connectivity |
2.4 GHz Wi-Fi Only |
|
Garage Door Count |
Plus Model works with two doors |
|
Garage Door Support |
sectional, roller, and tilt doors |
|
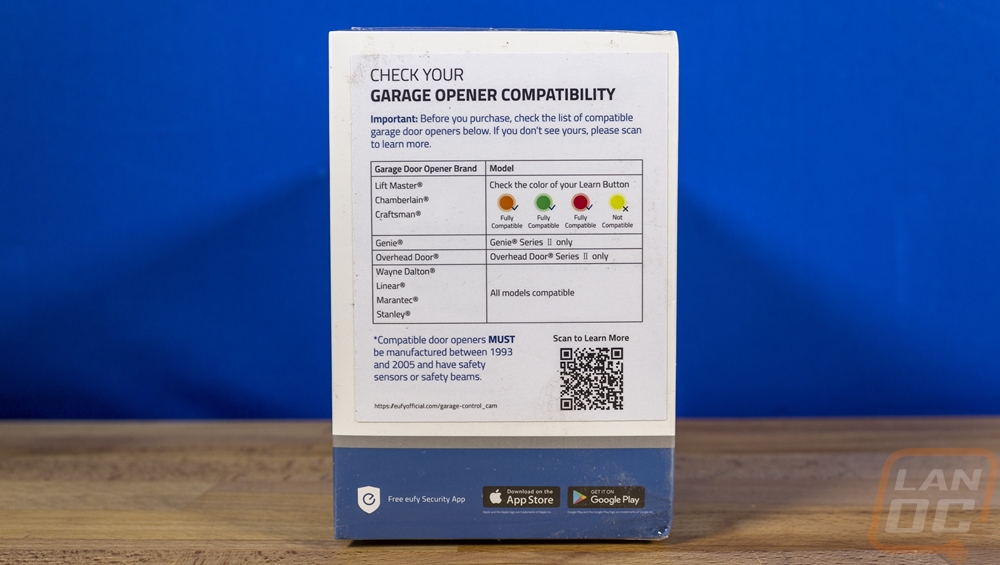
Garage Door Opener Compatability |
Learning Full Compatibility Wayne Dalton, Linear, Marantex, Stanley
Learning Partial Compatability Genie, Overhead Door, Craftsman, Chamberlain, Lift Master
Hardwire compatibility for openers not on the list as well |
|
Video Quality |
2K |
|
Smart AI Support |
Package Detection Human Detection |
|
Audio |
Two-Way |
|
Video Storage |
Local(SD card needed), cloud, NAS (RTSP) |
|
microSD Card |
32 GB SD card included(supports up to 128GB) |
|
Battery Life of Sensor |
Up to 1 Year |
|
What’s Included |
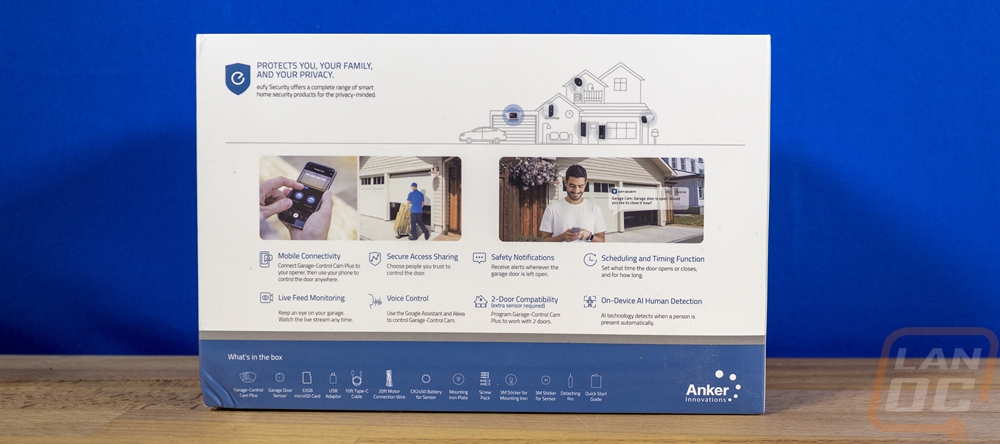
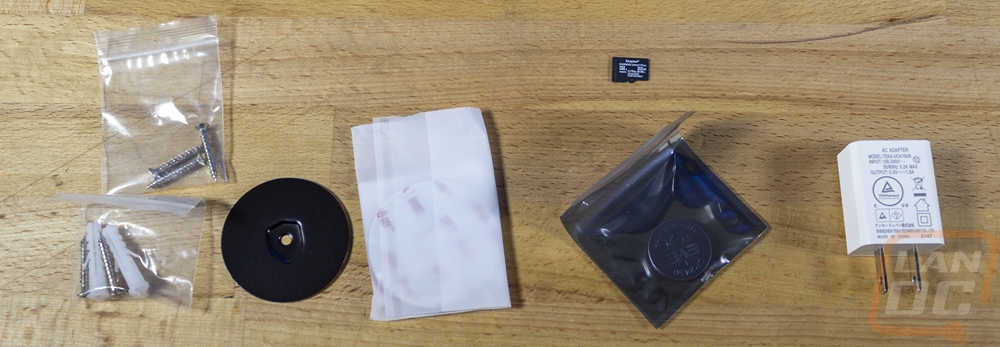
Garage-Control Cam Plus, Garage Door Sensor, 32 GB microSD Card, USB Adapter, 10 ft USB-C Cable, 20 ft Motor Connection Wire, Mounting Iron Plate, Screw Pack for Mounting Iron, 3M Sticker for Mounting Iron, CR2450 Battery for Sensor, 3M Sticker for Sensor, Screw Pack for Sensor, Positioning Card for Sensor, Detaching Pin, Quick Start Guide. |
|
Warranty |
12 months |
Photos and Features
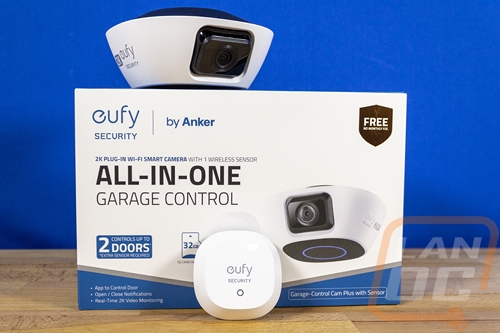
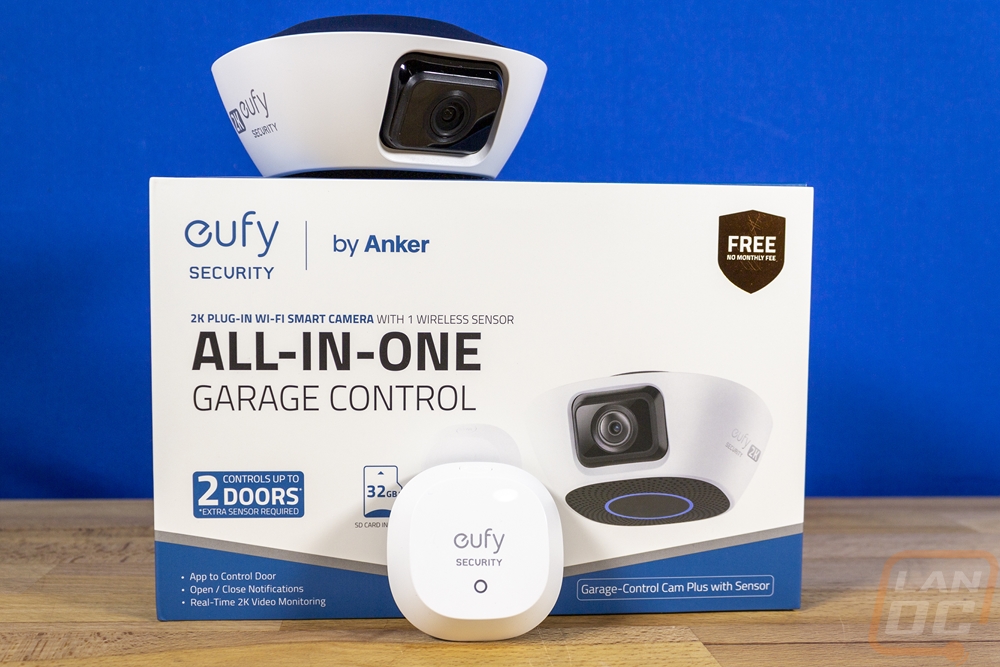
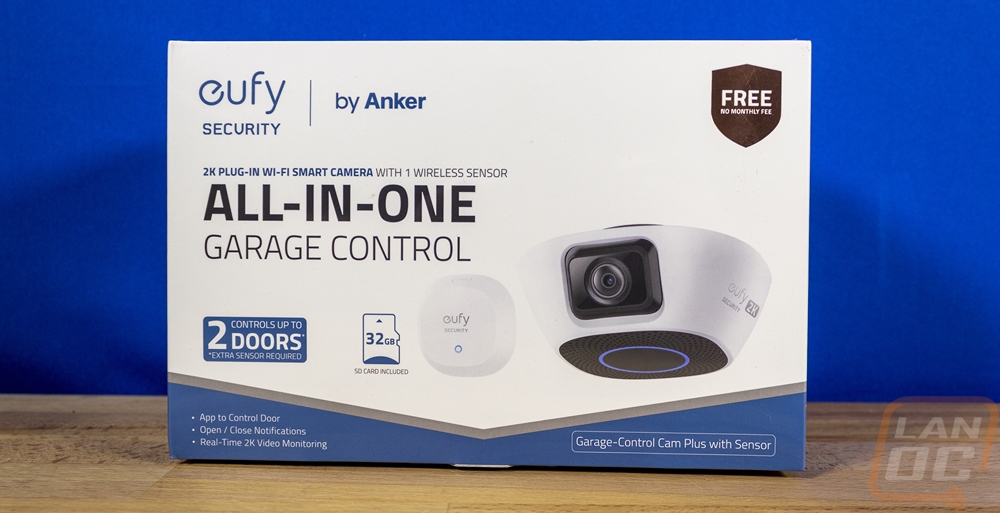
The packaging for the eufy Security Garage-Control Cam Plus shares the same styling as past eufy Security products like the Video Doorbell Dual that I took a look at list last July. By that I mean it has the same white background that runs down to the bottom with a V shape along with the blue and silver along the bottom. The front of the box has a picture of the camera as well as the sensor and they also have a line drawing of the 32GB SD card that is included as well. They then have the eufy Security logo up in the top left along with letting you know that is an Anker sub-brand. The box does a better job of telling you exactly what this is than the model name does by having “All-In-One Garage Control” in the biggest font than the Garage-Control Cam Plus with sensor down in the corner. Really I think the model name should be all in one garage control. Above that, they tell you that this has a 2K plug-in wifi smart camera and it comes with one wireless sensor. With this being the Plus model they also have a note letting you know this controls two doors but you will need an additional sensor and they tell you that you can control your door, get open and close notifications, and have real-time 2K video monitoring. They also have made the badge in the top right corner letting you know this doesn’t have monthly fees even larger which is a great idea.
One side of the box has a sticker that lets you know what garage doors are compatible including a QR code to scan to learn more. The other end lets you know that your privacy is something that they value. The back of the box shows off some of the various options in the eufy security lineup up at the top. The middle has a list of key features including some software features like scheduling and AI human detection. Then at the bottom, you get a list of everything in the box and it is a surprisingly long list

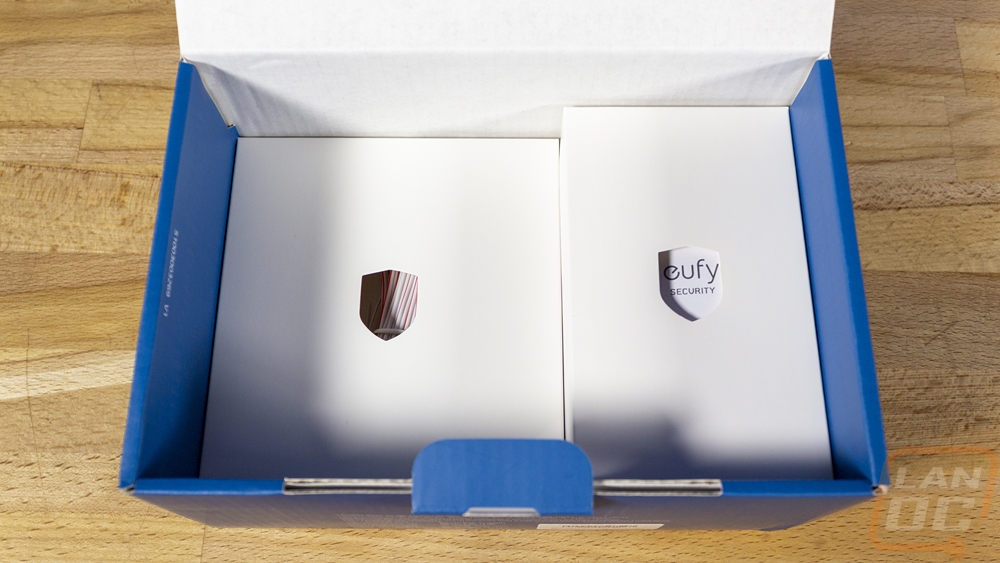
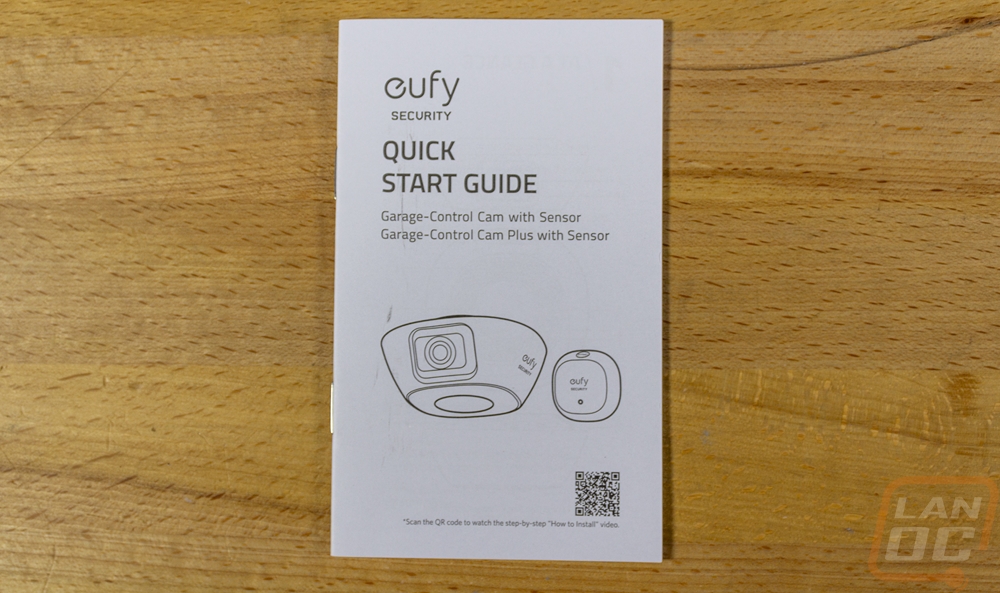
When you open the box up there is a plastic tray on top that is formed around the garage control itself as well as the sensor. Both of those also have plastic stickers on them to prevent any scratching as well including over the camera and on the top of each device. Below the tray, you have two boxes with all of the accessories needed for installation with both having a small shield-shaped hole on top to make it easier to pull them out. For documentation, the Garage Control Plus comes with just one small quick start guide. A majority of the installation instructions are built into the app to guide you one step at a time depending on your setup.
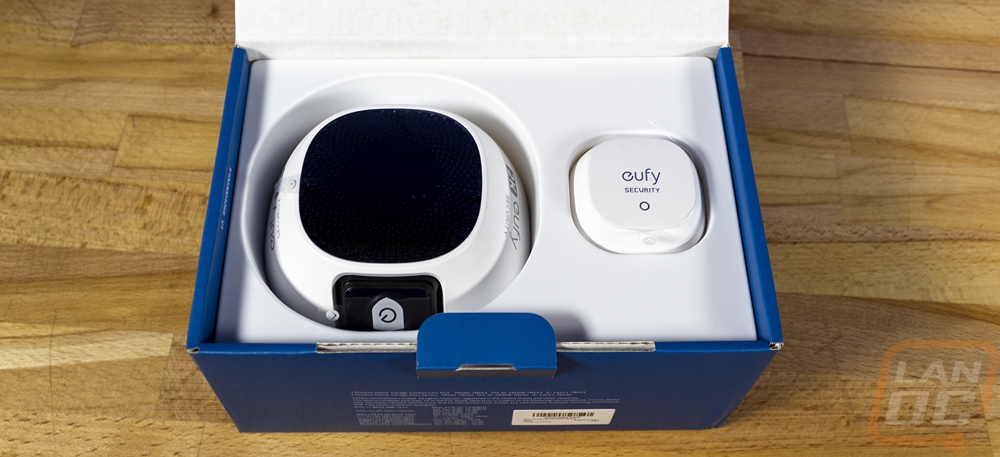
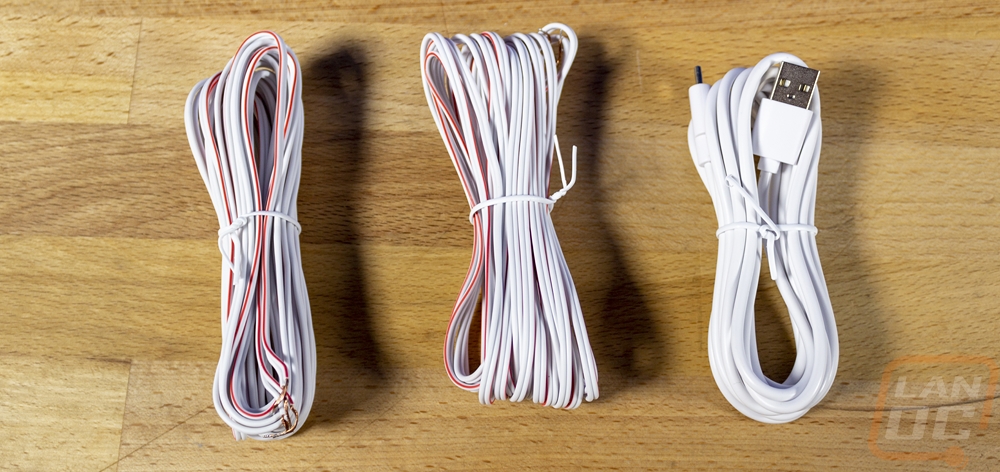
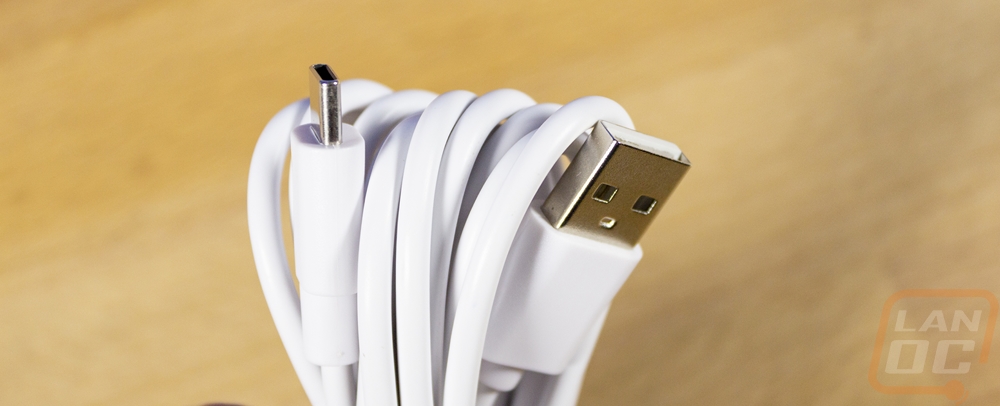
As I said, the Garage Control Plus comes with a LOT of accessories. The most surprising of which is that this kit includes a 32GB microSD card. I should point out that the non-plus model doesn’t come with a micro card for storage and for that model, you will need to provide your own microSD card. This one is a Kingston Canvas Select Plus. You get three cable bundles. One is a USB Type-C to Type-A cable which is 10 feet long and then there are two matching 10-meter (32-foot long) two-wire motor connection wires. There are two screw packs, one with three screws and the second with two screws and two drywall anchors. There is a metal mounting plate that has the eufy shield logo in its shape. A pack of two 3M double-sided tape cut to fit the sensor and the camera mount. A static protective bag with a CP2450 battery inside and an AC to USB Type-A power adapter.

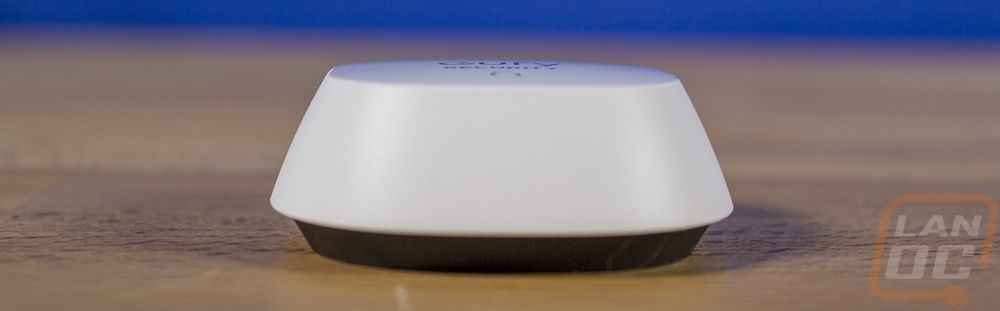
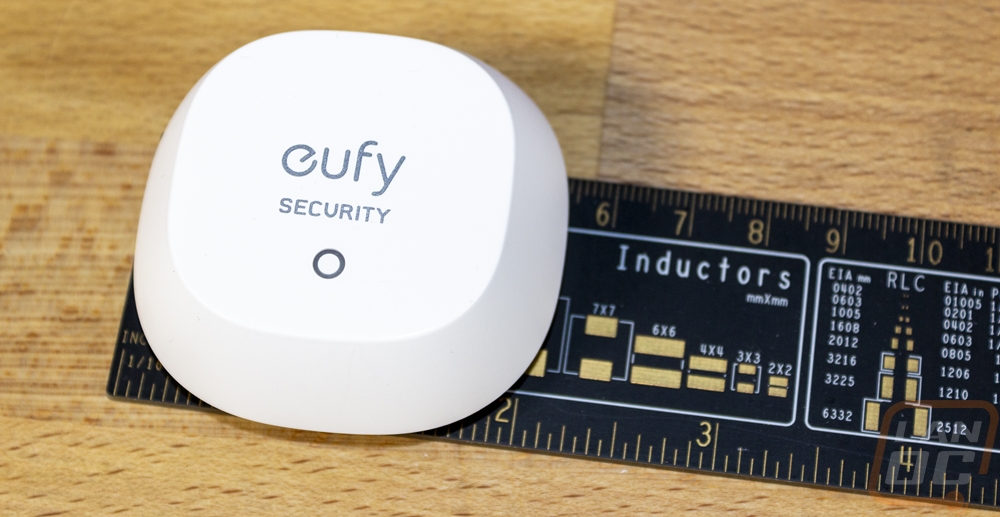
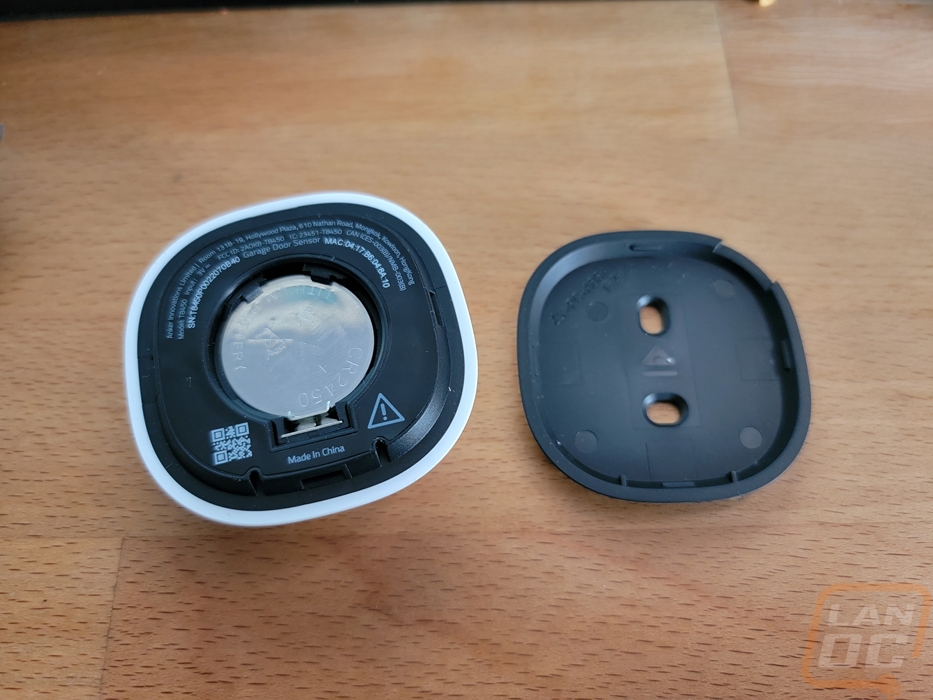
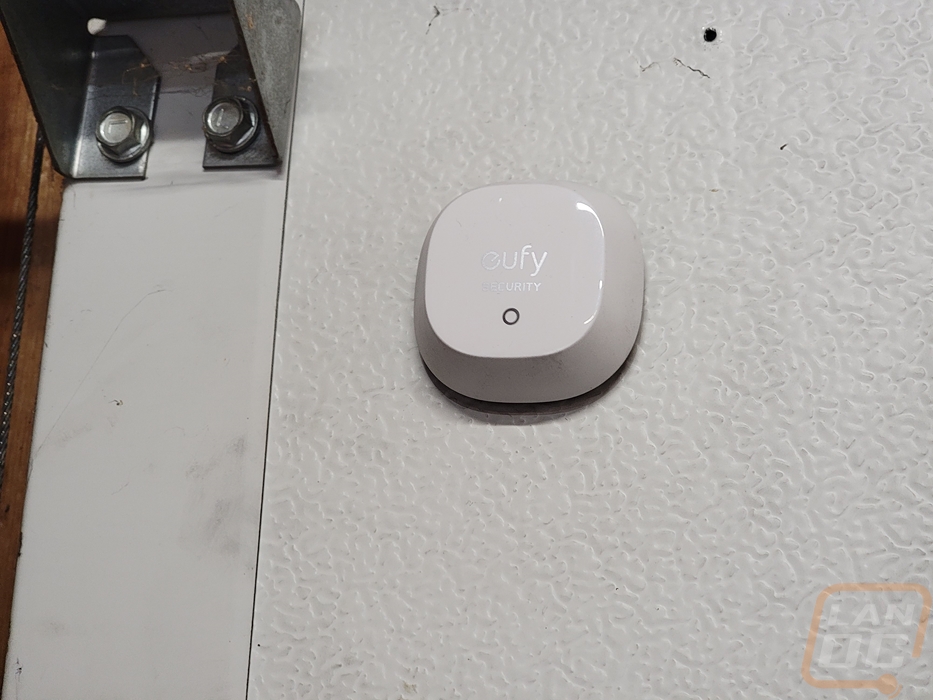
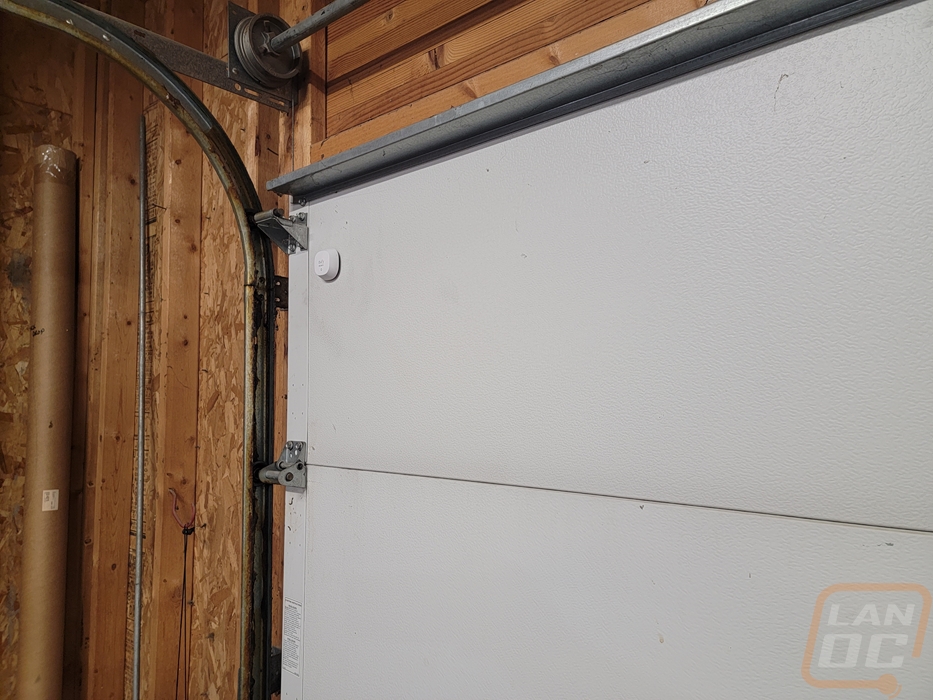
I’ve had a My Q based garage controller that I picked up a few years ago so the sensor that comes with the Garage Control Plus wasn’t a surprise at all. Its purpose is to tell the system when your garage is open or closed by being mounted to the door and knowing when it is tilted. With a majority of garage doors being white I was happy that this one is white as well. Our My Q model has a black sensor that stands out on the door. This has the eufy Security logo on top along with a ring-shaped status LED. It is smaller than the My Q sensor but similar in its mounting design with the back panel that pops off and can be screwed to the door or double-sided taped to the door. It also has a sync button up on the top edge for syncing it with the system.

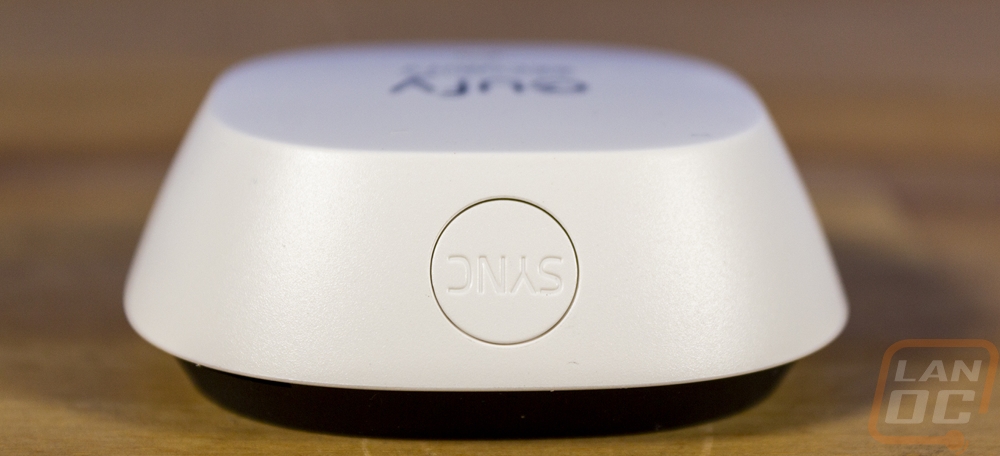
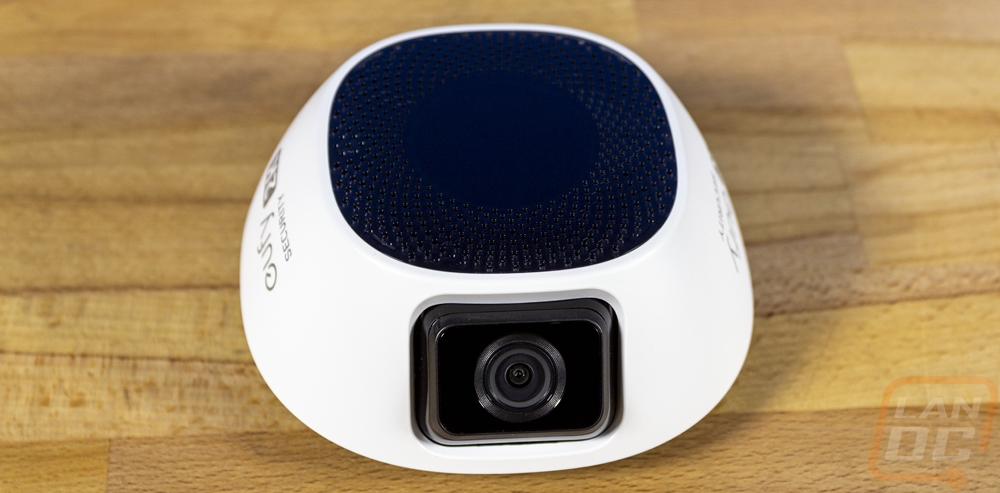
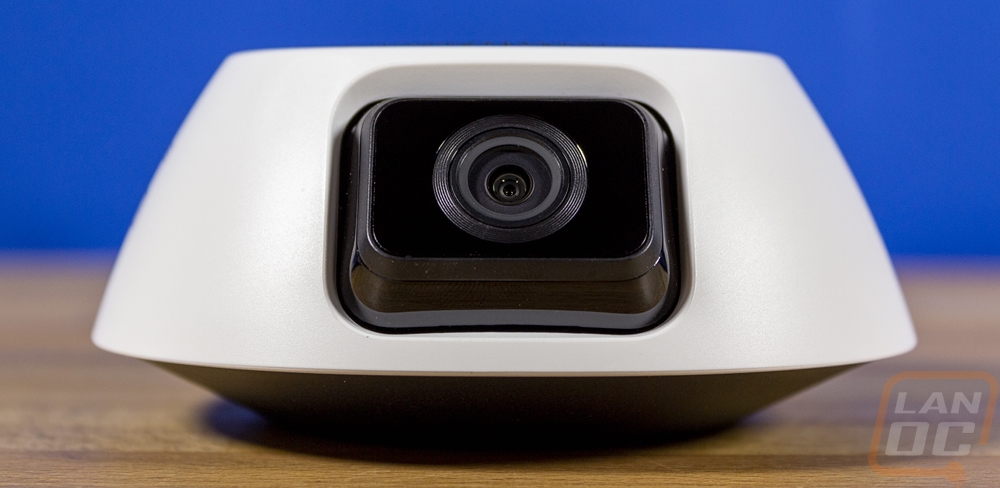
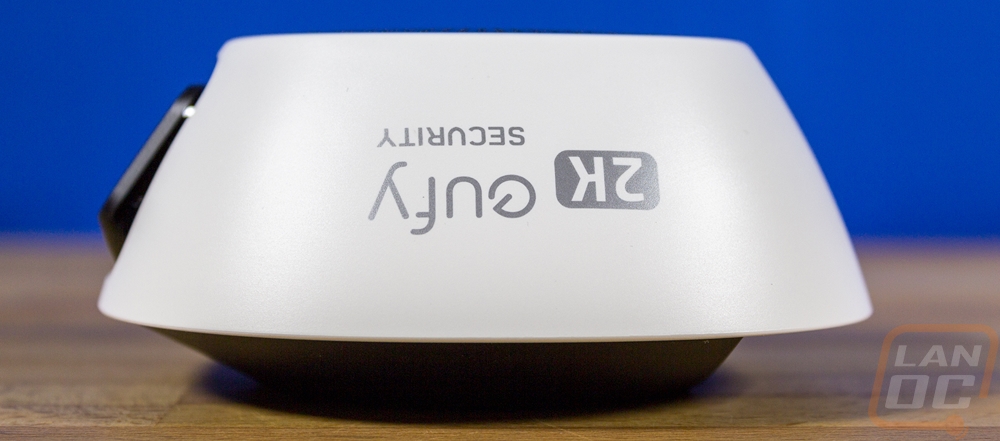
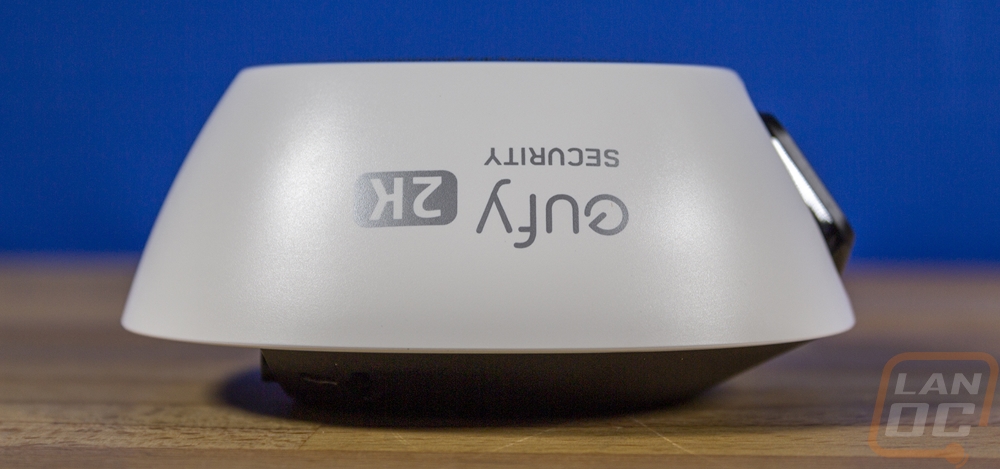
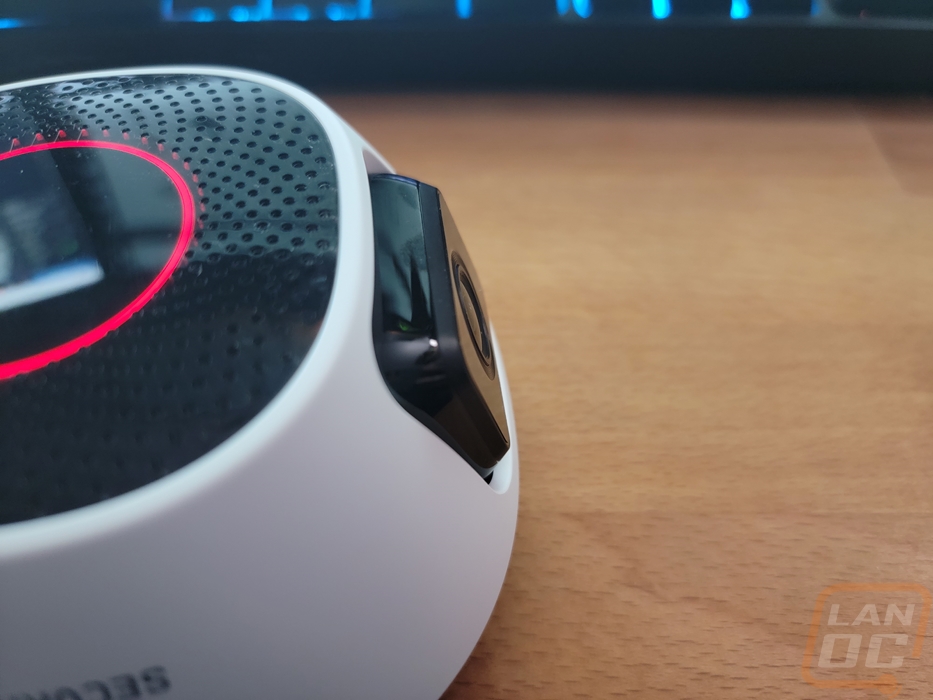
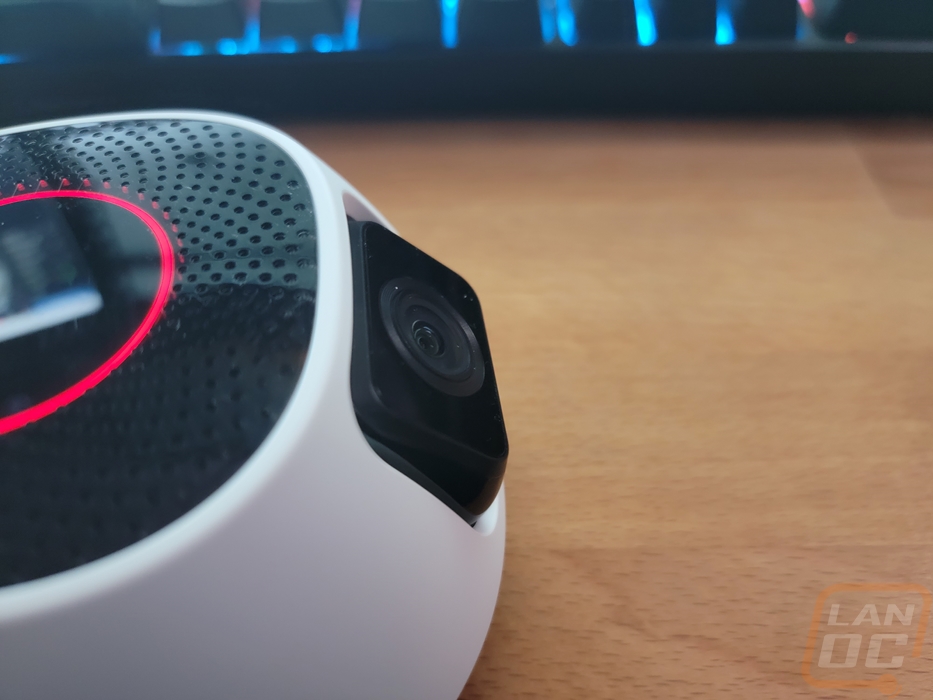
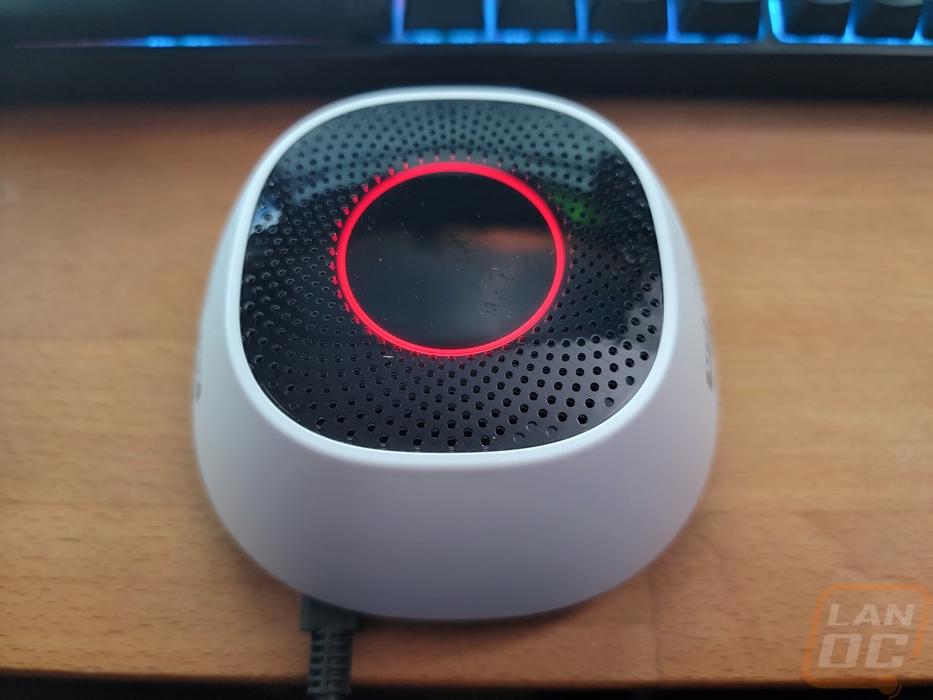
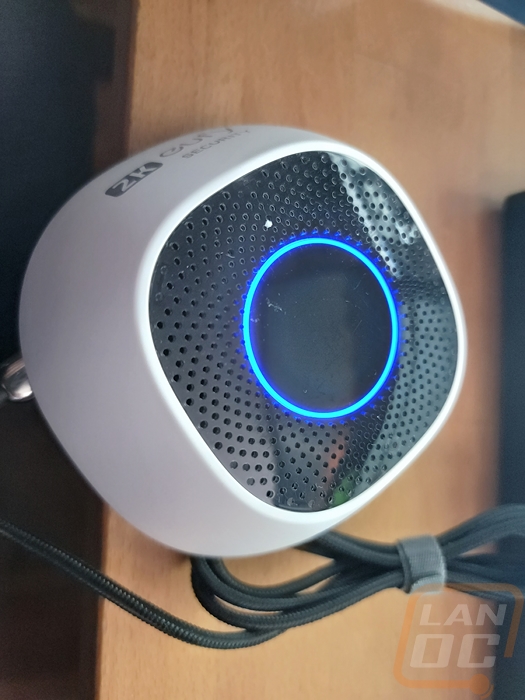
The side view of the Garage Control Cam has a shape that reminds me a lot of the top of a star wars droid like the BB-9E. It has a slight curve to the angled sides with a flat top. Two of the sides just have the eufy Security branding and also letting you know it is one of their 2K cameras. The back doesn’t have anything on it. Then the front is the only side with anything going on. This is where the camera is mounted which as the branding on the side indicated is a 2k or 1440p resolution camera with built-in infrared in the black housing for night vision.
Here is a look at the adjustability of the camera. It can be tilted maybe 22 degrees and from the looks of it from 22.5 degrees to 45 degrees.
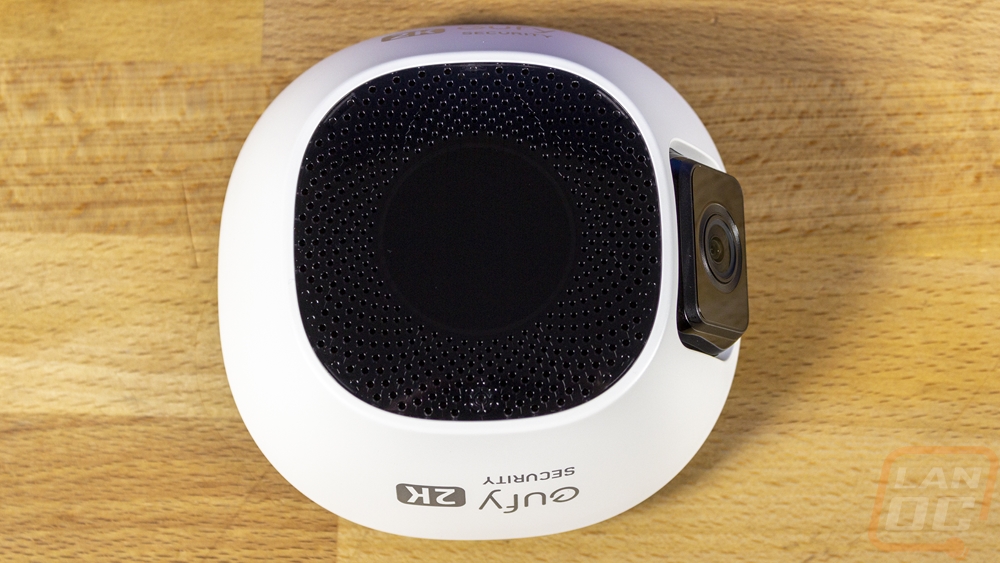
The bottom of the garage control cam has a gloss black finish and a perforated finish all around the outside with a solid circle in the middle. That circle has a ring LED status indicator behind it and the perforated area has a built-in speaker and microphone.
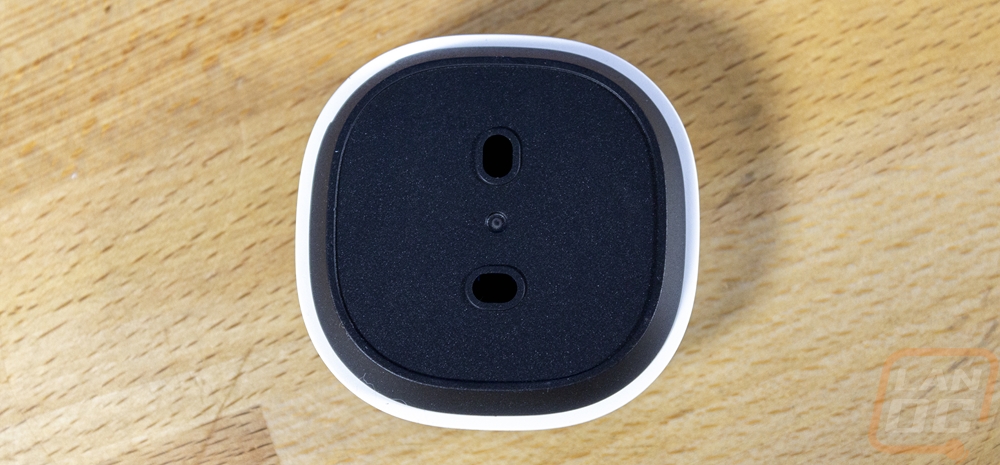
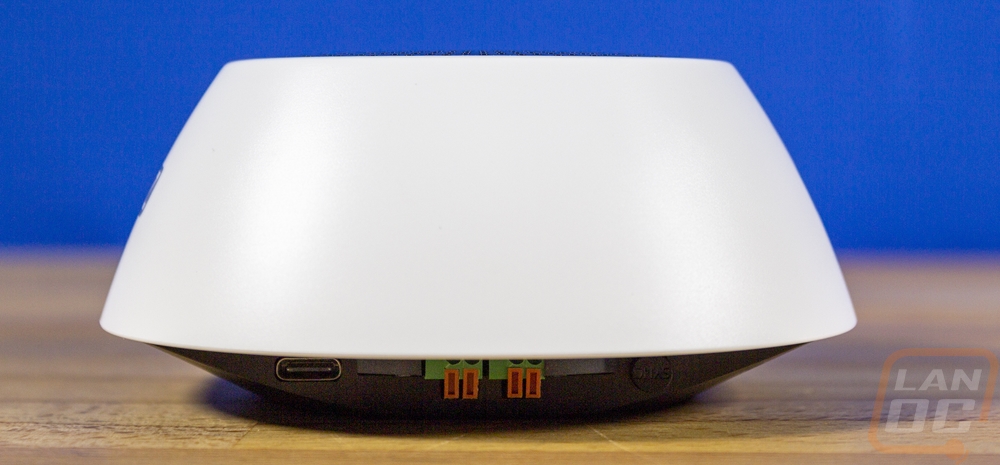
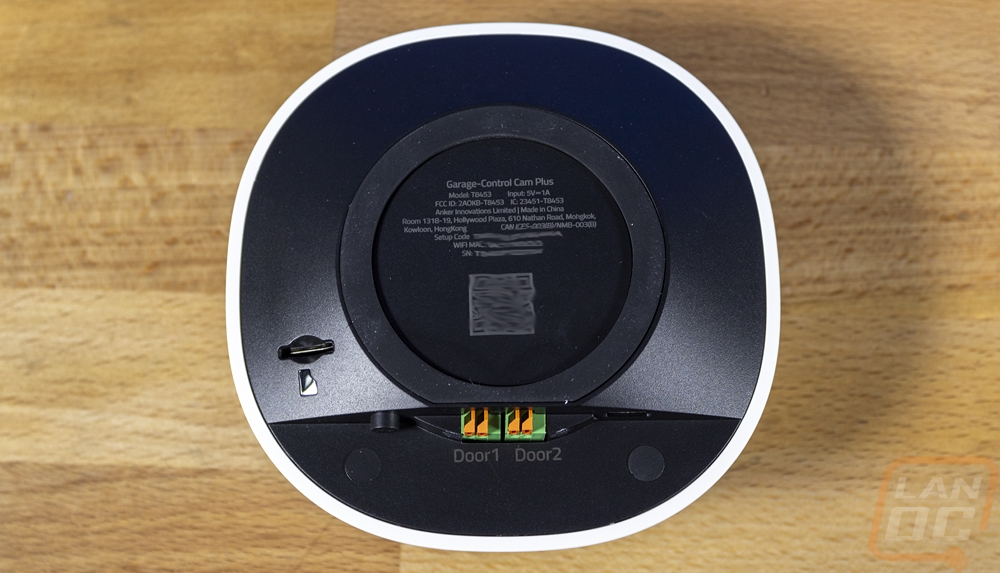
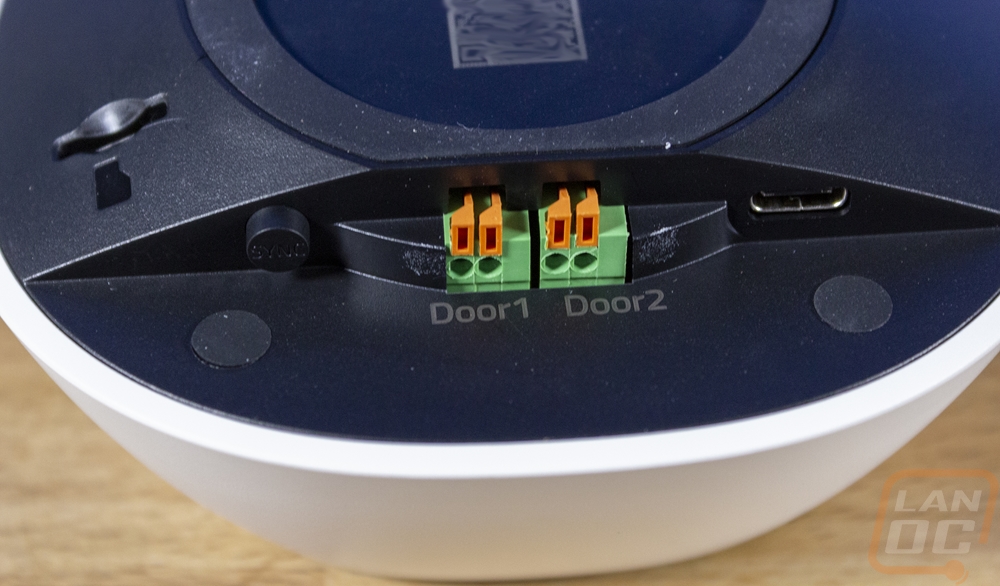
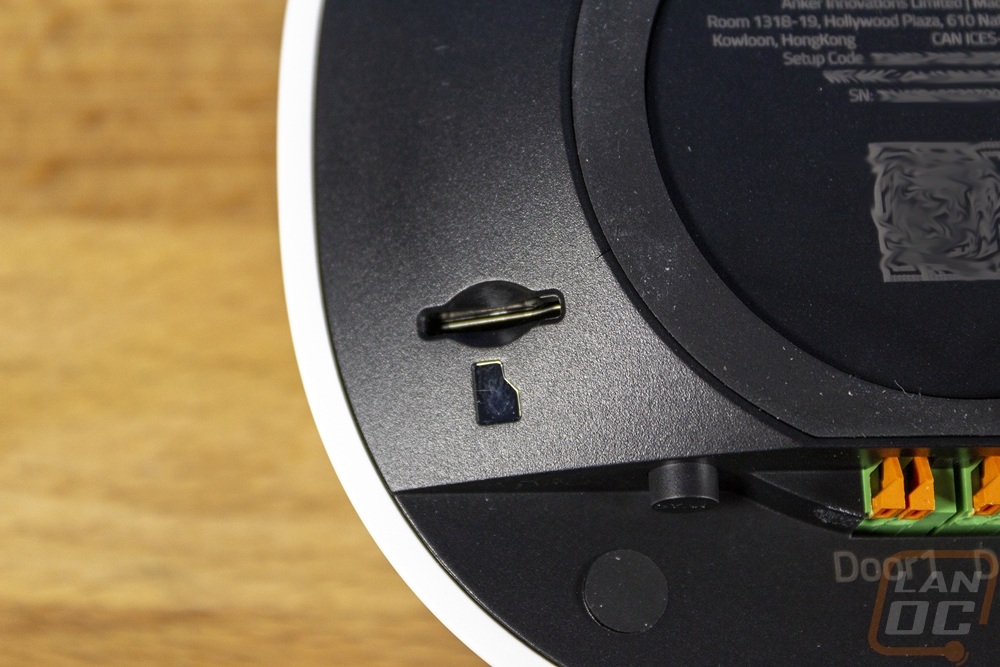
While this side looks like it would be the bottom, it is the top of the garage control cam because when installed you mount it upside down with this up against the ceiling. There is a lot going on here. In the center, they have the model and FCC information printed as well as a QR code for quickly adding the camera to the eufy security app. Around that center, it has a rubber ring and in the middle behind the print, it has a strong magnet. The design doesn’t have any traditional mounting options like a screw keyhole, this design works with the included steel mounting plate and just sticks to it with the magnet. The rubber ring is then there to help keep it from spinning around. Then the recessed area has the connections for the two doors. The orange bits are spring-loaded and lift up for the cord to slide in without any tools. Also in this area on the left is a sync button and then on the right is the USB Type-C power connection. I should note that the garage control cam plus that we have here supports two doors but the non-plus model only has the one door connection. I’m really surprised that they went out of the way to make two different models, if both had dual connections it could leave open the option for users to add a second door later but you HAVE to get the plus model to have that flexibility.
Installation
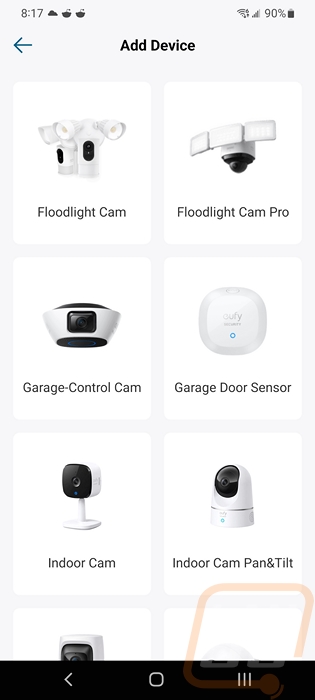
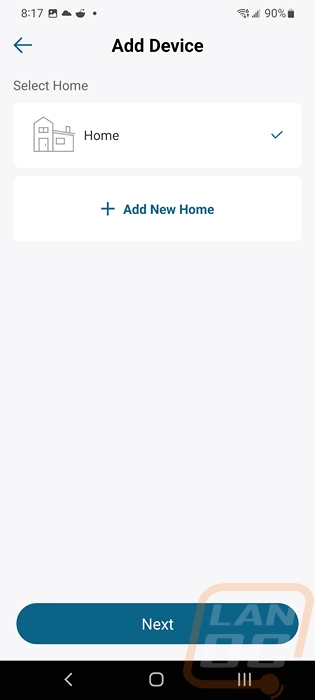
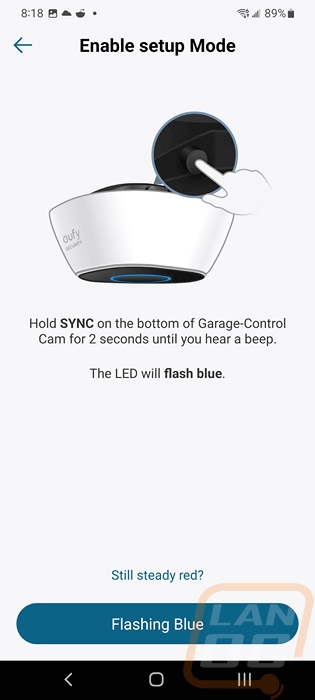
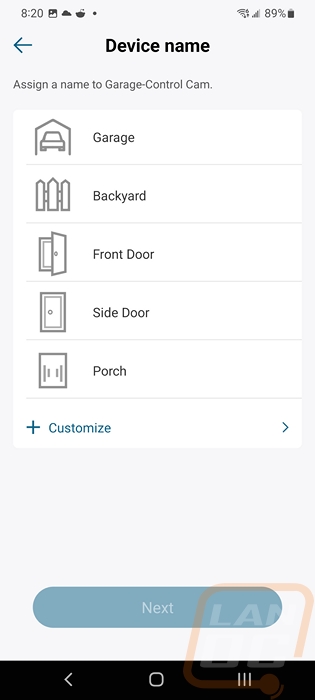
Before putting the Garage Control Cam Plus to the test I did need to get it installed and set up, similar to the eufy Video Doorbell Dual this is two different things. You have to get things set up on the software side of things and you have to install everything in your garage as well and get things up and running. To save some trouble I set things up in the house by putting power to the Garage Control Cam Plus and getting it set up in the eufy Security app. I plugged the camera into a USB Type-C charger and it powered up and started flashing the red light. On the app side, I logged in which shares the same logins that other Anker brand app use. From there you click the add device button which is the plus sign in the top right corner. This opens up a list of eufy Security devices that you can pick through and find the Garage Control Cam Plus. Once you click that it will then ask what home you want to add it to, most people will only need the one here but if you have more than one location you are running eufy products you can do that. The app will then let you know to plug the device in and let them know when the red status light is.

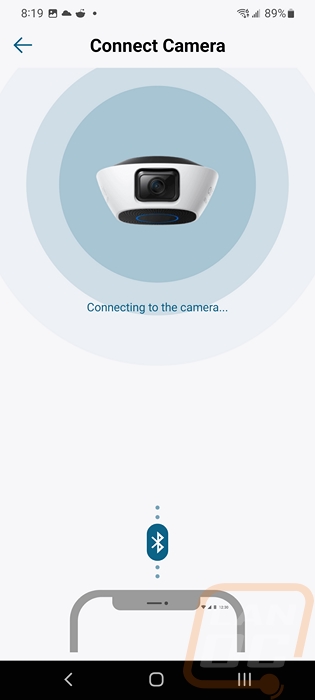
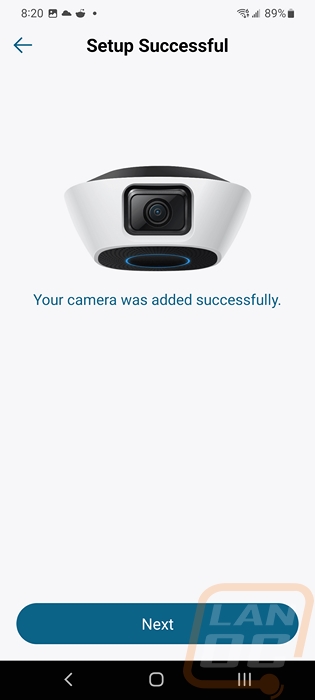
The app will open up your camera and you can use this to scan the QR code on the bottom of the Garage Control Cam Plus. This will add it to your devices. From there you hold the setup button and it will go into setup mode and connect via Bluetooth to the Garage Control Cam Plus. From there you can set up your wireless settings to get it on the network and up and running. Once done it also asks you what room you are installing it which is a bit ironic but it is nice that you could add multiple garages for example.


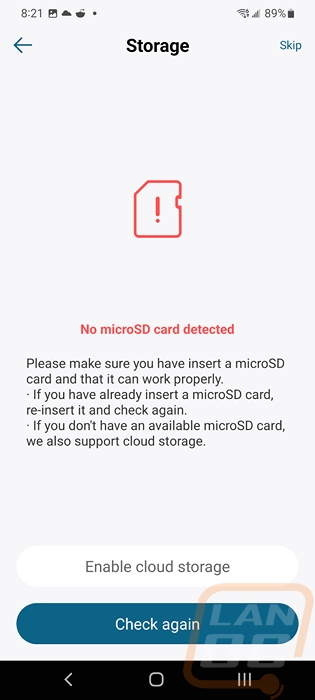
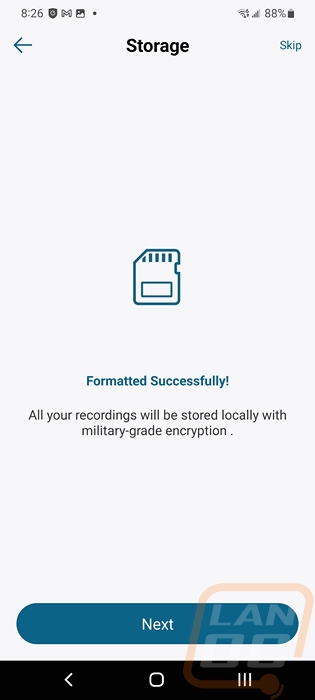
I did preinstall the SD card that eufy included with the Garage Control Cam Plus but initially when the setup tried to format the card it wasn’t detected. Removing it and reinstalling fixed the issue and we were ready to go.
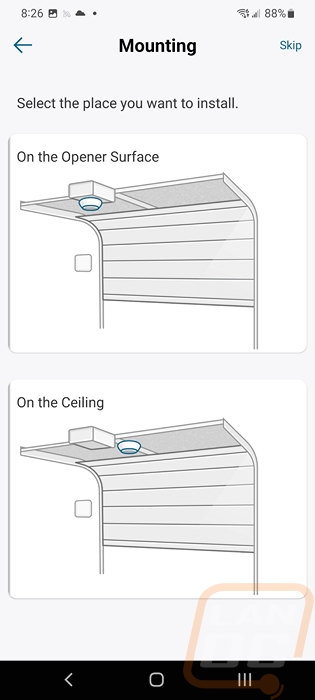
For installing everything in your garage and setting up the garage control eufy does have basic instructions on their website but the app itself has step-by-step instructions that are easier to use and asks you questions to help give you the best instructions. The first instruction asks you to mount the Garage Control Cam Plus and the second page lets you pick from the garage door opener or your ceiling where eufy will then break down the instructions even more. The installation is extremely easy, it comes with a metal mounting plate that has a screw hole in it. You can use the included screws to mount this to the ceiling or the included double-sided sticky tape to mount the camera. Then the Garage Control Cam Plus has magnets that let it stick to the mounting plate. This means that if you have a metal housing on your garage door opener you can also just stick it right to that and if not you would use the included double-sided tape. I would recommend mounting it as far back and high as possible to get a better view of the garage.
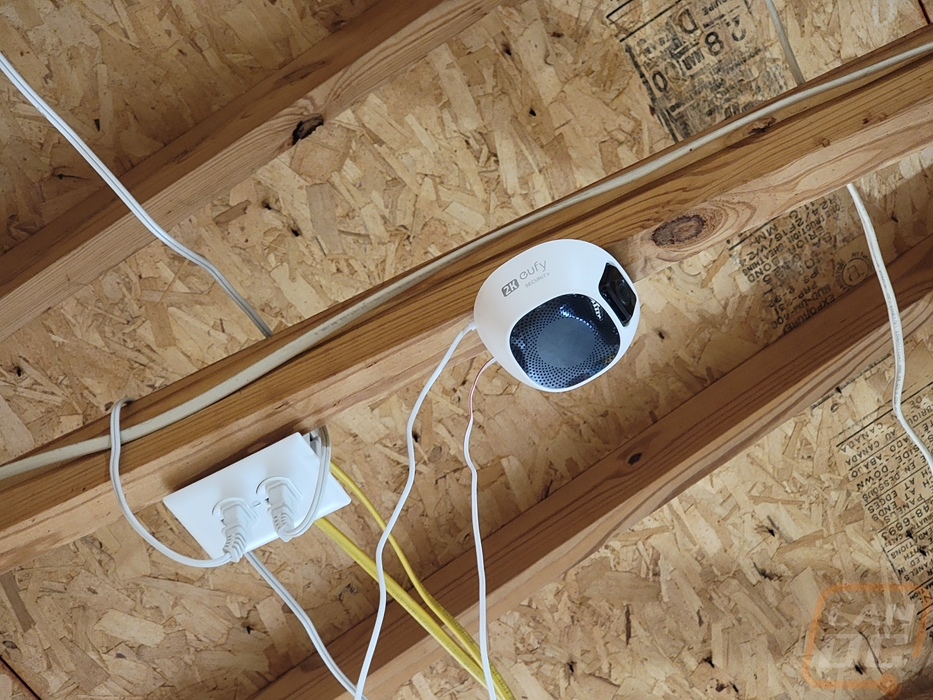
For our garage, we don’t have drywall on the ceiling so I used the screw mount to install the camera to the center rafter. From there I did have to get things wired up. When I initially looked at the online instructions for the Garage Control Cam Plus I thought that maybe it was fed power directly from the garage door opener but when I went to set things up I learned quickly that wasn’t the case at all. In fact, you do need to use the included AC to USB adapter and the USB cable to power the Garage Control Cam Plus up, and depending on your garage door make and model you may not have to run the feed wires at all. A majority of models can be connected just like you are adding an additional remote for wireless use but if you don’t want to do that or if that isn’t supported almost any opener will work with the wired option. You use the included small gauge wire that looks like speaker wire to run from the Garage Control Cam Plus to your opener and tie into the same spots that your wired door buttons hook up to. The Garage Control Cam Plus comes with two sets of wire for dual garage door setup and you have enough wire to reach for large garages. Our garage is 24x24 which is larger than the average garage size and even with the Garage Control Cam Plus mounted towards the front I had a mess of wire to clean up once I was done stapling the wire up. In hindsight, I should have hooked our opener up wirelessly for an easier and quicker installation. I should also point out to be careful on the camera end of the wire. Eufy has soldered the pre-stripped wire to make inserting it easier but they have stripped enough for easy installation around the screws on the opener end, the push connection at the Garage Control Cam Plus leaves a lot of extra exposed wire and when cleaning up my wiring my wire ended up twisted and it activated the garage door opener which was a little scary being on the ladder next to it and more importantly could be dangerous.
Next up you need to install the sensor near the top of your door. They include sticky tape for this or you can screw it to the door. The mounting plate has two screw holes, if you use them be sure to use both to keep it from turning or moving around. Once the plate is installed though you just snap the sensor on I would highly recommend syncing the sensor to the Garage Control Cam Plus before you do that. I didn’t do that and I had to pop the sensor off and hold it close to the Garage Control Cam Plus for it to sync via Bluetooth and removing it from the mount can be a pain.
Software and Performance
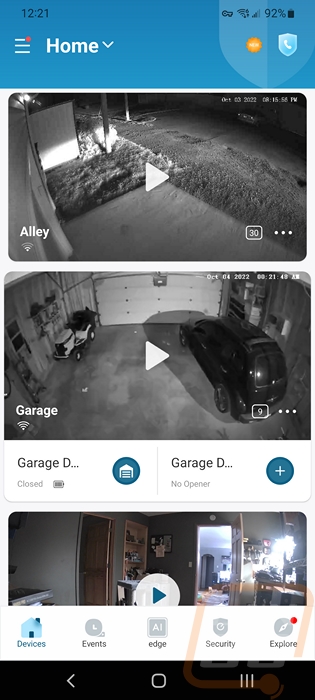
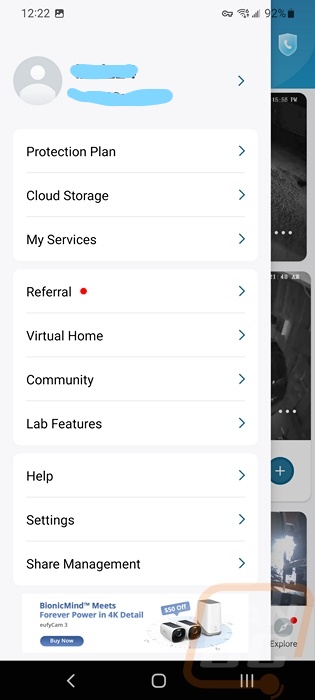
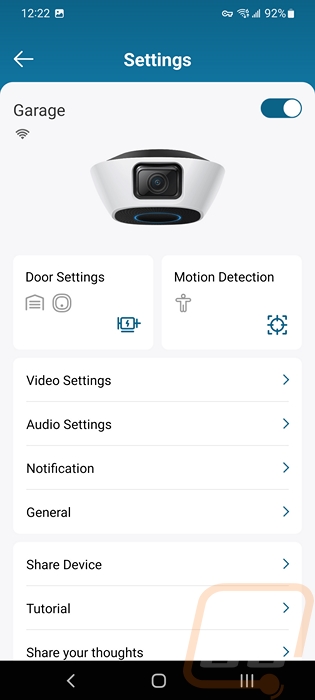
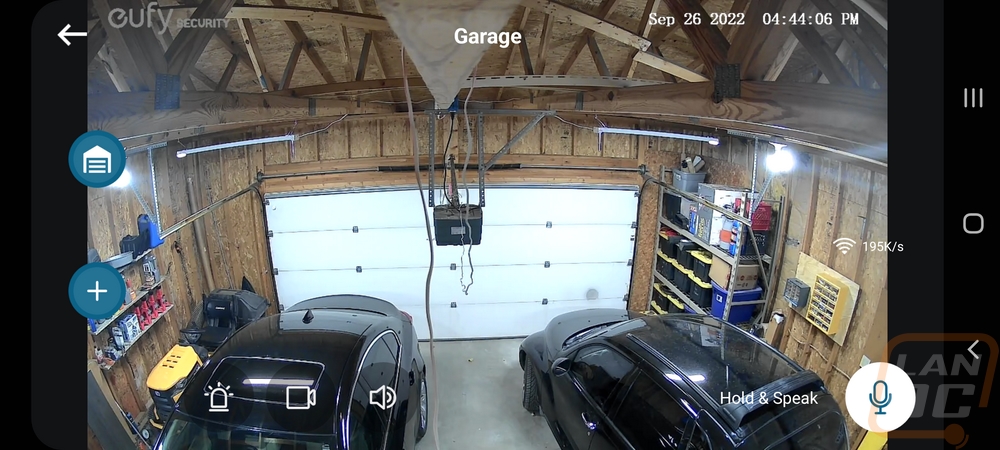
Once I had the Garage Control Cam Plus installed and added to the eufy Security app it was ready to go. Like with the Video Doorbell Dual, eufy does have a lot of options in the software for you to fine-tune how you will use the Garage Control Cam Plus so before talking about how it performed I wanted to run through the software first. The landing page in the eufy Security app has all of your eufy cameras shown with preview images. The Garage Control Cam Plus is a little different though because on this page it also includes easy-to-use buttons to open and close your garage door as well as the current status. Clicking in the middle of the image will open up a live feed of the video and in the bottom right the three dots open up the settings page for that device. Down at the bottom, the app has a few different tabs you can open up but only the first two are important for the Garage Control Cam Plus. On the top left the three lines open up a larger menu that has account-specific stuff like the option to pay for cloud storage which isn’t required unless you aren’t running an SD card.
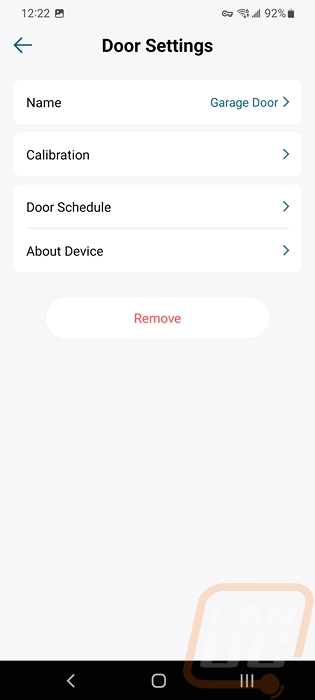
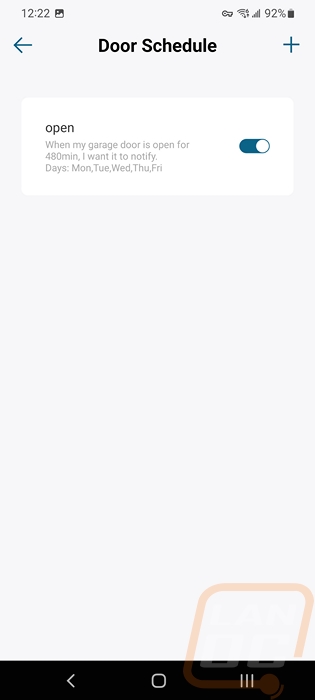
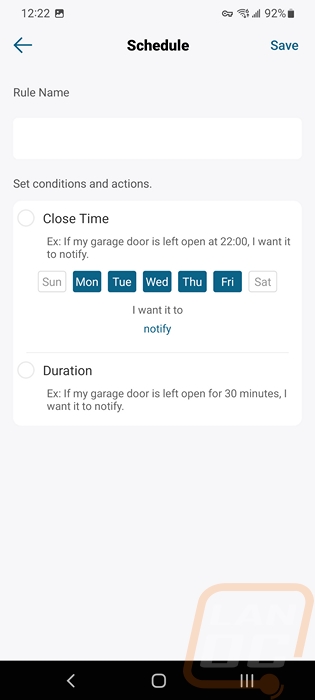
Once we open up the settings page right up top we have a switch where we can turn the camera off and we can see the wireless connection. Eufy then has the door settings and the motion detection as buttons because they are the most important settings. The door settings page starts with the option to pick from the two doors that the Plus model can control, then from there this is where you can rename the garage door, recalibrate the door sensor, and set up a door schedule. You can see that I have one schedule set up for me which is a rule set to let me know if I leave the garage door open for too long or if it is open past a specific time. The software gives the impression you should be able to click on the notify option to pick from different actions but notify is the only option available. So you can’t have it automatically close your door which I imagine is for liability reasons.
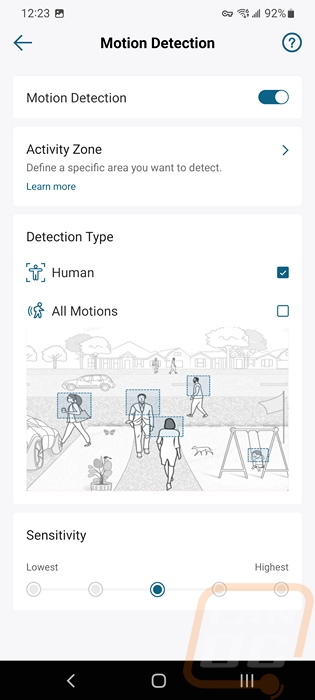
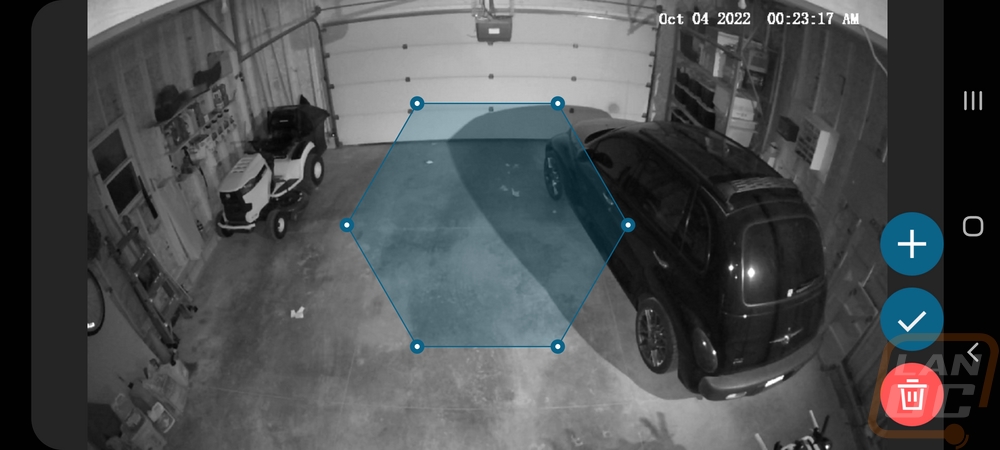
The motion detection page gives you the option to turn off motion detection completely up at the top. You can pick from what it will detect which you can select humans only or all motion and down at the bottom you have a sensitivity setting adjustment. There is also another page you can open to define an activity zone. This is great if you get motion often in a specific area, you can use the area to exclude that area. That page opens up a live image of what the camera sees and lets you move the points around to define the space.
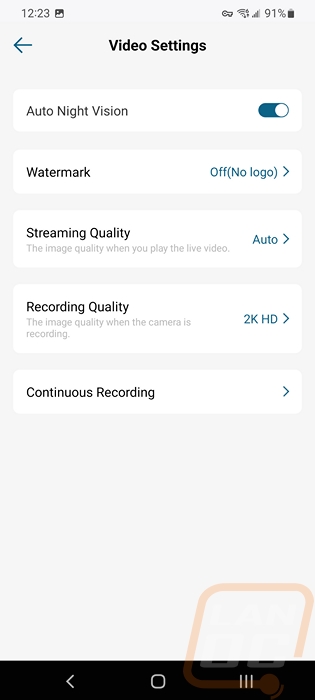
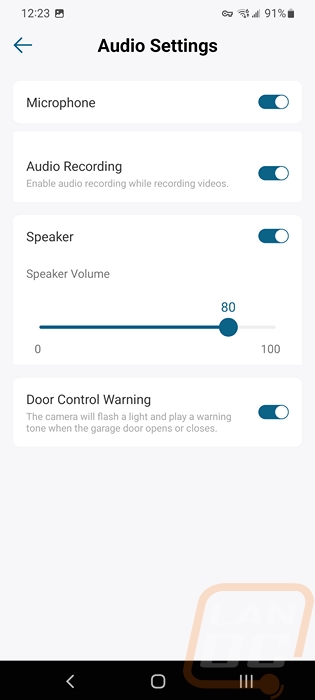
Diving into the other settings pages has a few options that I would recommend getting into. On the video settings page, you can select if you want night vision mode to turn on when it gets dark. You can also set the streaming quality and recording quality can be adjusted down from the default 2K resolution if you want to save storage space. You can also turn off the watermark which I recommend, who wants your view covered up by that? The continuous recording page lets you turn recording off altogether, have it record 24 hours a day, or you can create a schedule to only record specific times of the day or on specific days. The audio settings page lets you turn the microphone on or off and turn the audio recording on or off. You can also adjust the speaker settings here which you can use to talk to people through the app. This is also where the door control warning can be turned on or off, which sets off a warning noise before the door opens or closes to warn people. I would like to see that gain the option to set the volume of the warning which I will talk about more as we get into performance and maybe even have the option to record your own noise to create a more specific warning, especially if you are controlling more than one door.
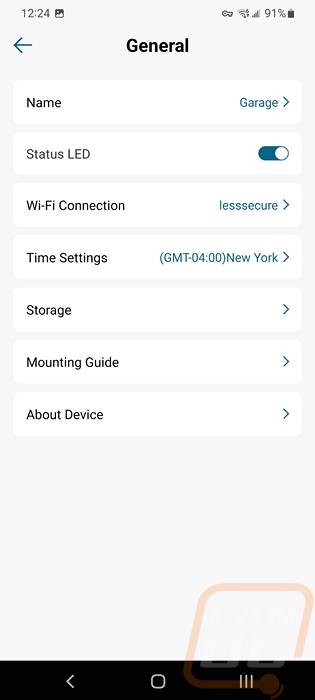
The notifications settings page lets you adjust what you want to set off a notification on the app and also what the notification will include. You can get a quick notification or have it include a thumbnail picture. You can also change the alert noise on this page. The general settings page has the option to rename the device, set up your time zone, and change your wireless connection settings. You can also turn the status LED on or off which with this being inside you may not care about but for outside cameras you may want them to be discrete or with the LED on you can let people know that they are on camera. You can get back into the mounting guide and on the about device page, you can also check for firmware updates. The storage option here lets you get into settings for the local storage to see how much you are using or to format it, add cloud storage, and there is a third more hidden option for NAS storage which lets you set up RTSP to use the Garage Control Cam Plus with your own security software. I will talk more about that in just a minute but this is a huge setting to have.
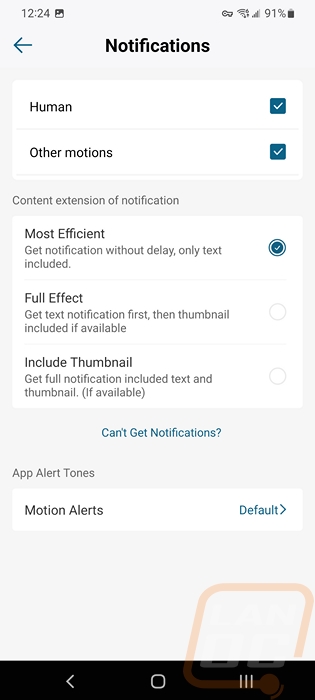
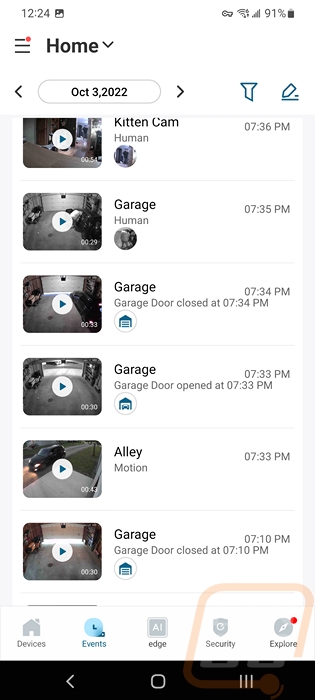
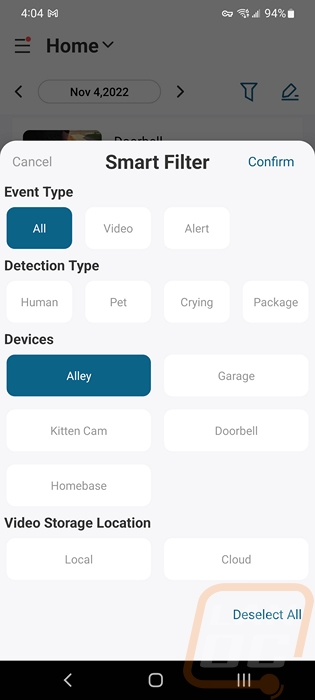
The events tab down at the bottom of the app is where you can see all of the motion notifications from all of your eufy Security devices. Up at the top, you can flip through the days, and then you have a filter button which has a smart filter. You can sort for just alerts or videos and dive deeper into things like sorting by the specific device, specific storage location, or by type of detection. This becomes even more important the more eufy cameras you have.
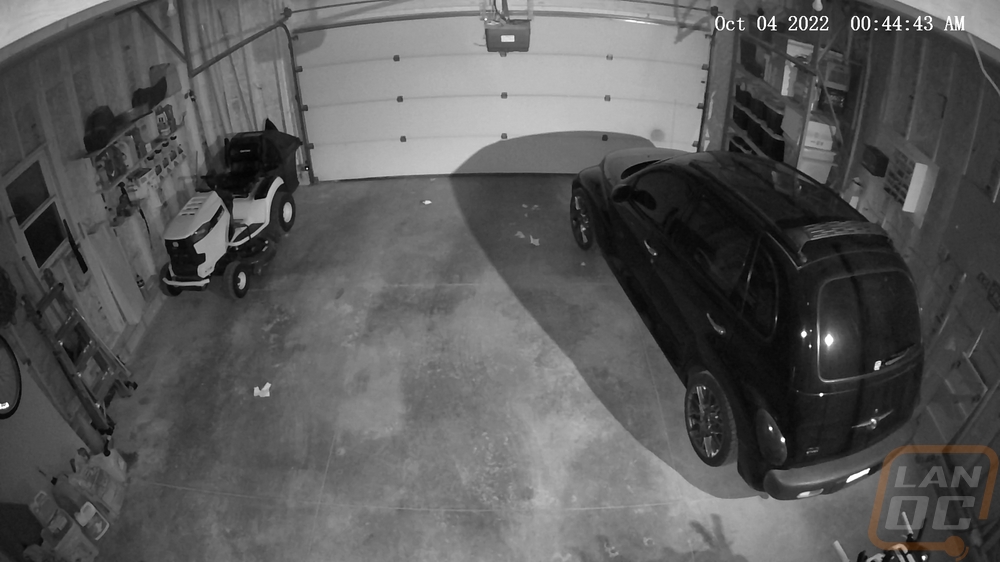
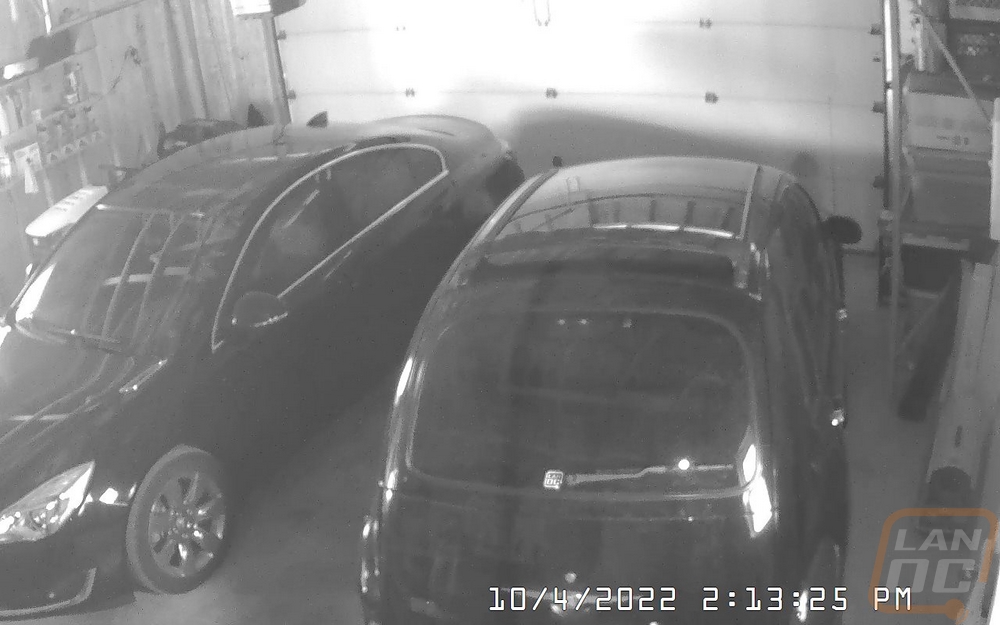
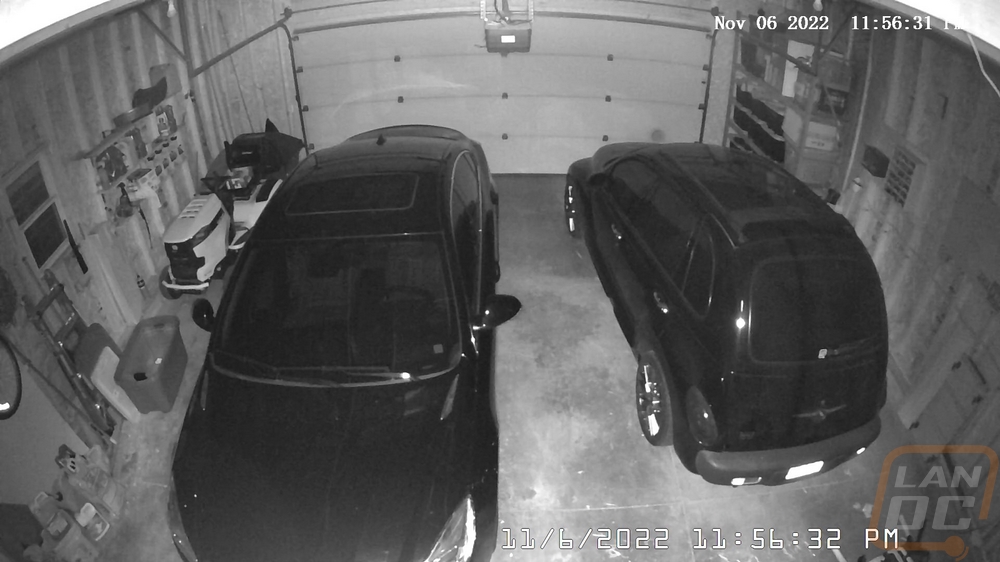
Once I had the Garage Control Cam Plus setup I could finally start putting it to use. In the past, I have used a basic MyQ garage controller to be able to remotely open our garage and I have one of our oldest IP cameras set up in the corner with our Blue Iris server giving us a view in the garage. The old camera I have been using has been needing an upgrade and getting a wider field of view would be ideal and while the MyQ setup I’ve been using has been okay but combining and having smart home functions spread across fewer would be nice. The eufy Security Garage Control Cam Plus at least on paper handles both of those issues. Already having other eufy products it just makes sense to get our remote garage control tied in and the 2K resolution is a big upgrade compared to our previous camera as well as the field of view being wider. You can see in the picture below a comparison between the two views. The Garage Control Cam Plus can see more off the garage. You can also see how the eufy does a better job handling the low light conditions. The top picture is from the eufy, the middle picture is from our older camera, and the third picture is from the eufy again but this time with the older camera turned off to show its view when it doesn’t have the extra infrared lighting helping things.
Another feature that eufy has included with the Garage Control Cam Plus is RTSP which allows you to potentially use the camera with other camera software. We run Blue Iris and run a mix of cameras and this is a big selling point for me though it does also lead me to most of the issues I have with the Garage Control Cam Plus as well. For starters, with some eufy cameras that have this support, you can turn off the date and time just like you can turn off the watermark but for some reason, they didn’t include that this time around. RTSP works well and I have been using the camera in on our own server the entire time I have had it set up, but like with some other RTSP devices from time to time, it will lose connection. Being a wireless camera, not being a POE wired camera like most of our other cameras this does happen from time to time, but around once a week I sometimes have to reboot the camera to get things working again. It works in the eufy Security app but just seems to be a breakdown in communication through RTSP. That said, having the feature was the main selling point for me. I don’t mind the eufy app, but being able to tie multiple brands together is important for someone like me who prefers to try to get the best possible device or best deal by going from brand to brand.
As far as image quality goes I couldn’t be happier with the performance there. Like I said before the wide angle helps get a great view of our entire garage but without the higher detail wouldn’t do much for us. I’m able to see exactly what is going on and with the app, it does also give me notifications when there are people spotted using its AI.
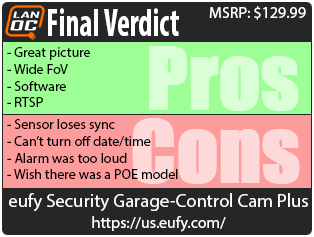
Here is a view through the eufy Security app when you have the camera fullscreen. You have options on the left to control both garage doors even in this view as well as on the main app landing page. They let you know what your connection speed is and you have a big button for talking through the camera to someone. You can manually record and mute or turn the volume on. This view also shows you some of the adjustment that the camera has with the different tilt adjustments. This is with the camera facing up as far as it will go and my other view is all the way down. The garage door opening functionality works well and by default was similar to the MyQ in that it would sound off an alarm being opening or closing the door. It doesn’t also have the bright strobe light but that isn’t necessarily for my use. I will say though that the alarm volume was WAY too loud, even with my garage door closed I was able to hear it inside of my house or on the far end of our property and I was concerned that it might get annoying to our neighbors. Thankfully eufy does give you the option to turn that off, but I wish you would also have the ability to adjust the volume level so I could keep it on but not have it scaring kids down the road. Along with that, being able to pick the sound and maybe even record my own could be helpful as well. All of that said I did run into an issue with the garage control a few times that I have to bring up. When it was working it worked great, but multiple times out of nowhere the sensor seems to have just stopped working and lost track if the door was open or closed. Once this happens even with the door closed I get the alerts that I set up for having the door open over and over and it doesn’t fix itself. You have to rerun the calibration. With MyQ I had this happen once or twice but only at the coldest part of winter and it would eventually realize that the door was closed. I hope this is just an issue on my end, but it is worth mentioning.
Overall and Final Verdict
With eufy launching the Garage Control Cam Plus and the single door Garage Control Cam I was excited that I could potentially cut another app out of my smart home without losing the ability to remotely open and close our garage door. Combining that with the camera was a bonus as we did already have a camera in the garage. That said the differences in the camera ended up being what set the Garage Control Cam Plus apart from our old setup with MyQ and a separate camera. The 2K resolution was great and was a big improvement from our older camera, but it was the wider field of view that I like the most. Even with our older camera in the highest corner, it covers half of the area that the Garage Control Cam Plus does. The Garage Control Cam Plus has the same software that other eufy cameras have and I like how simple it is to set up and use. With the garage control, you do need to take a few extra steps and I would highly recommend attempting to do the wireless garage control before going wired like I did, but it is good to know that if your opener isn’t supported that wired is an option which our MyQ setup didn’t have.
A big feature that goes under the radar is the Garage Control Cam Plus does support RTSP which means if you run your own camera server you can add it. Eufy leaves that option as well as storage on the included MicroSD card as two options that avoid storing your video on the cloud or paying for cloud storage.
I did run into a few issues with the Garage Control Cam Plus in my testing and some of them should be easy to fix on the software side. A good example of this is not having the option to turn off the date and time overlay which becomes an issue when using RTSP which if your own software also adds the date and time you end up with two overlays. I also felt like the alarm when opening and closing was too loud which lead to me turning it off, having the option to adjust the volume on that would be helpful because I didn’t want to get rid of it altogether, I just didn’t like hearing it everywhere. I also wish that with the Garage Control Cam Plus model that you could turn off the second door, as it is right now if you aren’t using that second door you still have the button for it on every screen where the standard model doesn’t. With the Plus model including an SD card, I wouldn’t be surprised if others end up with it but only need the one door controlled currently. On the hardware side of things, I feel like the Plus model should come with the second sensor and not force you to buy it separately. On that same note, I’m surprised that the non-plus version has a different base at all. The base Garage Control Cam should have the option to add the second door and the plus model should give you the second sensor so you are good to go. I know I’m in the minority on this one, but I would also love to see a POE ethernet option, wired is always going to be a more reliable network connection and wireless cameras can quickly clog up your wireless bandwidth. POE would also make installation even easier. Beyond that, I did run into issues with our door sensor losing sync which I didn’t have issues with on our MyQ setup except on a few -10 degree days. I may have to RMA ours if the issue continues but it isn’t consistent enough to show anyone.
As for pricing, the Garage Control Cam Plus that I have tested today has an MSRP of $129.99 and the single door model without an SD card is $99. The second door sensor to get both doors up and running will cost you $29.99 but as of writing this, it does look like eufy has added a bundle on Amazon that gets you the Garage Control Cam Plus and the second sensor for $139.99. For comparison, the competition is all over the place. Wyze has a garage controller that comes paired up with one of their cameras which will cost $43.99. This doesn’t have wireless remote options at all and the camera is a standard 1080p Wyze Cam v3. On the other end of the spectrum, Chamberlain and Liftmaster have MyQ which you can get the controller itself for between $25 and $50 without a camera or spend $300+ for a new opener with it built in and then add their optional 1080p camera for $90. In other words, eufy’s two Garage Control Cam options aren’t the cheapest option but do have the best camera and with the plus model is the only option with support for two doors.

Live Pricing: HERE


