Installation
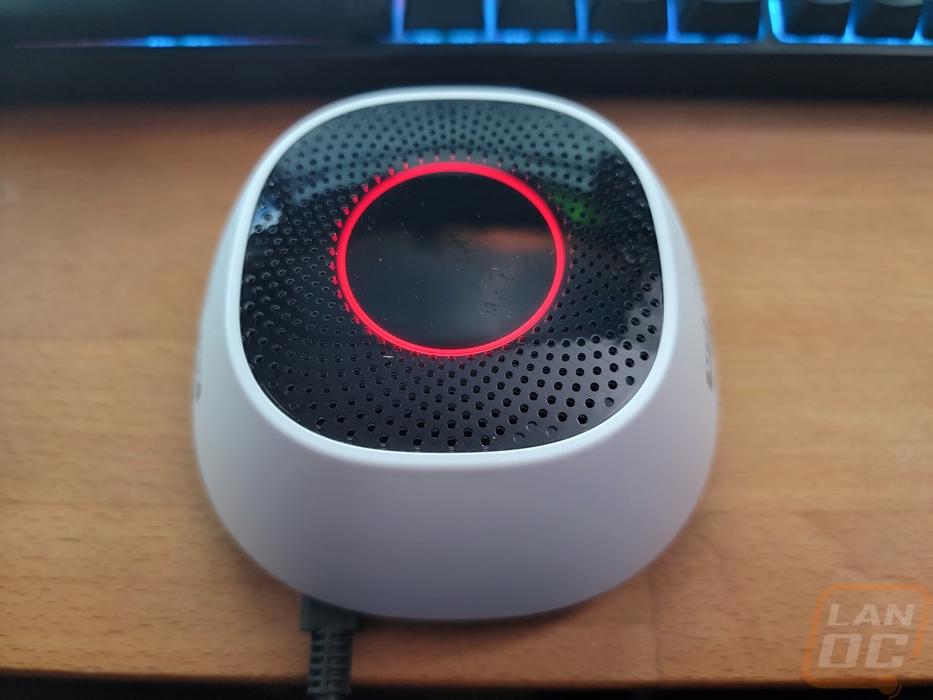
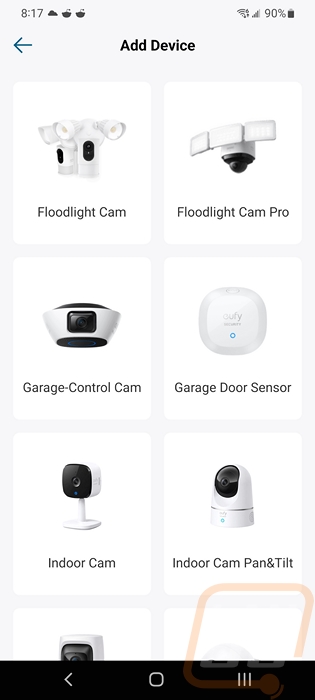
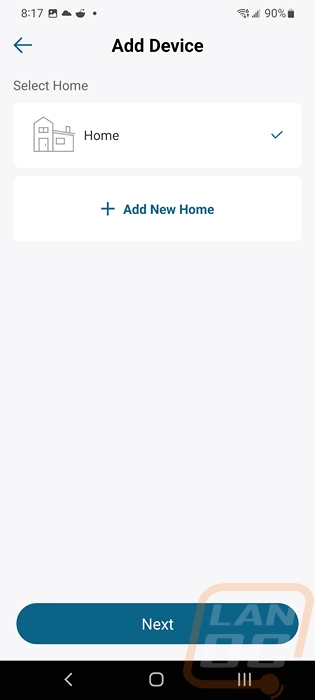
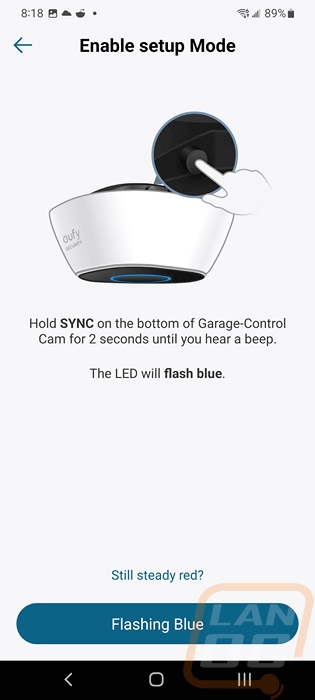
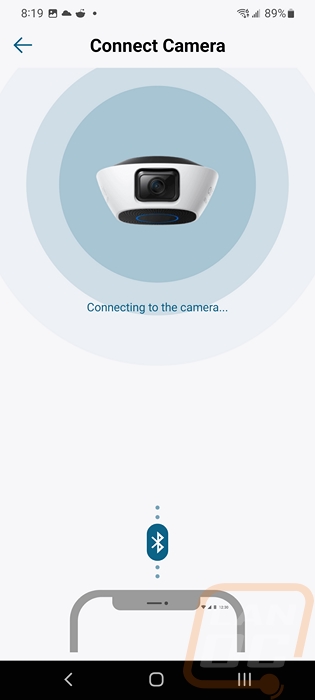
Before putting the Garage Control Cam Plus to the test I did need to get it installed and set up, similar to the eufy Video Doorbell Dual this is two different things. You have to get things set up on the software side of things and you have to install everything in your garage as well and get things up and running. To save some trouble I set things up in the house by putting power to the Garage Control Cam Plus and getting it set up in the eufy Security app. I plugged the camera into a USB Type-C charger and it powered up and started flashing the red light. On the app side, I logged in which shares the same logins that other Anker brand app use. From there you click the add device button which is the plus sign in the top right corner. This opens up a list of eufy Security devices that you can pick through and find the Garage Control Cam Plus. Once you click that it will then ask what home you want to add it to, most people will only need the one here but if you have more than one location you are running eufy products you can do that. The app will then let you know to plug the device in and let them know when the red status light is.

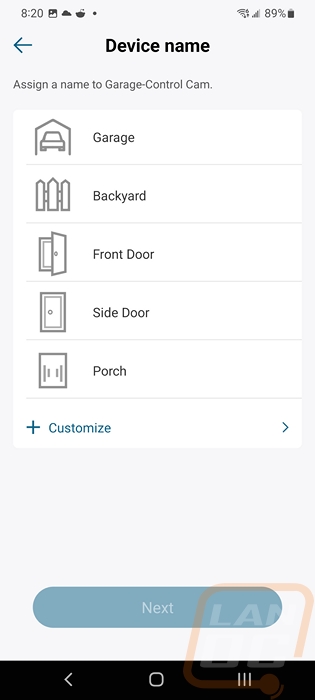
The app will open up your camera and you can use this to scan the QR code on the bottom of the Garage Control Cam Plus. This will add it to your devices. From there you hold the setup button and it will go into setup mode and connect via Bluetooth to the Garage Control Cam Plus. From there you can set up your wireless settings to get it on the network and up and running. Once done it also asks you what room you are installing it which is a bit ironic but it is nice that you could add multiple garages for example.


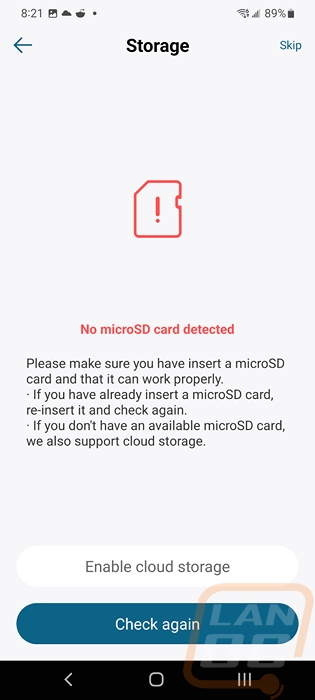
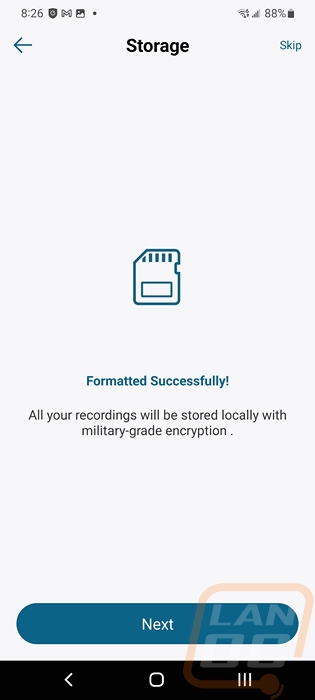
I did preinstall the SD card that eufy included with the Garage Control Cam Plus but initially when the setup tried to format the card it wasn’t detected. Removing it and reinstalling fixed the issue and we were ready to go.
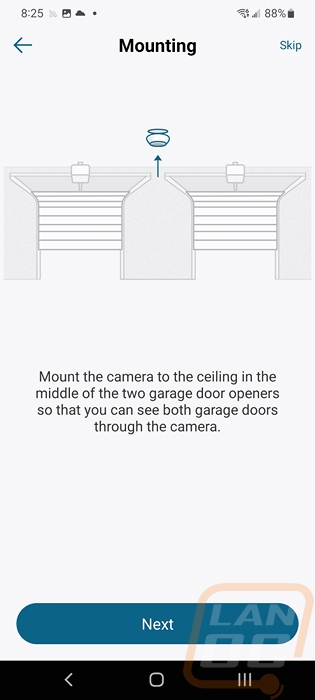
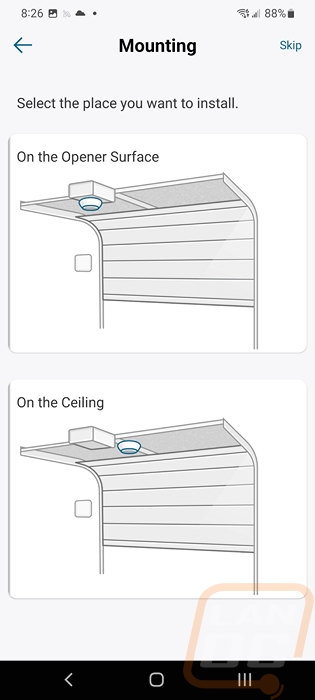
For installing everything in your garage and setting up the garage control eufy does have basic instructions on their website but the app itself has step-by-step instructions that are easier to use and asks you questions to help give you the best instructions. The first instruction asks you to mount the Garage Control Cam Plus and the second page lets you pick from the garage door opener or your ceiling where eufy will then break down the instructions even more. The installation is extremely easy, it comes with a metal mounting plate that has a screw hole in it. You can use the included screws to mount this to the ceiling or the included double-sided sticky tape to mount the camera. Then the Garage Control Cam Plus has magnets that let it stick to the mounting plate. This means that if you have a metal housing on your garage door opener you can also just stick it right to that and if not you would use the included double-sided tape. I would recommend mounting it as far back and high as possible to get a better view of the garage.
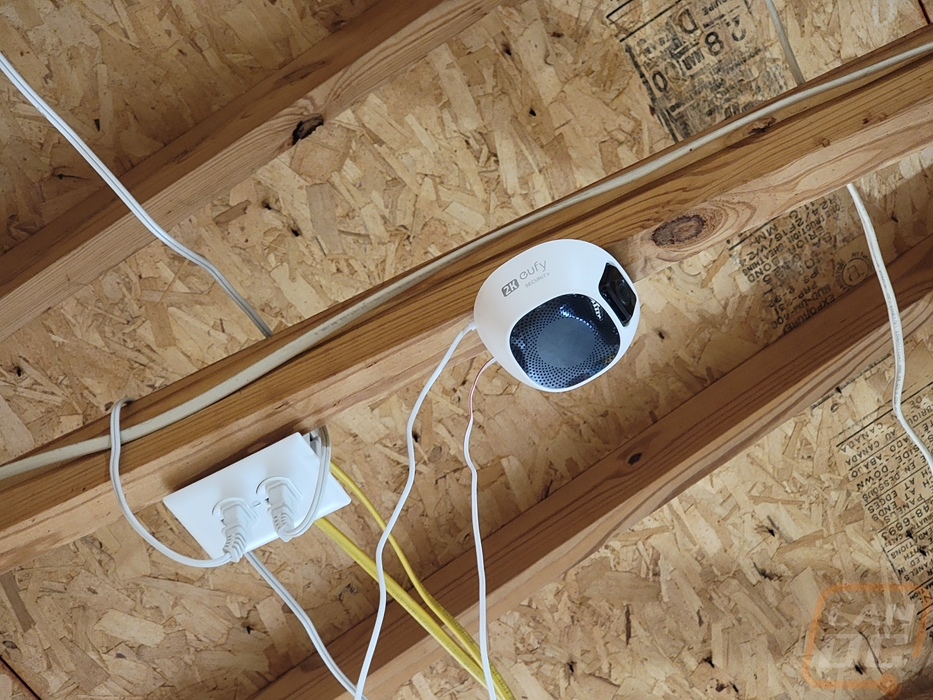
For our garage, we don’t have drywall on the ceiling so I used the screw mount to install the camera to the center rafter. From there I did have to get things wired up. When I initially looked at the online instructions for the Garage Control Cam Plus I thought that maybe it was fed power directly from the garage door opener but when I went to set things up I learned quickly that wasn’t the case at all. In fact, you do need to use the included AC to USB adapter and the USB cable to power the Garage Control Cam Plus up, and depending on your garage door make and model you may not have to run the feed wires at all. A majority of models can be connected just like you are adding an additional remote for wireless use but if you don’t want to do that or if that isn’t supported almost any opener will work with the wired option. You use the included small gauge wire that looks like speaker wire to run from the Garage Control Cam Plus to your opener and tie into the same spots that your wired door buttons hook up to. The Garage Control Cam Plus comes with two sets of wire for dual garage door setup and you have enough wire to reach for large garages. Our garage is 24x24 which is larger than the average garage size and even with the Garage Control Cam Plus mounted towards the front I had a mess of wire to clean up once I was done stapling the wire up. In hindsight, I should have hooked our opener up wirelessly for an easier and quicker installation. I should also point out to be careful on the camera end of the wire. Eufy has soldered the pre-stripped wire to make inserting it easier but they have stripped enough for easy installation around the screws on the opener end, the push connection at the Garage Control Cam Plus leaves a lot of extra exposed wire and when cleaning up my wiring my wire ended up twisted and it activated the garage door opener which was a little scary being on the ladder next to it and more importantly could be dangerous.
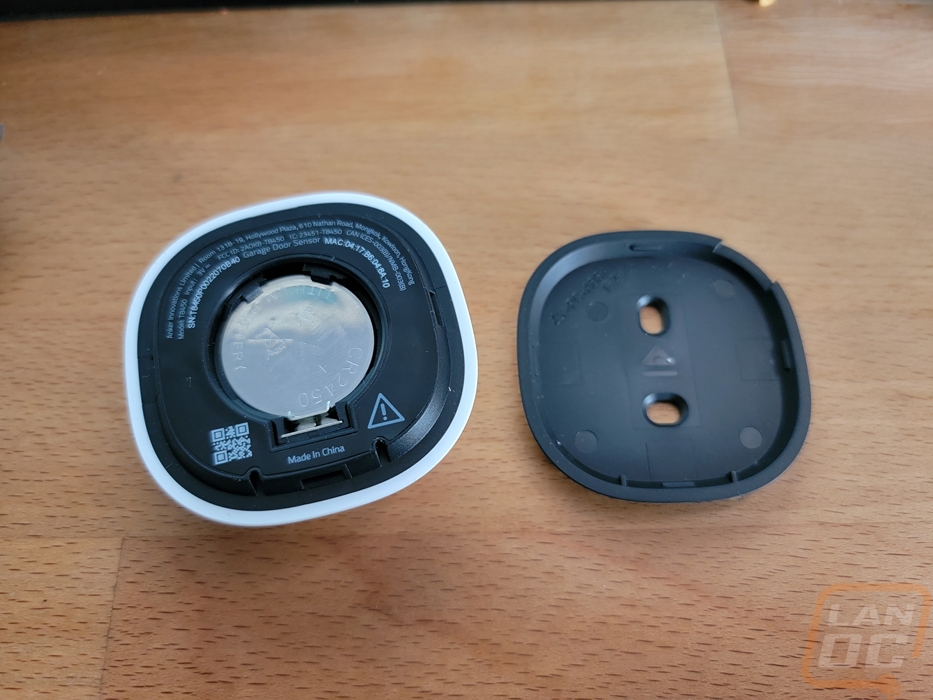
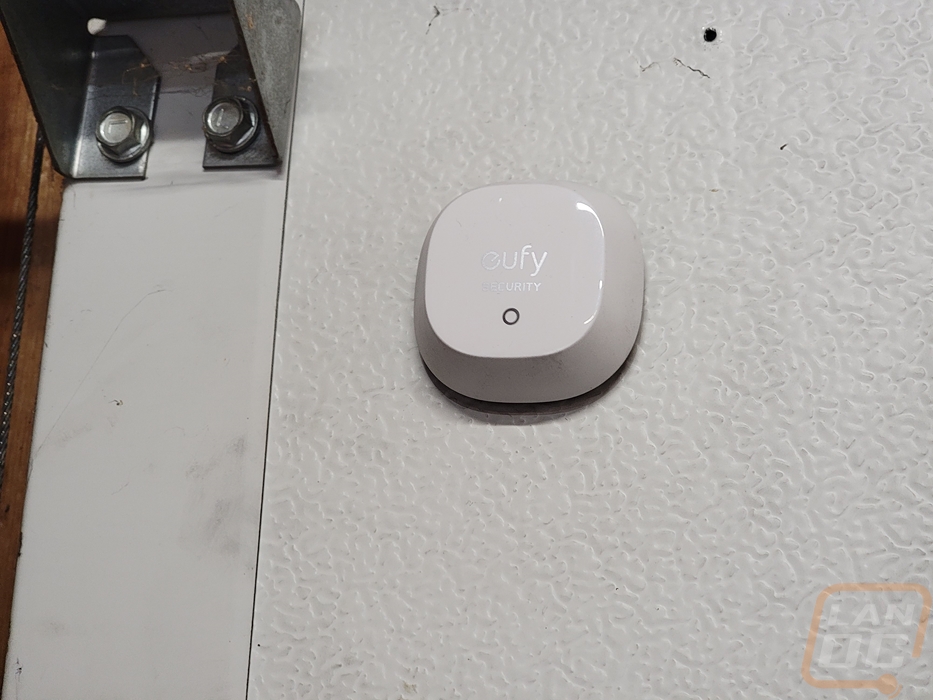
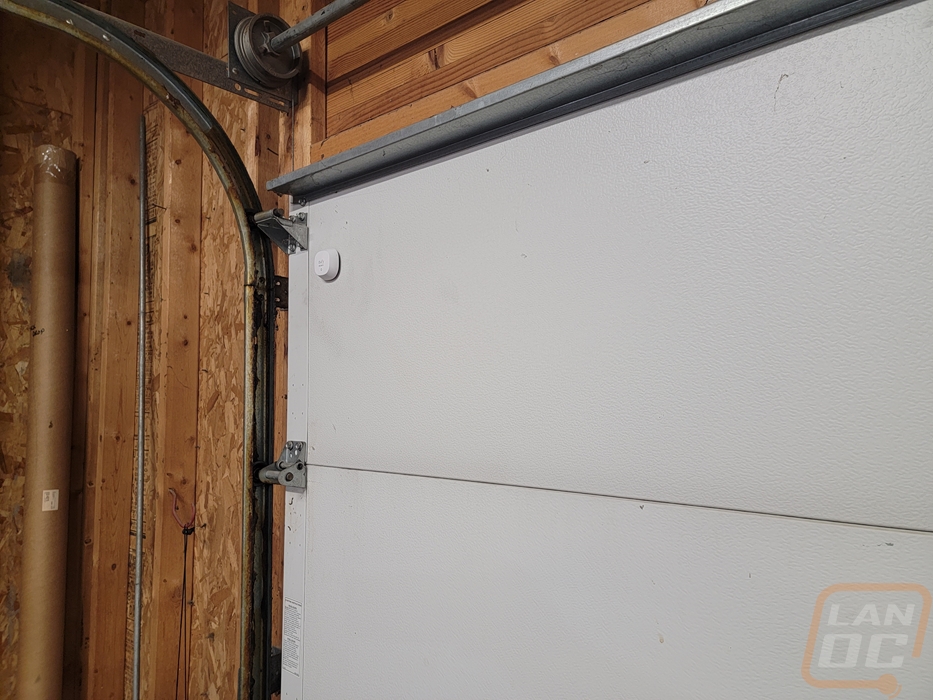
Next up you need to install the sensor near the top of your door. They include sticky tape for this or you can screw it to the door. The mounting plate has two screw holes, if you use them be sure to use both to keep it from turning or moving around. Once the plate is installed though you just snap the sensor on I would highly recommend syncing the sensor to the Garage Control Cam Plus before you do that. I didn’t do that and I had to pop the sensor off and hold it close to the Garage Control Cam Plus for it to sync via Bluetooth and removing it from the mount can be a pain.