Last week I went over what I was coming from and got an idea of what kind of build I was looking to build. I also locked down the CaseLabs Bullet BH7 as the case, so now we can finally get down to business and really figure out what is going to make this new built tick. Today I’m going to run through most of the main components. This includes picking out a motherboard, CPU, and RAM. I will also figure out what video card is going to push my games and all of the storage needed to store it all.
Title: Project Build: Crush – Part 2
Written by: Wes
Pictures by: Wes
Build Sponsors/Supporters: Nvidia - Gigabyte - Caselabs - Noctua - Kingston - Seagate - OCZ - Asus - Corsair - CableMods
Amazon Affiliate link: HERE
Links to other Parts: Part 1 – Part 2 – Part 3 – Part 4 - Part 5 - Part 6
Motherboard and CPU
So the story behind the motherboard and CPU for this build has been a long one. Long before I was even thinking about cases I originally had the motherboard and CPU for the new build all picked out and in the office. In fact, it goes all the way back to late 2014 and early 2015. At that time our video card test bench was running on the X79 platform and had been rock solid for years. With that, I decided to hold off on upgrading it to the new Haswell-E CPU and to use that CPU for a project to be named later. Well not too long after that Gigabyte sent over their X99-SOC Champion. So for a while, that configuration with the i7-5960X and the SOC was used around the office for other testing with the intention to use it in a new build but I never got around to it. I was too busy with a few of our event builds.
Well fast forward to 2016 around the launch of the GTX 1080 and days after the CaseLabs case in a matching orange shipped our X79 video card test bench died. X79 boards are extremely hard to come by so I set out to get a replacement board and CPU but I wasn’t able to get anything lined up in time to test the new GTX 1080. So I had to pull the X99 SOC into duty and retest a whole stack of video cards. In order to keep results consistent, this also meant I couldn’t just swap the setup out later without weeks of retesting. I was able to get a new orange board from Gigabyte, but a new CPU to go with it was much harder. Our friends over at Asus ended up finding a CPU and it was the last piece to get the build going. A HUGE thank you to Asus for helping me out there.
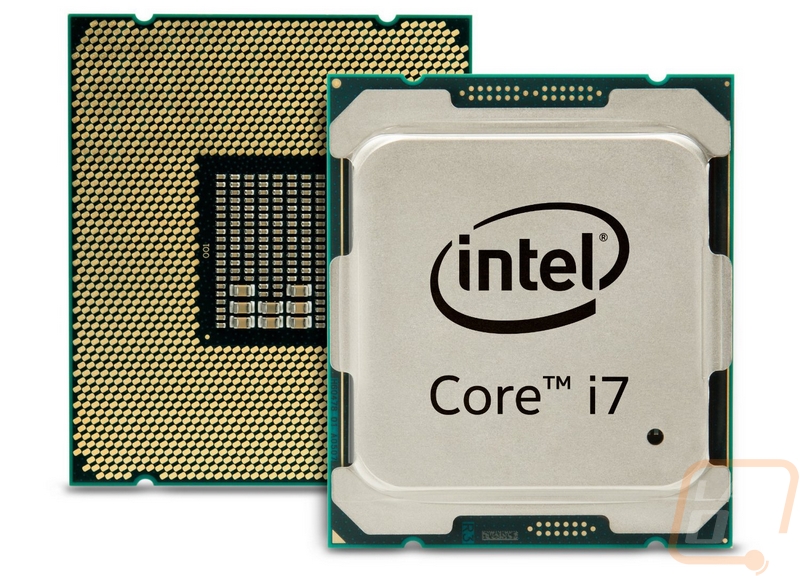
So what CPU did we end up going with? Well for starters this was one of those situations where I was going to be happy with anything. They ended up sending over an i7-6900K and I really don’t think we could get a better CPU for the build. Sure the I7-6950X is the king of the hill, but the two extra CPUs weren’t as important to me for gaming as the extra clock speed. In fact, I was originally looking to go even lower end with a 6800K or 6850K with their 6 cores. The 6900K is still really expensive and like a lot of components on this build, it is complete overkill.
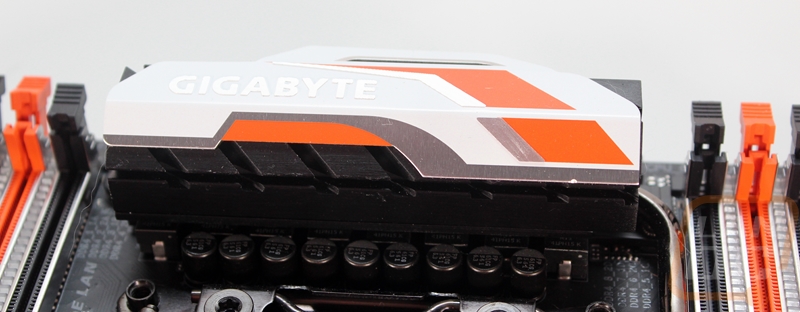
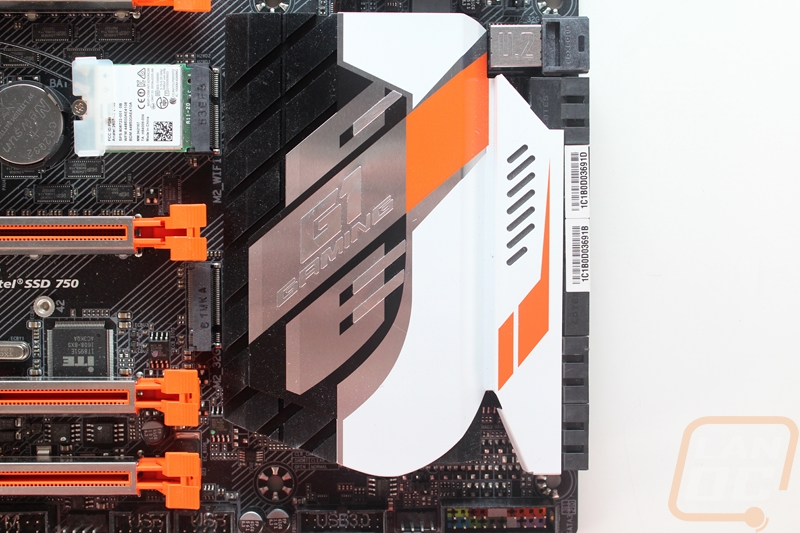
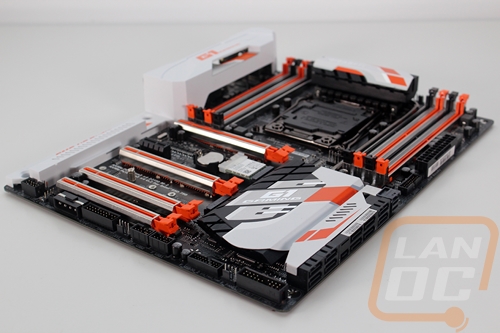
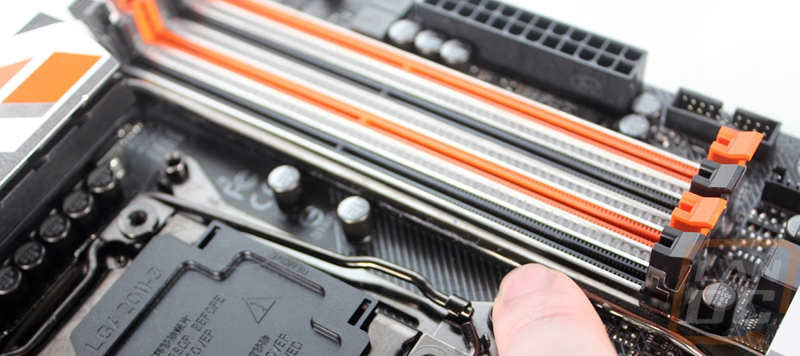
So what about the motherboard? Well, we had already locked in the orange CaseLabs Bullet BH7 so I wanted to go with something with orange or if not an all black motherboard to match the black interior of the case. After seeing Gigabytes new X99 boards introduced at Computex last year I found the perfect board. The X99 Phoenix SLI. After countless hours of begging, I was able to get my hands on a board from Gigabyte. It is similar to the X99 SOC in the way that it has orange plastic components for some of the memory DIMMs and the PCIe slots but it is actually a much better pick for this build as well.
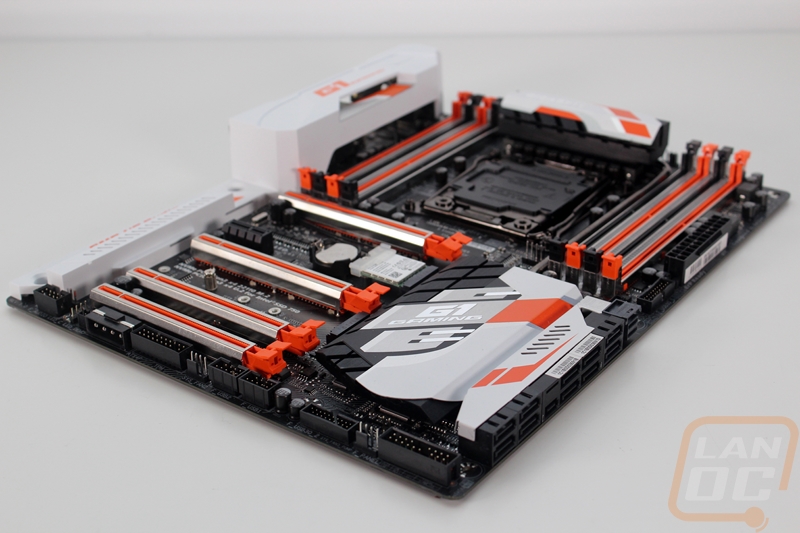
This is when Gigabyte started really going crazy with the lighting and while the Phoenix looked like it had orange lighting like the SOC, it actually has RGB lighting. They even slipped in LEDs in between the sticks of ram. The plan is to still use orange lighting, but having the option to flip to white lighting was a big plus.
I love the metal protectors on all of the PCI slots to help support heavy video cards and for EMI shielding. Most importantly though it had everything we needed for connections. There are four PCIe x16 slots, M.2 that supported NVMe, and built in wireless. All features I wanted in the build.
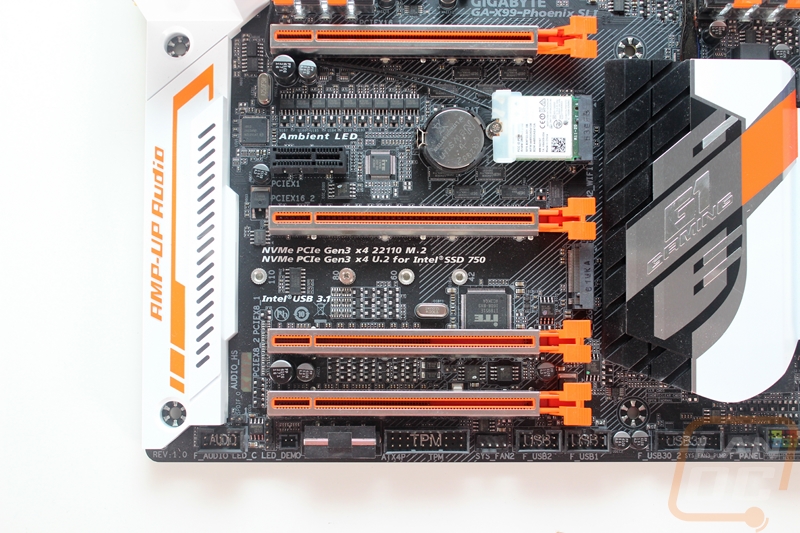
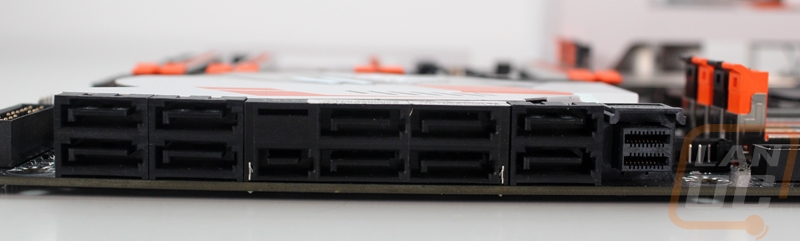
It also has a whole row of storage connection options including SATA Express and even a U.2 port.
Then back on the rear I/O panel the dual NICs were nice but I was really happy to see a USB Type-C connection, I think soon Type-C is going to take over.
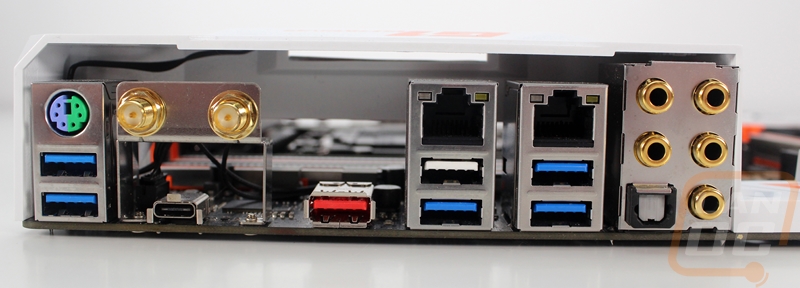
Really my only concern with the X99 Phoenix was with the excessive use of white on both of the heatsinks and the large rear I/O cover. It looks good individually, but with this build, I was trying to only use black and orange whenever possible. So I will have to look at options for that later when I get into making a few customizations.