Most of you know the saying “Give a man a fish and you feed him for a day, Teach a man to fish and you feed him for a lifetime”. Well when it comes to trinkets and other cool stuff, 3d printers are the same. You Can buy small items or you can print your own cool stuff. Early this year I did just that. I covered SeeMeCNC’s new at the time Eris and even well past my coverage I had one and then later two printers running all of the time in the office. I was having a blast but I really needed to go BIGGER. Well, a few months ago they sent over their new v3 model of their Rostock MAX, the big guy. With vacation and everything it took me a little while to get going, but I have been running the printer for a long time now and it’s about time I sit down and tell everyone about my experience with SeeMeCNC’s new printer. You might want to get comfortable, this might be a long one.
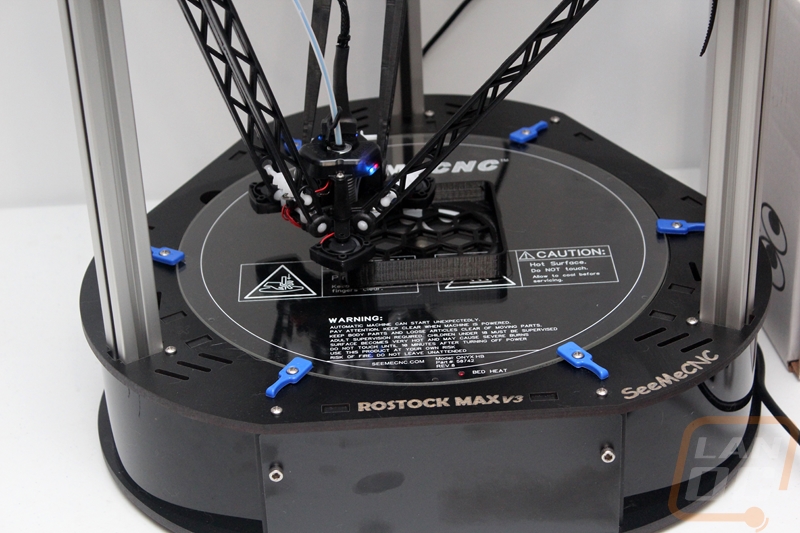
Product Name: SeeMeCNC Rostock MAX v3
Review Sample Provided by: SeeMeCNC
Written by: Wes
Pictures by: Wes
Amazon Link: HERE
| Specifications | |
| Printer Design | Delta |
| Color Options | Black or White |
| Controller | RAMBo by UltiMachine electronics |
| Raspberry Pi Support | Optional support included |
| Control options | USB or built in LED screen |
| Machine overall dimensions |
41 ¾ Inch high including spool holder 17 diameter at widest point |
| Build Volume | 265mm D x 400mm H Print Area |
| Build Surface | Borosilicate glass with floating Onyx heated bed under it |
| Cooling | Three part cooling fans and one hotend fan |
| Hotend | HE280 with 40w heater cartridge and accelerometer probe for calibration |
| Minimum Recommended Layer Height | w/.5mm nozzle of .1mm |
| Maximum Recommended Layer Height | w/.5mm nozzle of .4mm |
| Max Heated Bed Temp | 100c |
| Max Hotend Temp | 280c (with Hi-Temp Jet Kit) |
| Max Recommended Printing Speed | @.2mm Layer Height 100mm/s |
| Max Travel Speed | 300mm/s |
| Power Requirements | 110v or 220v (input power selectable) @ 350 watts |
| Needed for assembly |
Apx. 10hrs. assembly time (HALF of our previous v2 assembly time) Standard Allen wrench set Metric Allen Wrench Set Needle nose and/or small pliers Wire crimping tool Solder and soldering iron Standard and Phillips Screwdrivers |
Packaging
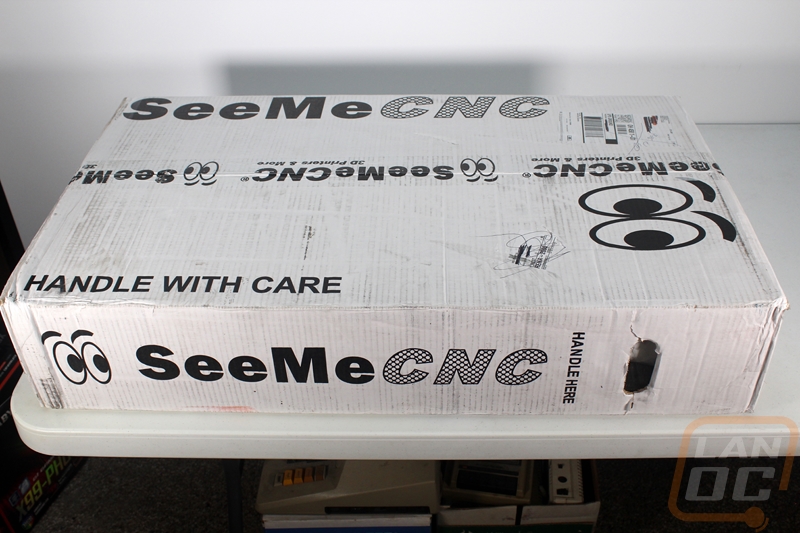
So in case you haven’t figured it out yet, the SeeMeCNC Rostock MAX v3 can be picked up in a pre-built configuration or a build it yourself configuration. The pre-built costs significantly more due to the time, plus shipping requires a pallet rather than a box. So I went with the build it yourself kit because I think it better fits the price range that people would be looking at, plus I wanted to learn more about the printer and building it is the best option to do that. So the box for the v3 isn’t much to look at. It is smaller than the printer will be when built but it is completely packed full of heavy materials. So your UPS driver isn’t going to like you on the day it comes in. The box has the same white and black look that the Eris had only the Eris came pre-built.
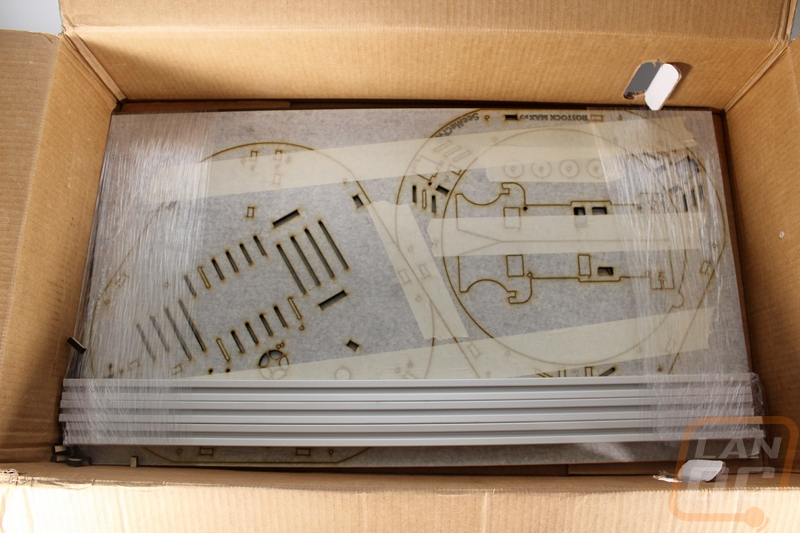
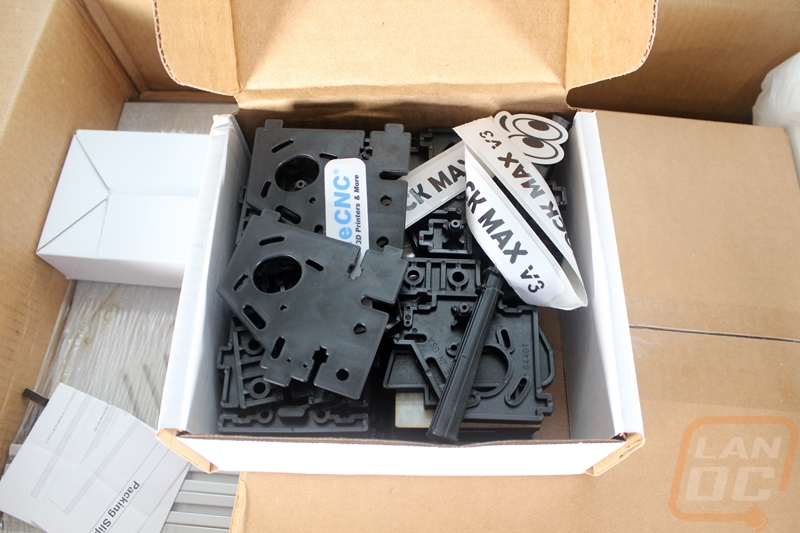
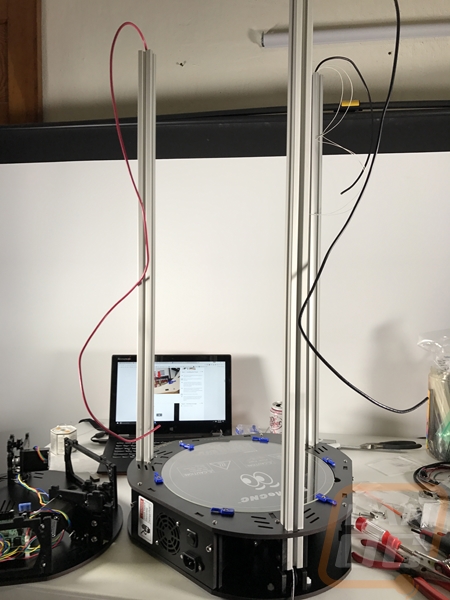
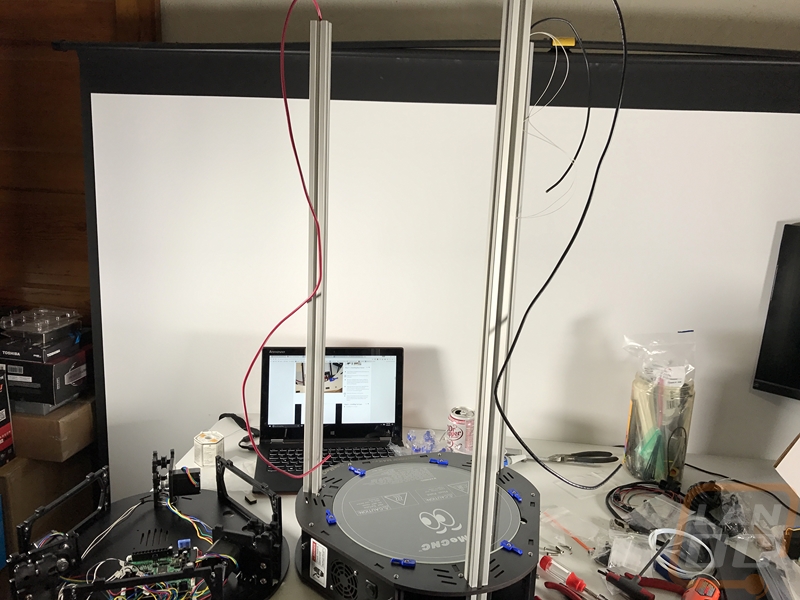
So when you open everything up it's not all that exciting. On top, there are just multiple boxes with all of the loose parts in them. Under all of the boxes are the melamine wood parts that have all been laser cut then wrapped up. The three towers are also strapped to the melamine.
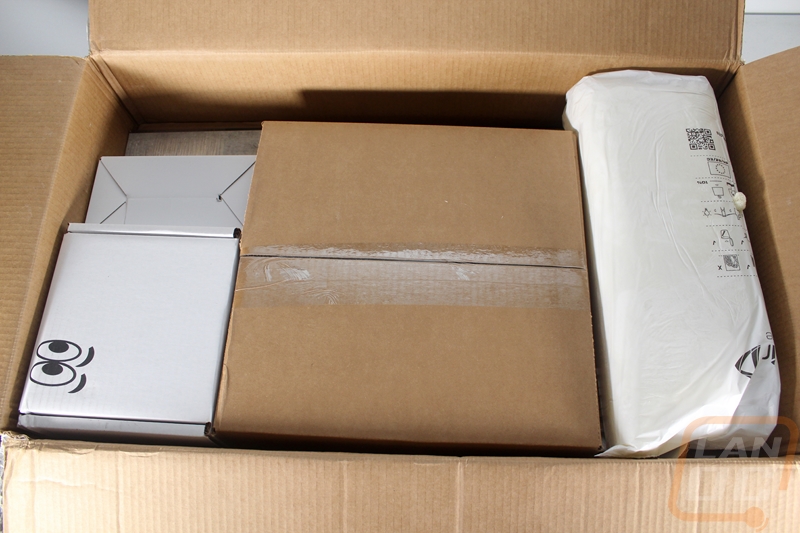
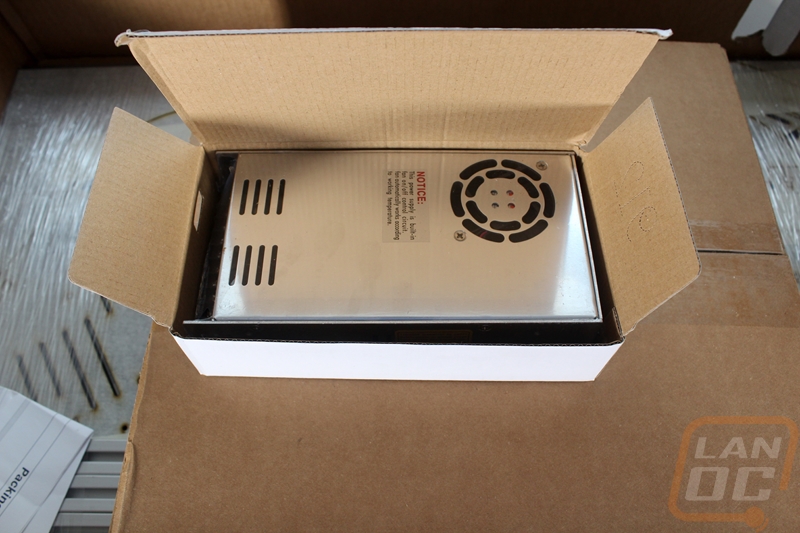
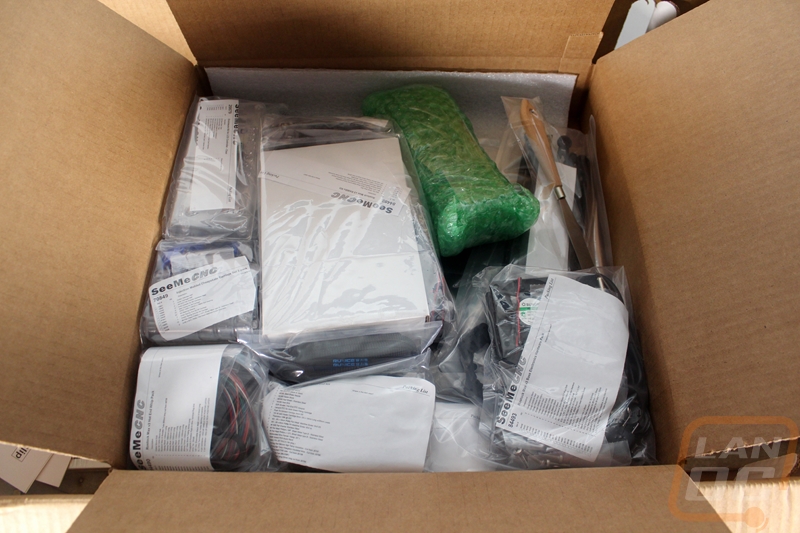
The three boxes are all split up by what is inside. The small white box has the power supply in it and the larger white box has all of the injection molded parts. The brown box is then filled with labeled bags with all of the electronics, wiring, and every other little part and accessory that the Rostock MAX v3 comes with.
Installation and Setup
Unlike the SeeMeCNC Eris that comes completely built and ready to go, with the Rostock MAX v3 is going to come as a kit unless you throw down the extra money to have SeeMeCNC build it. For some people that is going to be a big concern but I wasn’t too worried about it. I’ve built and taken things apart all of my life and regular readers on here have most likely seen me even build a few custom keyboards on top of 1000 times I’ve built and taken PCs apart. That said I did take a little time prior to the build to read about everything to be prepared. You just need a short list of tools and a soldering iron. If you haven’t soldered before I would recommend practicing a little before the build, but the build isn’t out of reach of someone new, in fact one of our readers and LAN attendees learned to solder and built his v3 right before I did mine.
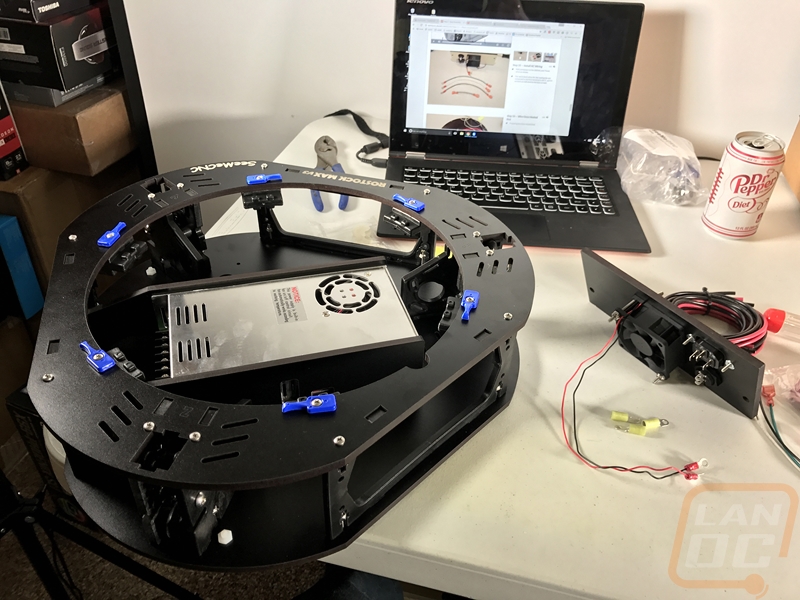
So you should set aside a full day or a few long nights for your build. SeeMeCNC suggests that the build will take about 10 hours. According to them, this is about half the time of the previous model but I can’t confirm that because I haven’t built a v2. I think the time you take is going to range a little more than that though, using the two builds of our LAN attendees, they spent well over that amount of time because they had no previous printer experience and in one case no soldering experience. For me, I spent 11 and a half hours doing the build. It took 2 and a half for the hot end, 3 and a half for section 2 of the instructions, 3 and a half for section 3, and two hours in section 4. Looking back I know I could build it much faster for the second time. I spent a lot of time reading through each step of the instructions and watching every video sometimes multiple times. The videos especially took up a lot of my time. I basically doubled my build time with them, watching all of the steps then doing all of the steps, but they were very helpful.
In the end, I ran into a few small issues where I was a little confused but I was able to figure them all out just looking at the photos or the video. The build instructions are HERE, you should check them out. The best part is they get updated quickly anytime someone suggests an edit to improve the directions. I would normally walk everyone through the build with our own photos, but there are just too many things to cover that the assembly instructions cover. So here are a few picture from our build. As you can see I setup my laptop in my build area, had lots of light, and put on TV in the background and went to town. I built the hot end the night before, then had the rest together in a full days work. In fact, I was up and running printing my first large print that night.
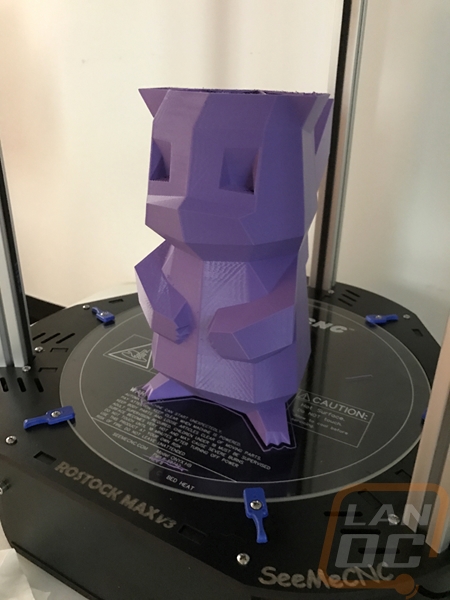
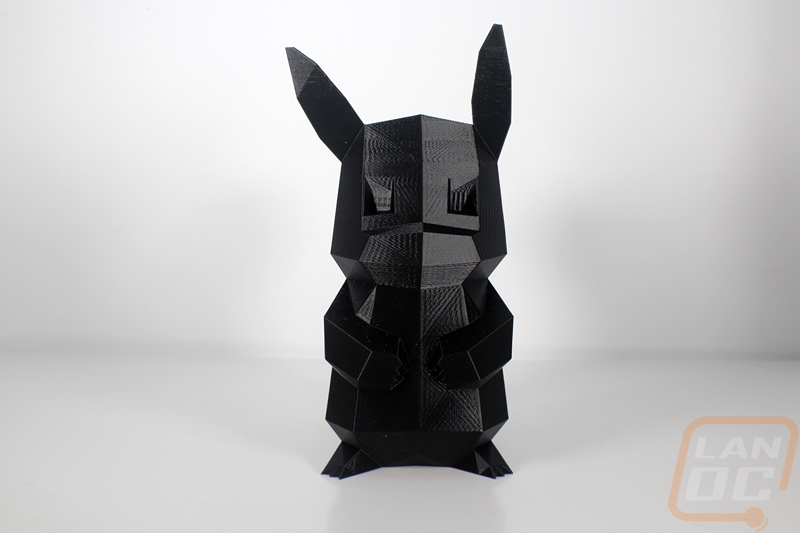
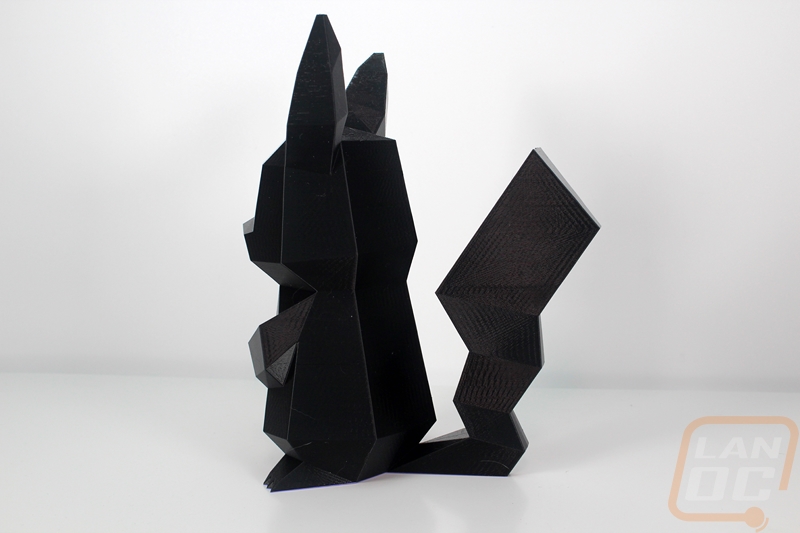
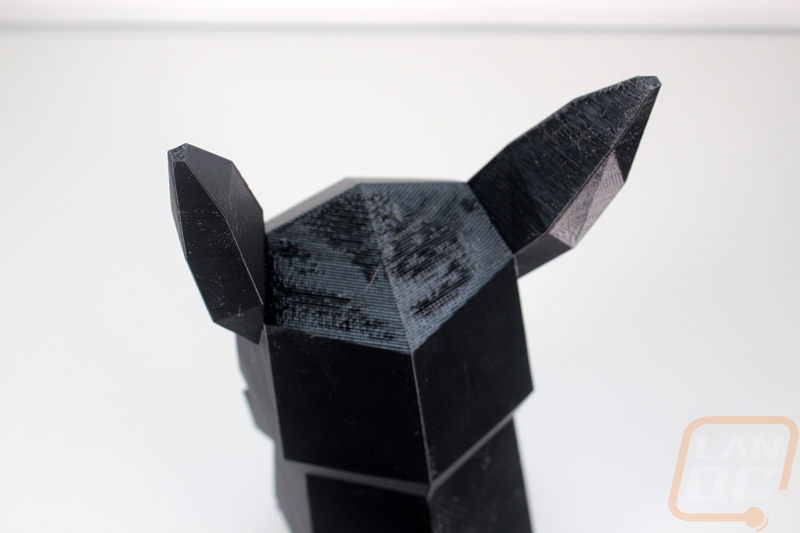
Then, of course, I had my first large failed print, the larger capacity blew through more filament than I expected and our purple Pikachu never got the top of its head. So I swapped to a black and started over.

Photos and Features
After getting the SeeMeCNC Rostock MAX v3 all built I cleaned up the mess I made in the office and took a few photos of the printer before diving into prints. This way I could take a look at a few of the details on the v3 that are new and different and also to see just how different it is from the Eris. Before diving into that I wanted to touch on a few different points for those of you who are completely new to 3D Printing. First, you should check out my visit to SeeMeCNC article where I take a look at their offices and also do a brief rundown on how 3D Printing works as well as talk a little bit about Delta printers and RepRap.
For a quick bit of history and information on the Rostock Max. The Rostock MAX is based on the original Rostock design from the RepRap community. SeeMeCNC built on that design with their original MAX design that they sold through their Indiegogo campaign. From there they evolved that design into the v2 a few years ago and then a few months ago to the v3. Being a RepRap based device they have a big focus on the open source community, so all of the v3 designs are shared with the community just like the previous models.
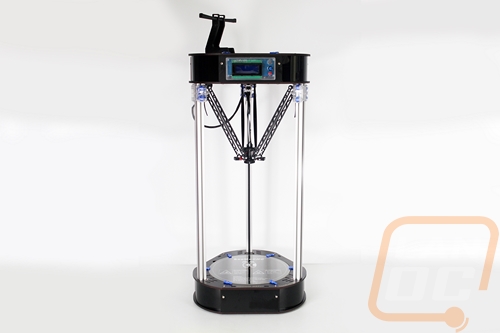
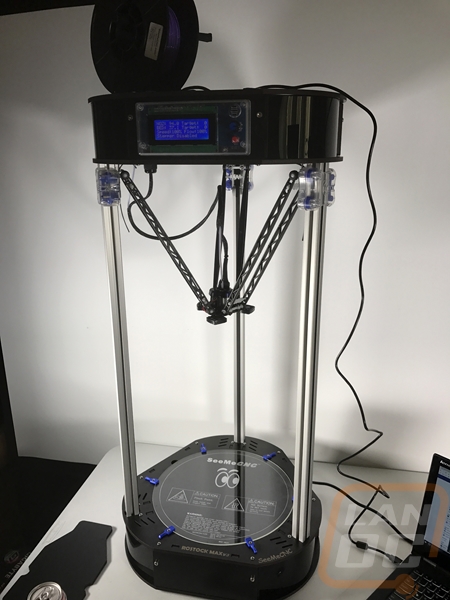
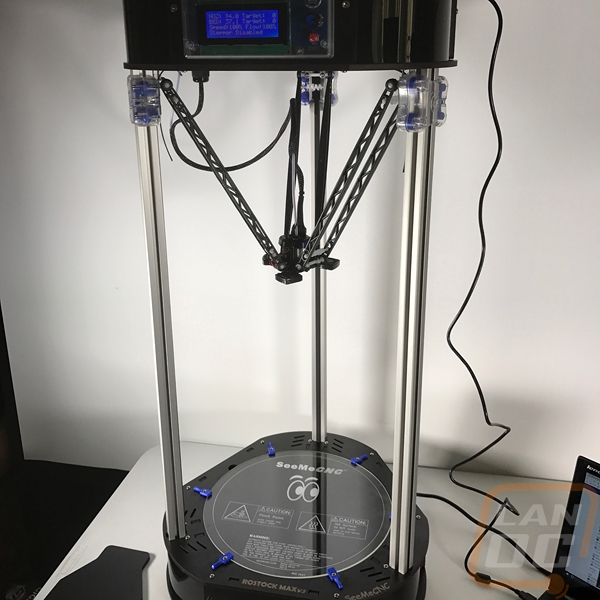
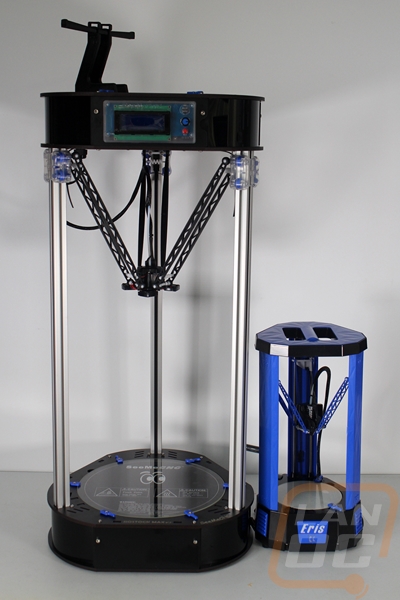
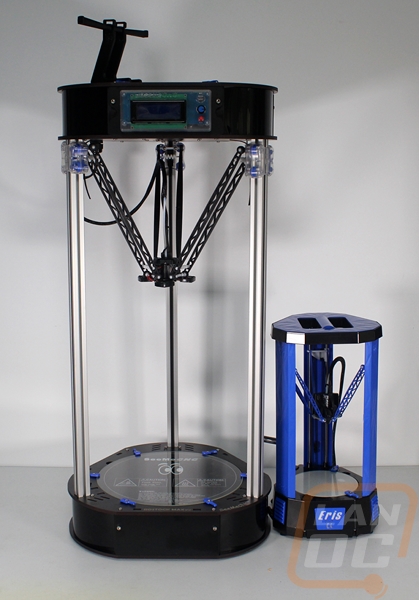
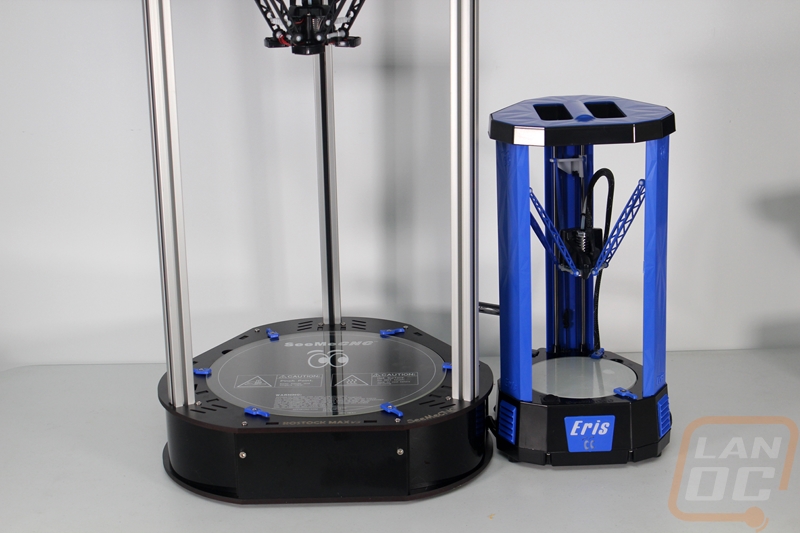
So the Rostock MAX v3 is really hard to even put to scale in photos, so I took a couple pictures of it with the SeeMeCNC Eris. As you can see, the v3 dwarfs the Eris with its almost 42-inch height (including the spool holder), in fact, the Eris is just a touch too high to fit in the v3’s overall build area. The v3, like the v2, before is constructed from laser cut melamine wood in the top and bottom sections with three aluminum t-slot extrusions for the towers. The Eris, on the other hand, is almost completely injection molded with just a few round metal pillars for tower stability. The v3 does incorporate a lot more injection molding than the v2, but we can’t really see them from the outside.
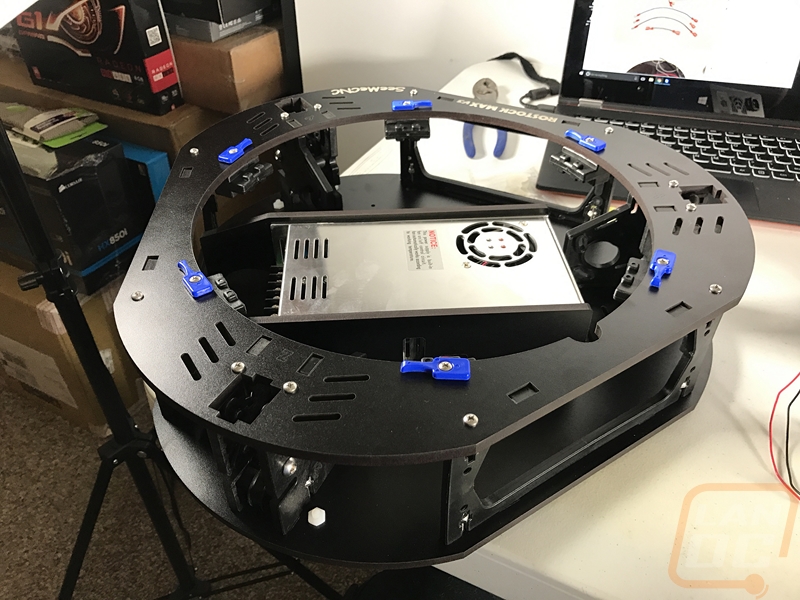
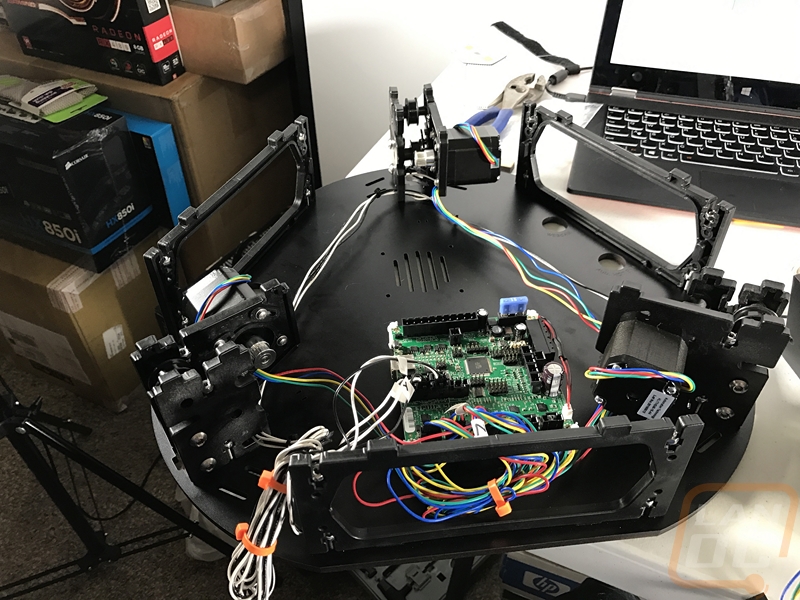
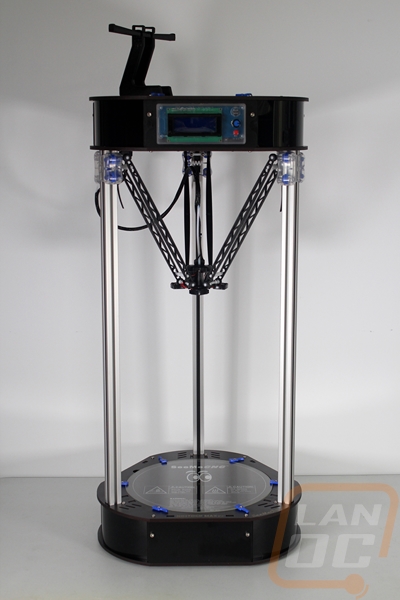
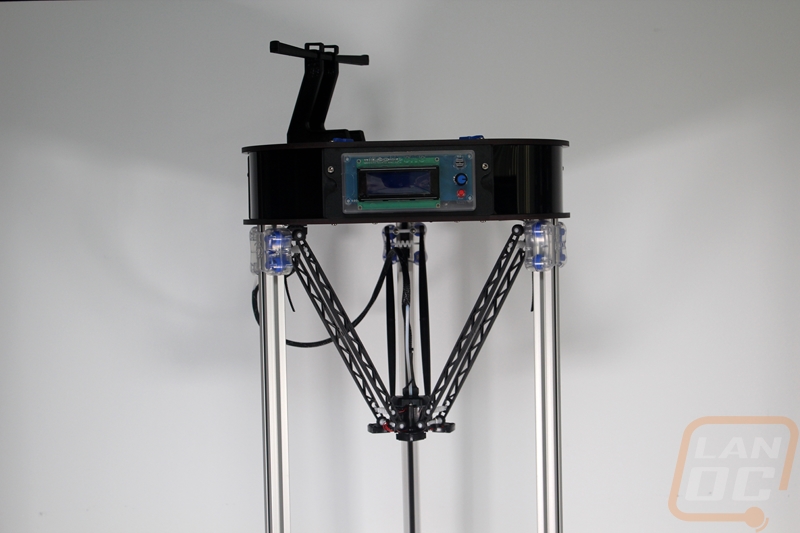
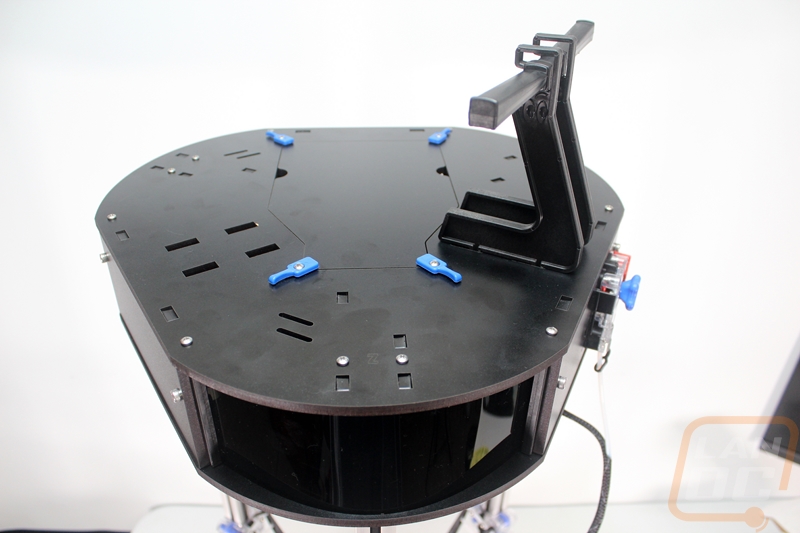
The MAX design has two enclosed areas, one at the top of the printer and the other at the bottom. With the v2 almost everything was down in the bottom of the printer but the v3 has moved everything up to the top to save on build time. Because of this, the LED screen is now up top on the front where before it was on the bottom. That said, SeeMeCNC did configure the v3 to be able to build the old way with the Rambo and controller down on the bottom as well if you would prefer that way but the build instructions only show the new layout.
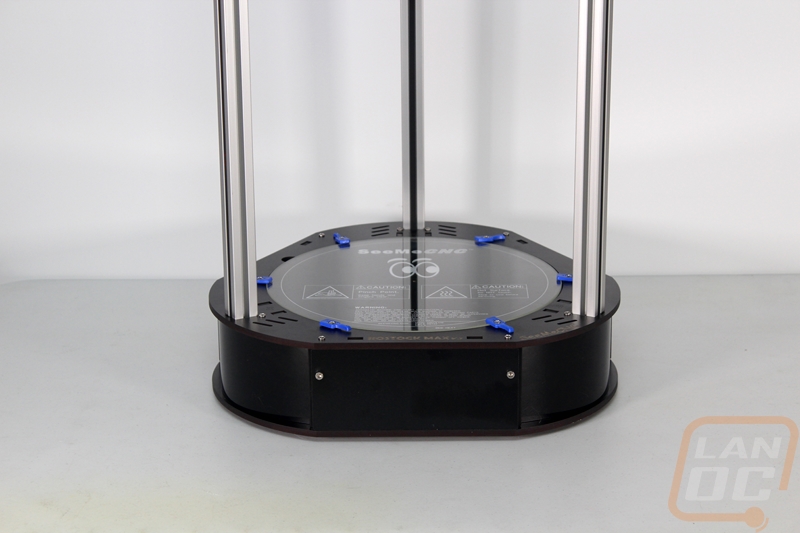
SeeMeCNC kept branding simple and to the point with the v3, letting the delta design that they are the biggest name in do most of the talk. Down on the bottom around the heated bed, they did etch the Rostock MAX v3 branding as well as the SeeMeCNC name as well. A pair of their signature eyes would have been cool as well.
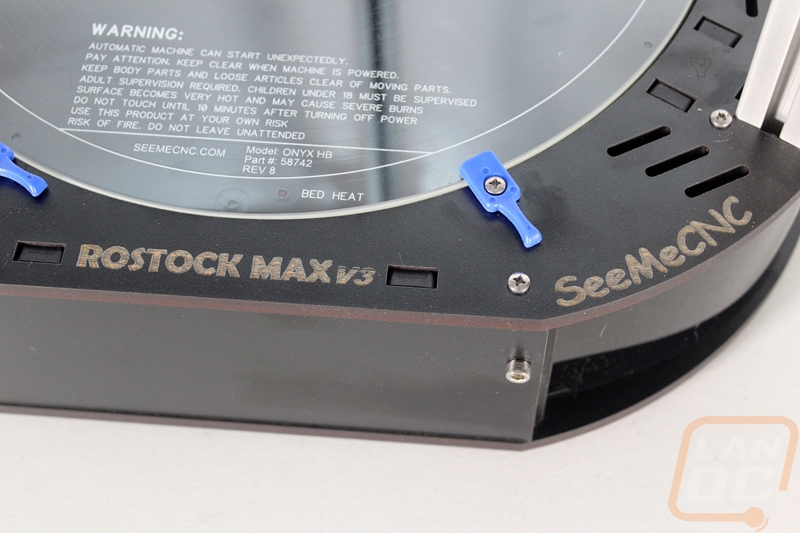
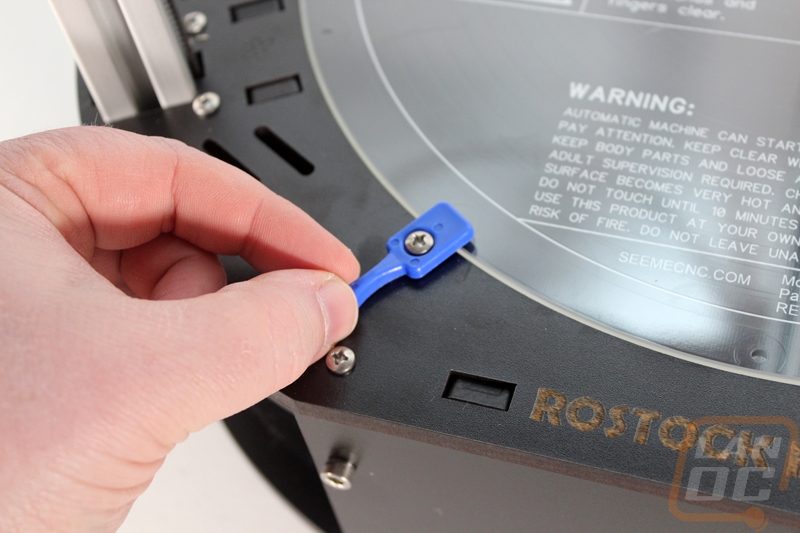
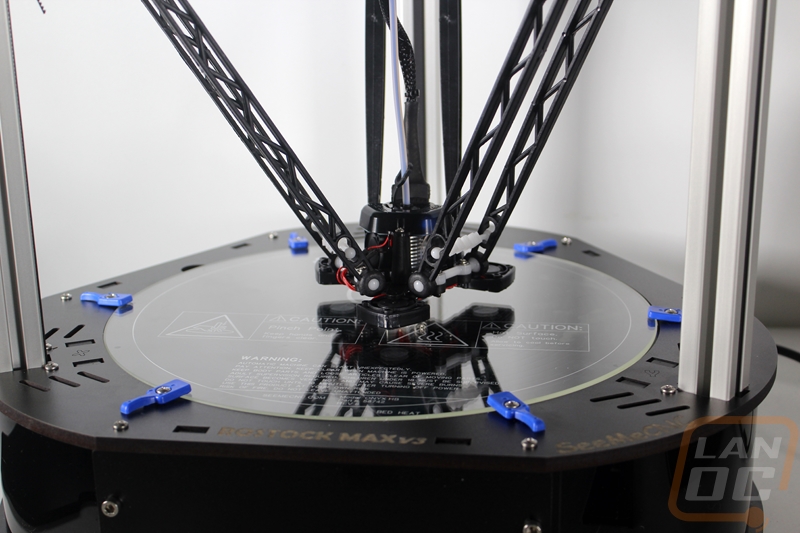
One of the new features on the v3 was actually old news to me as a heavy Eris user. They dropped the Borosilicate glass print surface down into the base where the v2 had the glass up top clipped on with metal binder clips. They did this with an injection molded plate inside the base, injection molded mounts for It to sit on, and then everything is held together with bolts running through the new hold downs into the mounts inside. The new hold down are blue plastic and rotate to let you lift the glass up and out if needed. This lets you have access to the new thinner Onyx heatbed. This is very similar to the Eris’s floating bed, even having the exact same hold downs.
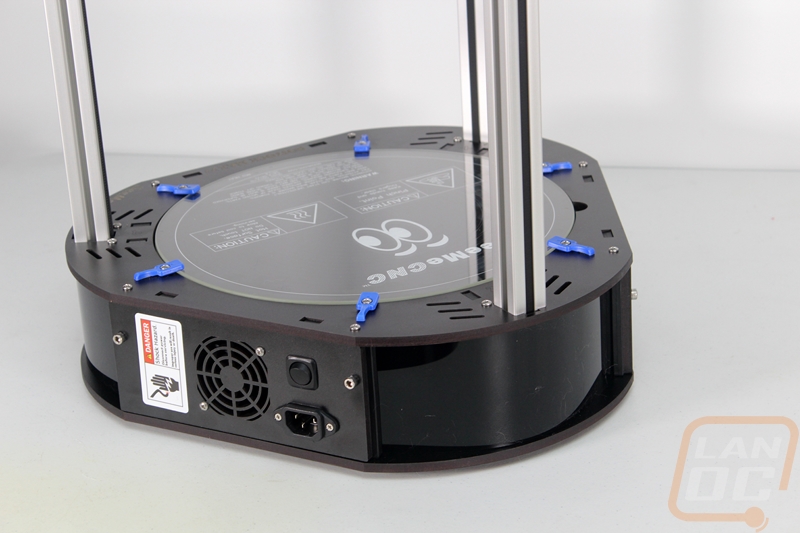
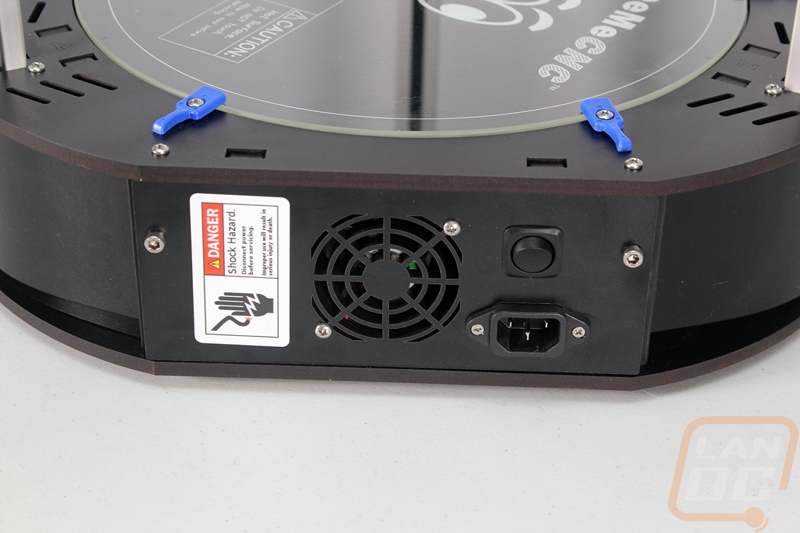
The new flipped design means the power supply is mounted down in the base. Once you get everything wired up, you have a standard PC plug for the power connection, an on/off switch, and the bases only cooling fan all in one panel.
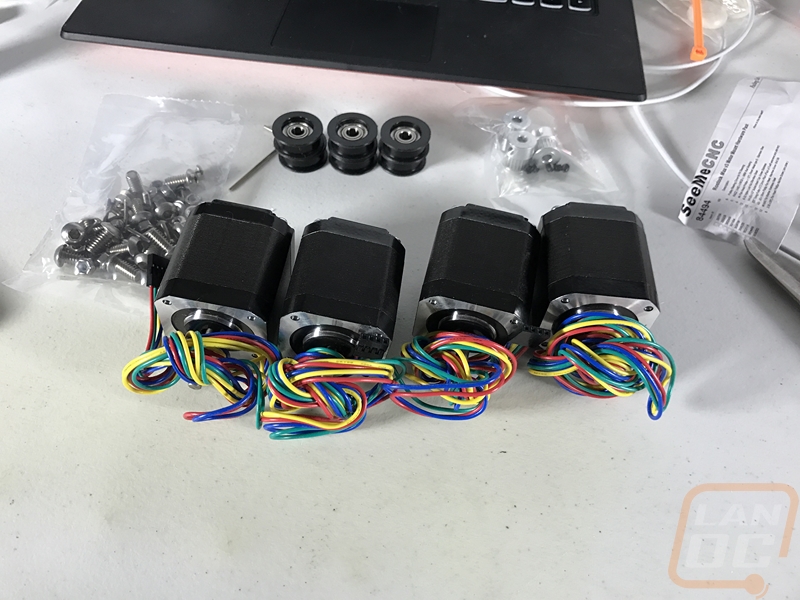
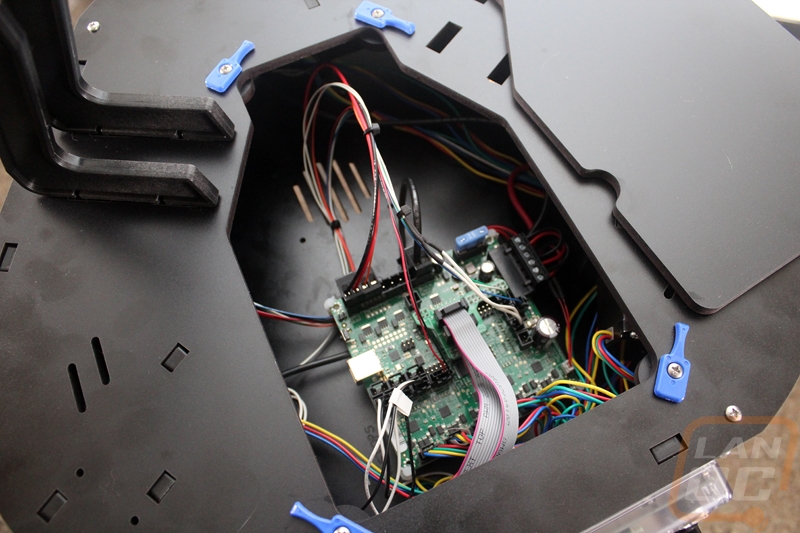
Up top, the v3 has the same rounded triangle shape of the base but rather than the floating heatbed the top has a removable panel to give us access to the inside. Directly under the opening is the Rambo control board, but you can also partially get at the four stepper motors from here. The v3 also supports installing a Raspberry Pi next to the Rambo to access and run your printer using remote software like Octoprint. By doing this you can put the printer in another room but send prints to it and if you install a camera you can also keep an eye on your print status.
The top access panel has the same blue hold downs keeping it in each corner. Beyond that, up top, we have a slide on double spool holder directly above the extruder. The top section is actually designed to support adding a second extruder including another spool holder over on the left side to match the one on the right for people who add a dual extrusion setup to their v3.
For the extruder, SeeMeCNC redesigned their already popular EZStruder to the new EZRStruder. The old design was used on the v1, v2, and the Eris and had a spring-loaded lever design that puts pressure onto the filament into the extruder gear. The lever design makes removing filament or installing new filament easy and avoids damage to the stepper. The new design is a little more compact and does the same thing only it now has better support around the filament before and after the gear. This makes loading easier and also helps with support for flexible filaments.

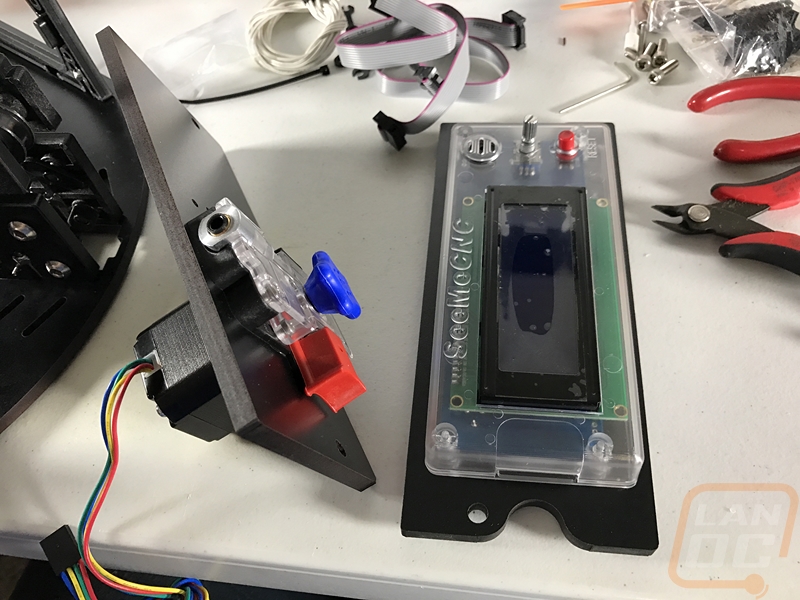
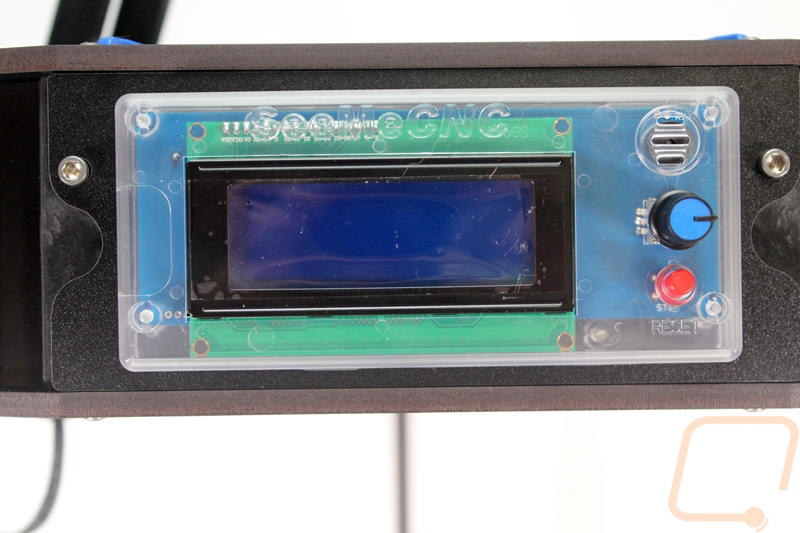
On the front panel, the v3 has a control panel. The LCD is 20 characters wide and 4 rows tall and it all packs into a transparent injection molded case with a reset button, speaker for notifications, and a knob that also pushed down for a click. This is the one part of the v3 that really looks out of place but is obviously extremely important. I would love to see a little tighter integration with it all being flush mounted preferably into a bolt on panel rather than having two independent designs attached to each other. The screen itself is enough to get the job done and it does have the SD card interface on the left side but a lot of the other manufacturers are quickly jumping into color displays with more modern navigation. I know that SeeMeCNC has brought on a software developer and they are working on big improvements in this exact area, so I’m sure we will see improvements in the future and I can’t wait!
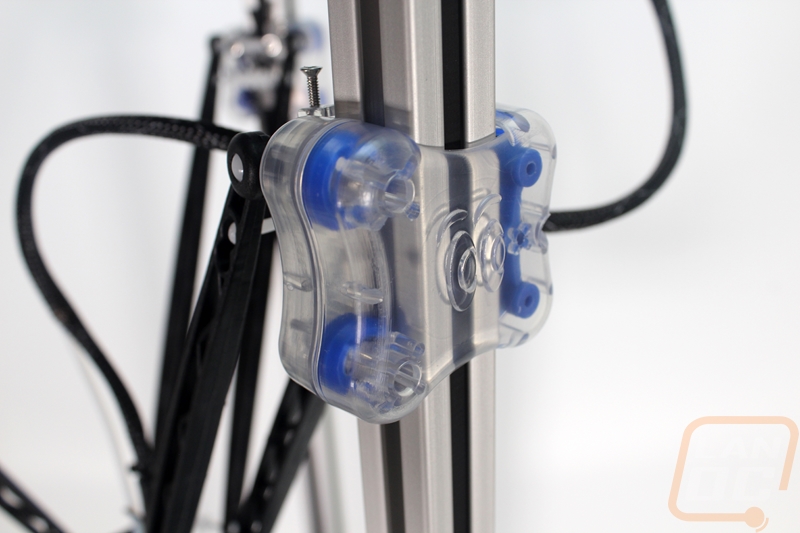
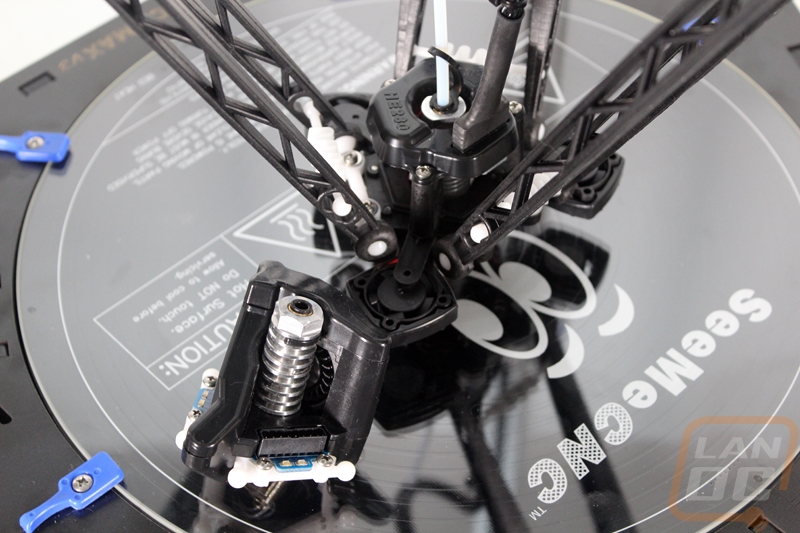
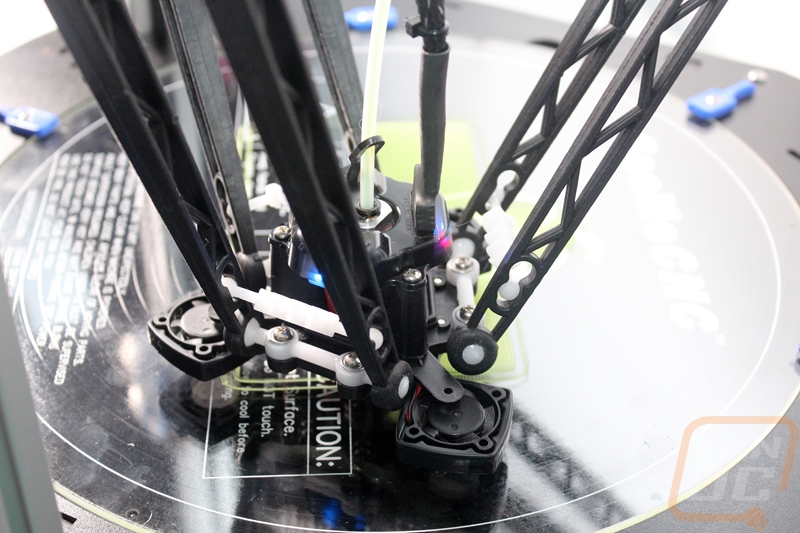
In between the top and bottom of the v3 are the three towers, the hot end, and the overall build area. This is the area that you are going to see all of the time. This is also where a couple big changes happened. First off the hotend is a completely new design, but before I get into that I did want to point out the injection molded cheapskates that bring everything together to move the hotend. These were actually introduced in September of 2015 so they came out after the v2 but before the v3. This happens a lot with SeeMeCNC, they don’t hold back changes and innovations for the next model, they brought these out and just included them with the v2 kits made after September 2015. Anyhow, I love the design, the have two transparent outer casings that hold four wheels with ball bearings in place. There are two wheels per side of the t-slot extrusions and they run perfectly in the track. One side has a suspension to keep the grip tight as well. From there they attach to the belt with a clip and they use ball sockets for the six (total) arms. A small plastic spring keeps the arms tight and straight and the same arms attach to the hot end the same way.

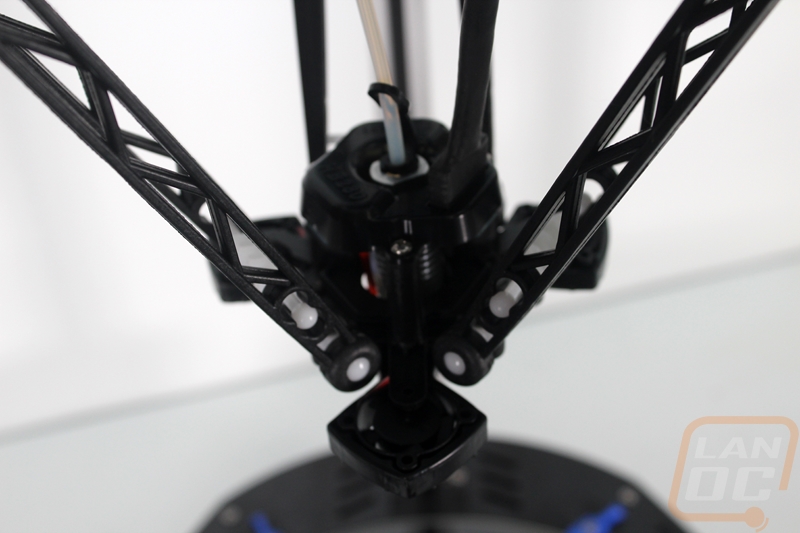
So beyond the frame improvements that make building the v3 easier, the cheapskates, and the ability to now add your Pi inside, it’s really the new HE280 hotend that makes the v3 so different. SeeMeCNC took the knowledge they learned with design and implementation of the automatic leveling on the Eris and introduced bed leveling on the v3. The leveling is a huge improvement as leveling delta printers is a lot more difficult. They managed to do it all without any extra moving parts, using an accelerometer on the PCB to pick up when the tip of the hotend touches the print surface as it taps around checking multiple spots. The new hotend is officially listed as an all metal design though some people will argue that it isn’t completely all metal with the PTFE tube still running down to the heatbreak. The new design also went with a heating cartridge that uses a thermal fuse for safety.
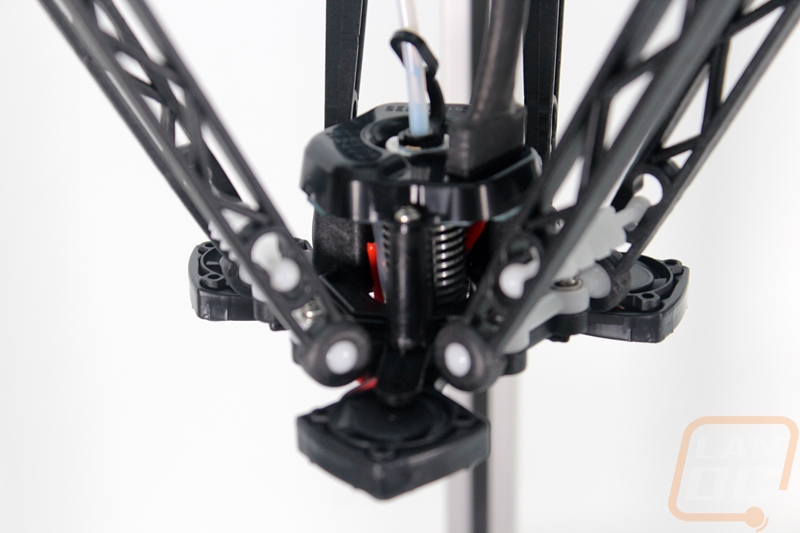
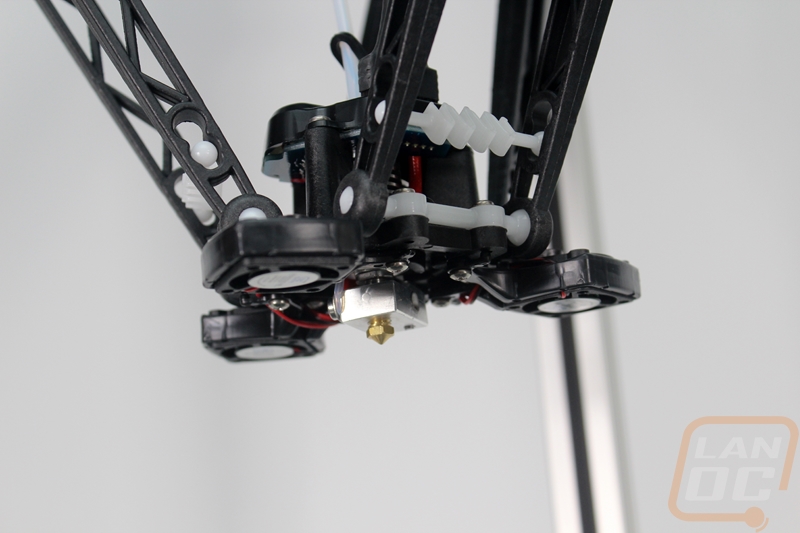
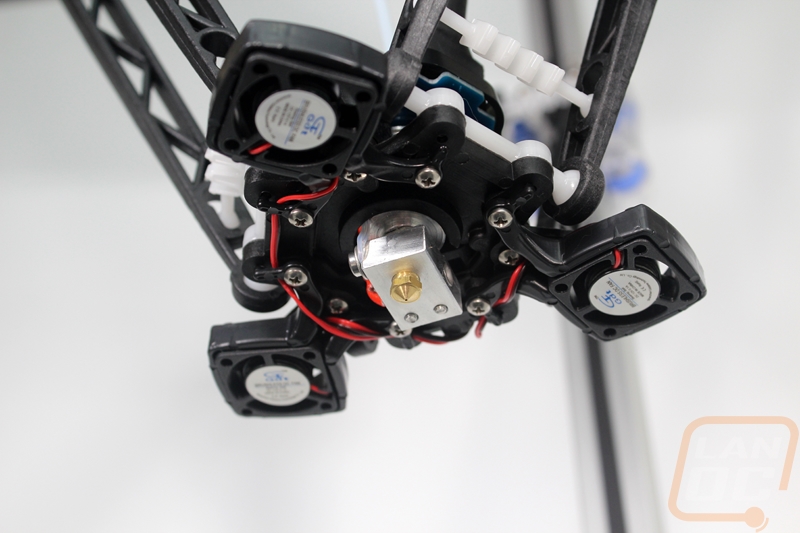
Just for comparison, I did grab one of the hotends for an Eris just to give a little scale. The three cooling fans make most of the difference, but even then there is a little more to the frame of the v3’s hotend where the Eris hotend is a little simpler. Both hotends have the same HE280 designation. This is a little confusing, but from what I can tell the actual metal part of the hotend is just about the same except the room they made for the thermal fuse. The PCB that houses the accelerometer is also the same, but it is now mounted up at the top of the heatsink to better keep it away from the heat. Beyond that the HE280’s from the Eris and v3 are completely different. The v3’s framing is larger and more robust and the v3 has three additional fans mounted to it facing down for part cooling where the Eris’s hotend used the one fan across the heatsink to also blow air at the nozzle.
Performance
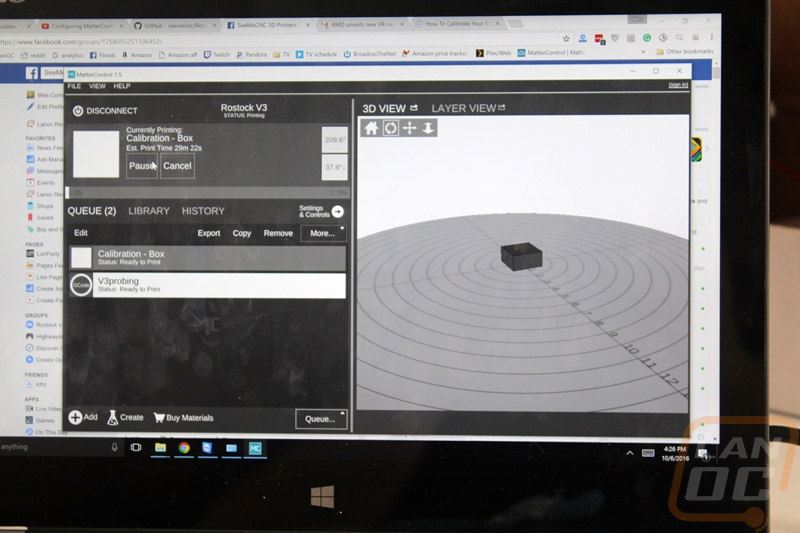
I actually finished building the Rostock MAX v3 back on October 6th and I jumped into testing it out as soon as I finished getting it together. I already had MatterControl installed on my laptop and I started off with a calibration cube to make sure everything was up and working correctly.
After that test print it would be recommended to work your way up to something a little larger like a 3dBenchy test print to check overhang performance and a few other details, but given the hundreds of hours printing on one and later two Eris’s I couldn’t wait to try to print something huge that wouldn’t have been possible in the Eris’ build space. I loaded up the Low-Poly Pikachu design from Thingiverse and jumped right into the print. I posted up photos in the installation and setup page but let's just say I ran out of filament and Pikachu now needs to wear a hat. After that, I loaded more filament and gave it a go once again, this time with much better luck. I used the stock settings right out of MatterControl but turned down my infill to 5% to save plastic and lower the print time. For it being completely untested my first big print came out really good. There were a few issues though, most notably because of the low infill the top of the head didn’t have great support and came out a little rough, adding a few more top layers would have fixed this. Beyond that, my only other nitpick was the banding visible with the glossy black PLA that I used. These aren’t typically as noticeable on prints, but given the size, flat areas, and the glossy finish they are more noticeable on this print than anything else I’ve printed after it. Banding can come from the slicer used, slack in belts and other moving parts, and also from the controller itself. The Rambo that SeeMeCNC uses does have some banding issues that users on their forums have gotten rid of moving from it to a Duet 32 bit board. In this case, it was a combination of that and the slicer with our lighting also making it look worse than it was.
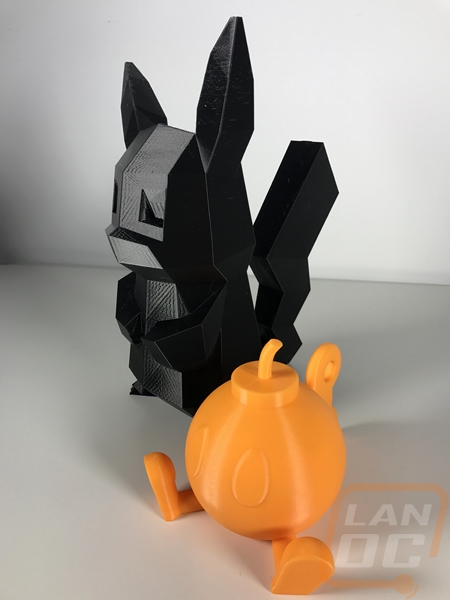
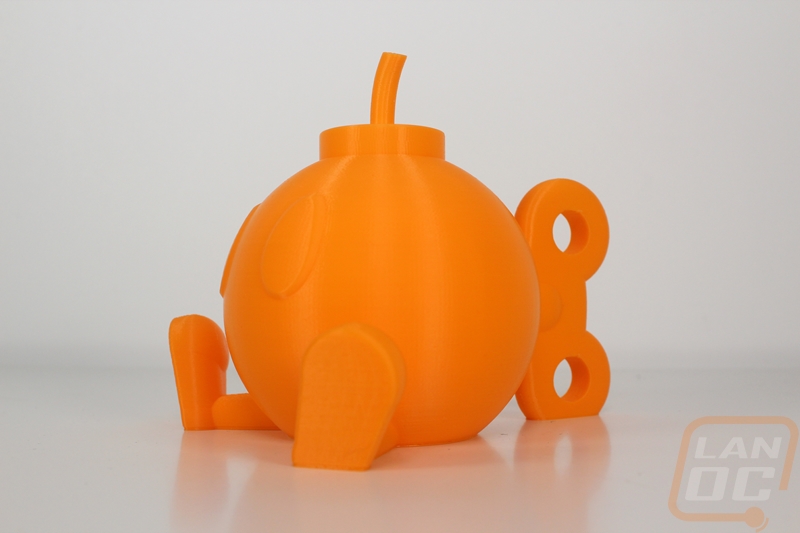
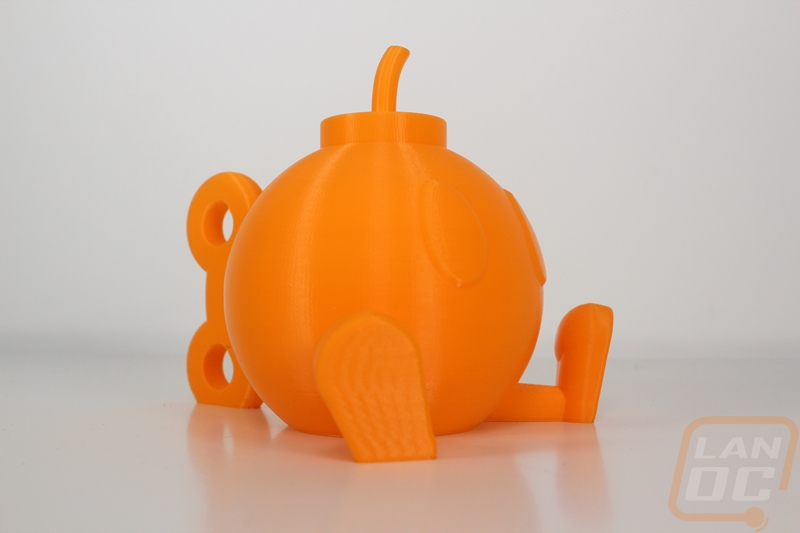
Moving back to a more normal sized print I finally printed myself a Bob-omb in orange and it has to be my favorite print that I’ve ever done. The print came out perfect without any major issues and it's just a cool looking object!
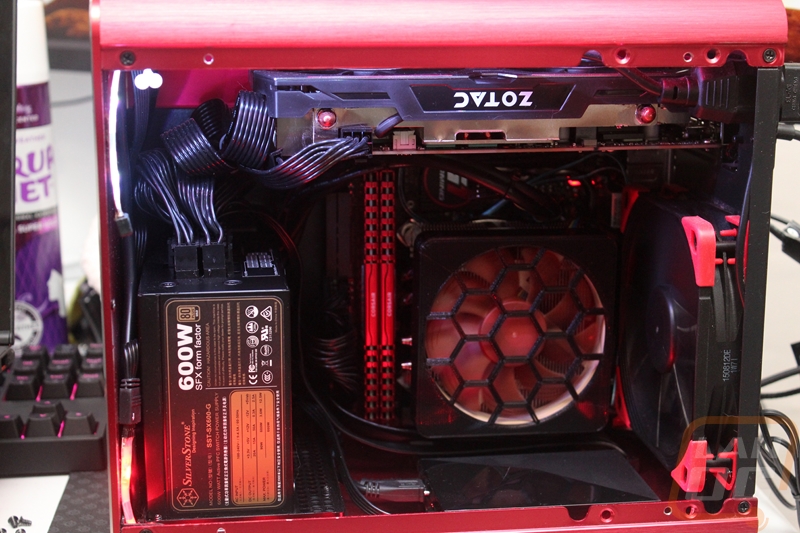
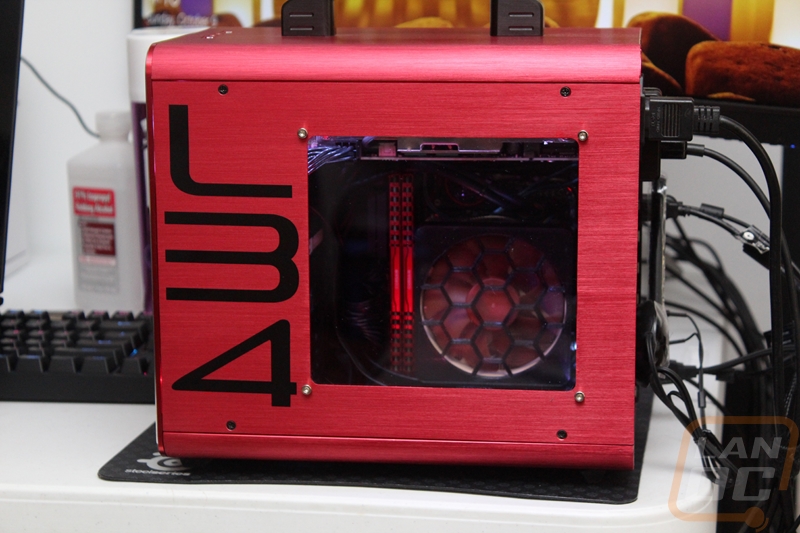
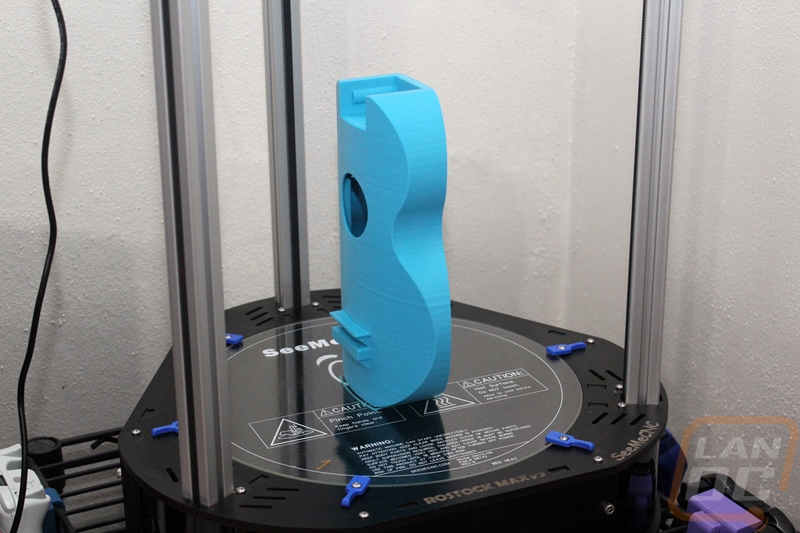
Next, I had to get back to my roots a little and finally print a design that I had made for our Lunchbox 4 project build. In my coverage, I mentioned multiple times how the Noctua fan stood out in a bad way in the otherwise all red and black build. I designed a cover to go over it but it wouldn’t fit on the Eris’s build plate, so with the larger v3, I printed my design. The good news was that it fit perfectly, the bad news was my design needed a little more work to cover the fan up better. Check it a before and after of the original design

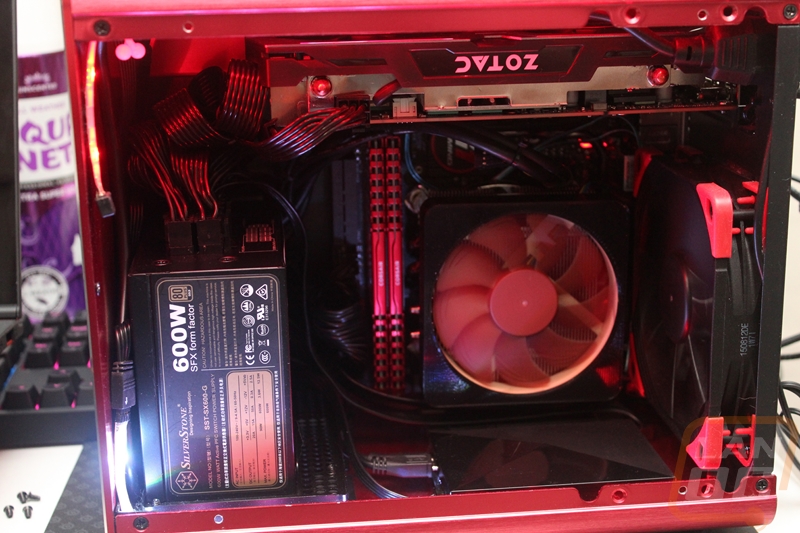
Now it was an improvement, but I decided to add a honeycomb design over the hole to help hide the fan a little better. It looked much better, especially with the side panel on. I also uploaded it HERE in case anyone else needs something similar.

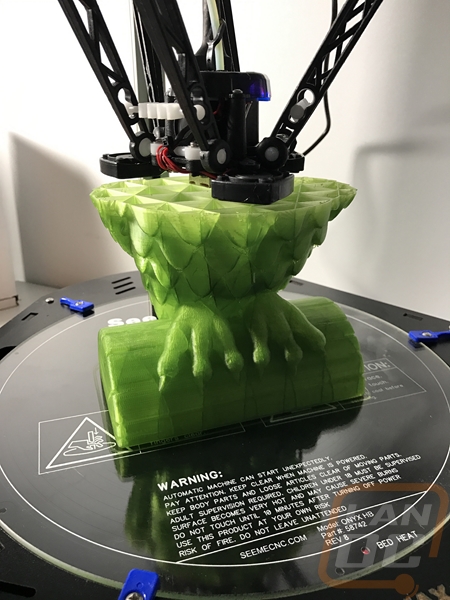
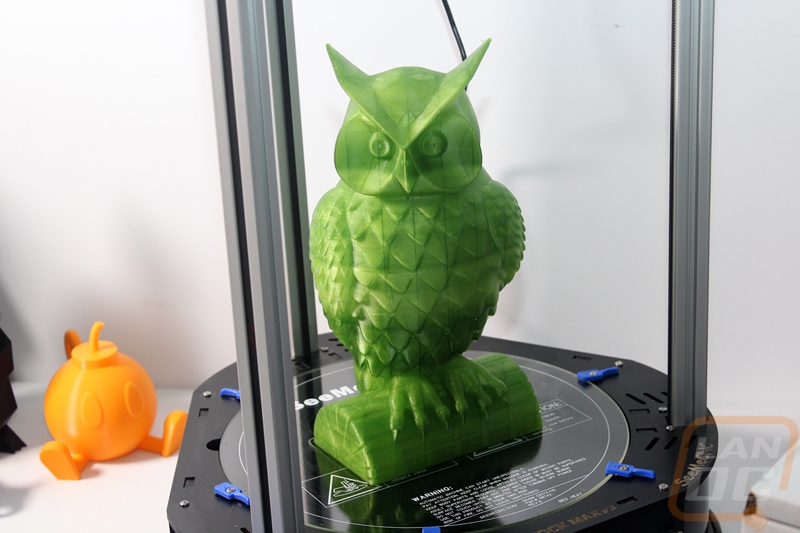
About this time I started to run out of filament, so I scheduled a trip to visit SeeMeCNC to get more and while I was at it I brought my wife. Well, I loaded up with new colors, ABS, and even a few transparent after being persuaded by my wife. You see, she saw a large owl design while visiting them and she had to have it done in a green transparent. When I got back, before setting out on the 40-hour print I did do a few test prints with the SeeMeCNC transparent PLA and they came out good.
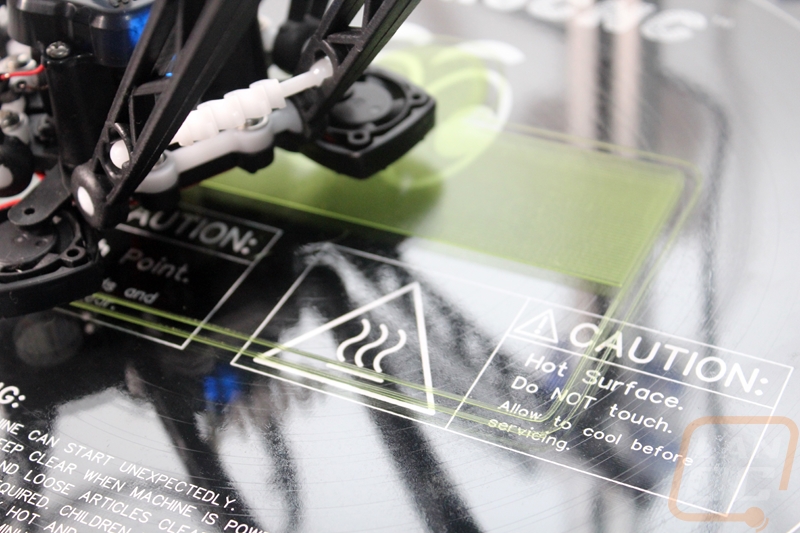
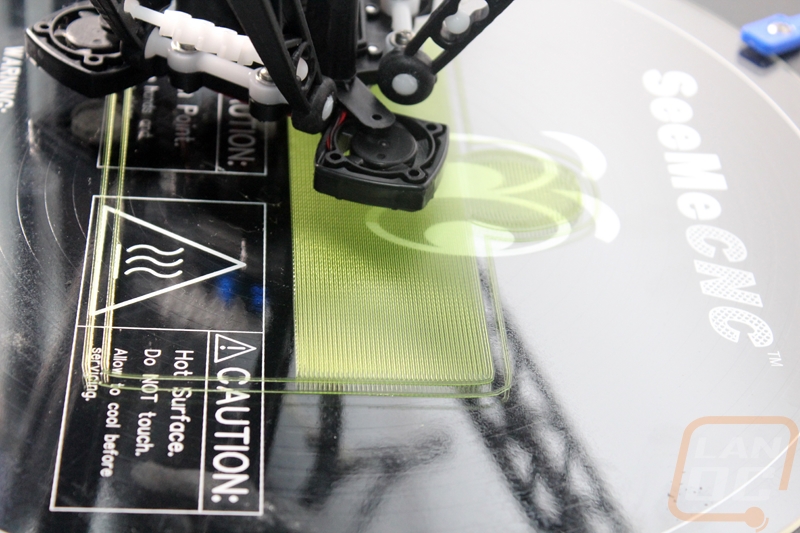
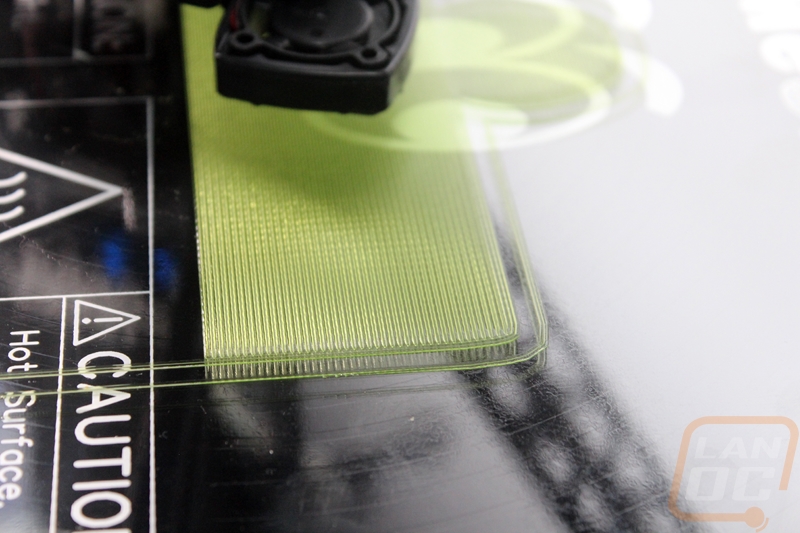
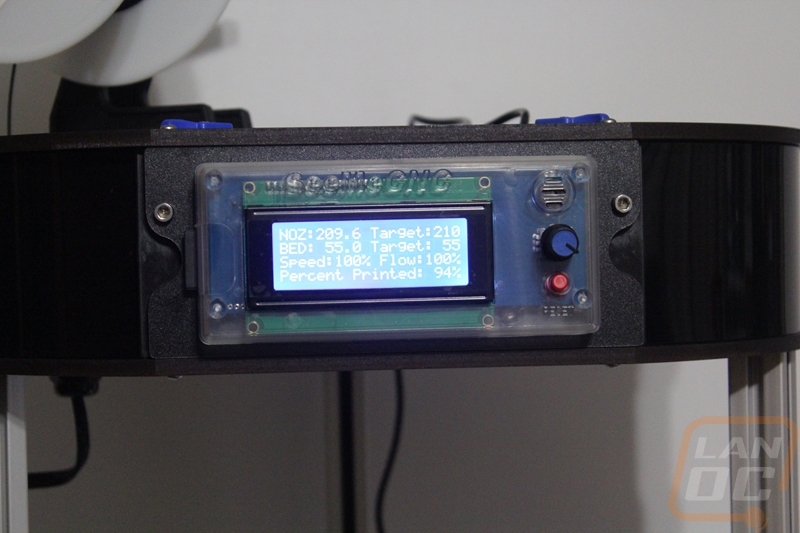
Before getting started I cleaned up the build surface and put a light coat of hairspray on it for good adhesion. I then ran the calibration gcode to make sure the first layer would come out good with the print. I haven’t really touched on it very much up until now in the review, but the calibration takes about a minute to run and has to be run with a clean surface and nozzle and with everything at around room temperature. So when I started my print the first layer of our owl went perfectly, check it out.
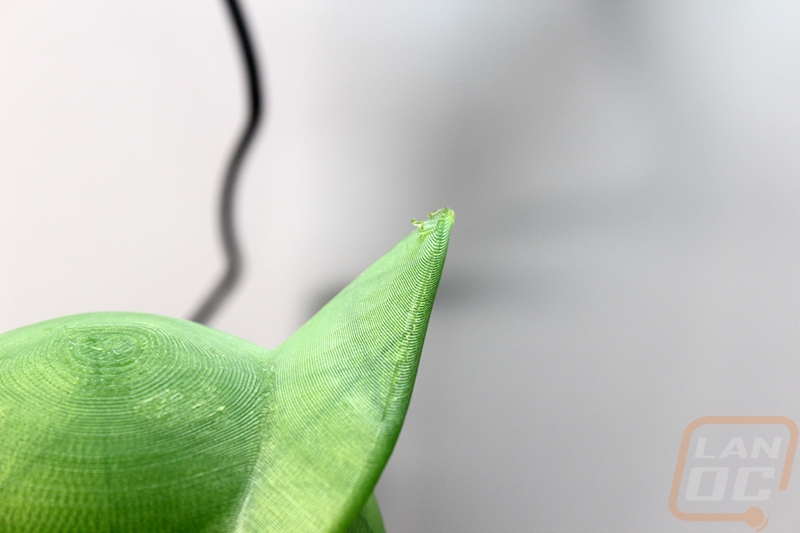
Well in my haste to get the owl printed for my wife I didn’t really spend enough time tuning the configuration for the transparent PLA because my test print came out good and I expected it to print just like the rest of the SeeMeCNC PLA’s did. So hours into our owl print I did notice that there was a little more droop on the overhangs that I would like as you can see in the photo below.
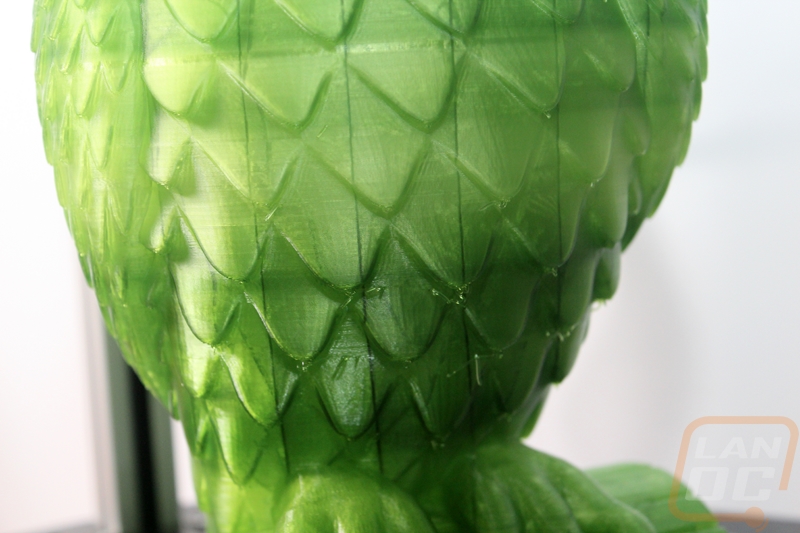
I turned down the heat from 210 to 200, then to 195 and I didn’t notice it at the time but there was a very noticeable difference in the transparent filaments appearance with the change. At the lower temperature, it lightened up a little, was more frosted than transparent, and had more of a satin finish than a glossy finish. Other than being a little bummed at the mistake, I was excited that I could actually get two different looks from the same filament as long as I tuned my temperatures correctly. But I did want to include it in here for anyone who prints using the SeeMeCNC Transparent PLAs.
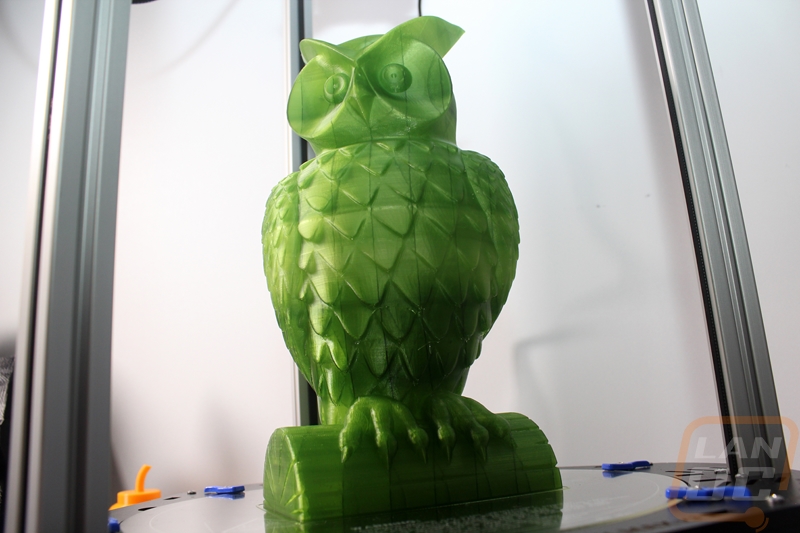
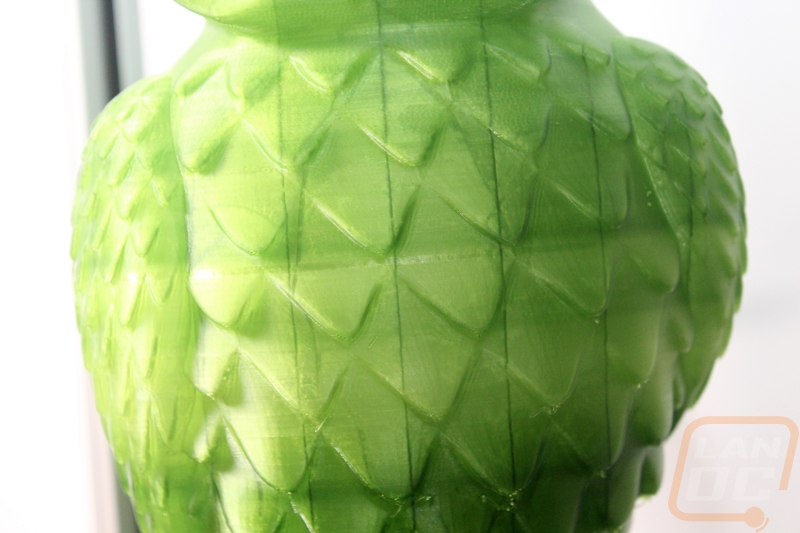
All in all the owl came out great and a lot of people on my wife’s Facebook wanted their own owl as well. Beyond the temperature issues, I did have to clean up a few droops from the print and the top of the ears required a touch of cleanup as well.
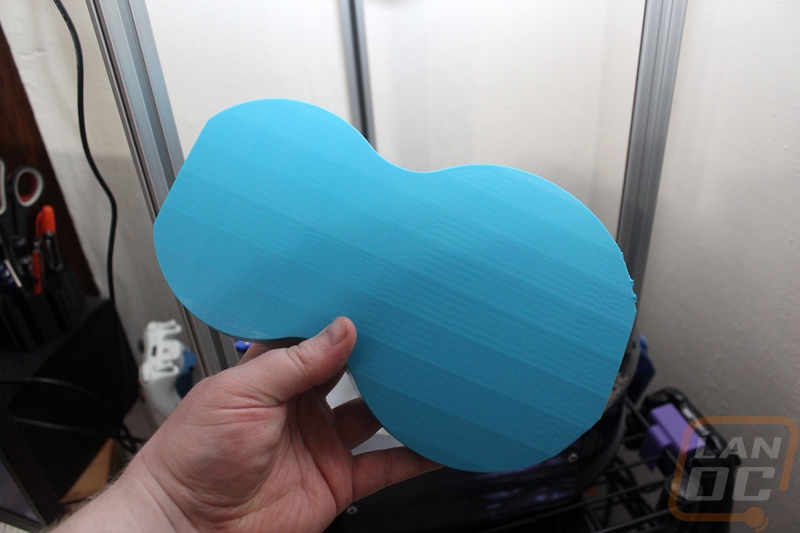
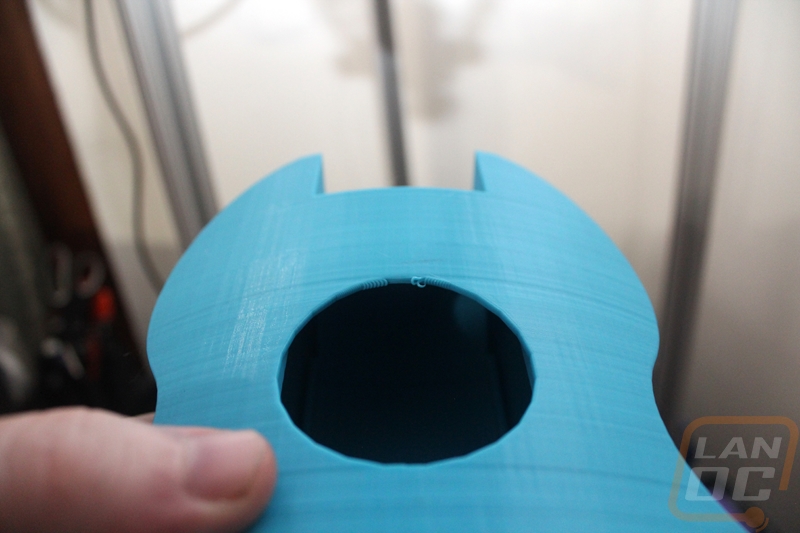
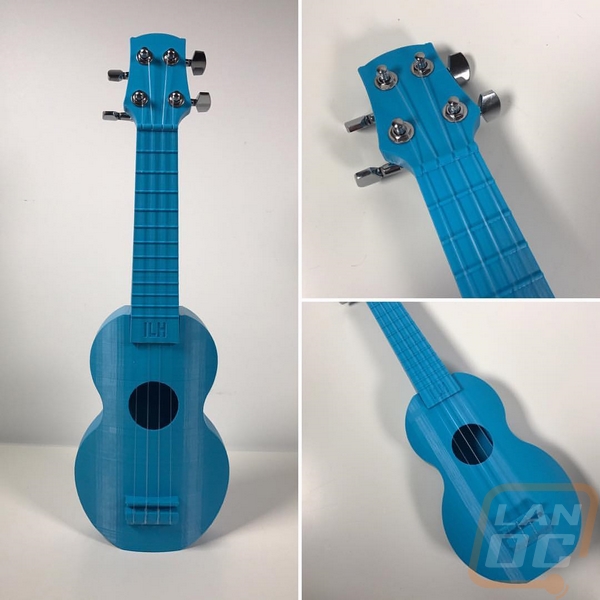
In between the nearly countless trinkets and small prints, I did manage to embark on a bit of a challenge. I decided that I wanted to print and use a Ukulele. Never mind the fact that I don’t know anything about them or anything about playing one, but I did find a good design on Thingiverse HERE and jumped into the print.
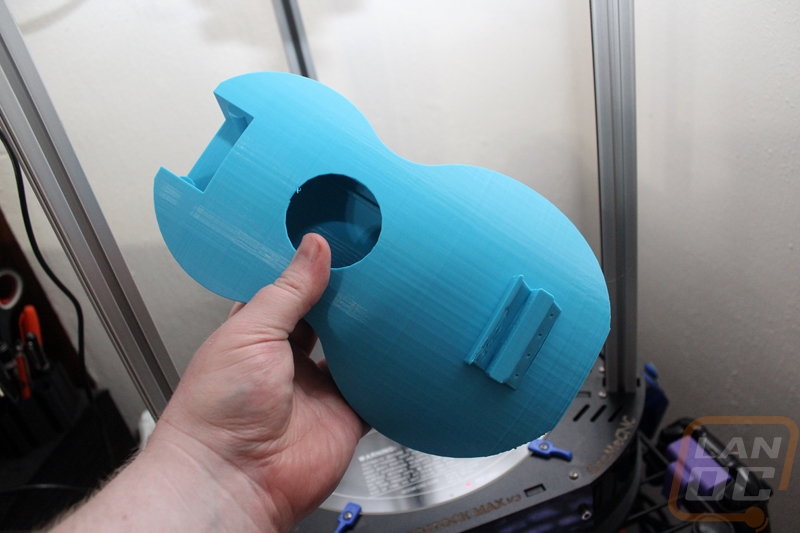
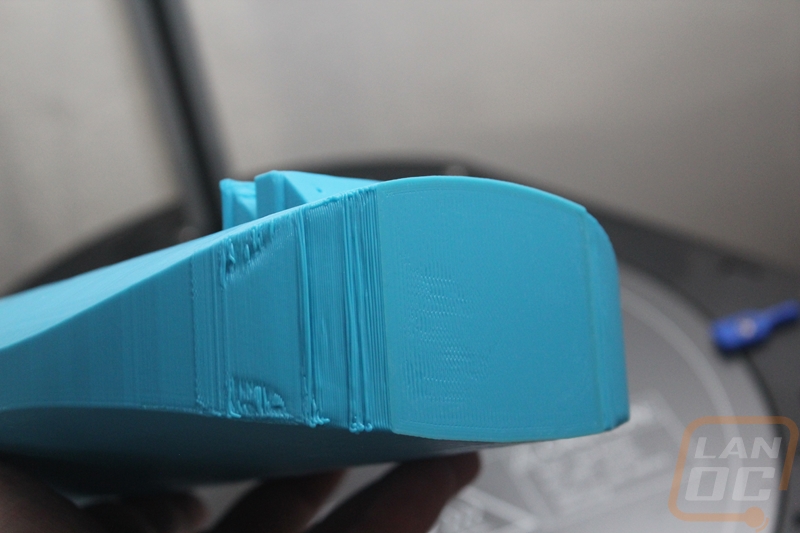
After getting it all printed I did learn that my configuration could use a touch more tuning with overhangs. I had a few issues as photographed below, but none were bad enough to make me want to reprint. I did, however, pick up some sandpaper and clean the imperfections up.
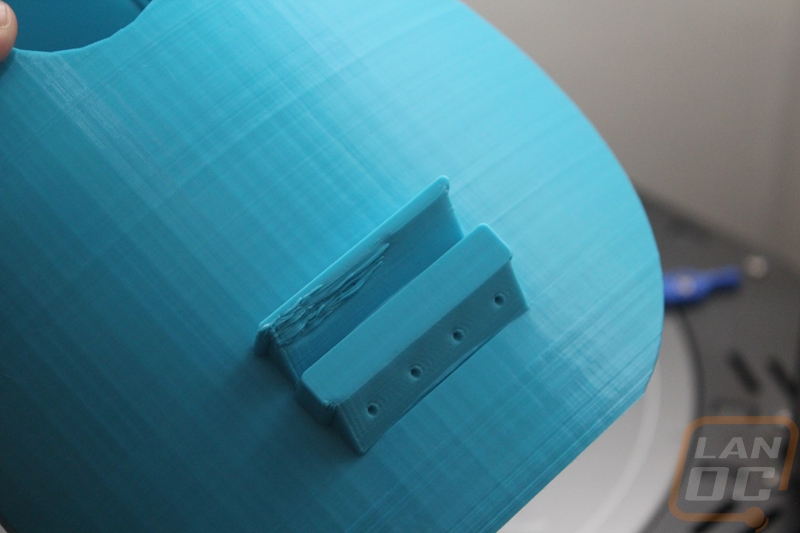
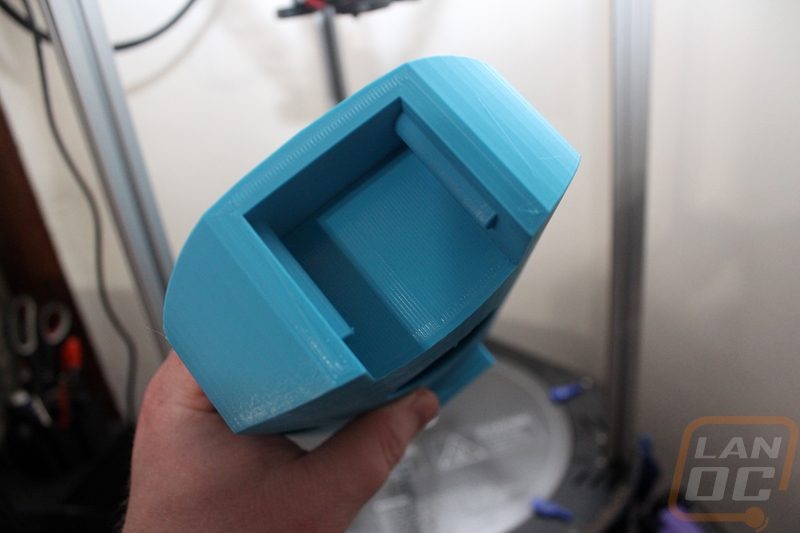
Once everything was printed, I had to glue the two pieces together and order strings and tuners. My original tuners didn’t fit and it was a big bummer because the pearl grips would have looked amazing. Ignoring that mess-up the tuners and strings only cost me 12.31 shipped via Amazon Prime. I used 1/3 of a role of filament as well but overall the cost was nothing. Now I never did learn to play it, but once I learned how to tune the ukulele it did sound good. However, it didn’t want to keep its tune all that well, I don’t know if this was the strings stretching out and breaking in or if the ukulele itself was flexing. But it blew my mind that I could make an instrument out of almost nothing with the v3.
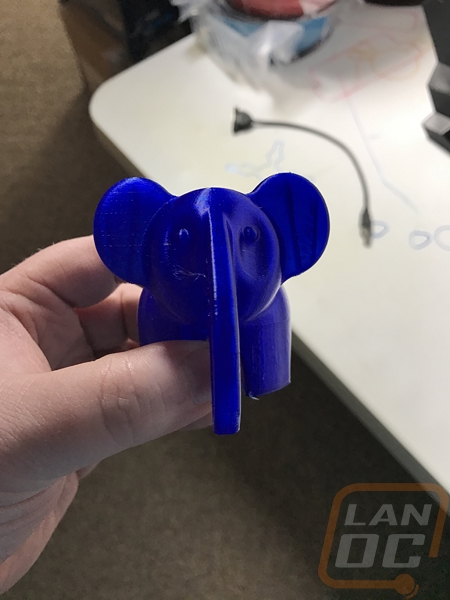
In the nearly 500 hours of printing I have done on the Rostock MAX v3 I have printed trinkets, figures, busts, hardware for my PCs, and even car parts. I mostly printed with standard PLA but I did spend time with transparent PLA, the new MeltInk PLA/PHA, ColorFabb PLA/PHA in standard and transparent, and even SeeMeCNCs ABS. The new MeltInk gave me fits when printing thin objects, but beyond that, I spent very little time adjusting and tuning. In fact, the ABS prints that I was worried about having trouble with didn’t give me as much trouble as I had originally expected. I did have to make sure I had a cleaned and hair sprayed surface, but the stock settings let me print a perfect replacement lid for our dryer vent outside and two new clips for the visors in our car that had broken. I went with ABS for those specific prints due to the higher heat resistance and because PLA doesn’t like water. All in all the v3 proved to be versatile in handling different brands and materials.
One area that was new to me with the v3 having started on the Eris was having the built in screen and being able to use an SD card to load up prints. With the Eris, I had to run everything through MatterControl and if windows updated or something happened with the software I was SOL. So I was excited to be able to run the v3 independently from an SD card. I do however wish the card reader was a little easier to get at than from the side of the screen. The four line screen got the job done as far as navigation, but I will recommend that you make sure you ground yourself out on one of the metal extrusions before touching it, if not you can have the screen go blank from the static discharge, I had it happen to me so much that I actually thought the controller just didn’t want me putting in the SD card when it was powered on.
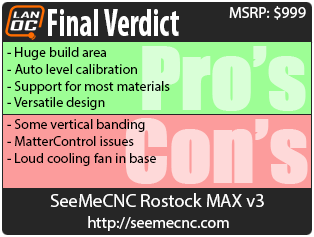
Overall and Final Verdict
Well, two months and more filament than I can count down and I can finally say I’m finished up with my testing of the new SeeMeCNC Rostock MAX v3. I had a great time building it though I know not everyone will feel the same way. I learned a lot by building it and it is a great feeling when you get it all together and it works. While I never built a v2 for comparison, the v3 does have an improved design that allowed for a faster (although still an all day or more project) build time.
So how is the Rostock MAX v3? Well coming from the Eris, the build area was just mind blowing. I was a little concerned that the cylindrical shape would prevent me from fitting some things into the space, but I haven’t really run into anything that I needed or wanted to print that I couldn’t fit in the build area. There are options out there that have a bigger base, but the vertical print area on the Rostock Max v3 makes up for it. The new accelerometer based leveling system is also a big plus. I ran the code and had a perfectly level first layer immediately. There is still room for improvement on it though, I did have to tweak the z-probe height a touch to get the perfect thickness, but after I did I had no issues in the future. While I still prefer to print with PLA or a PLA hybrid material, I was really happy to see that the v3 could handle any of the other materials like ABS or flexible filaments.
The last big thing for me was the v3’s overall versatility in its design. SeeMeCNC did a good job thinking ahead and they designed the printer to be built with the electronics all in the top or in the bottom. They also included mounting options for a Pi inside and to go with the Pi they even have a hole for wiring up a camera to a Pi as well. Looking even farther ahead they also included the ability to add a second extruder for anyone looking to convert the v3 into a dual extruder setup in the future. There isn’t currently a Hotend design to go with it, but I’m sure the community will come up with something in the future.
As far as downsides to the Rostock MAX v3 I only ran into a few and they are all fixable depending on how far you are willing to go. For starters, I did run into some vertical banding on the prints. Nothing that most people would even notice, but it is there. Part of this was just related to the slicer used (in my case MatterControl) but it is also related to limitations of the Rambo controller board. An upgrade to a Duet board would make a big difference and I’m fairly sure SeeMeCNC has been working on future options there. While I was a big fan of MatterControl with the Eris, now that I have more time with it I do think there are a few limitations to the software. Specifically, I’ve run into crashes or slowdowns when it generates G-Code. On top of spiral mode doesn’t work that well and every once in a while I run into designs that just won’t slice correctly in it but work fine in other software. I’ve actually been trying out Simplify3D and I plan on writing more about it soon. The last issue I ran into was just with the fan in the base of the printer being really loud. I plan on diving in and putting a resistor in line to turn down the RPMs slightly to make it a little more livable in my office.
So at the end of the day is the SeeMeCNC Rostock MAX v3 the printer to get? Well, it really depends on your situation. With the kit selling for $999 it isn’t exactly the cheapest way to get into 3D Printers, there are a whole list of cheaper options if you just need a smaller printer. Where the v3 excels is the overall build area when taking into account the total height. Also, let's not forget watching deltas print is still basically magic. So the Rostock MAX v3 wouldn’t be my first recommendation for a first printer, but it is the printer you are looking at after your first printer. It rides the edge between hobbyist printing and commercial printing with good print quality, fast speeds, a big build area, by being available in a kit form to save money.
For me the Rostock MAX v3 is perfect though. It fits in my office where a printer with a wider footprint wouldn’t and I really enjoyed building it. In the future I can see myself digging in and doing a few upgrades but for now I’m going to have the v3 running nearly all of the time with different projects that I have in my head and with Christmas coming up I might print a few things to give to friends and family. Plus I love that SeeMeCNC is an American based company building nearly everything in-house, so props to them!


Live Pricing: HERE


