Software and Performance
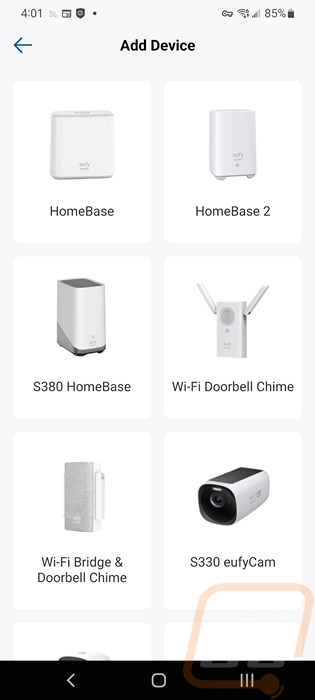
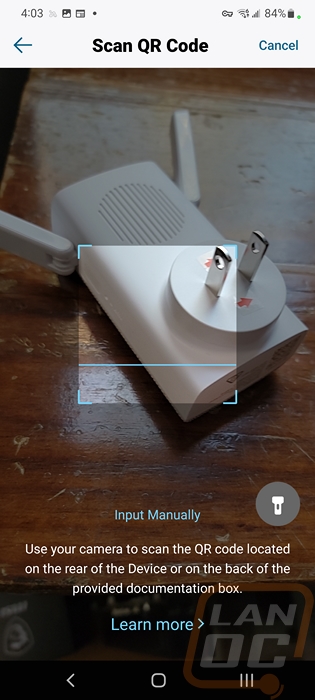
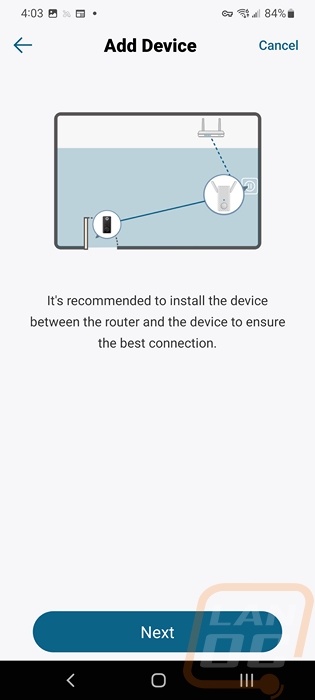
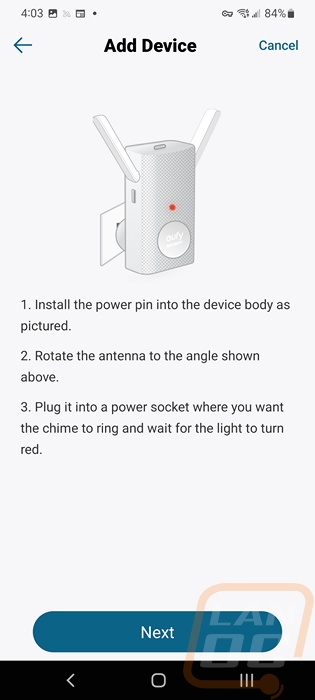
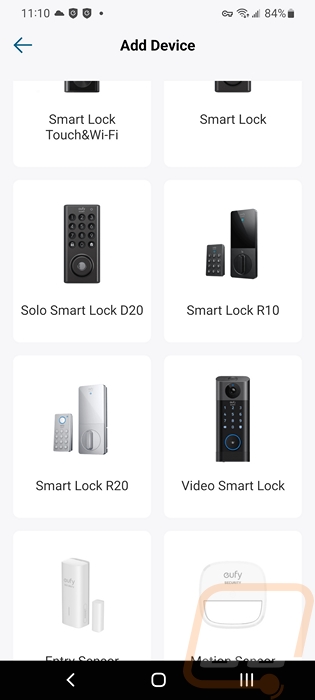
Before setting up the Video Smart Lock itself, as I mentioned in the installation section, you do have to get the bridge/chime up and running first. The eufy Security app makes this simple. Once you click the add device button you pick out the device which they have pictures of. They use your camera to scan the QR code on the bottom of the chime, and they then have instructions on where to plug it in.
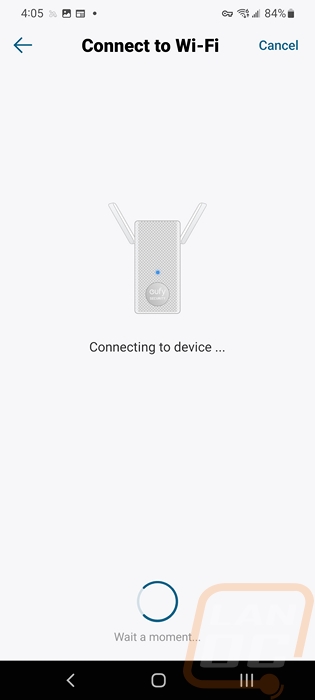
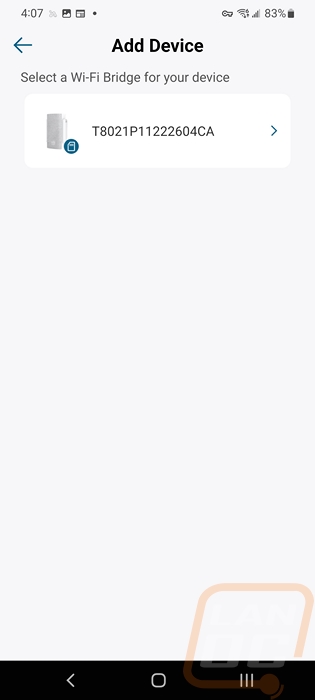
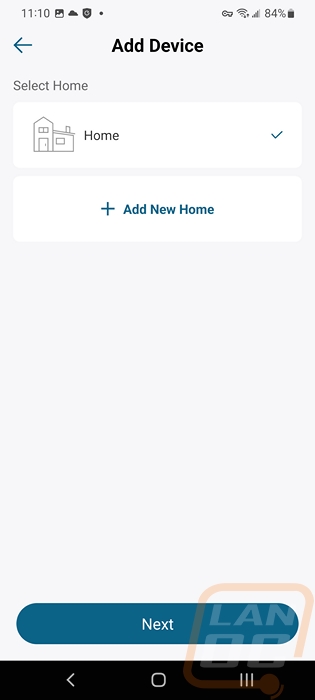
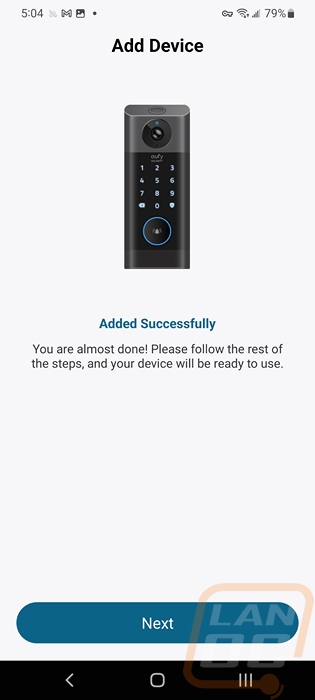
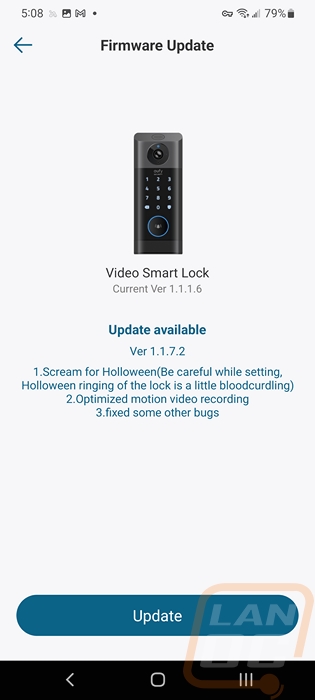
With the chime out of the way, I had to do the same thing with the Video Smart Lock as well. Finding the matching picture and model name, selecting your home (which is an option in case you have smart devices in multiple locations), then scanning the QR code and completing the setup. Once done eufy does also check for firmware updates and even though my initial setup of this was a while ago there was an update at the time that included a Halloween themed (and they misspelled Halloween) ring which is cool and also shows just how long ago I set this up. Also big props to eufy for showing what is updated though they also at the same time did the “fixed some bugs” thing which is always frustrating when you get an update. Seriously don’t do this.
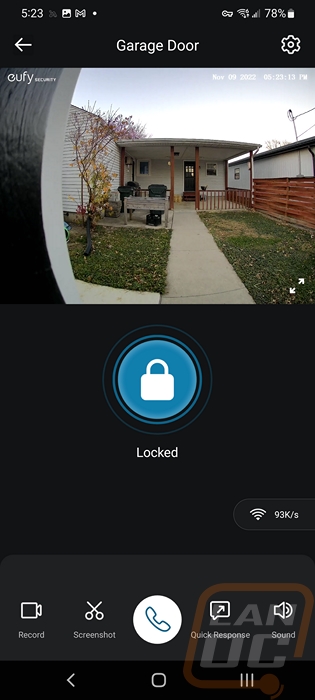
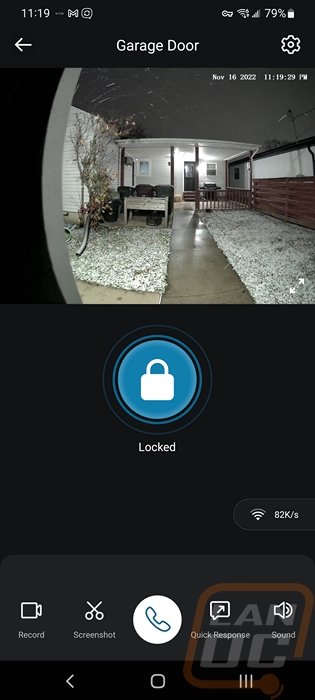
With everything set up, you can open up the Video Smart Lock just like any other eufy device in the app. Not only does it give you a live feed and audio but you get a large button to lock and unlock it remotely or just to check the status. They show you how good your wireless connection is which is always updating then down at the bottom you have a row of options. You can record which will create a video, screenshot to get a picture, turn sound on or off, and use quick responses which play prerecorded or computer-generated audio for a few common responses. Then in the middle, the white phone icon will let you talk through the speaker on the lock. All of these options are similar to what you can do with other eufy devices like their doorbell cameras and the garage control as well. Then in the top right corner, you have a gear that gets you into the menu for settings.
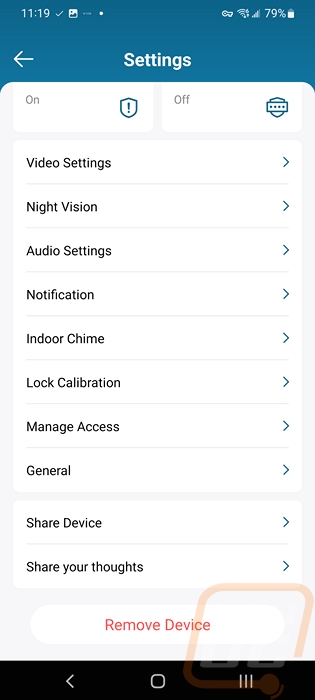
This is a look at what you will see when you open up the settings menu on the Smart Video Lock and frankly it is a lot to take in. The initial page gets you a picture of the device up top and a switch to turn it off. That also has a battery indicator and a wireless indicator to give you the status of each. Then there are 7 “main” options with large buttons that you can open up to dive into settings. But scrolling down you will find a whole list of other menu pages as well. As it turns out, combining three different products into one product means there are a lot of settings you can change so I’m going to try to get through these as quickly as possible.

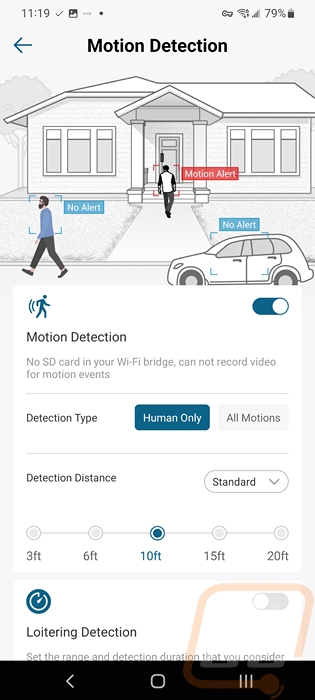
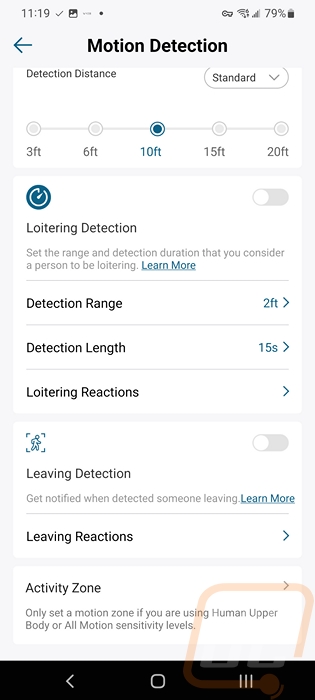
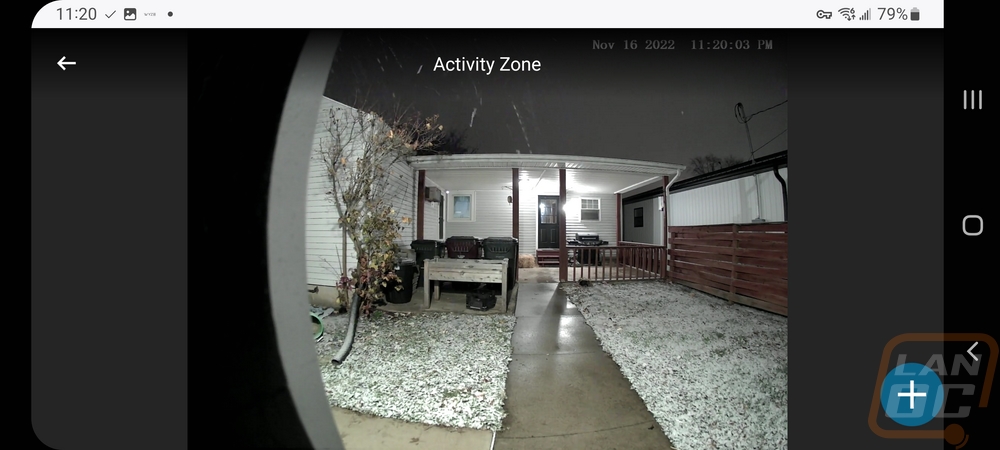
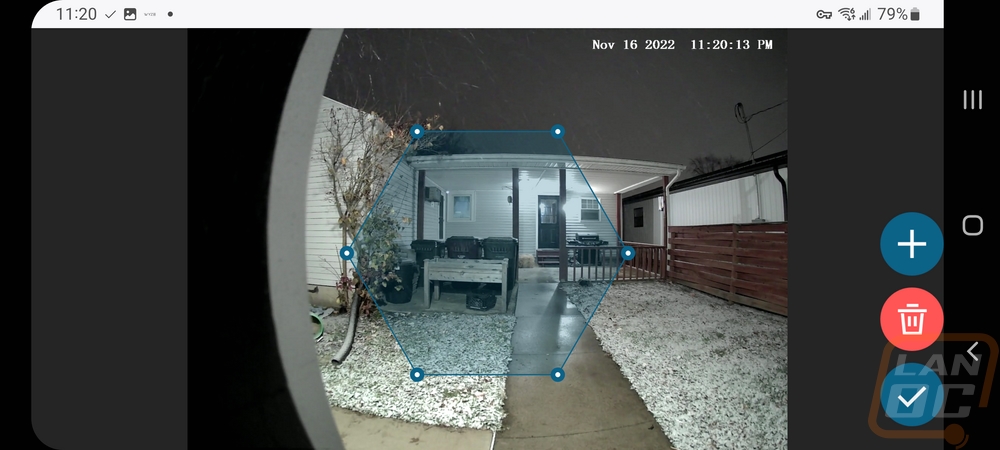
The biggest button right up top is the motion detection page and any of eufy’s products with a camera have this. They use a lot of the space when you open this page for a picture to show you what they mean which could be smaller and get more of the settings up top and visible. You can turn the motion control on or off and also set if you want it to pick up only humans or all motion. You can then using the standard setting to pick the distance you want it to pick up or switch to the advanced mode which gives you a pie shape showing you 8 sections where you can set the distance differently for each area. This could be good if your camera picks up motion from a neighbor in one direction but you want the distance to the other side. Scrolling down there is an option to turn on loitering detection which will pick up people sticking around and you can set the distance, time, and set how the video smart lock reacts including playing a sound telling people to leave. Below that is also an option that will pick up when people are leaving and you can set a voice response to that as well. Last up is the activity zone option which opens up a live picture and you can select the area you want it to pick up motion.
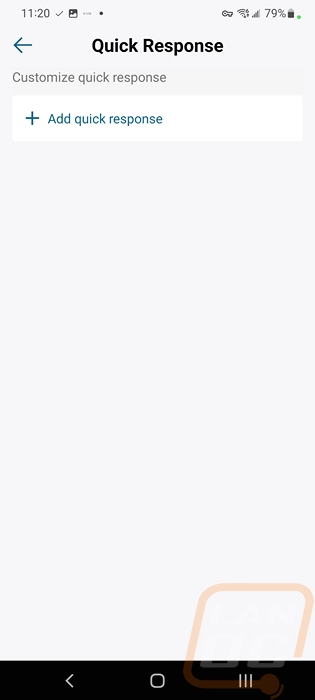
Next up is the quick response page which lets you create new quick responses. This just lets you record audio and give it a name. I think I might use this more if I could type in a response and pick a voice, avoiding having to hear my own voice altogether.
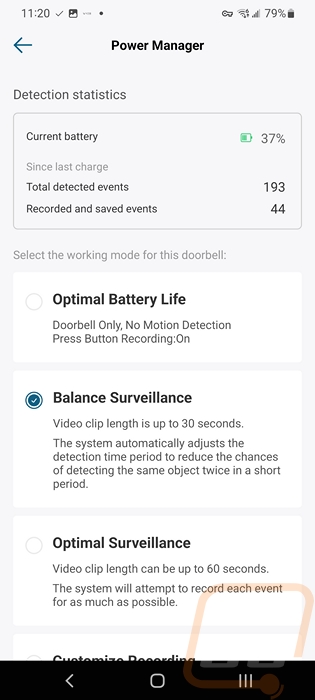
The power management page is an important page and one of the only pages you will visit in the future once you have things all set up. Up top, you can see the battery life left and I love that they also show you how many events have been detected and recorded from the last charge. Then below that, you have three battery power-saving options. You can get the best life by turning this into a doorbell (and lock, they forgot to include that in the text) only which turns off the motion detection and only records video when you hit the record button. Balanced is the default and that works how you would expect it and then optimal surveillance records clips longer. You can also create custom recording options as well.
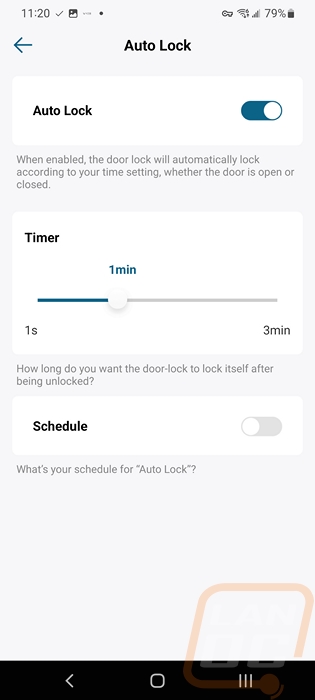
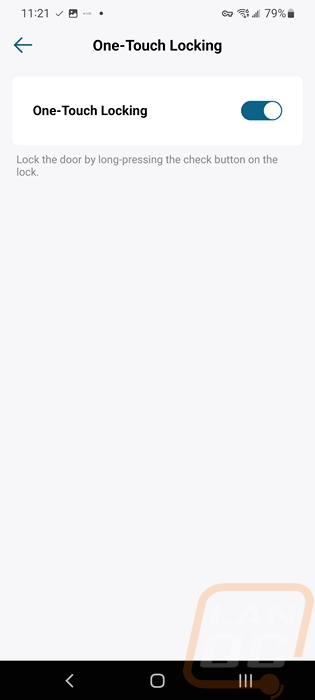
The auto lock and one-touch lock pages are different pages but they are close enough that I’m going to touch on them together here. The auto-lock setting comes off by default but is a great option to turn on. This uses a timer and relocks the lock a set amount of time after you open it. You can also set this to a schedule which is cool, only auto-locking at specific times. The way I look at it though is you can unlock the lock without your keys with a fingerprint or code so why not set this? The main exception to this is if you maybe keep that door open for extended periods or more obviously, if this is on a business where you would want people to come in. One-touch locking just turns on the option to press and hold the shield button for one second to lock the door without having to put the code in or use your fingerprint. This should be a default on as well as far as I am concerned unless you have a situation where people could be locked out.
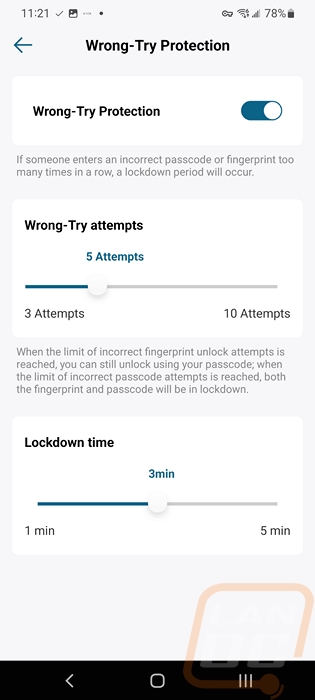
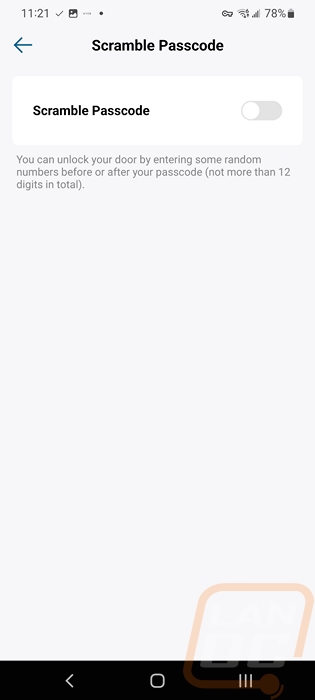
Wrong try protection and password scramble are also two different pages but tie in together as well. The wrong try protection page is an option that you can turn off that will lock the Video Smart Lock down after a specific number of attempts and you can set the lockdown time from 1 minute to 5 minutes, I’m not sure what happens if you just press the hidden reset button on the bottom in this time however. Then the scramble passcode option just lets you type random numbers before or after your code before hitting the enter button. This can prevent specific numbers from showing wear from your code or if someone is looking over your shoulder it can make the code harder for them to try to remember.
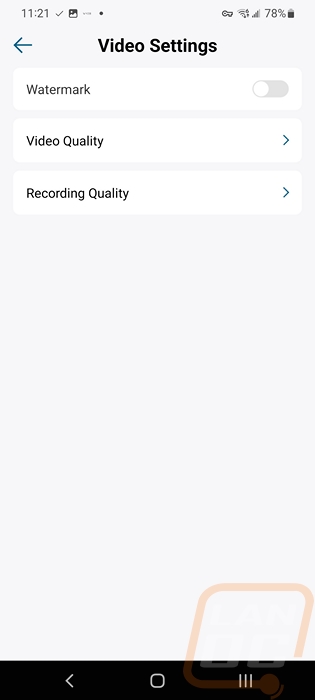
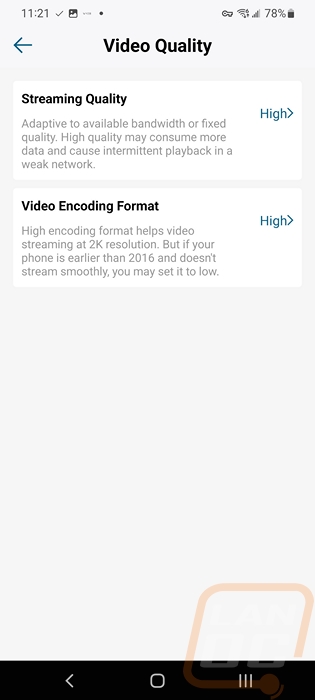
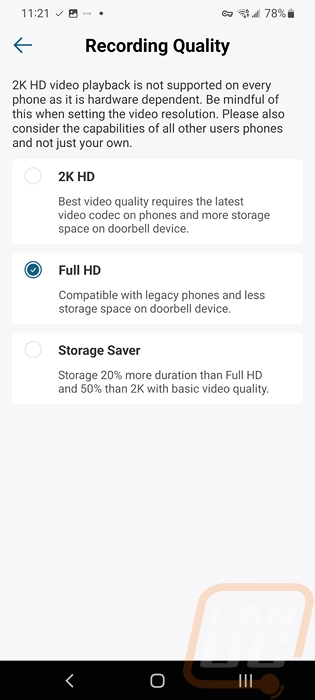
The video settings page is relatively simple with the option to turn off the watermark and then they have two pages which could have both been all on this first page. The video quality page lets you select the streaming quality which can be set to low, medium, high, or auto. This just sets the bit rate of the stream, interestingly enough it doesn’t let you pick the resolution at all. Then you have video encoding format which has just two options low and high. This is a little confusing though as they recommend low for older phones but technically low compression would be better quality but more bandwidth. The recording quality page then is where you set what resolution video is recorded in, the 2K HD and then FULL HD descriptions are a little confusing because I know that FULL HD is most likely 1080p but FULL indicates that it is all of the HD possible putting 2K and 1080p here might be easier. They also have storage saver down which gets you even more space than the other two but what resolution is this? I assume 720p but it would be nice if that was indicated. All of the quality settings really just depend on the side of the micro-SD card you put in the chime.
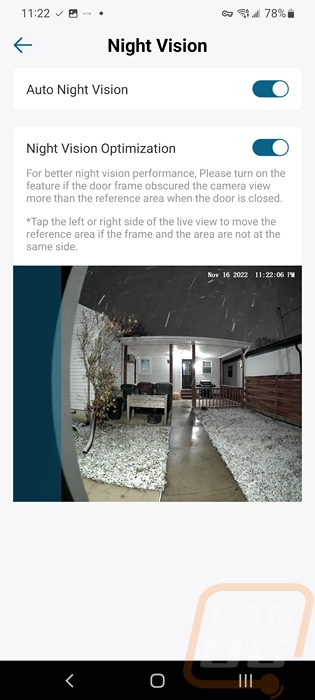
Next up is the night vision page. Here you can set auto night vision to be on or off and they also have an option for optimization. This is specific to the Video Smart Lock as you install it on the door near the door frame. This gives you the option to tell it to ignore a specific area that is your door frame. They even give you a live picture with the reference area so you can see if you should turn it on or off.
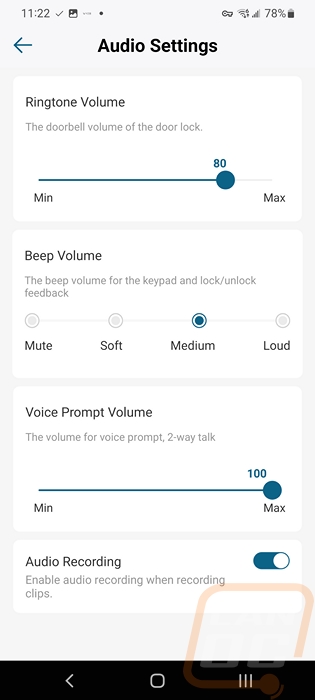
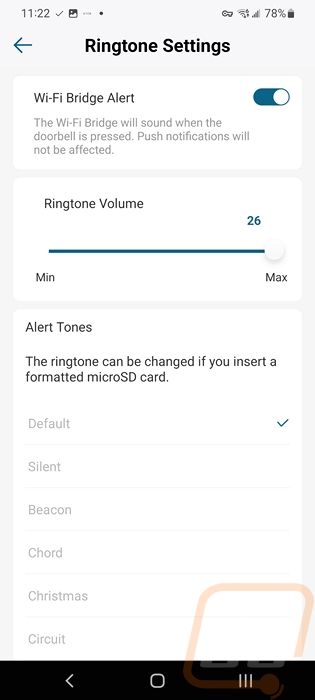
Next up for audio settings, the Video Smart Lock had the ringtone volume setting up top. This is just for the sound that plays on the lock itself, the chime has its own menu options which is where you set the chime volume and the sound it uses. You can change the beep volume for when you press buttons and when it unlocks and locks. Then for voice transmission, there is a volume control as well. Down at the bottom you can turn audio recording on or off which while it works here might be a better option alongside the video recording settings.
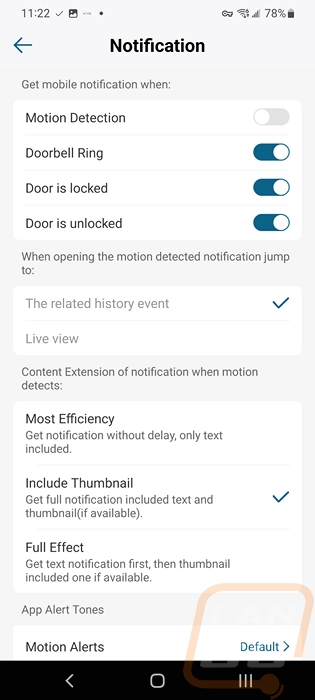
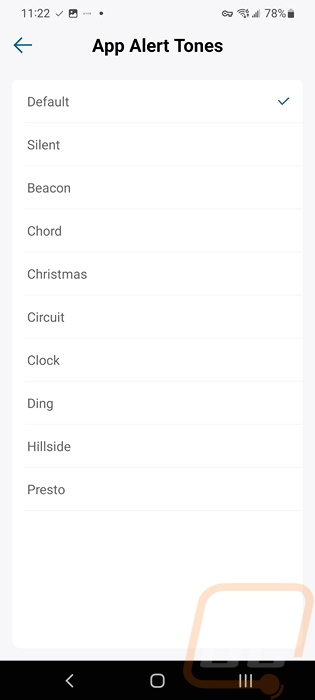
The notifications page is where you set up how you want the app to notify you and what alerts you want or don’t want. You can turn each on and off independently which is nice. Then down at the bottom, you can select how you want the alert. You can pick from fast but only text or you can get a thumbnail. This is one of the areas which eufy has changed recently due to backlash where they now also let you know that turning the option on to get the thumbnail also means that the picture will be saved on the cloud temporarily. That isn’t shown in this picture, but it has been changed on this device. Then at the bottom, you can pick what sound you want when an alert happens.
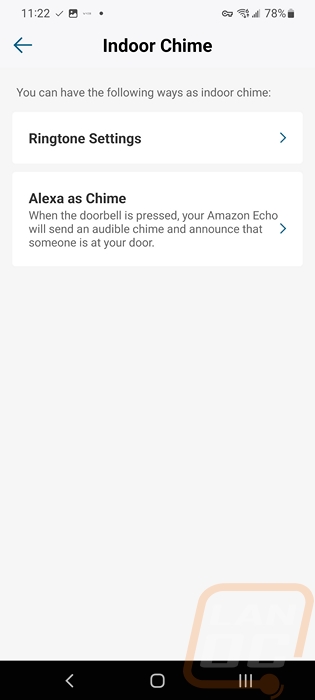
The Indoor chime page is where you can select if you want to use the included chime or set up your Alexa devices to play the sound. I wish there was support for google homes as well, but Google has that locked down to their own doorbells right now sadly. When using the included chime/bridge you can set the volume and pick from a list of alerts that will play on your phone and the chime at the same time.
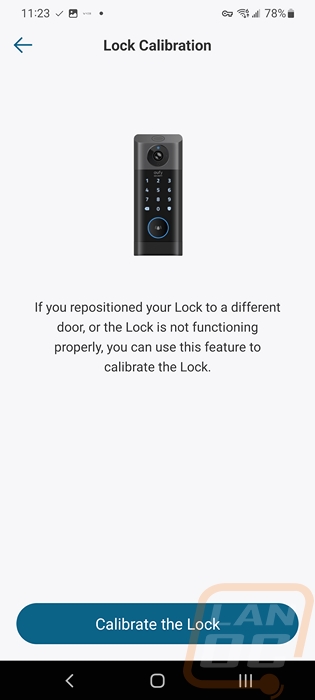
There is a lock calibration page and you do need to do this when you first set the Video Smart Lock up. This will also pop up if you have the auto lock setup and for some reason you don’t have the door closed completely and it hits the frame. Initially, on our setup our hinges were a little bent and when it would get cold the door would be hard to latch and I ran into this.
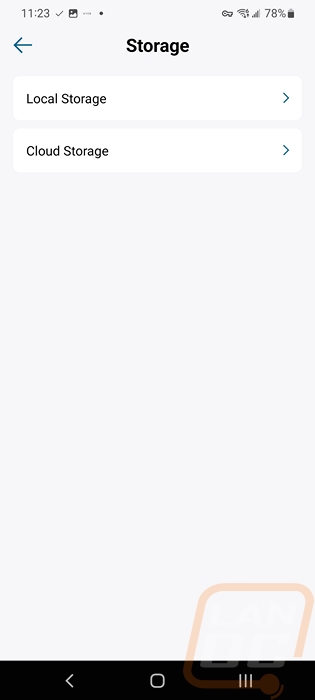
The last menu page is the general settings page. This is where you can rename the lock. You have the storage page which lets you check the status of your storage which as of writing this I only have 3.37 GB of space on our 64GB card used. You can also format and repair the card here. That page also shows the total number of motion alerts and how many days you have had the lock running which for me is 62 days and 1335 motions. The cloud storage option just options up where you can pick and buy a cloud storage option that can cover this one device or up to 10 devices. Given how cheap an SD card is and how much space this has taken up for me over 60 days I don’t think it is needed for the smart lock but if you are running multiple eufy cameras it might be an option for you. Personally not being stored on the cloud is a feature to me. The general menu page also has instructions for installing the lock if you ever need to go back to them and the about page which shows you the firmware version and can check for updates on that.

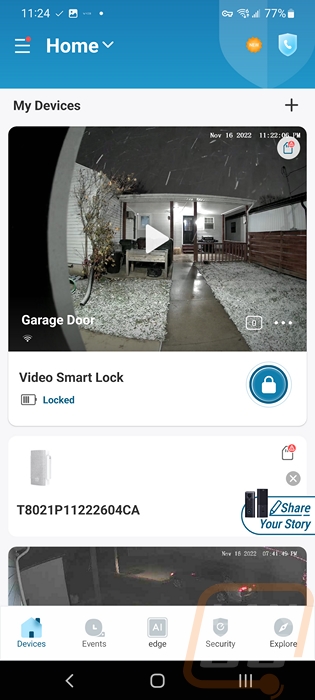
When you open up the eufy security app this is what you will see. You get a somewhat recent image from the device which is normally the last motion it has seen, it is not a live look. You can see the number of events and the three dots open up the settings page from here. Below that you can see the lock status as well as the battery life and you get a quick shortcut to unlocking or locking the lock. Scrolling down you get access to your other eufy security devices and you do have the option to rearrange the order of these which I would recommend pushing the chime down to the bottom to put it out of the way. I do wish you would have the option to shrink these down to half-sized to make it easier to check on multiple cameras.
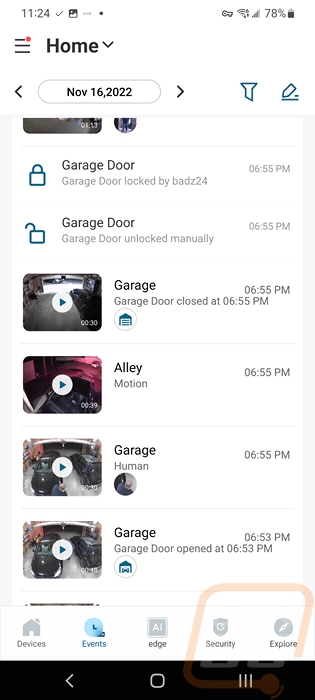
Down on the bottom of the app you have the events tab, this is where you will get any motion or other alerts listed for all eufy devices. The Video Smart Lock not only shows motion alerts but any doorbell rings will be listed here and it shows any time the lock is unlocked or locked. Up top, you can flip from day to day, and clicking on an alert will open it so you can watch it.
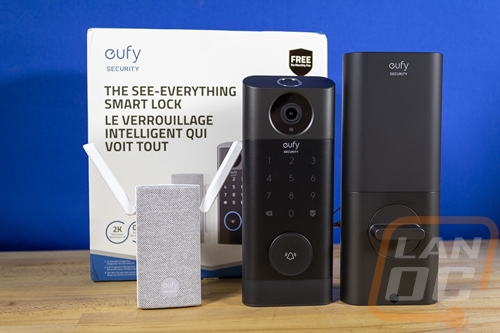
While the software experience plays a big role in the performance of the Video Smart Lock, there is more to keep in mind. Especially with the design combining multiple devices into one like eufy has done with this one. The Video Smart Lock is a doorbell, a camera, and a smart lock. Because of that, we need to look at each of those functions independently to see how well it performed at each function. Starting with the doorbell functionality I should point out that we did put this on our garage not on the front of the house so the doorbell was the one thing that we didn’t need at all. But it did still do the job well when testing it. The big round button is a lot nicer to push than a standard doorbell or video doorbell which don’t have the space needed to support this large of a button. Even with the button though, the first time someone shows up at your house they may miss it, not from any fault of eufys, but most people don’t think to look at the deadbolt for the doorbell. When you ring it both the included chime and my phone rang quickly and eufy offers a variety of custom rings. Like with the Video Doorbell Dual when I reviewed it, I would love to see the option to be able to add our own rings though. Recording our audio and being able to add rings found online could really open up options. Having support to ring to all of your echo devices is nice as well and I hope in the future that Google opens that option up for Google Homes for third-party devices.
Just like with video doorbells, the Video Smart Lock has its own camera which helps pick up motion around your house, check for package deliveries and offer at least some security to package theft, and when you have someone at the door you can see them. Eufy went with the same 2K camera that they have used on multiple other devices and the video performance of the camera was spot-on in all different situations. You have night vision and eufy has done a good job of helping with the night vision bouncing off of your door frame with settings for that. The only downside to the setup is the location and this is the big determining factor on if this setup would work for you. In some areas, especially up north where I am storm doors are common and a lot of storm door options are going to block the view completely or at least partially with the frame and sometimes this is also where the dual windows meet. Even with a thin frame and an all-glass front, you will run into issues with night vision and the glass being dirty. For our house, this would have been a problem, but our front door itself doesn’t have a traditional lock as well. But there are lots of states where a storm door isn’t common and even in areas where they are some people don’t need them because they have a covered porch. So that does eliminate this as an option for some people.
On our garage door, it worked great and I have some example footage and audio in the video below. It is interesting to watch sometimes though because none of my other security cameras mount to something that moves. So you get a view in our garage as my wife goes in and out. On some of the footage, you can see the bit rate affecting the recording quality which is the only quality issue I ran into.
Of course, none of those other features matter if the Video Smart Lock isn’t a good lock. At its core, the lock uses a Schlage SC1 style key which I was excited about potentially rekeying it to match all of our locks. It has a five-pin design which matched our locks as well but I ran into a few issues when I tried to dig in and rekey. For starters, the lock cylinder that eufy is using can’t be removed so you can’t repin it. This is an improvement from past designs which didn’t even use a traditional style key but adding that option would be great. So I attempted to key all of my other locks to match the eufy and I found that the pin locations on their lock didn’t line up with the standard set by the SC1 key. I could fiddle with things and make it work but it would have made some locks finicky so I decided against that and just left the lock key different than everything else. This might not seem like a big issue and for some, it might not be. But if you gave out this key and it was compromised or maybe your keys came up missing you wouldn’t be able to rekey the lock and would have to live with it or replace the entire lock at a significant cost. It's not all bad though, the smart lock functionality does mean you can avoid this happening in a few ways starting by maybe not carrying the real key on you unless this is locked on the only entry door you have (like some apartments).
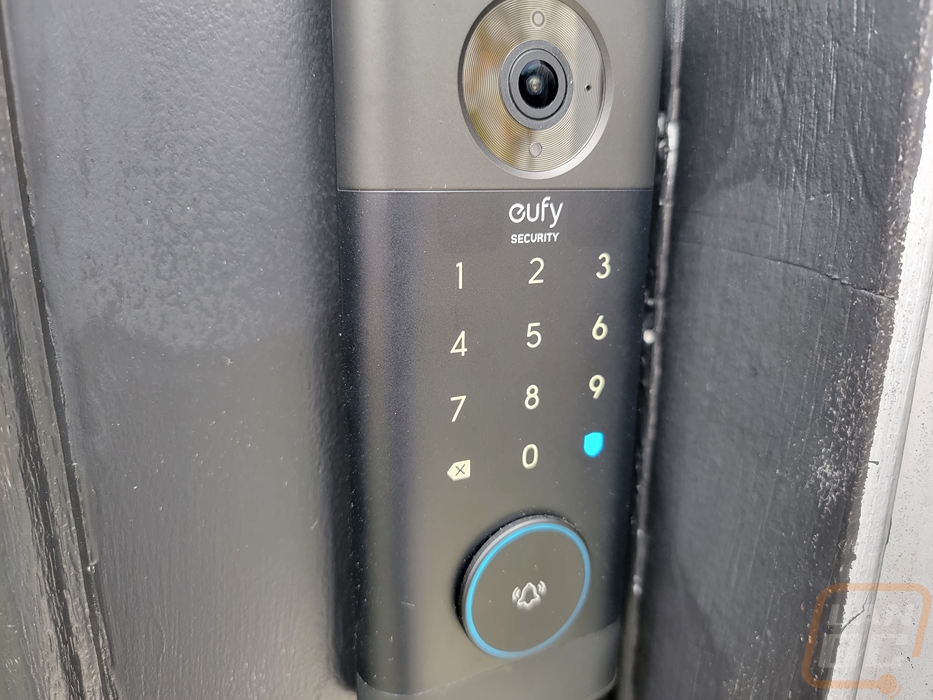
The reason the smart functionality helps so much with this situation is because for yourself you can program a code and also add your fingerprint and use either of those options to get in without the key. On top of that when it comes to visitors you can give them their own code which you can delete later and even do the same with a roommate. Both the touchpad for the code and the fingerprint sensor worked well in a variety of weather. In the snow, I did have to swipe the snow off the sensor before using it and if it was extremely wet I would do the same. But it never printed it from working, it did however slow it down slightly in situations where it had a hard time reading my fingerprint. You can see in the video above however that the fingerprint pickup is extremely fast and most of the time I would have it unlocked before the rest of my body gets to the doorway so there wasn’t any slowdown. In fact, I liked that so much that the keypad hasn’t gotten much use outside of testing it out, and sometimes when we would use the one-second hold on the shield to relock the door but the fingerprint sensor does that quicker as well. I mostly rely on the auto-lock function anyhow but you can see in the video my wife prefers to lock it most of the time.
With the eufy security app it tracks who is coming and going each time, lets you know (if you have notifications on for it) anytime someone unlocks the door manually, and even when it locks itself. So you don’t have to worry too much about it not locking. We did once not have the door latched completely and it tried to lock but hit the frame and even in that situation it lets you know. The only situation you might be caught unaware if the door is completely open and is locked, but you can see that with the camera especially if you have all motion on and it moves around. Because of the larger side of the Video Smart Lock, it has a much larger battery and battery life hasn’t been an issue at all. I did have to charge it once in the 60+ days I have been testing it and that is only because I didn’t give it a full charge when I set it up. Being able to remove the battery and having a type-C connection on it has made that part easy as well. I have a second battery ready to go which will make that even easier when the next time does come up but that will be more than a month away still.
