Photos and Features
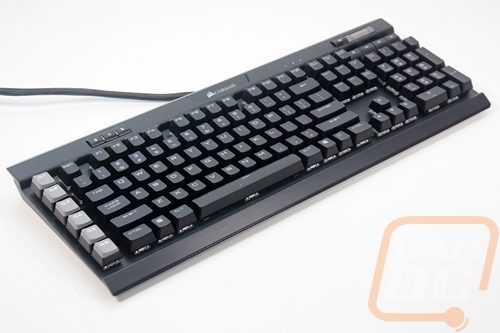
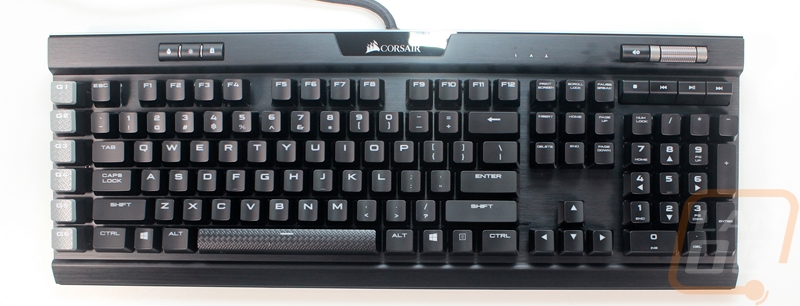
So Corsair came up with a relatively simple design with their original Vengeance keyboards and with just a few changes they have stuck to it. They use a no bezel design that uses the baseplate as the main part of the keyboard. This means the keys and switches sit up above everything else, and it also means less plastic use in the keyboard. The whole board is a thick aluminum panel with bends along the top and bottom. This open design was popularized by Corsair and in recent years a few other keyboards have come out with a similar design. The open design makes it much easier to keep your keyboard clean, all of the crumbs or in my case cat hair that might fall down between the keys are easy to blow out now. With the K95 and the K90 before it, they had an MMO focused design with three groups of 6 macro keys over on the left side of the keyboard. After getting feedback they cut this down to just a single row of 6 macro keys. For some people, this will be a surprise, but most people don’t use Macro keys and those who do can’t reach the far keys when gaming anyhow. Personally, I have always wanted to see someone tuck a row of macro keys in above the number row and below the function keys, this would be easier to reach when your hand is at WASD or QWER.
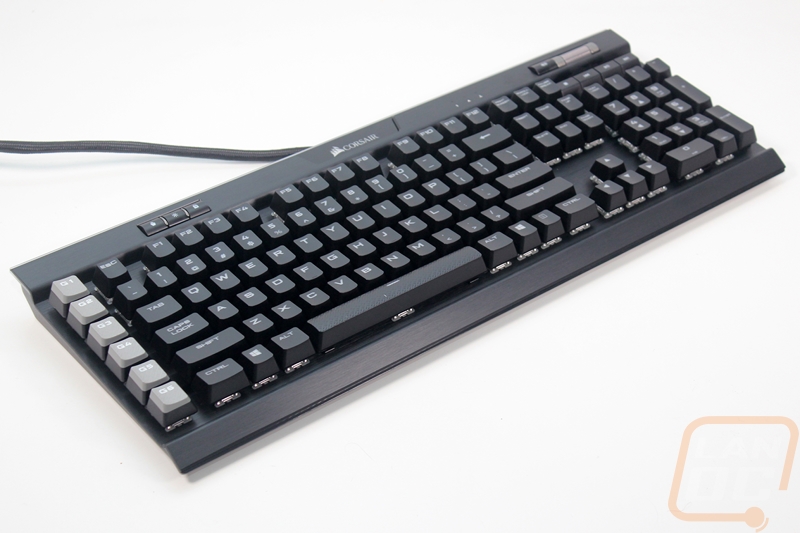
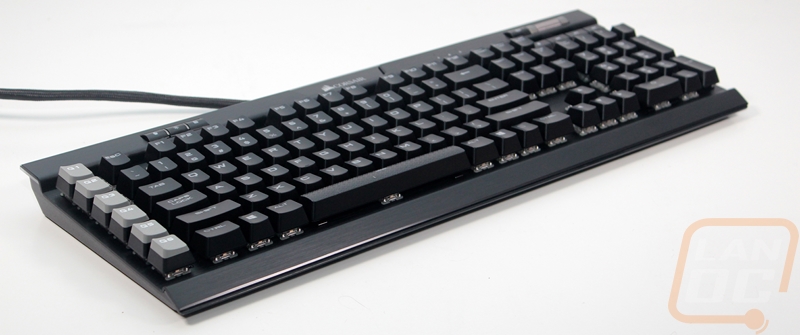
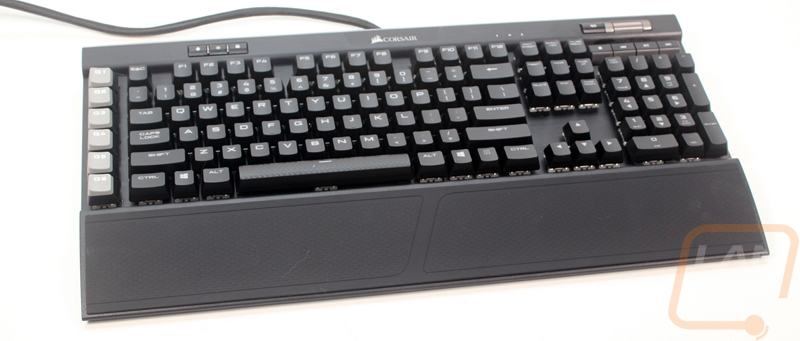
A little bit closer look at the K95 RGB Platinum gives us a better look at the brushed aluminum construction. Unlike the original K90, the K95 has a black finish, but the darker finish does show dust, dirt, and fingerprints even more. The keyboard even had a few oily fingerprints from prior to when I got it, I assume being an early model someone in marketing had boxed or reboxed it. Beyond that, the K95 has a full layout with a number pad, direction pad, and an F key row. The gaps between the number pad, direction pad, and regular keys are slightly smaller than normal but look good. The F key row is even tighter up against the top of the standard keys but all of the smaller gaps help keep the keyboard to an almost standard size. With the Macro keys it is an inch longer than the MasterKeys Pro L that I normally use and even without the wrist rest, it is 1 ¾ inch deeper as well due to the extra space up top and a little down on the bottom edge as well. The font that Corsair went with is a little more “gaming” than I expected. Some of the letters are harder to read, especially for things like the @ symbol. But also Z looks like N sideways, W looks like M, etc. I would prefer it to have a simpler font that fits the somewhat clean look of the keyboard.
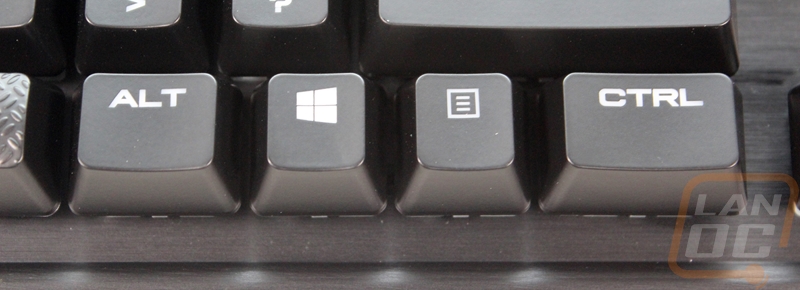
Even though they went with a full layout, Corsair didn’t go with “standard” layout. This means people who want to replace keycaps in the future are going to have issues in one area. The bottom row isn’t standard, they went with larger ALT and CTRL keys and a different sized spacebar. The spacebar also has an interesting texture to it that matches the macro keys and the extra keycaps the keyboard shipped with. Until I get into testing I’m not really sure how well it will work, but check it out. It looks like it is ready to go off-road. I don’t think I’ve ever needed to go off road in my keyboard, but at least the option in there.
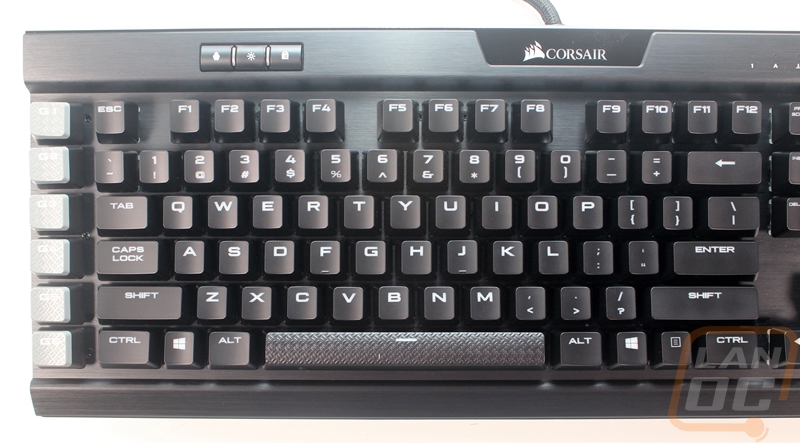
Then over on the left of the keyboard are the G keys or what I call the Macro keys. There is a normal gap between them and the standard keys and they do have that off road texture as well with rubber tops. Each key has an interesting profile that is higher on the left than the right so it is easier to reach them when in game. Now when Corsair introduced the K95 RGB Platinum, I did see some comments in their Youtube video complaining about how they went down from 18 keys to 6. Frankly, a lot of the gaming keyboards have been going away from keys like this all together because a lot of people don’t use them and they make the keyboards bigger. When you have that many on the left, they are impossible to reach as well. I mean you CAN reach them, but you can’t while still keeping your hand on your main game keys like WASD or QWER So cutting down to 6 isn’t a bad idea to still offer a few, but not punish everyone else who doesn’t use them.
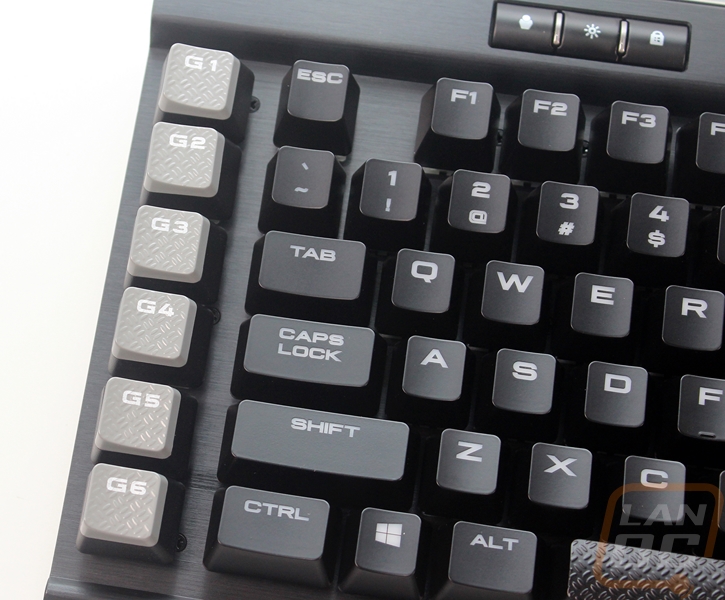
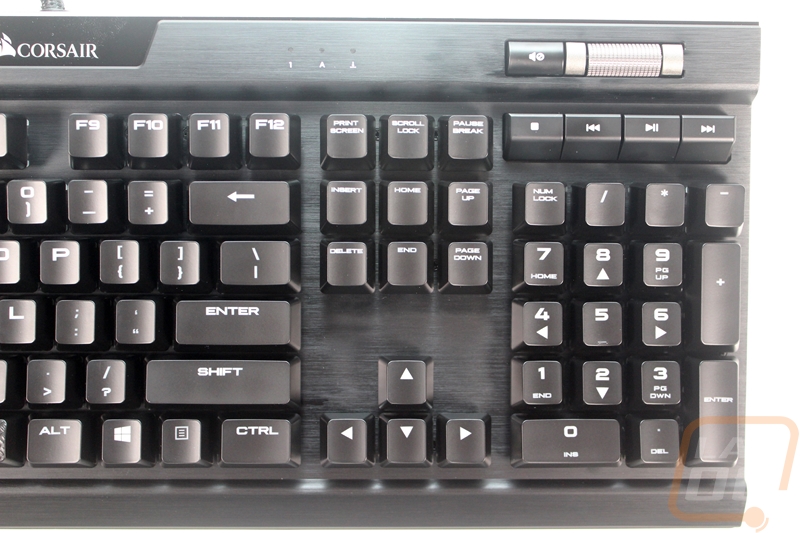
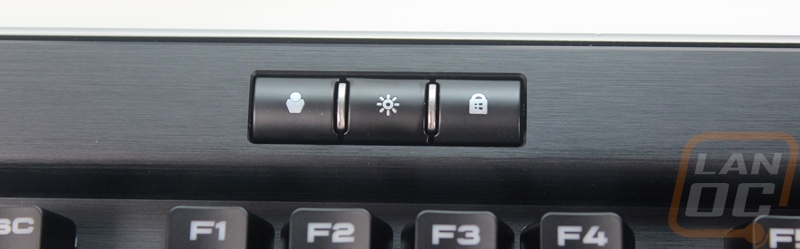
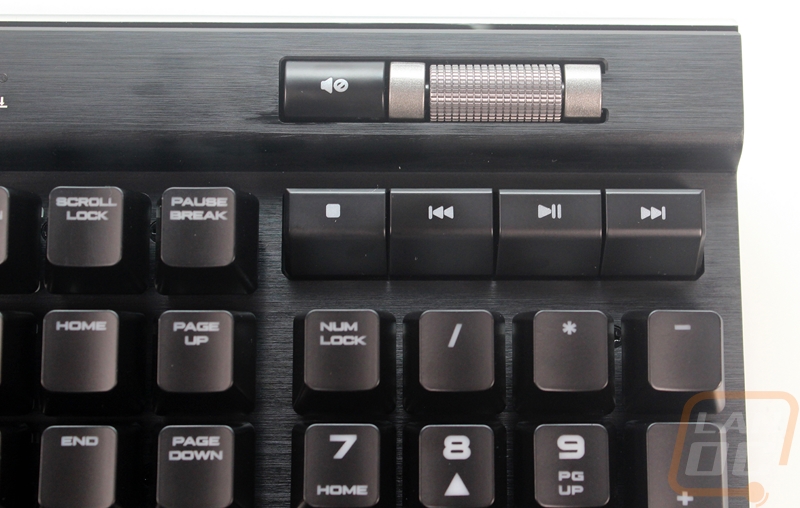
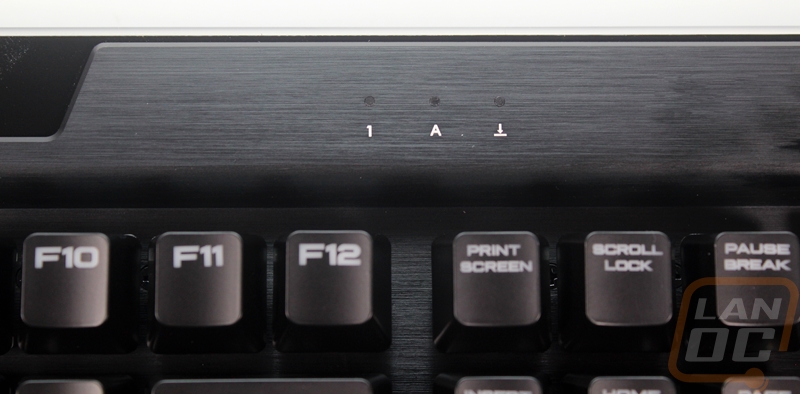
Beyond the standard keys, the K95 does have a few other controls around the keyboard. Well not really around, up on the top edge. They have three non-mechanical keys above the F-keys that let you flip between the multiple profiles, adjust backlight brightness, and also turn on a windows key lock. I like that all three are options but I think I would rather them also be mechanical keys, maybe on the function layer even. That’s coming from someone who hates function layer stuff normally. Then there is a mute button above the number pad as well as media controls for stop, play, skip forward, and skip back. Then you get a really nice all metal knurled scroll wheel for volume control. I’ve always been a big fan of having this type of volume control on the keyboard, it is quick to get at and you don’t have to tab out of game as well. The three lock LEDS that you would normally find above the number pad are over to the left a little, they are small pinhole sides indicators so you can hardly see them when they are off but can see them when you need to see them.
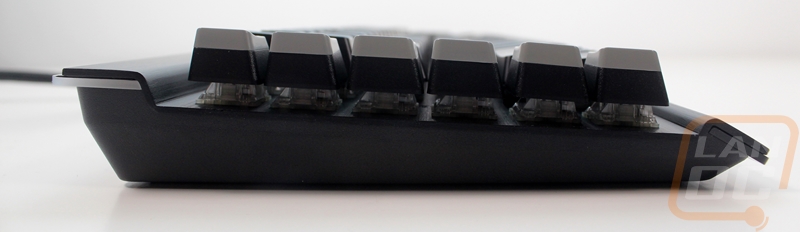
It’s a little hard to see the profile of the K95’s keycaps because the G keys on the left don’t as well but it does have a standard OEM style profile with the exception of the G keys. The view below also gives us a look at the lack of bezels that let you clean the keyboard quickly. It also means you can see the keyswitches from the side. Beyond that there isn’t anything going on with the side of the keyboard, the top metal backplate sticks out past the plastic base and we can see that the RGB strip across the top that was added is about an inch deep up under the backplate.
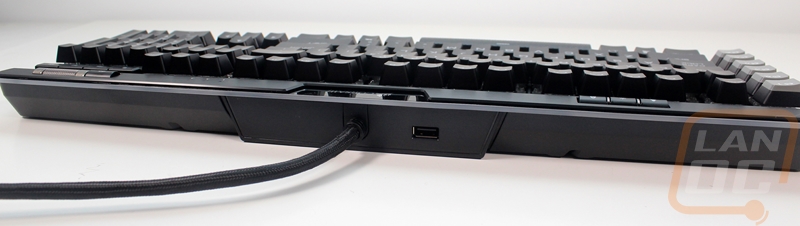
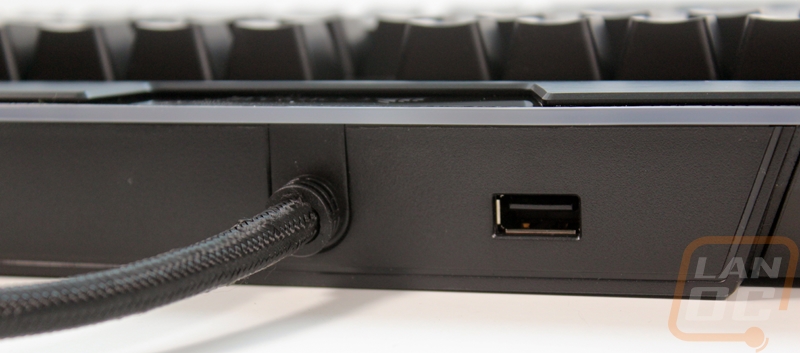
Now along the back edge, there were a few changes, in fact, this is where most of the changes were made from the K95 RGB to the Platinum that I have here today. They brought back the USB pass-through connection that is in the center next to the USB cable. The idea here is you can have a USB connection up on your desk all of the time for anything you need to plug in or if you want to keep your cord short for your mouse or headset. I personally avoid using USB connections on a keyboard unless it is a full pass-through because sometimes the keyboard will fight for bandwidth with your mouse, but in this case it is full pass-through so we are good to go. The USB cable isn’t detachable and because it has two cords in it, it is really thick so keep that in mind. Also added along the back edge here is a new RGB light strip. It has LEDS all the way across it that are individually controlled so it will have a cool lighting effect that will match up with the individually controlled keys.
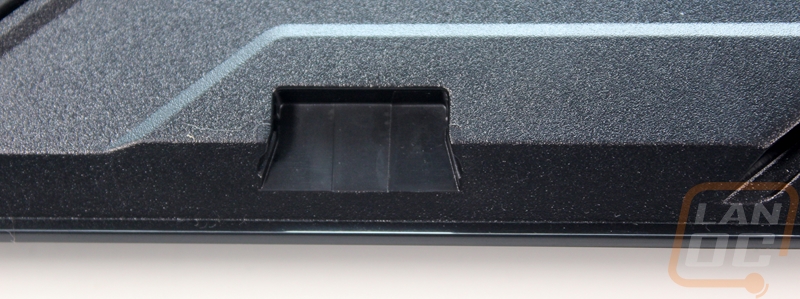
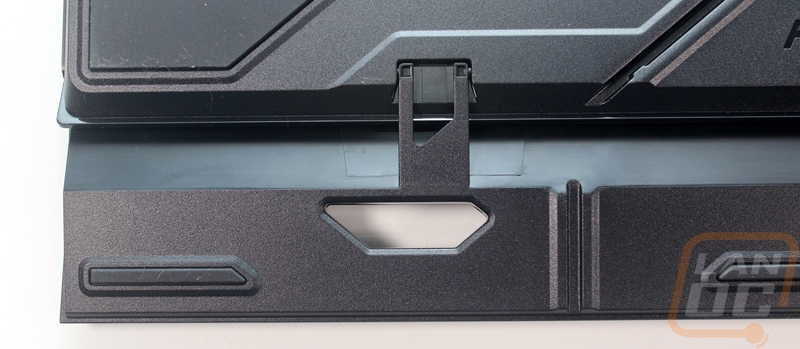
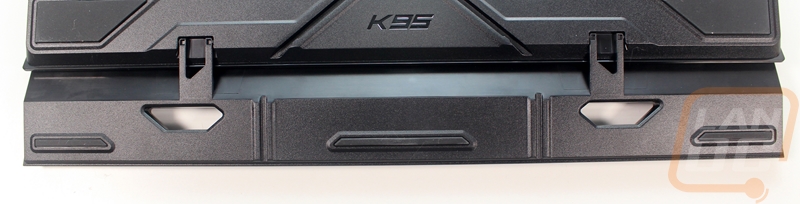
When I flipped the keyboard over I was taken back a little. Honestly, if you took the logos off, I think most people would assume this was the bottom of a Logitech keyboard with its angular styling. In the center is the serial number and all of the normal certifications. Then there is a big X shape across the bottom. This isn’t for the keyboard's cord, it comes out the back. This is for when you use the UBS pass-through connection, you can run a headphone cord under your keyboard. It has hooks all along it to keep the cord in place but the wrist rest that isn't pictured here doesn’t have matching hooks. For feet there are four really large rubber contact areas, I don’t think this thing is going to be moving around much. In the top pads, it also has a smaller flip out feet to angle the keyboard, they also have rubber on the ends, but you will, of course, lose some traction.
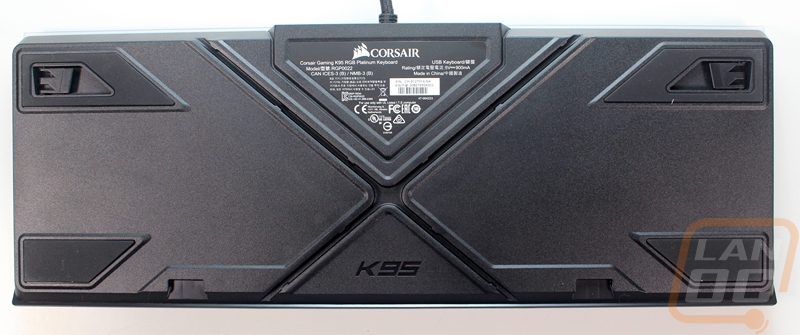
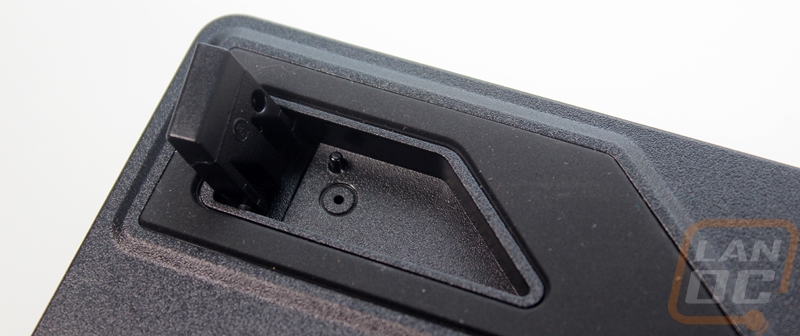
While also looking at the underside of the keyboard we can get a good look at how the included wrist rest attaches at all. I’ve seen companies try just about everything all the way to even using magnets but Corsair kept it old school with a plastic clip that latches into two spots on the bottom of the K95. You might remember this type of clip design because they almost always break, so that was a bummer. As long as you don’t remove them or transport it around with the rest attached you should be fine, but honestly, I would have liked to see a better design here.
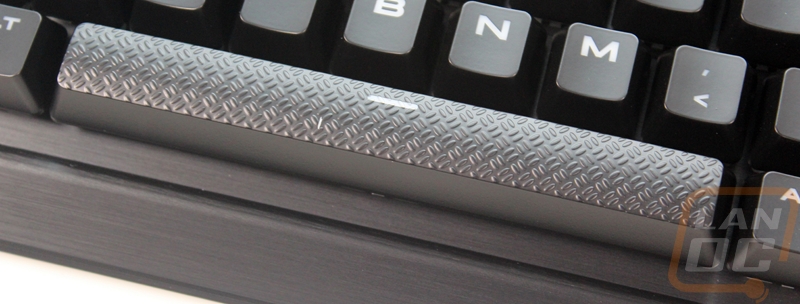
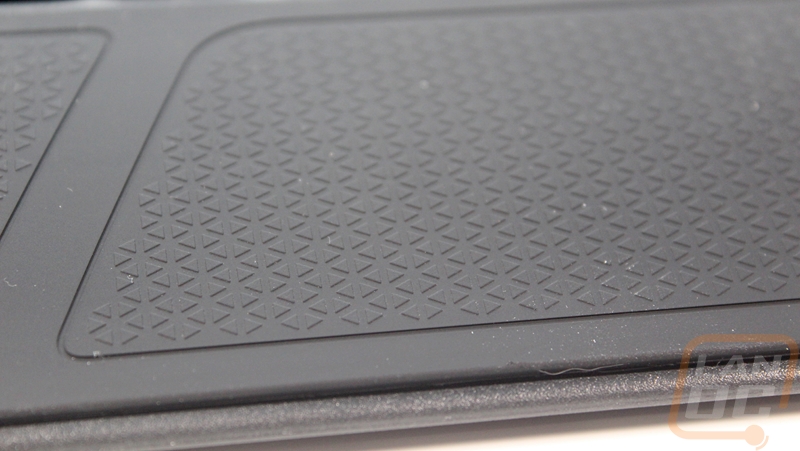
With the wrist rest attached, we finally have a full view of the whole keyboard and man is it big with the rest on there. I like a nice wrist rest but a lot of the built-in designs end up being uncomfortable. For the K95 though they have a really nice rubber finish across the top. It is actually removable and held in place by magnets. Even better, once you pull it off you can flip it over to pick between two finishes. One has a diamond shape cut in it and the other has small dots.
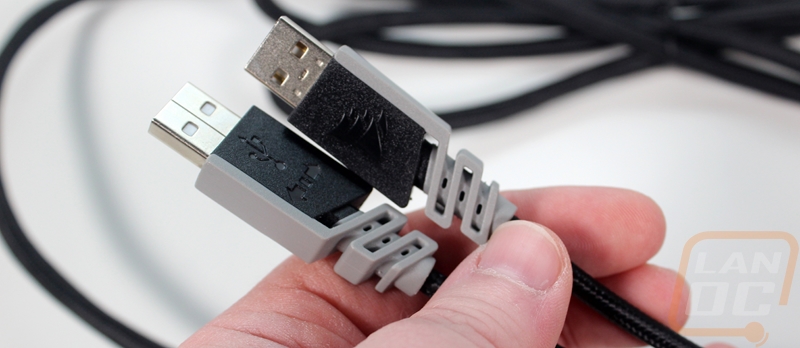
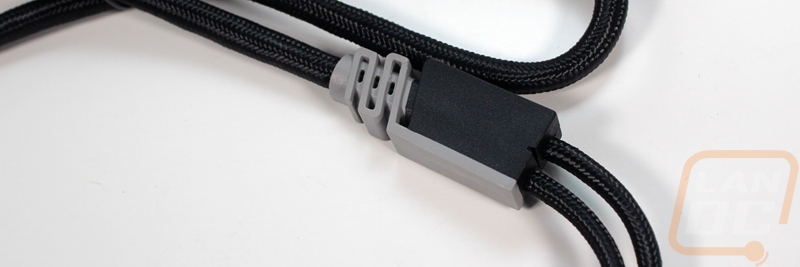
I mentioned before that the cord is a little thick due to the pass-through USB connection. Well at the end of the sleeved cord Corsair does have a plastic box where they split the connection back down into two cables. Both of the USB connections have a very unique design that integrates a strong cable protector to prevent binding. The connections do fit next to each other and really you only need to hook one up unless you are using the USB plug on the keyboard.
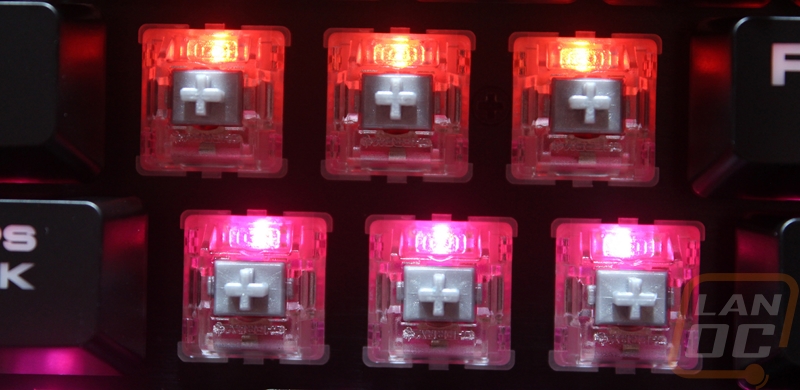
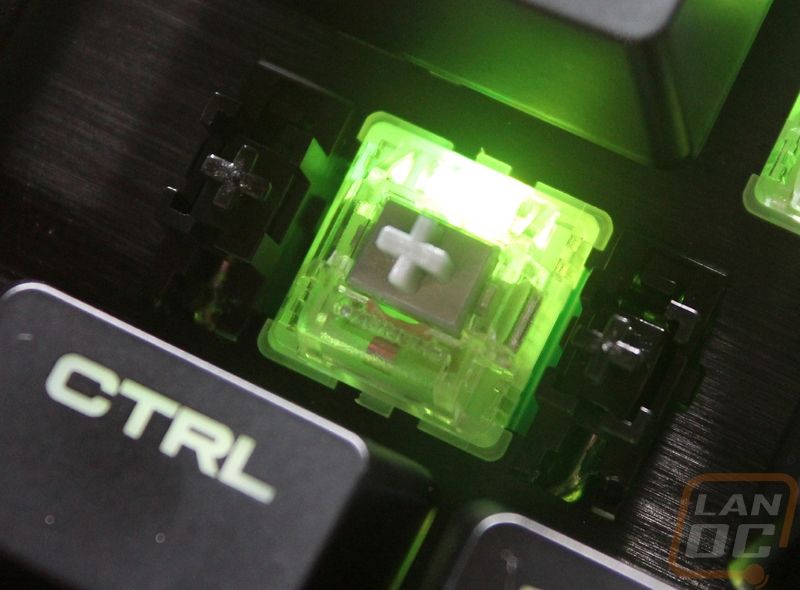
So my pictures of the keyswitches ended up being a lot more colorful than normal. My original photos were corrupted, so I had to snap new pictures with the lighting on It does give us a great look at how the Cherry switches work for lighting, though. There are on PCB LEDs up under the switches and then the switches have a transparent housing lets the light through and all around your key for the best lighting. For switches the K96 RGB Platinum has two options, you can get browns (my preferred switch type) and you can get the new Cherry MX Speed that has a gray stem. Well, our sample has the new speed switches so it gives me the chance to check out an all new switch type. They have a 1.2mm actuation distance meaning the key will register closer to the top, so when you press the key it should be quicker. They are linear like a Cherry red and make sure to check in the performance section to see what I thought of them. For stabilizers they stuck with Cherry as well, this means the stabilizers are run under the PCB and you don’t have to fight with those metal clips on your wide keys if you change the keycaps or clean your keyboard. Of course with the non-standard bottom row don’t plan on getting new caps.