Noise Testing and Fitment
Before diving into testing I did need to get the ML280 Mirror installed on to our test system. This ends up being easy if you are doing this on a new build because Cooler Master decided to go with the stock AMD mounting strap design. Corsair has also been doing the same on their coolers as well. So there aren’t any brackets to install on the motherboard. If you are installing on AMD like I was, you just need to mount the two brackets to the pump, put thermal paste on the CPU, then strap things down. From there you install your radiator and fan assembly with the 8 included screws and you are good to go. In the picture below you can see the C shaped hold-down bracket. This has a hook with a thumbscrew on the end, this is what hooks on to the stock AMD bracket.
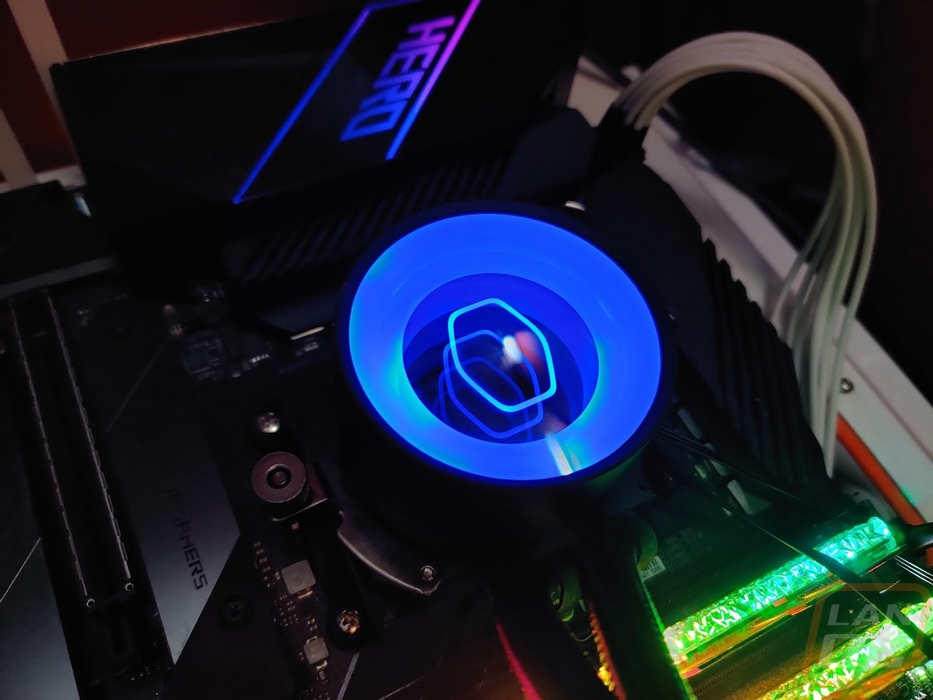
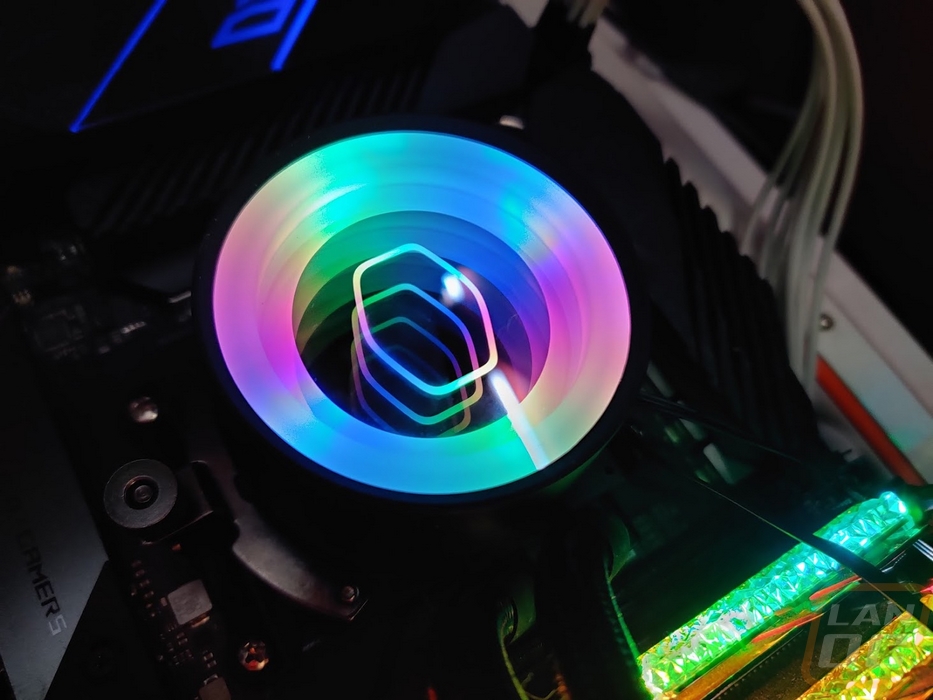
While we are here, we can also take a look at the mirror design as well as the addressable RGB lighting. The design has dual mirrors to give an infinity mirror look, so when looking down on it you can see everything repeated forever. They did put a Cooler Master logo in the center, but it is the simpler design with just the outside ring in the CM shape with no words which I like. Then the outside has the rest of the lighting. The included controller lets you pick from a few basic colors or this one full RGB effect. Hooking into your motherboards software is your best bet. That will get you a lot more control and more effects if you want them.
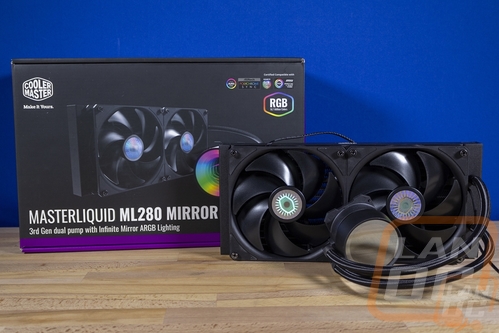
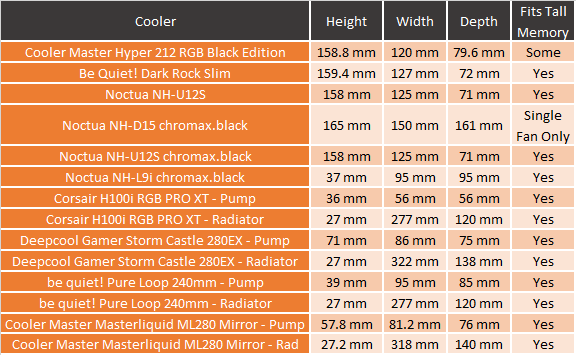
As for fitment, which I look at with all heatsinks and coolers. The ML280 of course doesn’t have any trouble with tall memory because the only thing nearby is the pump. The pump is taller, but not tall enough to be an issue. For comparison, the Gamer Storm 280EX was 71mm tall compared to the 57.8mm of the ML280. Cooler Master has multiple radiator size options available when it comes to the Master Liquid Mirror as well. I am testing with the 280mm which is a dual 140mm fan design, but they do also have a 240mm with two 120mm fans and a 360mm with three 120mm fans.
To start my performance testing off I did take a look at the overall noise performance of the all in one cooler. To do this I set our decibel meter up 18 inches away and ran three different tests. I tested with the fans and pump running at 50% and 100% fan speeds to get an idea of the noise range. Then I warmed things up using AIDA64’s CPU Stress Test for a half hour and measured the noise levels. At 50% fan and pump speed, it did better than I expected, coming in a touch below the Pure Loop, Gamer Storm Castle, and H100i RGB Pro XT. The same goes for at 100% fan speed, this was due in part because of the 140mm fans not needing to spin as fast. The SickleFlow fans only max out at 1400 RPM. But interesting enough, the last test and the most important were the under load results and the ML280 Mirror was louder than the Pure Loop and the Castle at 36.5 decibels which was still quieter than the Corsair H100i RGB Pro XT.