Software and Performance
For me, the overall software experience plays a huge role in my experience with a product like an access point. Raw performance is obviously very important as well, but that will depend on other aspects on top of the AP itself. So first off I want to check out what EnGenius has going for the EWS377-FIT and that gives us a good look at the overall experience for the entire Fit lineup. To complicate things, there is a lot of software to check out. There is the cloud-based website and the cloud-based phone app, then the FitController which hosts its own software entirely on your own network to keep things off the cloud, and then lastly there is also a web interface on the EWS377-FIT itself. Let’s start things off with the EWS377-FIT web interface to get it out of the way, then we can split up the cloud and on-site experiences. Because there is so much to look at I won’t be diving in to talk about every single feature, but the overall experience of each. I do have most of the main things in the photos which there are a LOT of.
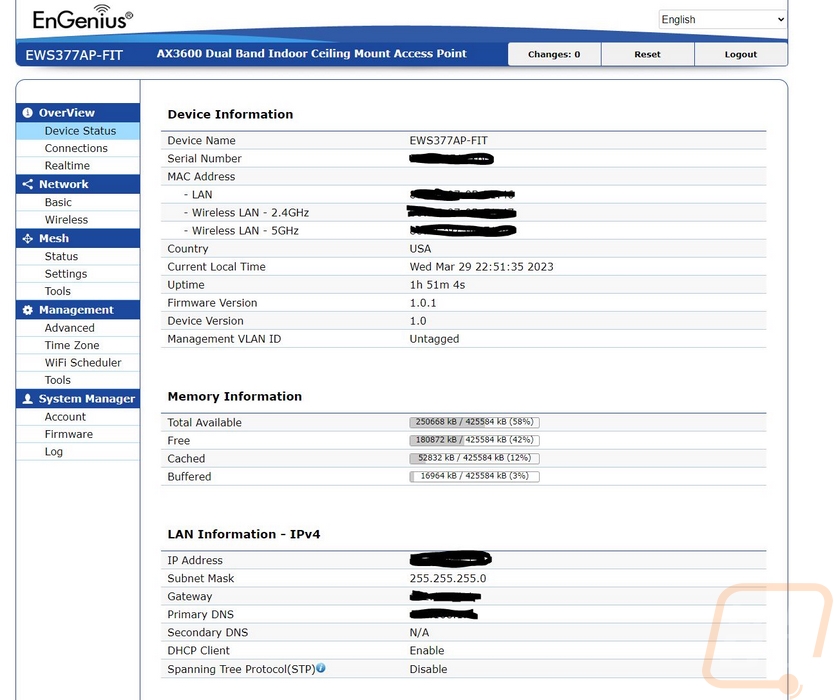
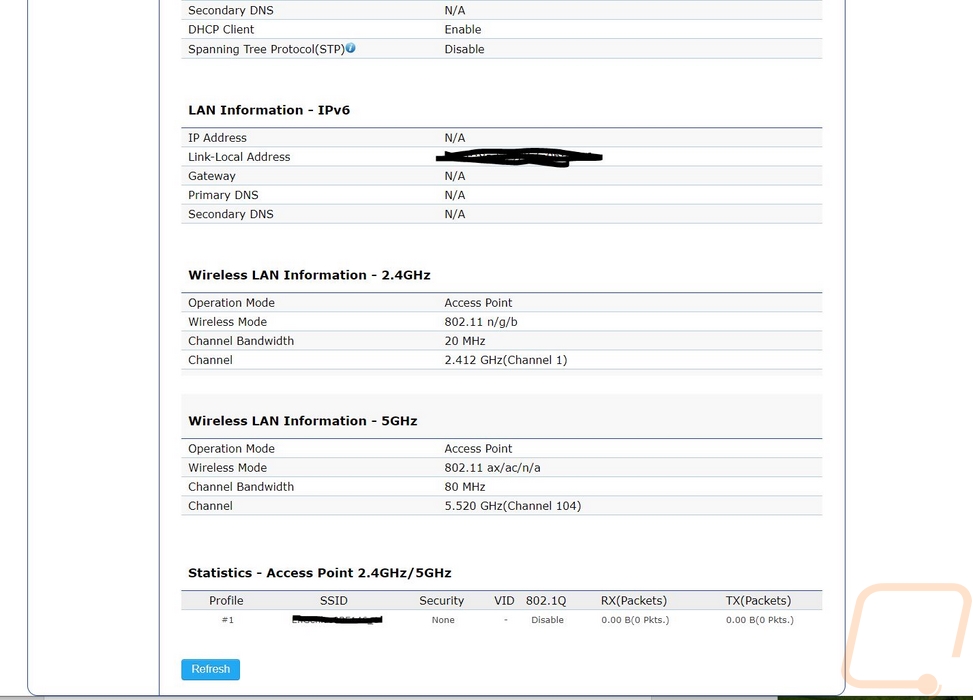
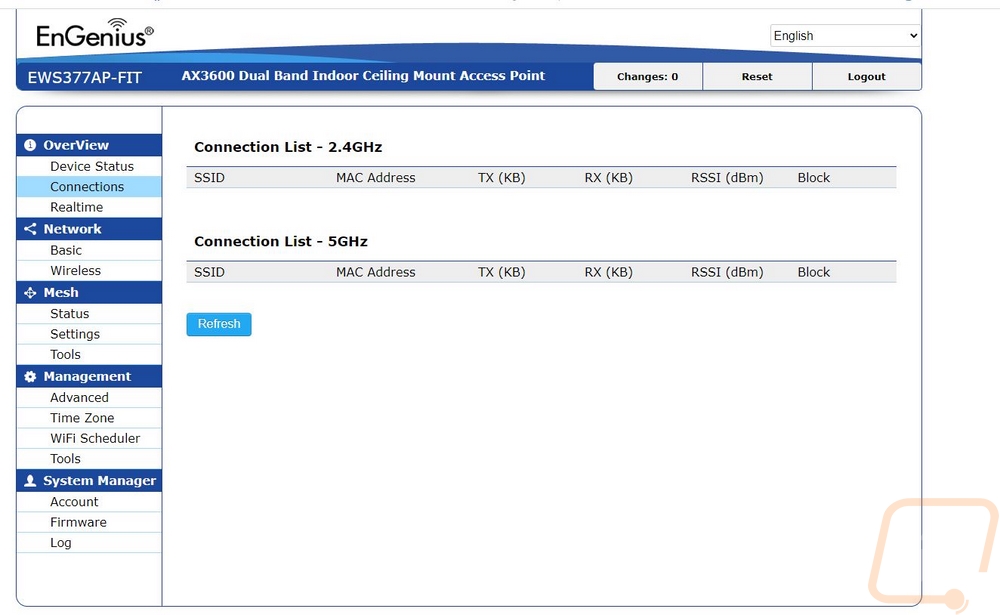
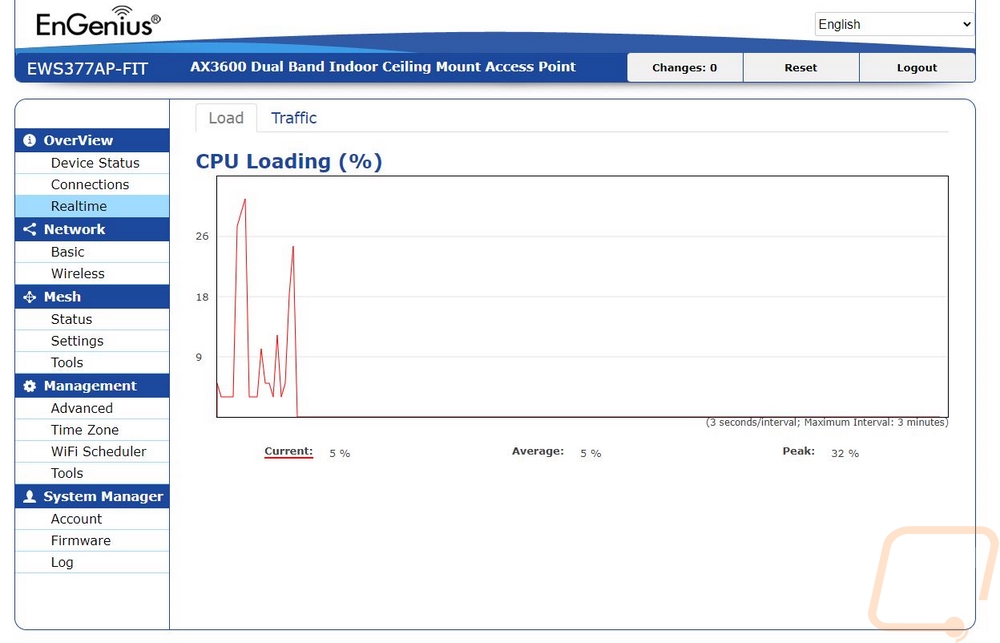
Interestingly enough, with the talk of the cloud software and the FitController. If you are running just one access point and you don’t need access remotely you can just use the web interface on the EWS377-FIT which is surprisingly complete. The other options come into place for looking at performance, clients logged in, and controlling more than one device easily. The web interface on the other hand feels old school with a simple interface with pages listed on the left and a bright white background. The landing page gets you device and LAN information as well as your current memory usage. You can also see what each frequency is doing and all of your SSIDs. In the overview section you can also get a list of connections on each frequency and real-time graphs for CPU load and traffic which can help get an idea of how loaded an access point is if you are using this with a lot of devices.
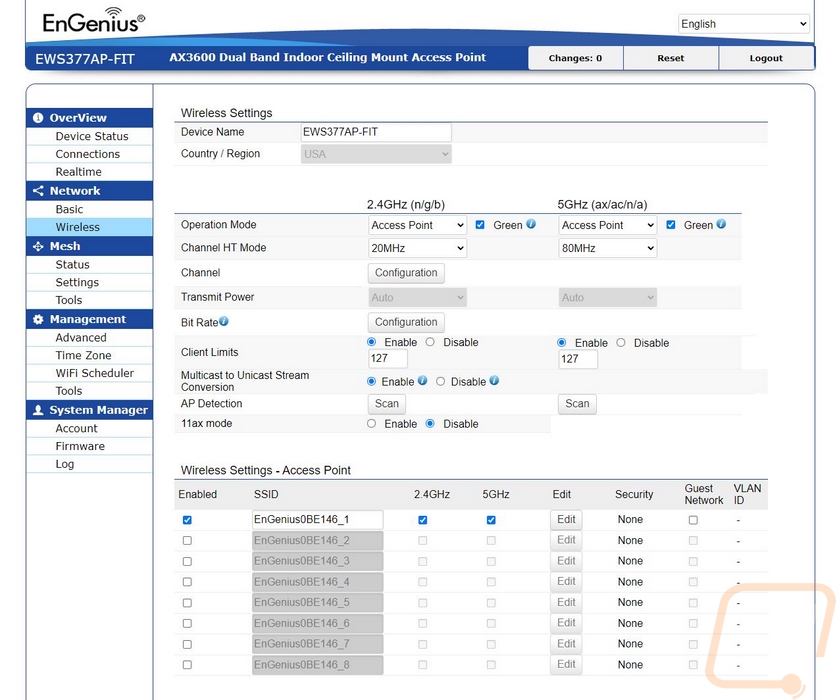
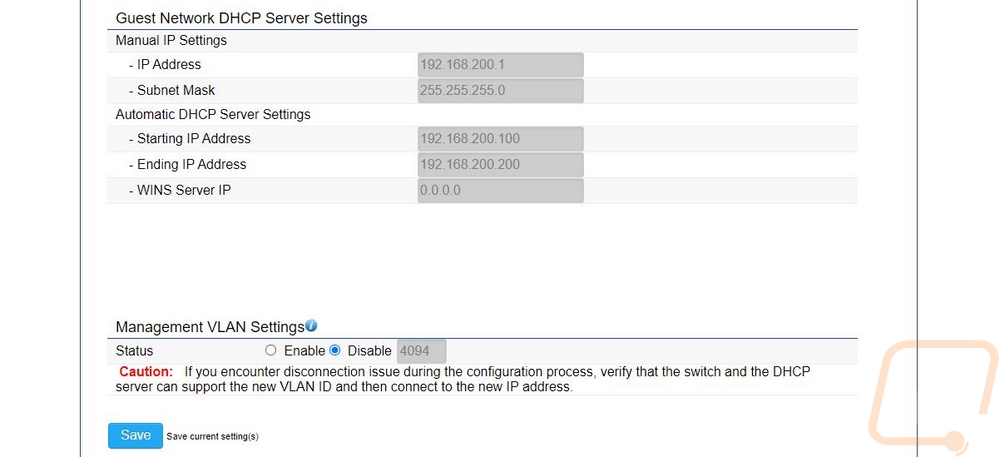
The network pages are where you can set up how the EWS377-FIT handles its wired connection which by default is DHCP. You can also set up your wireless settings and see how each frequency is handled. This includes setting up each of your SSIDs and their security as well as how DHCP is handled for everything as well.

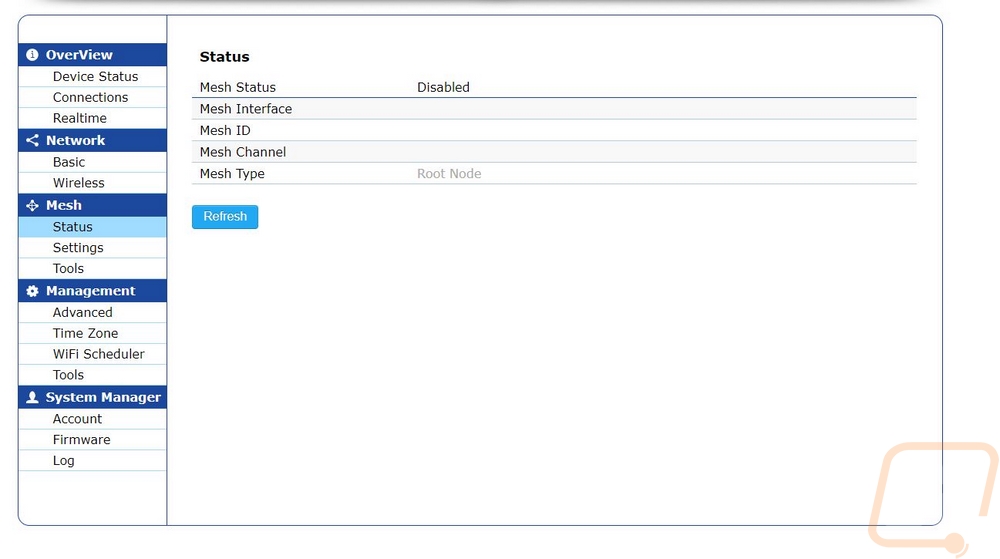
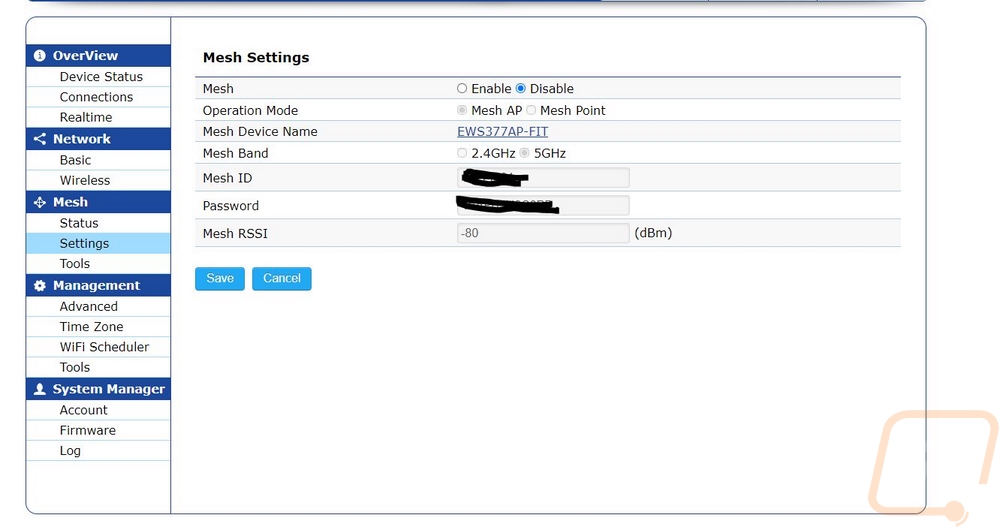
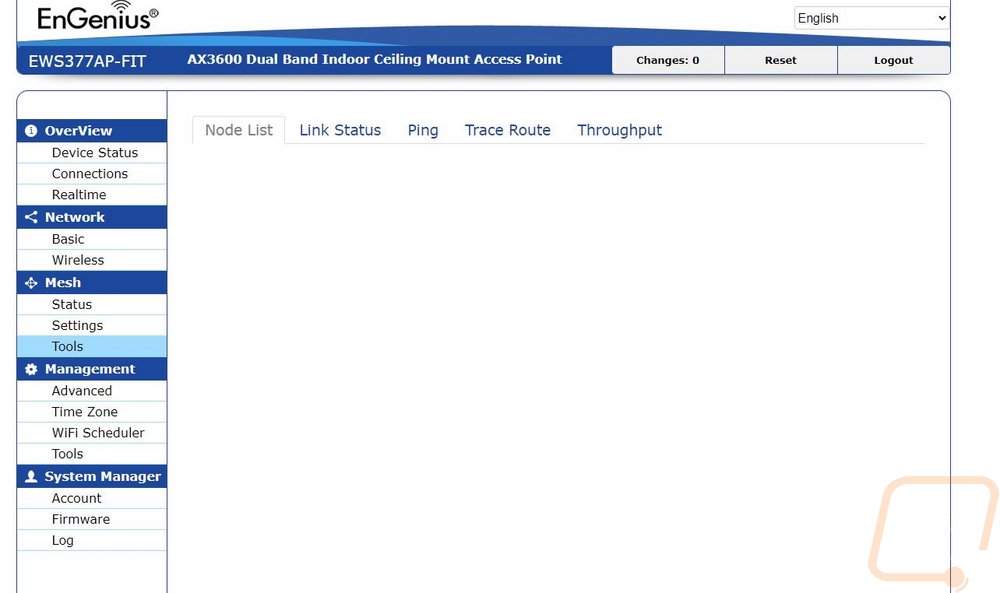
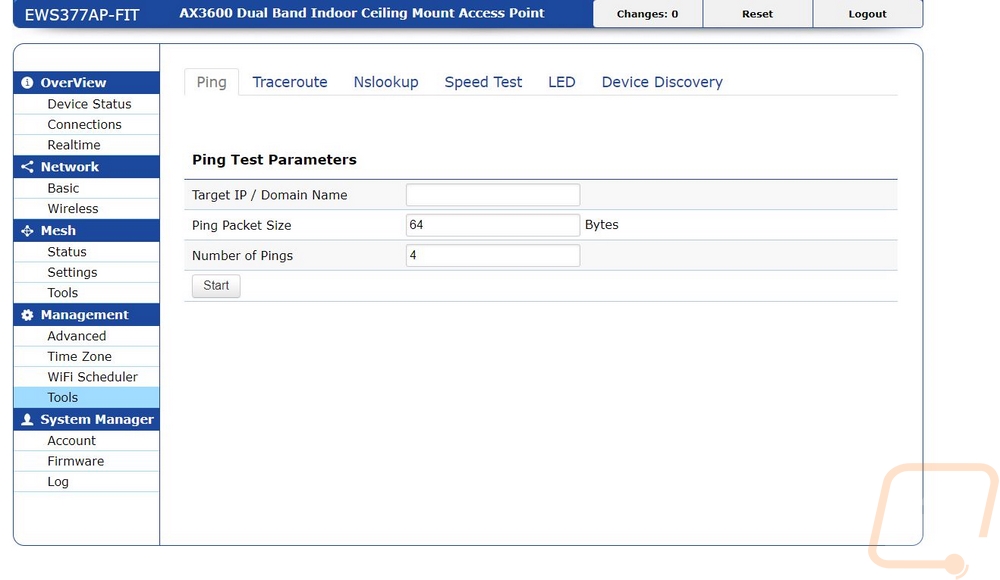
The mesh section is exactly what you would think it is. This is all of the settings for setting up a mesh network except for the main settings on the radio page to turn it on. It also has a page full of tools for diagnosing issues which help even with non-mesh related issues.
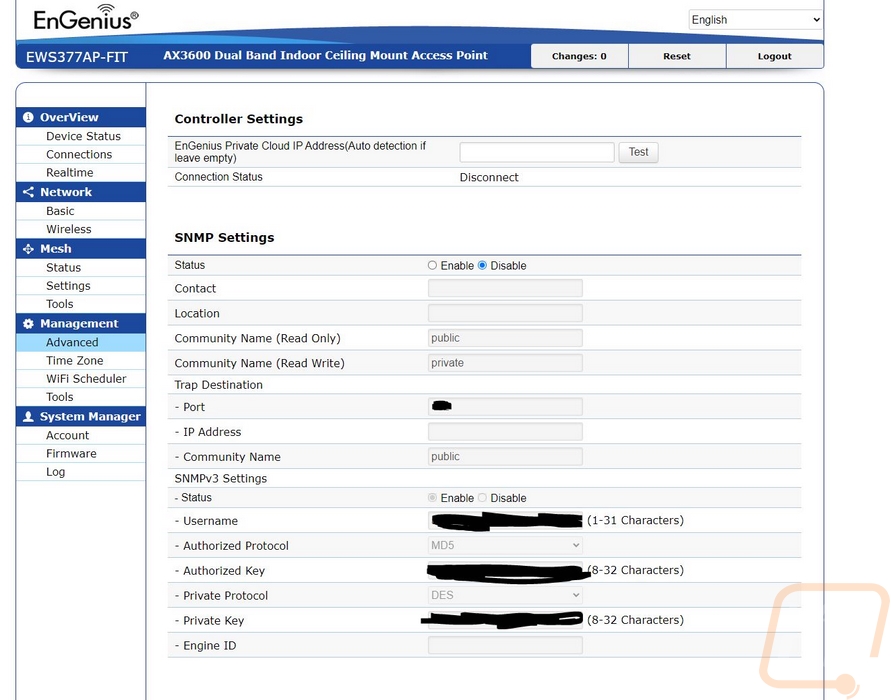
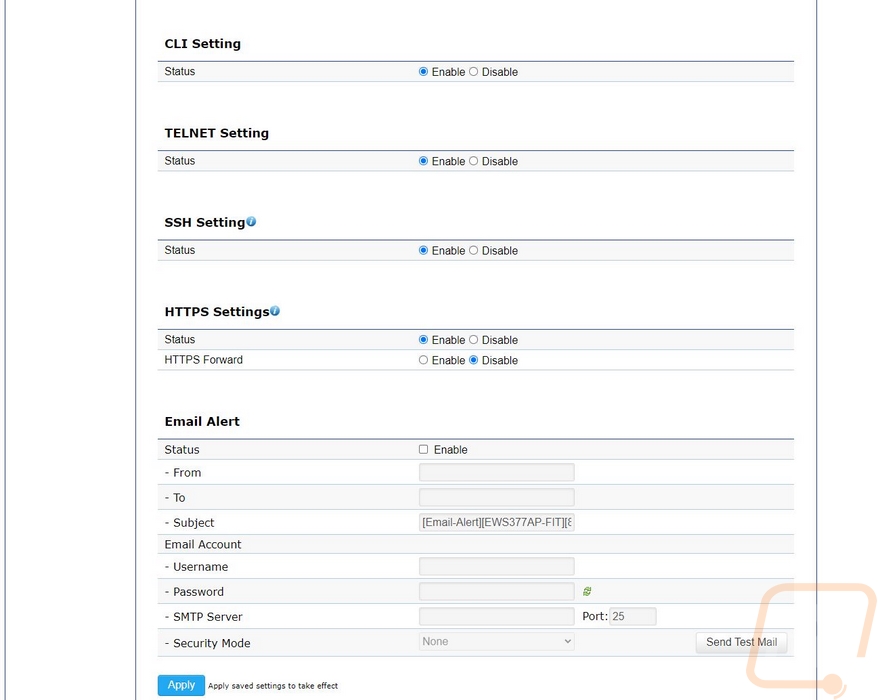
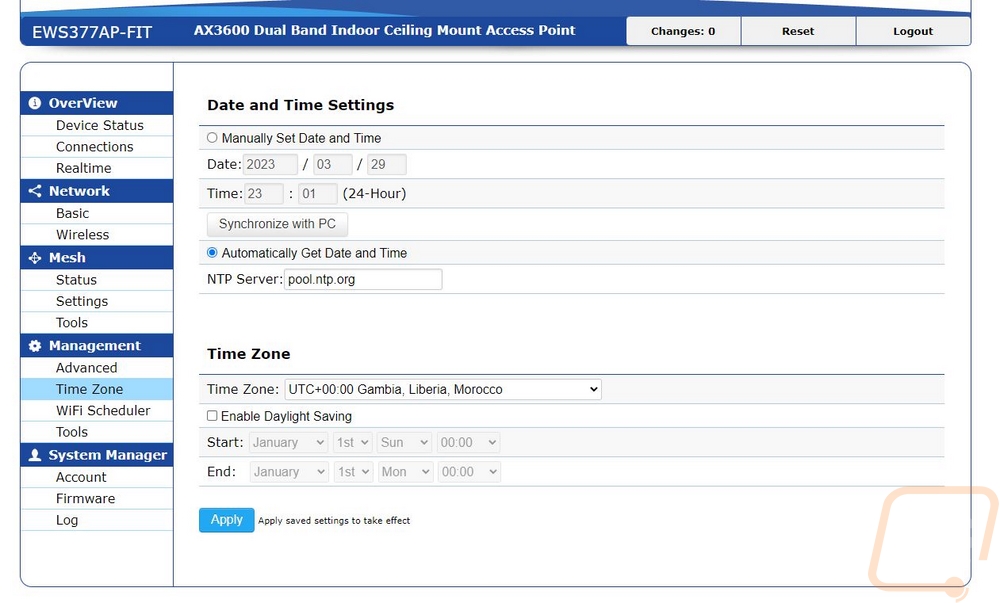
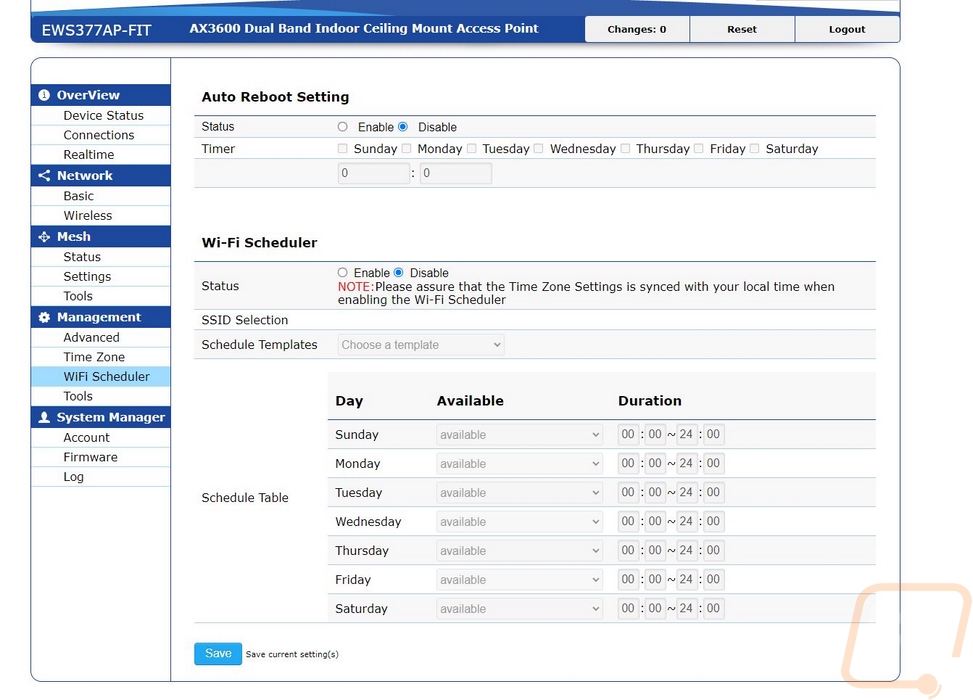
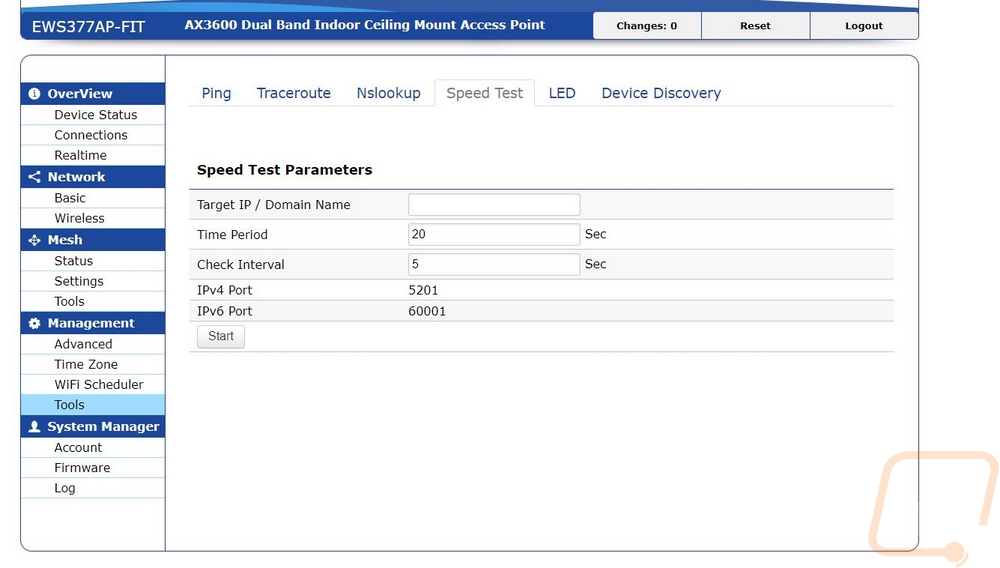
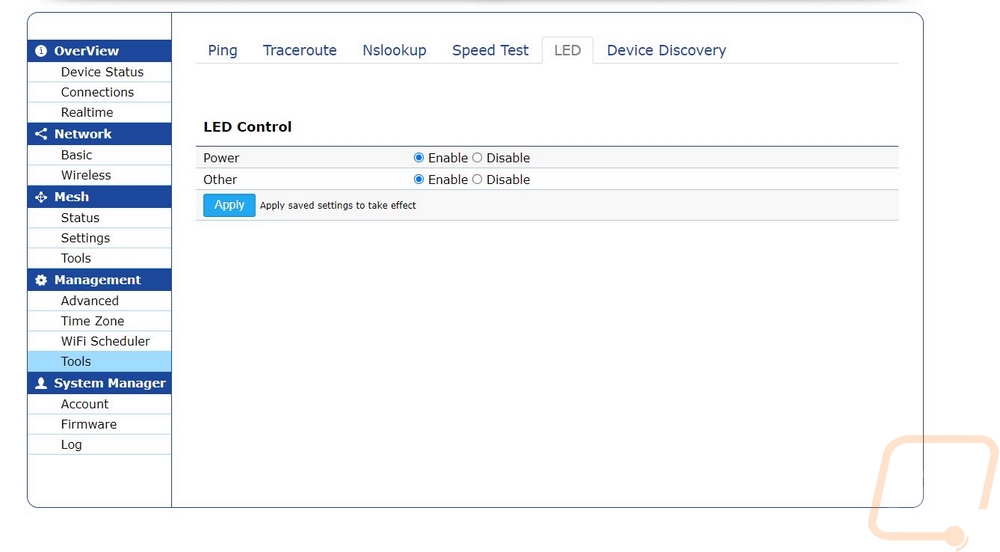
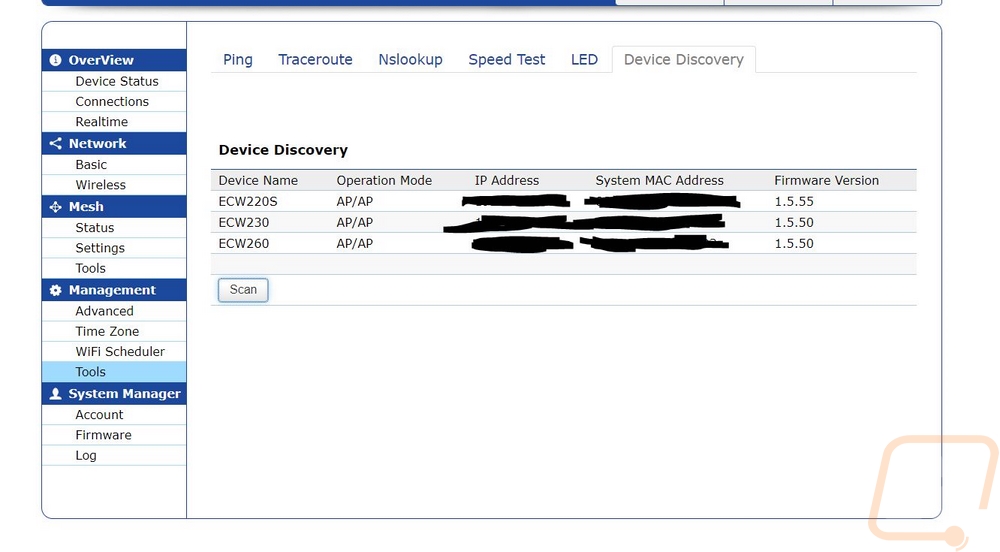
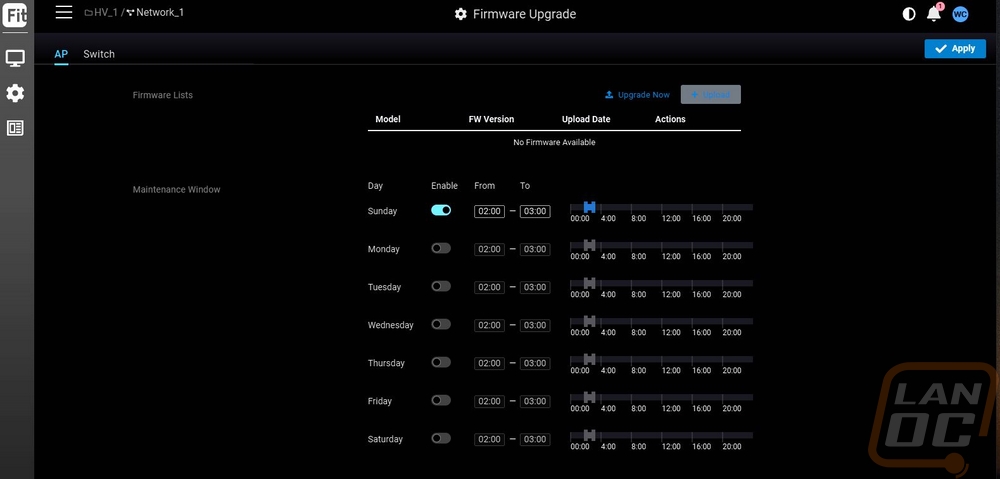
The management pages dive into SNMP settings, SSH, email notifications, and even date and time settings. You also have auto reboot scheduling that you can set up and a schedule to turn SSIDs on and off. That can be really helpful for businesses that close and you don’t want to leave wireless on to risk someone getting access while you are away and for home users, it can be a good way to help control family device usage. The management pages also have a whole list of diagnostic tools including being able to turn LEDs on and off and helping find other EnGenius devices. While Fit and the standard EnGenius products don’t work together, they do still get picked up when it scans for them which is interesting.
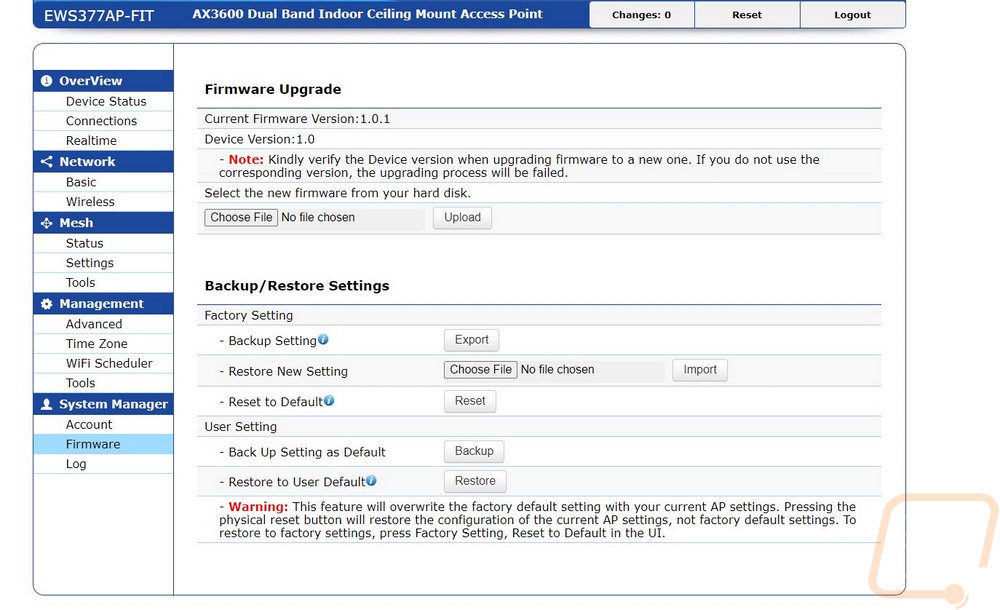
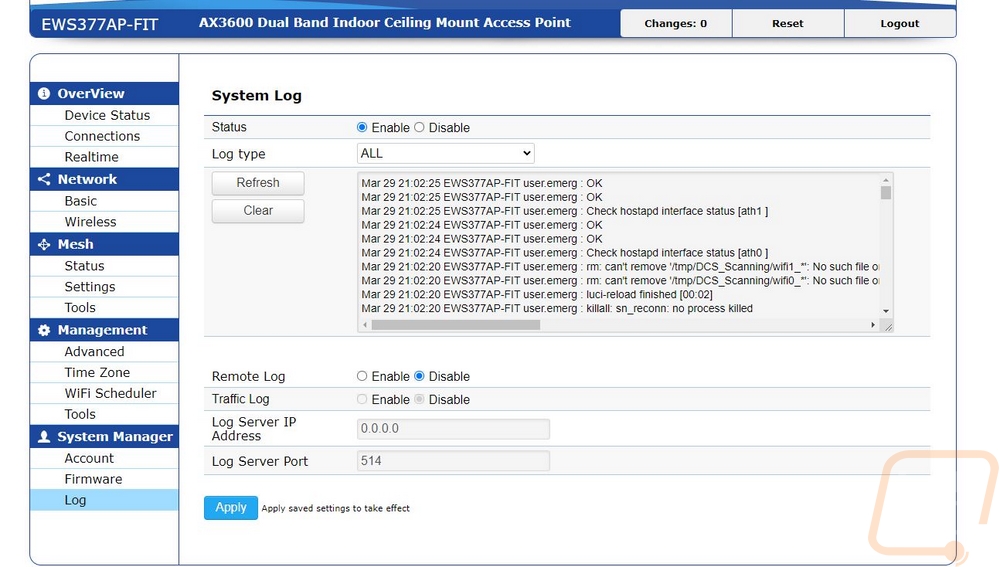
Then the last section is the system manager section. This is where you can do firmware upgrades and backup and restore settings as well as resetting things to default. You also have your logs here as well.
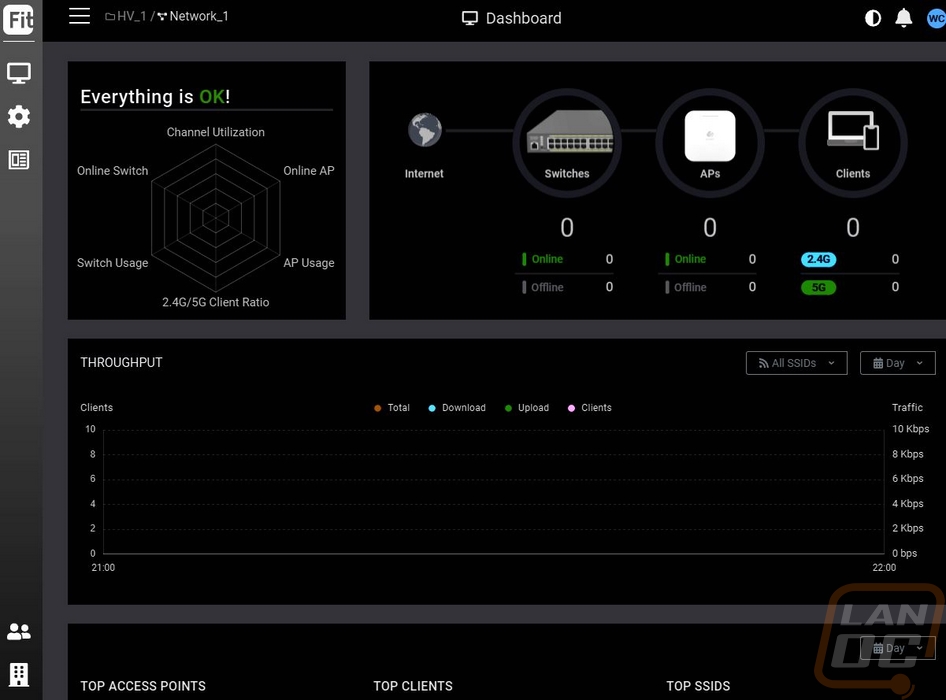
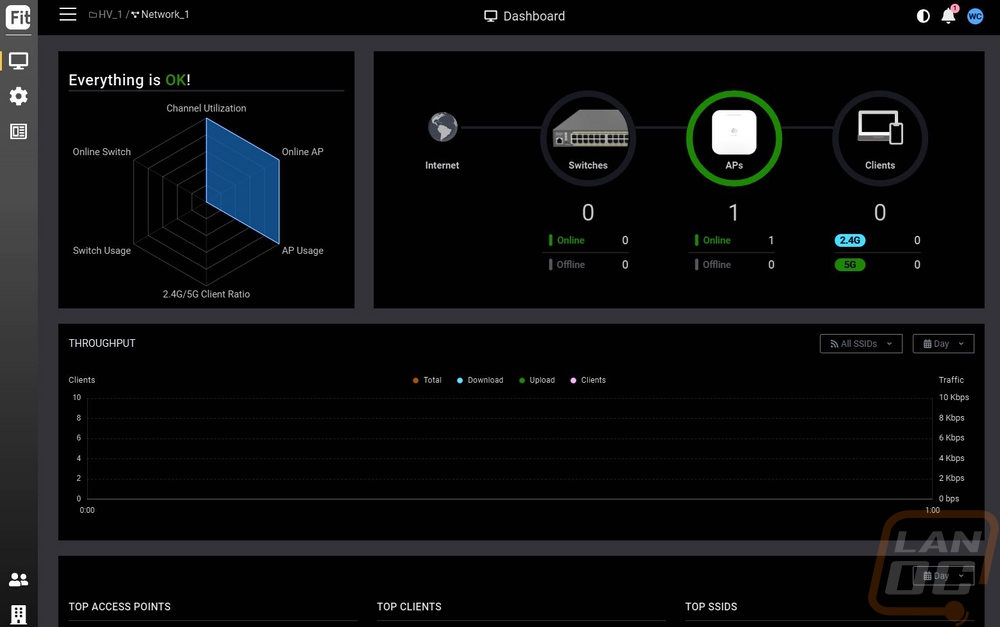
Hooking the EWS377-Fit up and pairing it up with the FitController is a second option if you are looking to keep all of the control on-site and avoid any cloud connections. The difference here though is the FitController is running your on-site cloud whereas connecting to the EWS377-Fit for its onboard interface only lets you control just the one AP. The FitController can control all of your EnGenius Fit devices all through one interface. I was surprised when I set this one up because the web interface for the FitController is a 1 for 1 replica of the EnGenius main lineup’s cloud interface. The main landing page gives you status updates for all of the Fit devices connected including the number of switches, APs, and clients online. Below that you have graphs for throughput which can show traffic by the house, days, etc and you can split it up by SSID as well. The home page also lists out the top used access points, top clients, and top SSIDs which can help in pinpointing issues where one person or AP is being hit too hard. Then on the far left the menu pops out.
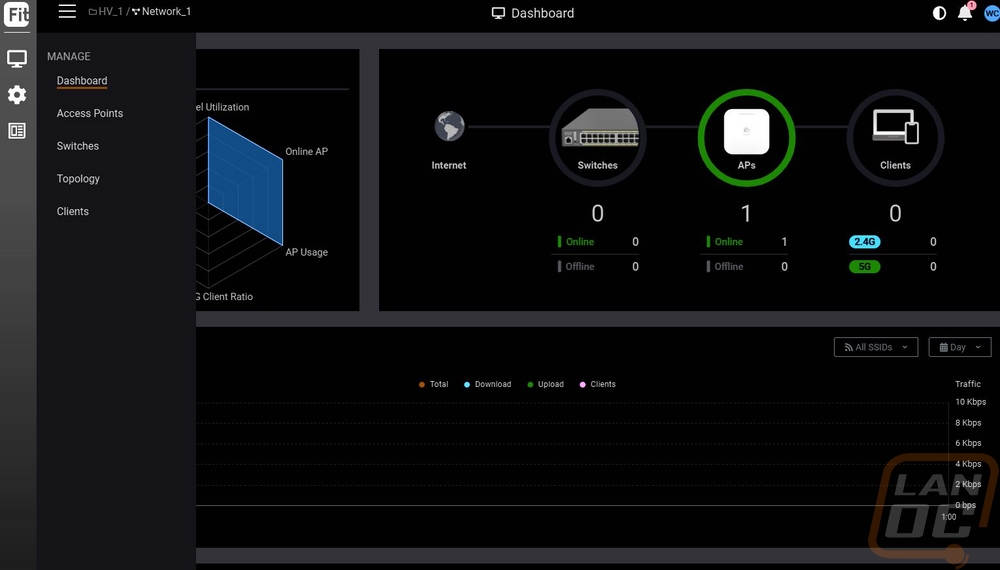
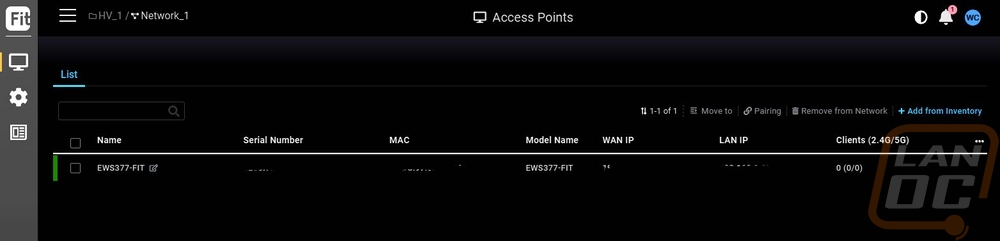
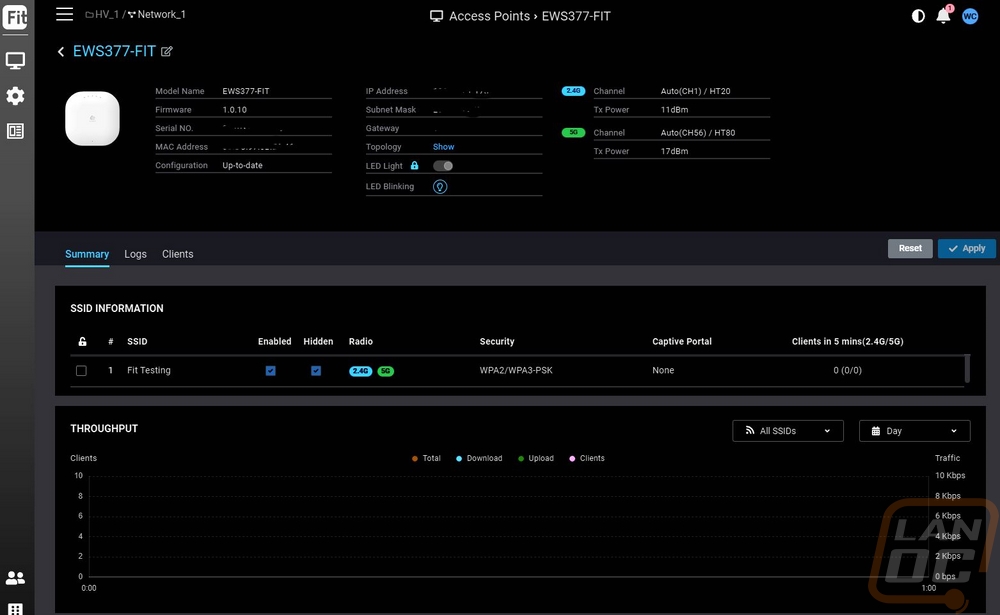
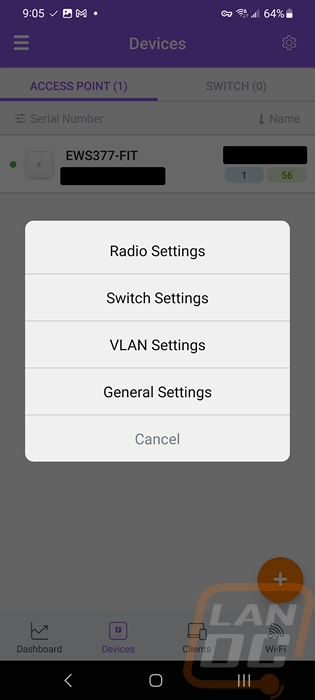
The manage menu has options for clients, access points, and switches but for this situation, the access point management page is the main one we need to see. This will list all of your access points. Each has the serial number, mac address, model information, LAN and WAN IPs, and the number of clients connected. I have covered up some of that information for my protection but you get the idea. Mousing over any of the access points will then give you the option to reboot, replace, or look at details. Replace is unique but is a way to swap over to a backup device if you have them set up. But that isn’t as important in the high-end home and lower-end business situations that EnGenius is targeting with the Fit lineup. Clicking on the details opens up a full page on that access point. This shows even more details including things like transmission power and channel numbers for the 2.4Ghz and 5Ghz radios. Then below that you can see all of the SSIDs that you have running and that same throughput graph from the main page. There is also a lag page and a client page that will list all connected clients.
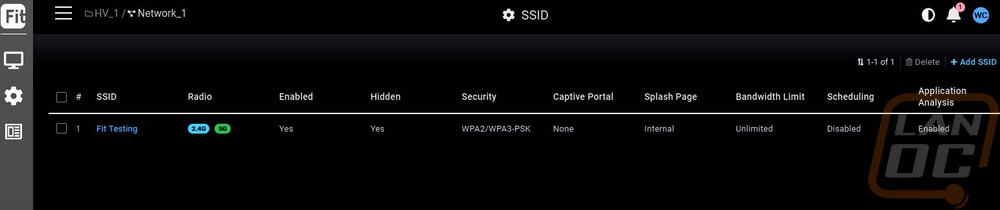
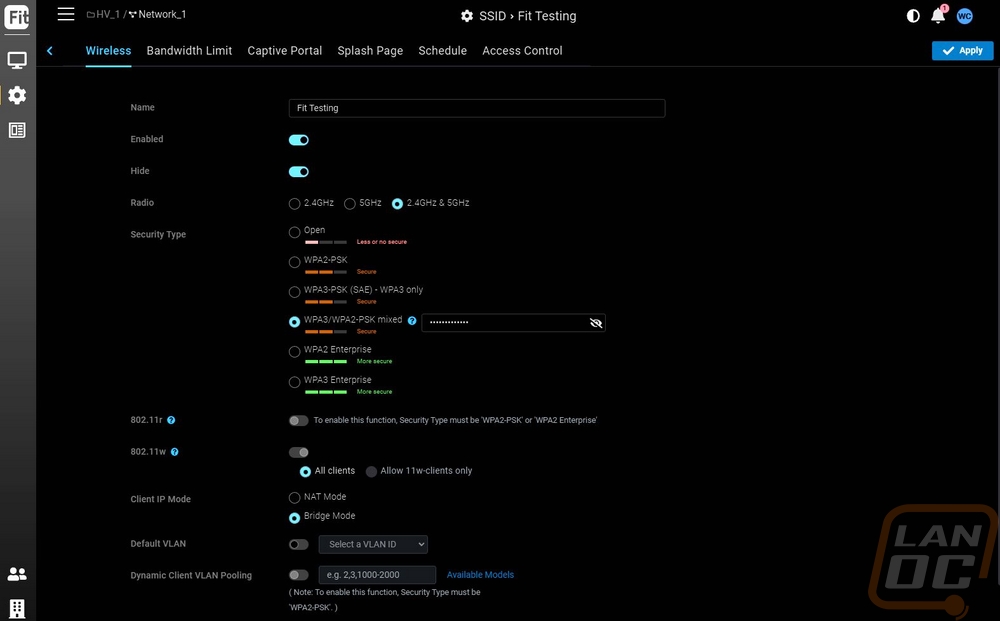
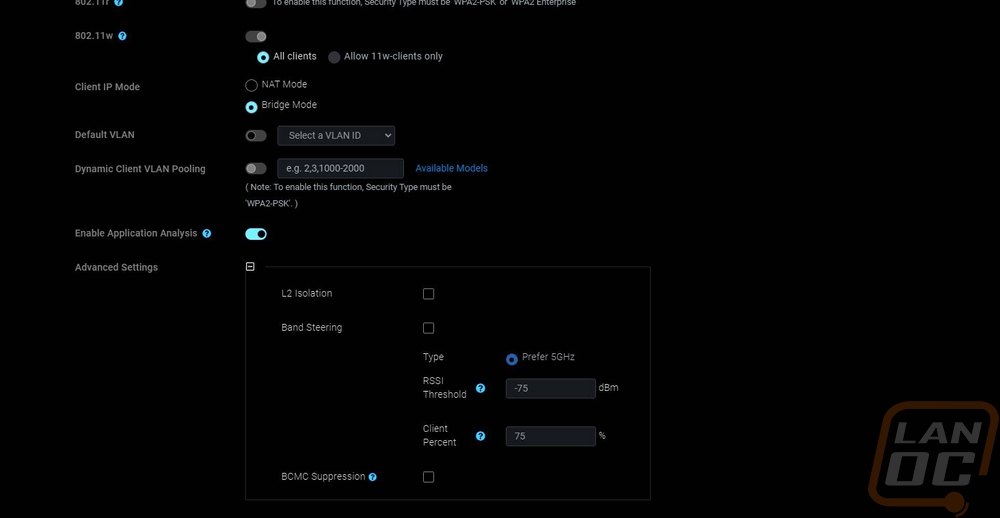
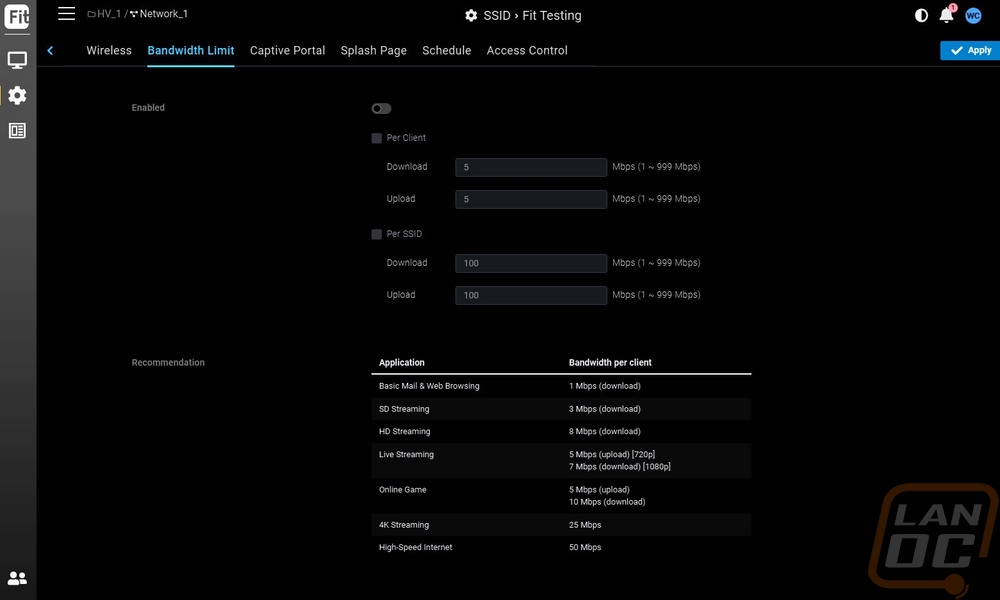
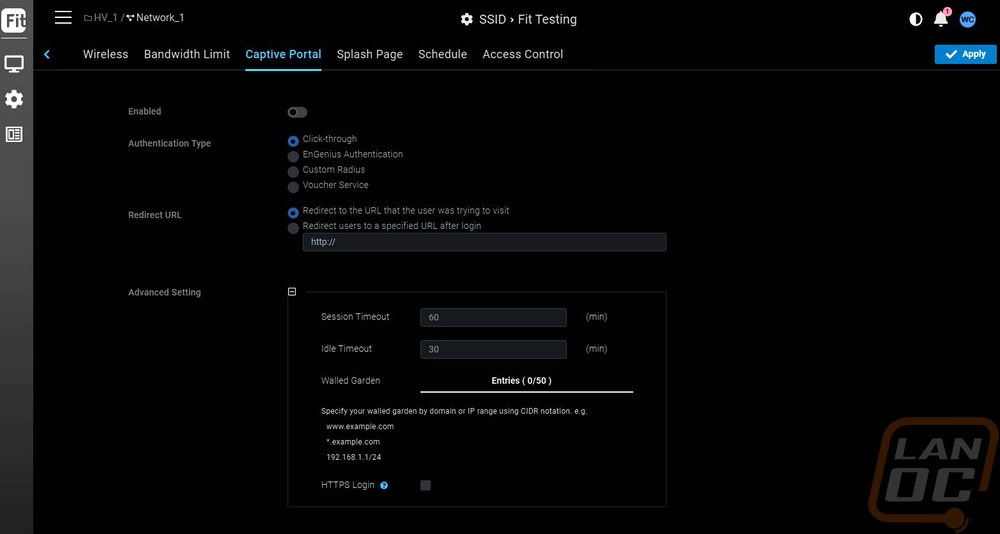
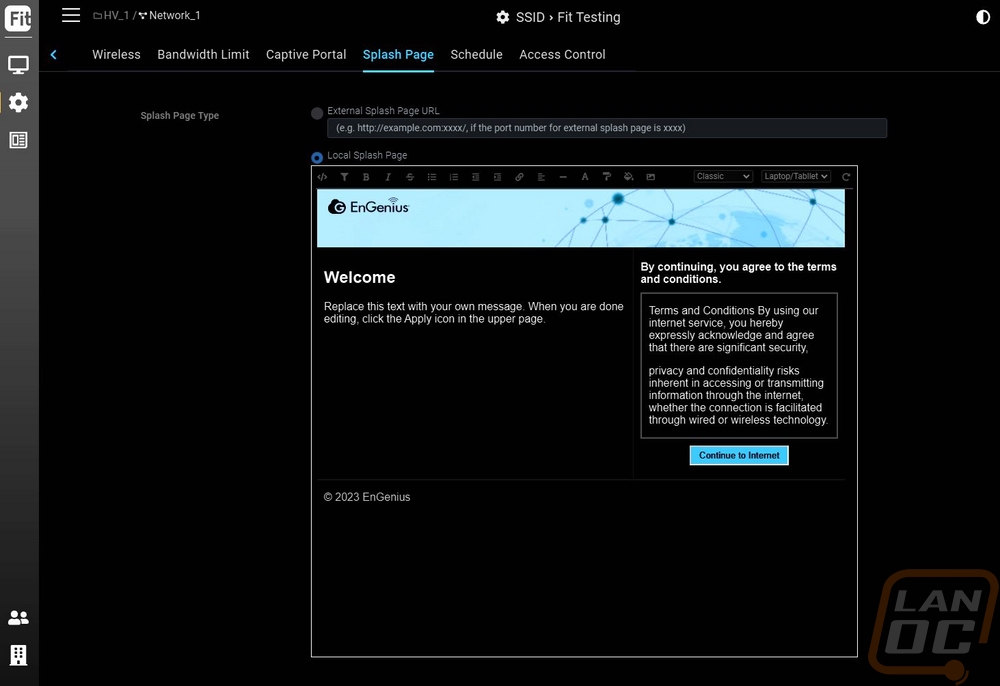
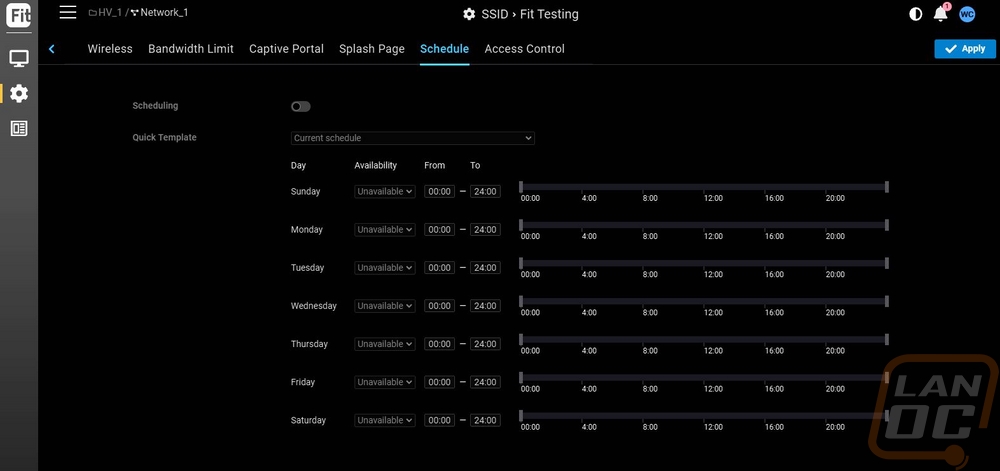
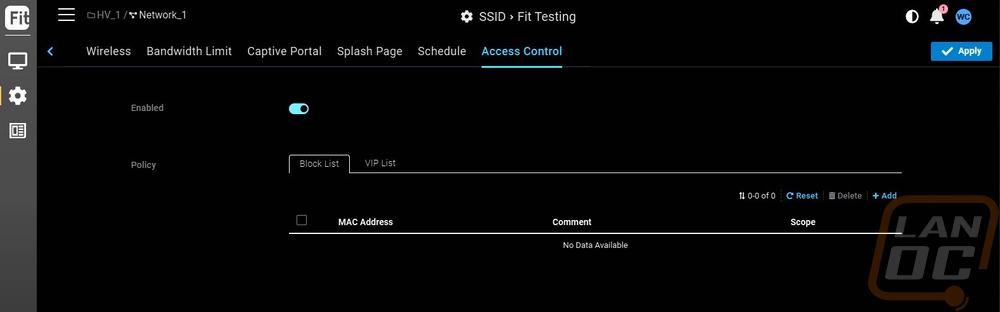
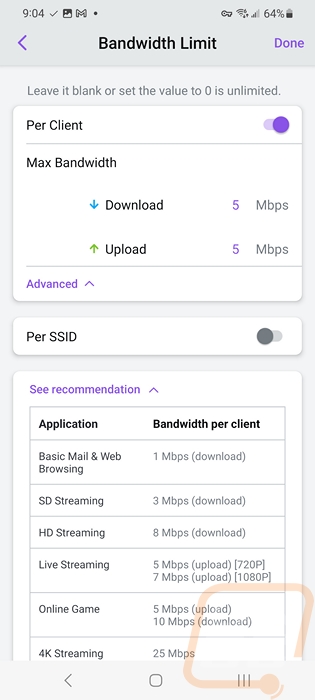
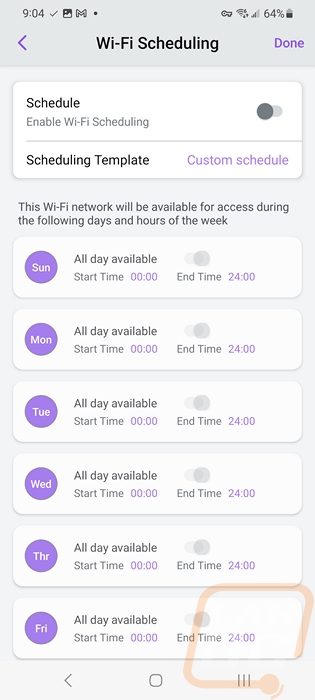
The second menu option is the configure menu which has a long list of pages for all of your network devices. For access points the two big pages here are going to be the SSID page and the radio page. All settings set here will sync to all of your attached access points to keep your network consistent. The main page for the SSID menu lists all SSIDs configured along with a few key settings. You can then add SSIDs or click and edit any of the current ones. The first page when adding an SSID is the wireless page and this is where most of your important settings are set. You set the SSID name up at the top, you can hide it, turn it off, and even set if it is exclusive to 2.4 GHz or 5 GHz. You can pick from a list of security types, the Fit lineup supports WPA3 which is great to see and with that, you can then put in your password. You can set bridge or NAT mode, turn on VLANs which is a nice way to sort people's VLANs by the SSID that you give them. Then down at the bottom, they have advanced settings like band steering and L2 isolation. You get a full page of bandwidth limit settings where you can set per client or per SSID limits on download and upload speeds. I especially like that they do give you a short list of applications and how much bandwidth they might take. Being an enterprise access point you have a whole list of captive portal options including different authentication types, idle and session timeouts, and the option to redirect the portal to a specific website after logging in. The splash page is tied in with that as well, letting you see the basic local splash page or put in your own. But it is the access control and schedule pages that I think are the most useful on a higher-end home or business access point. You can set a schedule for an SSID to turn on and turn off. This can keep your wireless unavailable when you are closed to help keep things locked down and for home use, you can limit the times that your family or kids can be online this way as well without taking the entire network down. Though this may just lead to them learning to plug in a wired connection lol. The access control is then how you can ban specific devices that SSID, or set a white list of the only devices that can work on it. This is good for keeping an uninsulated wireless network locked down.
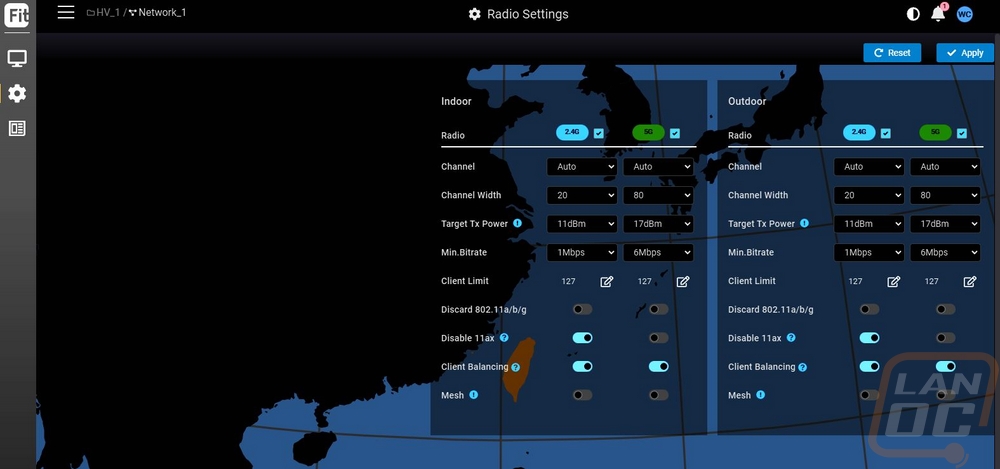
The radio settings page is also an important one but there are a lot fewer options needed here. This is split up between indoor and outdoor devices but for the EWS377-Fit you would only need to worry about the settings on the left. You can set the channel and channel width and even adjust transmitting power for both 2.4 GHz and 5 GHz. You can set max client numbers and select how to handle balancing. Fit also supports full Mesh networking if you turn it on here to run access points without a wired connection if your location needs that.
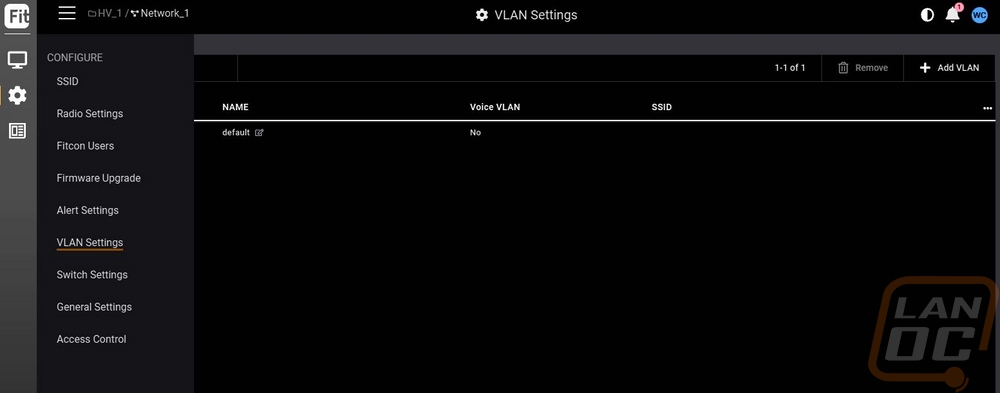
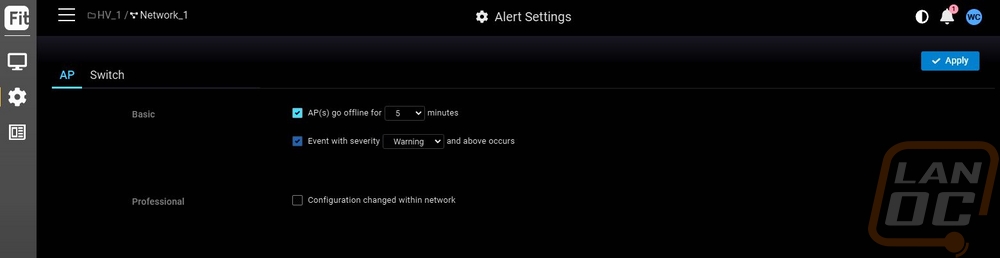
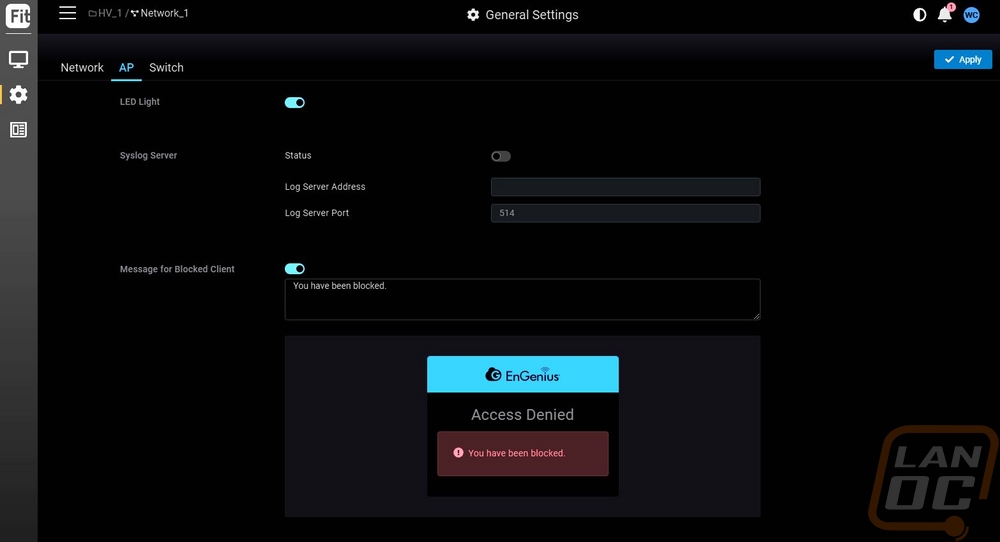
There are also a few more general settings pages. Like the alert settings page which you can set how Fit will handle sending alerts including how long an AP has to be offline before the FitController notifies you. You can turn off the LED status lights and turn on a Syslog server to gather logs if you want. You also have control of the message that is given out to someone who has been blocked.
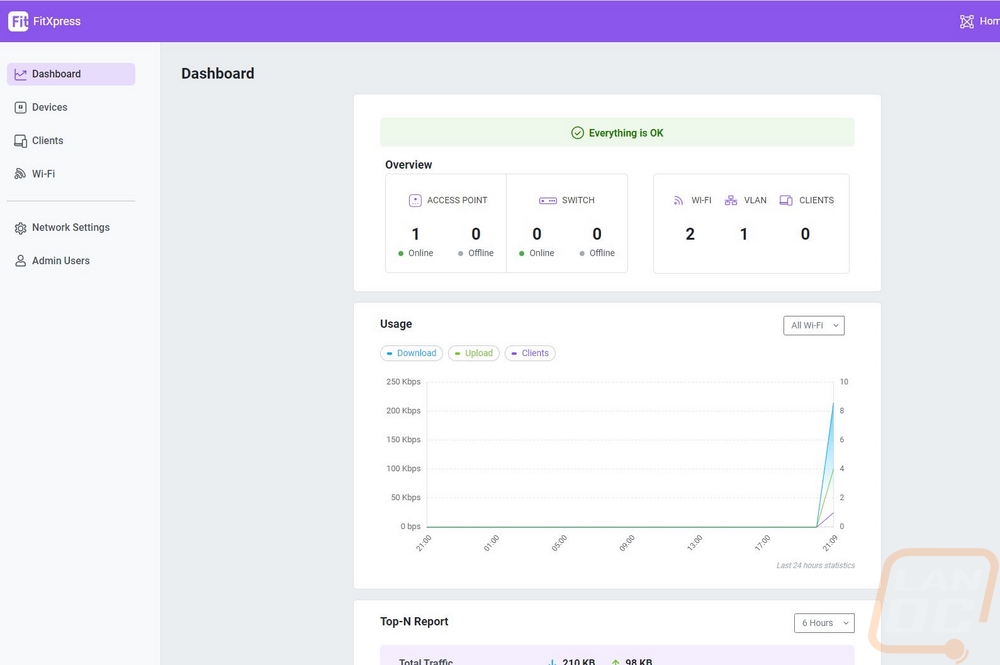
Beyond the FitController and the base interface for the EWS377-Fit, you have two more options. You can connect it to FitExpress which is the Fit version of the cloud. This gives you a mobile app that you can control things with or another web interface. I only have just one picture of the browser-based interface just because we don’t need to show everything twice but I was really surprised when I saw it. Given that the FitController had the same interface as the EnGenius Cloud I assumed the FitExtress would be a rebranded version of it as well but it isn’t at all. It is cut down significantly but with that is also a lot easier to get to all of the settings. Here is a look at the browser interface.
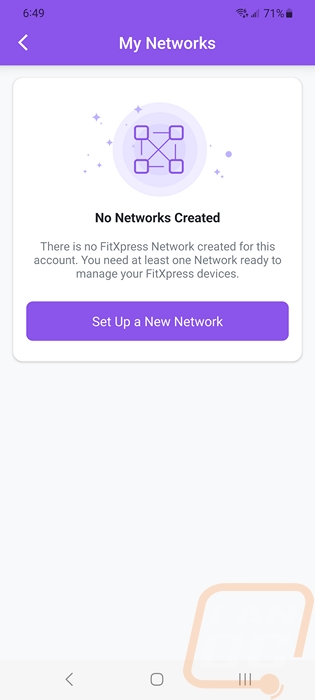
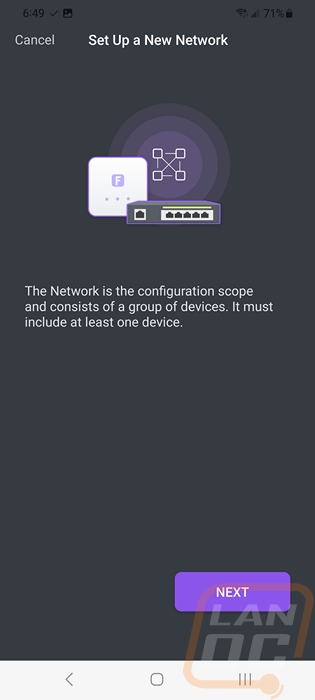
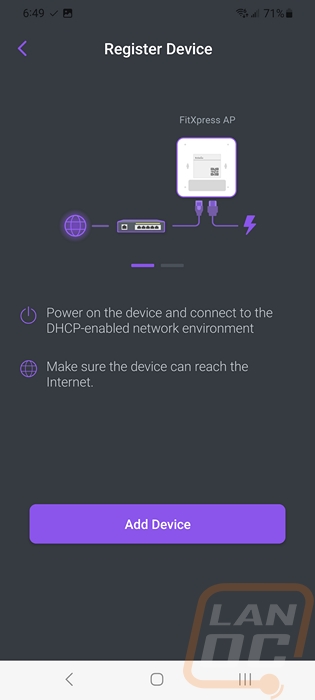
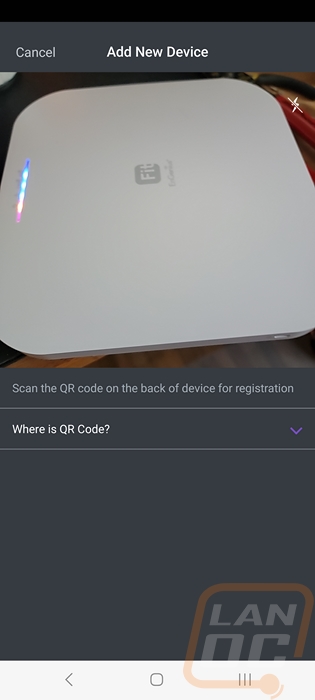
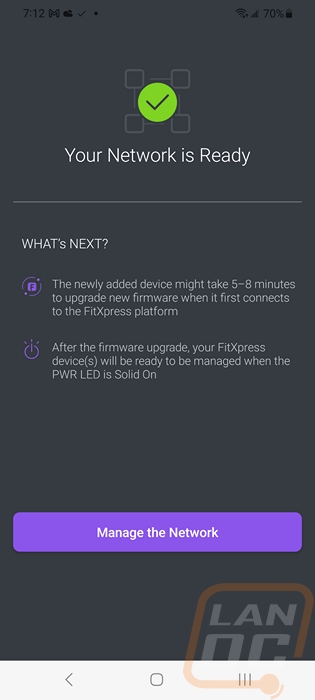
The FitExtress app works similarly to how the EnGenius cloud app works for your initial setup. You will need to create an account and past EnGenius accounts won’t work because they aren’t tied together. You then have to set up a new network under your networks, and you can create more than one for those who are curious. You could make one for work, your home, and another for a vacation house if you wanted. They walk you through a basic network setup which includes using your phone's camera to scan the QR code on the bottom of the access point. This will link the EWS377-Fit to your account, but if you have set it up previously with a FitConnect you will need to reset it all.
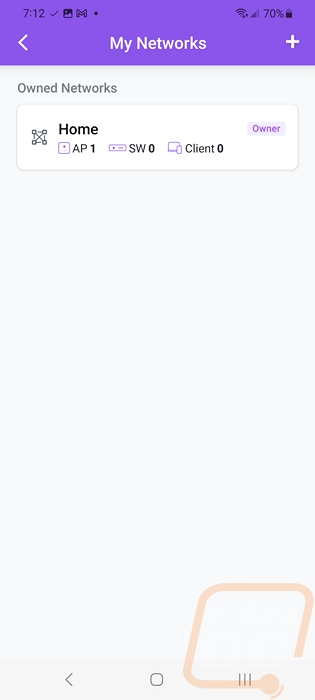
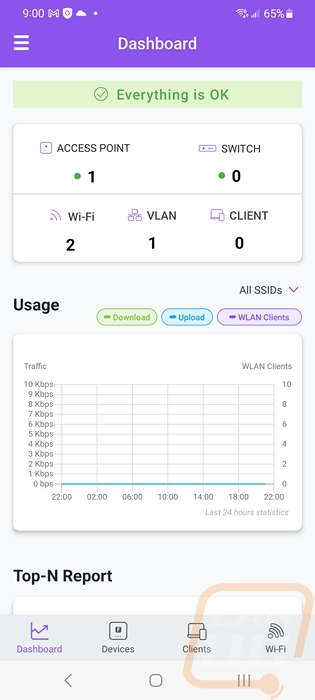
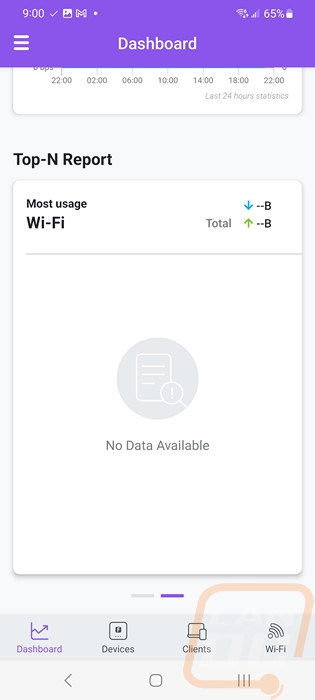
Once set up the main page lists out all of your networks and shows you how many access points, switches, and clients are on each. Clicking on a network then opens up the dashboard which is similar to the EnGenius Cloud and the FitConnect which shows you the number of APs, Switches, SSIDs, VLANs, and Clients. Then graphs out usage by SSID and shows the top devices, top SSID, and Top access point to help you spot any big users quickly.
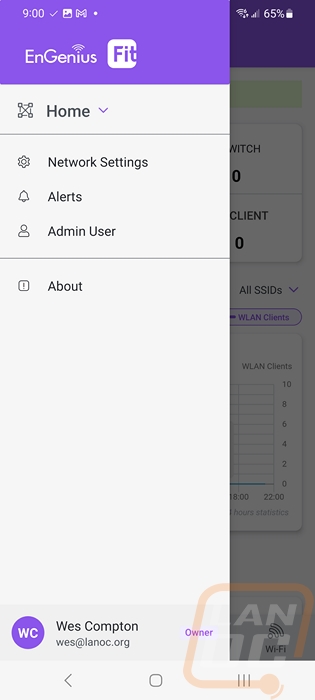
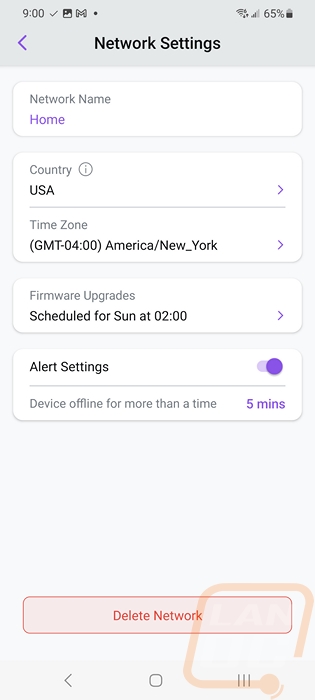
The menu button opens up the options on the left. This has a network settings page, alerts, admin users, and an about page. Network settings is where you can rename the network, and set its location and time zone. You also have options on when to set the firmware updates and how to handle alerts including turning them off.
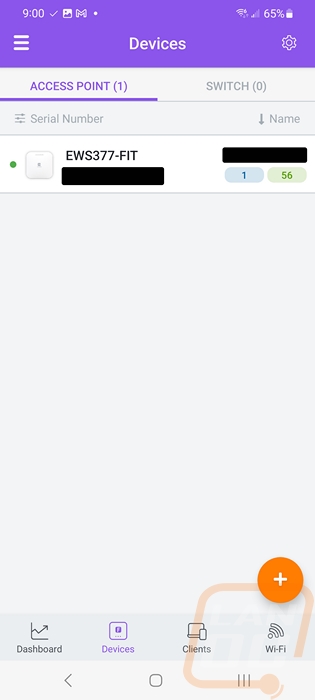
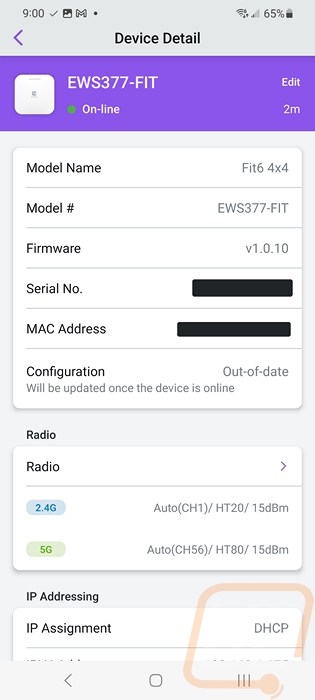
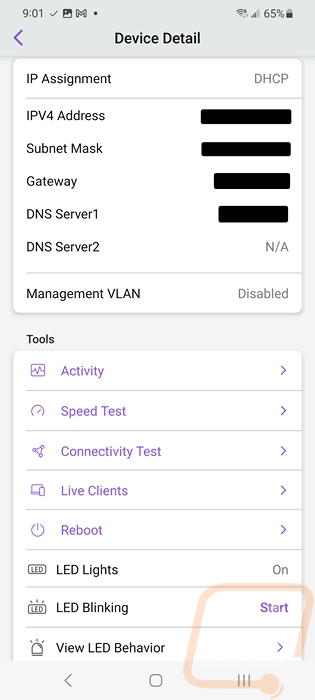
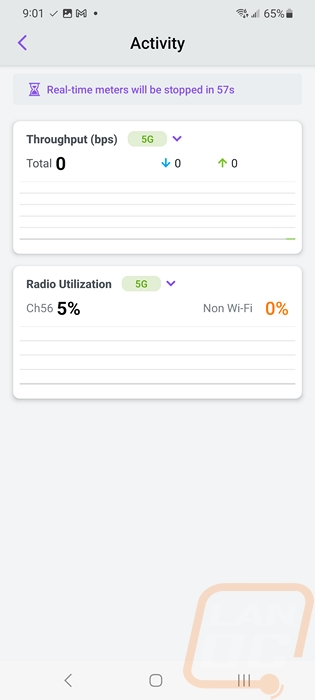
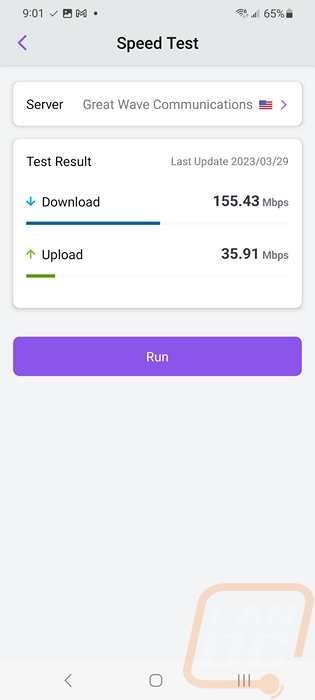
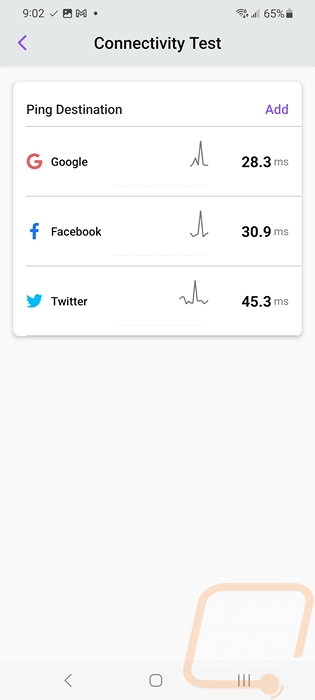
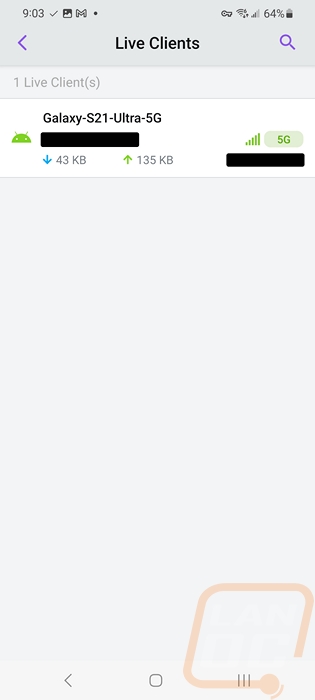
Under devices, you can see a page for access points and a page for switches. This shows a picture of the device, the name, IP, and mac address as well as shows what channels both 2.4 GHz and 5 GHz are running on. Clicking on the device then opens up the device details page. This dives more into the model information including showing you if the device is out of date. This can be a firmware update or in our case here I just set the network up and it hasn’t updated with our settings just yet. You can open up the radio page from here and down at the bottom you have a list of tools. This includes turning the lighting on or off and how they behave when on, reboot, get a live client list, connectivity test, speed, test, and see activity. The activity page just shows radio utilization and throughput and you can pick if you want to see 5 GHz or 2.4 GHz on both. The speed test runs a test to a server from a drop-down load to check the AP's connection to the internet and the connectivity test is similar but shows pings to three default websites and you can add more. These also have a small graph showing past pings as well for each. The live client page gives you more details on each user including their device name and connection speeds.
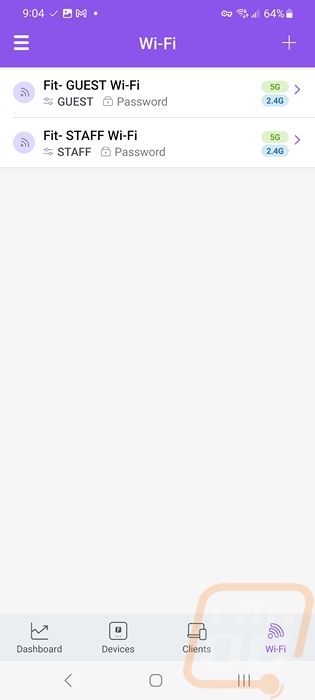
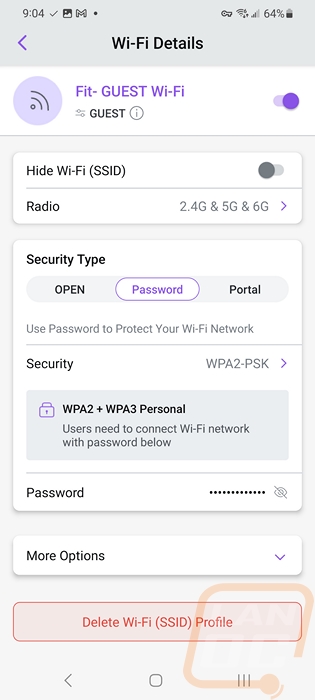
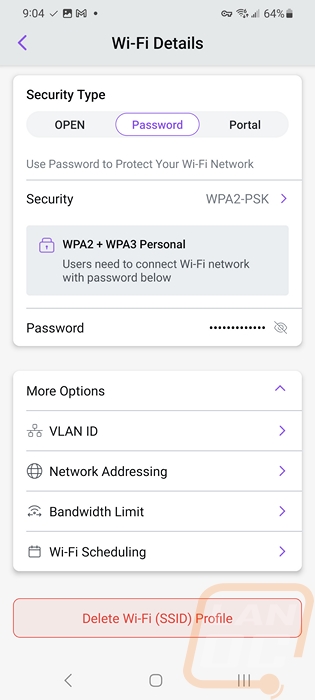
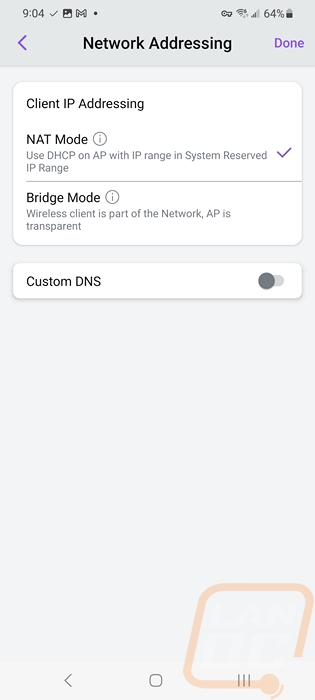
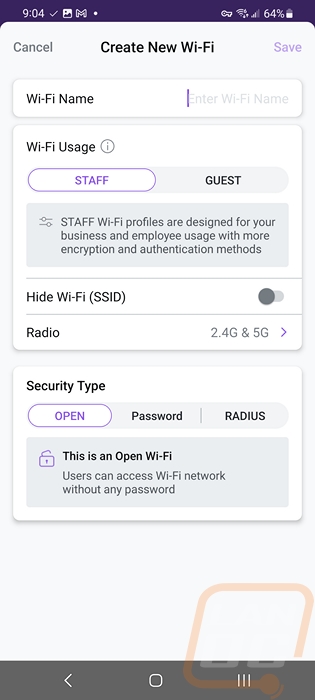
The WiFi page is from the menu down at the bottom. This lists all of the current SSIDs s well as a few details on each. This is where you can add a new SSID or edit what is already there. I should point out that by default the EWS377-Fit came with these two guest and staff SSIDs which is fine but be careful because they do some with no security setup leaving your network open until you finish setting them up. Clicking one has a switch to turn it off, hide the SSID and pick the radio settings. You can also pick from all of the security types and set up the password. There is a more options menu down at the bottom which lets you dive into more advanced settings for SSID as well. This has VLAN settings, bandwidth limits, scheduling, and network addressing which has your NAT or Bridge mode. This came in NAT mode which is interesting, normally default is bridge mode.
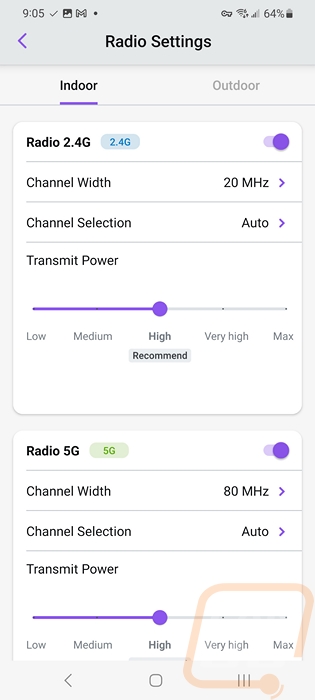
The radio settings page doesn’t look anything like the other EnGenius radio pages. But all of the same settings are there and they have made it easy to navigate. You have indoor and outdoor pages up at the top then it is split up by 2.4 GHz and 5 GHz. From there you have transmit power sliders, channel selection if you want to set that manually, and channel width which is where you can gain more speed if your location supports it.
All of the software is great, but if the performance isn’t there when you are using it, none of that matters right? So I put the EWS377-FIT through a few of our standard tests. Before getting into the numbers I should point out that my office is highly congested when it comes to wireless frequencies and I also live in an older house with thick plaster walls and most likely old lead paint. Because of that, I don’t typically see anything close to the “perfect scenarios” for wireless performance but I was still surprisingly happy with what I saw of the EWS377-FIT. I have the EWS377-FIT hooked up to a 2.5G wired connection which takes full advantage of the 2.5G wired NIC in it. Then I tested across the room with a wired PC to a wireless PC which is connected to the EWS377-FIT using PassMark Performance Tests 10.2’s network benchmark. The EWS377-FIT ended up with an average speed of 635.4 Mbps which is far from what the EWS377-FIT is capable of but given that it is WiFi 6, for comparison this was better than the 5Ghz performance I saw on the EnGenius ECW336 which scored a 545.6 Mbps in the same test. The ECW336 did however improve on that when running on 6E 6Ghz which the EWS377-FIT can’t do. I tested the wireless again using my Samsung S21 Ultra with a wifi and internet speed test app. It did better in this test with it averaging 820.93 Mbps, for comparison this was close to the 831 Mbps that I saw with the ECW336 on 6Ghz and well over the 406.18 that the ECW336 did with 5Ghz so the EWS377-FIT did well. I also noted the connection speed that my phone and the PC were connecting at as well which was 1200 Mbps, this isn’t a benchmark at all but it does give us a look at how good the connection was.
|
EWS377-FIT Performance Tests |
Mbps |
|
Passmark 10.2 Network Test |
635.4 Mbps |
|
WiFi test on Samsung S21 Ultra |
820.93 Mbps |
|
Phone Link Speed |
1200 Mbps |
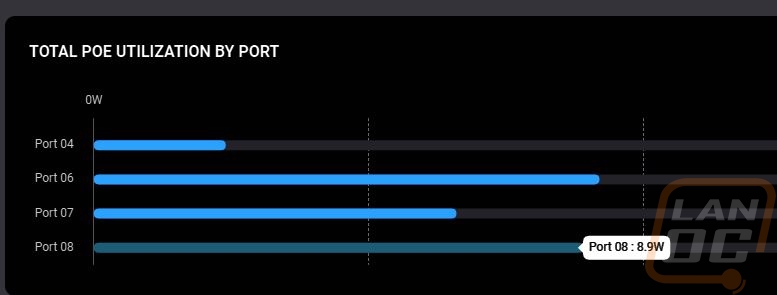
The EWS377-FIT is rated at up to 19.5 watts maximum power draw which would be if you were hitting it hard with a LOT of devices. Under less use, however, I was seeing it running at 8.9 watts through PoE which wasn’t too bad. The ECW336 with WiFI 6E that I tested prior to this had a slightly higher max power of 22.5 watts and it was pulling 9.5 watts consistently in the same test situation.
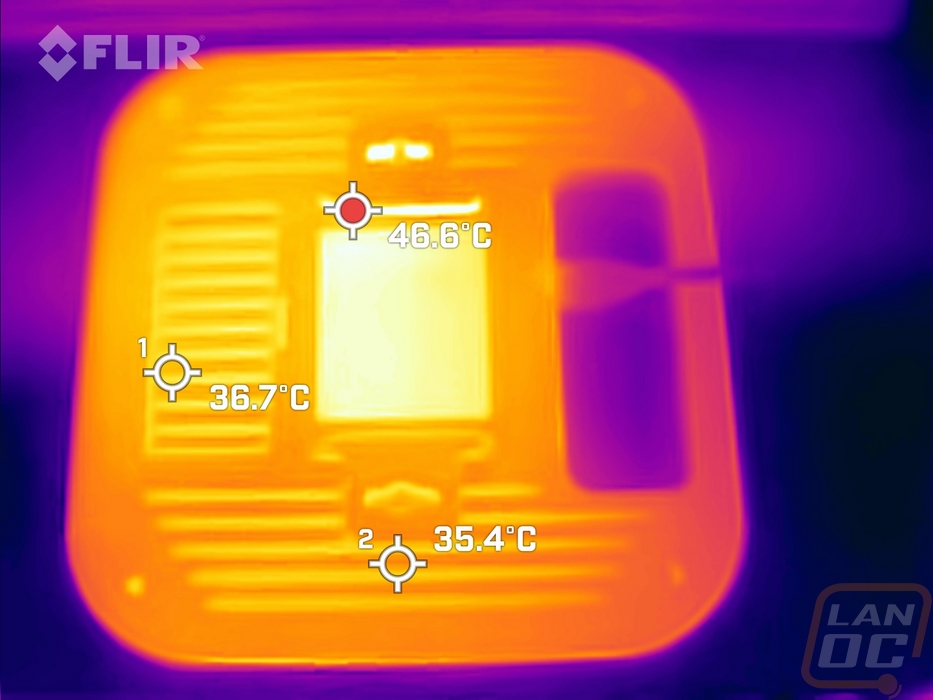
Before finishing up my testing I did want to get a look at how warm the EWS377-FIT was while running. I used our thermal camera to get a look at both sides but I should point out that while it had been running for days at this point it was sitting on my desk with the heatsink side down as it would be on a ceiling. But my desk most likely has a little more airflow than being jammed up against a ceiling. The top of the EWS377-FIT makes it clear what is going on inside of the AP, you can see where the whole PCB is including the CPU in the middle which is the hottest spot which shows up at 39.3c through the plastic housing. The back side of the EWS377-FIT with its aluminum construction and the built-in heatsink fins that I haven’t seen on other EnGenius APs has the heat across it more because of how aluminum helps pull it out away from the source. The hottest area is in the center where the label is and the heatsink is clearly working because all of those areas are running cooler than the 46.6c there in the middle.