
BIOS
Rather than have stacks of pictures I put together a basic video that just goes through and clicks on each menu option in the BIOS so if there is anything you want to check out you can see it and pause when needed. The ROG Strix X870-I Gaming Wifi starts off on the EZ mode page like most boards these days. This has the ROG theme which is just like the TUF board I recently took a look at, only with the ROG red at the top and bottom and a dark grey for the background of most of the BIOS. On this page, they have simplified things for users who might not be comfortable with the full BIOS. You can turn on XMP and swap your boot order by drag and drop. You have access to an overclocking profile in the top right corner which is one way to turn on the PBO enhancement setting which tunes based on thermals. You can see your CPU temps with a graph, core voltage, and all of your fan speeds. The most noticeable thing for me however is Asus’s move to a higher resolution for the BIOS. It doesn’t change the functionality at all but it looks significantly better. They have truly gone from standard definition to high definition.
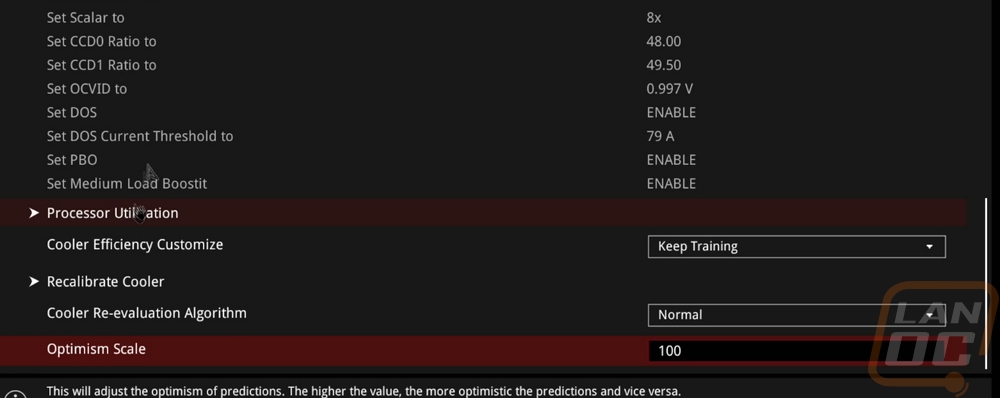
Jumping over to the Advanced mode you have on the right side of this and every page the hardware monitor that shows CPU, Memory, and Voltage information live. There was a few seconds lag for this to load up which was interesting. The ROG Strix X870-I Gaming Wifi also has the prediction information here. Asus has a microcontroller on the board that is always keeping track of your CPU’s performance, even if you aren’t using their AI Overclocking. They use this to create a silicon prediction rating for your specific CPU and a rating for your cooler's performance. With that, they give potential voltage settings for different clock speeds. There is a setting page for this that I will touch on in a minute.
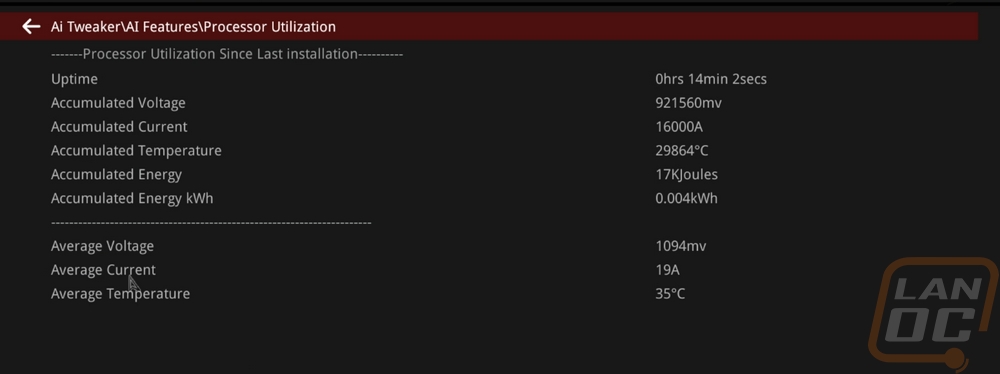
Up top, there are a few basic options like the language button and search that helps you find something specific if you know the name. The first page is the main tab and this has the BIOS version, PC information, and date and time. From there up top the Ai Tweaker page is where they have all of the overclocking-specific features tucked away. At the top of that page, it shows you the target frequencies for your current settings so you can see what your changes are doing. The basic BCLK and performance preference settings are up top. As you go down there are pages for core-specific settings, e-core settings, AVX, and dram controls. The DRAM controls page is overwhelming with just how much control you have in there. Then near the bottom, you have the VRM and CPU power management pages. The AI Features page lists all of the current information well beyond what is shown on the right side in the prediction section. I somehow didn’t scroll down on that page in this video, so I have included pictures below. You get full states on your CPU including total uptime, accumulated voltage, current, temperature, energy, and average states as well.
Getting on the advanced tab then dives into a lot of the motherboard-specific settings. Asus has it split up letting you get into USB, Network, NVMe, PCH, CPU, Thunderbolt, APM, and even Trusted Computing settings here with all of those and a lot more having their own pages. Down at the bottom is the AMD CBS page and this is where a lot of people are going to be wanting to dive into things. Here you can change the PBO enhancement settings to tune in the overclock including setting what temperature range you want to be running in. The monitor page has sub-pages for the temperatures, fan speeds, and voltages that show you all of the different readings for each. Then they also have a Q-Fan settings page, a majority of the settings are in the tool like all of the individual fan settings. You can open up the Qfan tool up top or by pressing F6. It is a tool that lets you pick or create your own fan profiles for each fan plugged in. It might go unnoticed by most people, but Asus has 8 points in their fan manual fan curve settings whereas most boards (including the competition to this board) have fewer. This isn't just a software change, the fan controller has been upgraded to support this. You can change what device they use for temperatures which is huge, you can set fans near your GPU to worry about your GPU speeds. This is the tool I use the most on my own PC to fine-tune keeping things cool but also quiet.
The boot tab has your boot priority and other boot settings. Then the last tab is the Tool tab. This has the EZ Flash utility which has been upgraded from version 3 to 4 this generation (this isn’t pictured in the video, my recording was with the previous BIOS revision). The big upgrade, it now will accept zip folders so when you download a new BIOS you no longer need to unzip it before booting up into the BIOS. Making a BIOS upgrade even simpler. Doing it that way also upgrades the ME version at the same time. You have an SSD secure erase tool. The BIOS Q-Dashboard has Q in it so we know it is designed to make things simpler. This has a line drawing of the board including the rear I/O. It shows each device that is installed with a green dot and mousing over those shows what the device is even going as far as to show my wireless mouse receiver for example on the USB ports. The SPD information tool just shows the full readout for each installed stick of RAM. The Profile is where you can save different BIOS setting profiles, this is nice for overclocking especially if you want to save a known good overclock or have profiles depending on the season (for when it's hot or cold). The MyHotKey tool lets you set specific functionality when booting and pressing that key. You can jump into the EZ Flash directly or set it to boot from a specific device.
