
After taking a look at a few of Asus’s full-sized options, it's high time we check out what they have to offer for smaller builds. Currently, Asus has just one X870 board smaller than ATX and that is their ROG Strix X870-I Gaming Wifi. I was impressed with the ROG Strix X870E-E so I’m excited to see what they packed into the Strix X870-I Gaming Wifi. With the next generation of X3D CPUs around the corner, I can’t be the only one starting to think about a new SFF build to save some space in my office and to hit a few LANs. Will the Strix X870-I Gaming Wifi be the ticket?
Product Name: ROG Strix X870-I Gaming Wifi
Review Sample Provided by: Asus
Written by: Wes Compton
Amazon Affiliate Link: HERE
|
Specifications |
|
|
CPU |
AMD Socket AM5 for AMD Ryzen™ 9000 & 8000 & 7000 Series Desktop Processors* * Refer to https://www.asus.com/support/download-center/ for CPU support list. |
|
Chipset |
AMD X870 |
|
Memory |
2 x DIMM slots, max. 96GB, DDR5 Supports up to 8400+MT/s(OC) with Ryzen™ 9000 Series Processors, 8600+MT/s(OC) with Ryzen™ 8000 Series Processors, 8000+MT/s(OC) with Ryzen™ 7000 Series Processors, ECC and Non-ECC Un-buffered DIMM*" Dual channel memory architecture Supports AMD Extended Profiles for Overclocking (EXPO™) ASUS Enhanced Memory Profile (AEMP) * Supported memory types, data rate (speed), and number of DRAM modules vary depending on the CPU and memory configuration, for more information please refer to CPU/Memory Support list under the Support tab of product information site or visit https://www.asus.com/support/download-center/. * Non-ECC, un-buffered DDR5 memory supports On-Die ECC function. |
|
Graphics |
1 x HDMI™ port** 2 x USB4® (40Gbps) ports support USB Type-C® display outputs*** * Graphics specifications may vary between CPU types. Please refer to AMD CPU specifications. ** Supports 4K@60Hz as specified in HDMI 2.1. *** Supports max. 4K@60Hz as specified in DisplayPort 1.4a **** VGA resolution support depends on processors' or graphic cards' resolution. |
|
Expansion Slots |
AMD Ryzen™ 9000 & 7000 Series Desktop Processors 1 x PCIe 5.0 x16 slot
AMD Ryzen™ 8000 Series Desktop Processors 1 x PCIe 4.0 x16 slot (supports x8/x4 mode)*
* Specifications vary by CPU types. - To ensure compatibility of the device installed, please refer to https://www.asus.com/support/ for the list of supported peripherals. |
|
Storage |
Supports 2 x M.2 slots and 2 x SATA 6Gb/s ports*
AMD Ryzen™ 9000 & 7000 Series Desktop Processors* M.2_1 slot (Key M), type 2280(supports PCIe 5.0 x4 mode)
AMD Ryzen™ 8000 Series Desktop Processors* M.2_1 slot (Key M), type 2280(supports PCIe 4.0 x4 mode)
AMD X870 Chipset M.2_2 slot (Key M), type 2242/2260/2280 (supports PCIe 4.0 x4) 2 x SATA 6Gb/s ports*** * AMD RAIDXpert2 Technology supports both PCIe RAID 0/1/10 and SATA RAID 0/1 *** Install ROG FPS Card to support 2 x SATA 6Gb/s ports. |
|
Ethernet |
1 x Intel® 2.5Gb Ethernet ASUS LANGuard |
|
Wireless & Bluetooth |
Wi-Fi 7* 2x2 Wi-Fi 7 (802.11be) Supports 2.4/5/6GHz frequency band** Support Wi-Fi 7 320MHz bandwidth, up to 6.5Gbp transfer rate. Bluetooth® v5.4*** *Wi-Fi features may vary depending on the operating system For Windows 11, Wi-Fi 7 will require 24H2 or later version for full functions, Windows 11 21H2/22H2/23H2 only support Wi-Fi 6E. For Windows 10, please note that no driver is available, refer to the Wi-Fi chipset vendor's website for details. ** Wi-Fi 6GHz frequency band and bandwidth regulatory may vary between countries. *** The Bluetooth® version may vary, please refer to the Wi-Fi module manufacturer's website for the latest specifications." |
|
USB |
Rear USB (Total 10 ports) 2 x USB4® (40Gbps) port(s)(2 x USB Type-C®) 5 x USB 10Gbps port(s) (4 x Type-A + 1 x USB Type-C®) 3 x USB 2.0 port(s) (3 x Type-A) Front USB (Total 3 ports) 1 x USB 10Gbps connector (supports USB Type-C®) 1 x USB 5Gbps header supports 2 additional USB 5Gbps ports * USB Type-C® power delivery output: max. 5V/3A ROG STRIX HIVE II(Total 2 ports) 2 x USB 10Gbps port ( 1 x Type-A + 1 x USB Type-C®) ROG FPS Card (Total 3 ports) 2 x USB 2.0 headers additional 3 USB 2.0 ports |
|
Audio |
ROG Strix Hive II Audio Features - ROG Hyper-Grounding Technology - ESS® SABRE9260Q DAC - Silver-plated audio jacks - Dedicated audio PCB layers |
|
Back Panel I/O Ports |
2 x USB4® (40Gbps)(2 x USB Type-C®) 5 x USB 10Gbps port(s) (4 x Type-A + 1 x USB Type-C®, 1 port supports ROG STRIX HIVE II) 3 x USB 2.0 port(s) (2 x Type-A) 1 x HDMI™ port 1 x Wi-Fi module 1 x Intel® 2.5Gb Ethernet port 1 x BIOS FlashBack™ button 1 x Clear CMOS button |
|
Internal I/O Connectors |
Fan and Cooling Related 1 x 4-pin CPU Fan header(s) 1 x 4-pin AIO Pump header(s) 1 x 4-pin Chassis Fan header(s) Power Related 1 x 24-pin Main Power connector 1 x 8-pin +12V CPU Power connector Storage Related 2 x M.2 slots (Key M) USB 1 x USB 10Gbps connector (supports USB Type-C® ) 1 x USB 5Gbps header support(s) 2 additional USB 5Gbps ports Miscellaneous 2 x Addressable Gen 2 headers 1 x 2-pin Power Button header 1 x Thermal Sensor header 2 x USB Type-C® connectors to install ROG FPS card ROG FPS card 2 x SATA 6Gb/s ports 1 x CPU Over Voltage jumper 1 x Front Panel header 1 x Alteration PCIe Mode switch 2 x USB 2.0 headers support 3 additional USB 2.0 ports |
|
Special Features |
ASUS Q-Design - M.2 Q-Latch - PCIe Slot Q-Release Slim (with PCIe SafeSlot) - Q-Antenna - Q-Code - Q-DIMM - Q-LED (CPU [red], DRAM [yellow], VGA [white], Boot Device [yellow green]) - Q-Slot ASUS Thermal Solution - M.2 heatsink - Aluminum backplate ASUS EZ DIY - BIOS FlashBack™ button - BIOS FlashBack™ LED - Clear CMOS button - ProCool II - Pre-mounted I/O shield - SafeSlot - SafeDIMM Aura Sync - Addressable Gen 2 header(s) ROG STRIX HIVE II 1 x USB Type-C® connects to motherboard 2 x USB 10Gbps port ( 1 x Type-A + 1 x USB Type-C®) 1 x Headphone jack with mic in 1 x Power button 1 x FlexKey button 1 x Volume control knob with mute button Q-LED (CPU [red], DRAM [yellow], VGA [white], Boot Device [yellow green]) |
|
Software Features |
ROG Exclusive Software - ROG CPU-Z - Dolby Atmos ASUS Exclusive Software Armoury Crate - AIDA64 (60 days free trial) - Aura Creator - Aura Sync - Fan Xpert 4 (with AI Cooling II) - GameFirst - HWiNFO - Power Saving ASUS Driver Hub ASUS GlideX Adobe Creative Cloud (Free Trial) Norton 360 for Gamers (60 Days Free Trial) WinRAR (40 Days Free Trial) UEFI BIOS AI Overclocking Guide ASUS EZ DIY - ASUS CrashFree BIOS 3 - ASUS EZ Flash 3 - ASUS UEFI BIOS EZ Mode - ASUS MyHotkey FlexKey Dynamic OC Switcher |
|
BIOS |
256 Mb Flash ROM, UEFI AMI BIOS |
|
Manageability |
WOL by PME, PXE |
|
Accessories |
Cables 1 x Panel cable 1 x ROG USB2.0 splitter cable 2 x SATA 6Gb/s cables ROG FPS Card 1 x ROG FPS Card ROG STRIX HIVE II 1 x ROG STRIX HIVE II 1 x USB Type-C® power connection cable Miscellaneous 1 x ASUS WiFi Q-Antenna 1 x Cable ties package 1 x M.2 Q-Latch package(s) 1 x ROG key chain 1 x ROG Strix stickers 1 x M.2 rubber package(s) Documentation 1 x Quick start guide |
|
Operating System |
Windows® 11 64-bit |
|
Form Factor |
Mini-ITX Form Factor 6.7 inch x 6.7 inch (17 cm x 17 cm) |
Packaging and Accessories
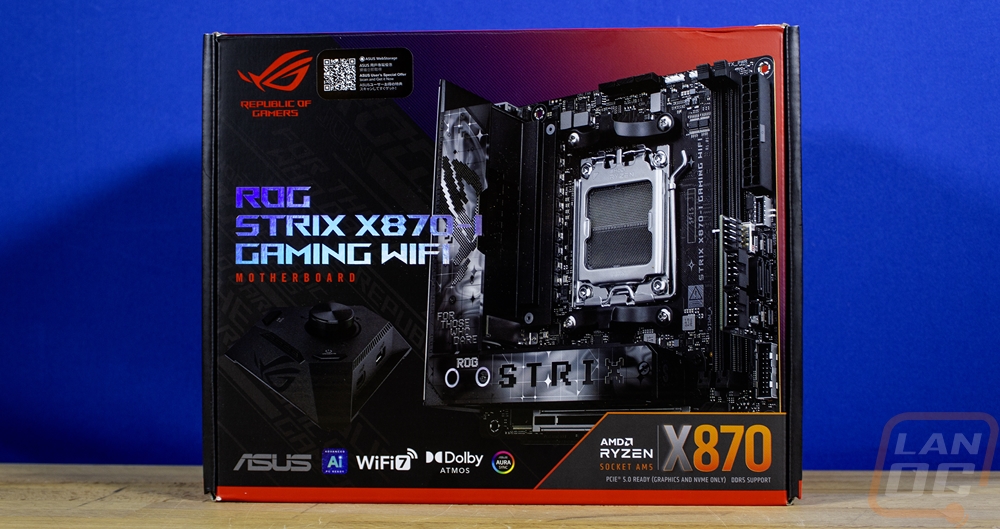
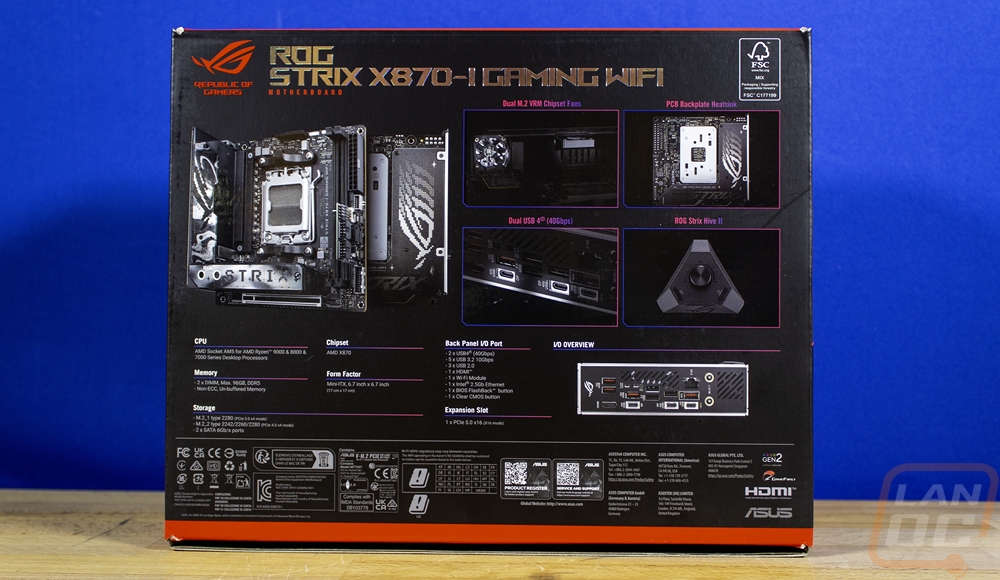
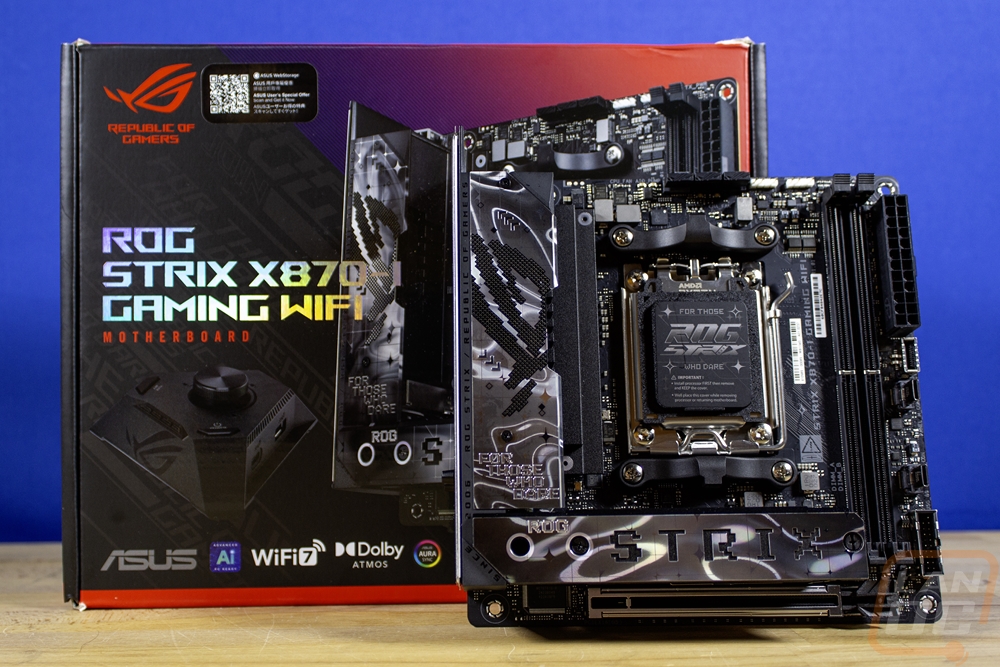
The box for the ROG Strix X870-I Gaming Wifi is significantly smaller than any of the full ATX boards but even then for a Mini ITX board, this is still a lot bigger than other ITX boards come in. There is a reason for that though, Asus has this thing packed with accessories. The outside of the box has the typical red and black background that all ROG products have. On the front, they have the ROG Strix X870-I Gaming Wifi model name with a reflective finish and then a large picture of the board takes up most of the box. They also have a picture of the included ROG Strix Hive as well. The ROG logo is in the top left corner and the bottom right it has the AMD wrap-around which includes a mention that this is an AM5 board and the X870 chipset. Also along the bottom Asus has icons showing off the WiFi 7 support as well as Asus Aura Sync lighting controls and Dolby Atmos support. Around on the back, if the pictures on the front weren’t enough you have a full shot that also has a second picture showing part of the bottom of the board as well. Next to that are four more pictures that highlight key features like the Dual USB 4 connections, dual M.2 VRM chipset fans, the backplate heatsink, and the Strix Hive II pictured on the front. There is also a picture of the rear I/O so you know all of the connections available and a basic specification listing that lets you know the rest of the connection options and the board dimensions. That might not seem important, but the pictures and information are huge when shopping in retail.
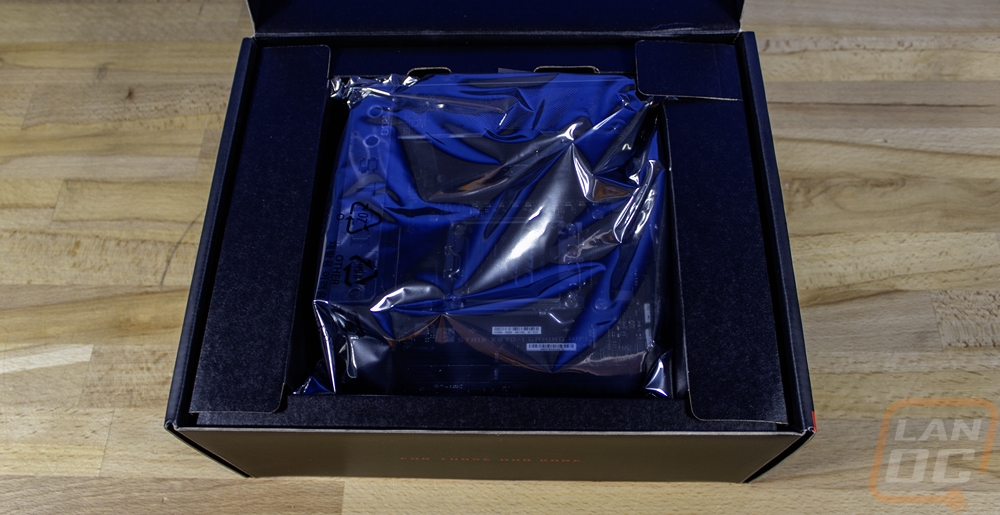
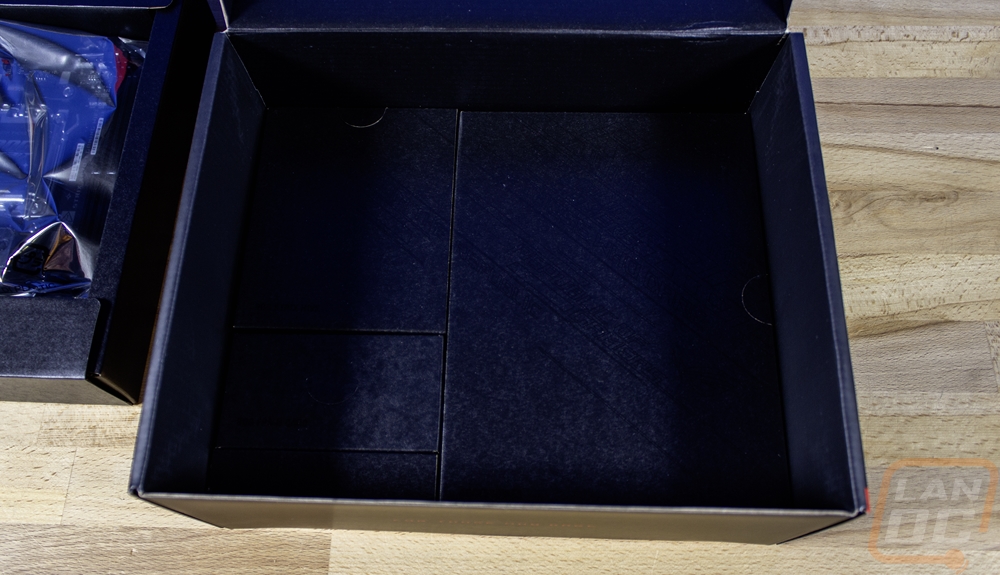
When you get inside the box, the ROG Strix X870-I Gaming Wifi comes wrapped up in its static protective bag and sits in a cardboard tray with cardboard flaps on all sides giving it a buffer from the sides and keeping it from moving around. Up under that tray, there is a second cardboard layer. This one has multiple compartments with labels, each has some of the accessories and documentation inside.
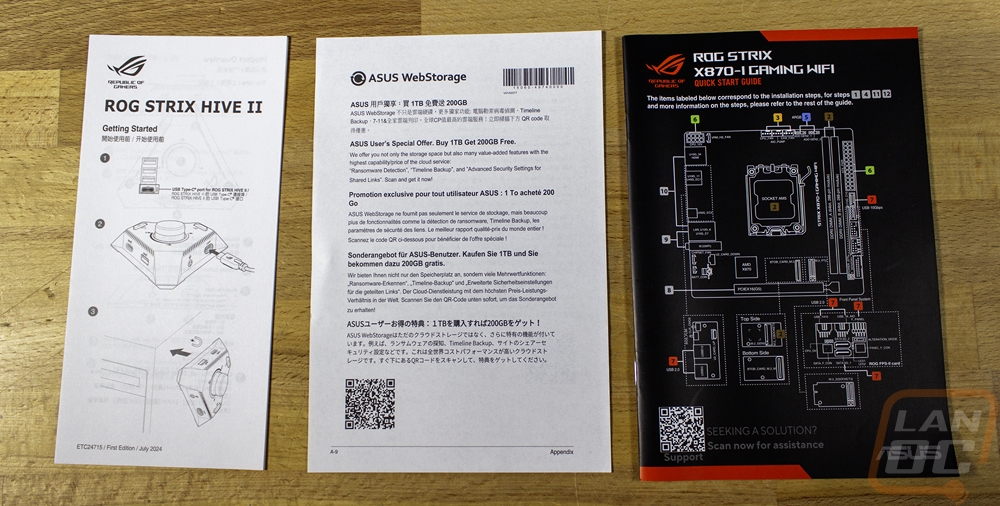
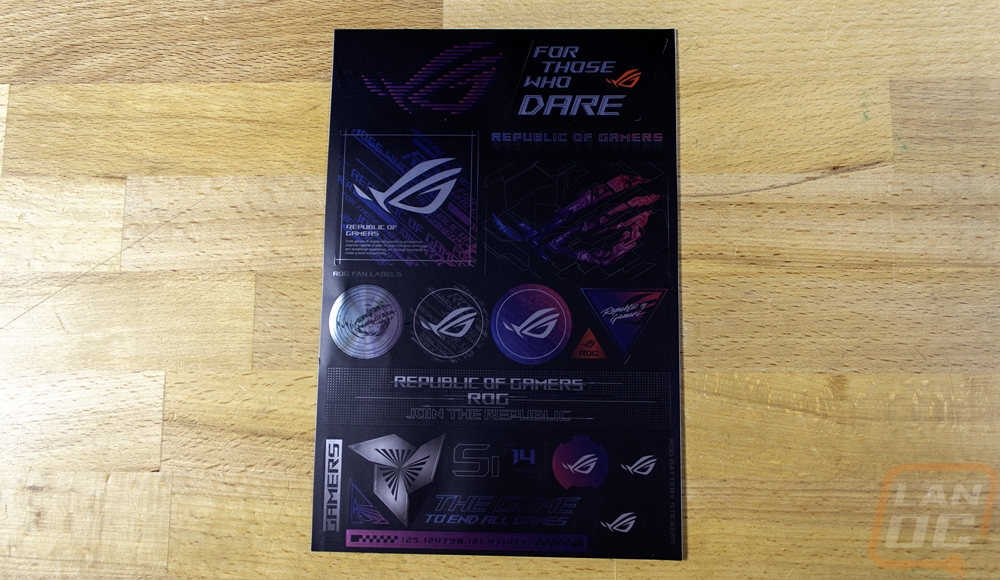
The ROG Strix X870-I Gaming Wifi has a LOT of accessories, so much so that I can’t just lump them all together. Beyond the bigger things, you get a stack of documentation. One is a color quick start guide. Right on the cover, Asus has a line diagram showing off where all of the connections are. You get a paper about Asus WebStorage and then a quick start guide for the included Stric Hive II as well. Along with those you get an ROG sticker sheet which has a nice metallic finish.
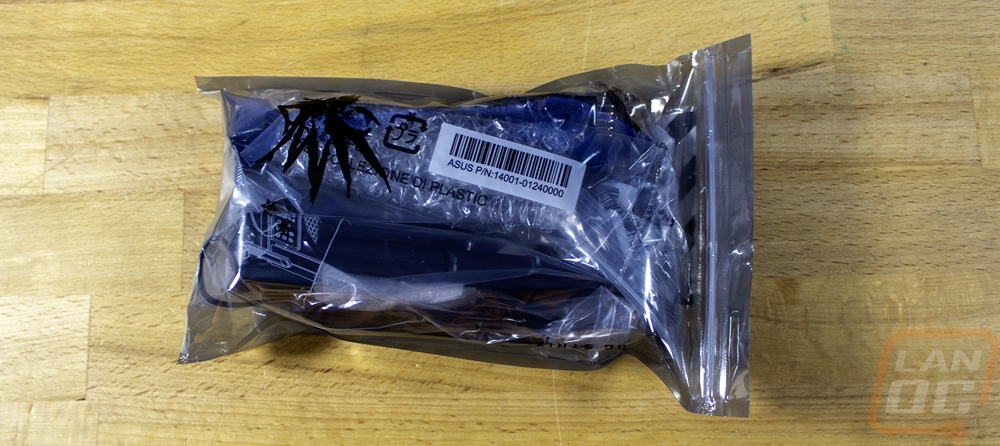
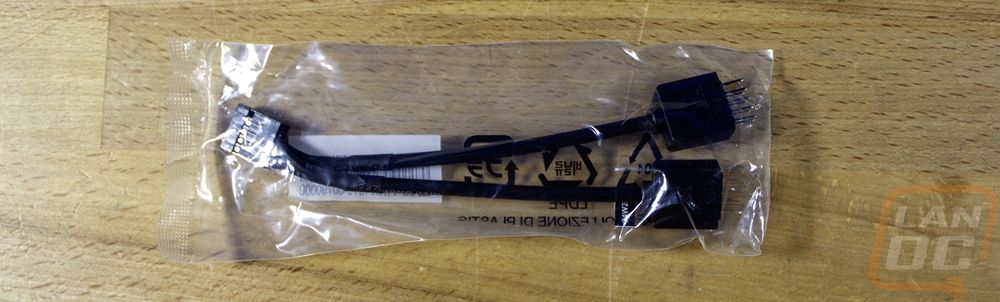
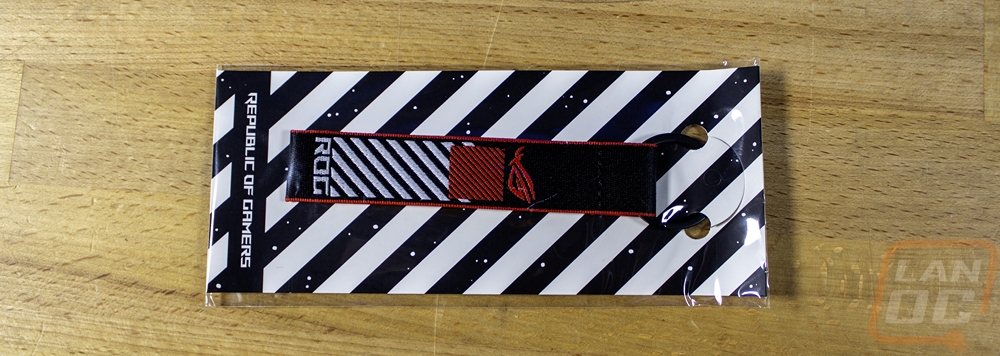
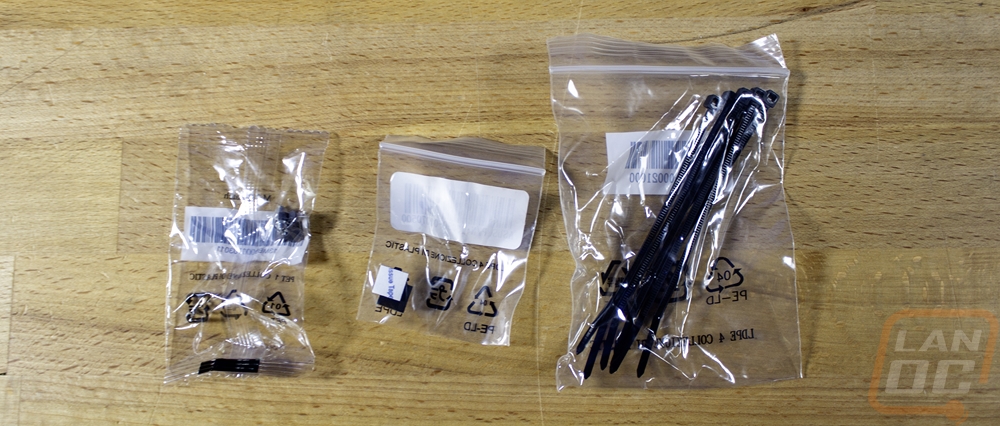
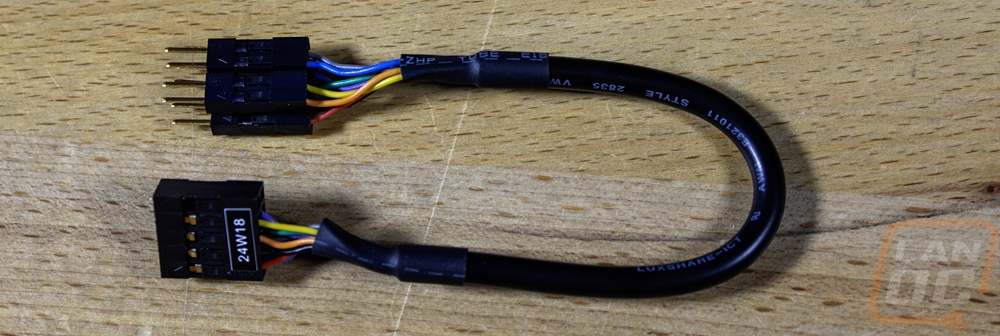
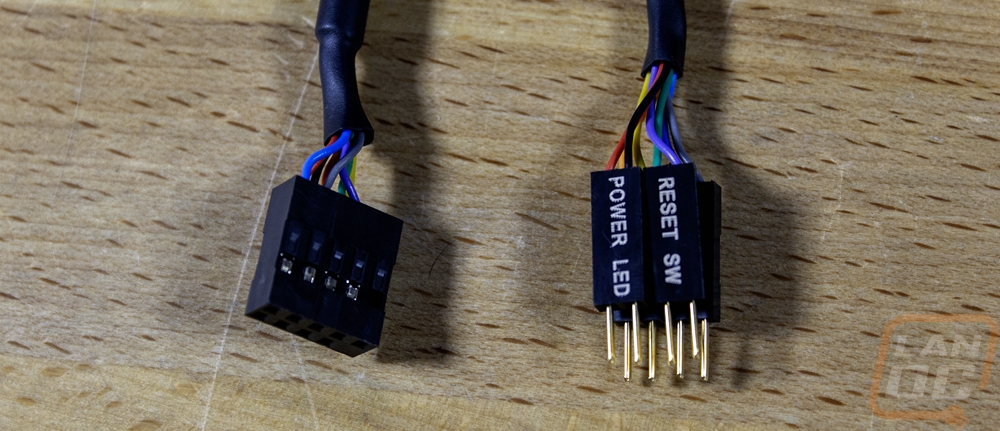
There is a bag stuffed full in one of the other compartments. Inside it includes a bag with two black SATA cables inside. There is also a thick Type-C cable, this is for the Strix Hive II. The small splitter cable is a USB 2.0 splitter to double up the number of USB 2.0 connections you get. They include an ROG-branded keychain. Then you have a bag with black zip ties and two smaller bags with rubber mounts and Q-Latch for the M.2 slots. There is also an extension cable for the front panel connections. One end has a solid plug, and on the other, you have all of the individual connections to make it easy to prep all of those hard to plug in connections outside of your case.

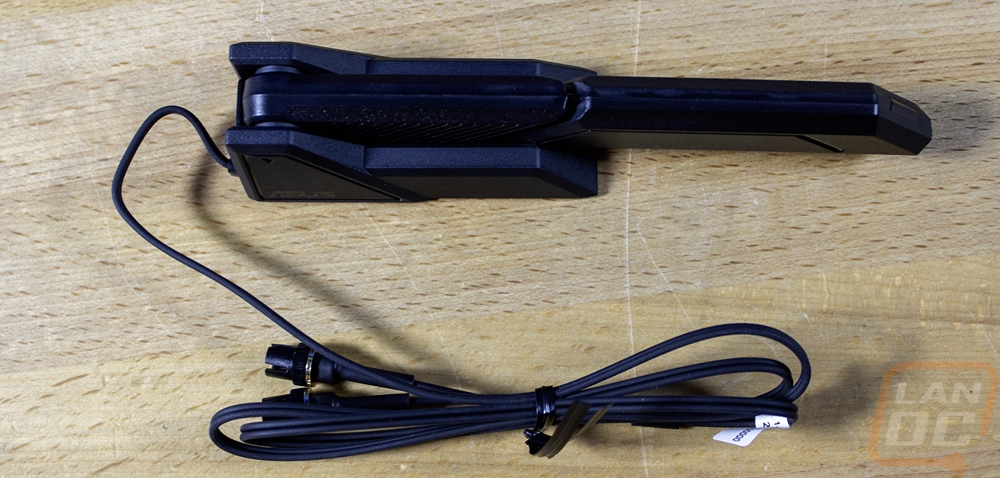
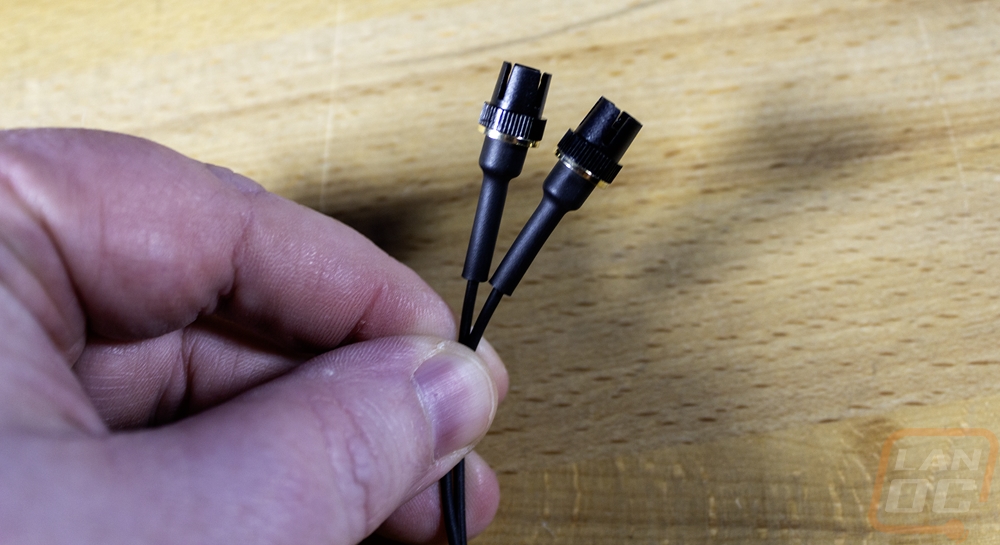
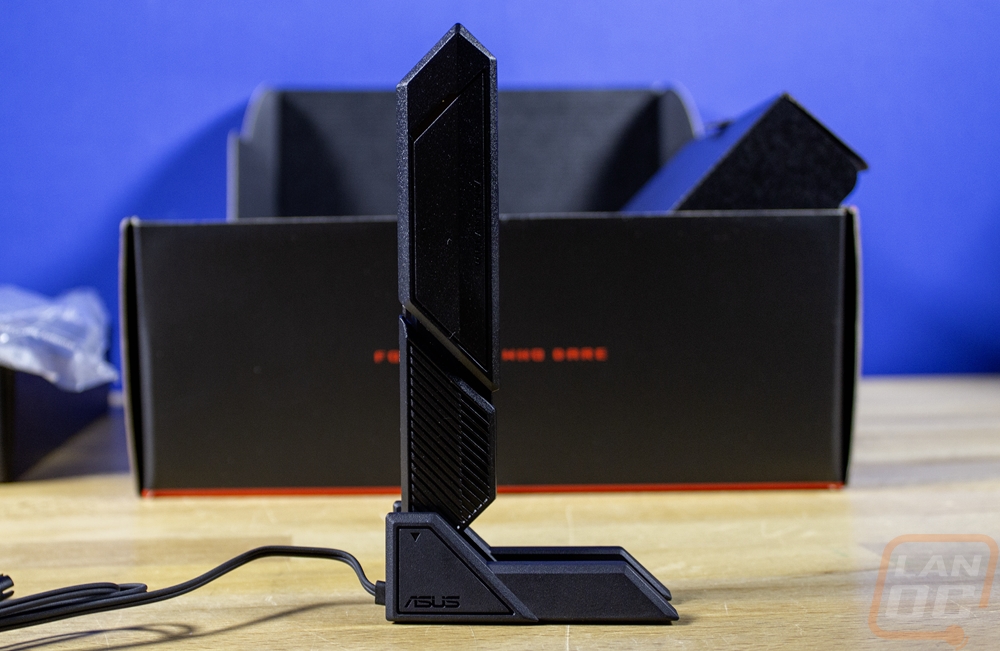
The ROG Strix X870-I Gaming Wifi, as the name suggests, has a built-in wireless NIC. With that, you do need an antenna and Asus includes that. This is the same antenna that I’ve seen on Asus boards for a few years now, except this has the newer Q-Antenna which means it has the snap on connections. The antenna itself has a black plastic housing with a rubber grip on the base as well as magnets in the base allowing you to stick it to most cases. It then flips out or can be folded down depending on what works better for your setup. Asus has a direction finder tool in their software to help you move the antenna around to get the best possible connection.
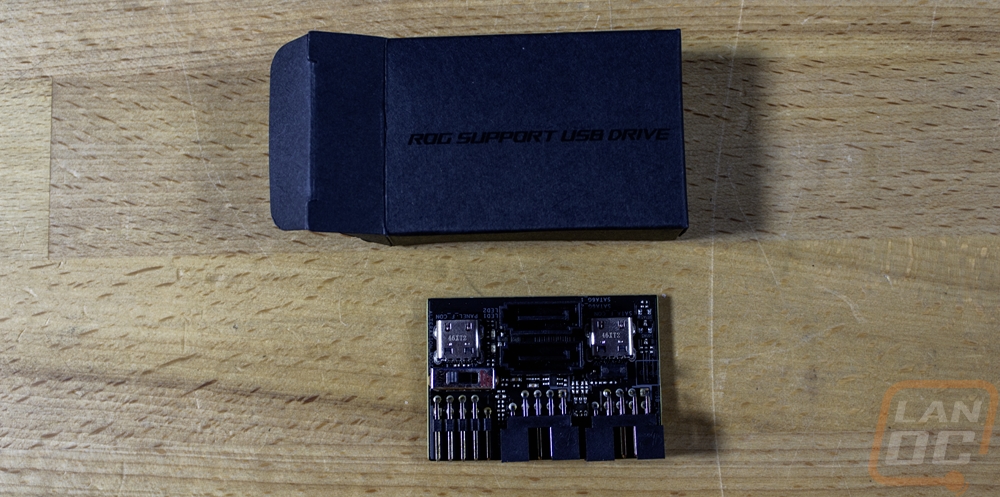
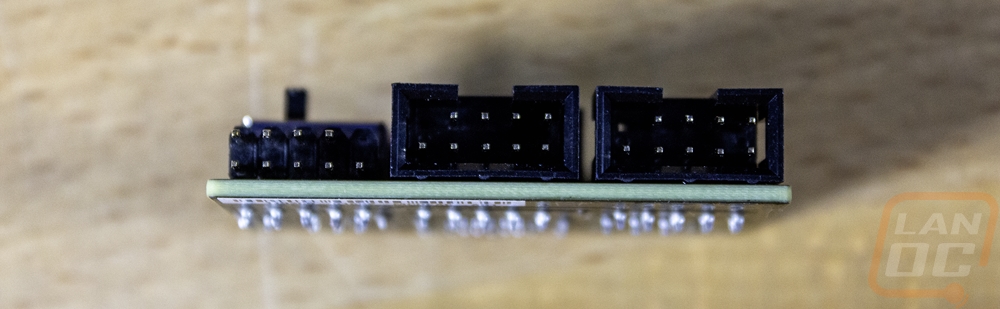
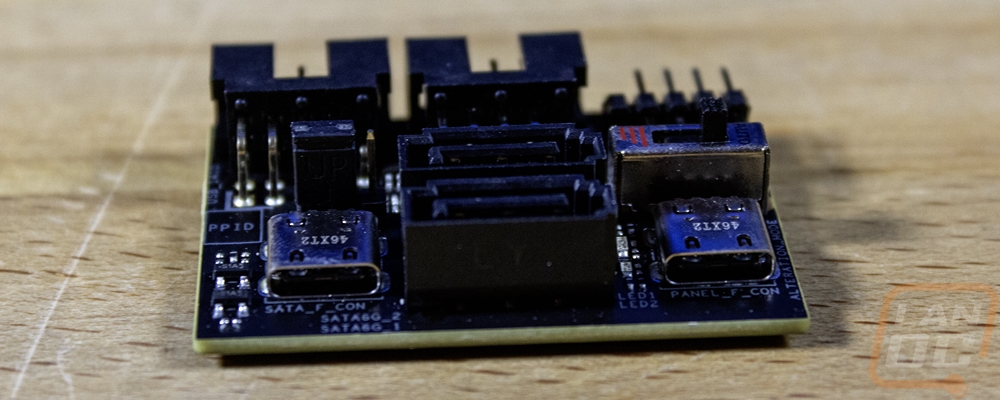
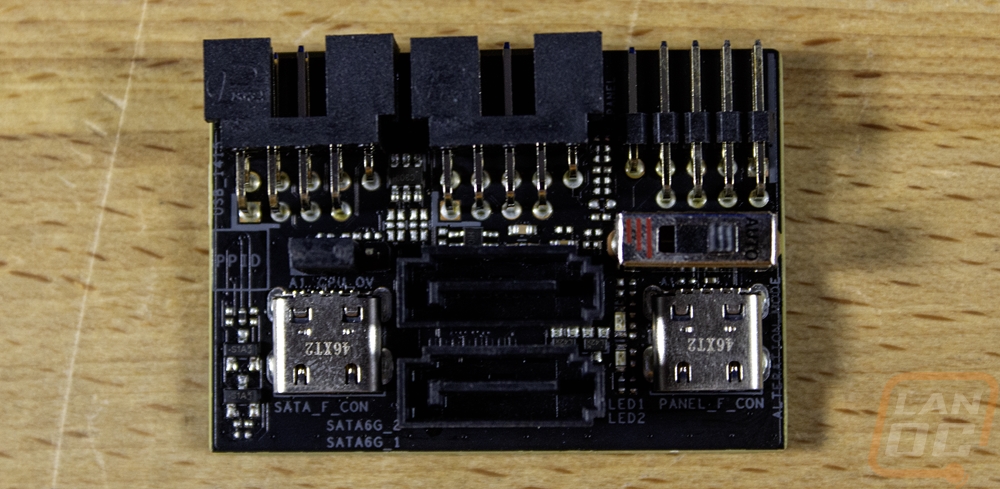
I don’t know if it's our early sample or what but I got a laugh when I saw this small black box that is labeled saying it has a USB drive inside but when I pulled it out I found this small break-out board. Asus packs a lot in their ITX motherboards and often that means risers that stack additional boards and boards like this. They call this the FPS Card which stands for Front Panel SATA card. It has two Type-C connections which is how it connects to the board. From there it has the front panel header, two SATA ports, the CPU-OV jumper, an alteration mode switch, and two USB 2.0 headers. I like these expansion boards, but including the front panel connection means that this isn’t an optional board, you need to have it to boot things up. With that, it might as well be permanently attached to prevent any damage. If you were curious the alteration mode switch forces the PCIe slot to run at a lower generation, something that can sometimes be needed when running PCIe ribbon cables. The CPU OV jumper is for enabling overvoltage mode, allowing you to run higher voltage settings in the BIOS if you want to.
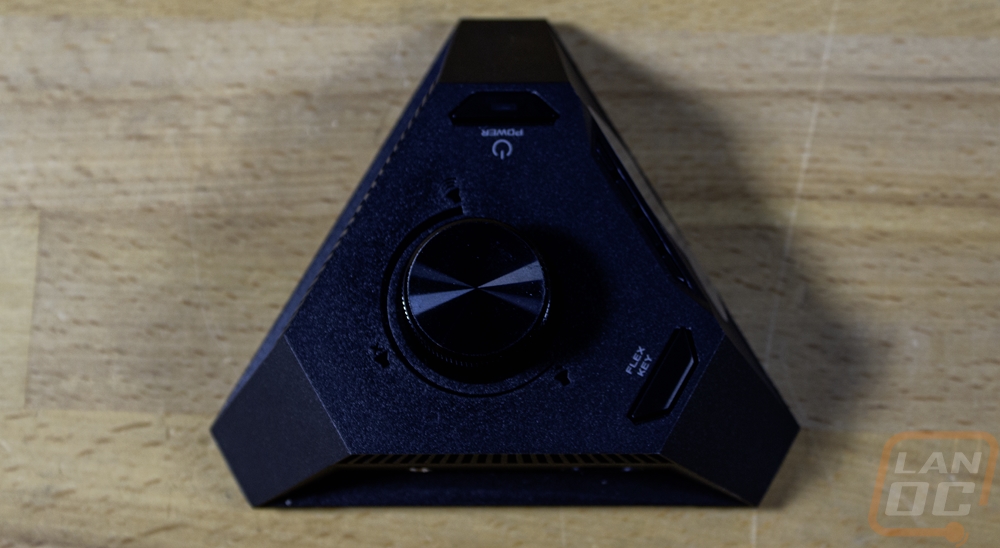
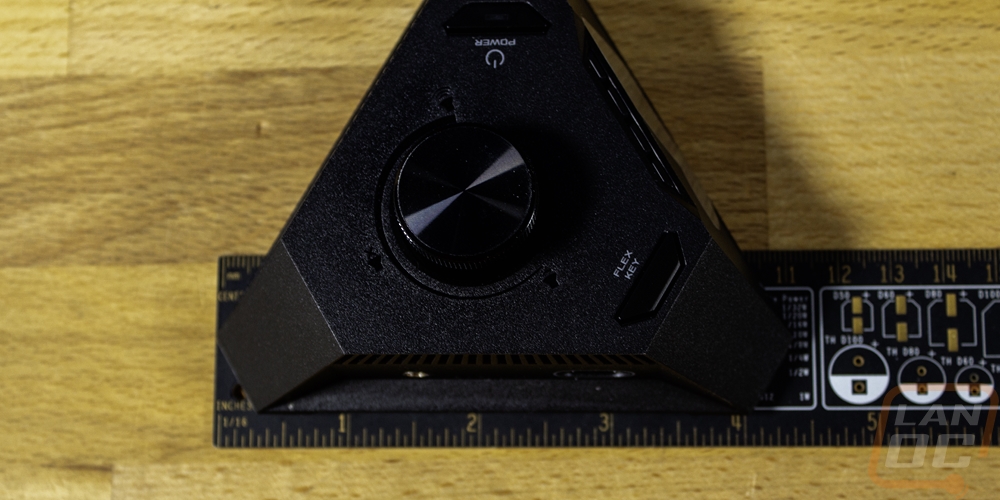
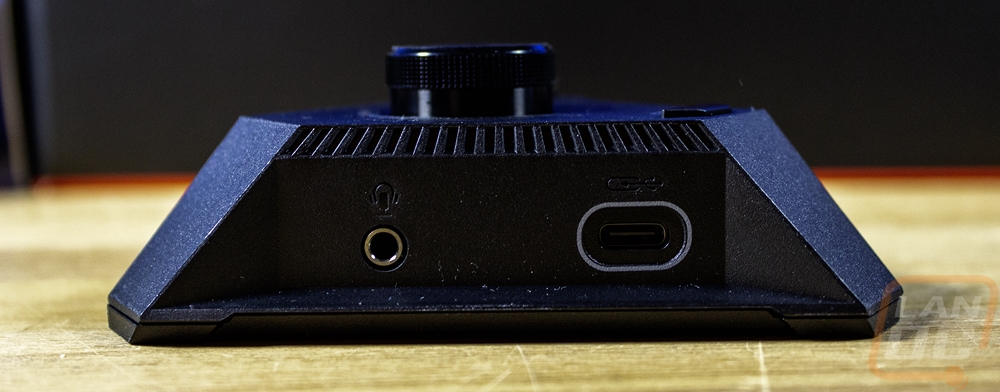
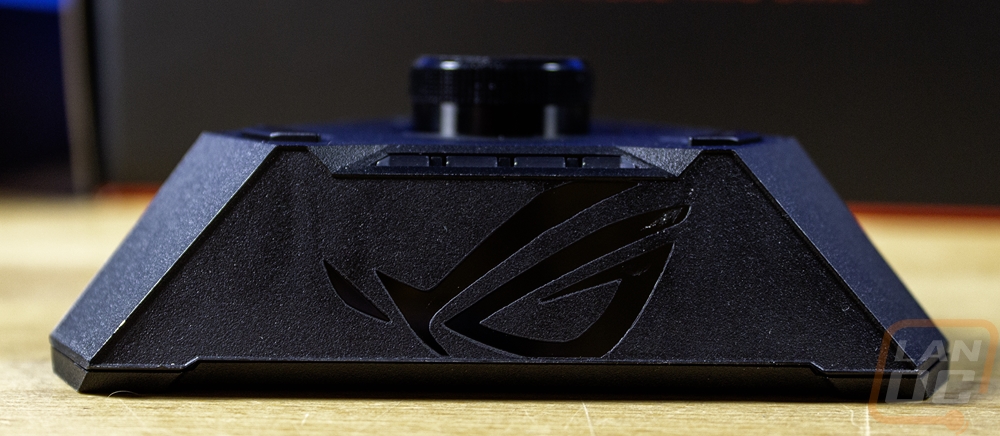
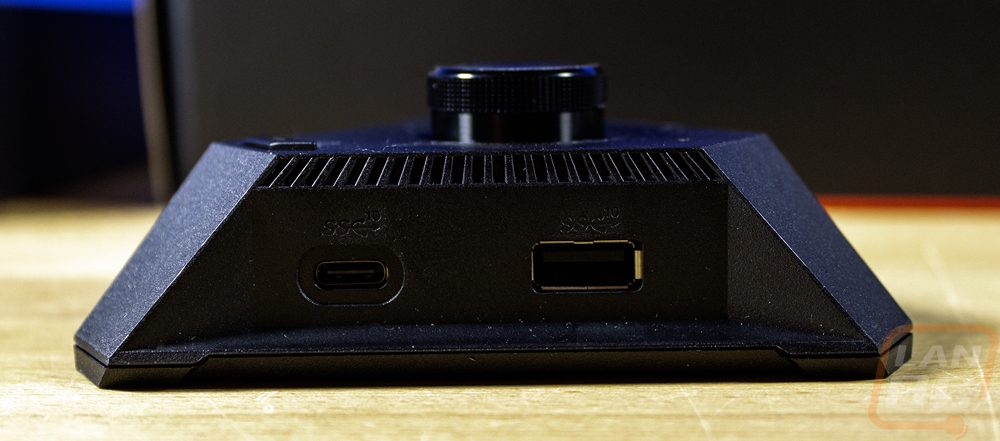
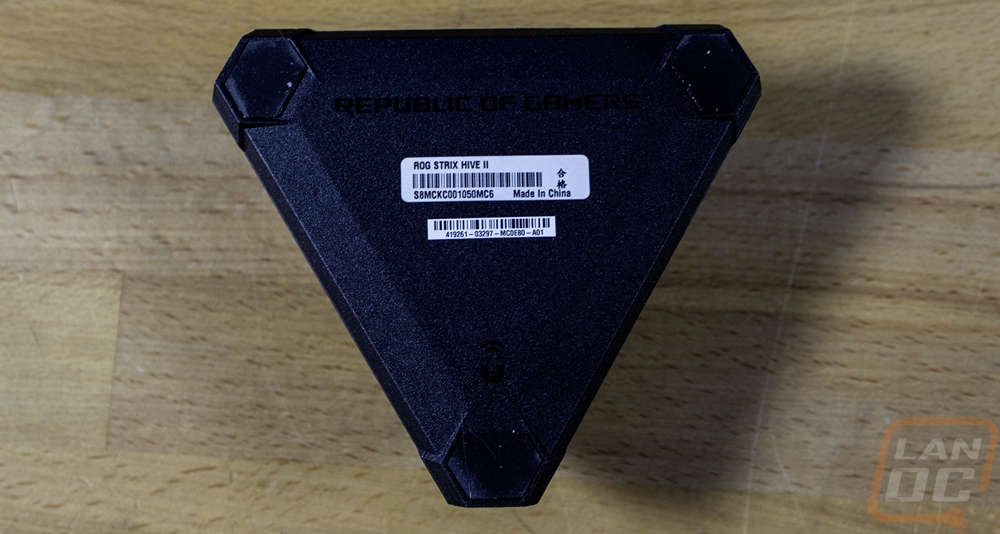
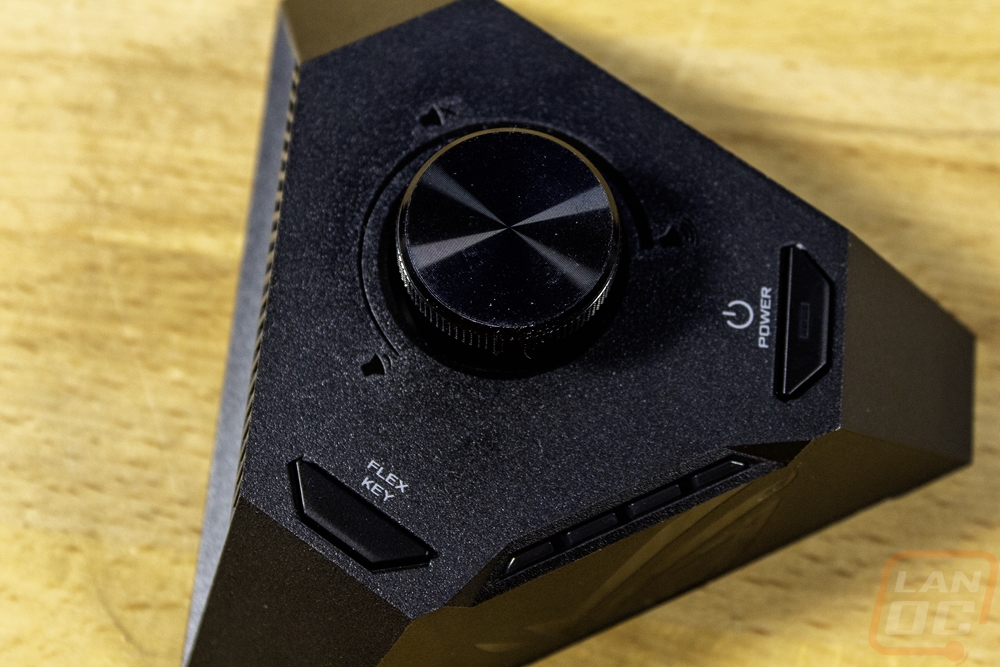
The biggest surprise in the accessories is the ROG Strix Hive II. The ROG Strix X870-I Gaming Wifi comes with a full-on docking station with volume control to put on your deck. It’s 110 mm wide in a triangle shape. Up on top, it has a large volume wheel in the center and then two buttons. One is dedicated to be a power button and the other is a Flex Key button. Flex Key can be programmed to be a reset button, Direct Key, and Aura Sync in the BIOS. The volume knob is obvious with it turning clockwise to raise the volume and counter-clockwise to lower it and you can also push down on it to mute. Also on the top edge, there are four LEDs, these are Debug LEDs showing red for CPU, orange for DRAM, white for VGA, and green for Boot. With most boards, you would see these on the PCB, but the idea here is that in compact SFF builds you wouldn’t be able to see them when needed not to mention most ITX boards don’t have room for them. The Strix Hive II has three rubber feet on the bottom along with the ROG branding and the model and serial number information on stickers. The base also has neodymium magnets in it letting you stick it to your case or on your desk if they are ferrous. It also has a Type-C and Type-A connection on the side, both being USB 10Gbps connections. There is also one 3.5mm audio jack that has both headphone and microphone connections. The last Type-C connection with the ring around it is what you use to plug the Hive into the back of the board. The Hive II has an ESS SABRE9260Q DAC inside to handle the audio for the Strix X870-I Gaming Wifi. With that in mind, I do think it should have two audio jacks so there would be one for your headset and one for speakers.
Board Layout and Pictures
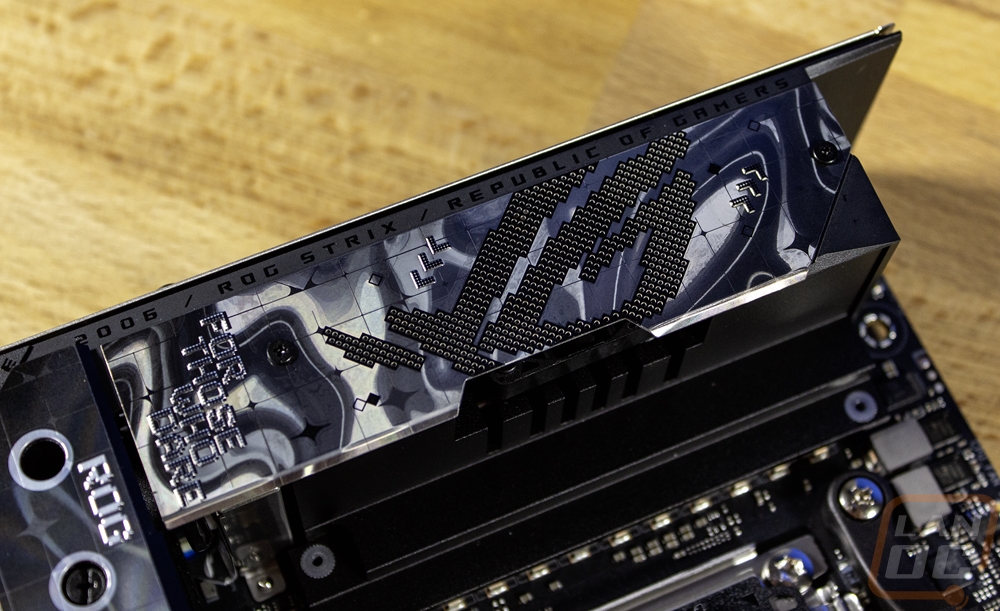
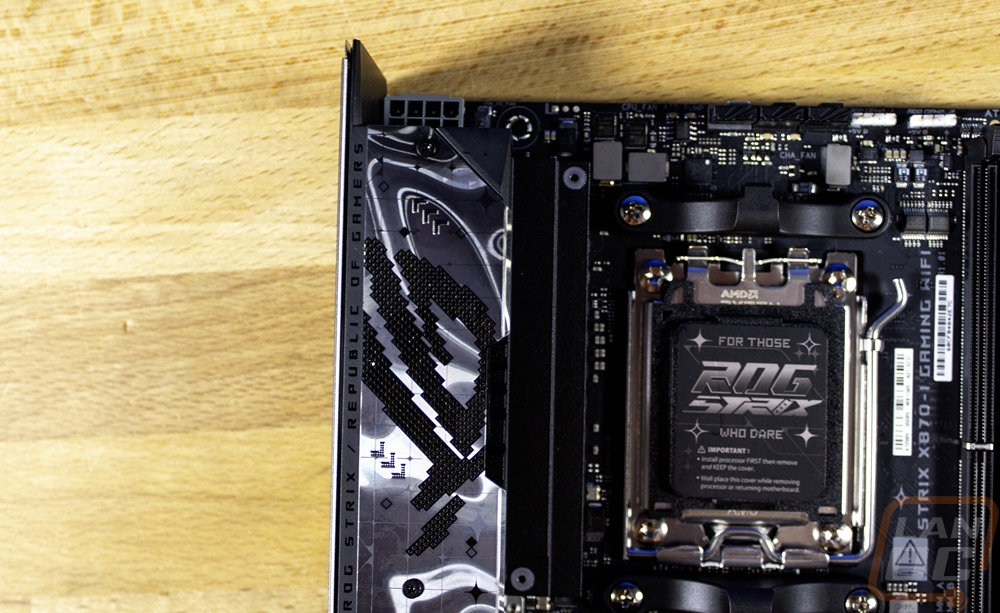
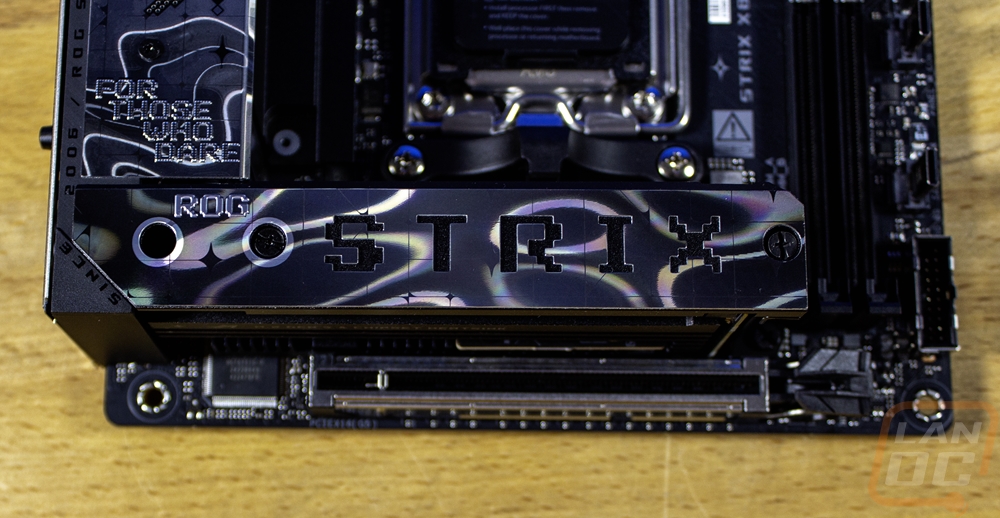
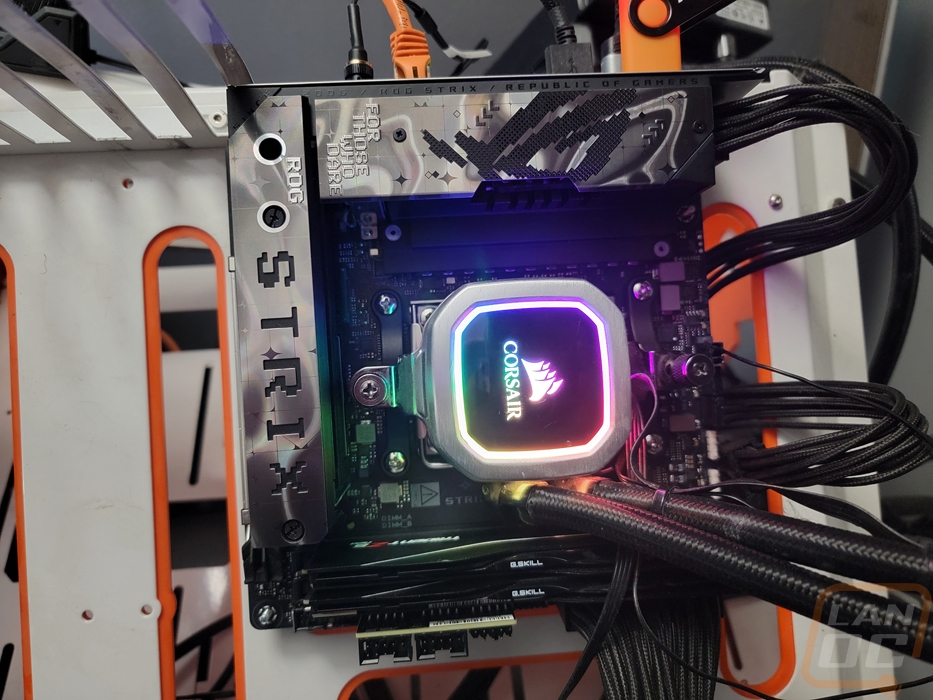
The ROG Strix X870-I Gaming Wifi has taken the stainless steel finish that we saw on the ROG Strix X870E-E Gaming Wifi and cranked it up to eleven. Where on the X870E-E it was just on the one heatsink. The Strix X870-I Gaming Wifi has it on top of the rear I/O and on the M.2 heatsink. With it being a Mini-ITX form factor those two heatsinks fill up most of the board and it looks great. The bottom cover has the Strix branding cut out letting black peek through and it has the ROG branding on it. The cover over the rear I/O has the ROG logo across it and it all has a cool halo look with the reflecting light being turned into random light circles all over.
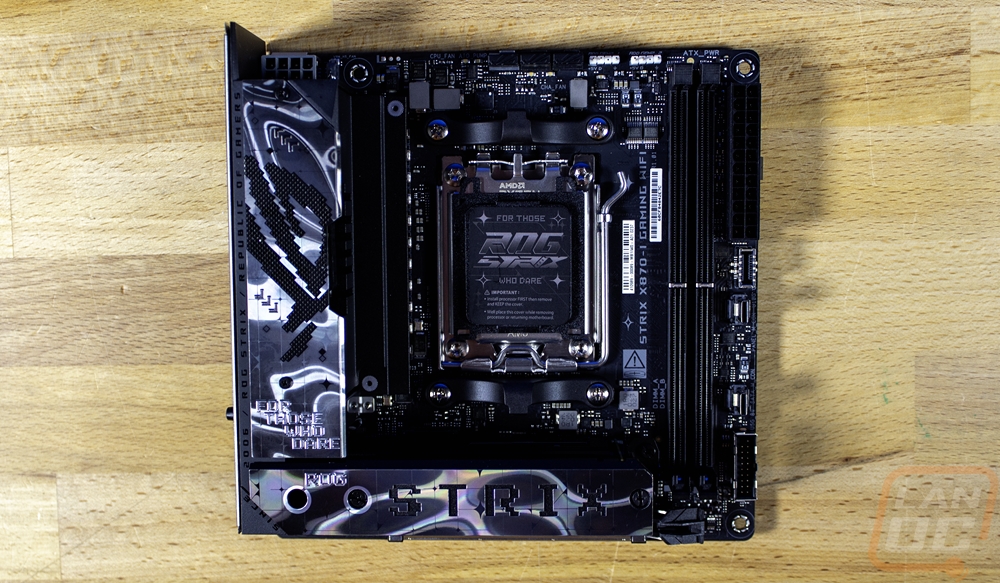
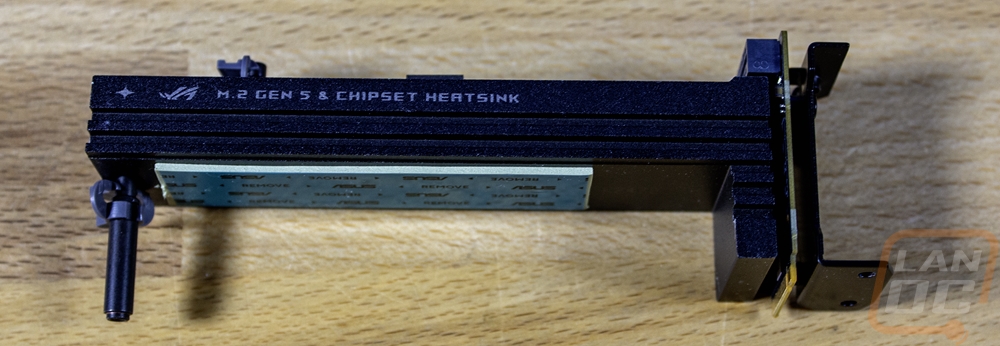
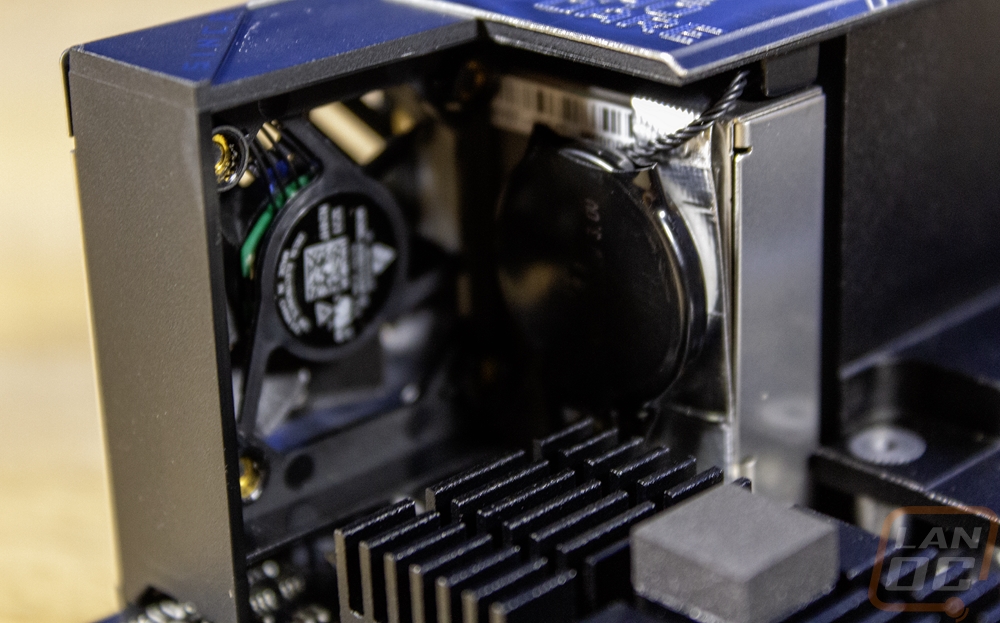
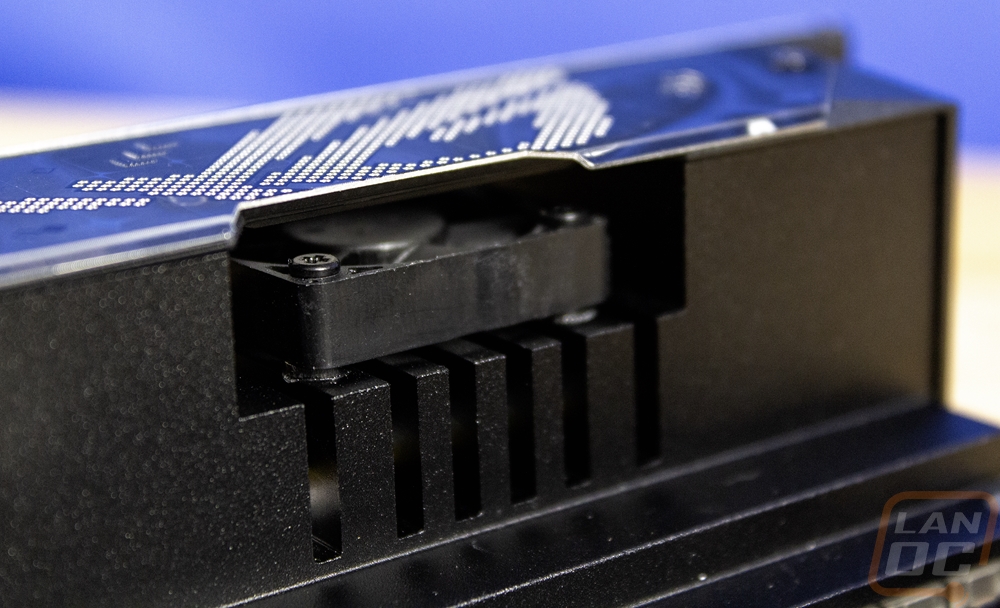
Cooling on ITX boards is always a challenge but that gets even harder in situations like this where Asus is packing a lot of other features in a swell. The Strix X870-I Gaming Wifi has 12 power stages for the V-Core and two more for the V-SOC and they have support for 110 amps using Asus’s Smart Power Stage design. Those VRMs are all on the left of the CPU socket except for two. That left side has an aluminum heatsink that extends out over those VRMs but is low profile there to leave room for coolers. Towards the rear I/O, that turns into a full-height cooler and Asus has slipped a small cooling fan in the middle. Below the CPU there are three more heatsinks but they are all stacked together. They have a finned heatsink down on the bottom, then a riser PCB for the first M.2 slot, then a thick L-shaped heatsink above that for cooling that M.2. Then there is another riser for the top M.2 slot and a thinner heatsink up on top that sandwiches it all together. This handles both of the M.2 drives as well as the chipset. To help with it, the rear I/O has a second small fan, this fan blows in through all of those heatsinks. Also tucked in that area you will find the CMOS battery that is only visible when you have the heatsinks all apart.
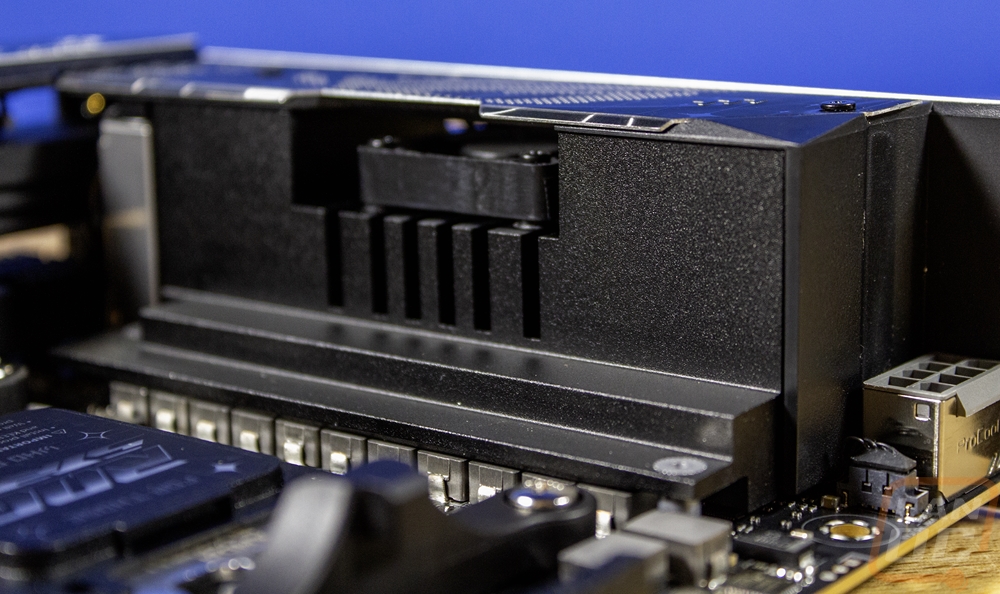

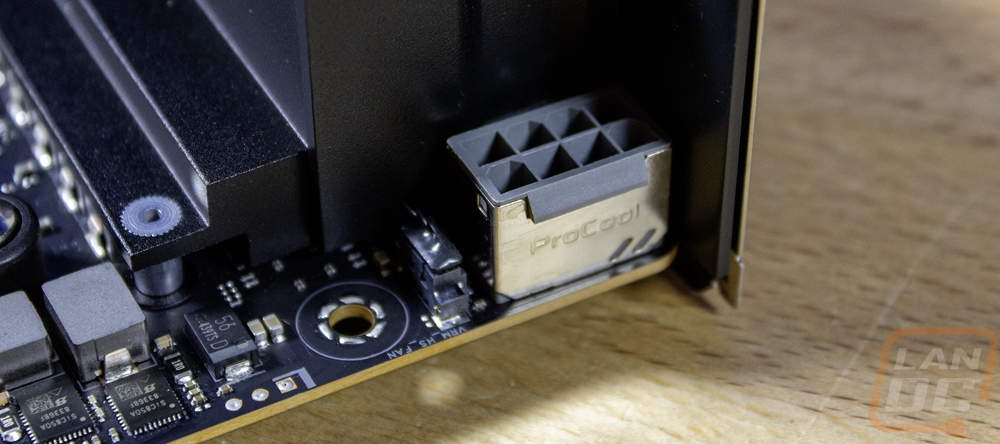
Starting in the top left quadrant there isn’t too much going on. Most of the space is taken up by the CPU socket and the VRM heatsink that is combined with the rear I/O. Right in the corner though the Strix X870-I Gaming Wifi has the single 8-pin CPU power plug. It has a metal shield around it with the Procool branding on it. Asus is using their Procool II power connections here which have solid pins and the shield over it to help dissipate heat down into the 10-layer PCB. Speaking of that, the PCB uses 2oz of copper inner layers to help cut down on electrical interference and to help with thermals from high currents as well. The ProCool II connections also have a status LED that lets you know the plug is connected. Right next to that connection, they do have the VRM fan plugged in.
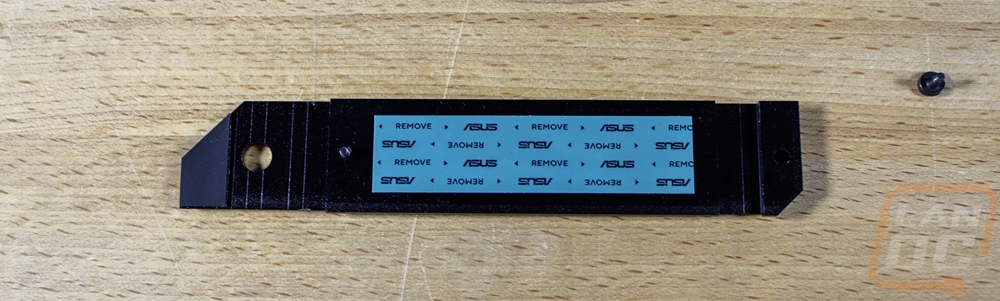
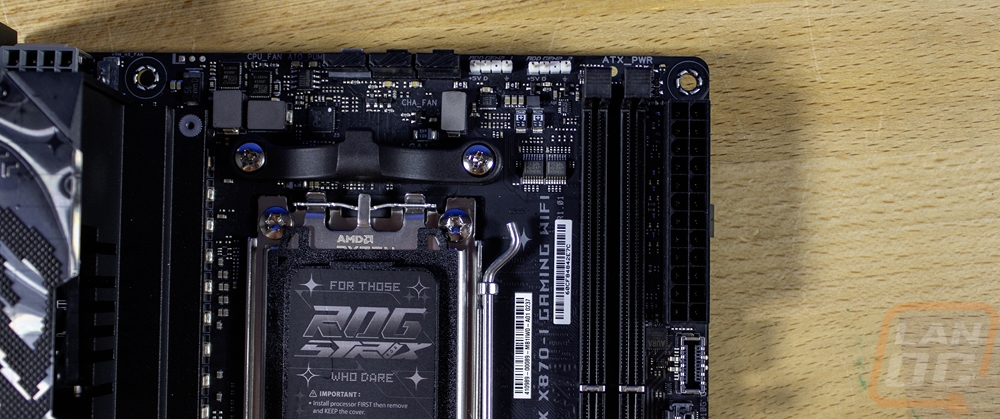
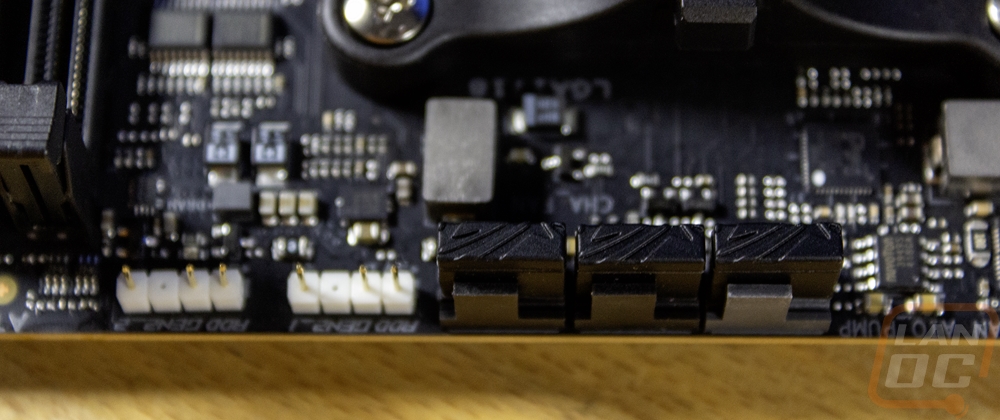
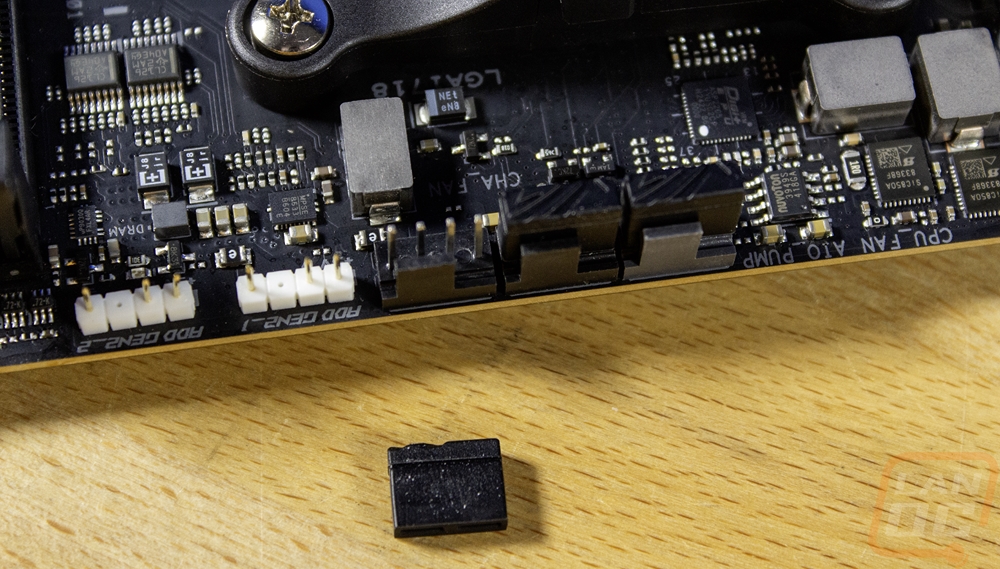
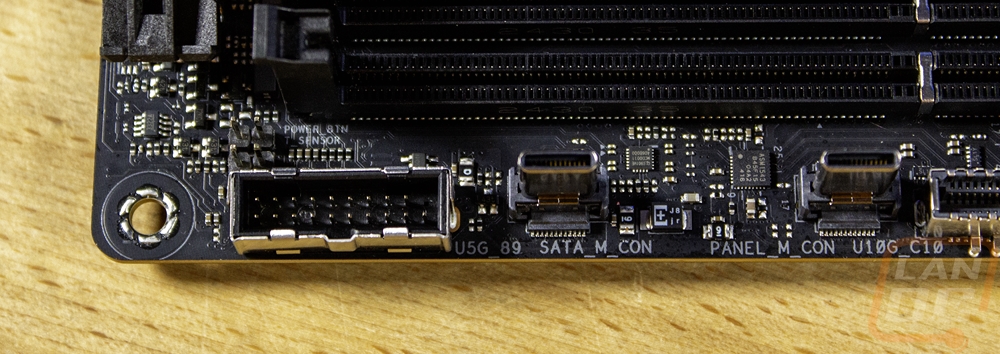
Moving into the top right quadrant the Strix X870-I Gaming Wifi has three 4-pin PWM fan headers along the top edge. They all come with rubber protectors that you will need to remove, those are there to prevent a comment damage location. Those three plugs cover two fans and one for your AIO pump, these are all of the fan headers on the board but it's enough to cover most ITX builds. Next to those are two addressable RGB headers, these are one of the only white things on the board and are easy to spot. You have the two DDR5 ram DIMMs then next to that the 24-pin motherboard power. This connection also has the ProCool II, but it doesn’t have the outside shield, just the solid pins and status light. Below that is a 10G front panel USB connection then one of two weird internal male Type-C connections on the board which are for the included FPS Card which I spoke about more in the accessories section but is a riser card with SATA, front panel, and USB 2.0 headers as well as the alteration mode and CPU_OV jumper.

Because I will talk about the M.2 and PCIe connections in the next section. The last quadrant is the entire bottom half of the Strix X870-I Gaming Wifi. On the right side below the FPS Card connections, you have a USB 5Gbps connection. There are no other connections along the bottom edge at all. One big thing to note here that is missing. There isn’t a traditional front panel audio connection, in fact, the board itself doesn’t have audio on it at all, which is all running through the included ROG Hive II.
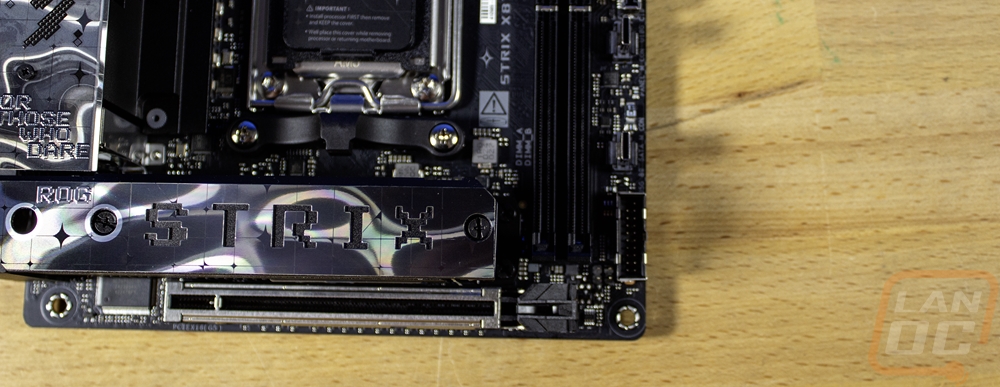
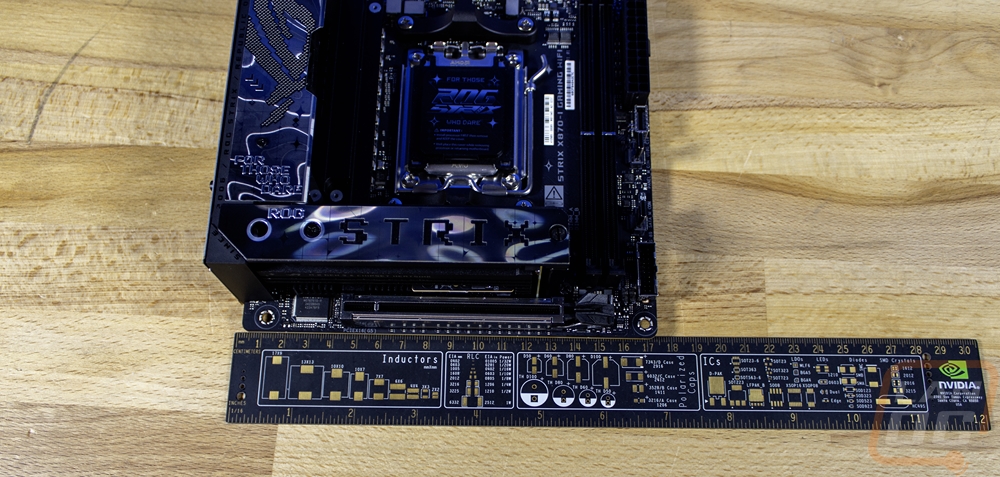
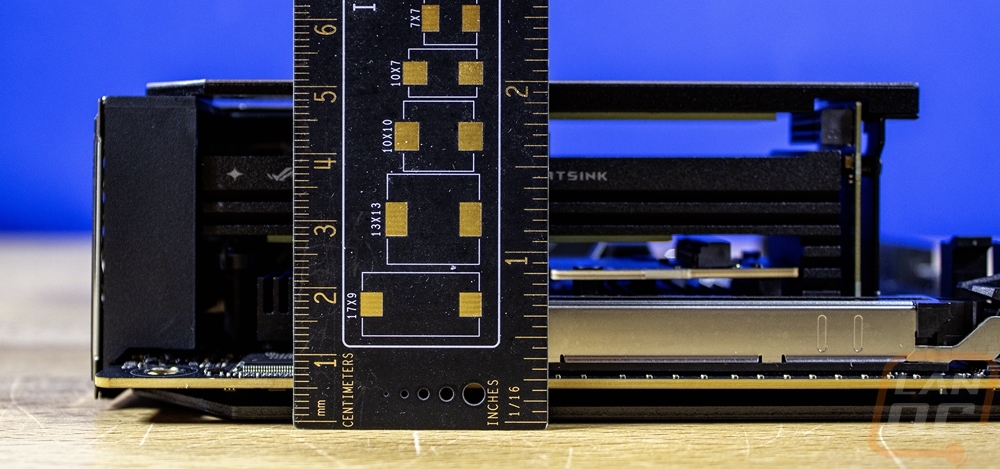
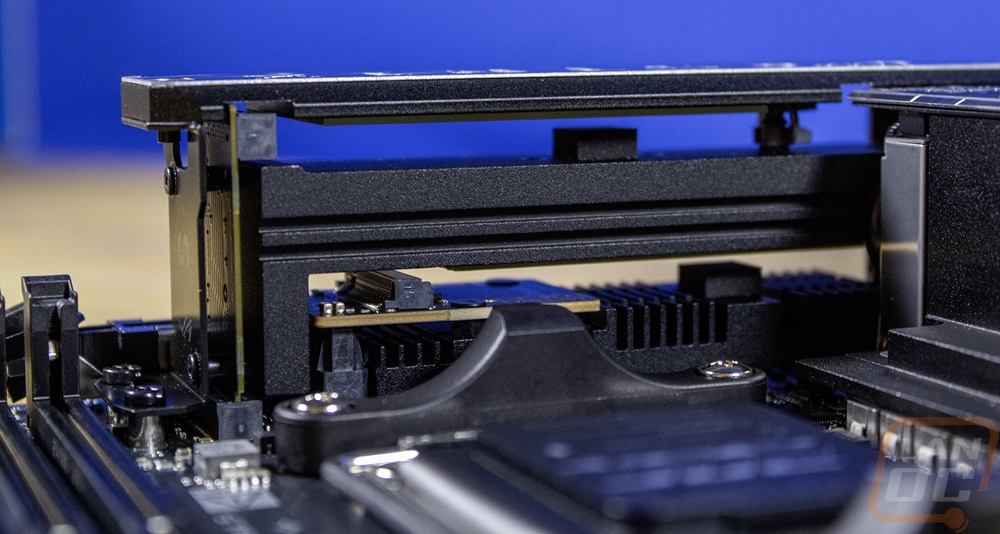
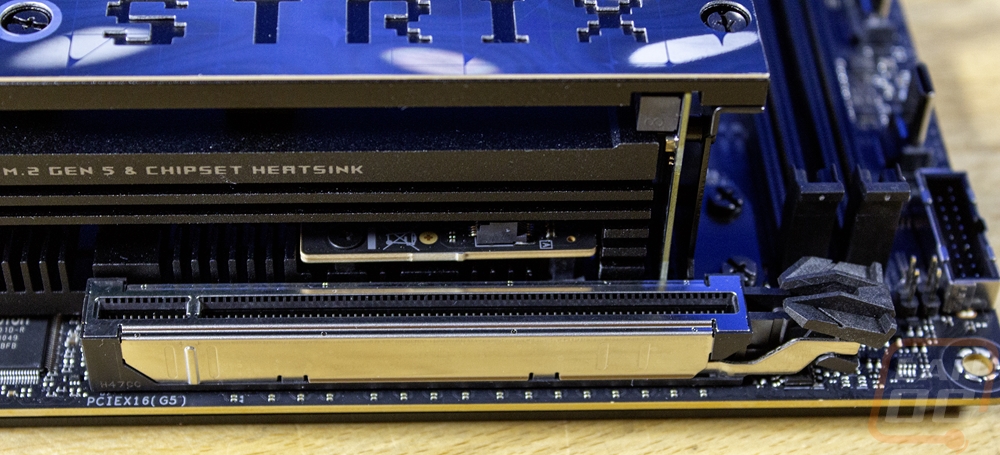
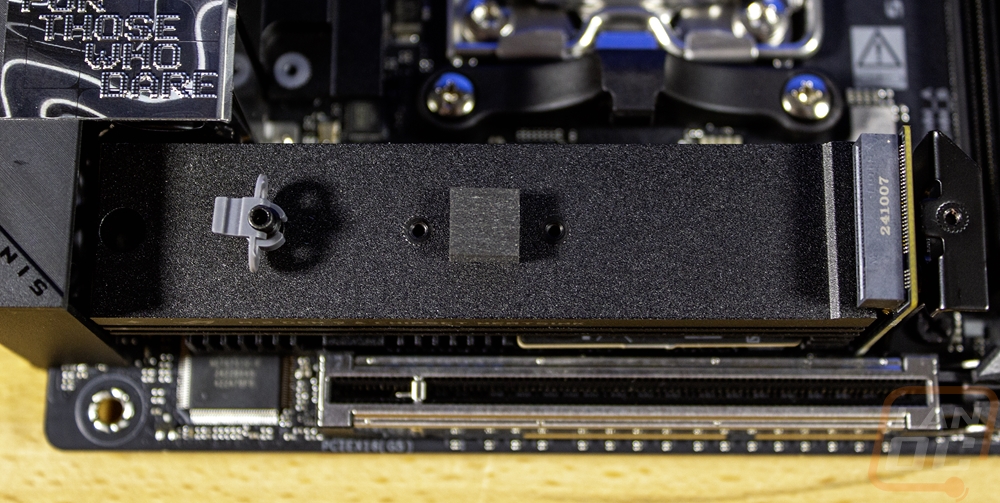
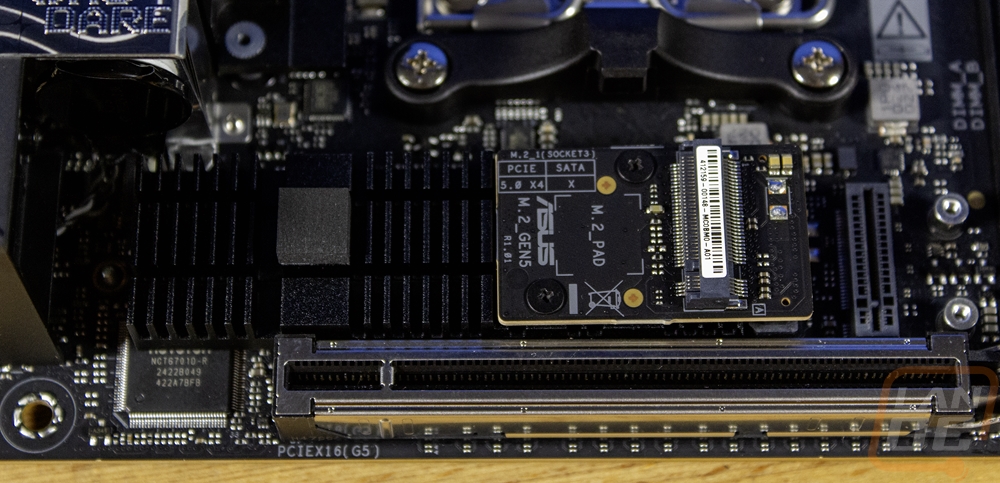
Being an ITX board, it's no surprise that the Strix X870-I Gaming Wifi has just one PCIe slot. That is a full x16 length and lanes and is PCIe 5.0. It has a metal shield around it, this time for strength to hold today's heavy video cards. If you look closely on this one you will see metal on the sides of the latch as well. That is Asus’s PCIe Q-Release Slim. Q-Release originally had a button you could push to release the latch, which was extremely helpful given how tight things get especially in this situation. With this design, the button isn’t necessary. You can pull your card out with one hand by lifting the card from the left side. This will tilt it and the mechanism will pop out and unlock allowing you to take the card the rest of the way out. Just above that we have the M.2 sandwich which has two M.2 slots stacked on top of each other with heatsinks on the bottom, middle, and top that combined with the small fan cools both M.2 slots as well as the chipset which is under it all. The top cover/heatsink has thermal tape on the underside and is held in place with two screws. I was a little surprised that Asus didn’t make this a cool tool-less design like I have seen on some of their boards this generation. You will need tools to take the cover off. Below that though they do have their M.2 Q-latch that is toolless for holding the drives in place. Not perfectly easy given the cover, but at least you don’t have to mess with those tiny screws anymore. The top M.2 slot is the M.2_1 slot and is PCIe 5.0 and runs off of the CPU. The bottom M.2 slot is M.2_2 and is PCIe 4.0 and runs through the chipset. Part of me was hoping to see an M.2 on the back of the board as well, but given that PCIe 4.0 is the standard at this point I understand that putting drives back there no longer works given the cooling needs. That said, I wouldn’t have minded a slower PCIe 3.0 slot back there for a big storage drive (of course that would confuse some users).
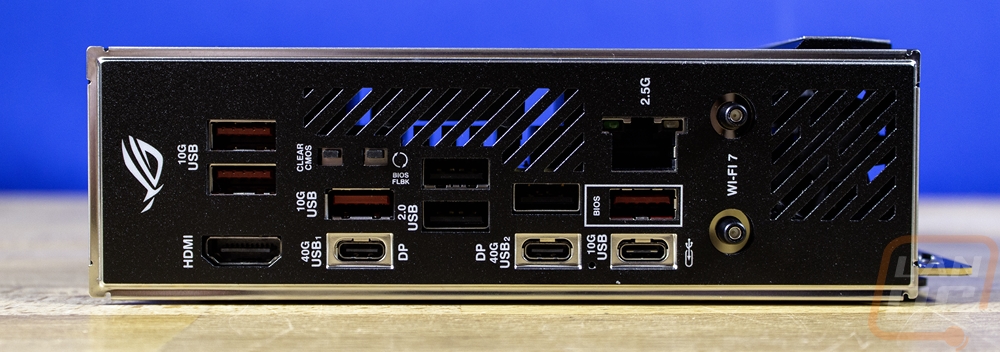
For how much is packed into the Strix X870-I Gaming Wifi, the rear I/O looks a lot more bare than you would expect. That isn’t to say that there isn’t a lot back here though because there is. It is because over on the right side, where they have that fan intake would normally be the rear audio connections and they are missing. The audio is all run through the ROG Hive II which I touched on a few times now. Next to that area, you have two snap on antenna connections for the WiFi 7 wireless NIC which supports 320 MHz bandwidth. Next to that is the wired NIC which is a 2.5G Intel NIC. On the far left you have one onboard video display connection which is HDMI. Then tucked up under the second vent in the rear I/O panel are two tiny buttons. One is a clear CMOS button and the second is for running BIOS Flashback to update your BIOS without memory or a CPU installed. That leaves us with the USB connections and in total the Strix X870-I Gaming Wifi has 10. Three of those are Type-C with two being 40 Gbps connections (USB 4) and one being 10Gbps. That 10Gbps connection is also labeled as the connection used for the ROG Hive II. The other two can also double as a DisplayPort output if you have a monitor that supports DisplayPort over Type-C. There are three black USB 2.0 ports which I’m happy to see, that’s a perfect number to cover your keyboard, mouse, and DAC or headphones. Then there are four red 10Gbps USB plugs as well that are all Type-A. The rear I/O comes with the shield preinstalled and that has a nice black finish that should match most builds and each port has easy to see white legends next to them.
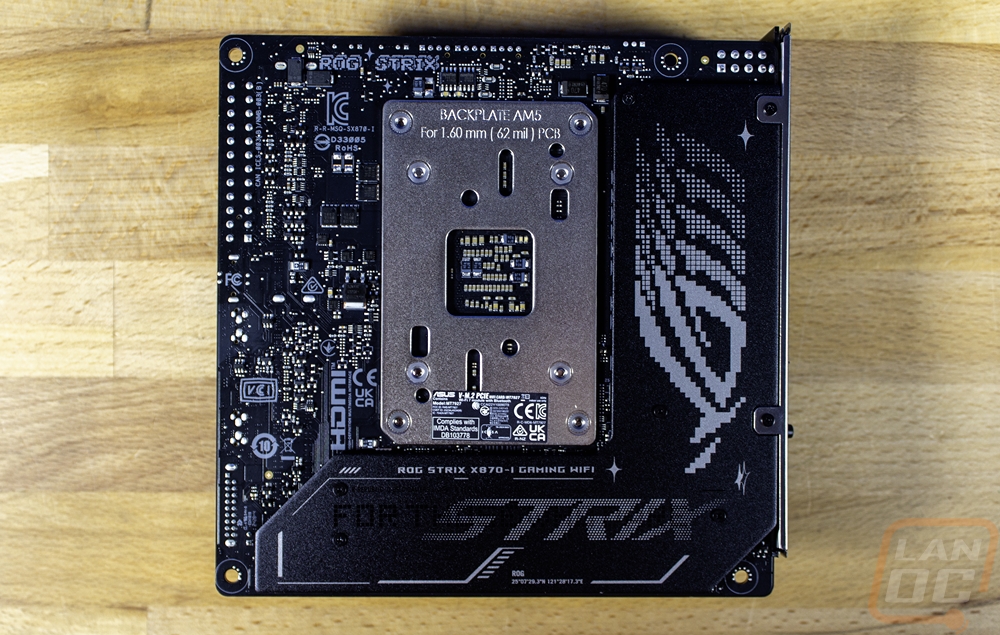
The bottom of the Strix X870-I Gaming Wifi might be compact, but a lot is going on down here. Where most full-sized motherboards have a lot of open PCB space you can see that they are fitting a lot into a compact space with very little open space here. The AM5 backplate looks huge but if that isn’t enough to protect the bottom of the board, it also has an L-shaped shield over the right and bottom portions as well. It is aluminum and has the ROG and Strix branding all over it as well as the full Strix X870-I Gaming Wifi model name.
BIOS
Rather than have stacks of pictures I put together a basic video that just goes through and clicks on each menu option in the BIOS so if there is anything you want to check out you can see it and pause when needed. The ROG Strix X870-I Gaming Wifi starts off on the EZ mode page like most boards these days. This has the ROG theme which is just like the TUF board I recently took a look at, only with the ROG red at the top and bottom and a dark grey for the background of most of the BIOS. On this page, they have simplified things for users who might not be comfortable with the full BIOS. You can turn on XMP and swap your boot order by drag and drop. You have access to an overclocking profile in the top right corner which is one way to turn on the PBO enhancement setting which tunes based on thermals. You can see your CPU temps with a graph, core voltage, and all of your fan speeds. The most noticeable thing for me however is Asus’s move to a higher resolution for the BIOS. It doesn’t change the functionality at all but it looks significantly better. They have truly gone from standard definition to high definition.
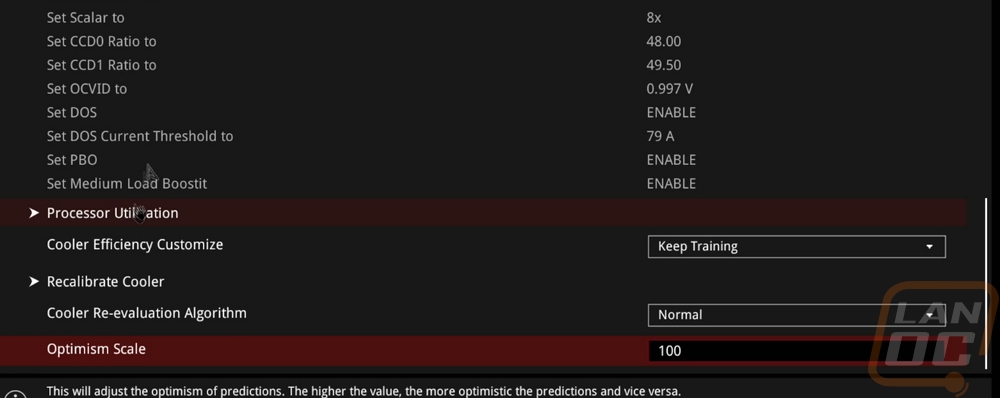
Jumping over to the Advanced mode you have on the right side of this and every page the hardware monitor that shows CPU, Memory, and Voltage information live. There was a few seconds lag for this to load up which was interesting. The ROG Strix X870-I Gaming Wifi also has the prediction information here. Asus has a microcontroller on the board that is always keeping track of your CPU’s performance, even if you aren’t using their AI Overclocking. They use this to create a silicon prediction rating for your specific CPU and a rating for your cooler's performance. With that, they give potential voltage settings for different clock speeds. There is a setting page for this that I will touch on in a minute.
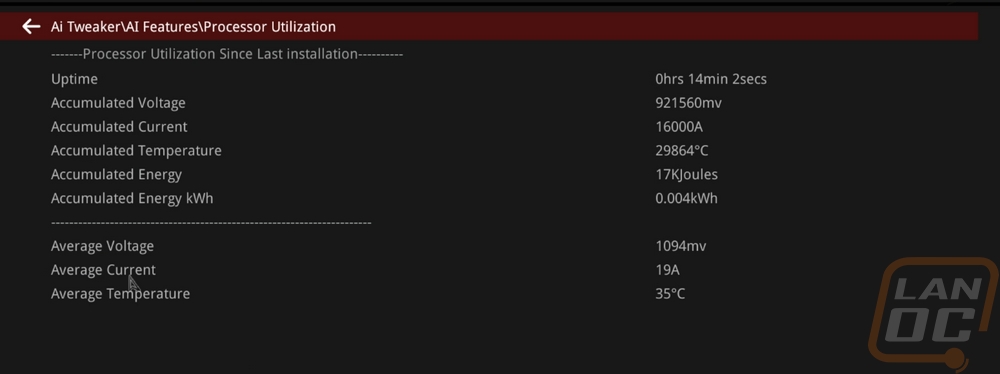
Up top, there are a few basic options like the language button and search that helps you find something specific if you know the name. The first page is the main tab and this has the BIOS version, PC information, and date and time. From there up top the Ai Tweaker page is where they have all of the overclocking-specific features tucked away. At the top of that page, it shows you the target frequencies for your current settings so you can see what your changes are doing. The basic BCLK and performance preference settings are up top. As you go down there are pages for core-specific settings, e-core settings, AVX, and dram controls. The DRAM controls page is overwhelming with just how much control you have in there. Then near the bottom, you have the VRM and CPU power management pages. The AI Features page lists all of the current information well beyond what is shown on the right side in the prediction section. I somehow didn’t scroll down on that page in this video, so I have included pictures below. You get full states on your CPU including total uptime, accumulated voltage, current, temperature, energy, and average states as well.
Getting on the advanced tab then dives into a lot of the motherboard-specific settings. Asus has it split up letting you get into USB, Network, NVMe, PCH, CPU, Thunderbolt, APM, and even Trusted Computing settings here with all of those and a lot more having their own pages. Down at the bottom is the AMD CBS page and this is where a lot of people are going to be wanting to dive into things. Here you can change the PBO enhancement settings to tune in the overclock including setting what temperature range you want to be running in. The monitor page has sub-pages for the temperatures, fan speeds, and voltages that show you all of the different readings for each. Then they also have a Q-Fan settings page, a majority of the settings are in the tool like all of the individual fan settings. You can open up the Qfan tool up top or by pressing F6. It is a tool that lets you pick or create your own fan profiles for each fan plugged in. It might go unnoticed by most people, but Asus has 8 points in their fan manual fan curve settings whereas most boards (including the competition to this board) have fewer. This isn't just a software change, the fan controller has been upgraded to support this. You can change what device they use for temperatures which is huge, you can set fans near your GPU to worry about your GPU speeds. This is the tool I use the most on my own PC to fine-tune keeping things cool but also quiet.
The boot tab has your boot priority and other boot settings. Then the last tab is the Tool tab. This has the EZ Flash utility which has been upgraded from version 3 to 4 this generation (this isn’t pictured in the video, my recording was with the previous BIOS revision). The big upgrade, it now will accept zip folders so when you download a new BIOS you no longer need to unzip it before booting up into the BIOS. Making a BIOS upgrade even simpler. Doing it that way also upgrades the ME version at the same time. You have an SSD secure erase tool. The BIOS Q-Dashboard has Q in it so we know it is designed to make things simpler. This has a line drawing of the board including the rear I/O. It shows each device that is installed with a green dot and mousing over those shows what the device is even going as far as to show my wireless mouse receiver for example on the USB ports. The SPD information tool just shows the full readout for each installed stick of RAM. The Profile is where you can save different BIOS setting profiles, this is nice for overclocking especially if you want to save a known good overclock or have profiles depending on the season (for when it's hot or cold). The MyHotKey tool lets you set specific functionality when booting and pressing that key. You can jump into the EZ Flash directly or set it to boot from a specific device.
Test Rig and Procedures
Test System
CPU: AMD Ryzen 9 7950X3D – Live Pricing
Cooling: Corsair H100i RGB Platinum - Live Pricing
Noctua NT-H1 Thermal Paste - Live Pricing
Memory: G.Skill Trident Z5 Neo DDR5 16GBx2 6000MHz - Live Pricing
Storage: Kingston FURY Renegade 2TB PCIe 4.0 SSD- Live Pricing
Video Card: Nvidia RTX 4090 FE - Live Pricing
Power Supply: Corsair AX1200 - Live Pricing
Case: Primochill Wetbench - Live Pricing
OS: Windows 11 Pro 64-bit - Live Pricing
|
Motherboard Testing |
|
|
Passmark Performance Test 11 |
Overall PCMark score |
|
PCMark 10 |
PCMark 10 standard test, not the quick or extended versions |
|
3DMark |
We run the newer Speed Way benchmark, Time Spy on its regular setting, and Time Spy Extreme. |
|
In Game Tests |
|
|
Watch Dogs Legion |
4K, In-Game Benchmark, Ultra detail |
|
Tom Clancy’s Ghost Recon: Wildlands Breakpoint |
4K, In-Game benchmark, Ultra Detail profile |
|
Far Cry 6 |
4K, In-Game benchmark, Ultra detail setting |
|
Subsystem Testing |
|
|
Network Testing |
OpenSpeedTest local server |
Performance
When it comes to performance testing, typically motherboard to motherboard we aren’t going to see any big performance difference when running the same components and clock speeds. The exception to that is when boards are auto overclocking of course and there are a few areas where components can make a difference like with ethernet and USB controllers. For testing the ROG Strix X870-I Gaming Wifi I ran through a few basic 3DMark benchmarks, PCMark, and Passmark Performance Test 11. I also tested in a few games. The ROG Strix X870-I Gaming Wifi was running with the 7950X3D for the CPU and a Founders Editon RTX 4090 and I have comparison numbers from the three other X870 and X870E motherboards that I have tested. No big surprises, but the ROG Strix X870-I Gaming Wifi tested right in line with all of them in all of those tests. I also ran networking tests, once with the wired connection. It has an Intel 2.5G NIC and the 2448.1 Mbps score is right in line with that and comparable to the two other boards using a 2.5G NIC as well. I ran the same test with the wireless connection as well. The ROG Strix X870-I Gaming Wifi has a Wifi 7 NIC but all of the boards, including this one have all been tested on our WiFi 6E network. Wifi 7 is coming, but for now, this is a look at what you can expect from 6E. The ROG Strix X870-I Gaming Wifi’s wireless connection can support 320MHz. I only tested at the 160MHz supported by Wifi 6E, but even still we see it outperform the three other boards tested running at 1518 Mbps.
|
3DMark – Speed Way – Overall Score |
|||||||||
|
Gigabyte X870 Aorus Elite Wifi7 |
10210 |
||||||||
|
Asus TUF Gaming X870-Plus Wifi |
10164 |
||||||||
|
ROG Strix X870E-E Gaming Wifi |
10185 |
||||||||
|
ROG Strix X870-I Gaming Wifi |
10144 |
||||||||
|
Motherboard |
Overall Score |
Graphics Score |
CPU Score |
||||||
|
Gigabyte X870 Aorus Elite Wifi7 |
29716 |
34970 |
16051 |
||||||
|
Asus TUF Gaming X870-Plus Wifi |
29375 |
34688 |
15727 |
||||||
|
ROG Strix X870E-E Gaming Wifi |
29268 |
34630 |
15590 |
||||||
|
ROG Strix X870-I Gaming Wifi |
29269 |
34574 |
15658 |
||||||
|
3DMark – Time Spy Extreme |
|||||||||
|
Motherboard |
Overall Score |
Graphics Score |
CPU Score |
||||||
|
Gigabyte X870 Aorus Elite Wifi7 |
17544 |
19139 |
11917 |
||||||
|
Asus TUF Gaming X870-Plus Wifi |
17451 |
19098 |
11724 |
||||||
|
ROG Strix X870E-E Gaming Wifi |
17472 |
19093 |
11798 |
||||||
|
ROG Strix X870-I Gaming Wifi |
17450 |
19085 |
11750 |
||||||
|
PCMark 10 Score |
|||||||||
|
Motherboard |
Overall Score |
Essentials |
Productivity |
Content Creation |
|||||
|
Gigabyte X870 Aorus Elite Wifi7 |
10108 |
11842 |
12221 |
19368 |
|||||
|
Asus TUF Gaming X870-Plus Wifi |
10177 |
11874 |
12381 |
19453 |
|||||
|
ROG Strix X870E-E Gaming Wifi |
9931 |
11992 |
12325 |
17983 |
|||||
|
ROG Strix X870-I Gaming Wifi |
10155 |
11932 |
12494 |
19064 |
|||||
|
Passmark PerformanceTest 11 |
|||||||||
|
Motherboard |
Overall |
CPU Mark |
2D Graphics Mark |
3d Graphics Mark |
Memory Mark |
||||
|
Gigabyte X870 Aorus Elite Wifi7 |
16553.8 |
63943.3 |
1128.2 |
33342.5 |
4109.0 |
||||
|
Asus TUF Gaming X870-Plus Wifi |
16416.0 |
63743.0 |
1184.2 |
33363.9 |
3903.5 |
||||
|
ROG Strix X870E-E Gaming Wifi |
16489.5 |
63858.8 |
1176.4 |
33415.6 |
3984.8 |
||||
|
ROG Strix X870-I Gaming Wifi |
16149.9 |
63476.9 |
1177.7 |
33281.4 |
3932.5 |
||||
|
Watch Dogs Legion – 4K Ultra Detail – Average FPS |
|||||||||
|
Gigabyte X870 Aorus Elite Wifi7 |
122 FPS |
||||||||
|
Asus TUF Gaming X870-Plus Wifi |
122 FPS |
||||||||
|
ROG Strix X870E-E Gaming Wifi |
122 FPS |
||||||||
|
ROG Strix X870-I Gaming Wifi |
122 FPS |
||||||||
|
Tom Clancy’s Ghost Recon: Wildlands Breakpoint – 4K Ultra Detail Preset - Average FPS |
|||||||||
|
Gigabyte X870 Aorus Elite Wifi7 |
146 FPS |
||||||||
|
Asus TUF Gaming X870-Plus Wifi |
147 FPS |
||||||||
|
ROG Strix X870E-E Gaming Wifi |
149 FPS |
||||||||
|
ROG Strix X870-I Gaming Wifi |
148 FPS |
||||||||
|
Far Cry 6 – 4K Ultra Detail - Average FPS |
|||||||||
|
Gigabyte X870 Aorus Elite Wifi7 |
142 FPS |
||||||||
|
Asus TUF Gaming X870-Plus Wifi |
144 FPS |
||||||||
|
ROG Strix X870E-E Gaming Wifi |
145 FPS |
||||||||
|
ROG Strix X870-I Gaming Wifi |
145 FPS |
||||||||
|
Average Network Speed – WiFi 6E - Mbits/Sec |
|||||||||
|
Gigabyte X870 Aorus Elite Wifi7 – MediaTek Wi-Fi 7 MT7925 |
1003.9 Mbits/sec |
||||||||
|
Asus TUF Gaming X870-Plus Wifi |
1020.4 Mbits/sec |
||||||||
|
ROG Strix X870E-E Gaming Wifi |
993.9 Mbits/sec |
||||||||
|
ROG Strix X870-I Gaming Wifi - MediaTek MT7927 |
1518.7 Mbits/sec |
||||||||
|
Average Network Speed – wired on 10G Network - Mbits/Sec |
|||||||||
|
Gigabyte X870 Aorus Elite Wifi7– Realtek 2.5GbE NIC |
2464.7 Mbits/sec |
||||||||
|
Asus TUF Gaming X870-Plus Wifi - Realtek 2.5GbE NIC |
2437.9 Mbits/sec |
||||||||
|
ROG Strix X870E-E Gaming Wifi - Realtek 5Gb Ethernet |
4859.4 Mbits/sec |
||||||||
|
ROG Strix X870-I Gaming Wifi – Intel I226-V 2.5GbE NIC |
2448.1 Mbits/sec |
||||||||
Before finishing up my testing I did want to check out the lighting but other than the glow coming from our water cooling, there isn’t any visible lighting on the ROG Strix X870-I Gaming Wifi.
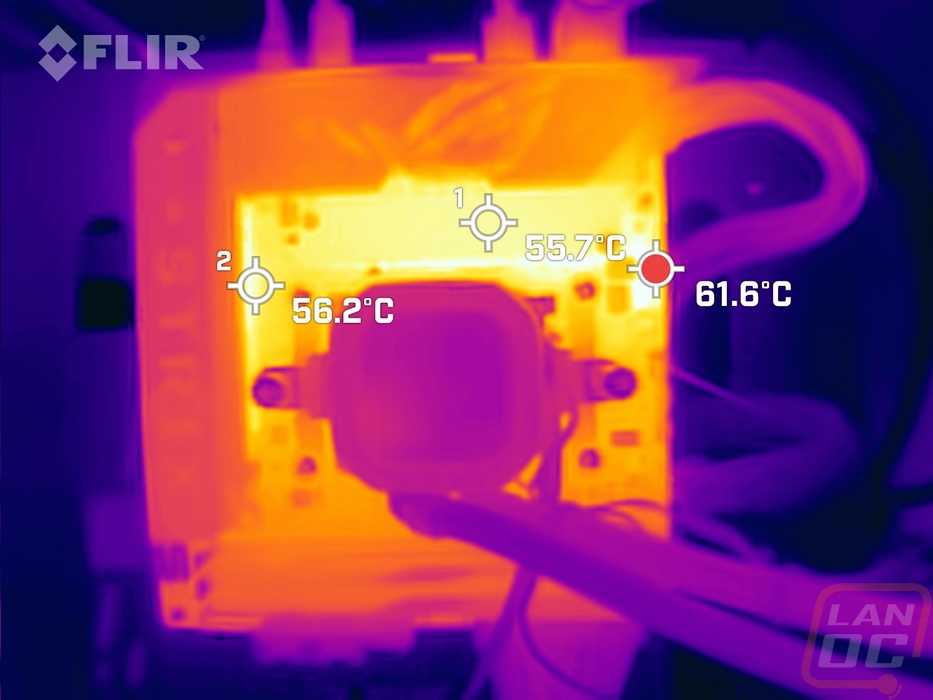
I also put the 7850X3D in the AIDA64 CPU Stress test using the PFU workload for a half hour. I did this to heat things up and pull power to get a look at how the thermals on the ROG Strix X870-I Gaming Wifi would look using a thermal camera. Being an ITX board, heat is hard to deal with but it does have the fan built into the heatsink to the left of the CPU socket. The hottest spot ended up being near the top edge of the board above the CPU socket. The PCB between the CPU and the VRMs was at 55.7c. That’s a little warmer than we see on a full ATX board that has room for larger heatsinks, overall this isn’t bad for an ITX board.

Overall and Final Verdict
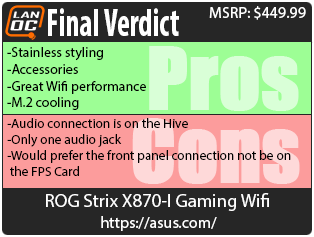
For the ROG Strix X870-I Gaming Wifi, Asus went above and beyond what I saw on the ROG Strix X870E-E Gaming Wifi when it comes to styling. Even with it being a compact board the two heatsinks look great with the halo-like reflections on the stainless steel covers. It still fits the look you expect from ROG Strix but typically on a Mini ITX board like this, the styling is very limited if there at all. The Strix X870-I Gaming Wifi impressed me with performance in line with the full-sized boards as well as great performance on its Wifi 7 NIC. The cooling was good, given the board's size but I was most impressed that they managed to get solid cooling for two M.2 drives in the space available. I do hope that the next -I board also gets the tool-less heatsink design that we have seen on the full-sized Asus boards this generation. In addition to packing the board with features, Asus also packed a lot of accessories with the Strix X870-I Gaming Wifi. You have the FPS Card which is a riser card that adds in more connections. I would prefer to see that just be a permanent riser card, especially given that it has the front panel connection on it. You get the ROG Hive II which can stick to your case or sit on your desk and lets you adjust your volume, power your PC on or off, see diagnostic lights, and give on-desk USB and audio connections. The Hive II also has the Strix X870-I Gaming Wifi’s DAC built into it which means that there are no rear audio connections on the board itself, if you want audio you will need to use it. I would like to see a second audio connection on it to allow you to have both speakers and headphones hooked up.
For pricing the Strix X870-I Gaming Wifi is selling for $449.99 which is a pretty penny that is for sure. For comparison the last generation X670E-I launched at 439 but is currently $409. If you are looking for a basic AM5 ITX motherboard, the Strix X870-I Gaming Wifi isn’t the right tool for the job. Without a full ROG Impact in the lineup, the Strix X870-I Gaming Wifi is the highest-end AM5 motherboard on the market. Once we get B850 I would guess that Asus will have an ITX variant, like they have with the B650E-I Gaming Wifi. Overall I was impressed with the Strix X870-I Gaming Wifi, but I’m torn on the ROG Hive II. Especially having to run it for your audio, but assuming you have room for it, it is great to get on-desk control of your PC.

Live Pricing: HERE
