Board Layout and Pictures
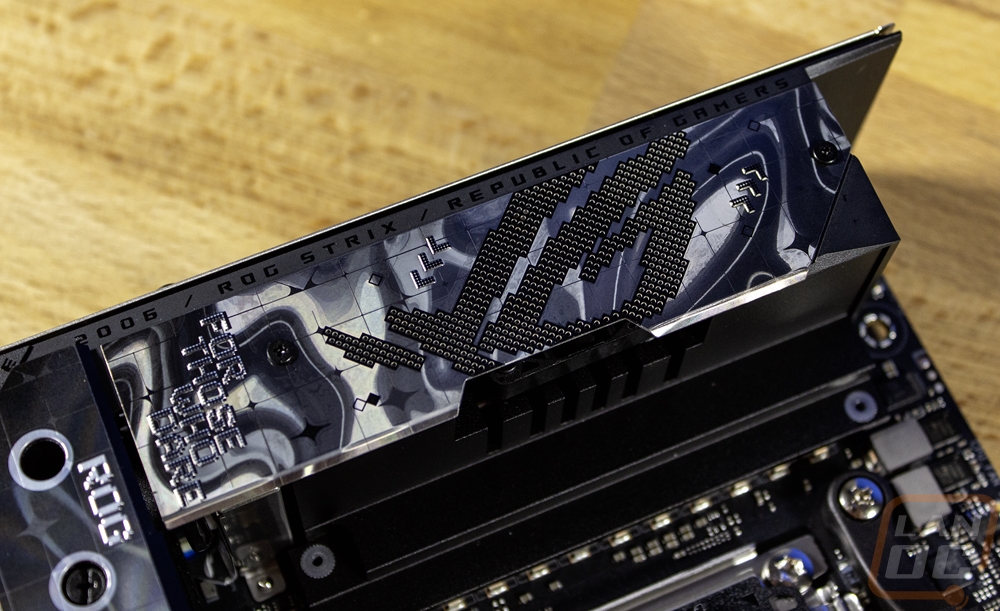
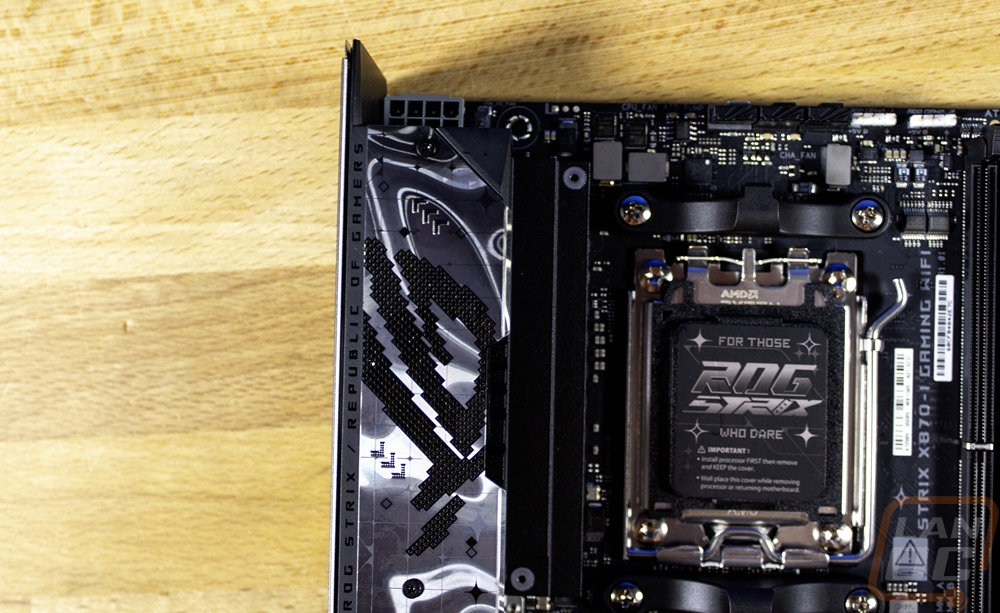
The ROG Strix X870-I Gaming Wifi has taken the stainless steel finish that we saw on the ROG Strix X870E-E Gaming Wifi and cranked it up to eleven. Where on the X870E-E it was just on the one heatsink. The Strix X870-I Gaming Wifi has it on top of the rear I/O and on the M.2 heatsink. With it being a Mini-ITX form factor those two heatsinks fill up most of the board and it looks great. The bottom cover has the Strix branding cut out letting black peek through and it has the ROG branding on it. The cover over the rear I/O has the ROG logo across it and it all has a cool halo look with the reflecting light being turned into random light circles all over.
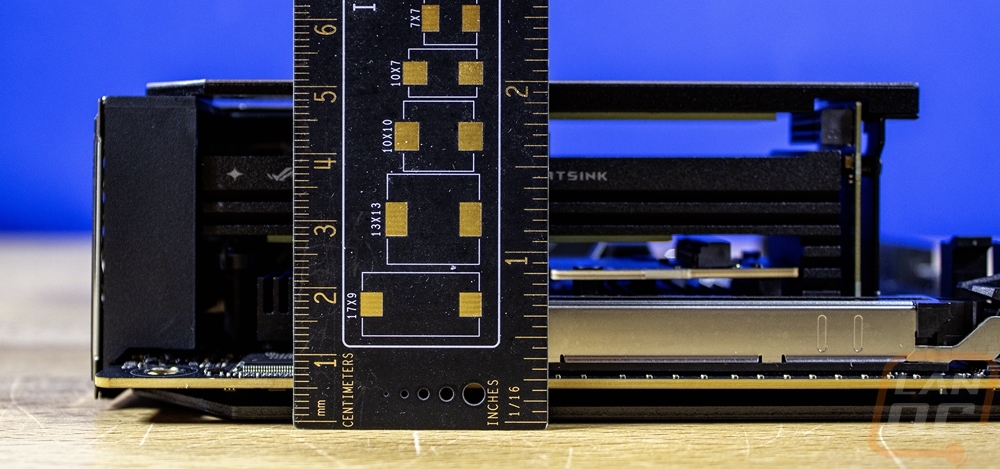
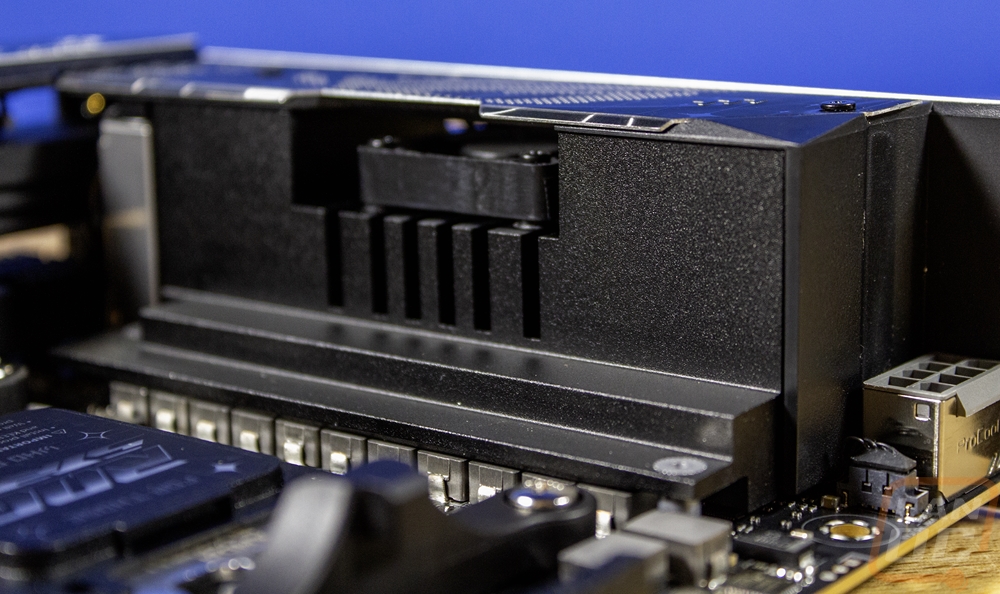
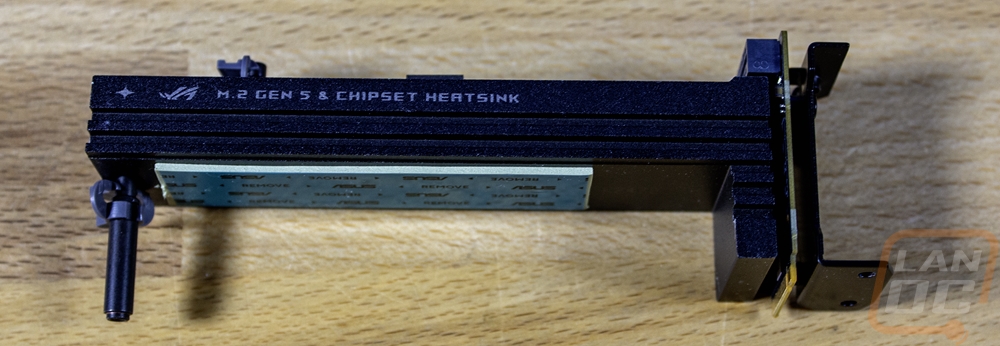
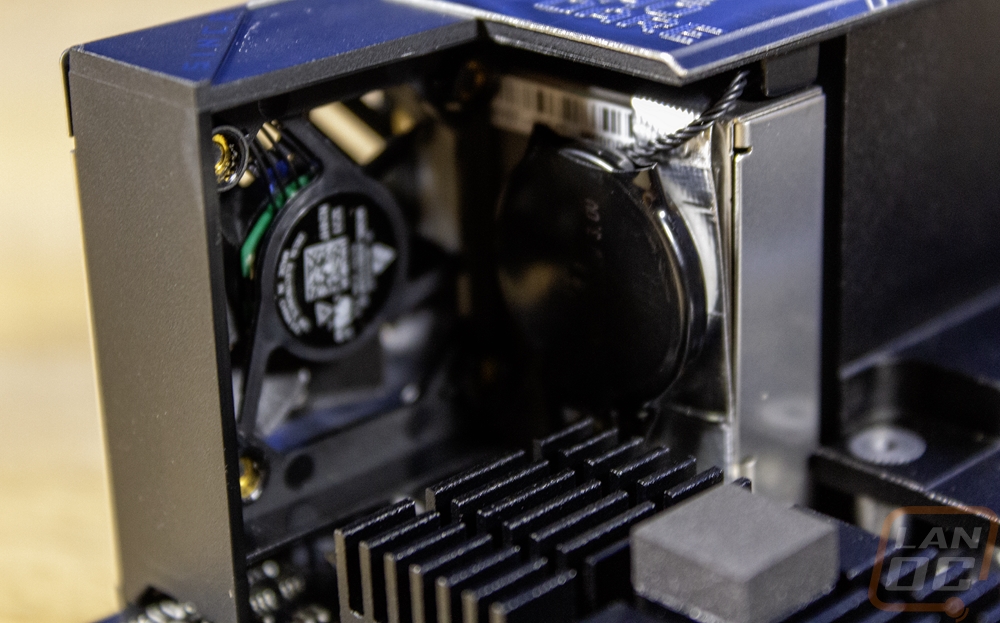
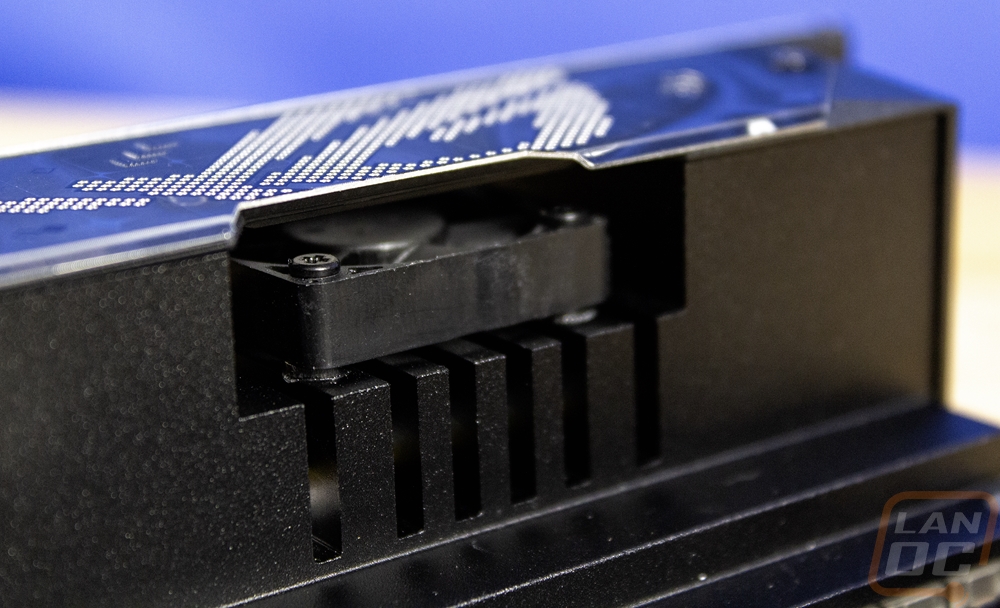
Cooling on ITX boards is always a challenge but that gets even harder in situations like this where Asus is packing a lot of other features in a swell. The Strix X870-I Gaming Wifi has 12 power stages for the V-Core and two more for the V-SOC and they have support for 110 amps using Asus’s Smart Power Stage design. Those VRMs are all on the left of the CPU socket except for two. That left side has an aluminum heatsink that extends out over those VRMs but is low profile there to leave room for coolers. Towards the rear I/O, that turns into a full-height cooler and Asus has slipped a small cooling fan in the middle. Below the CPU there are three more heatsinks but they are all stacked together. They have a finned heatsink down on the bottom, then a riser PCB for the first M.2 slot, then a thick L-shaped heatsink above that for cooling that M.2. Then there is another riser for the top M.2 slot and a thinner heatsink up on top that sandwiches it all together. This handles both of the M.2 drives as well as the chipset. To help with it, the rear I/O has a second small fan, this fan blows in through all of those heatsinks. Also tucked in that area you will find the CMOS battery that is only visible when you have the heatsinks all apart.

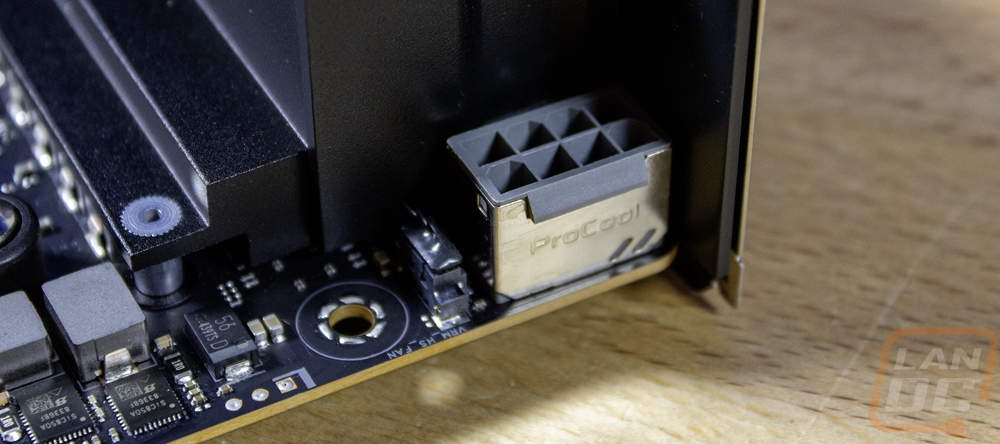
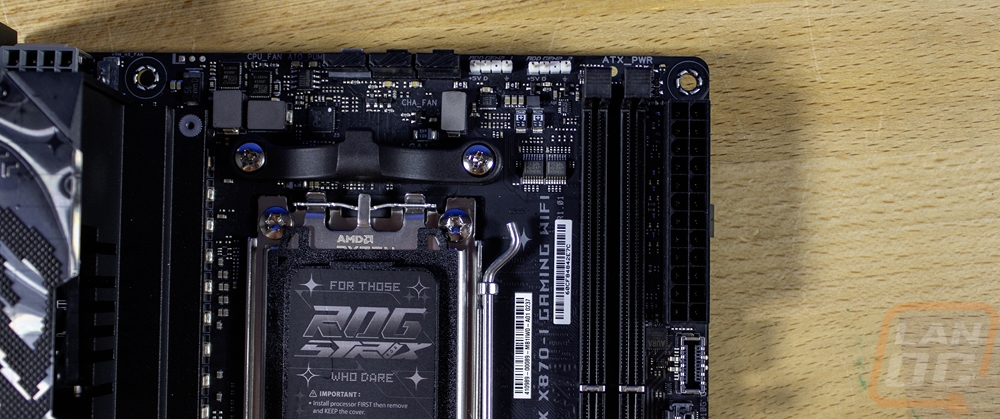
Starting in the top left quadrant there isn’t too much going on. Most of the space is taken up by the CPU socket and the VRM heatsink that is combined with the rear I/O. Right in the corner though the Strix X870-I Gaming Wifi has the single 8-pin CPU power plug. It has a metal shield around it with the Procool branding on it. Asus is using their Procool II power connections here which have solid pins and the shield over it to help dissipate heat down into the 10-layer PCB. Speaking of that, the PCB uses 2oz of copper inner layers to help cut down on electrical interference and to help with thermals from high currents as well. The ProCool II connections also have a status LED that lets you know the plug is connected. Right next to that connection, they do have the VRM fan plugged in.
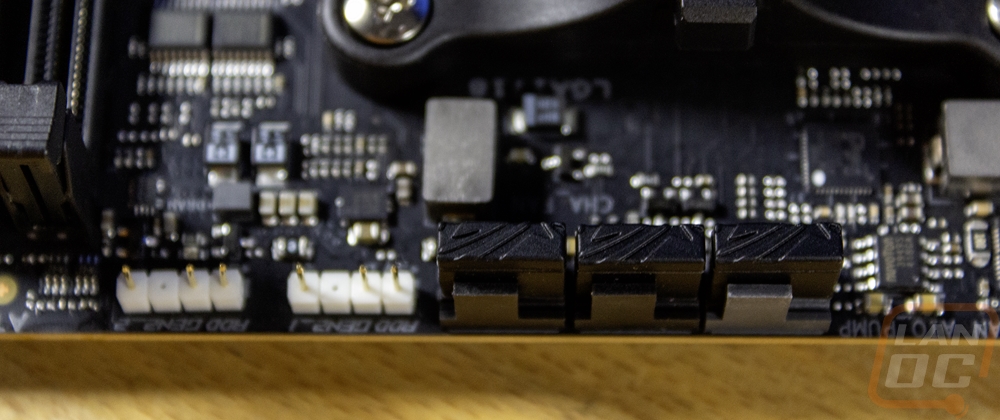
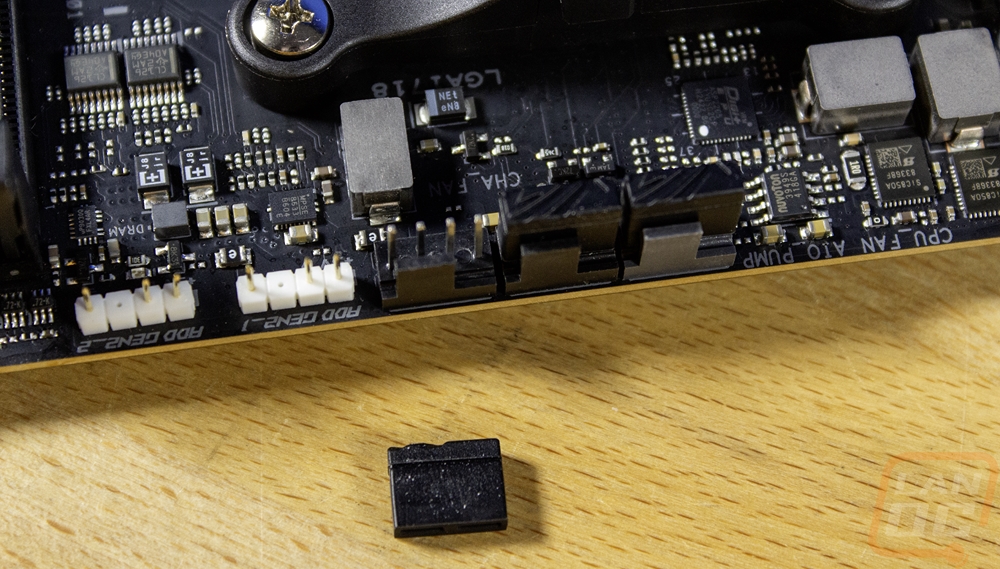
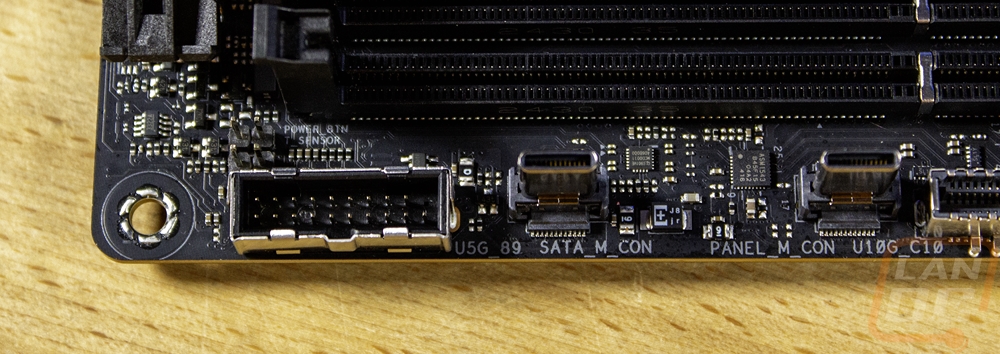
Moving into the top right quadrant the Strix X870-I Gaming Wifi has three 4-pin PWM fan headers along the top edge. They all come with rubber protectors that you will need to remove, those are there to prevent a comment damage location. Those three plugs cover two fans and one for your AIO pump, these are all of the fan headers on the board but it's enough to cover most ITX builds. Next to those are two addressable RGB headers, these are one of the only white things on the board and are easy to spot. You have the two DDR5 ram DIMMs then next to that the 24-pin motherboard power. This connection also has the ProCool II, but it doesn’t have the outside shield, just the solid pins and status light. Below that is a 10G front panel USB connection then one of two weird internal male Type-C connections on the board which are for the included FPS Card which I spoke about more in the accessories section but is a riser card with SATA, front panel, and USB 2.0 headers as well as the alteration mode and CPU_OV jumper.

Because I will talk about the M.2 and PCIe connections in the next section. The last quadrant is the entire bottom half of the Strix X870-I Gaming Wifi. On the right side below the FPS Card connections, you have a USB 5Gbps connection. There are no other connections along the bottom edge at all. One big thing to note here that is missing. There isn’t a traditional front panel audio connection, in fact, the board itself doesn’t have audio on it at all, which is all running through the included ROG Hive II.
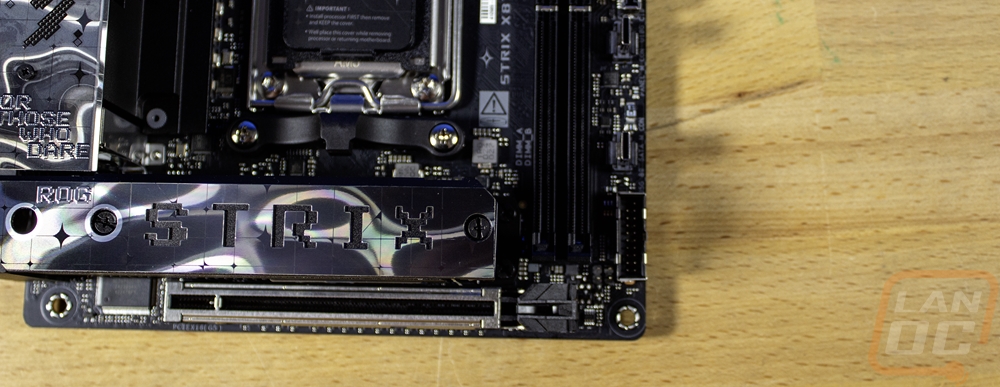
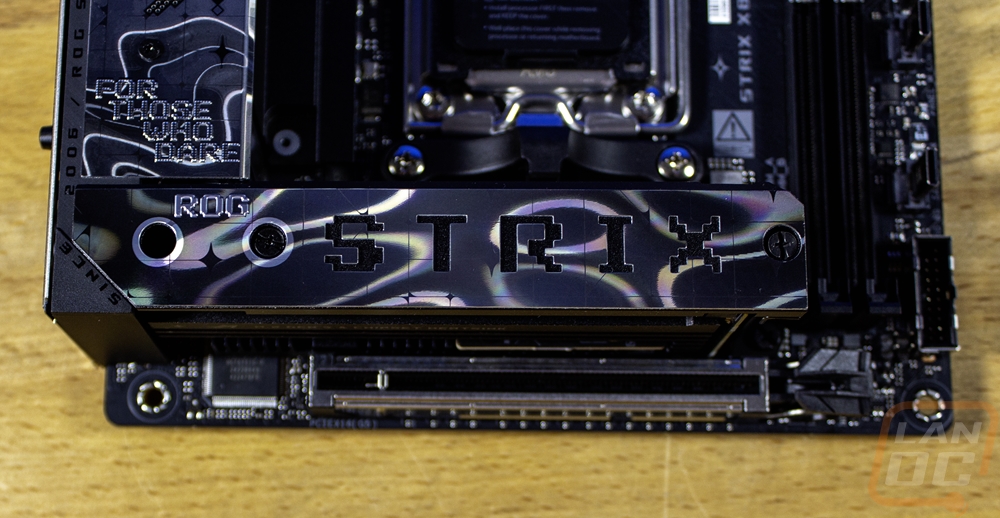
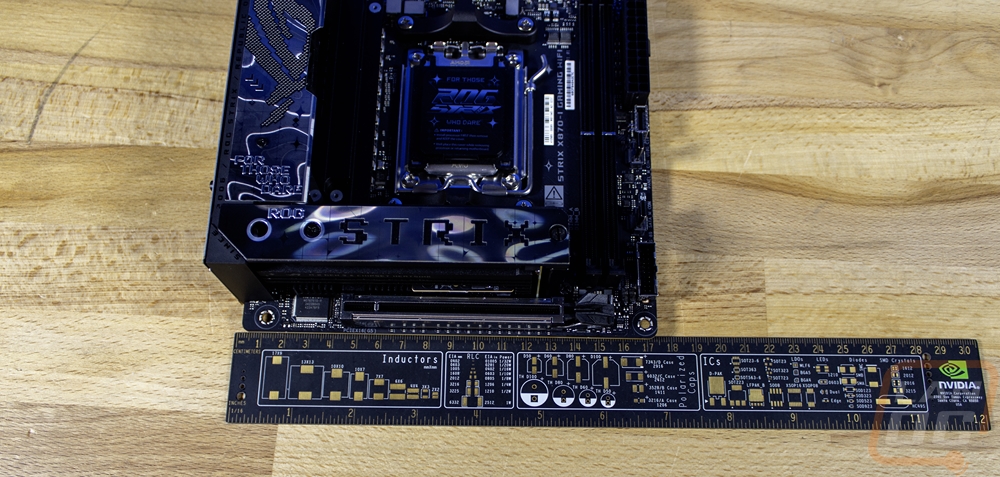
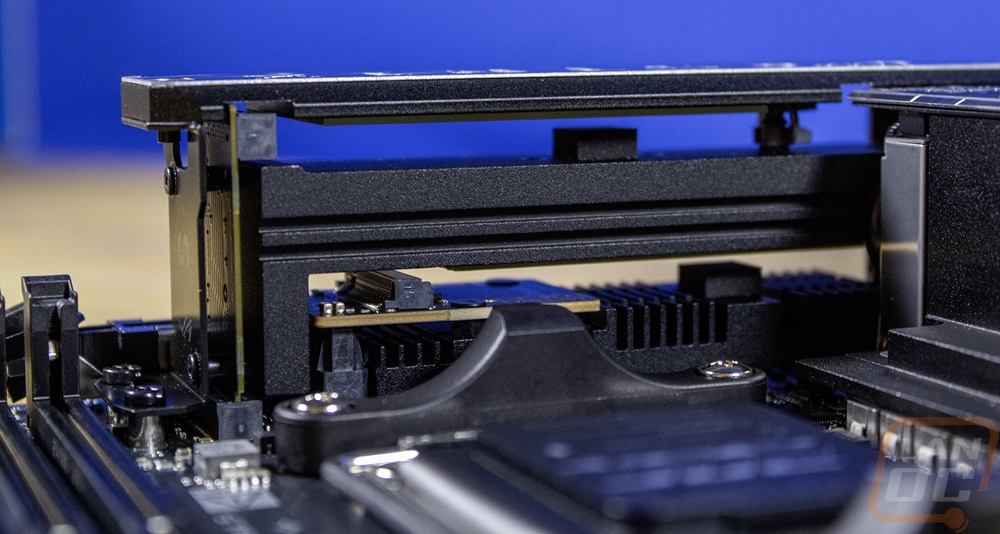
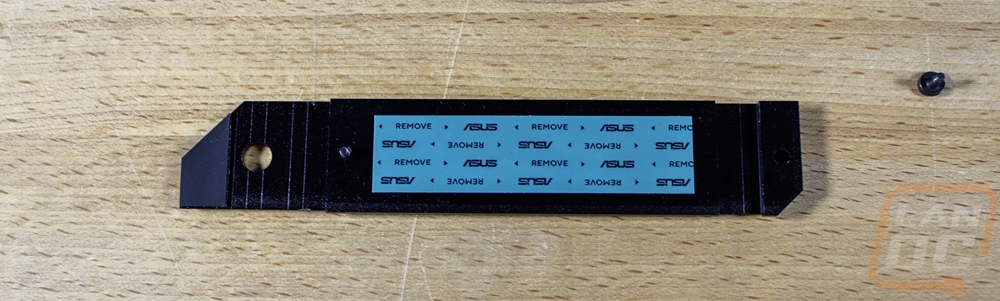
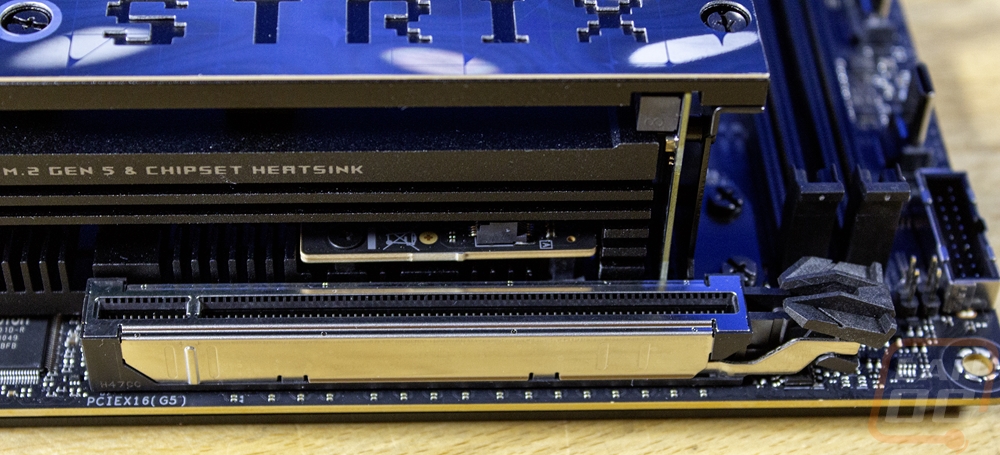
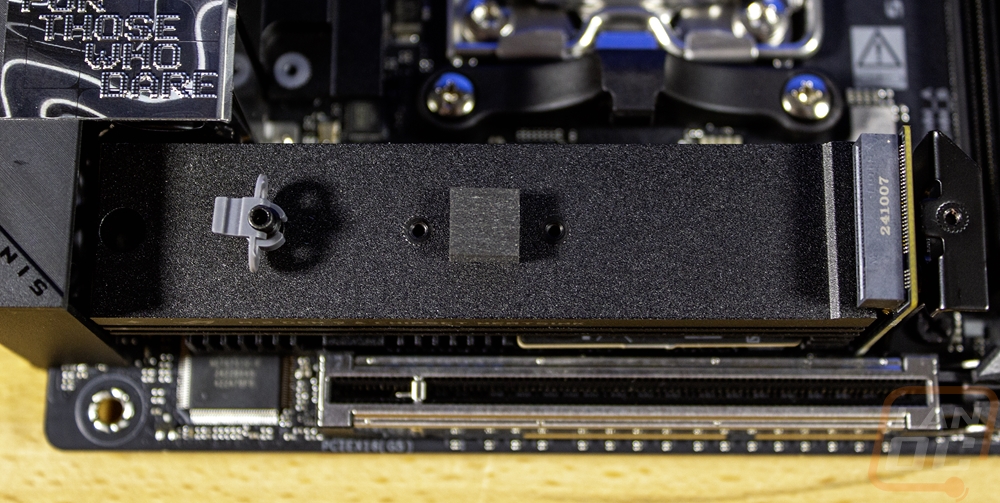
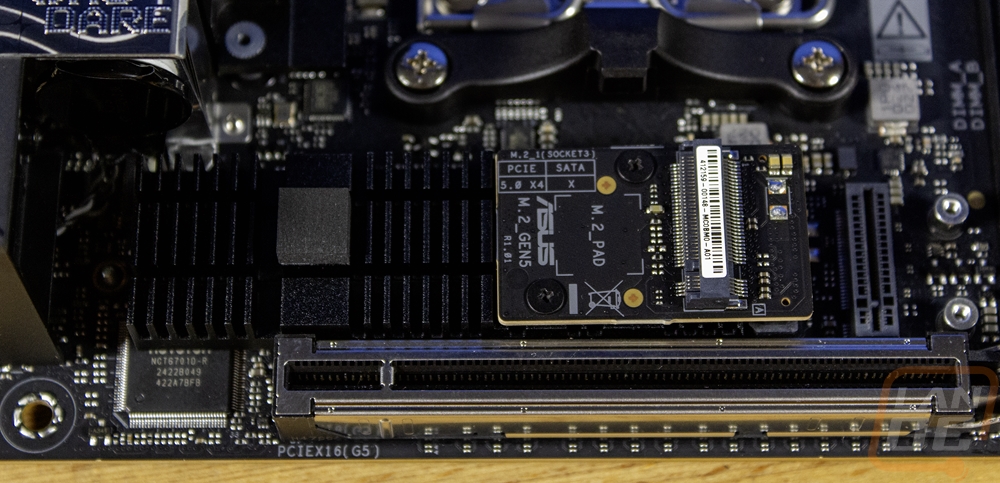
Being an ITX board, it's no surprise that the Strix X870-I Gaming Wifi has just one PCIe slot. That is a full x16 length and lanes and is PCIe 5.0. It has a metal shield around it, this time for strength to hold today's heavy video cards. If you look closely on this one you will see metal on the sides of the latch as well. That is Asus’s PCIe Q-Release Slim. Q-Release originally had a button you could push to release the latch, which was extremely helpful given how tight things get especially in this situation. With this design, the button isn’t necessary. You can pull your card out with one hand by lifting the card from the left side. This will tilt it and the mechanism will pop out and unlock allowing you to take the card the rest of the way out. Just above that we have the M.2 sandwich which has two M.2 slots stacked on top of each other with heatsinks on the bottom, middle, and top that combined with the small fan cools both M.2 slots as well as the chipset which is under it all. The top cover/heatsink has thermal tape on the underside and is held in place with two screws. I was a little surprised that Asus didn’t make this a cool tool-less design like I have seen on some of their boards this generation. You will need tools to take the cover off. Below that though they do have their M.2 Q-latch that is toolless for holding the drives in place. Not perfectly easy given the cover, but at least you don’t have to mess with those tiny screws anymore. The top M.2 slot is the M.2_1 slot and is PCIe 5.0 and runs off of the CPU. The bottom M.2 slot is M.2_2 and is PCIe 4.0 and runs through the chipset. Part of me was hoping to see an M.2 on the back of the board as well, but given that PCIe 4.0 is the standard at this point I understand that putting drives back there no longer works given the cooling needs. That said, I wouldn’t have minded a slower PCIe 3.0 slot back there for a big storage drive (of course that would confuse some users).
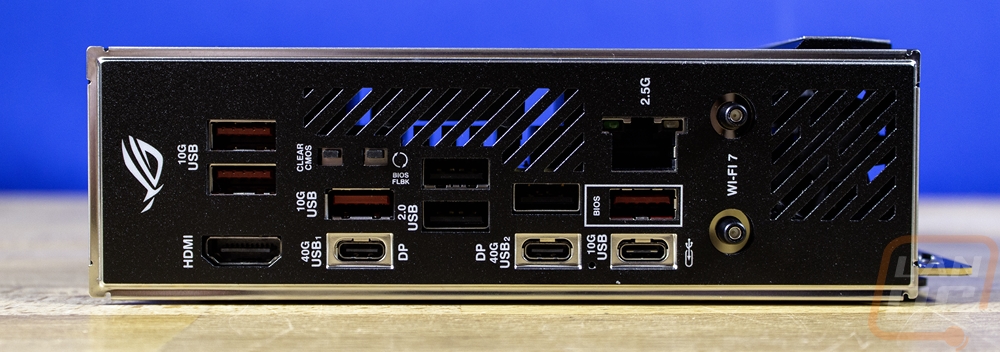
For how much is packed into the Strix X870-I Gaming Wifi, the rear I/O looks a lot more bare than you would expect. That isn’t to say that there isn’t a lot back here though because there is. It is because over on the right side, where they have that fan intake would normally be the rear audio connections and they are missing. The audio is all run through the ROG Hive II which I touched on a few times now. Next to that area, you have two snap on antenna connections for the WiFi 7 wireless NIC which supports 320 MHz bandwidth. Next to that is the wired NIC which is a 2.5G Intel NIC. On the far left you have one onboard video display connection which is HDMI. Then tucked up under the second vent in the rear I/O panel are two tiny buttons. One is a clear CMOS button and the second is for running BIOS Flashback to update your BIOS without memory or a CPU installed. That leaves us with the USB connections and in total the Strix X870-I Gaming Wifi has 10. Three of those are Type-C with two being 40 Gbps connections (USB 4) and one being 10Gbps. That 10Gbps connection is also labeled as the connection used for the ROG Hive II. The other two can also double as a DisplayPort output if you have a monitor that supports DisplayPort over Type-C. There are three black USB 2.0 ports which I’m happy to see, that’s a perfect number to cover your keyboard, mouse, and DAC or headphones. Then there are four red 10Gbps USB plugs as well that are all Type-A. The rear I/O comes with the shield preinstalled and that has a nice black finish that should match most builds and each port has easy to see white legends next to them.
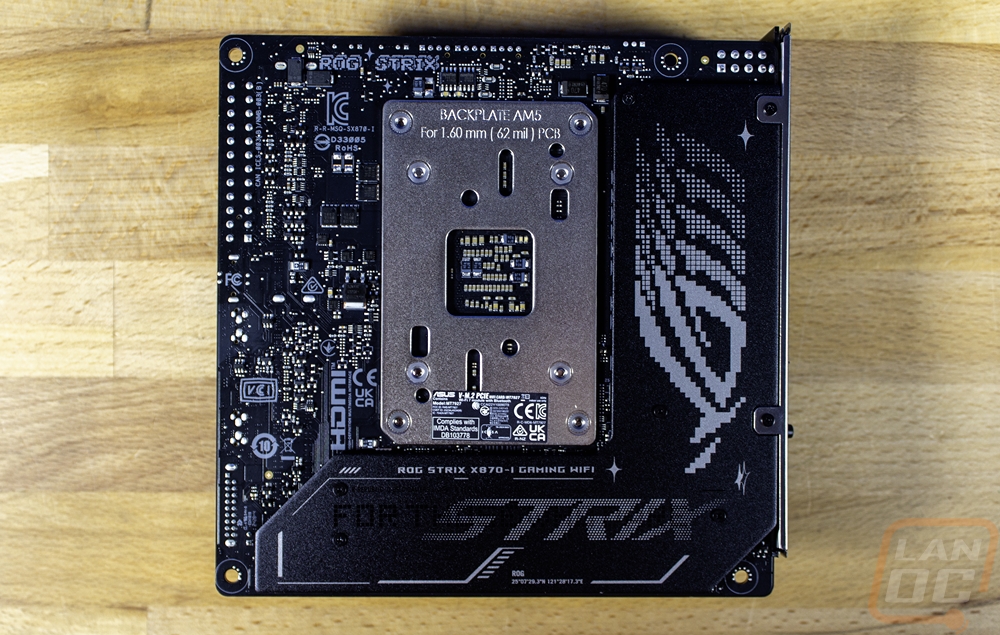
The bottom of the Strix X870-I Gaming Wifi might be compact, but a lot is going on down here. Where most full-sized motherboards have a lot of open PCB space you can see that they are fitting a lot into a compact space with very little open space here. The AM5 backplate looks huge but if that isn’t enough to protect the bottom of the board, it also has an L-shaped shield over the right and bottom portions as well. It is aluminum and has the ROG and Strix branding all over it as well as the full Strix X870-I Gaming Wifi model name.