So it's almost tax time and this year we couldn’t ask for better timing on hardware launches. Intel launched their new chipsets and CPUs around CES time and AMD has their new CPUs and Chipsets coming here soon as well. So it looks like this year might be a big year for hardware, especially with more companies refocusing again on the PC. Well, Gigabyte introduced a whole selection of Z270 boards at CES and along with that they also expanded the reach of their Aorus line. It used to just be their gaming laptop lineup, but they have now brought together that brand with their gaming peripherals, motherboard, and video cards as well. The first Aorus product to come in is their new Z270X-Gaming K7 board. Let’s take a look and see what it’s all about.
Product Name: Gigabyte Aorus Z270X-Gaming K7
Review Sample Provided by: Gigabyte
Written by: Wes
Pictures by: Wes
Amazon Link: HERE
| Specifications | |
| CPU |
-Support for 7th and 6th generation Intel® Core™ i7 processors/ Intel® Core™ i5 processors/Intel® Core™ i3 processors/ Intel® Pentium® processors/Intel® Celeron® processors in the LGA1151 package -L3 cache varies with CPU (Please refer "CPU Support List" for more information.) |
| Chipset | Intel® Z270 Express Chipset |
| Memory |
-4 x DDR4 DIMM sockets supporting up to 64 GB of system memory -Dual channel memory architecture -Support for DDR4 4133(O.C.) - 2133 MHz memory modules -Support for ECC UDIMM 1Rx8/2Rx8 memory modules (operate in non-ECC mode) -Support for non-ECC Un-buffered DIMM 1Rx8/2Rx8/1Rx16 memory modules -Support for Extreme Memory Profile (XMP) memory modules (Please refer "Memory Support List" for more information.) |
| Onboard Graphics |
Integrated Graphics Processor-Intel® HD Graphics support: 1 x DisplayPort, supporting a maximum resolution of 4096x2304@60 Hz * Support for DisplayPort 1.2 version. 1 x HDMI port, supporting a maximum resolution of 4096x2160@24 Hz * Support for HDMI 1.4 version. Maximum shared memory of 1 GB |
| Audio |
-Realtek® ALC1220 codec -Support for Sound Blaster X-Fi MB5 -TI Burr Brown® NE5532P operational amplifier -High Definition Audio -2/4/5.1/7.1-channel -Support for S/PDIF Out |
| LAN |
1 x Intel® GbE LAN chip (10/100/1000 Mbit) (LAN1) 1 x Killer™ E2500 LAN chip (10/100/1000 Mbit) (LAN2) |
| Expansion Slots |
-1 x PCI Express x16 slot, running at x16 (PCIEX16) * For optimum performance, if only one PCI Express graphics card is to be installed, be sure to install it in the PCIEX16 slot. -1 x PCI Express x16 slot, running at x8 (PCIEX8) * The PCIEX8 slot shares bandwidth with the PCIEX16 slot. When the PCIEX8 slot is populated, the PCIEX16 slot operates at up to x8 mode. -1 x PCI Express x16 slot, running at x4 (PCIEX4) * The PCIEX4 slot shares bandwidth with the M2P_32G connector. The PCIEX4 slot will operate at up to x2 mode when a PCIe SSD is installed in the M2P_32G connector. -3 x PCI Express x1 slots * The PCIEX1_3 slot shares bandwidth with the SATA3 1 connector. When the PCIEX1_3 slot is populated, the SATA 3 1 connector becomes unavailable. (All of the PCI Express slots conform to PCI Express 3.0 standard.) |
| Multi-Graphics Technology |
-Support for NVIDIA® Quad-GPU SLI™ and 2-Way NVIDIA® SLI™ technologies -Support for AMD Quad-GPU CrossFireX™ and 3-Way/2-Way AMD CrossFire™ technologies |
| Storage Interface |
Chipset: 1 x M.2 connector (Socket 3, M key, type 2242/2260/2280/22110 SATA and PCIe x4/x2 SSD support) (M2M_32G) 1 x M.2 connector (Socket 3, M key, type 2242/2260/2280 SATA and PCIe x4/x2 SSD support) (M2P_32G) 1 x U.2 connector 3 x SATA Express connectors 6 x SATA 6Gb/s connectors Support for RAID 0, RAID 1, RAID 5, and RAID 10 * Refer to "1-10 Internal Connectors," for the installation notices for the PCIEX4, M.2, and SATA connectors. |
| USB |
Chipset+ASMedia® ASM2142 USB 3.1 Gen 2 Controller: 1 x USB Type-C™ port on the back panel, with USB 3.1 Gen 2 support 1 x USB 3.1 Gen 2 Type-A port (red) on the back panel Chipset: 8 x USB 3.1 Gen 1 ports (4 ports on the back panel, 4 ports available through the internal USB headers) 6 x USB 2.0/1.1 ports (2 ports on the back panel, 4 ports available through the internal USB headers) |
| Internal I/O Connectors |
1 x 24-pin ATX main power connector 1 x 8-pin ATX 12V power connector 1 x CPU fan header 1 x water cooling CPU fan header 2 x system fan headers 1 x system fan/water cooling pump header 1 x RGB (RGBW) LED strip extension cable header 3 x SATA Express connectors 6 x SATA 6Gb/s connectors 2 x M.2 Socket 3 connectors 1 x U.2 connector 1 x front panel header 1 x front panel audio header 1 x S/PDIF Out header 2 x USB 3.1 Gen 1 headers 2 x USB 2.0/1.1 headers 1 x Trusted Platform Module (TPM) header 1 x Thunderbolt™ add-in card connector 1 x Clear CMOS jumper 1 x ECO button 1 x OC button 1 x audio gain control switch |
| Back Panel Connectors |
1 x PS/2 keyboard/mouse port 1 x DisplayPort 1 x HDMI port 1 x USB Type-C™ port, with USB 3.1 Gen 2 support 1 x USB 3.1 Gen 2 Type-A port (red) 4 x USB 3.1 Gen 1 ports 2 x USB 2.0/1.1 ports 2 x RJ-45 ports 1 x optical S/PDIF Out connector 5 x audio jacks (Center/Subwoofer Speaker Out, Rear Speaker Out, Line In, Line Out, Mic In) |
| I/O Controller | iTE® I/O Controller Chip |
| H/W Monitoring |
Voltage detection Temperature detection Fan speed detection Overheating warning Fan fail warning Fan speed control * Whether the fan (pump) speed control function is supported will depend on the fan (pump) you install. |
| BIOS |
2 x 128 Mbit flash Use of licensed AMI UEFI BIOS Support for DualBIOS™ PnP 1.0a, DMI 2.7, WfM 2.0, SM BIOS 2.7, ACPI 5.0 |
| Bundle Software |
Norton® Internet Security (OEM version) Intel® Optane™ Memory Ready |
| Operating System |
Windows® 10 64-bit (for 7th Generation Intel® Processors) Windows® 10 64-bit / Windows® 8.1 64-bit / Windows® 7 32-bit / 64-bits (for 6th Generation Intel® Processors) * Please download the "Windows USB Installation Tool" from GIGABYTE's website and install it before installing Windows 7. |
| Form Factor | ATX Form Factor; 30.5cm x 24.4cm |
| Box Contents |
GA-Z270X-Gaming K7 motherboard Motherboard driver disk User's Manual Quick Installation Guide Four SATA cables I/O Shield One GC-SLI2P SLI bridge connector One G Connector One RGB (RGBW) LED strip extension cable Two Velcro Cable Ties One pack of back I/O dust covers |
Packaging and Accessories
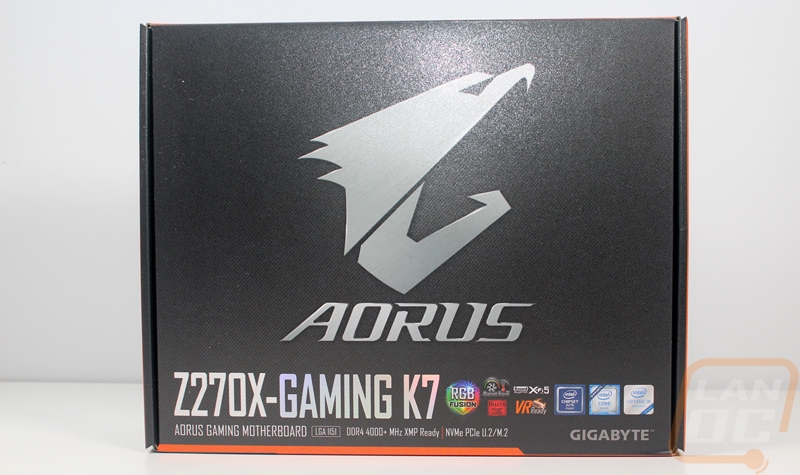
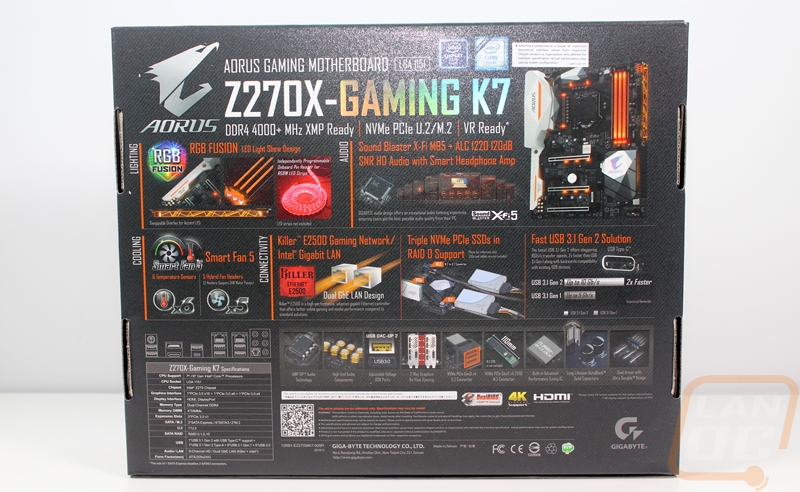
The packaging for the Gaming K7 was almost completely blacked out with the Aorus logo across the front. Down along the bottom edge, there is a small strip of orange along with the product name and a few badges for features and Intel’s required badges. When you flip it around though there is a lot more going on, in fact, it is completely packed. It is covered in small boxes with photos and short descriptions of key features. They also have a line drawing of the rear I/O panel to show the connection options and a short specification list as well.
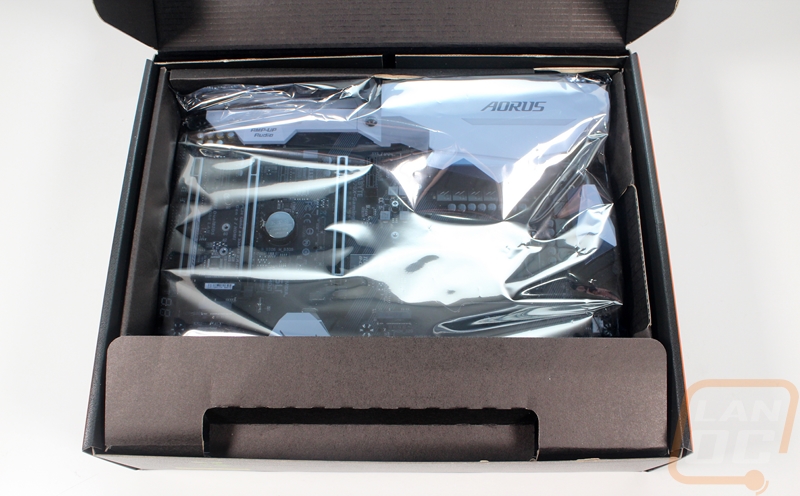
Inside the board comes wrapped up in a static bag and it sits in its own cardboard tray. Up under that tray, they have all of the documentation and accessories.
For documentation, you get a standard user manual as well as an installation guide. They also have a color postcard that is asking people to post up reviews in exchange for entry into a contest. There is a driver/software DVD and then they include a sticker sheet with color coded stickers to tag and label all of your SATA cables. Honestly, I always like that they include the stickers but I’ve never cared enough to use them. Plus it might mess with my cable management.

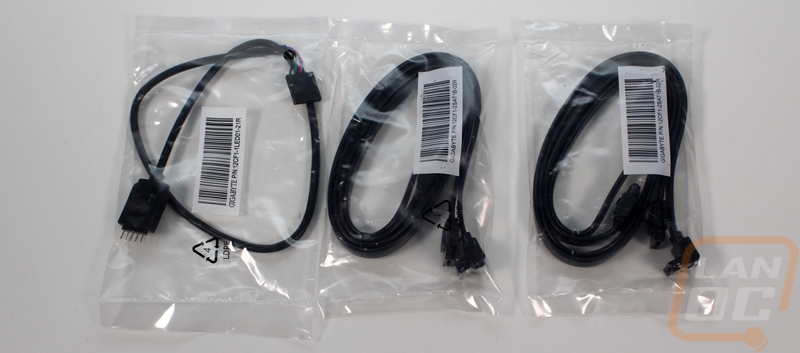
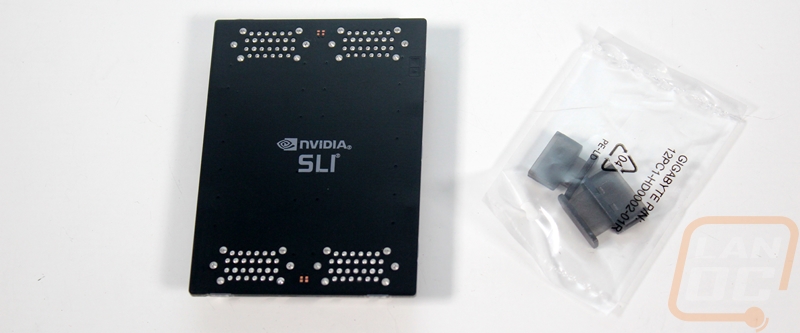
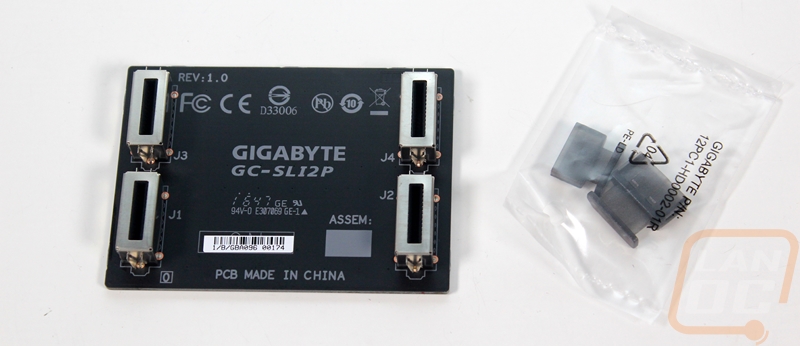
The Gaming K7 has a whole bunch of accessories. You get a rear I/O cover, of course, this one has a tinted silver finish and uses the foam backing to keep things tight so you won’t get cut up. They give you a small Aurus case badge as well. Then you get two Velcro cable ties with their branding on it and a small bag with a front panel connection helper. For cables, you get four black SATA cables and an adapter cable to tie your case RGB into the motherboard RGB lighting. They also include a solid PCB SLI HB bridge and they include plugs for the display connection options if you end up using a video card to keep dust and dirt out of them.

Board Layout and Pictures
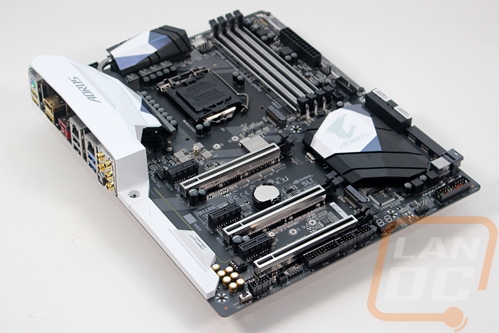
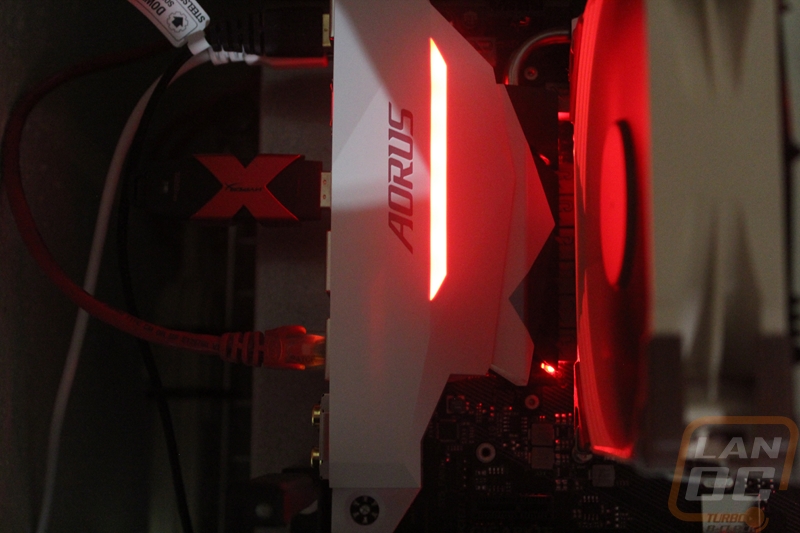
So the new Z270 board might have new branding, but it reminds me a lot of Gigabytes Z170 boards. In fact, a lot of the same features introduced on them have been carried over or improved on. For styling, they stayed color neutral with the black PCB, black heatsinks, and use of gray and white. The rear I/O cover is bright white and that stands out a lot from the rest of the board, but that is the look Gigabyte has seemed to prefer for the past year. The cover is a little different this time around, though, it has a more angular design and it actually integrates into one of the heatsinks. The color-neutral look is all about letting people pick their own style with the RGB lighting and Gigabyte did slip that in a few areas.
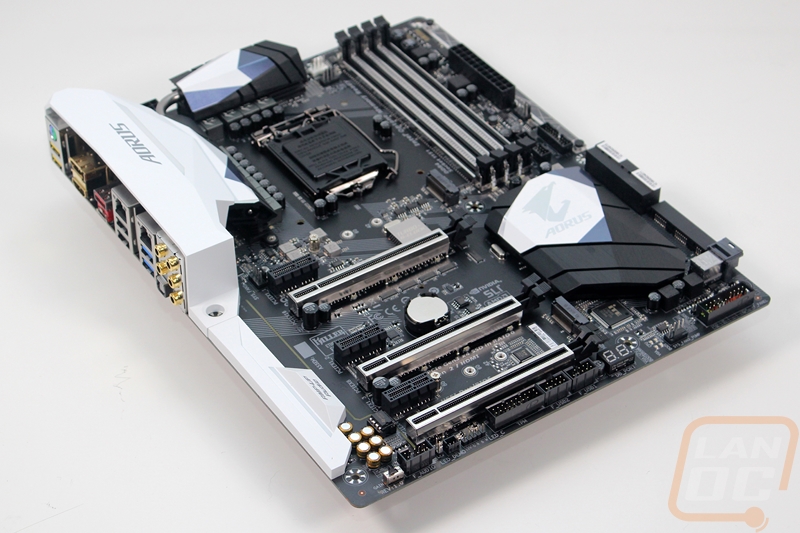
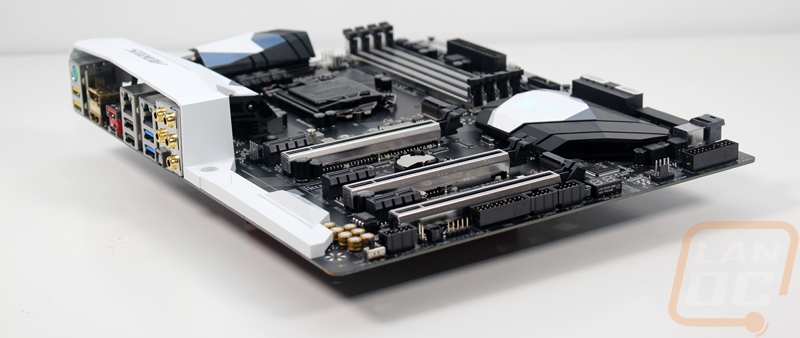
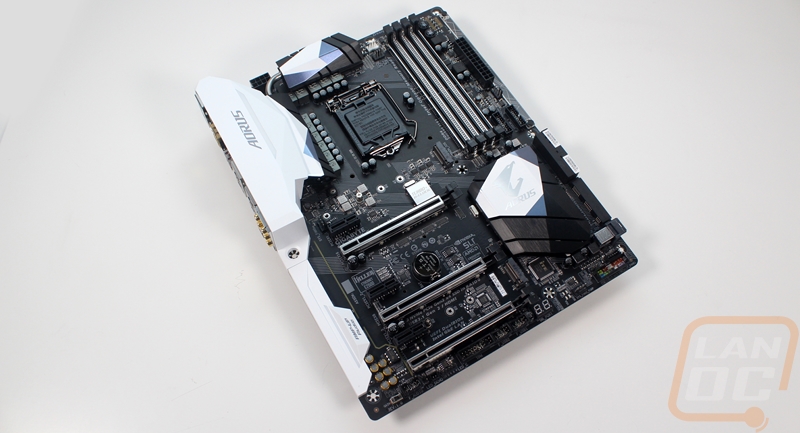
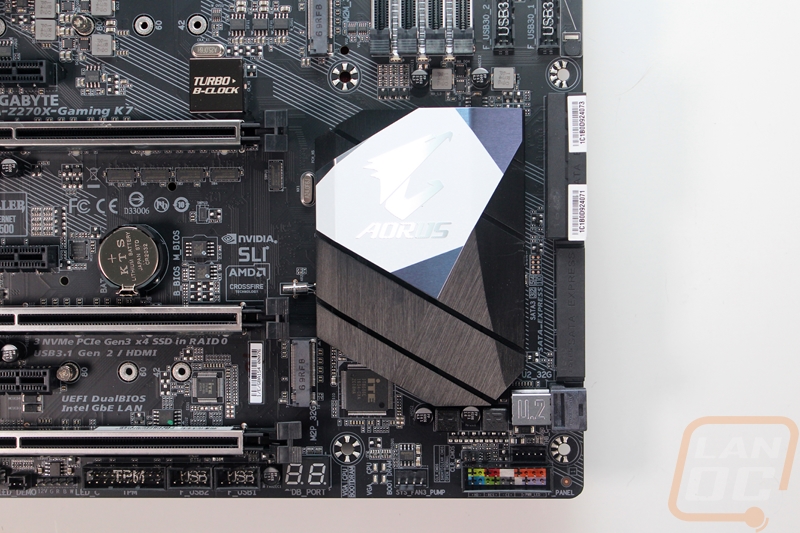
The coolers are similar to the Z170 and second gen X99 boards only more angular in design as well. The chipset cooler down at the bottom is still low-profile to slip under cards but they did get the Aorus logo onto it in the white patch. The cooling for the power circuitry is up to the top and left of the CPU socket and these are even more angular. They also have flat black heatsinks under the gray and white plates on top and the left heatsink has the rear I/O cover touching it as well. Between them is a relatively thick heatpipe to spread the heat out.


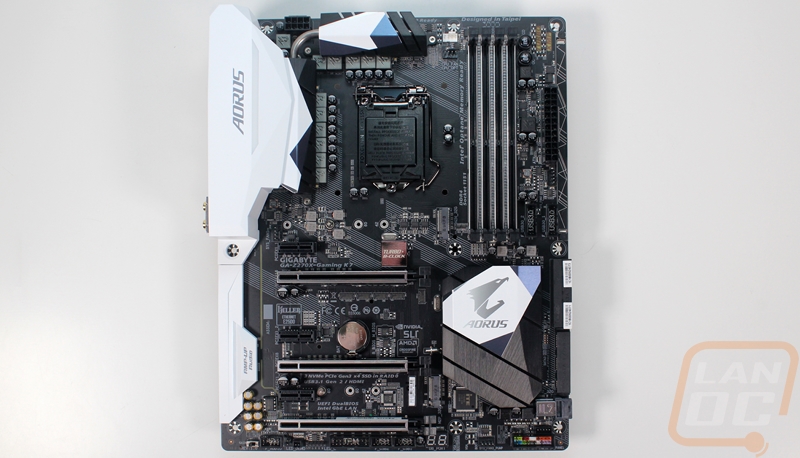
Starting up in the top left corner of the Gaming K7 lets check out what the board has to offer. Around the CPU socket we can see all of the power phases along with the dual heatsink configuration to keep them all cool The white plastic rear I/O cover goes over both the heatsink and the I/O with no room for anything to be hidden behind it so there really is only the 8-pin power connection up in the corner by the heatpipe and the two fan connections to the right. The fan connections are for the CPU cooler, you get a main PWM fan header for a cooler fan and the second can be used for a second fan or for a water pump for water cooling. For lighting, there is an RGB strip under the I/O panel that lights up and there are four surface mounted LEDs to the top and left of the CPU socket to light your cooler up.
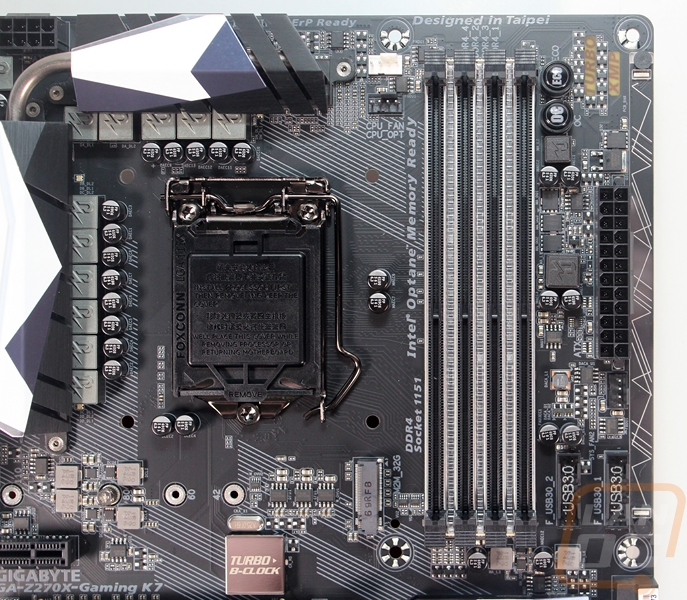
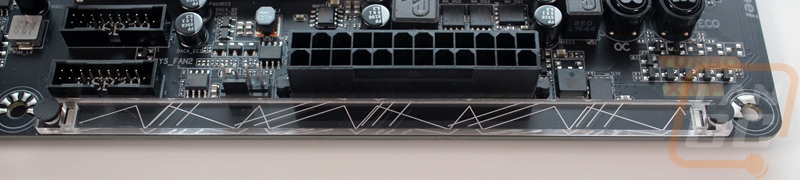
Over on the top right, the four DDR4 DIMMs take up most of the space. There are a few other things over along the edge, though. For starters, there is a standard 24-pin motherboard power connection but strangely enough, it's not right up against the edge like normal. There are also two buttons up next to the ram to overclock or to turn on the ECO mode without even having to get into the BIOS. There isn’t a power or reset button, though. Down at the bottom of the ram, they slipped in a 4-pin PWM can fan header and two USB 3.0 internal headers on the off chance your case needs two. I haven’t seen any cases that do even though I would prefer to have more USB 3.0 connections on them. I would actually prefer the second connection to be the new USB 3.1 internal header to open up options for that later when it starts to get used on cases for Type C connections.
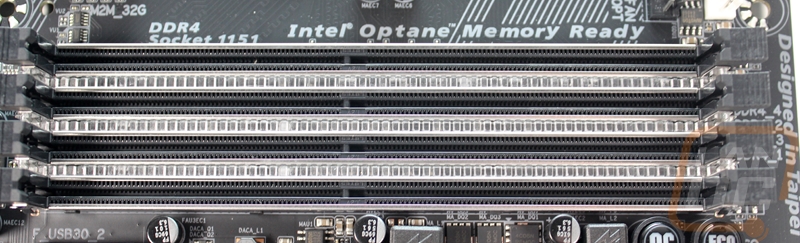
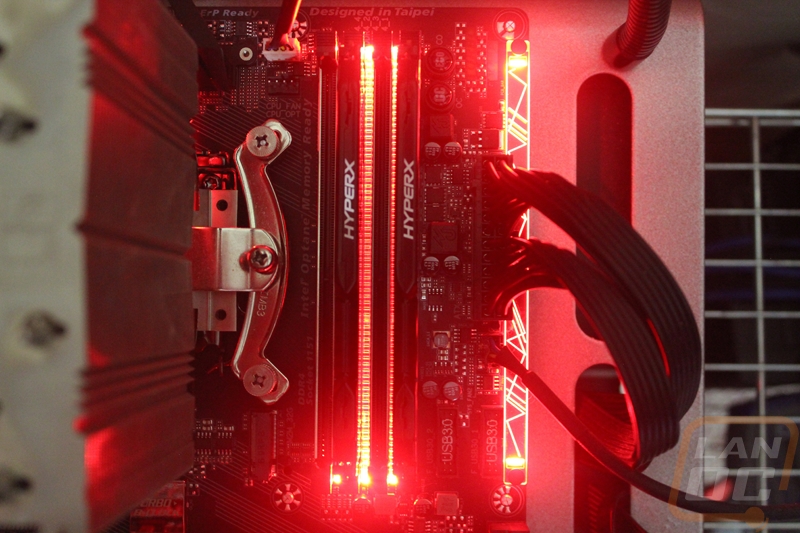
The top right area is really heavy on the lighting. In between each DIMM Gigabyte put RGB LED strips to light up your ram to match the rest of the board. In addition to that, there is an odd plastic strip that gets lit up by the RGB LEDs with this line design on it. They advertise it as a swappable array and they have designed it to be easy to swap out with other overlays that you can make. I’m not sure if they plan on selling any others themselves, though.
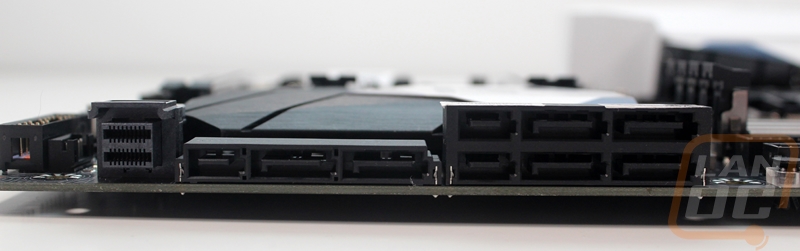
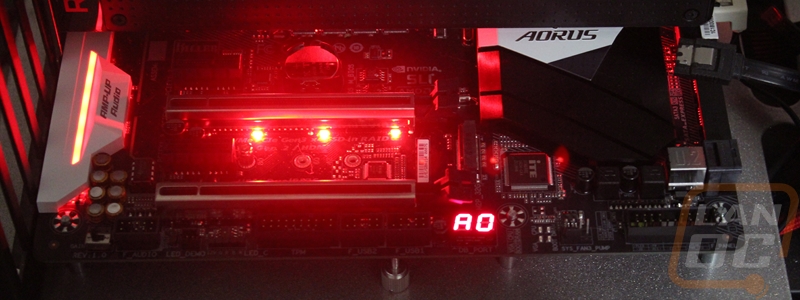
Down in the bottom right corner, the front panel connections are color coded and put on the bottom edge for the easiest access. The clear CMOS pins are also right above it, that’s a big improvement, a lot of times you can’t even find them without the manual. There is another 4-pin PWM system or pump fan header and next to it is a two digit LED readout for error codes and to show the boot process. The main connections though are all on the right edge. The board has three SATA Express ports on the off chance anyone actually makes devices for that form factor. They can also be used as six normal SATA connections as well. They also included a U.2 port as well. The Intel 750 Series drive is the only one using that right now, but it's nice to have.
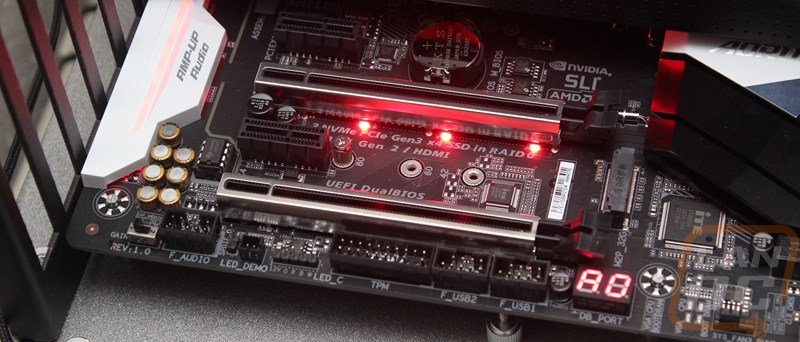
Then down on the bottom left edge, the board is packed full of connections. There are two USB 2.0 headers and a TPM header. The front panel audio connection is there and this is where you will find the single RGB header to wire up your own lighting to the board with the included adapter. There is even a switch to flip between two gain settings for the audio card. Speaking of, you can see the gold Nichicon caps. The most interesting thing though is the replaceable OP AMP right next to them.
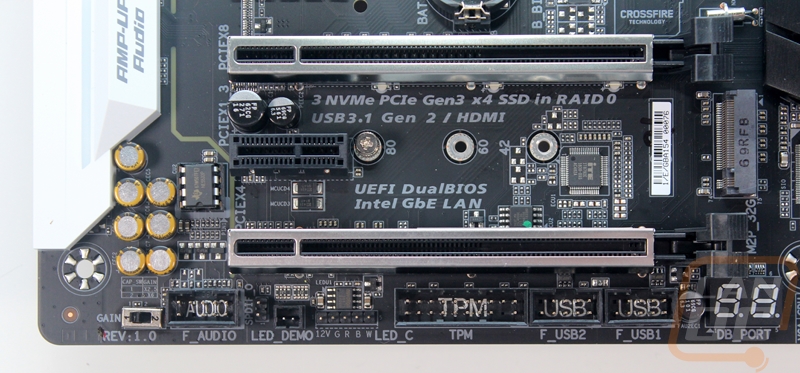
So for PCIe connections, there are three full-length x16 slots and three x1 slots. The three x16 slots all have metal armor around them that is reinforced from the back of the board. This helps protect from interference and most importantly it helps hold the strength of today's heavy video cards. The third x1 slot shares bandwidth with the SATA Express port one so you can only use one or the other. For the x26 slots, the top will run at x16 if you don’t have a card in the second slot, but if you do they both drop down to x8 slots. The last x16 slot runs at x4 all of the time. In between the PCIe slots the Gaming K7 also has two m.2 slots, both running at x4 with PCIe drive and SATA support.
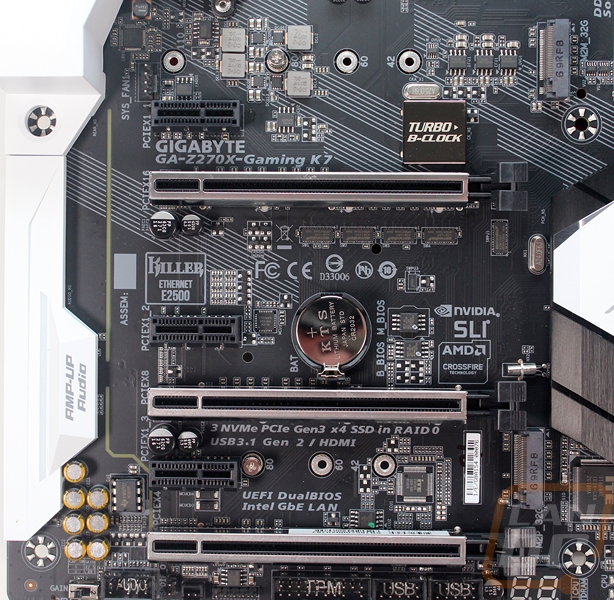
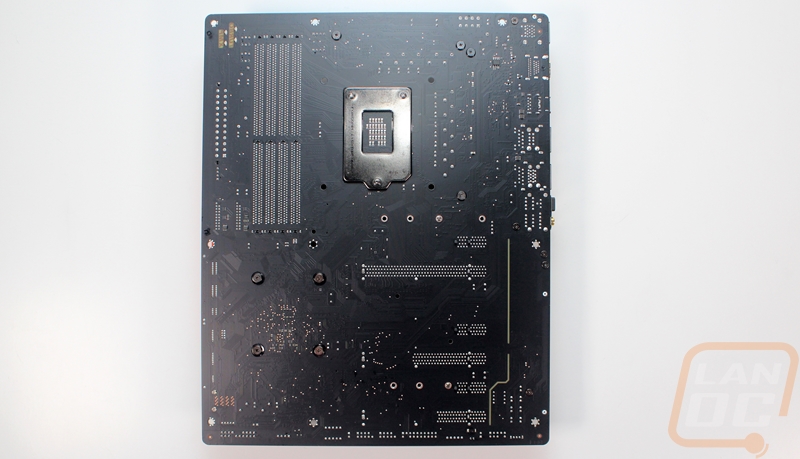
The back of the board mostly just gives a better look at that flat black PCB finish. We can also see the gap for the audio chipset down on the bottom right but it doesn’t really completely cut off at the end of the audio connections on the rear I/O like you would expect. I also really like that all of the heatsinks are attached with screws, not plastic pushpins like normal.
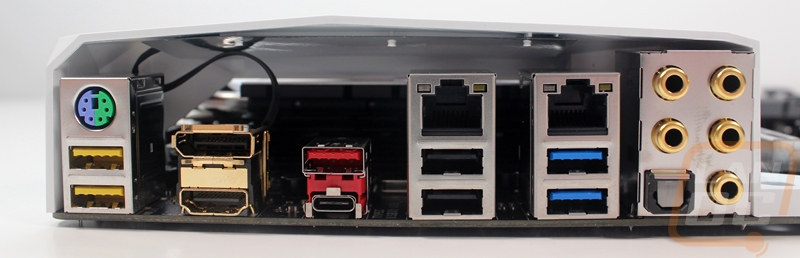
For connections on the rear I/O panel the Gaming K7 has a nice mix. Over on the right, it has gold plated audio connections in a standard audio layout with optical. Then there are two 1GbE network ports. One is run on the Intel chipset and the other is a Killer E2500. There are full sized Displayport and HDMI options for the onboard GPU and those are also gold plated. Then there is a PS2 port for those who still want to run an older keyboard or mouse. For USB there are two USB 2.0 ports, four USB 3.1 Gen 1, and then two USB 3.1 Gen 2. The two Gen 2 ports are the Type-C and the red labeled port, those are going to have the fastest transfer speeds with devices that support it.
Software
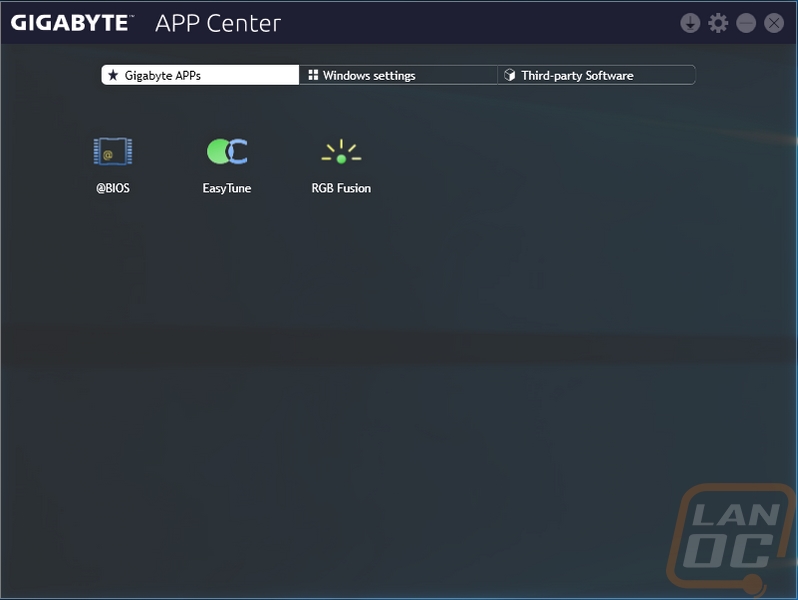
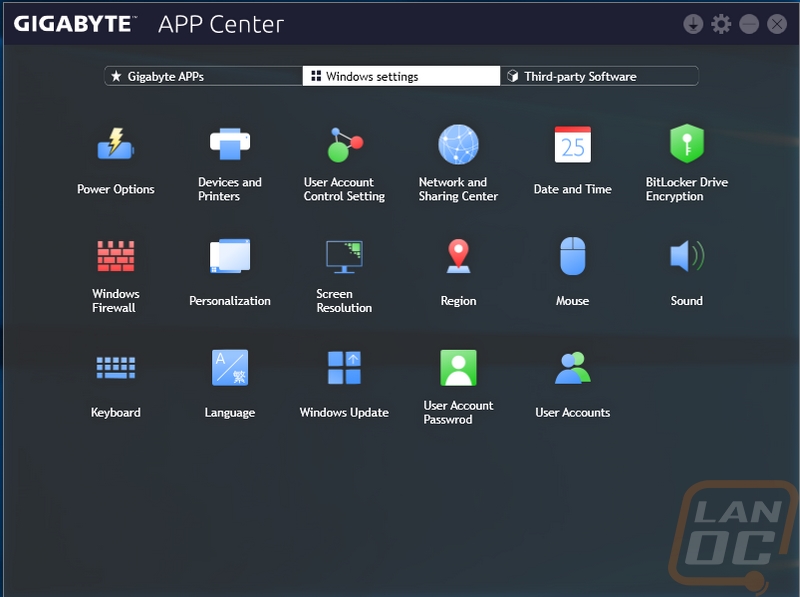
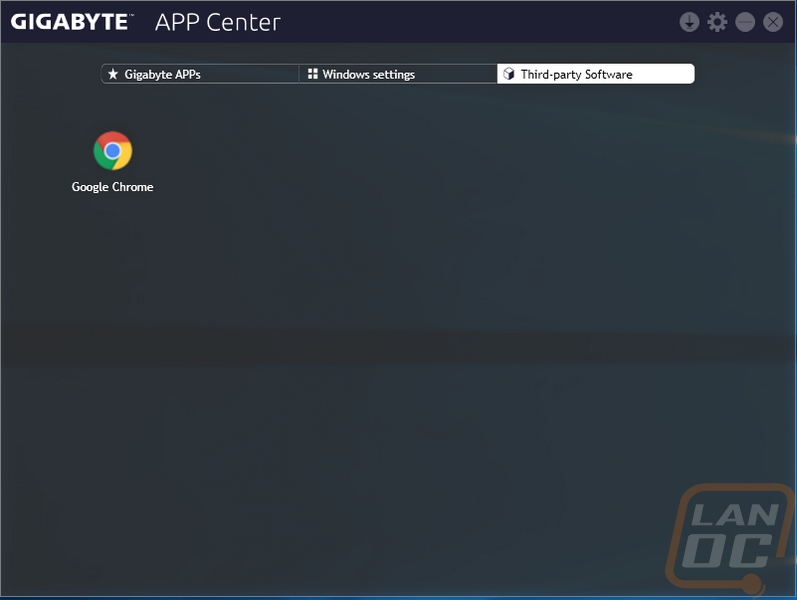
Beyond board features, software is also important to the user experience so I did take a look at the software included with the Gaming K7 as well as the BIOS. So Gigabyte has their software split up into a whole list of programs, but at the core is their APP Center. Everything requires it to be installed first and it is how you get to everything. The App Center is really simple with just three tabs. You can get to a page of all of the installed apps, a windows settings page that basically just replicated your normal windows settings, and a third party page.
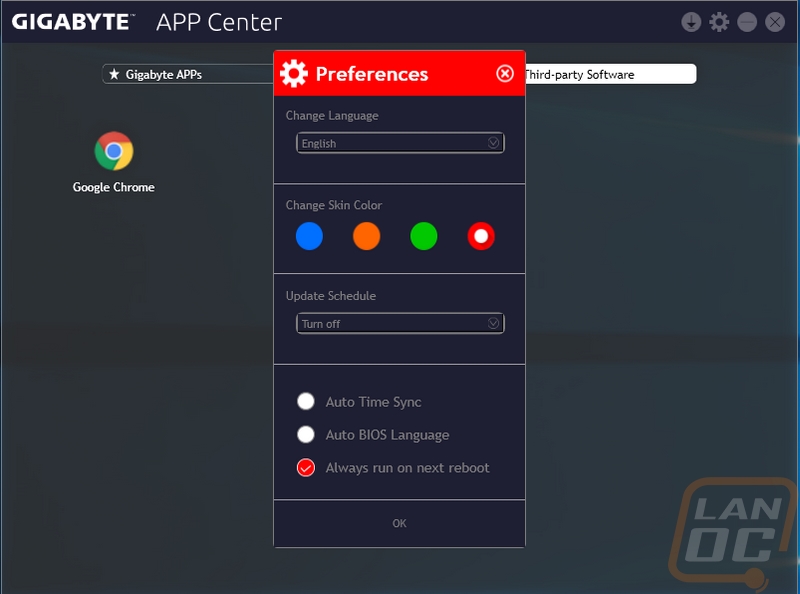
There is a settings option where you can change the software color and schedule updates. I didn’t change the color from the default red, so you will notice all of the apps have red accents, you can change this to anything that matches your style.
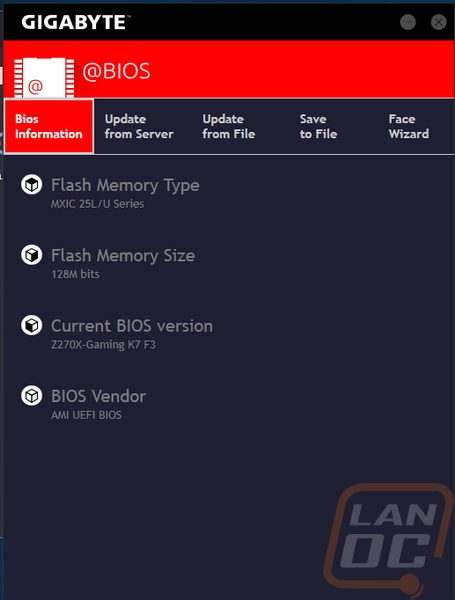
I always install @BIOS, this is a simple app that lets us check the current BIOS version and update it. You can update via the internet but that hasn’t been working for me for the past 6 months or so, so I always just download the updated BIOS from the drivers page and update it manually here.
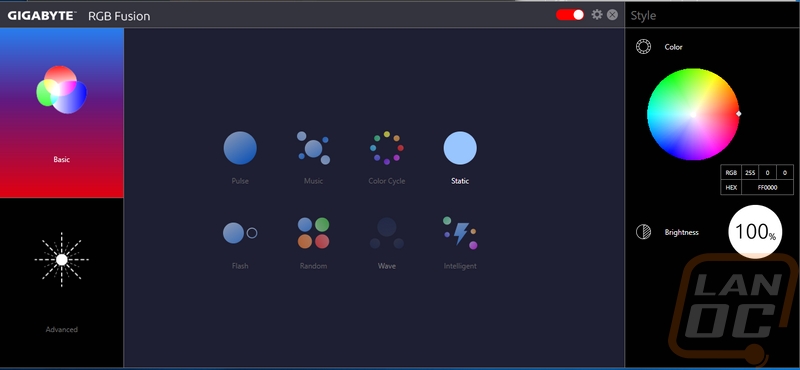
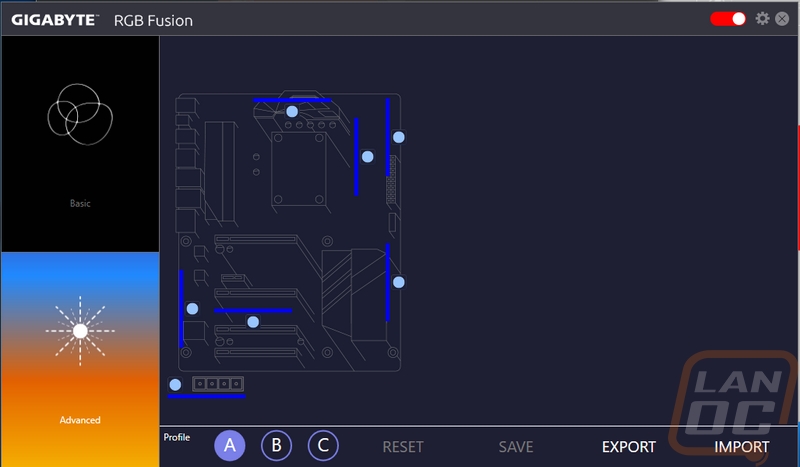
The build in RGB lighting has to be controlled somehow, the new RGB Fusion app is how you do that. You can set the brightness and color of all of the lighting at once over on the right. In the middle, they have a whole selection of lighting effects you can use for flashing or rotating lighting. There is even an option to have the lighting change depending on the health of your PC. If you want more control you can also get in the advanced page and control each LED individually. You can setup three profiles to flip between as well. So if you have a multicolor theme you can set some to your primary color and others to the secondary color. Or in my case, I sometimes prefer to flip the case lighting to white lighting to see better in the case.
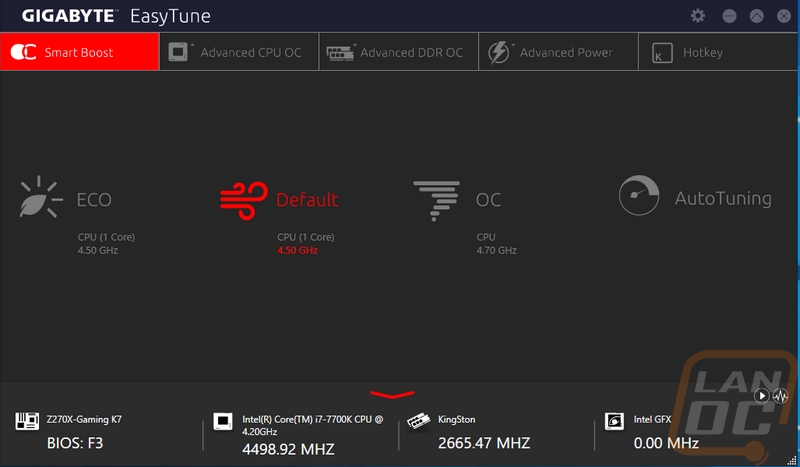
While there are a whole bunch of other options for apps, the only other app I ever use is EasyTune. This lets you overclock your CPU and ram manually or automatically. It also gives you access to power settings on your board and shows the status of your clock speeds down at the bottom. All without having to reboot to get into the BIOS.
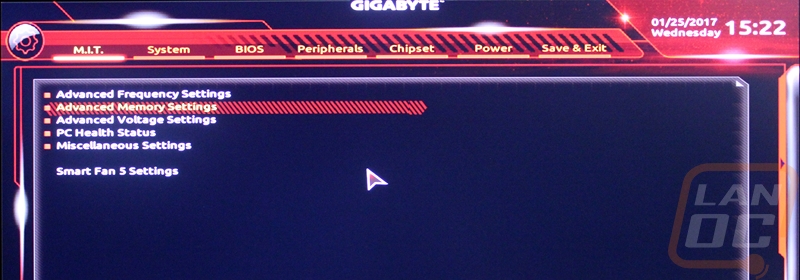
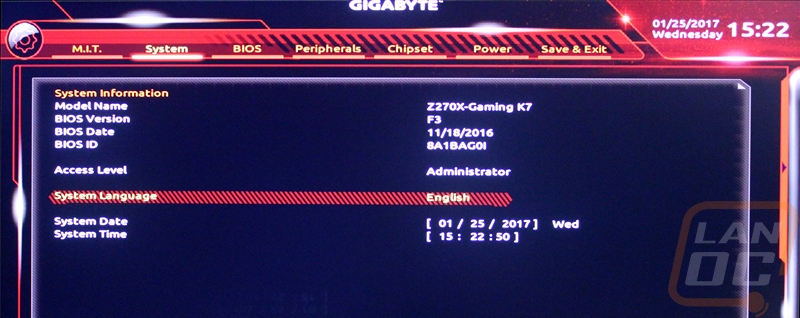
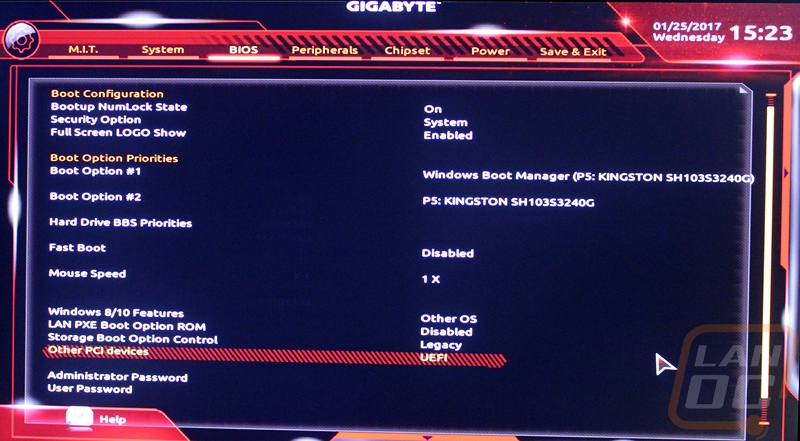
Speaking of the BIOS, I did get a few pictures of it as well. The mouse controls in the BIOS still need more refining, it doesn’t feel like a mouse in windows but it is still faster than flipping through with your keyboard. Up top, you have the date and time along with each of the available pages. The first page you get to really has all f the overclocking options. Here you can get into CPU or RAM overclocking or voltages and fan speeds. The next page is a system tab with just a few basic details on the board like the BIOS ID and language settings. After that s the BIOS page but it really would be better labeled the boot options page. Here you can set up the booting options as well as things like wake on LAN and set a bios password.
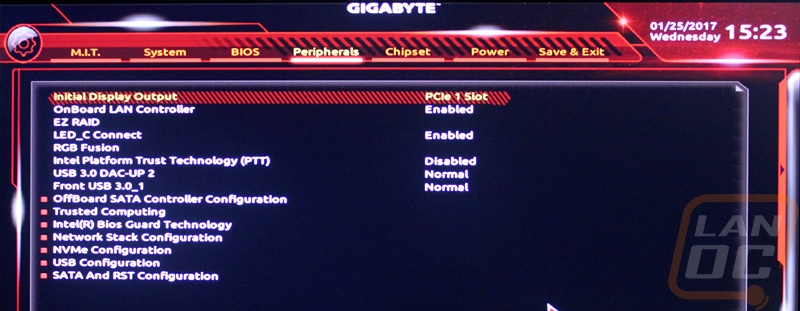
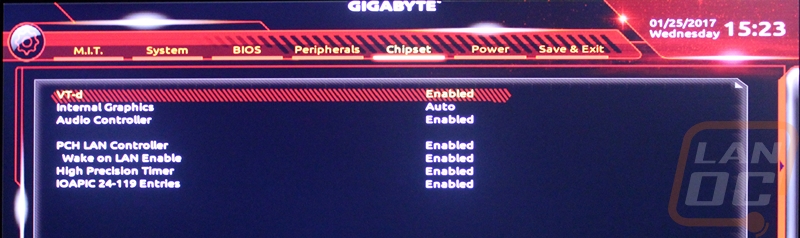
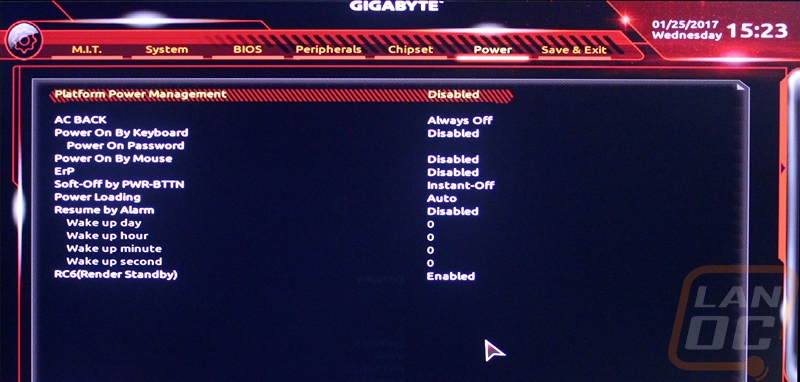
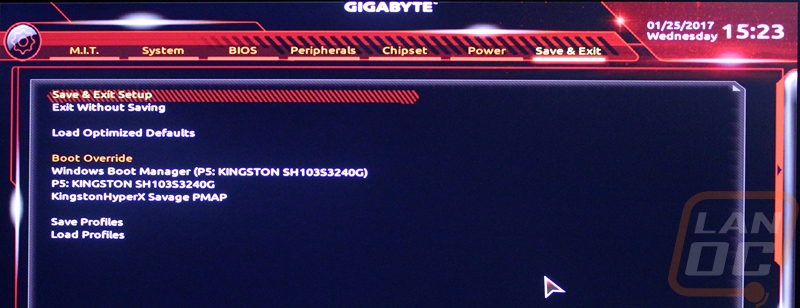
Next, the peripherals page basically covers all of the SATA, USB, and NIC settings. There are a few individual options but most open up other pages for more detailed settings. The Chipset tab expands on this a little more with settings for onboard graphics and more LAN controller controls. Then from there, the power tab has all of the wake options to set things like a wake-up alarm, powering on by moving the mouse, etc. The last page is just where you can save and exit or if you want to load and save profiles. You can also override the boot device here if you need to get into a rarely used secondary OS.
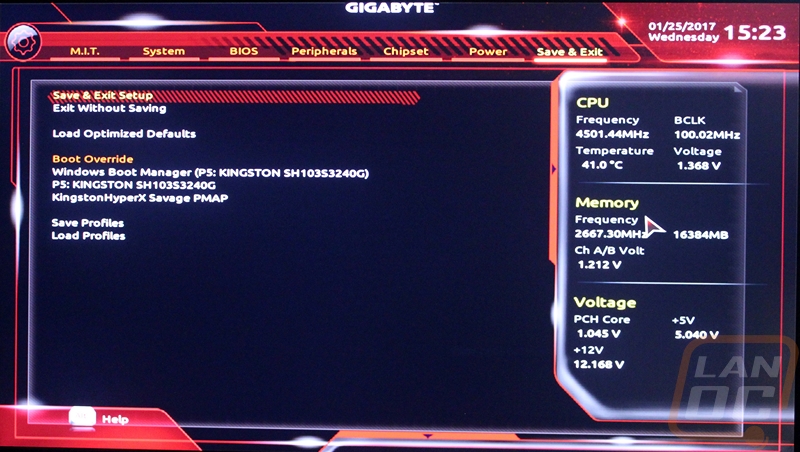
On all of the pages, there are two other options. Over on the right if you mouse over the edge it will open up a pullout menu with the CPU, Memory, and Voltage settings on a live readout. Down along the bottom a small menu slides up to show an easy mode and to get access to Q-Flash for the BIOS updates and smart fan. While these options are here to be quick I didn’t even notice them until at the end of my messing around in the BIOS, I think they are more likely to be overlooked. The Easy Mode should honestly be the default boot mode, in case someone gets into the BIOS that doesn’t know what they are doing, they shouldn’t have to find the easy mode. Q-Flash and Smart fan could really be on a few different tabs, any of them I would have found the settings faster than here hidden on the bottom.

Test Rig and Procedures
| Intel Z270 Test System | ||
| CPU | Intel | Live Pricing |
| Cooling |
Noctua NH-U14S for cooling Noctua NT-H1 Thermal Paste |
|
| Memory | Kingston HyperX FURY DDR4 16GB kit 2666MHz | Live Pricing |
| Storage | Kingston HyperX 240GB SSD | Live Pricing |
| Video Card | AMD RX480 | Live Pricing |
| Power Supply | Thermaltake 850w | Live Pricing |
| Case | Microcool Banchetto 101 Test bench | Live Pricing |
| OS | Windows 10 Pro 64-bit | Live Pricing |
| Motherboard Testing | |
| Passmark Performance Test 9.0 | Overall PCMark score |
| PCMark 8 | We use the Home Accelerated benchmark and track the overall score |
| 3DMark | We run the 2013 Fire Strike test on the performance setting |
| In Game Tests | |
| Deus Ex: Mankind Divided | In game benchmark, ultra setting, 1080p |
| Hitman 2016 | Fullscreen with V-Sync turned off Detail, Texture Quality, Shadow Maps, and Shadow Resolution all set to their highest settings. Tested at 1080p in DX12 |
| Subsystem Testing | |
| Passmark | Passmark Advanced network test |
Performance
For testing of the Gaming K7, after messing with the software I made sure I had my RAM setup to the XMP profile and went through a few basic tests to make sure things were running well. Most motherboard tests aren’t really good for comparing between boards, but as you can see below, the Gaming K7 did perform well with the i7-7770 and an RX480. The Deus Ex results would have me adjusting the settings down slightly, but that is on the video card, not the board. I think the only really important test was the network cards and that is because the Gaming K7 actually comes with two different high-quality NICs. The Intel NIC is a solid pick and most people would be happy with that but they also included a Killer NIC E2500 for its gaming QoS performance. Both performed well across the office network with no sign of the weird issues I would have with older Intel NICs on our Trendnet switches. The Intel performed slightly faster, but I wouldn’t read into it much. They would both be great to use or you can even team them up together and double your transfer rates as well.
| 3DMark | |||
| Motherboard | Overall Score | Graphics Score | Physics Score |
| Gigabyte Z270X Gaming K7 | 11151 | 13073 | 14604 |
| PCMark 8 Home Accelerated Score | |||
| Gigabyte Z270X Gaming K7 | 5191 | ||
| Passmark Overall Score | |||
| Gigabyte Z270X Gaming K7 | 6415.7 | ||
| Deus Ex: Mankind Divided Average FPS | |||
| Gigabyte Z270X Gaming K7 | 45.2 | ||
| Hitman 2016 Average FPS | |||
| Gigabyte Z270X Gaming K7 | 81.74 | ||
| Average Network Speed | |||
| Gigabyte Z270X Gaming K7 - Killer E2500 | 884.5 | ||
| Gigabyte Z270X Gaming K7 - Intel NIC | 895.4 | ||
Given the popularity of aesthetics these days, I couldn’t really get through the performance testing without also checking out the RGB lighting on the board. I left the lighting set to the stock RED for my photos, but you can set them to any color you want. I was curious how that weird lightbar on the right side of the board would look. In the end, it was a little brighter than I prefer, if I had this board in my PC I might turn it down unless I had a custom bar made to show it off. I love the lights around the CPU cooler that light up that are a little. I don’t care much about the lighting in the rear I/O cover as well. It's mostly the lighting between your video cards, between the ram, and around the CPU like I like because they put the focus on the main parts of your PC.
Overall and Final Verdict
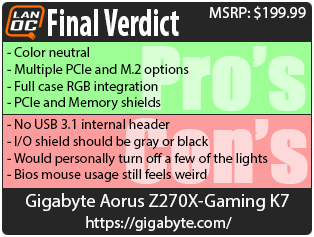
So for the first of many Z270’s to come into the office, the Z270X-Gaming K7 or as I have been calling it the Gaming K7 is a good place to start. It is one of a few new boards under Gigabytes Aorus brand that has now been expanded to handle their gaming focused boards, video cards, and peripherals. So how is the Gaming K7? Well, I was actually a big fan of the Gigabyte Z170 that I took a look at and they have basically expanded on that without changing things too much. They still have the bright white cover over the rear I/O area and all the way down to the sound card. I’m not a huge fan of that much white on the board, I think a gray would look great but at least it is still color neutral. This is because they loaded the board up with RGB lighting options. There are lights around the CPU, between the ram and video cards, on the rear I/O cover, and there is a weird strip on the right side of the board. I love most of the lighting but if building a PC with this board would turn off the I/O and lightbar. It also has one header to hook up your case lighting into everything else to match.
For features, the board have nearly everything you could ask for. Especially with the PCIe options and having two m.2 slots. M.2 is getting popular really quick so it's nice to have some expandability there. If that doesn’t do it for you, there is also a U.2 and three SATA Express. With all of that, they were missing a new USB 3.1 header, though, I would have liked to of seen one in place of the two USB 3.0 headers. The full shields on all of the PCIe x16 slots should help hold heavy video cards and the shields on all of the memory DIMMs look awesome if nothing else.
The BIOS has all of the features you might need but still feels weird when using a mouse, I would think all of the manufacturers would figure that one out by now and it's not just Gigabyte, its everyone. Beyond that, if I had to ask for anything that isn’t already on the board I would be looking for one or two more fan headers. At four it is enough for a basic build, but with a dual fan heatsink or water cooling, you are down to only two connections for case fans.
The $200 price point seems a little high until we consider that other Z270 boards are ranging from $100 all the way up to $500 now. This is however what I would consider to be a high-end board, with the exception of a few of the crazy setups this is going to have anything you need now and in the future and it has the clean styling and customization with RGB lighting to make your build specific to you. So if I were building a new Kaby Lake PC, this board would be on my short list. I would most likely paint the I/O cover and tweak the lighting but all of the features that I can’t change are there.

Live Pricing: HERE


