Installation and Performance
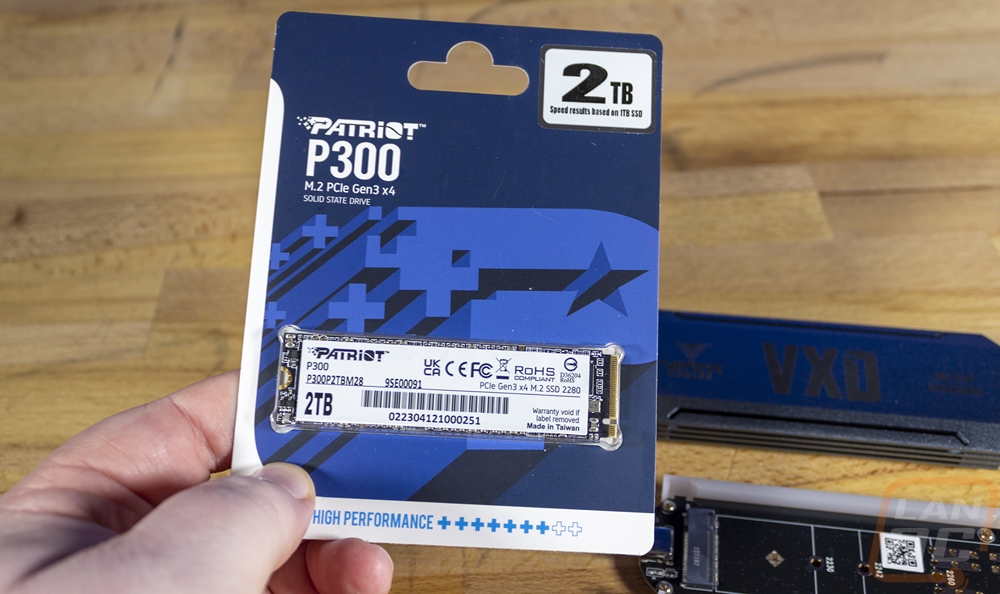
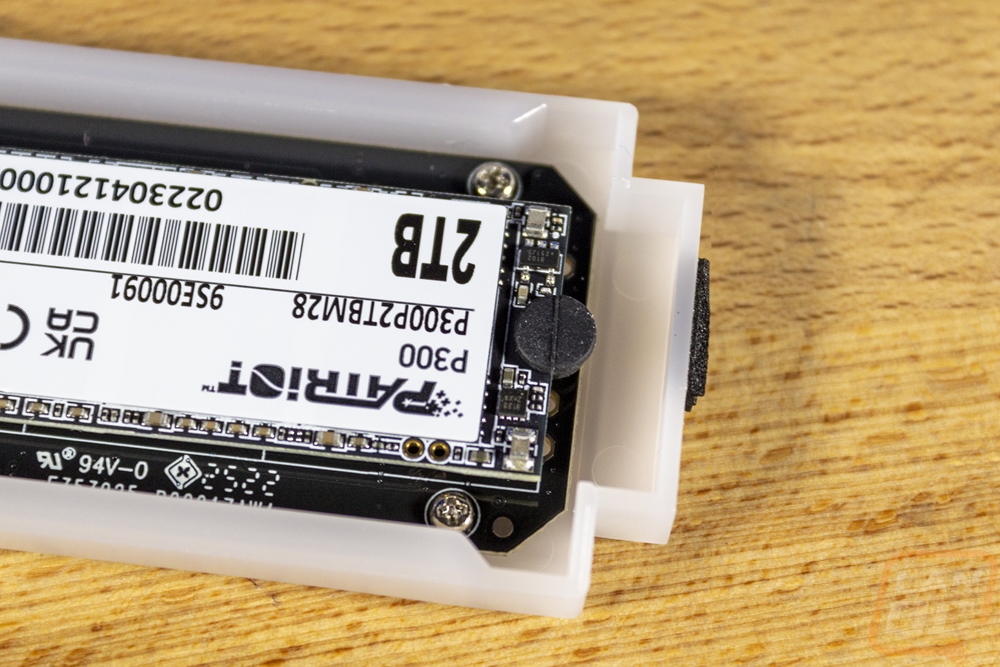
Before testing everything I did need to get a drive inside of the VXD External SSD Enclosure and Patriot was nice enough to include just the drive. With the USB 3.2 Gen2 interface, a crazy fast drive would be put to waste. Not to mention the PCIe Gen 3 connection speed for the drive itself would limit any newer PCIe 4 or 5 drive even if the USB wasn’t the main limitation. So they send over a Patiot P300 2TB drive. This is a standard PCIe Gen 3x4 SSD and without a heatsink or anything like that, I don’t have to worry about taking any of that off so it will fit inside of the enclosure.
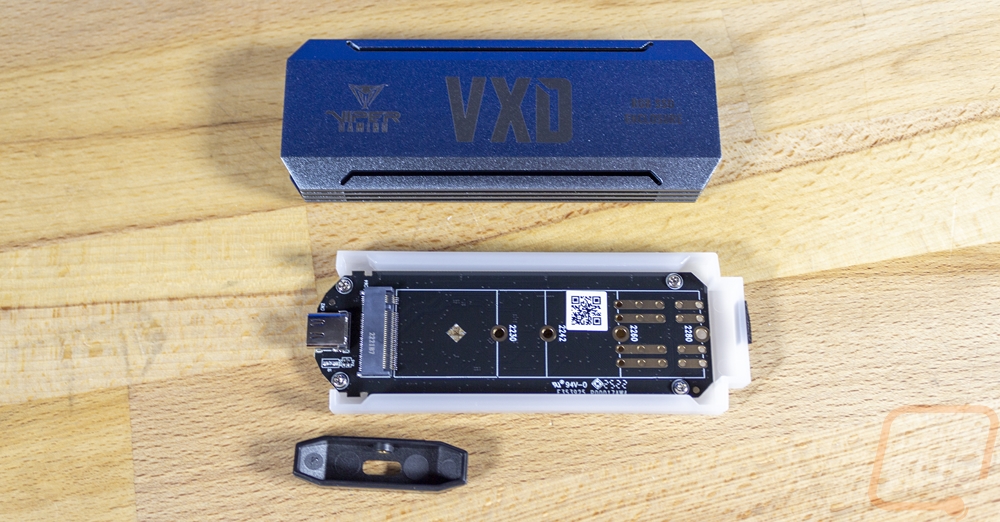
From there I had to get the VXD opened up and because it comes with the needed torx screwdriver I didn’t even have to get any tools out. This is important because unless you have a set of small screwdrivers for electronics you most likely wouldn’t have that Torx 5 bit. You just have to remove the one black screw on the bottom of the VXD but even with that done I had to shake it around a few times to knock the cap off of the end. Once the cap on the USB connection end comes off there is a plastic tray inside that will slide out. They have pulled double duty using the plastic tray to hold everything but it is also the light diffuser that we saw behind the slots in the enclosure. Inside the tray, you have a small black PCB. For the most part, you should be able to figure out the overall installation and that is a good thing because you don’t have an instruction manual inside of the box and initially when I went to the Viper website the product page doesn’t have one linked there as well. They have put together instructions and there is a QR code on the box. But if you don’t look there you will only find the instructions from googling it when they could easily have them linked or even right on the product page.
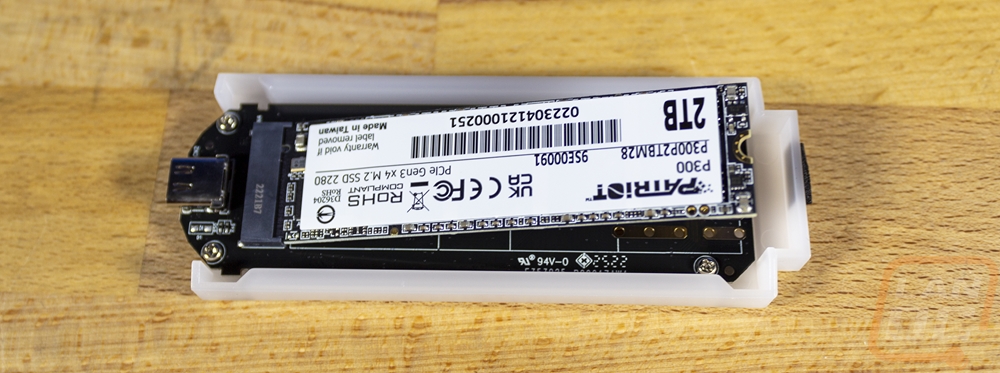
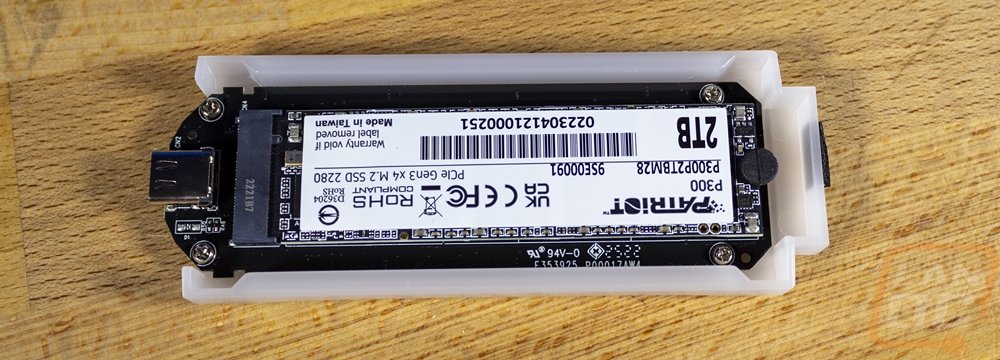
What I wanted to look up was how they want you to install the small heatsink because with the thermal pad, I didn’t want to mess it up by having to do it twice. You put the pad on your SSD or in the heatsink and it snaps onto the SSD. I wanted to make sure you didn’t slide it on. With that installed you then use the small rubber bit that you get and that will sit on the SSD where a screw would normally go. You then push it down and it will hold it in place. From there you can slide the tray back into the enclosure and put it all back together.

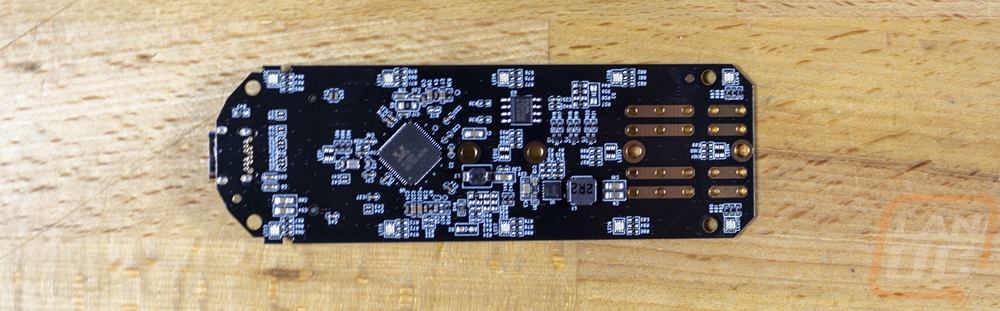
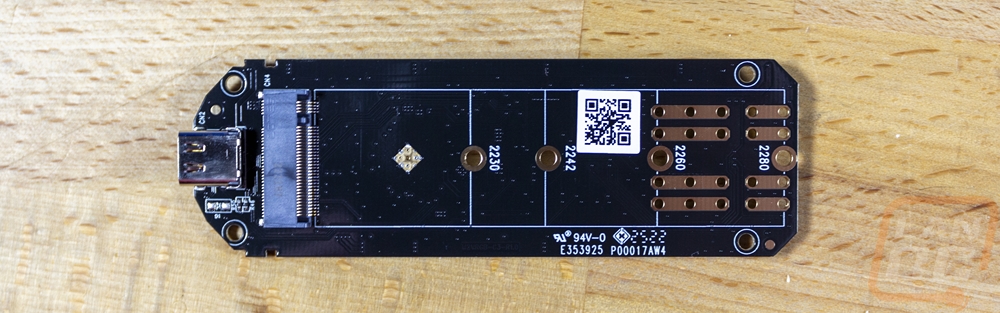
I did get a few pictures of the full PCB before putting everything together, the top side really just has the M.2 slot with holes to support different lengths of drives and then the Type-C header at the end. Around on the back, we can see the controller as well as the RGB lighting that Viper installed. They are right next to the edge of the PCB and you have five in total per side. These face down and help the plastic tray glow to avoid any hotspots.
With the drive installed, you will still need to format it if it wasn’t already formatted before you installed it in the enclosure. That is one of the big benefits of external enclosures like this. You can reuse older drives that you maybe have upgraded from a system and you can keep the files on them if you would like, you just connect through USB to M.2 not direct M.2.
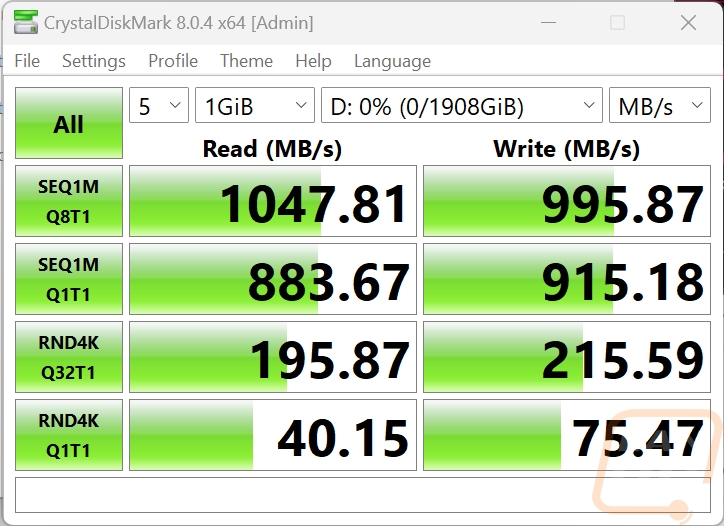
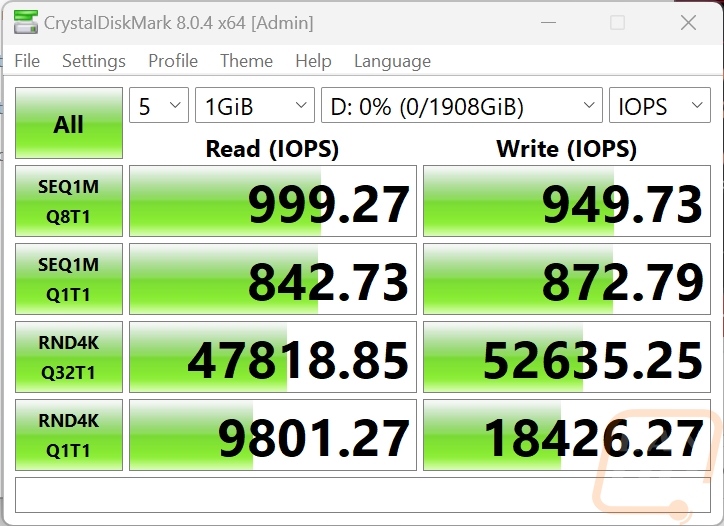
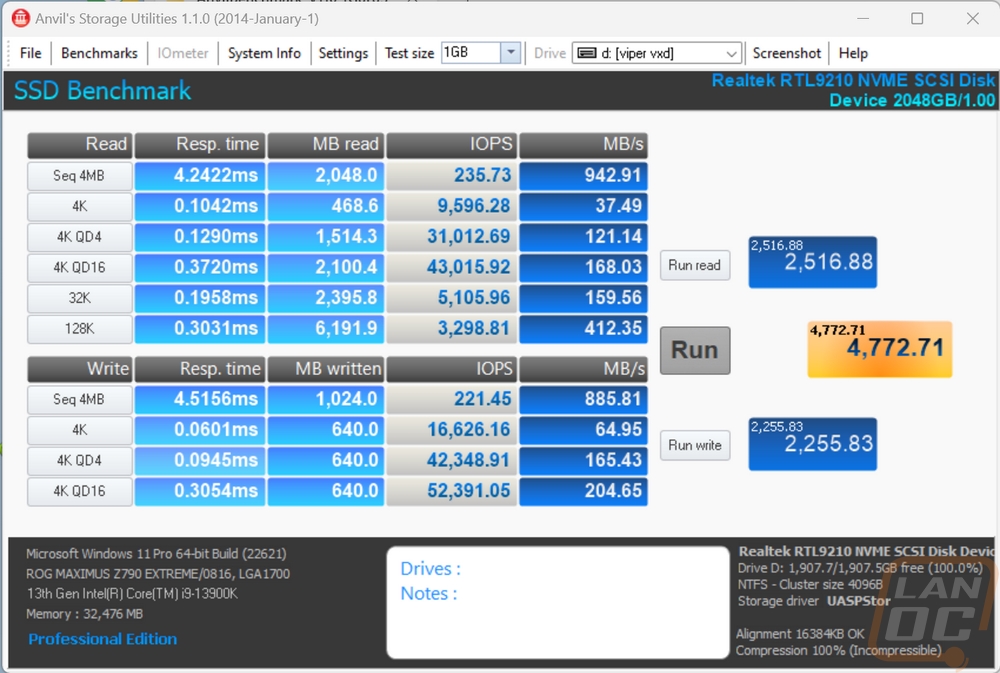
With everything set up, I could finally dive into some testing but because you supply your own drive performance is going to depend on the drive you provide to some extent. That said the USB connection is still the main limitation when it comes to full sequential speeds and we can see that in the CrystalDiskMark test the read speed was t 1047 and the writes were at 995 MB/s, right at the limit of USB 3.2 Gen 2. The same thing can be seen in the Anvil Storage Utility test where we can also see the IOPS performance.
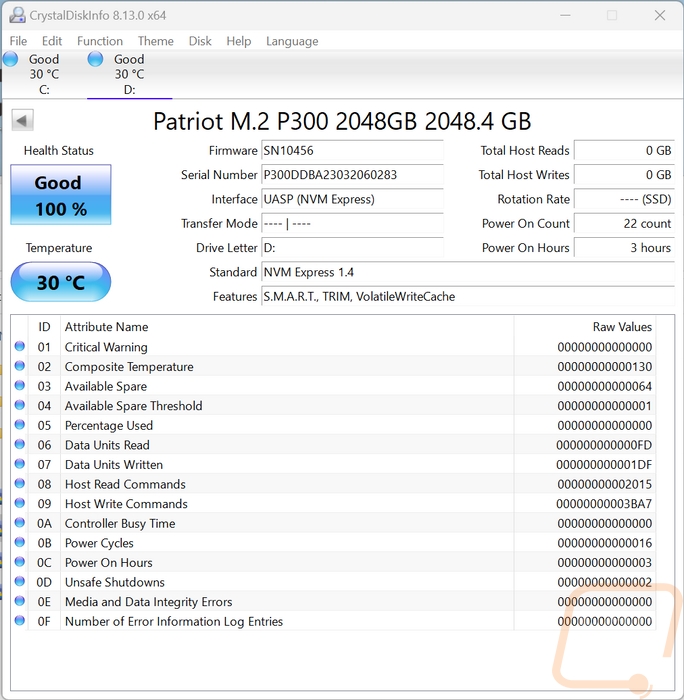
I did run CrystalDiskInfo just to see what would show up and to confirm we were connected at the correct speed. The Patriot P300 that we installed inside shows up here along with the UASP interface aka USB-attached SCSI Protocol.
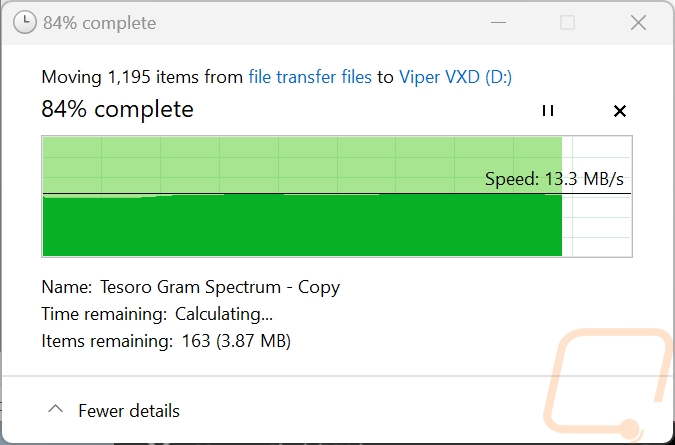
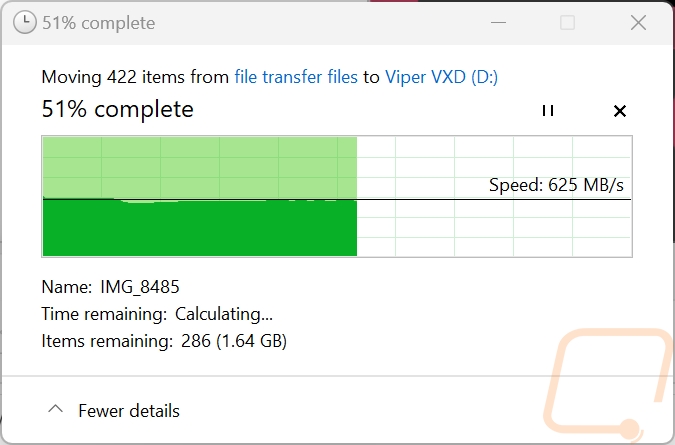
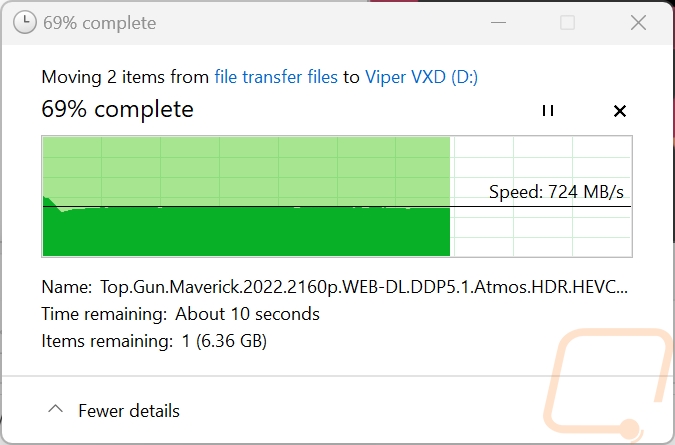
I also ran my favorite tests, real-world file transfers using file explorer in Windows. I copied three different file types to and from the VXD to see how it would perform but had to remove the VXD to PC files because the SSD on our test bench was caching the files and showing crazy performance numbers. I transferred a folder full of Word document files to get a look at performance when transferring lots of small-sized files which always brings drives to a crawl. The combination wrote to the drive at 13.3 MB/s constantly which was in line with what I’ve seen from other drives. I did a folder filled with image files, both JPG and RAW files. This was much faster at 625 MB/s. Then for movies which are large single files performance was faster at 724 MB/s but a little lower than I thought it would be.
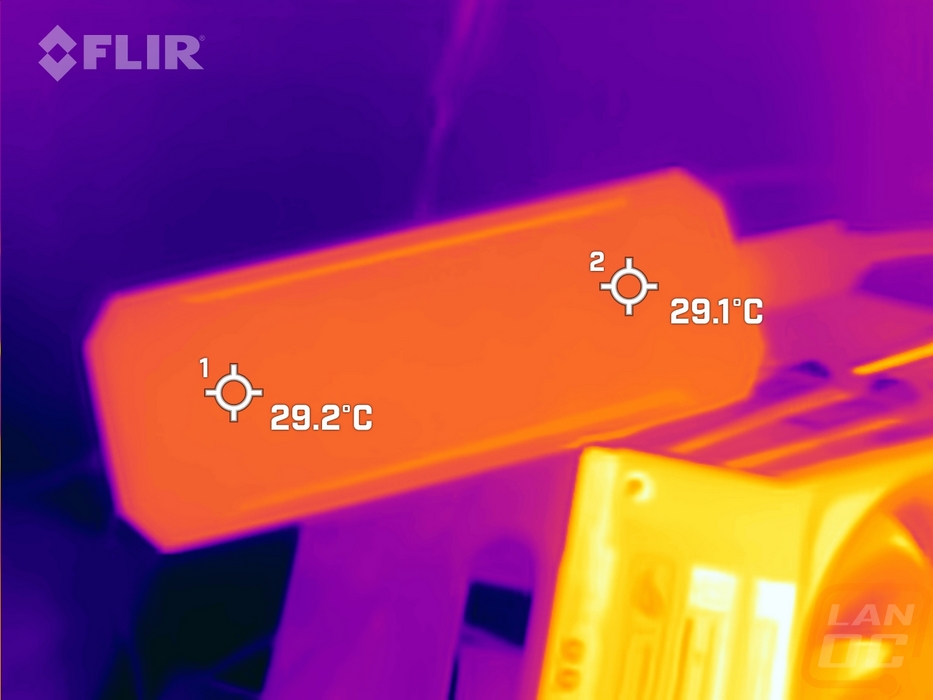
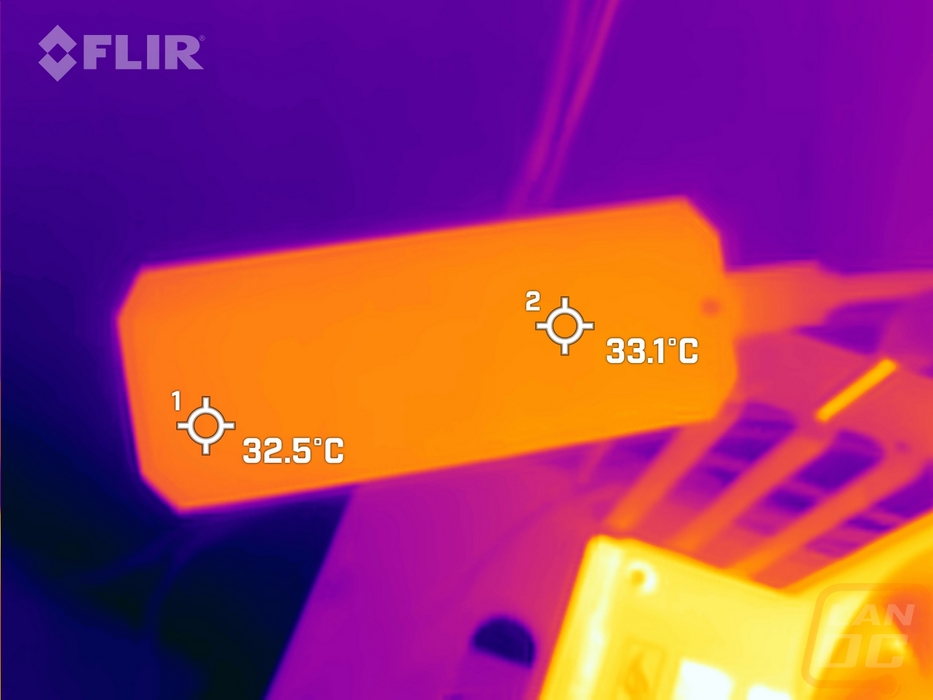
Beyond standard testing, I did also get the thermal camera out when testing the VXD. For this, I ran a disk benchmark using AIDA64 to heat things up. After a half hour, the thermal images show that the VXD is handling the heat from the P300 SSD really well. The enclosure shows just a little bit of heat but it has been transferred out across the entire enclosure and with the hottest spot at 32.5c or 90.5f it was barely reaching temps that you would even notice when handling the drive.
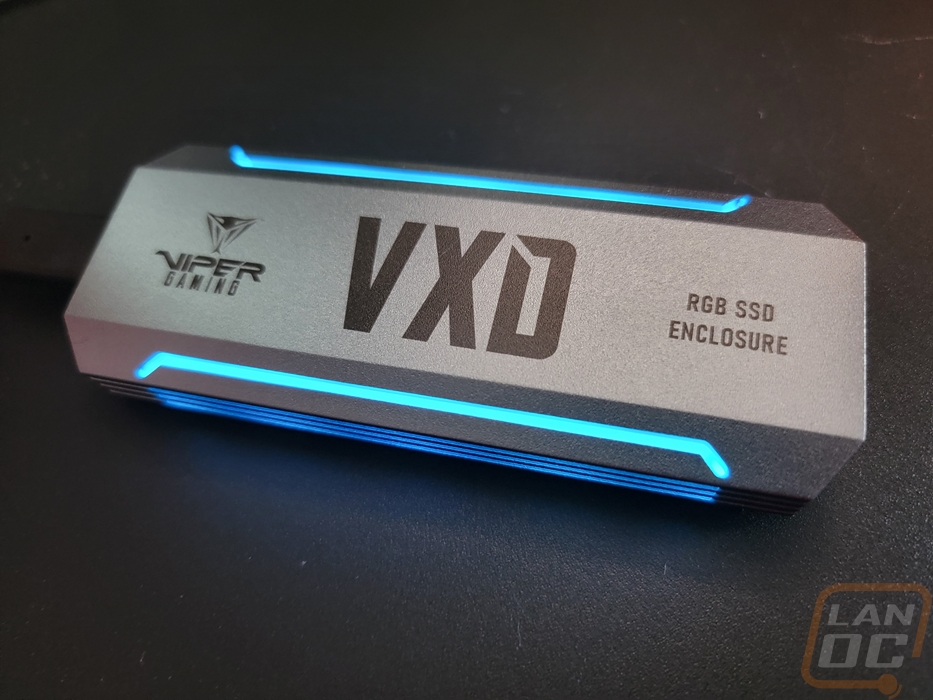
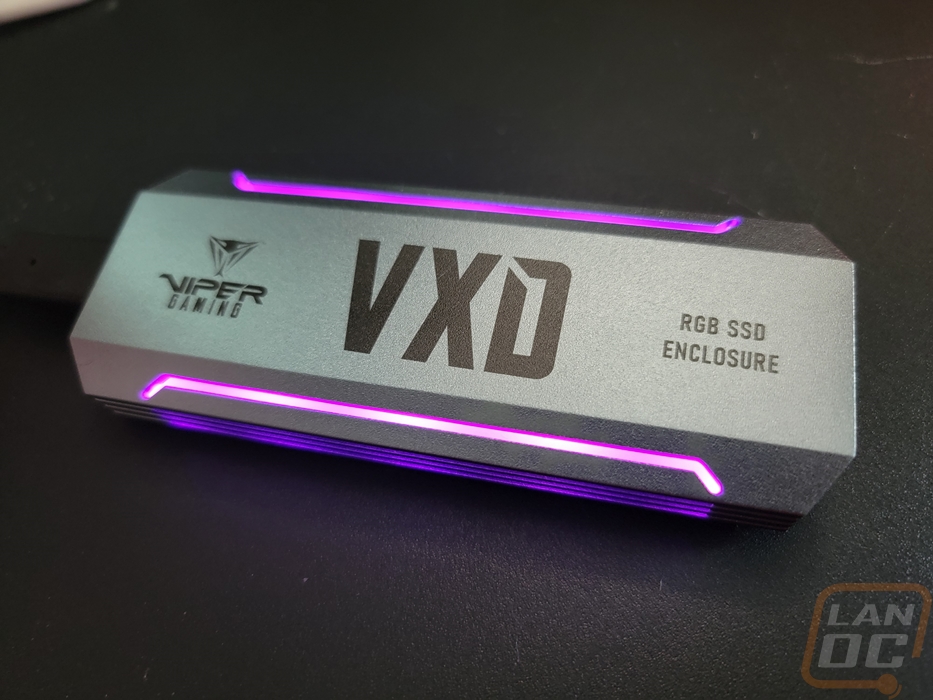
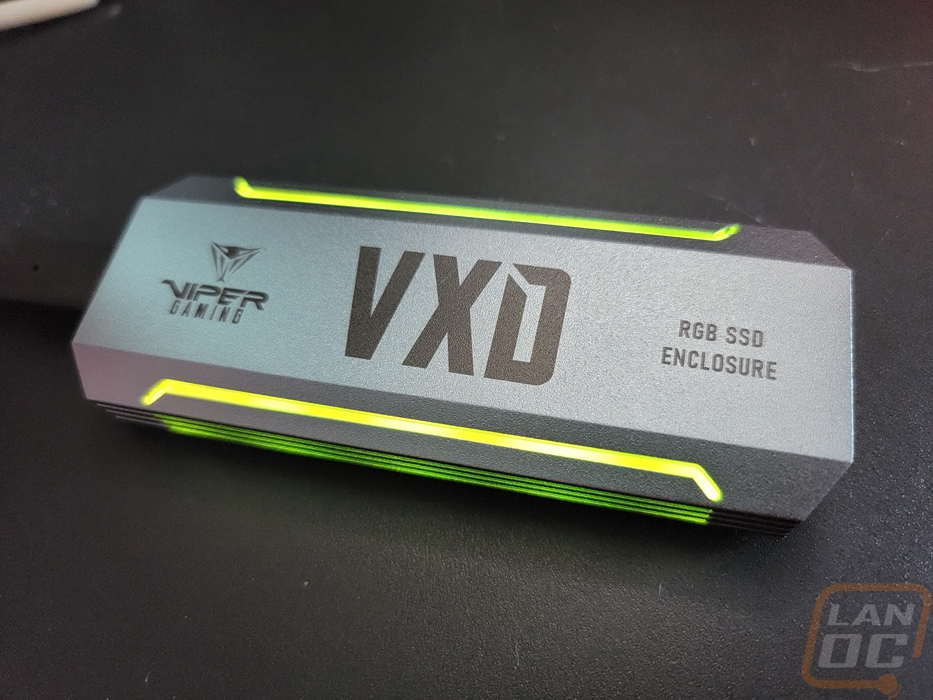
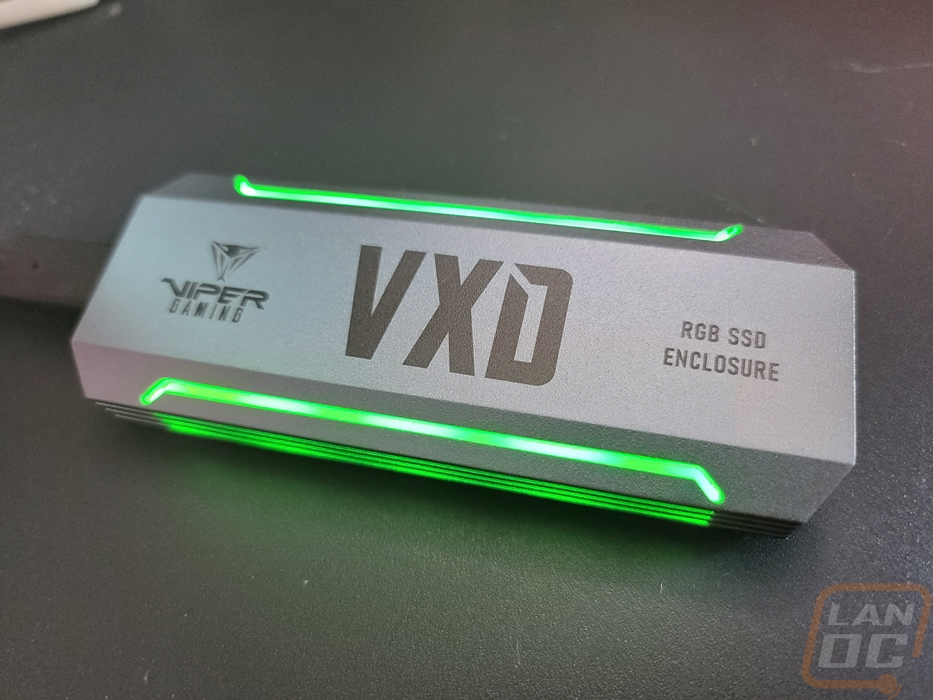
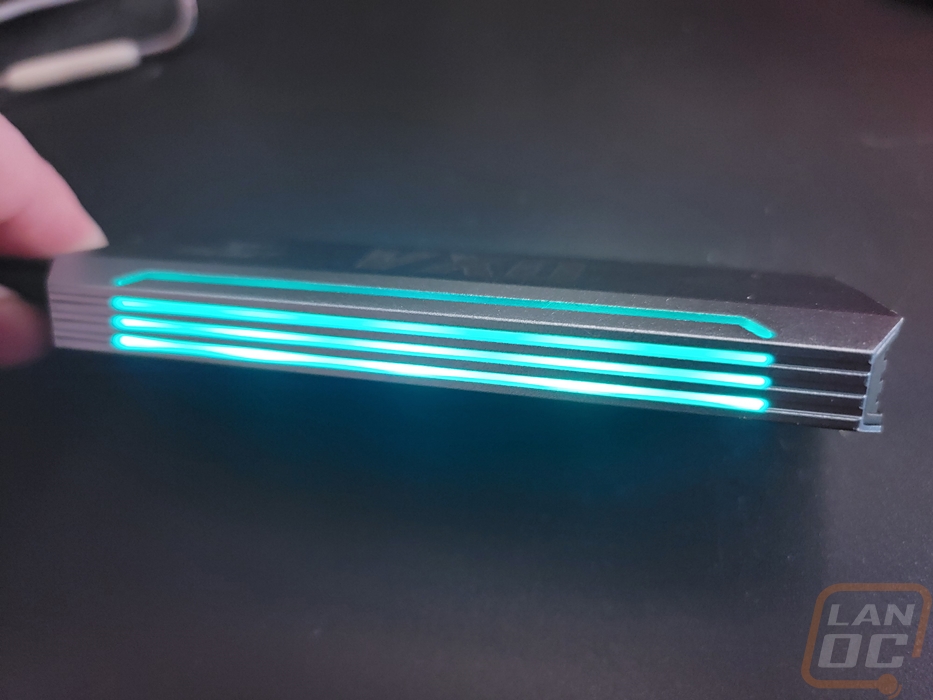
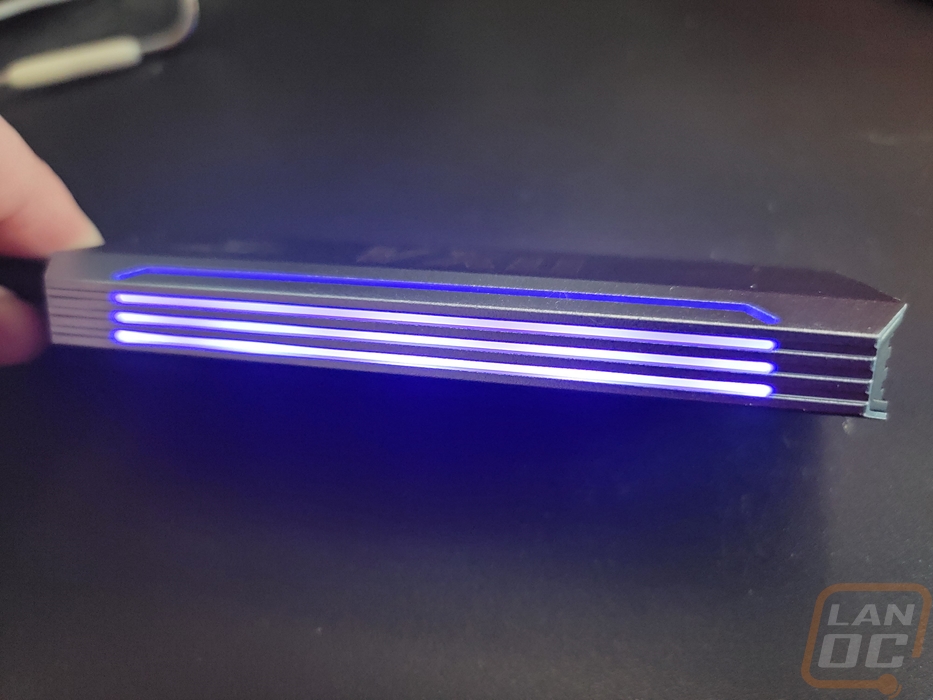
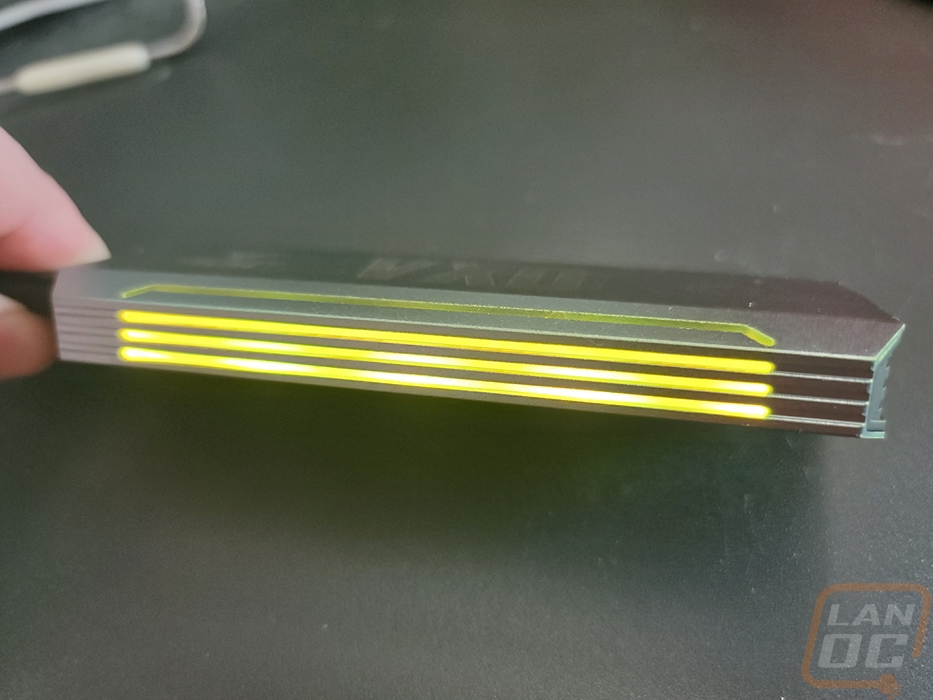
I couldn’t finish my testing without also taking a look at the RGB lighting as well. The lighting for the enclosure isn’t individually controlled LEDs, all of the lighting shows the same color at the same time. In fact, it isn’t controlled at all, they have it set to rotate through the color spectrum changing colors most of the time. But it does also flash when you are transferring files and the transfer completes. Beyond that the lighting doesn’t have any purpose, it is just there to look cool if RGB lighting is your thing. For me, I could take it or leave it. Having the option to set it to a specific color to stay on would be nice. It did help to find it in the mess that is my desk when I was testing it as well. Beyond that though the lighting does look good with it lit up on the side and top. Even with the diffuser, there are still hot spots where each of the LEDs is but not bad enough for it to take away from anything.