Compact M. 2-based external SSDs have been growing in popularity and it’s no wonder why. They max out the performance of USB 3.2 Gen 2 connections with crazy read and write performance, are extremely durable, and their size is a lot better than any hard drive based external option. I’ve had the chance to check out a variety of the options in the past. Alongside of them, some companies make M.2 external enclosures that do all of the same things, but you just add your own drive inside. They are a nice option to use an old SSD or offer you the chance to be able to upgrade later. Viper, the gaming brand of Patriot has had a few including their latest Viper VXD which I’m going to check out today.
Product Name: Viper VXD External SSD Enclosure
Review Sample Provided by: Patriot
Written By: Wes Compton
Amazon Affiliate Links:
Viper VXD External SSD Enclosure
|
Specifications |
|
|
Connection Type |
USB 3.2 Gen2 |
|
Cables Included |
Dual USB-C to C and USB-C to A cables included |
|
Read Speeds |
SEQ read performance up to 1000 MB/s |
|
Dimensions |
4.33“(L) x 1.69”(W) x 0.54“(H) 11 cm (L) x 4.3 cm (W) x 1.38 cm (H) |
|
Weight |
0.13 lbs / 58.6 g |
|
Shell Material |
100% Aluminum Alloy |
|
Drive Sizes supported |
M.2 SSD sizes, 2230 / 2242 / 2260 / 2280 |
|
Interface |
PCIe Gen3 x 4, NVMe 1.3 |
|
RGB Lighting |
Yes |
|
Warranty |
3 Year Warranty |
Photos and Features
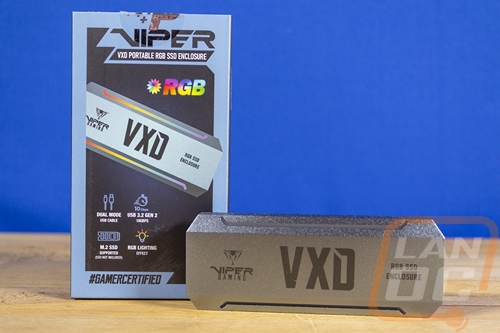
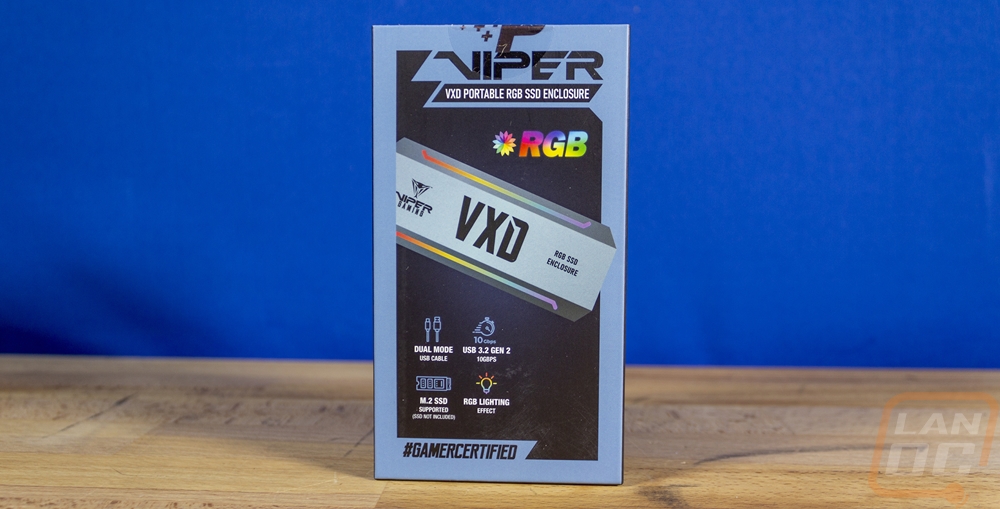
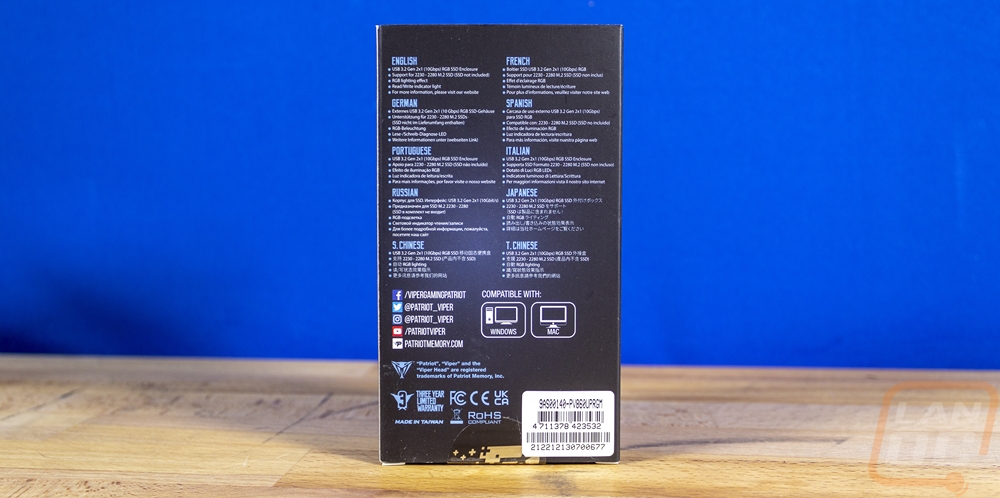
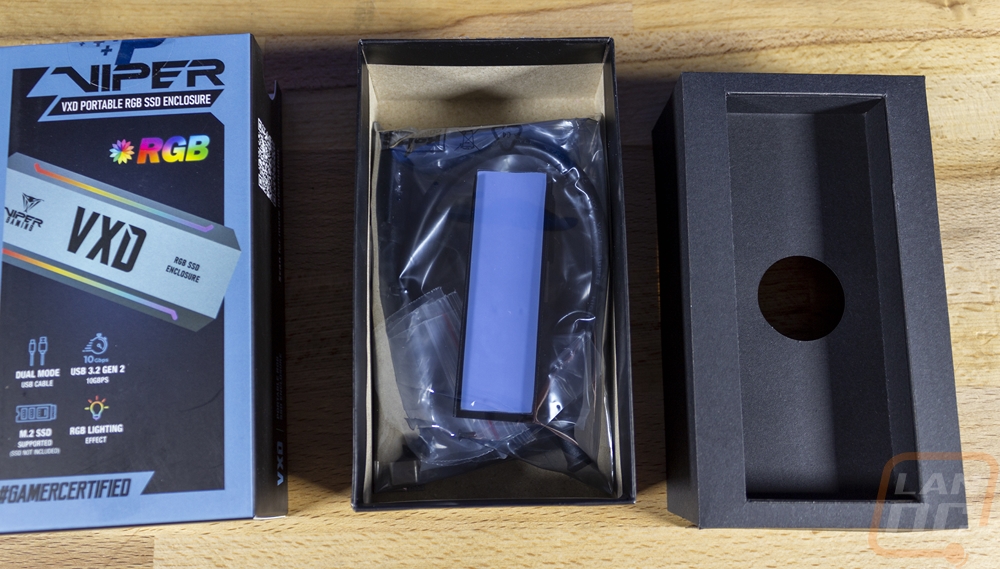
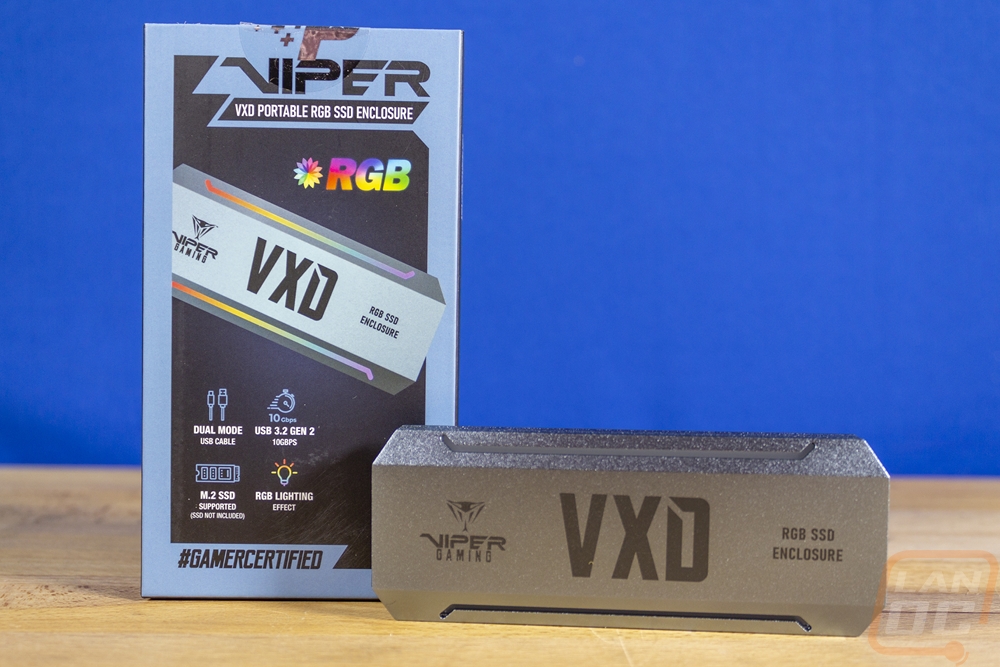
The Viper VXD External SSD Enclosure is packaged similarly to what I’ve seen with the Viper internal SSDs only with the box having a blue outline. This has the Viper branding up top along with the model name just below that. The front has a rendering of the enclosure including it having its RGB lighting on. Below that four icons highlight the enclosure’s features. Then on the back, they repeat those features again but this time in a small list that is repeated across 10 languages in total. The back does have some good information however with a badge showing that the Viper VXD External SSD Enclosure has a 3-year warranty and is compatible with Windows and Mac.
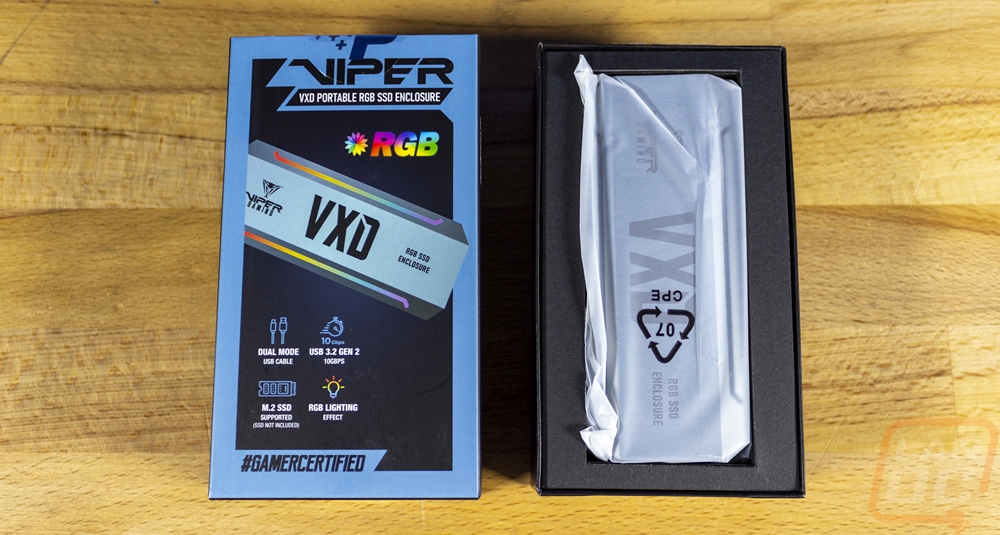
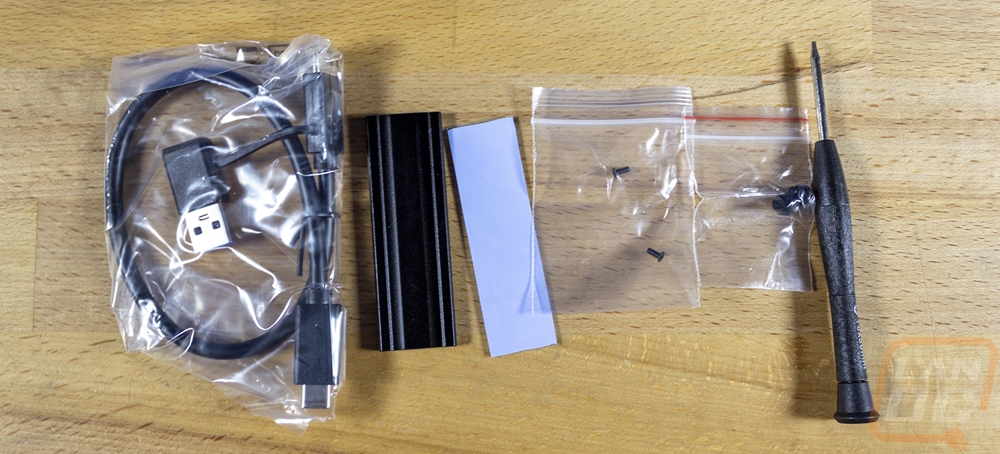
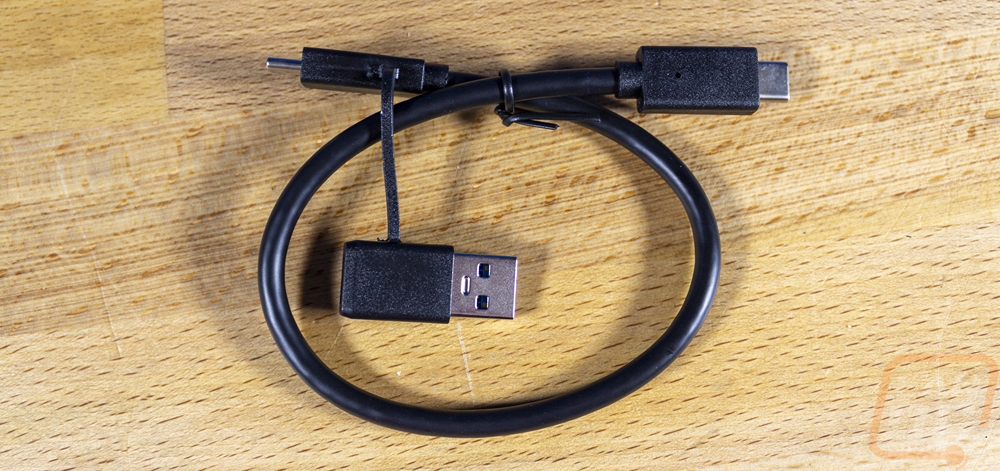
Once you cut the seal you can pull the tray inside of the box out of the top. The tray has the Viper VXD External SSD Enclosure right on top. It is protected with a soft plastic bag and then sits in a foam tray with a cutout in the shape of the enclosure. All of the accessories are under that. There are two small baggies one with small screws and one with rubber clips. You also get a small torx 5 screwdriver, an aluminum heatsink, and a thermal pad. You also get a 1 foot long USB cable which has Type-C connections on both ends and comes with a Type-C to Type-A adapter that is attached to one end. I love that the adapter can’t be lost easily and you do have the option to use Type-A if you don’t have a fast Type-C connection on the device you are trying to plug into.
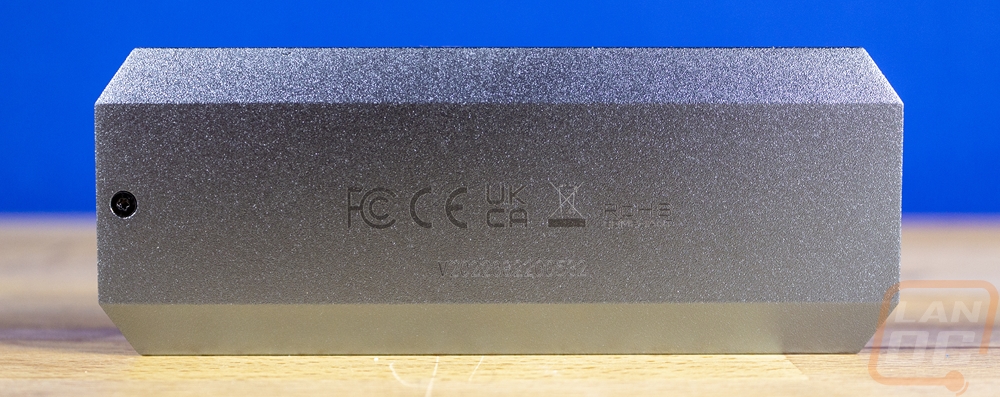
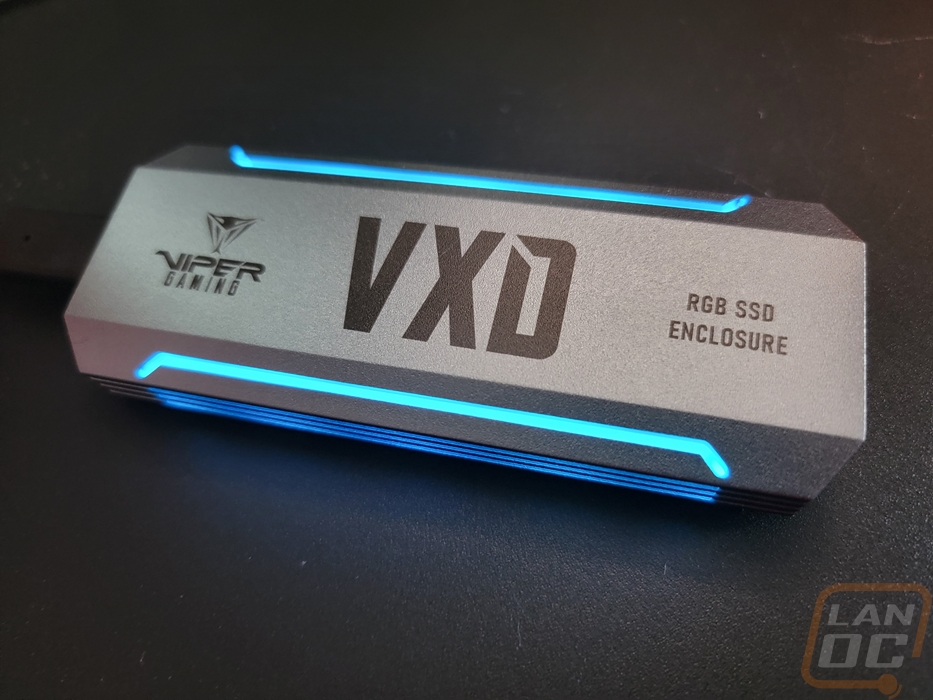
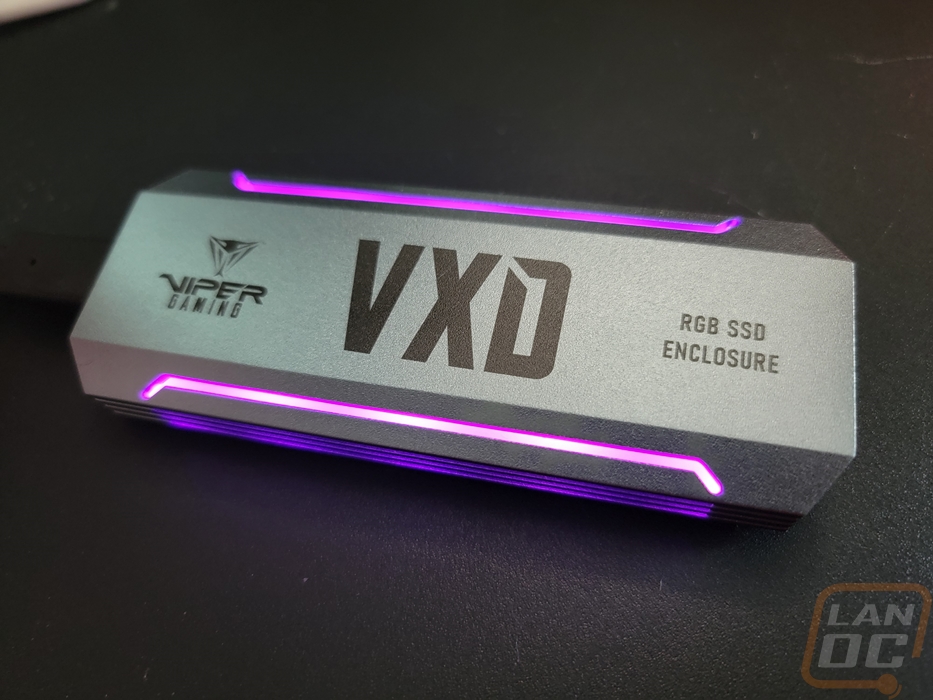
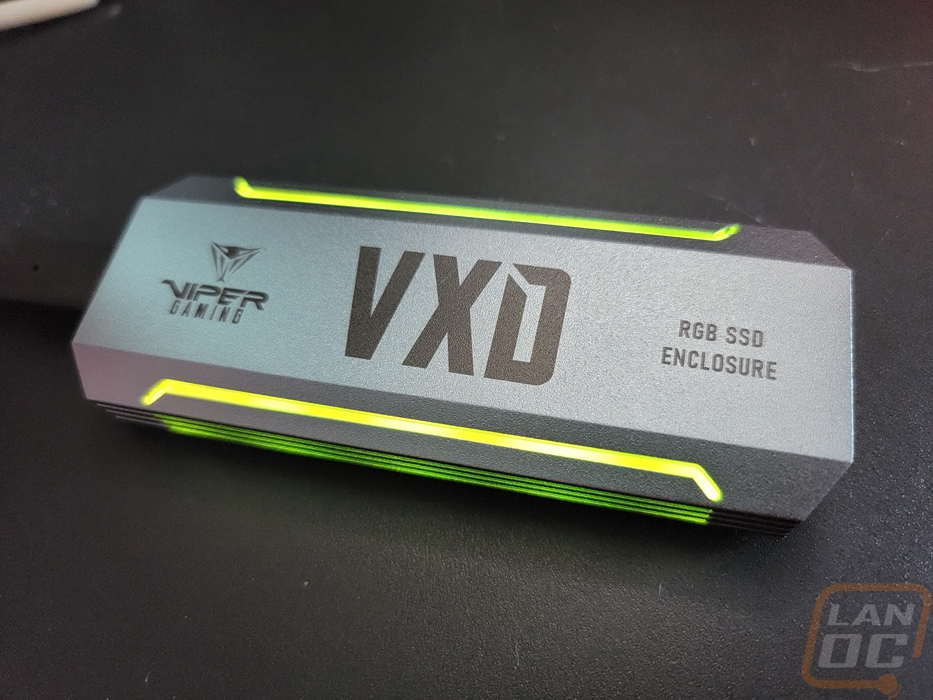
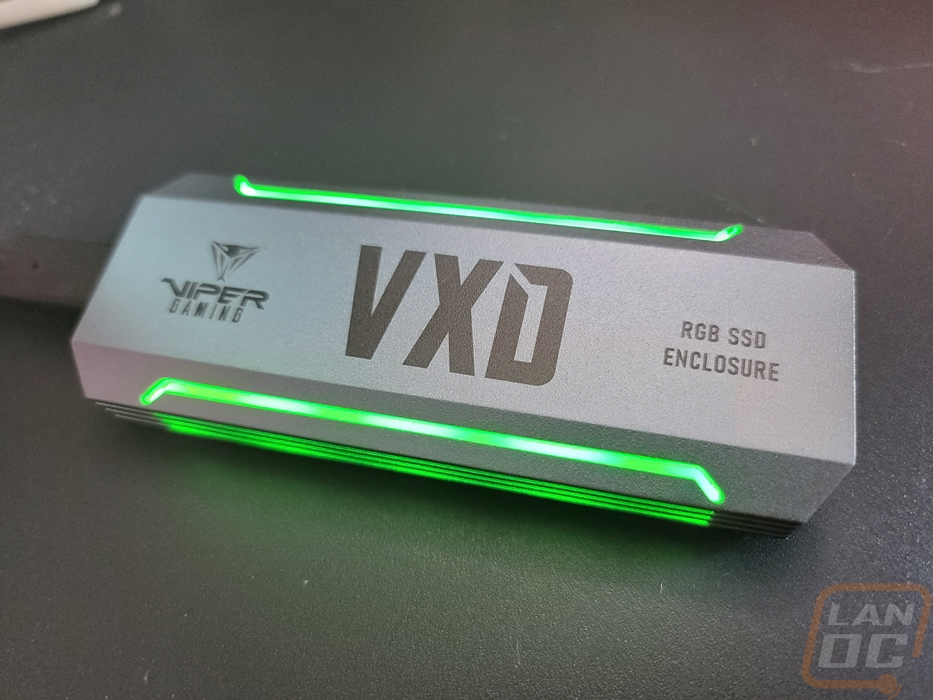
The Viper VXD External SSD Enclosure without the cable is 4.33 inches long or 110 mm long, 1.69 inches wide or 43mm wide, and .54 inch or 13.8 mm thick. For comparison, the Sabrent USB 3.2 Tool-Free Enclosure EC-TFNE which is the last M.2 enclosure I took a look at was 4.23 x 1.52 x 0.58 inches which was a hair shorter and on the width but was slightly thicker. That said the shape of the VXD feels a lot smaller because it has angled corners which make it feel a lot less big and bulky even while being slightly larger in a few dimensions. It is machined out of aluminum and has a blasted finish that gives it a great look. The top has the VXD branding in large letters then the Viper Gaming branding is smaller and over to the left. They also let you know this is an RGB SSD Enclosure here as well, but I don’t think that is needed. The angled edges also have hockey stick-shaped groves cut into them which expose the light diffuser behind it for the RGB lighting. The back of the enclosure has the same shape but without the lighting cutouts. The back does have the certification logos as well as the serial number etched into the middle. The back also has the enclosures only exposed screw as well.
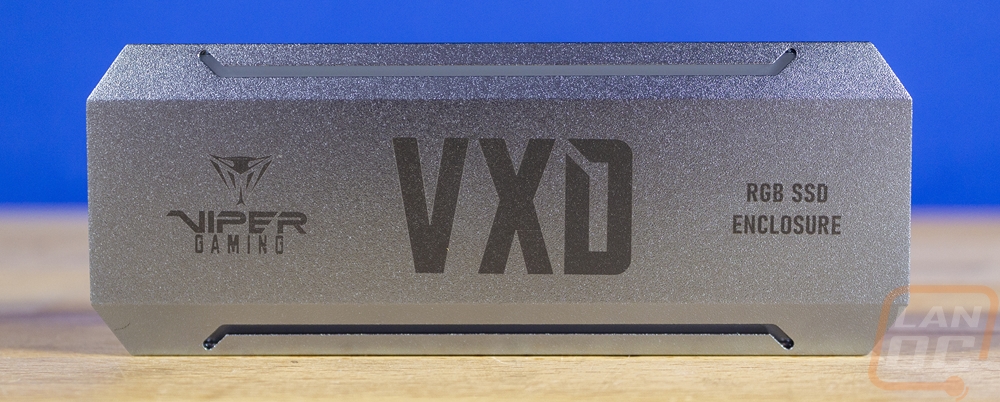
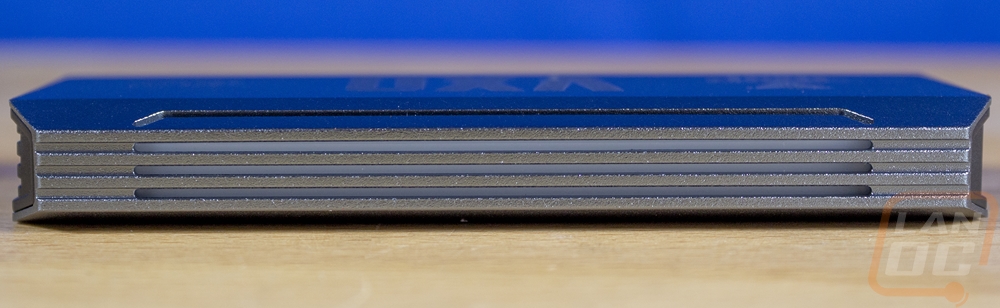
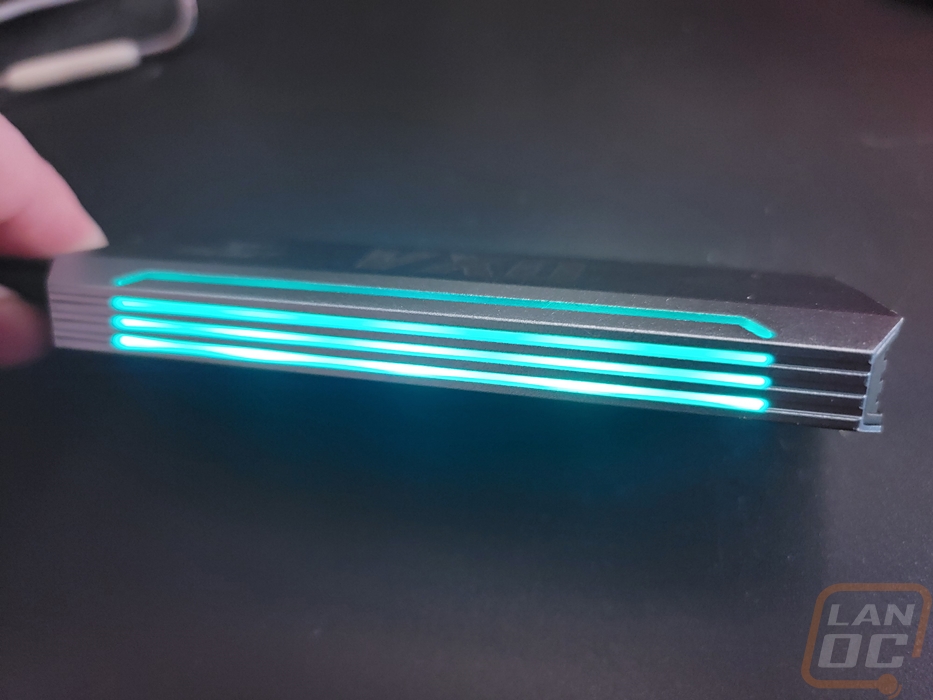
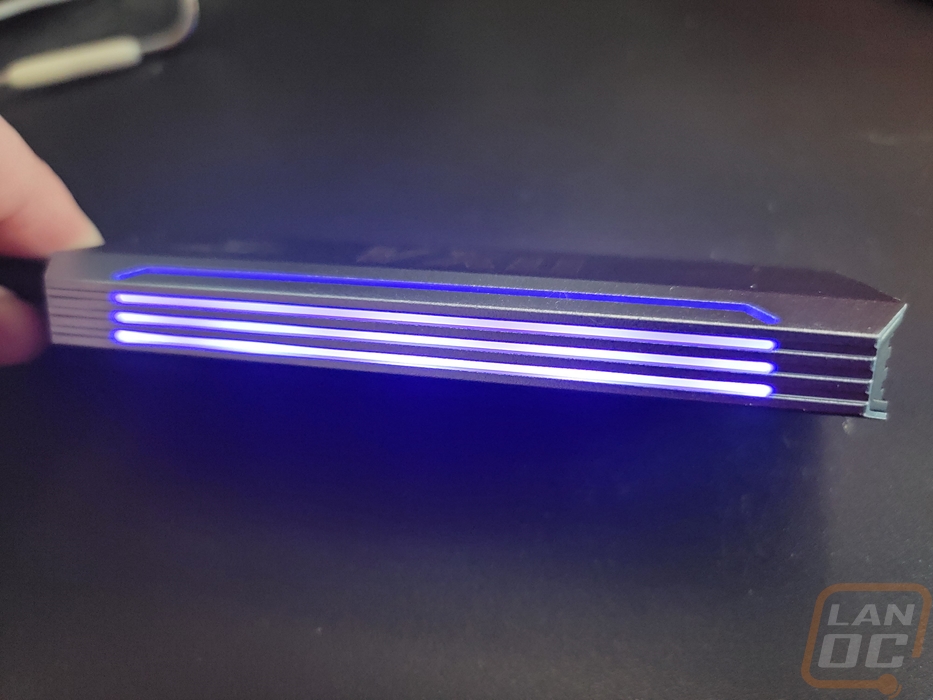
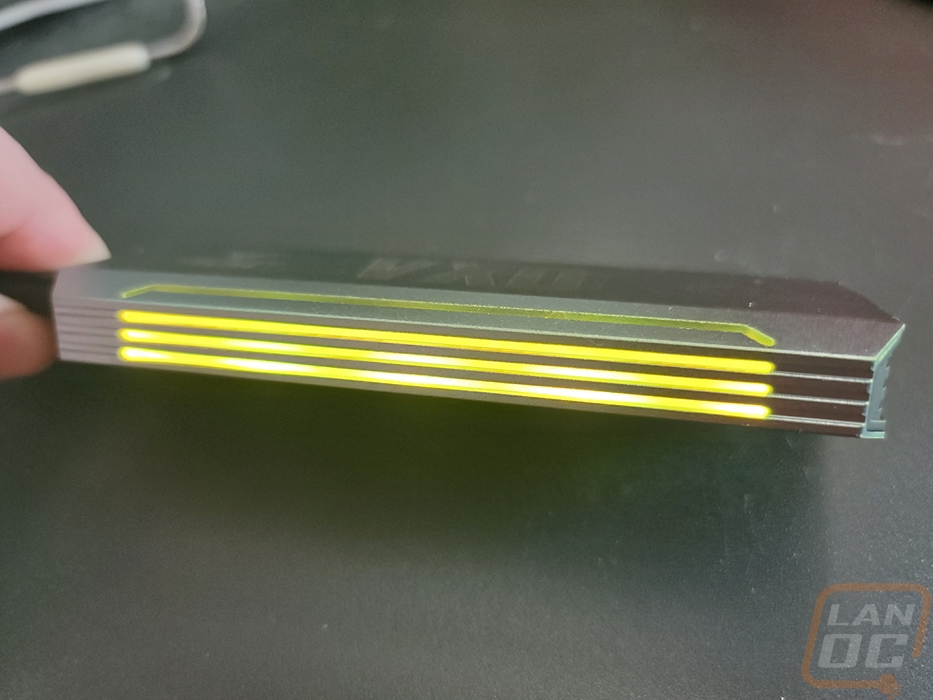
Both sides of the VXD have the same look. There are groves cut into the aluminum which run the length of the drive. These give a little more grip when holding it but in the center, they also are cut down deeper exposing the light diffuser just like on the top of the enclosure. In total, you have three groves on each side plus the top grove for 8 in total.

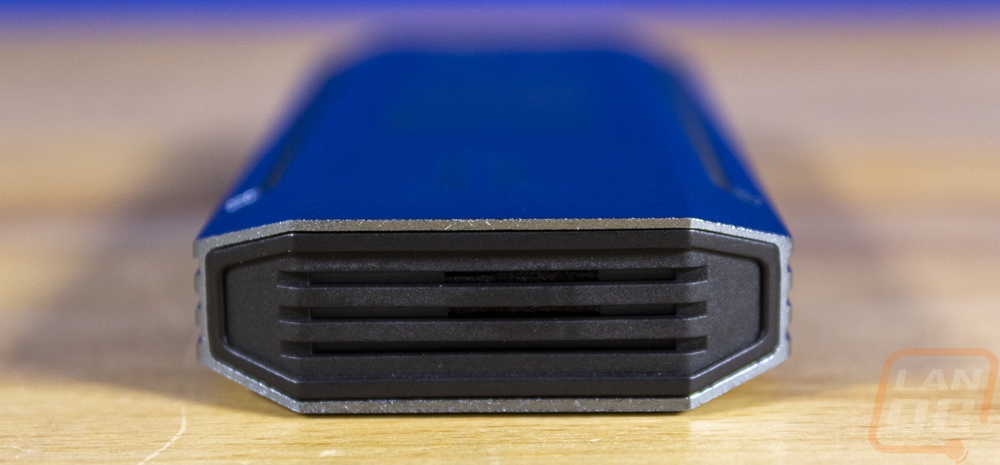
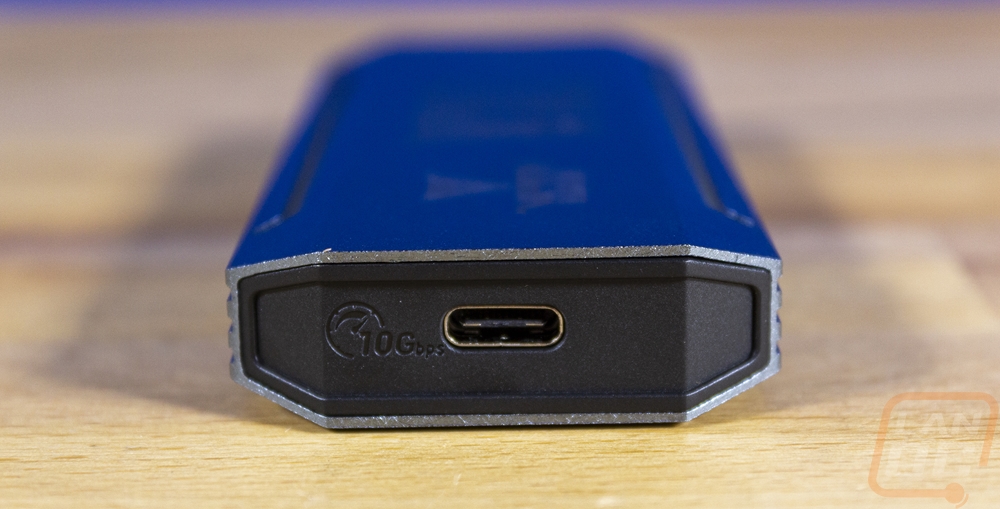
Then on the ends, you can see the only exposed area that isn’t aluminum. Both ends are black plastic. One end continues the groves like on the sides of the enclosure. Then the other end has the encloser lone USB Type-C connection. Next to that the plastic also reminds you that this is a 10Gbps connection. The interface is USB 3.2 Gen2, not the faster USB 3.2 Gen2x2 or Thunderbolt which 2x2 is capable of up to 20Gbps and Thunderbolt 3 can do 40Gbps.
Installation and Performance
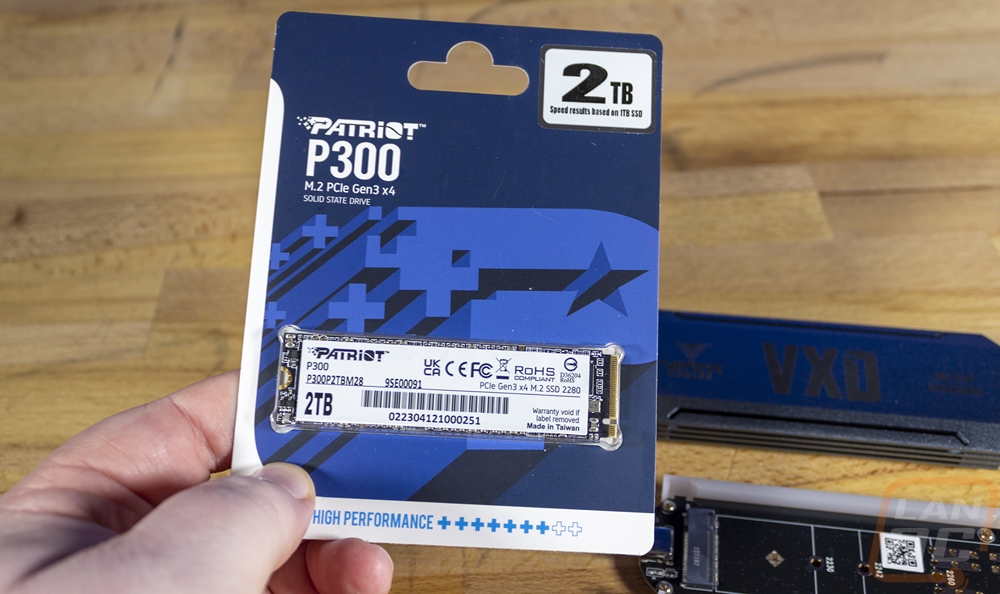
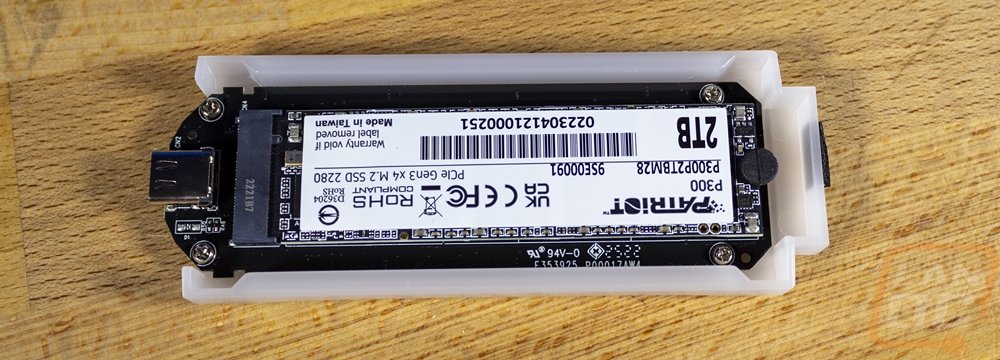
Before testing everything I did need to get a drive inside of the VXD External SSD Enclosure and Patriot was nice enough to include just the drive. With the USB 3.2 Gen2 interface, a crazy fast drive would be put to waste. Not to mention the PCIe Gen 3 connection speed for the drive itself would limit any newer PCIe 4 or 5 drive even if the USB wasn’t the main limitation. So they send over a Patiot P300 2TB drive. This is a standard PCIe Gen 3x4 SSD and without a heatsink or anything like that, I don’t have to worry about taking any of that off so it will fit inside of the enclosure.
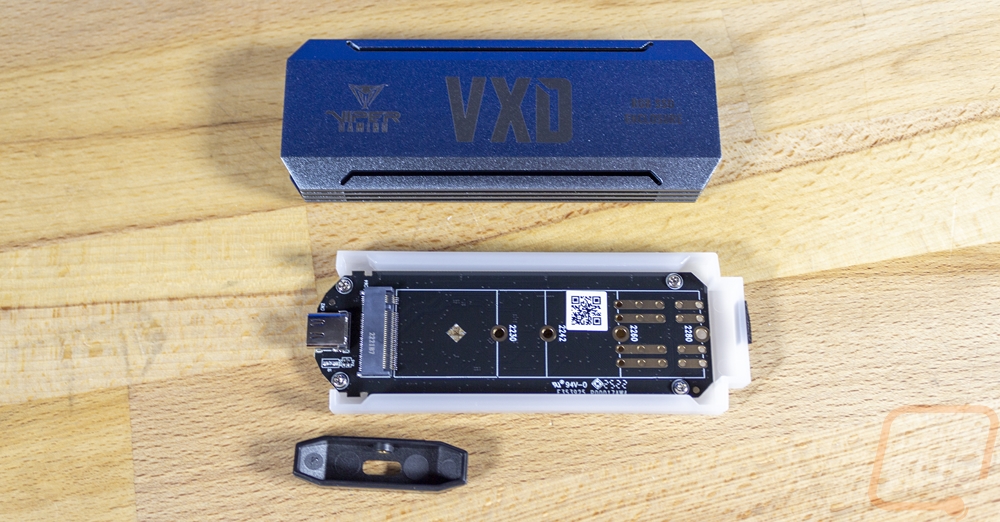
From there I had to get the VXD opened up and because it comes with the needed torx screwdriver I didn’t even have to get any tools out. This is important because unless you have a set of small screwdrivers for electronics you most likely wouldn’t have that Torx 5 bit. You just have to remove the one black screw on the bottom of the VXD but even with that done I had to shake it around a few times to knock the cap off of the end. Once the cap on the USB connection end comes off there is a plastic tray inside that will slide out. They have pulled double duty using the plastic tray to hold everything but it is also the light diffuser that we saw behind the slots in the enclosure. Inside the tray, you have a small black PCB. For the most part, you should be able to figure out the overall installation and that is a good thing because you don’t have an instruction manual inside of the box and initially when I went to the Viper website the product page doesn’t have one linked there as well. They have put together instructions and there is a QR code on the box. But if you don’t look there you will only find the instructions from googling it when they could easily have them linked or even right on the product page.
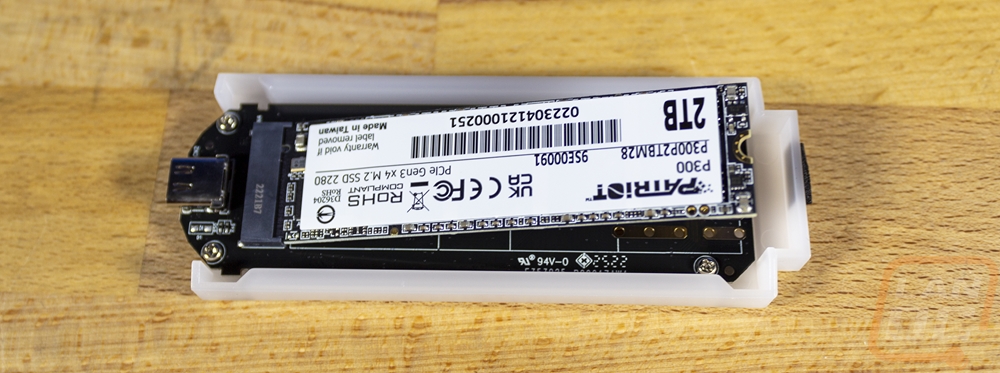
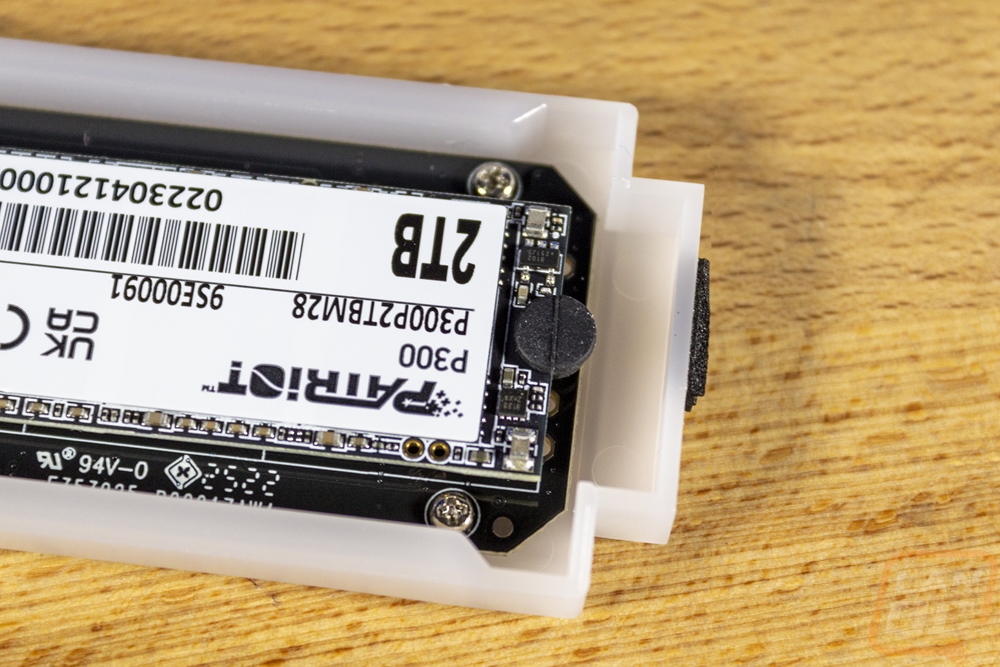
What I wanted to look up was how they want you to install the small heatsink because with the thermal pad, I didn’t want to mess it up by having to do it twice. You put the pad on your SSD or in the heatsink and it snaps onto the SSD. I wanted to make sure you didn’t slide it on. With that installed you then use the small rubber bit that you get and that will sit on the SSD where a screw would normally go. You then push it down and it will hold it in place. From there you can slide the tray back into the enclosure and put it all back together.

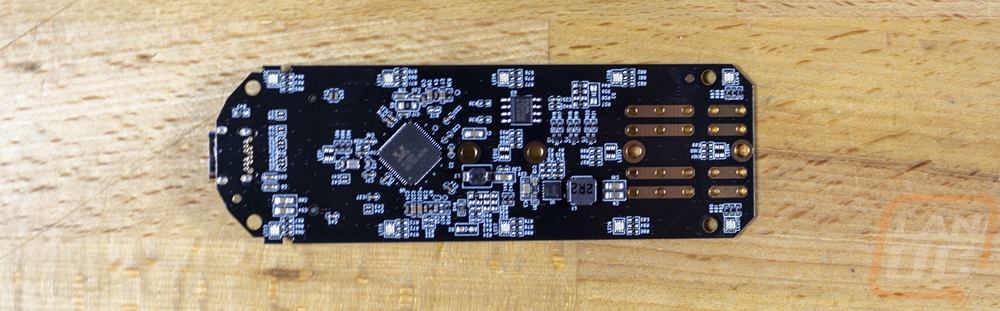
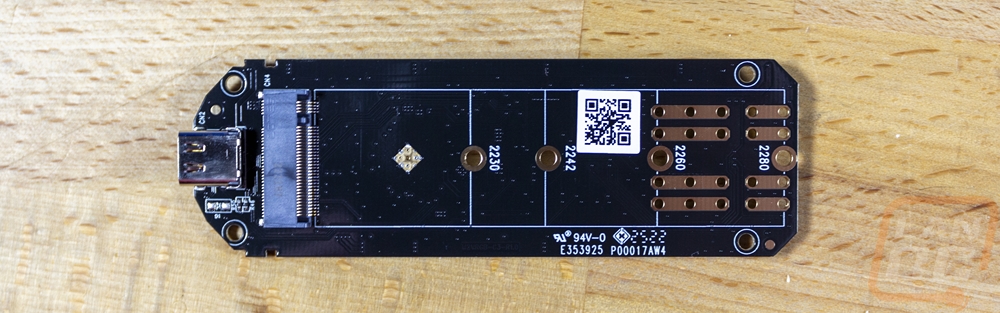
I did get a few pictures of the full PCB before putting everything together, the top side really just has the M.2 slot with holes to support different lengths of drives and then the Type-C header at the end. Around on the back, we can see the controller as well as the RGB lighting that Viper installed. They are right next to the edge of the PCB and you have five in total per side. These face down and help the plastic tray glow to avoid any hotspots.
With the drive installed, you will still need to format it if it wasn’t already formatted before you installed it in the enclosure. That is one of the big benefits of external enclosures like this. You can reuse older drives that you maybe have upgraded from a system and you can keep the files on them if you would like, you just connect through USB to M.2 not direct M.2.
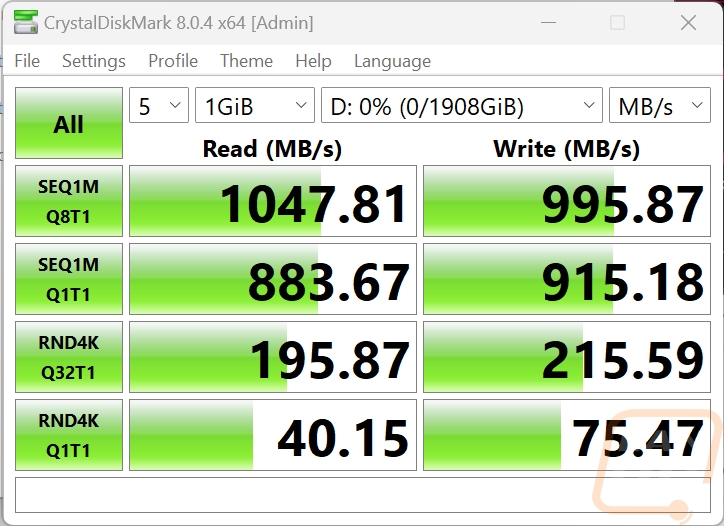
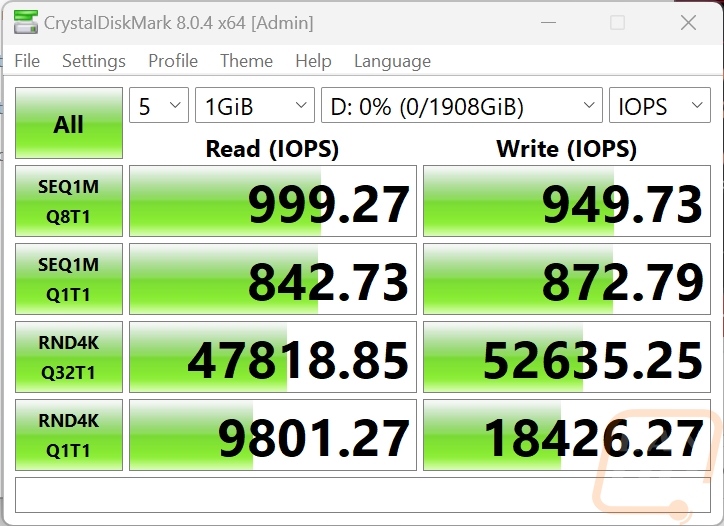
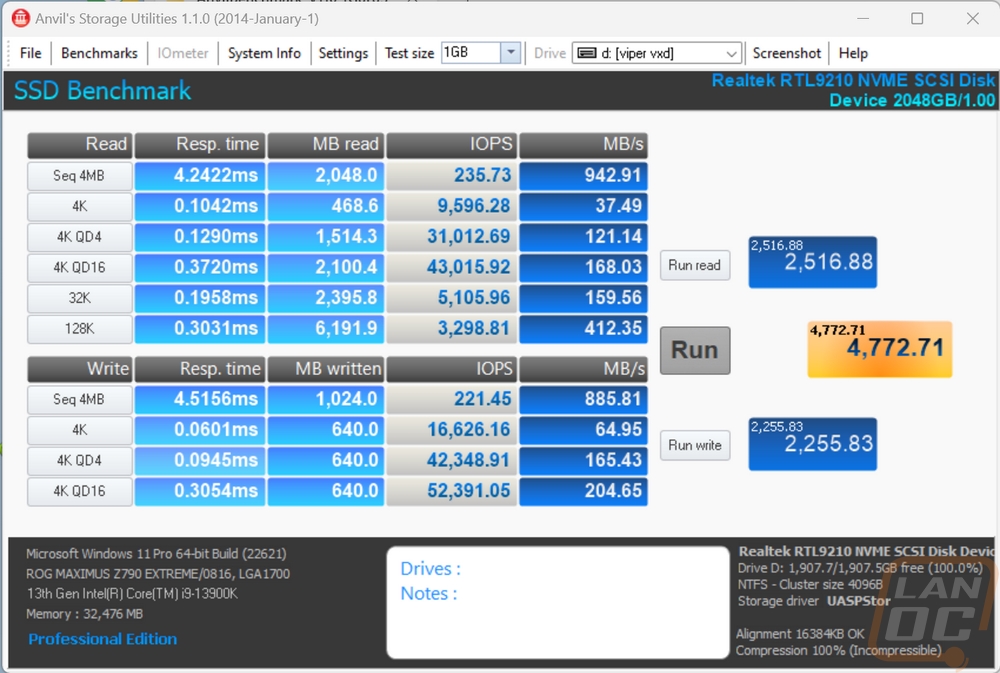
With everything set up, I could finally dive into some testing but because you supply your own drive performance is going to depend on the drive you provide to some extent. That said the USB connection is still the main limitation when it comes to full sequential speeds and we can see that in the CrystalDiskMark test the read speed was t 1047 and the writes were at 995 MB/s, right at the limit of USB 3.2 Gen 2. The same thing can be seen in the Anvil Storage Utility test where we can also see the IOPS performance.
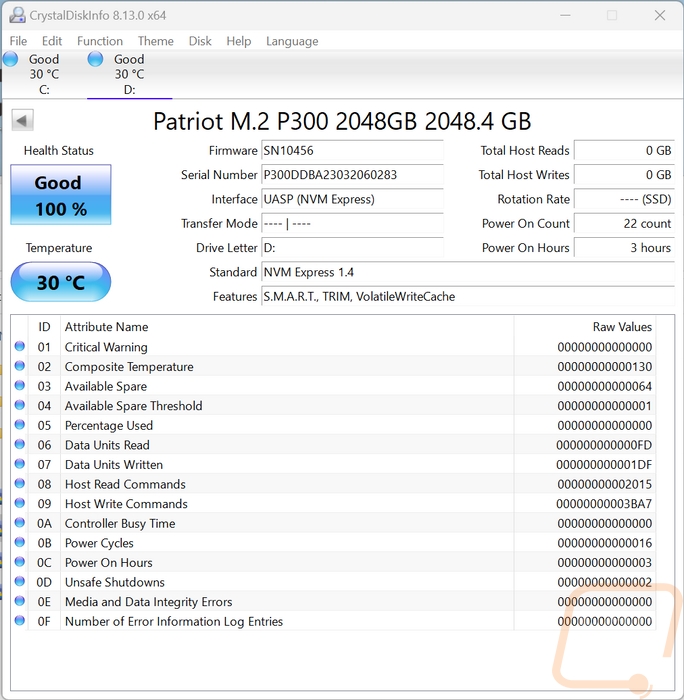
I did run CrystalDiskInfo just to see what would show up and to confirm we were connected at the correct speed. The Patriot P300 that we installed inside shows up here along with the UASP interface aka USB-attached SCSI Protocol.
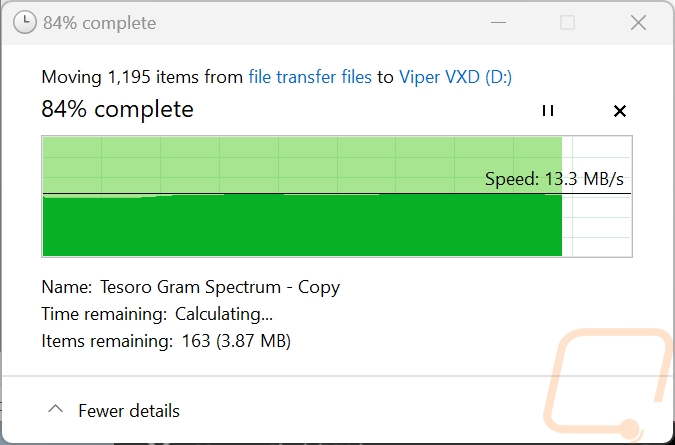
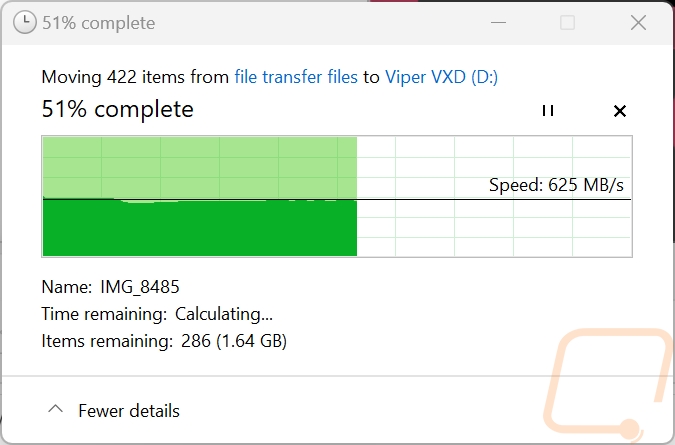
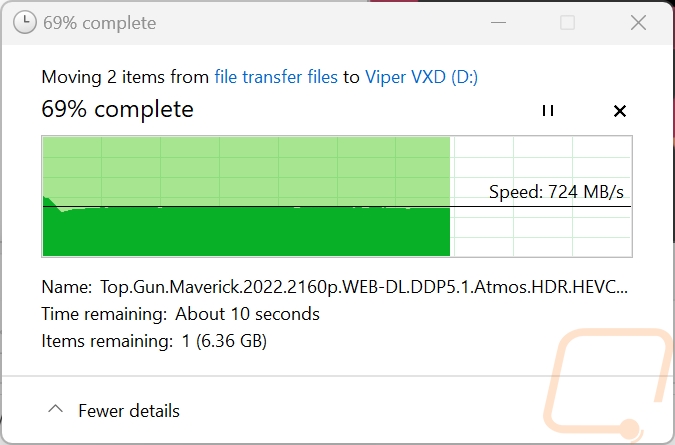
I also ran my favorite tests, real-world file transfers using file explorer in Windows. I copied three different file types to and from the VXD to see how it would perform but had to remove the VXD to PC files because the SSD on our test bench was caching the files and showing crazy performance numbers. I transferred a folder full of Word document files to get a look at performance when transferring lots of small-sized files which always brings drives to a crawl. The combination wrote to the drive at 13.3 MB/s constantly which was in line with what I’ve seen from other drives. I did a folder filled with image files, both JPG and RAW files. This was much faster at 625 MB/s. Then for movies which are large single files performance was faster at 724 MB/s but a little lower than I thought it would be.
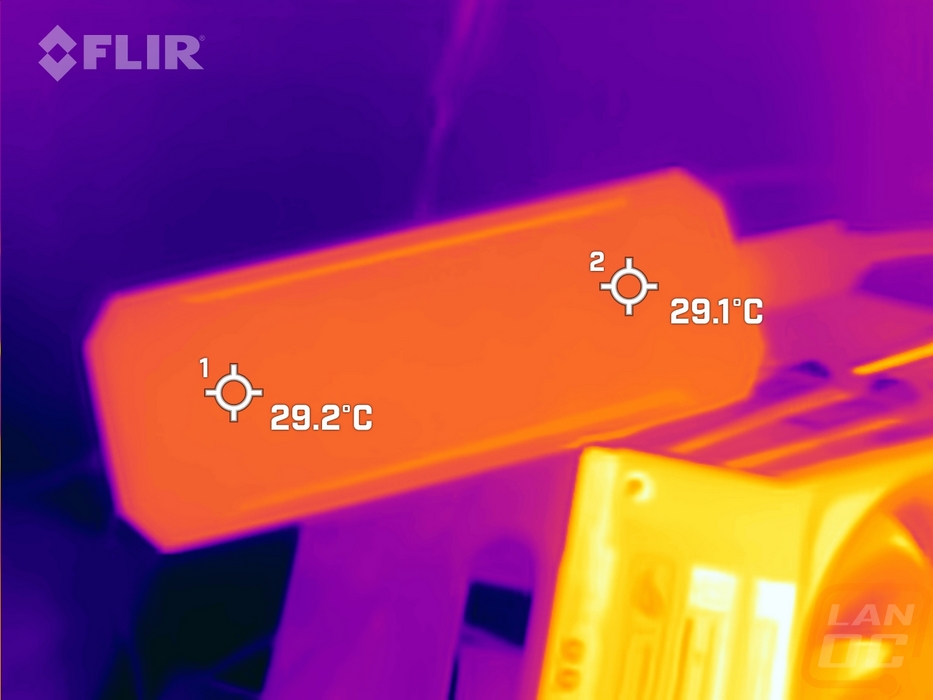
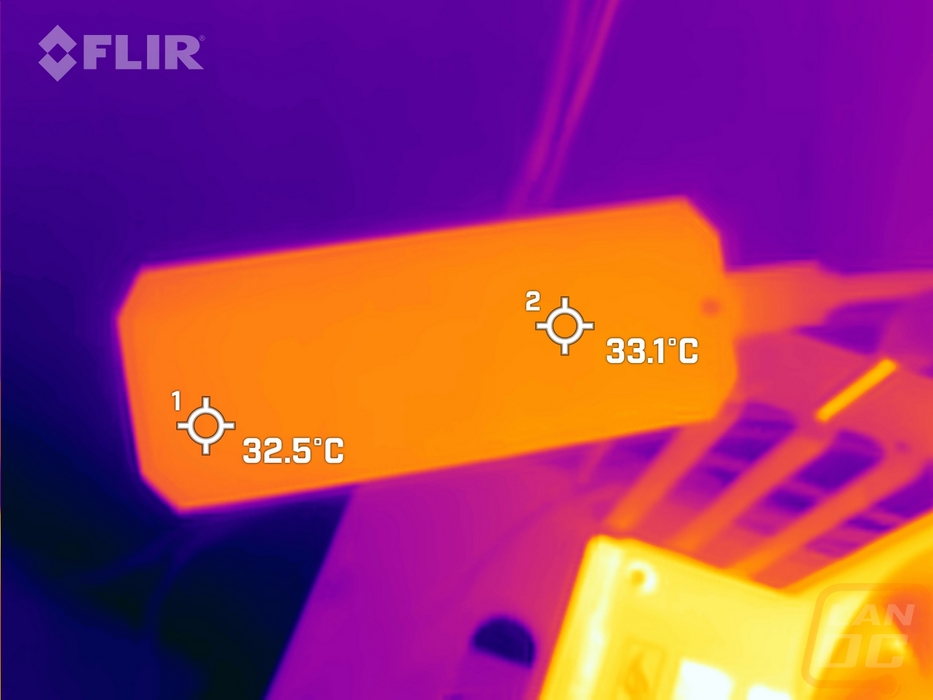
Beyond standard testing, I did also get the thermal camera out when testing the VXD. For this, I ran a disk benchmark using AIDA64 to heat things up. After a half hour, the thermal images show that the VXD is handling the heat from the P300 SSD really well. The enclosure shows just a little bit of heat but it has been transferred out across the entire enclosure and with the hottest spot at 32.5c or 90.5f it was barely reaching temps that you would even notice when handling the drive.
I couldn’t finish my testing without also taking a look at the RGB lighting as well. The lighting for the enclosure isn’t individually controlled LEDs, all of the lighting shows the same color at the same time. In fact, it isn’t controlled at all, they have it set to rotate through the color spectrum changing colors most of the time. But it does also flash when you are transferring files and the transfer completes. Beyond that the lighting doesn’t have any purpose, it is just there to look cool if RGB lighting is your thing. For me, I could take it or leave it. Having the option to set it to a specific color to stay on would be nice. It did help to find it in the mess that is my desk when I was testing it as well. Beyond that though the lighting does look good with it lit up on the side and top. Even with the diffuser, there are still hot spots where each of the LEDs is but not bad enough for it to take away from anything.
Overall and Final Verdict
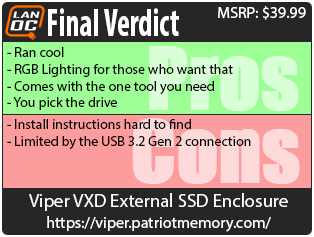
An external SSD enclosure like the Viper VXD External SSD Enclosure isn’t going to be for everyone. Some people aren’t going to want to “build your own” external SSD but the other side of that coin is that because you pick your own SSD you can use the Viper VXD with a previously used SSD to give it more life or if you build it now and need a larger capacity in the future you don’t have to buy an entirely new external SSD, just the drive inside which will now be cheaper. The aluminum design that Viper went with is going to hold up long-term and I don’t see M.2 drives vanishing for a while now. The aluminum design also helped the Viper VXD run cool even after the P300 we used inside was under load for a half hour. The RGB lighting is going to be hit or miss depending on what you are into. But if you are an RGB fan, the Viper VXD lighting does look good and covers both sides and the top of the drive.
As far as installation is concerned, the Viper VXD is almost toolless, the one exception to that is the one screw you have to remove but they include the small torx screwdriver you need for that. I did have to shake it around to get the components to come out, but beyond that installing everything was easy. Finding the installation instructions on the other hand was a little bit of a challenge, but a lot of people aren’t going to need those at all. The enclosure comes with a short Type-C to Type-C cable which also has the Type-A adapter attached so you don’t lose that. Size wise it is similar in size to past external M.2 enclosures that I have taken a look at and with the angled corners it was easily pocketable. Your performance is going to be mostly limited by the USB 3.2 Gen 2 connection speed, Gen 2x2 would be nice, or Thunderbolt 3 but with speeds reaching 1000 MB/s with just about any drive you are still getting performance fast enough to use this to quickly transfer files when needed or to run games or applications.
As for its pricing, it has an MSRP of $39.99 which if we compare it with the ASUS external enclosure, the Arion is selling for $52.99 the VXD looks extremely cheap. But once you dive into some of the other RGB external drive-less enclosures you will start seeing them for $29.99 and $39.99, so the VXD is a touch on the high side but is in the mix with other similar enclosures.
Live Pricing:
Viper VXD External SSD Enclosure


