For some people, you get your computer together and never mess with it again. I, on the other hand, have a problem and as they say, the first thing is to admit you have a problem. I finished up the Crush build and even posted up performance numbers last week. My problem is I keep looking and thinking how much better the build could look with this one change. Once you do that, you are done, right? Nope! Now that you did that, this other thing really needs to be changed. It’s an endless battle. Well with Crush I just HAD to pull it all apart and keep messing with it. I’m actually in the middle of a few different changes, but the biggest was painting the two GTX 1080’s like I had originally planned. So today I’m going to run through how to paint the new GTX 1080/1070 Founders Edition cards for a nice matching look.
Title: Project Build: Crush – Part 5 – Painting a GTX 1080 FE
Written by: Wes
Pictures by: Wes
Build Sponsors/Supporters: Nvidia - Gigabyte - Caselabs - Noctua - Kingston - Seagate - OCZ - Asus - Corsair - CableMods
Amazon Affiliate link: HERE
Links to other Parts: Part 1 – Part 2 – Part 3 – Part 4 – Part 5 - Part 6
What do you need
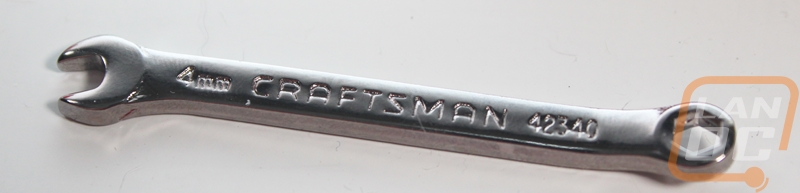
Okay before getting started you are going to need a few tools to get your card apart. You will also need the space to work on the card and a proper area to paint. For tools, I needed a 2mm and 2.5mm Allen Wrenchs, a 4mm deep well socket, and PH1 and PH0 sized Phillips head screwdrivers. I used a simple screwdriver set and it had all but the 4mm socket. I have an extensive toolset but I didn’t have a 4mm socket or for that matter a 4mm wrench so I had to run to Sears. Our local store only had a set of tiny wrenches with the smallest being a 4mm. So while I used a wrench, I would HIGHLY recommend no one else do that and to get a deep well 4mm socket for the job.
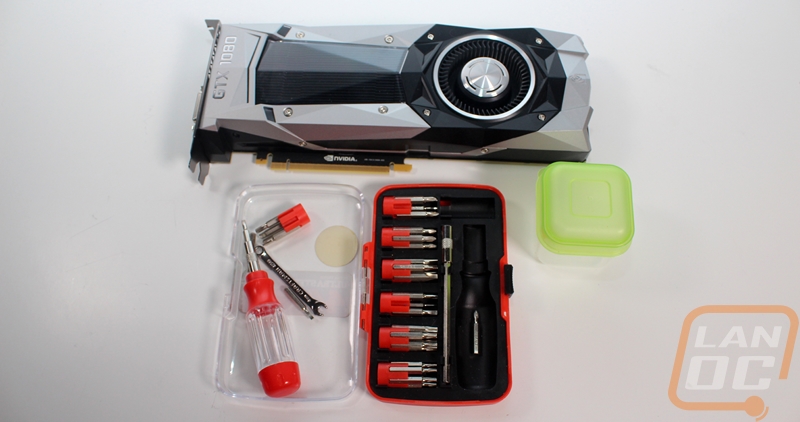
In addition to the tools, you will need some rubbing alcohol, thermal paste, paper towels or a rag you don’t mind getting thermal paste on, and a clean microfiber cloth.
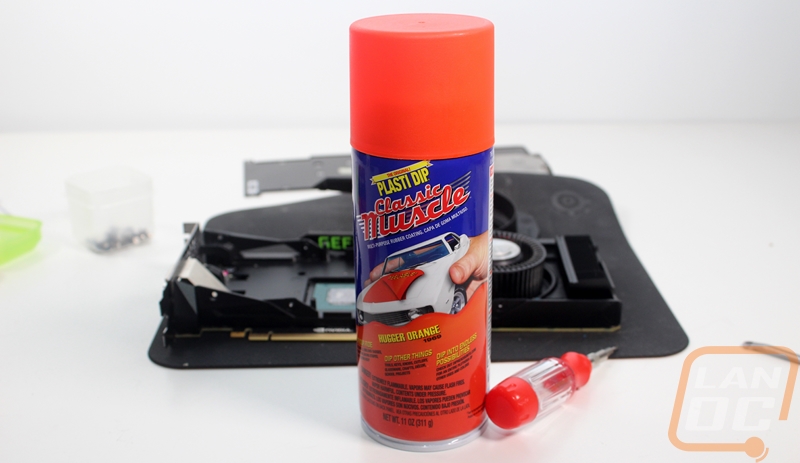
Then you also need to know exactly how you plan on painting the card and with what paint type and color that you are going to use. I went with a Plasti-Dip because I wanted to have the option to go back later on. You can also paint using a standard paint, but if you do you will also need primer and sandpaper. I spent a lot of time typing to lock down a color that was a close match to the tangerine finish on the Case Labs Bullet BH7 but I ended up going with Hugger Orange from the Plasti-Dip muscle car series. There actually ended up being a great selection of oranges. I only used one can of orange for two cards but if you think you might mess up, getting a second can wouldn’t hurt. I also picked up a standard black to use on the Nvidia SLI bridge.
Here is a link to the exact paint I went with
TL:DR Tool List
PH1 Phillips
PH0 Phillips
4mm Deep Well Socket
2mm Allen Wrench
2.5mm Allen Wrench
Other items needed
Small screw container
Thermal Paste
Rubbing Alcohol
Clean Microfiber cloth
Paper towels
Paint
Primer (if painting with standard paint)
Sandpaper (if painting with standard paint)
Taking everything apart
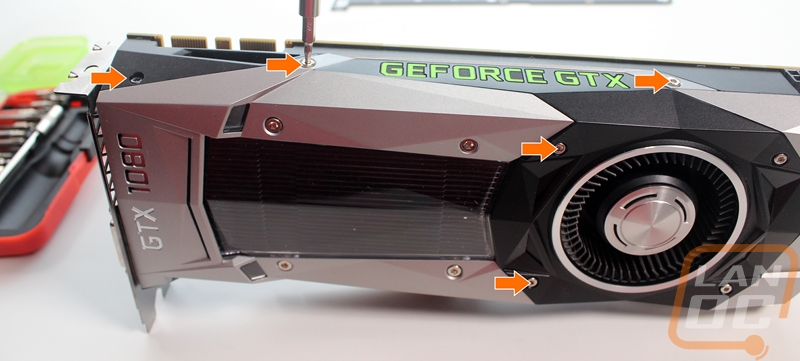
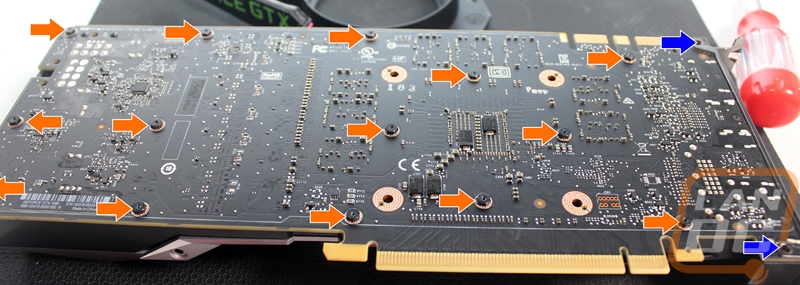
Once you have all of your tools ready and have a workspace to be able to pull your card apart for a day or two you can get started. The first thing we want to remove is the large plate that covers most of the card with the window in it. To make things easier I have put arrows showing each of the screws needed to be removed. While we are doing this we are also going to go ahead and remove the screws holding the top and bottom trim plates as well. So on the top of the card, you have three 2mm hex bolts to remove and on the bottom of the card, there are the same. Really only the two black bolts hold the main plate on though. Then from there, you have two more 2mm hex bolts to the left of the intake fan.
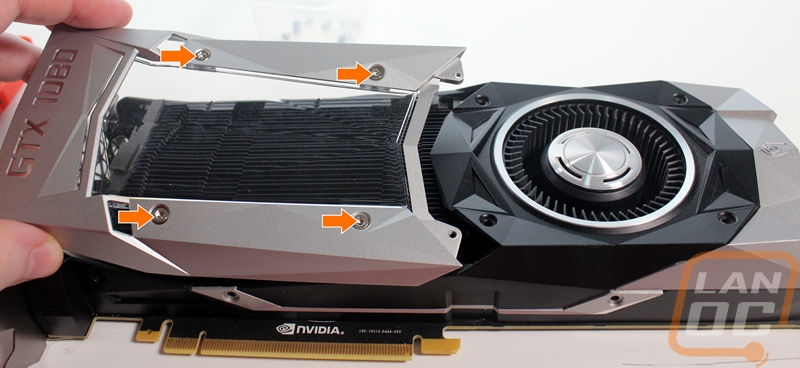
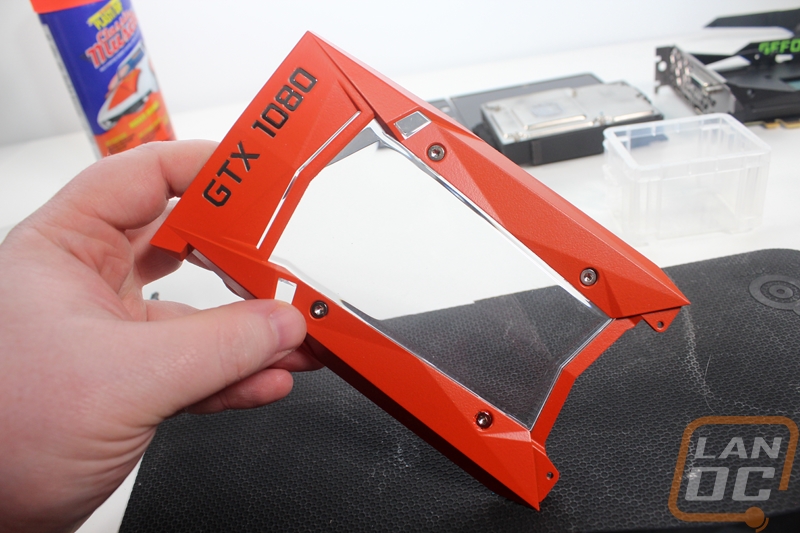
With the front plate out you can remove the four 2.5mm hex bolts that hold the front window in. Then we can sit the front plate aside until we get ready to paint.

Next, the black shroud around the fan needs to come out. This is all that is left holding the top and bottom accent bars in and we have to get this out to start working on the last silver piece at the back. The black shroud has four tiny screws above and below the heatsink. There are also two more 2mm hex bolts up on top. Once removed the shroud comes loose but remember this has the Geforce GTX logo on the top that is backlit. You can unplug the cable or just set it just above the card and work around it. Unplugging might be easier but I kept mine plugged in on both cards and was just careful what I was doing.

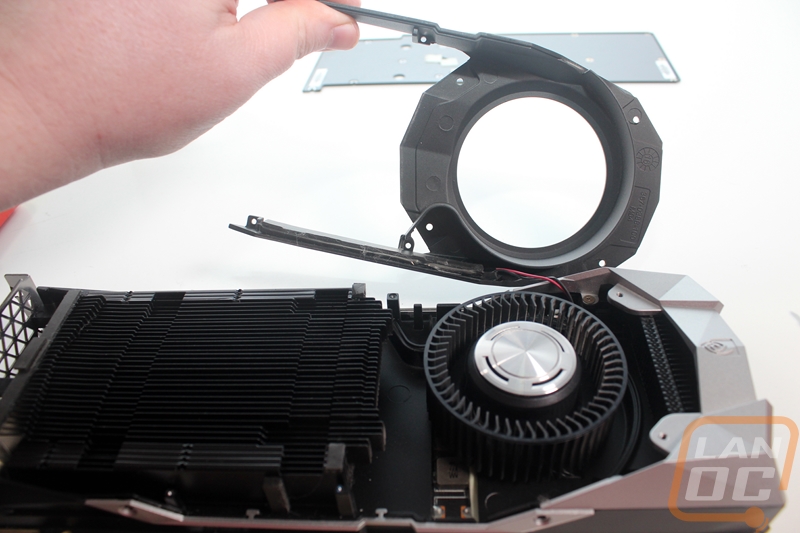
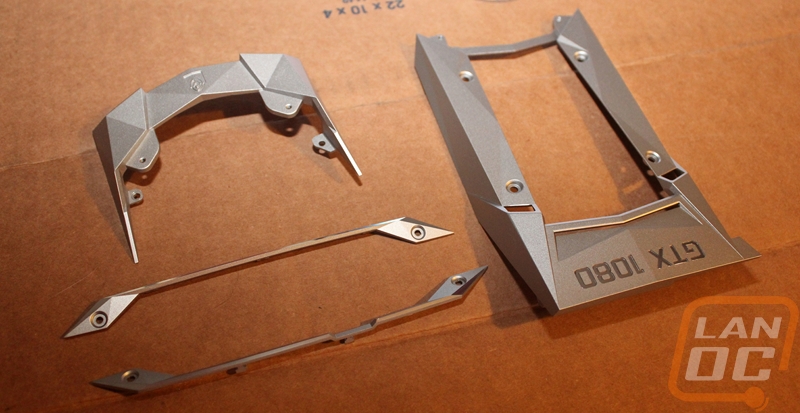
With the black shroud out the top and bottom accent bars that we already removed the bolts on should just lift up. Previous generations of Nvidia’s cards had glue here but these just have T-shaped clips that hold them in place. Be very careful with them, they bend and flex really easy and you can break them. One of my cards had these come out easily and the other I had to carefully pry up on them because they were sitting tightly in place.

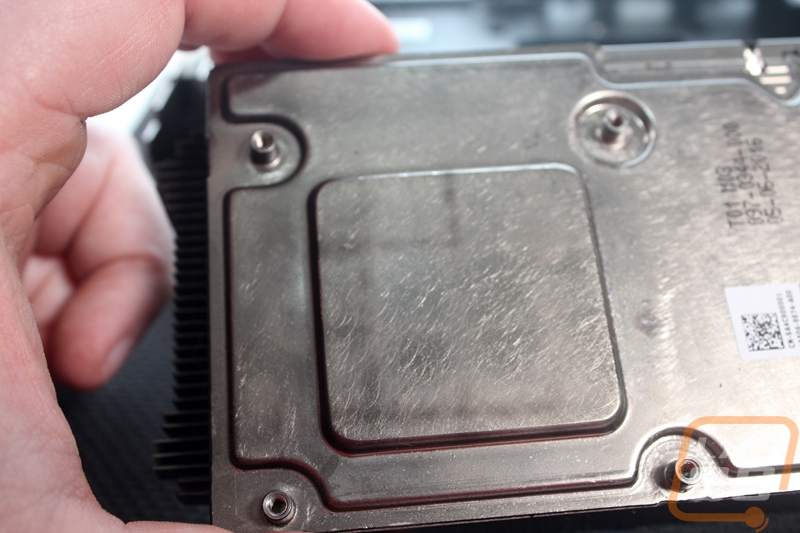
You would think that at this point we are in the home stretch right? We have three out of the four pieces that we are going to paint off. Sadly that last panel requires a few other things to come apart before we can get it off. To start off we will have to remove the heatsink. You can access these screws with the back panel on even though I don’t have it on in the photo below. So these four screws all have springs built in. When you remove them make sure you have your hand under the card because the heatsink may drop off depending on how old the thermal paste is.
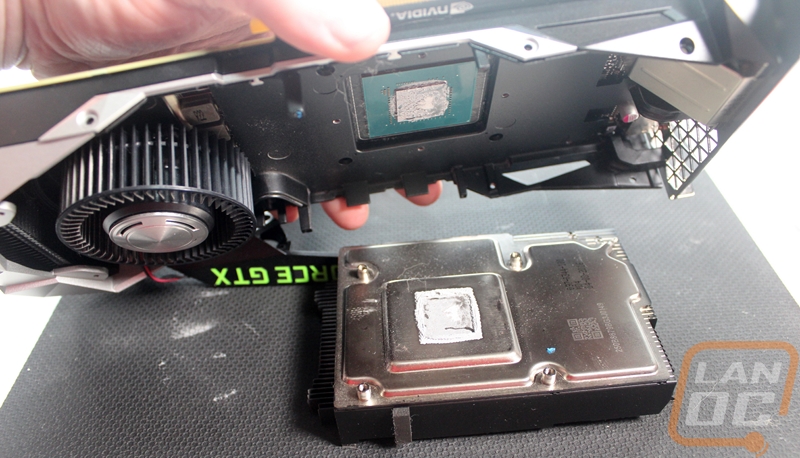
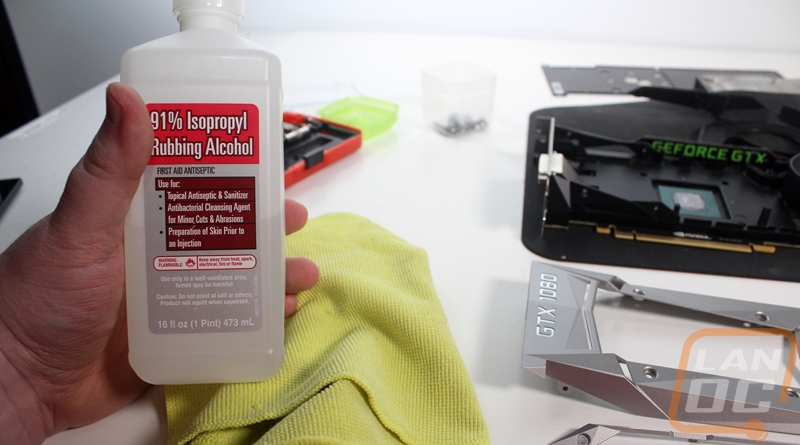
Before we make a mess, make sure to get a paper towel and clean both surfaces off. Use rubbing alcohol to get them perfect. Be careful around the edges on the GPU of course, you don’t want to knock any of those surface mounted bits off.
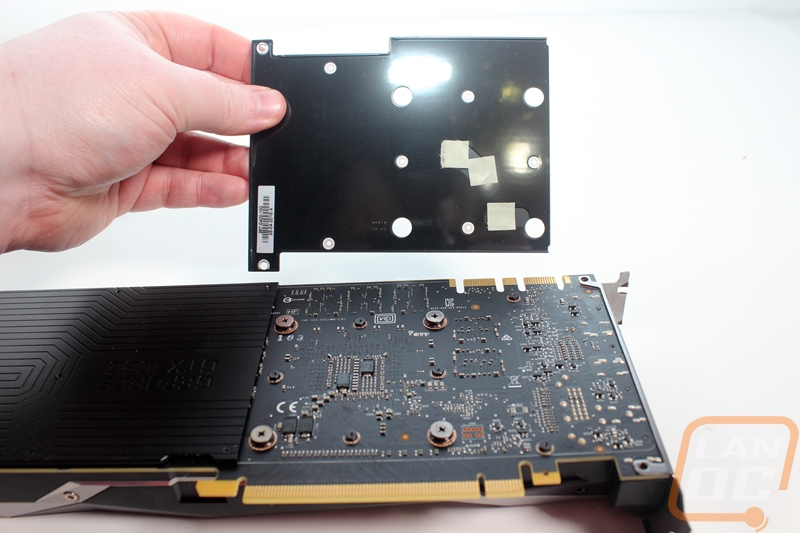
Next, we have to actually pull the base of the heatsink off the PCB but to do that you have to get the backplate off first. There are two halves to the backplate and it is held in place with 14 tiny Philips head screws. You need that PH0 sized screwdriver for this one and be careful not to lose any of them as they are really small. This is why we have the small container to keep all of the removed screws in.
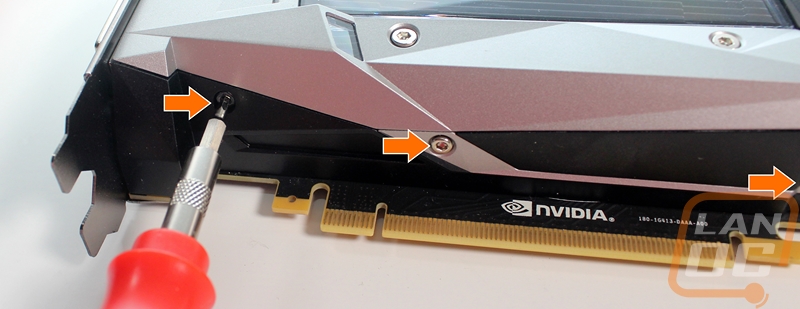
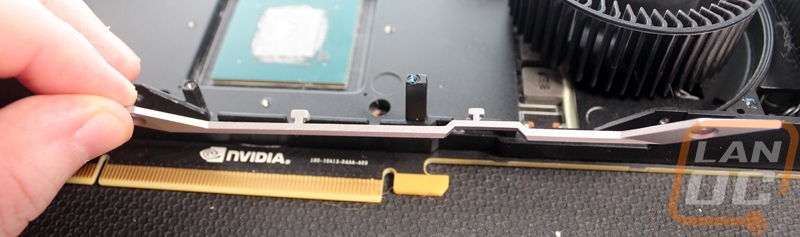
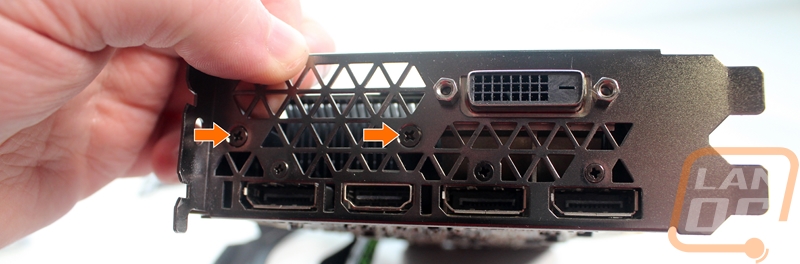
Next, we have two screws to remove on the PCI endplate. A lot of people will be tempted to just remove all of the screws here but you only have to remove the two that I have pointed out below.
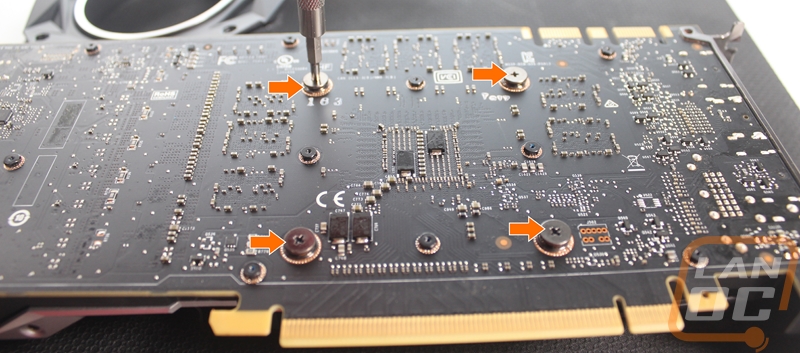
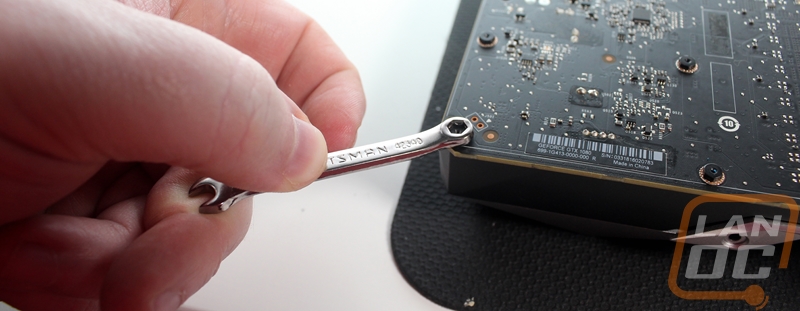
Now to pull the PCB off the heatsink you have to remove two screws over on the right then we have to deal with the 14 standoffs that the backplate screws screwed into. This is where that odd 4mm deep well socket comes in handy. As you can see I ended up using the 4mm wrench and I would highly recommend no one else do this. You can loosen the standoffs with it but you risk bumping all of the surface mounted diodes and other components on the back of the card. The standoffs aren’t tight at all so the deep well socket and your hand should get them off.
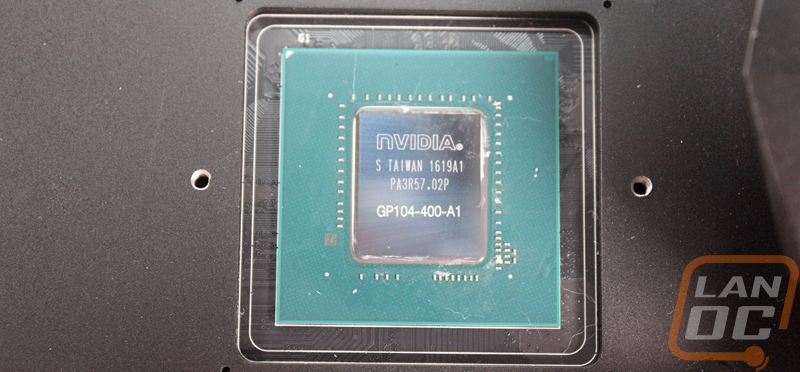
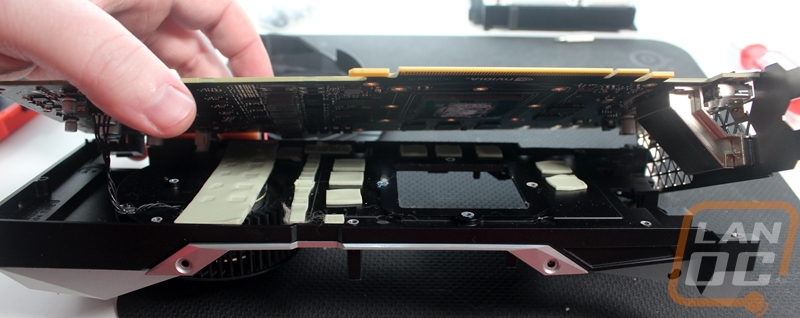
Once removed the PCB will lift off of the rest of the heatsink. There are thermal pads on the memory and other components so you might have to pull it apart a little bit to get it started.
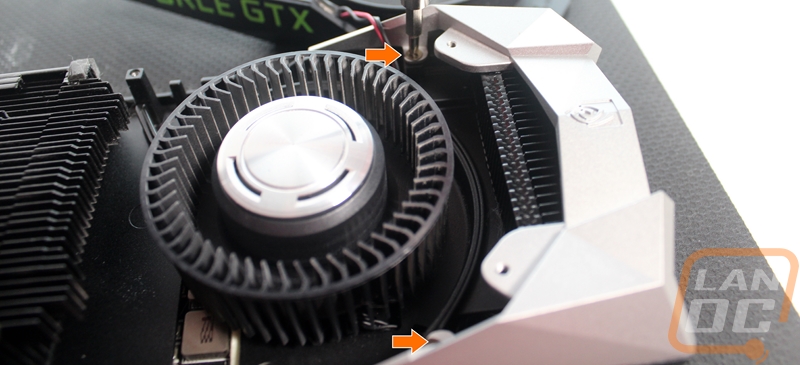
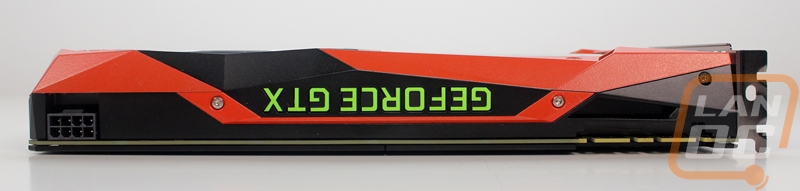
Finally, we can get to that last piece. It is held in place with four screws. Two are up top next to the fan and are really visible. The other two, on the other hand, are hidden up under the card and under the PCB. When I pulled the PCB off I didn’t unplug the fan or the light so I kept it close to the heatsink still but moved it just to the side on the end. There is a screw in the same area of the 8 pin power connection and one on the bottom as well. Once you pull them off the panel will fall right off, be sure to grab the screws then put the PCB back in place to protect the thermal pads.

Painting and Assembly
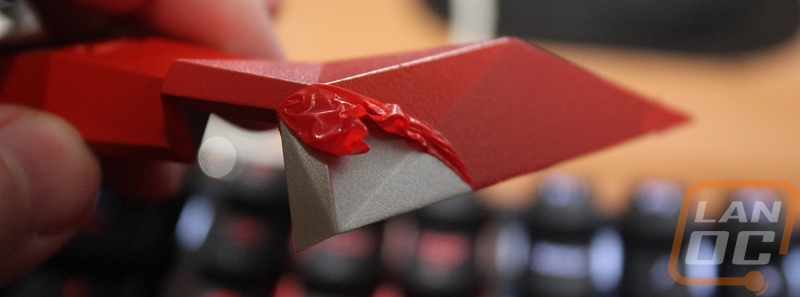
So this section is going to depend on the type of finish you are planning on doing. You could take the four pieces and send them off for powder coat for the best possible finish. You can sand them down, prime, then paint with a traditional paint. For me, though I wanted to do something a little less permanent. With rumors of GTX 1080 Ti’s, AMDs Vega cards, and even talk of GTX 2000 series cards I wasn’t really trying to lock myself into the two GTX 1080’s forever even though they do perform really well. I went with Plasti-Dip because it is rated for the temperatures and it can be peeled off later on. Check this panel out that I had a small problem with and decided to repaint. I pulled most of the finish off in one piece.
So to start painting you need to prep the panels. I made sure they were all clean then used rubbing alcohol on them to get any oil from my hands off.
Make sure you are painting in a vented area and also painting in low humidity and decent temperatures. For someone in Ohio in the middle of winter this was really hard, it was actually snowing when I painted one of the two cards. I ended up painting in my breezeway and then bringing the painted parts into the house in between coats. This isn’t ideal but did help cut down on the smell. You want to give the card a good four coats, waiting 30 minutes between each coat. Then at the end, you have to wait 4 hours before you can do anything with them.
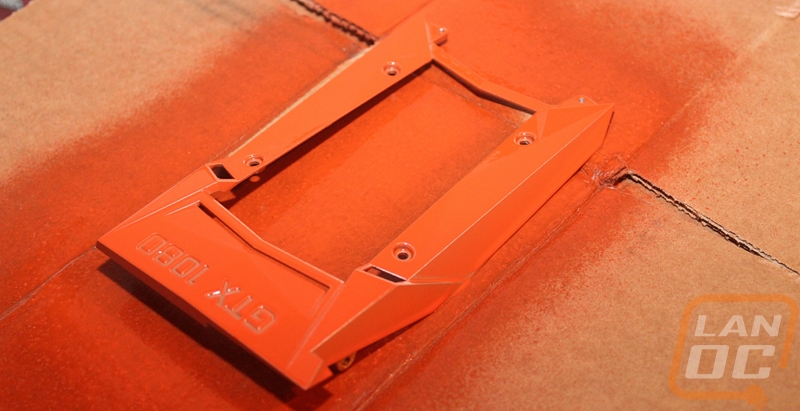
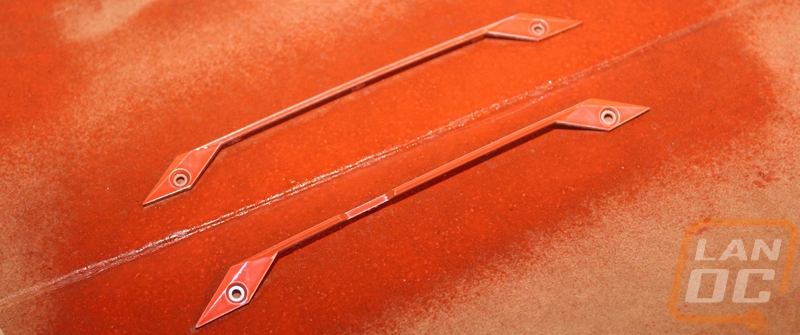
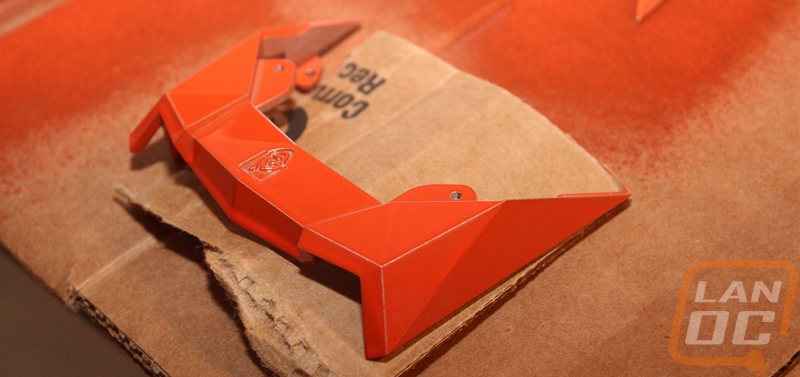
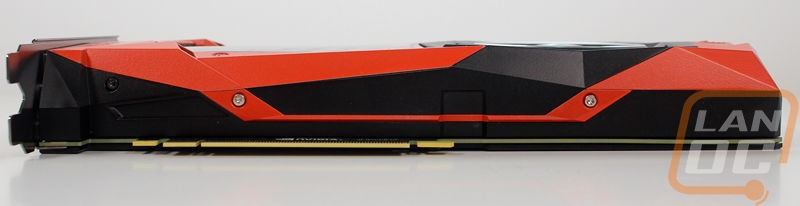
That back panel you have to be especially careful when painting. The pointy ends will collect the most paint and they like to stick to the surface you are painting. I experienced this on both cards and this is why I had to repaint one of them. It stuck and then started to peel up when I picked the panel up. To fix this I would paint it then lift it up onto a piece of cardboard to keep the corners up in between coats. Also with the back panel, remember that you need to get a few coats at an up angle on the back edge because that area is visible with the card back together as well.
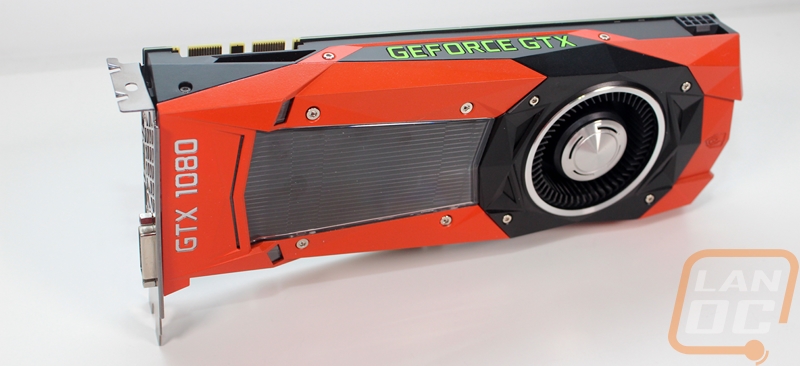
Once everything is dry you can start to put everything back together but be careful when handling the new parts. They were still a little sticky and on one of our cards I scuffed up the front edge when I had the card flipped over to attach the backplate. Before putting it all back together though you should be considering what you want to do with the GTX 1080 or GTX 1070 logos on the side of the card. I was planning on painting them but decided to try to clean them up first and see how they look. I used a new Exacto knife and carefully cut around the edges on each letter then using the tip scrubbed the finish off the top of the chrome. This is REALLY hard to do and risky as well. If you don’t do it right you can end up peeling up the finish up the top of the card and have to repaint the whole thing. If you are worried about this you can leave it painted in or hand paint the letters in another color. The end result was well worth it, though.
Putting your card back together is mostly just putting everything back together the way it came apart. In other words, you can follow my previous instructions starting at the bottom and get it all back together. I do have a few tips, though. For starters, dump out your screws and take the time to sort them all out by style, length, and color, this helps make sure you get everything back in the correct locations. For example, the two screws on the PCI slot have a different finish than the other similarly sized screws. Take your time when putting everything back together and make sure you don’t over-tighten anything. This is especially true with the tiny screws that hold the backplate on, they will strip out with almost no force at all. To prevent that I held my screwdriver by the stem, not the handle to keep the torque to a minimum.
Glamor Shots
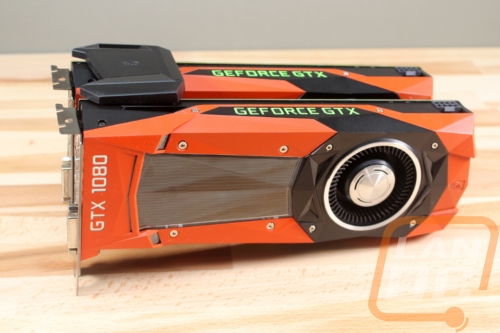
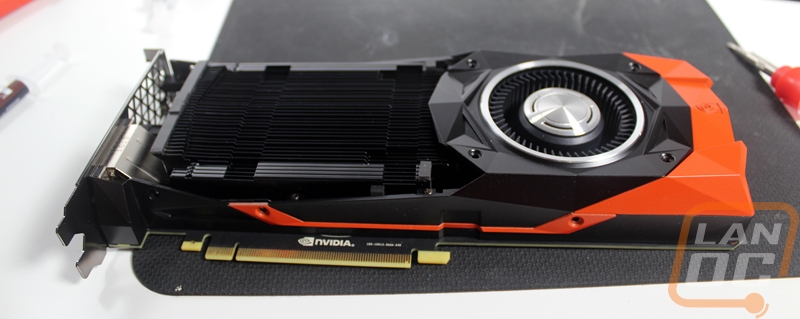
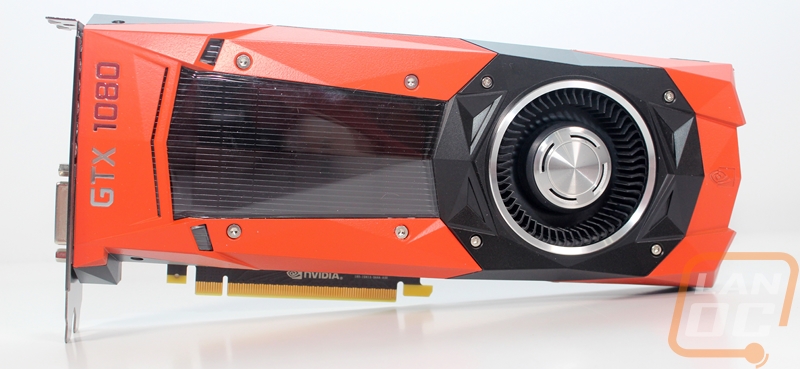
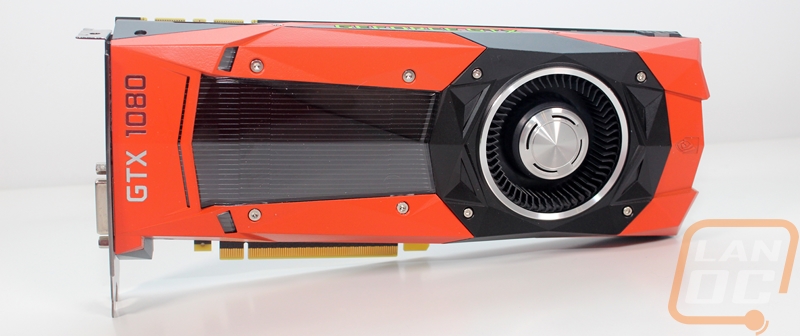
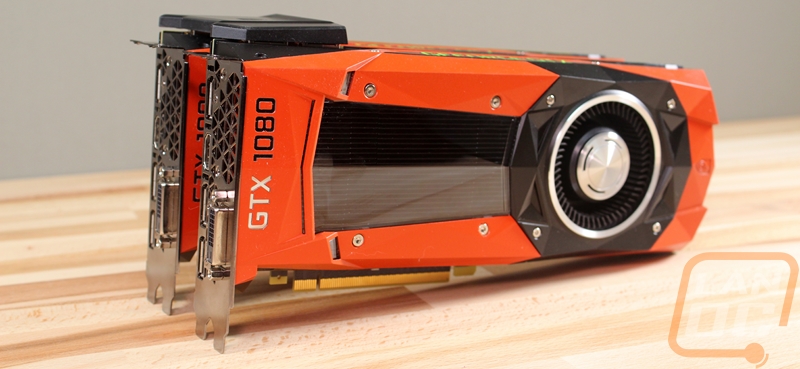
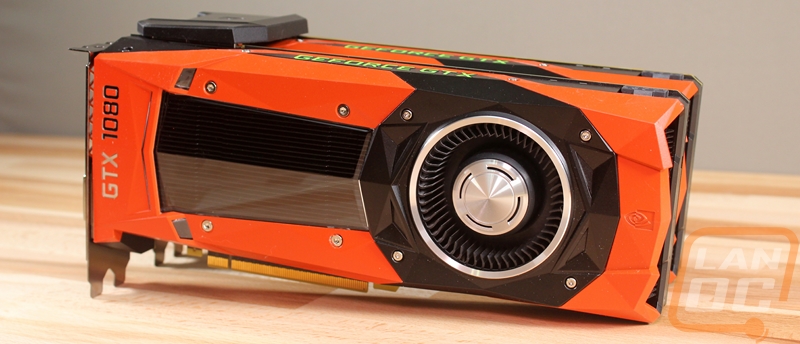
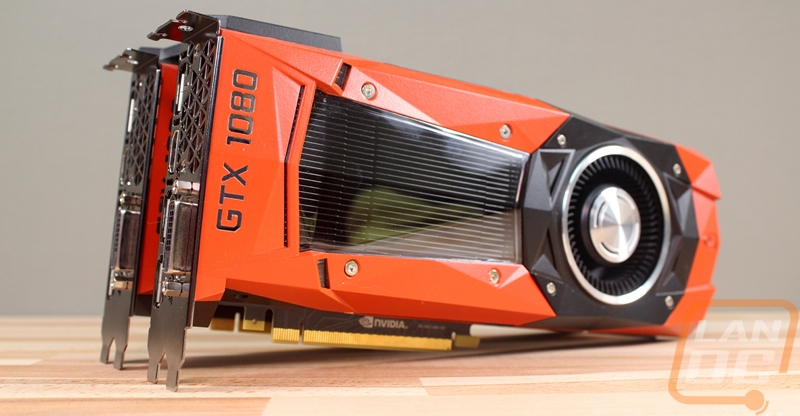
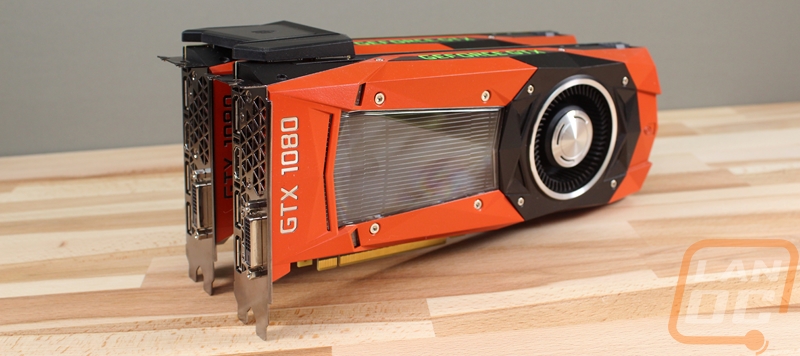
So with the card all back together I did get a few individual card shots for everyone to check out. The Hugger Orange looks amazing and the finish came out surprisingly good.


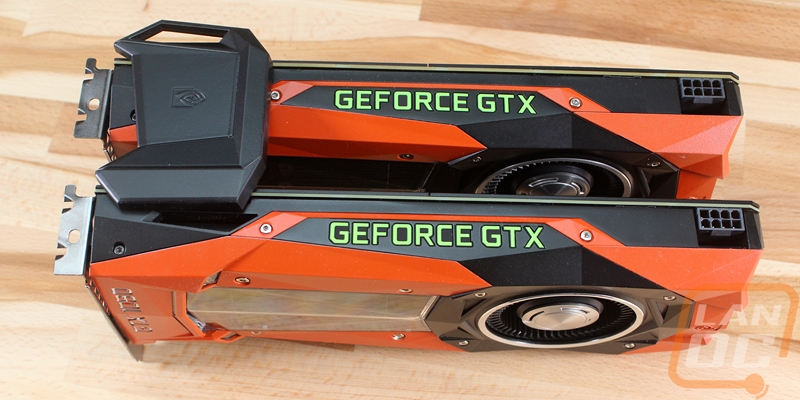
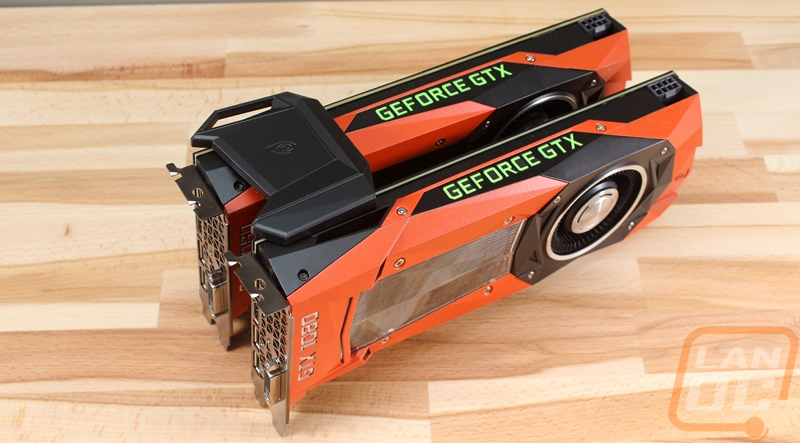
Here are both of the cards together in our new photo area. You can also see that I gave the Nvidia SLI bridge a few quick coats of black as well so it better matches the cards. The original plan was to paint the silver areas on it orange as well but I found when I pulled it apart that the black and silver parts are press fit together and won’t come apart. I could have taped it off and painted it that way but I decided to be lazy and go with black. Notice I did plasti-dip over the green LED strip on the SLI bridge, I run the cards and bridge with the lighting turned off as it is. Speaking of, a few people have already mentioned the green GeForce Logos up top. I considered sanding them down to the white finish but I don’t really like that look. Been testing out other options, but even with those still in green, I don’t think they look too bad.
So I thought that Part 4 would be the end of this series but here we are finishing up Part 5 and I’m not done. Keep an eye out for at least one more where I look at options to keep the dust in the case down and I try to make the Intel 750 Series drive match the GTX 1080’s.


