Software
As always, the hardware is only part of the picture when you are looking at motherboards. The overall experience includes all of the time you spend messing with the software and in the BIOS so I do take a look at those as well. Even though I didn’t check out an Asus board in the past year, not too much has changed on the software front but that’s not really a bad thing. I would suggest installing their AISuite and at least the Aura software to control your lighting. The AISuite has a whole list of Asus software all integrated though I do hope they get the lighting controls integrated in the future as well. Being able to install just one program and go is really nice.
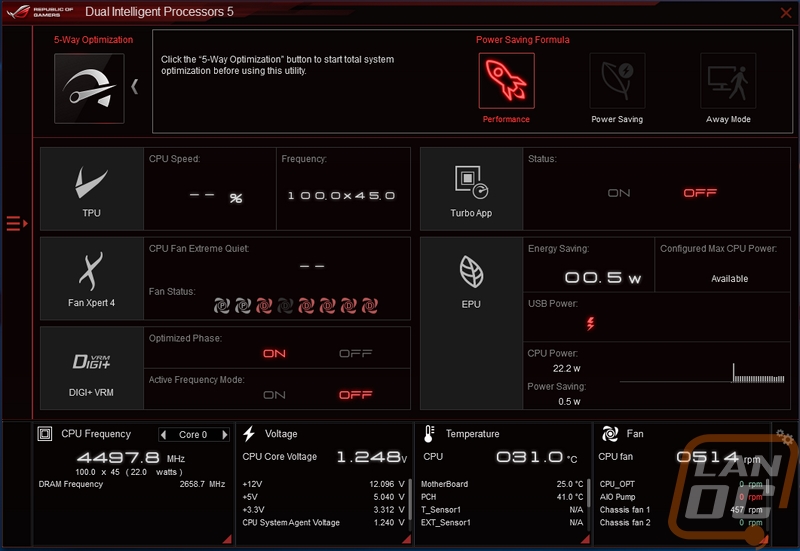
When you open up the AISuite the main page as a lot of information going on. They have most of the integrated software all right here with each section showing a bit of information. Each is clickable and opens up into more information and options. Then down at the bottom they also have live information on the CPU, Voltages, Temps, and fan speeds for quick access, this shows no matter what page you are on.
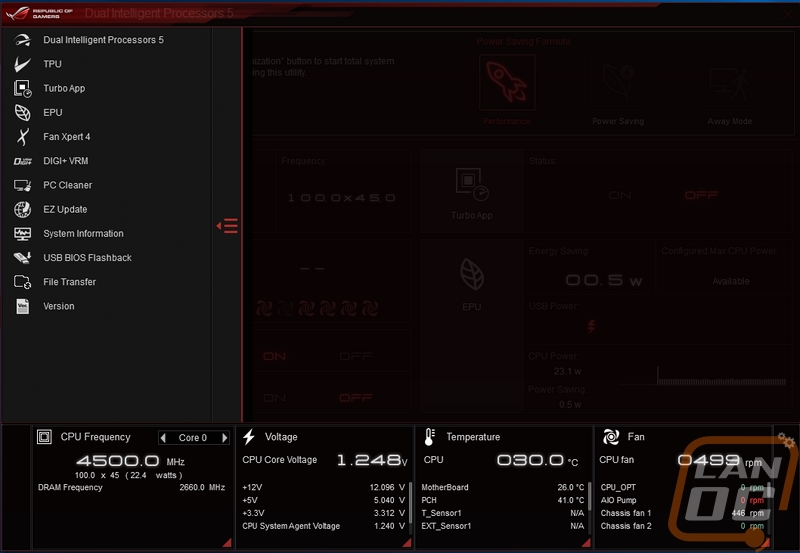
The pop out on the left is the main menu though and it shows you all of the other parts you have installed.
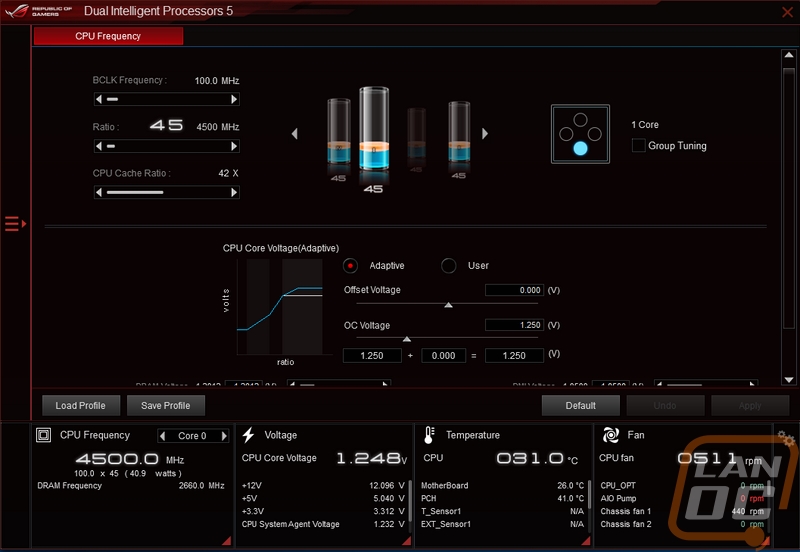
You can get in and overclock your CPU without even having to mess with the BIOS at all.
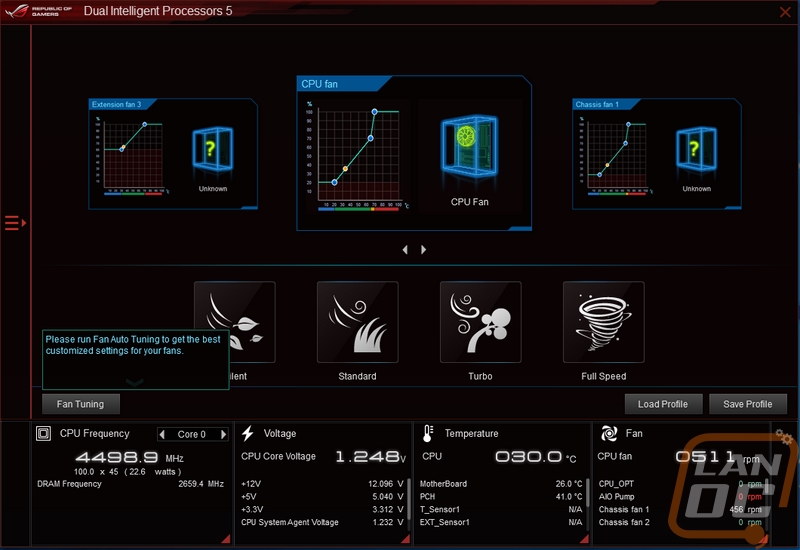
You can run fan tuning to let the software know what range your fans have then from there you can have profiles to turn the fan speeds up or down depending on your noise tolerance and the cooling needs of your PC at the time. You can also open up each fan and create your own fan profiles as well.
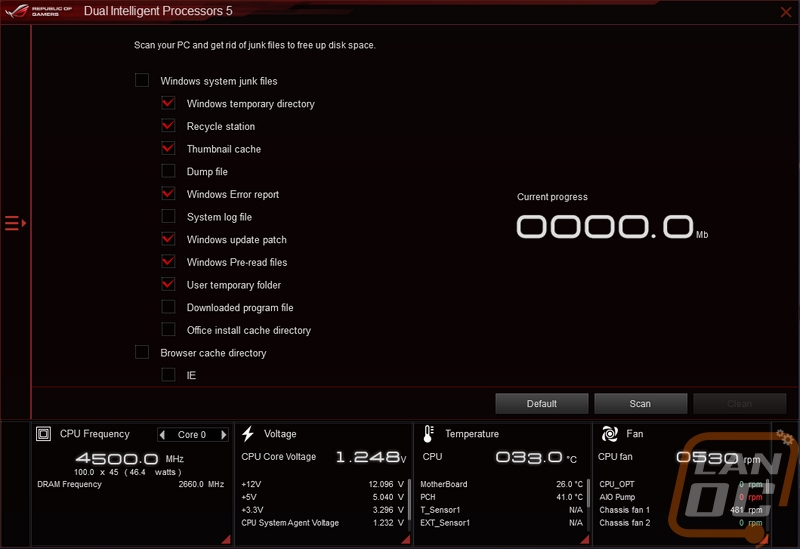
This one was new to me, they actually have a program built into AISuite that will scan your PC for old files to delete. This is very similar to CCleaner but requires one less program installed to get the same functionality.
You can of course download and install new BIOS updates with EZUpdate. This means less searching to figure out what version your BIOS is then going to the website and checking to see if anything is new. One click and you are all set.

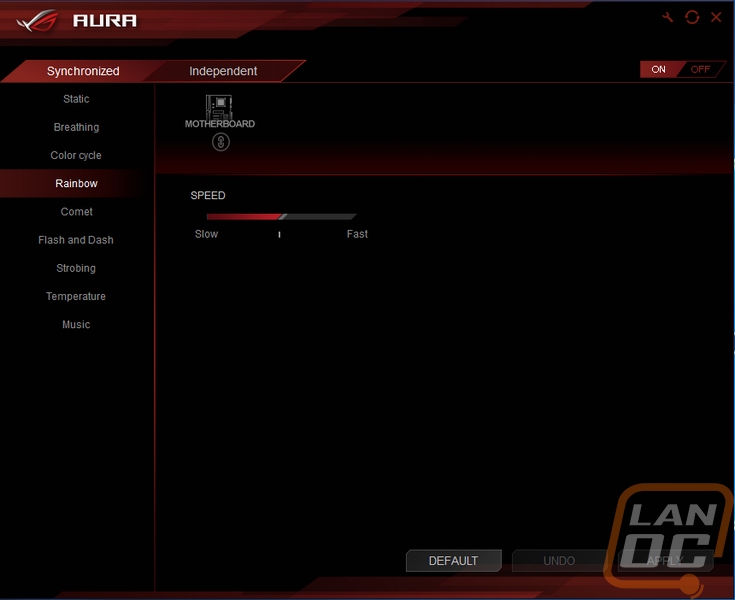
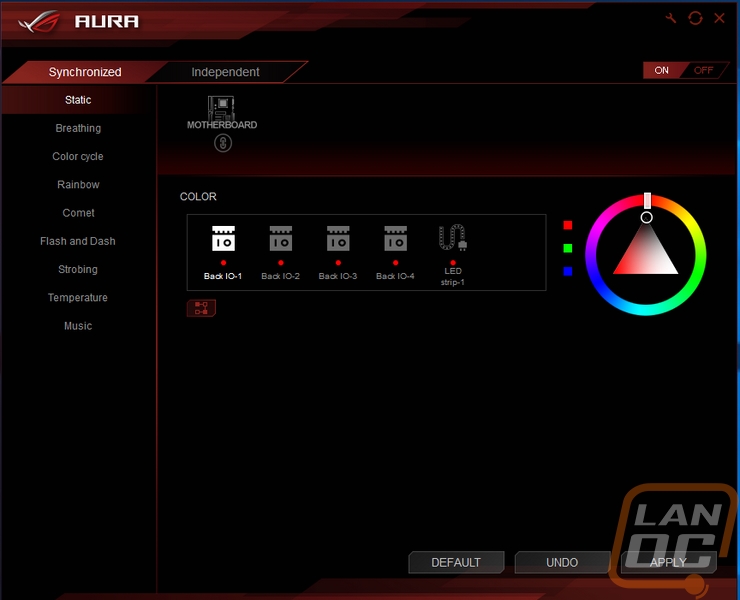
Then there is the Aura software. With the Strix Z270E only really having the one lighting area this is less important with this board but still interesting to check out. This is also where you would control RGB LED strips if you hook them up to the two headers on the board. What is interesting though is the lighting on the Z270E does have four zones in that one strip that can be controlled independently. The base more uses the zones to role through a color mix but you could set your two accent colors as every other zone for an interesting look. There are different lighting options as well including the standard breathing and static modes or you can flash, strobe, show PC temperatures, or set the lighting to your music. Then of course right up top, you can turn them all off as well for those who don’t like lighting.
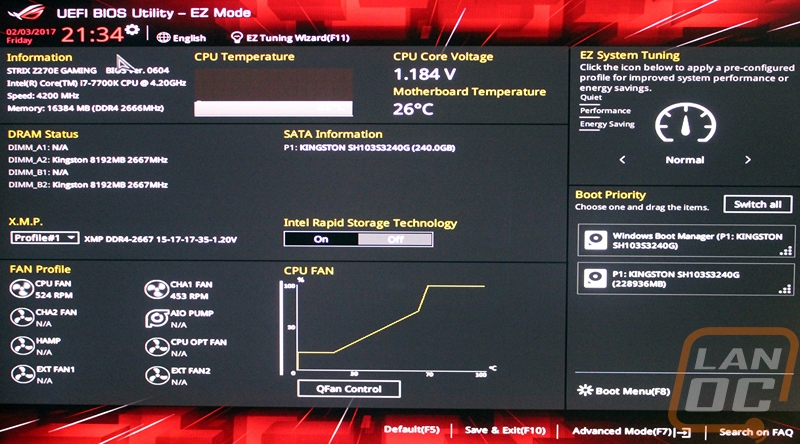
For the BIOS, Asus does things the right way and you boot into the EZ Mode first. For some reason the other Z270 boards that came in both have a similar option but don’t boot to them, it doesn’t really help if the people who have a hard time in the BIOS have to dig around and find the easier mode. Anyhow the EZ Mode has some basic information on your CPU and memory as well as lists what slots have memory in them and what storage drives you have hooked up. You can turn on XMP from here and see and get to fan speed adjustments. There is one simple overclocking option and then drag and drop boot options as well.
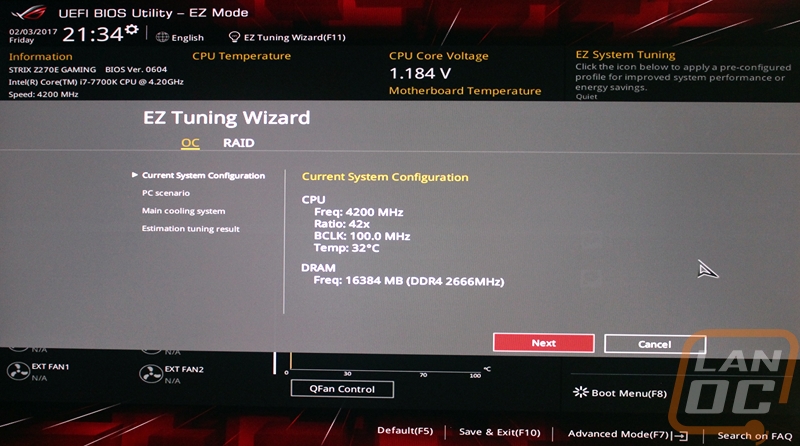
The EZ Tuning wizard walks you through a few options to tune the overclock to your usage and cooling setup.
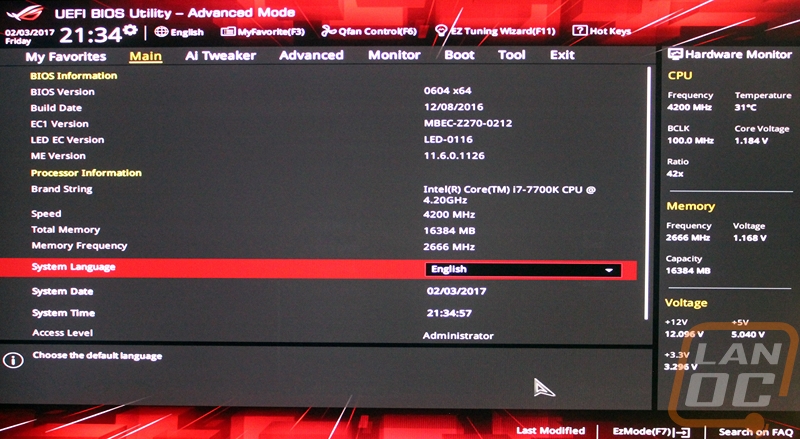
The Advanced Mode is back to the standard BIOS but with mouse or keyboard navigation. I will say that the mouse movement is actually good, MSI and Gigabyte both feel laggy when you move the mouse around. The home page is the main tab, this just has information on your hardware and bios versions. You also have the hardware monitor over on the right side at all times with CPU and Memory clock speeds and temps as well as voltages.
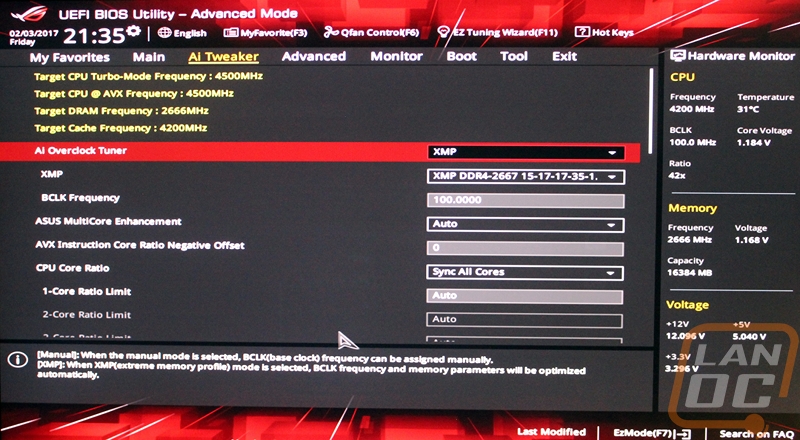
The AI Tweaker page is where they have put all of the overclocking options. There are a ton not in the photo that you can scroll down through as well. This covered CPU nd memory overclocking as well as voltages.
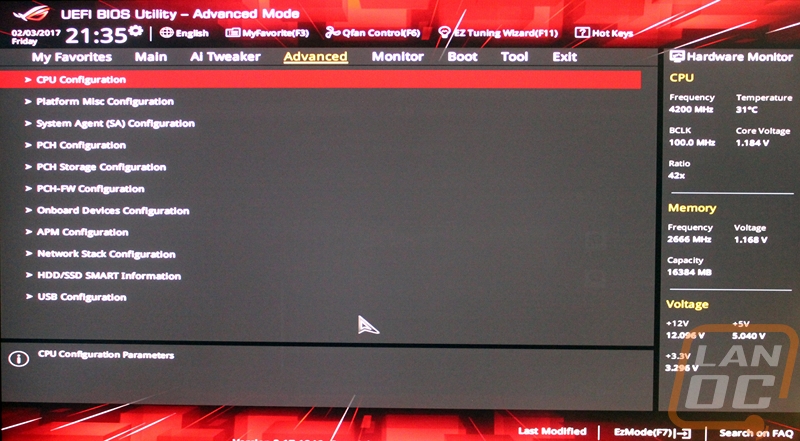
The Advanced tab is basically the home for any other option to change chipset and subsystem settings.
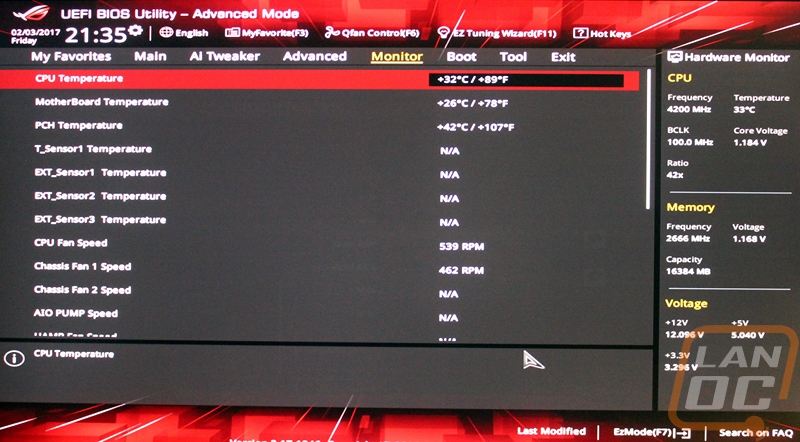
The Monitor page exactly that, you can check fan speeds, temperatures, and any other readout the board has built in.
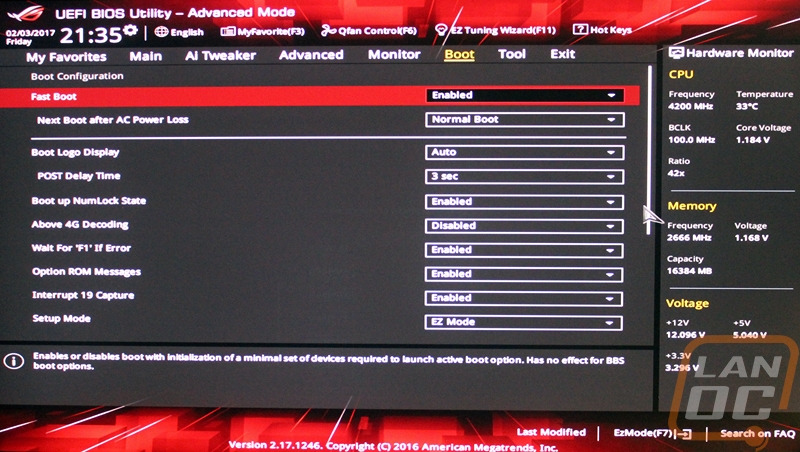
The Boot tab has a more in-depth set of boot options from the drag and drop EZ options. Here you can turn on things like fast boot and how your PC handles a power loss.
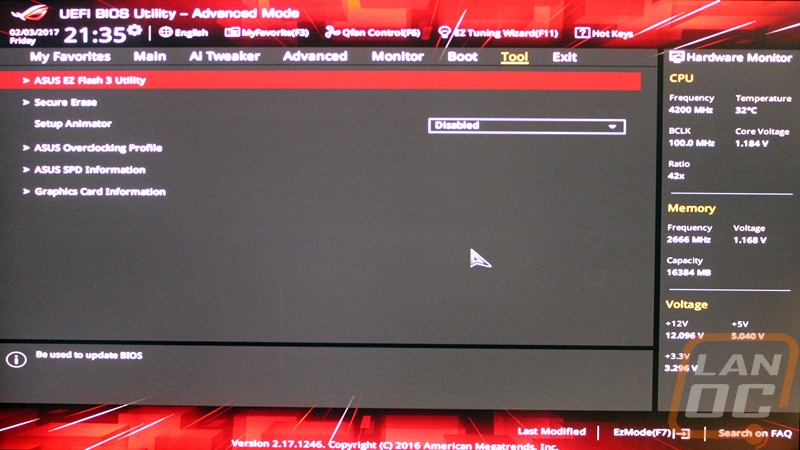
Then the Tool page is where you can update you BIOS using the EZ Flash 3 Utility or you can even securely erase an attached drive. They also have the overclocking profiles tucked away in this area.
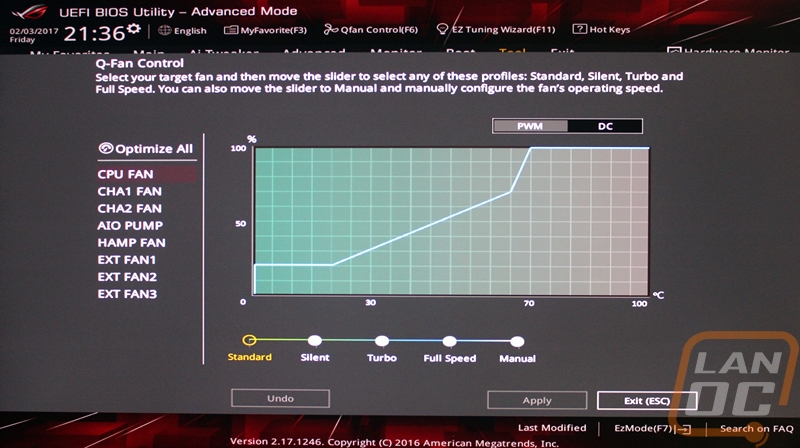
At any point, you can get into the EZ Tuning or QFAN controls up at the top of the screen. The Q-Fan controls let you run an optimize mode to test your fans and set up profiles or you can go in and create your own fan profiles using PWM or the older DC option.