
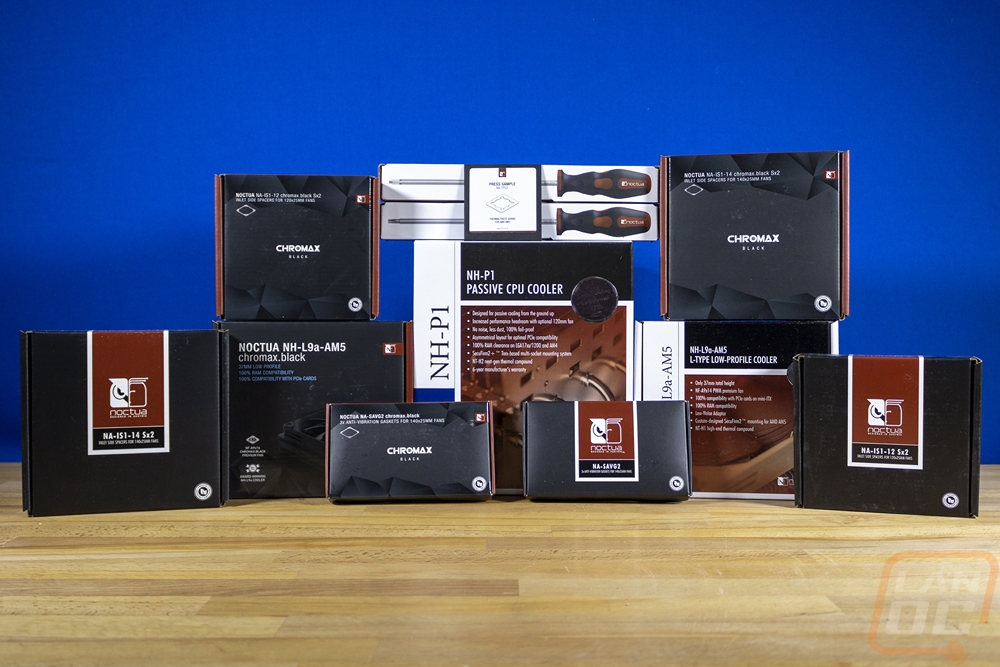
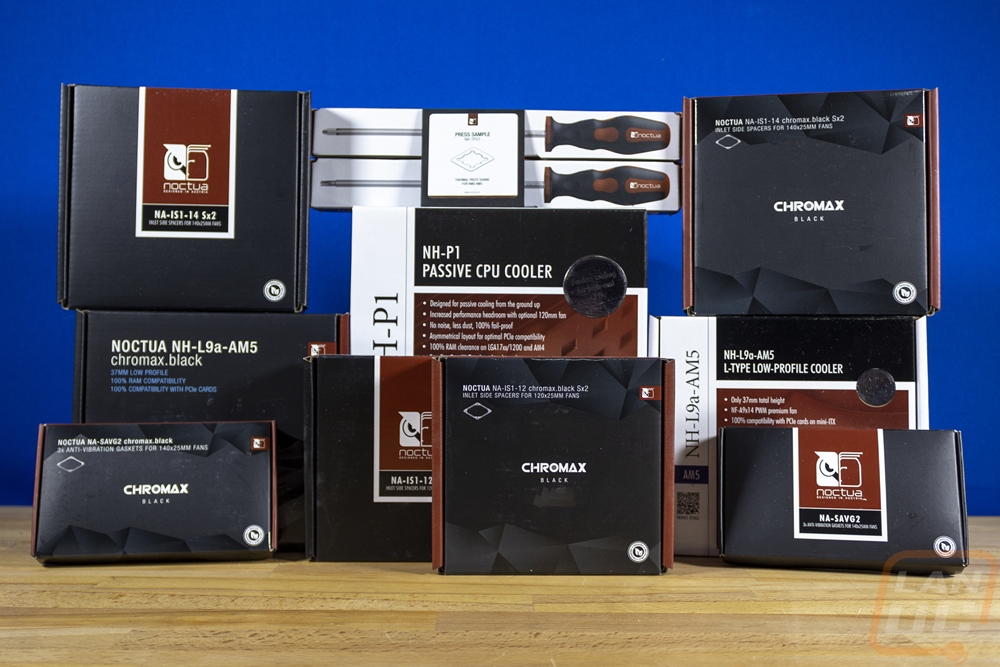
We've been working with Noctua for 10 years now and while they have been really consistent with the product lineup they still manage to innovate and surprise us with new products. That has been especially true in the past year where they've introduced a fanless heatsink and a variety of different accessories going as far as even bringing out their own screwdrivers as well as new small form factor coolers like the NH-L9a-AM5 for AM5 chipsets. Frankly, it's been hard to keep up, but I wanted to take a little time and check out what Noctua has been up to this past year and catch up a little bit. So today we're going to check out both NH-L9a-AM5 coolers, NH-P1 fanless heat sink, their inlet spacers and gaskets, the amp thermal paste guard, and new screwdrivers to see what everything is all about.
Product Name: Catching up with Noctua 2023
Review Sample Provided by: Noctua
Written by: Wes Compton
Amazon Affiliate Link:
NA-IS1-12 chromax.black Sx2 Inlet Spacer
NA-IS1-14 chromax.black Sx2 Inlet Spacer
AM5 thermal paste guard NA-TPG1
|
NH-L9a-AM5 Specifications |
|
|
Notes and warnings |
The NH-L9a-AM5 is a highly compact, quiet low-profile cooler designed for use in small form factor cases and HTPC environments. While it provides first-rate performance in its class, it is not suitable for overclocking and or CPUs that create high heat loads. Please consult our CPU compatibility list to find out whether the NH-L9a-AM5 is recommended for your CPU. |
|
Cooler Specification |
|
|
Socket compatibility |
AMD AM5 |
|
Height (without fan) |
23 mm |
|
Width (without fan) |
114 mm |
|
Depth (without fan) |
92 mm |
|
Weight (without fan) |
390 g |
|
Height (with fan) |
37 mm |
|
Width (with fan) |
114 mm |
|
Depth (with fan) |
92 mm |
|
Weight (with fan) |
465 g |
|
Material |
Copper (base and heat-pipes), aluminum (cooling fins), soldered joints & nickel plating |
|
NSPR |
61 |
|
Max. TDP |
see NSPR |
|
Fan compatibility |
92x92x14mm, 92x92x25mm |
|
Scope of delivery |
NF-A9x14 PWM premium fan NA-RC7 Low-Noise Adaptor (L.N.A) NT-H1 high-grade thermal compound SecuFirm2™ AM5 mounting kit Screws for 92x92x25mm fans Noctua Metal Case-Badge |
|
Warranty |
6 Years |
|
FAN Specification |
|
|
Model |
Noctua NF-A9x14 HS-PWM |
|
Bearing |
SSO2 |
|
Max. rotational speed (+/- 10%) |
2500 RPM |
|
Max. rotational speed with L.N.A. (+/- 10%) |
1800 RPM |
|
Min. rotational speed @ 20% PWM (+/-20%) |
600 RPM |
|
Max. airflow |
57.5 m³/h |
|
Max. airflow with L.N.A. |
40.8 m³/h |
|
Max. acoustical noise |
23.6 dB(A) |
|
Max. acoustical noise with L.N.A. |
14.8 dB(A) |
|
Input power (max.) |
2.52 W |
|
Voltage range |
12 V |
|
MTTF |
> 150.000 h |
|
NH-L9a-AM5 chromax.black Specifications |
|
|
Notes and warnings |
The NH-L9a-AM5 is a highly compact, quiet low-profile cooler designed for use in small form factor cases and HTPC environments. While it provides first-rate performance in its class, it is not suitable for overclocking and or CPUs that create high heat loads. Please consult our CPU compatibility list to find out whether the NH-L9a-AM5 is recommended for your CPU. |
|
Cooler Specification |
|
|
Socket compatibility |
AMD AM5 |
|
Height (without fan) |
23 mm |
|
Width (without fan) |
114 mm |
|
Depth (without fan) |
92 mm |
|
Weight (without fan) |
390 g |
|
Height (with fan) |
37 mm |
|
Width (with fan) |
114 mm |
|
Depth (with fan) |
92 mm |
|
Weight (with fan) |
465 g |
|
Material |
Copper (base and heat-pipes), aluminum (cooling fins), soldered joints & nickel plating |
|
NSPR |
61 |
|
Max. TDP |
see NSPR |
|
Fan compatibility |
92x92x14mm, 92x92x25mm |
|
Scope of delivery |
Black NH-L9a-AM5 heatsink NF-A9x14 HS-PWM chromax.black premium fan NA-RC7 Low-Noise Adaptor (L.N.A) NT-H1 high-grade thermal compound Black SecuFirm2™ AM5 mounting kit Black screws for 92x92x25mm fans Noctua Metal Case-Badge |
|
Warranty |
6 Years |
|
FAN Specification |
|
|
Model |
Noctua NF-A9x14 HS-PWM chromax.black |
|
Bearing |
SSO2 |
|
Max. rotational speed (+/- 10%) |
2500 RPM |
|
Max. rotational speed with L.N.A. (+/- 10%) |
1800 RPM |
|
Min. rotational speed @ 20% PWM (+/-20%) |
600 RPM |
|
Max. airflow |
57.5 m³/h |
|
Max. airflow with L.N.A. |
40.8 m³/h |
|
Max. acoustical noise |
23.6 dB(A) |
|
Max. acoustical noise with L.N.A. |
14.8 dB(A) |
|
Input power (max.) |
2.52 W |
|
Voltage range |
12 V |
|
MTTF |
> 150.000 h |
|
NH-P1 Specifications |
|
|
Socket compatibility |
Intel LGA2066, LGA2011-0 & LGA2011-3 (Square ILM), LGA1700 (included since Q4 2021, older coolers require NM-i17xx-MP83), LGA1200, LGA1156, LGA1155, LGA1151, LGA1150 & AMD AM4, AM5 |
|
Height (without fan) |
158 mm |
|
Width (without fan) |
154 mm |
|
Depth (without fan) |
152 mm |
|
Weight (without fan) |
1180 g |
|
Material |
Copper (base and heat-pipes), aluminum (cooling fins), soldered joints & nickel plating |
|
NSPR |
42 |
|
Max. TDP |
see NSPR |
|
Fan compatibility |
120x120x25 |
|
Scope of delivery |
NH-P1 heatsink SecuFirm2+™ multi-socket mounting system NT-H2 high-grade thermal compound NA-CW1 cleaning wipe NM-SD1 screwdriver Fan clips for optional 120mm fan Noctua Metal Case-Badge |
|
Warranty |
6 Years |
|
Notes and warnings |
Caution: while the NH-P1 provides first-rate performance for a passive cooler, it is not suitable for overclocking or CPUs that create high heat loads. |
|
NA-IS1-12 Sx2 Specifications |
|
|
Fan compatibility |
|
|
Scope of delivery |
2x NA-IS1-12 inlet spacers for 120mm fans 8x NA-AV3 anti-vibration mounts 8x NM-SFS4-BK long fan screws 8x NM-SFS5-BK radiator screws (M3) 8x NM-SFS6-BK radiator screws (UNC) |
|
Warranty |
6 years |
|
Notes and warnings |
Caution: As influx turbulences vary between different fans models and setups (e.g. different fan speeds, grill shapes, mesh patterns, overall flow resistance, etc.), it is not possible to reliably predict how much of an improvement adding inlet spacers will make. While the improvements are significant in most configurations, there sometimes may be little to no improvements and, in rare situations such as with particular slit-type grills, adding spacers may even lead to undesirable results with particular fan models. |
|
NA-IS1-12 Sx2 chromax.black Specifications |
|
|
Color |
Black |
|
Fan compatibility |
|
|
Scope of delivery |
2x NA-IS1-12 inlet spacers for 120mm fans 8x NA-AV3 anti-vibration mounts 8x NM-SFS4-BK long fan screws 8x NM-SFS5-BK radiator screws (M3) 8x NM-SFS6-BK radiator screws (UNC) |
|
Warranty |
6 years |
|
Notes and warnings |
Caution: As influx turbulences vary between different fans models and setups (e.g. different fan speeds, grill shapes, mesh patterns, overall flow resistance, etc.), it is not possible to reliably predict how much of an improvement adding inlet spacers will make. While the improvements are significant in most configurations, there sometimes may be little to no improvements and, in rare situations such as with particular slit-type grills, adding spacers may even lead to undesirable results with particular fan models. |
|
NA-IS1-14 Sx2 Specifications |
|
|
Fan compatibility |
|
|
Scope of delivery |
2x NA-IS1-14 inlet spacers for 140mm fans 8x NA-AV3 anti-vibration mounts 8x NM-SFS4-BK long fan screws 8x NM-SFS5-BK radiator screws (M3) 8x NM-SFS6-BK radiator screws (UNC) |
|
Warranty |
6 years |
|
Notes and warnings |
Caution: As influx turbulences vary between different fans models and setups (e.g. different fan speeds, grill shapes, mesh patterns, overall flow resistance, etc.), it is not possible to reliably predict how much of an improvement adding inlet spacers will make. While the improvements are significant in most configurations, there sometimes may be little to no improvements and, in rare situations such as with particular slit-type grills, adding spacers may even lead to undesirable results with particular fan models. |
|
NA-IS1-14 chromax.black Sx2 Specifications |
|
|
Color |
Black |
|
Fan compatibility |
|
|
Scope of delivery |
2x NA-IS1-14 chromax.black inlet spacers for 140mm fans 8x NA-AV3 anti-vibration mounts 8x NM-SFS4-BK long fan screws 8x NM-SFS5-BK radiator screws (M3) 8x NM-SFS6-BK radiator screws (UNC) |
|
Warranty |
6 years |
|
Notes and warnings |
Caution: As influx turbulences vary between different fans models and setups (e.g. different fan speeds, grill shapes, mesh patterns, overall flow resistance, etc.), it is not possible to reliably predict how much of an improvement adding inlet spacers will make. While the improvements are significant in most configurations, there sometimes may be little to no improvements and, in rare situations such as with particular slit-type grills, adding spacers may even lead to undesirable results with particular fan models. |
|
NA-SAVG2 Specifications |
|
|
Color |
Noctua Brown |
|
Fan compatibility |
|
|
Scope of delivery |
3x NA-AVG2 anti-vibration gasket for water-cooling radiators |
|
Warranty |
6 years |
|
NOCTUA NA-SAVG2 chromax.black Specifications |
|
|
Color |
Black |
|
Fan compatibility |
|
|
Scope of delivery |
3x NA-AVG2 chromax.black anti-vibration gasket for water-cooling radiators |
|
Warranty |
6 years |
|
NM-SD1 Screwdriver Specifications |
|
|
Screwdriver head |
Torx T20 |
|
Mounting system compatibility |
SecuFirm2+ |
|
Size |
150 mm |
|
NM-SD2 Screwdriver Specifications |
|
|
Screwdriver head |
Phillips PH2 |
|
Mounting system compatibility |
SecuFirm SecuFirm2 |
|
Size |
150 mm |
|
NA-TPG1 Specifications |
|
|
CPU Supported |
AM5 |
|
Color |
Grey |
|
Scope of delivery |
NA-STPG1 thermal paste guard 10x NA-CW1 cleaning wipes |
NH-L9a-AM5 and NH-L9a-AM5 chromax.black
My ties with SFF builds go way back and Noctua’s NH-L9 coolers have played a big part in a lot of those builds over the years. The NH-L9 coolers are unique from Noctua in that they are socket specific whereas all of their other coolers have supported any socket including Noctua providing brackets for coolers as time has gone on. Well with the new AM5 socket, Noctua updated their design once again with both the NH-L9a-AM5 and the NH-L9a-AM5 chromax.black and they sent both over to check out. The NH-L9a-AM5 is of course updated for the new socket and the chromax.black model is the same but blacked out in true chromax fashion. The chromax lineup hit the L9 lineup back in 2019, relatively late into the lineup so a majority of the L9 coolers I have used in the past have been the traditional Noctua style but I have even gone as far as designing my own fan cover to help get the colors to match builds when needed.
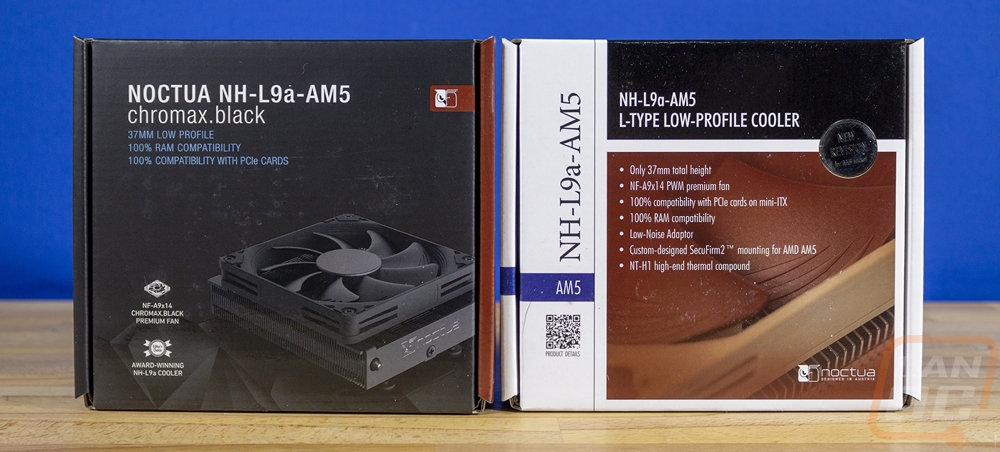
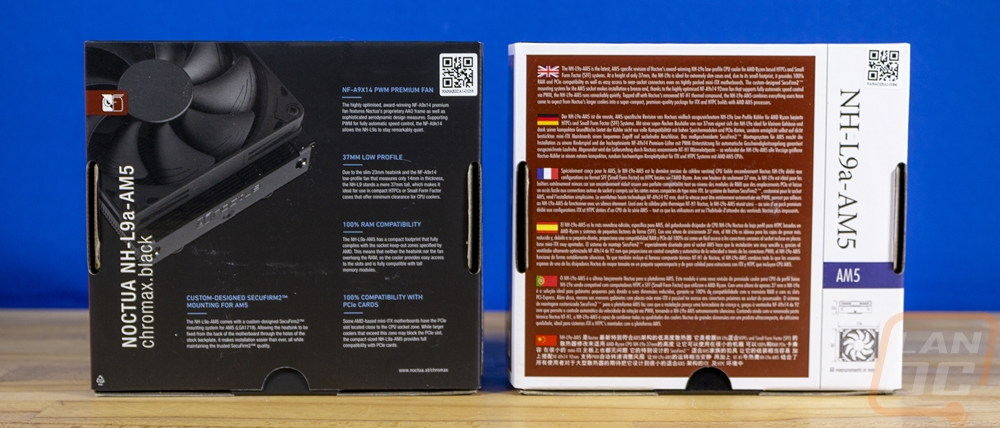
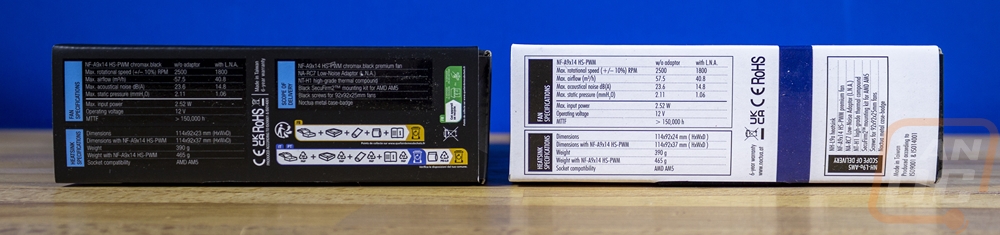
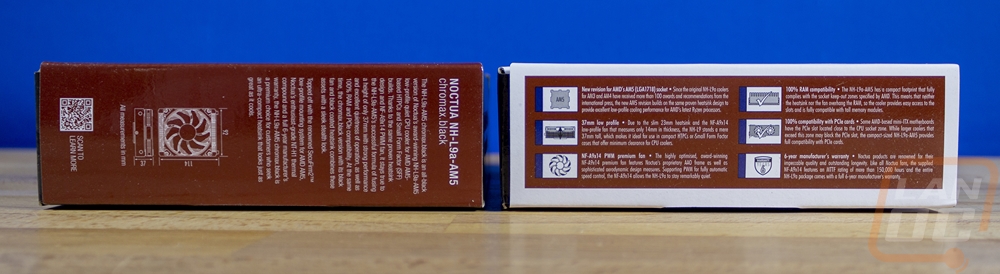
The NH-L9a-AM5 and NH-L9a-AM5 chromax.black both have the same sized box but like with other Noctua coolers they have different styling. The chromax cooler has a blacked-out box with just the Noctua brown on the edges and a picture of the cooler across the front. The standard NH-L9a-AM5 on the other hand has the traditional Noctua packaging including the zoomed-in picture of the cooler giving it that brown background. The chromax has another picture on the back along with a few key features highlighted. Then both have the specifications on the side of the box which is helpful.
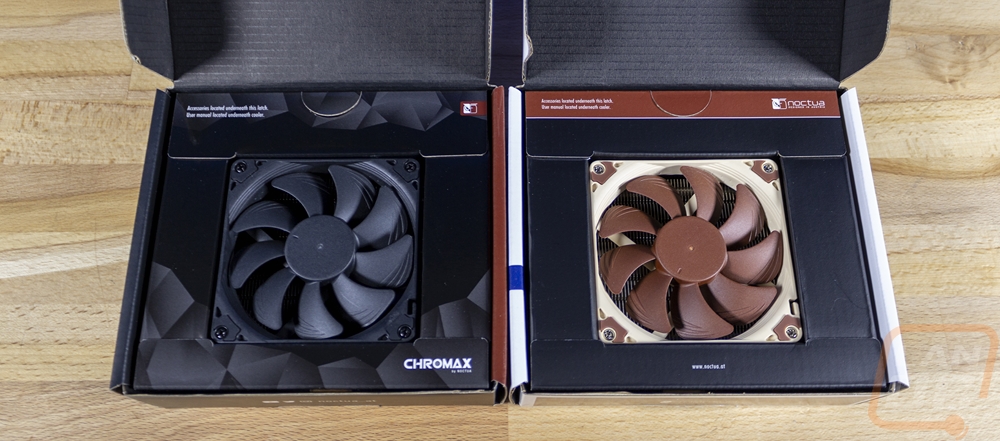
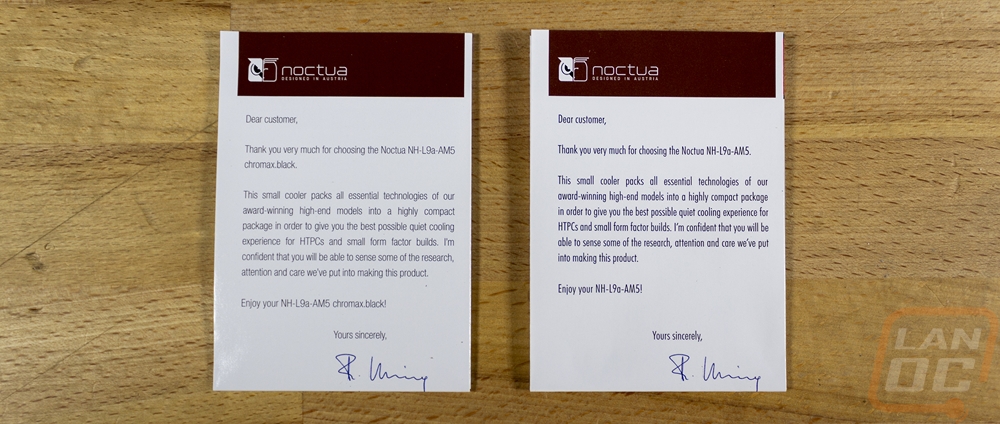
When you open the boxes up they both have the cooler featured in the middle sitting in a pull-up surround. The chromax has an angular black design whereas the standard NH-L9a-AM5 has black with a brown accent. Then when you pull up on that it pulls the cooler out and under it, they both have a tube with the accessories inside. The chromax is black whereas the standard model is brown. You also get a folded-up instruction manual which has line drawings guiding you through the installation. Because this cooler is specific to AM5, only one instruction is needed. This also has a thank you for your purchase and the signature from Roland Mossig, Noctua’s CEO.
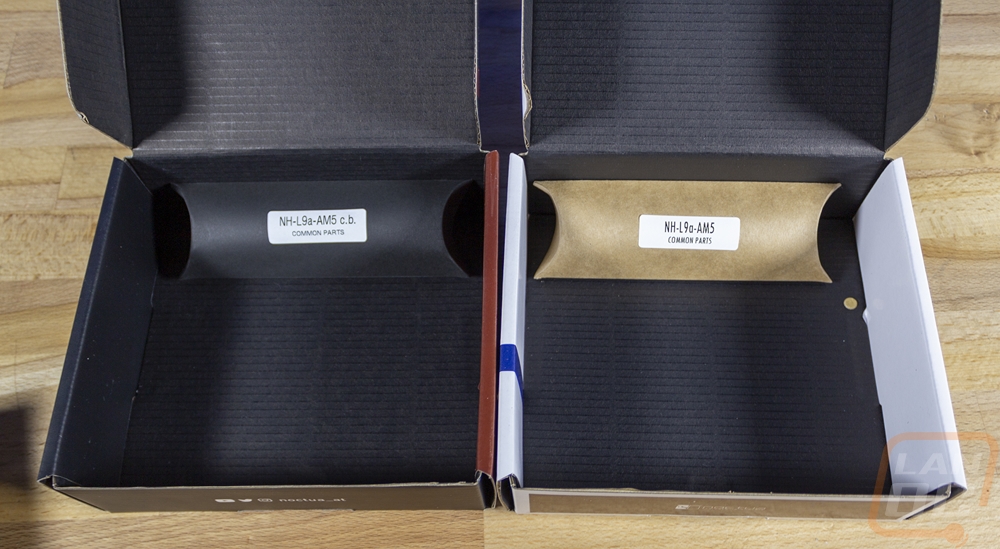
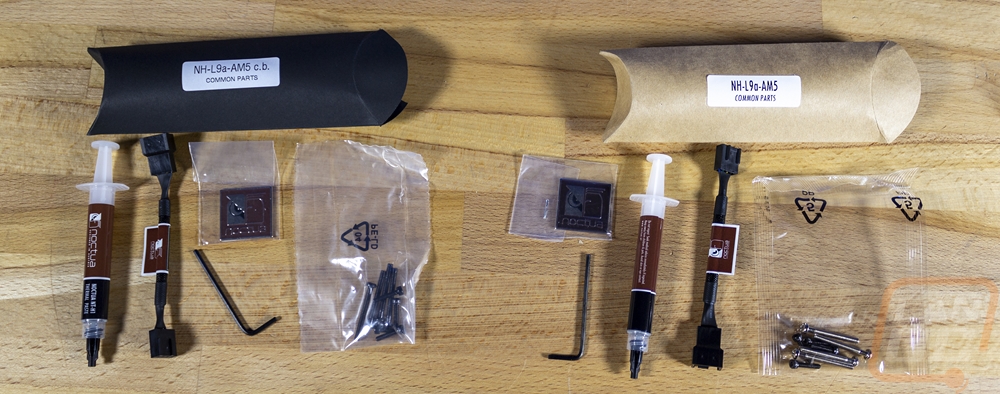
Both tubes come with nearly the same accessories with one exception. The NH-L9a-AM5 chromax.black has black screws for all of its screws whereas the standard NH-L9a-AM5 has chromed screws for the fan screws. You get that pack of mounting and fan screws, a low power adapter that can be plugged inline for the fan to lower the fan speed, an Allen wrench, a full tube of thermal paste, and a case badge. Noctua’s case badge is a thick metal design that has been painted, I know that case badges aren’t important to most people anymore but I love the quality of their design and wish more were like it. The same goes for them including a full tube of thermal paste which adds a lot of value to the cooler compared to the competition. Especially given that this isn’t cheap thermal paste, it is the same stuff I use on everything.
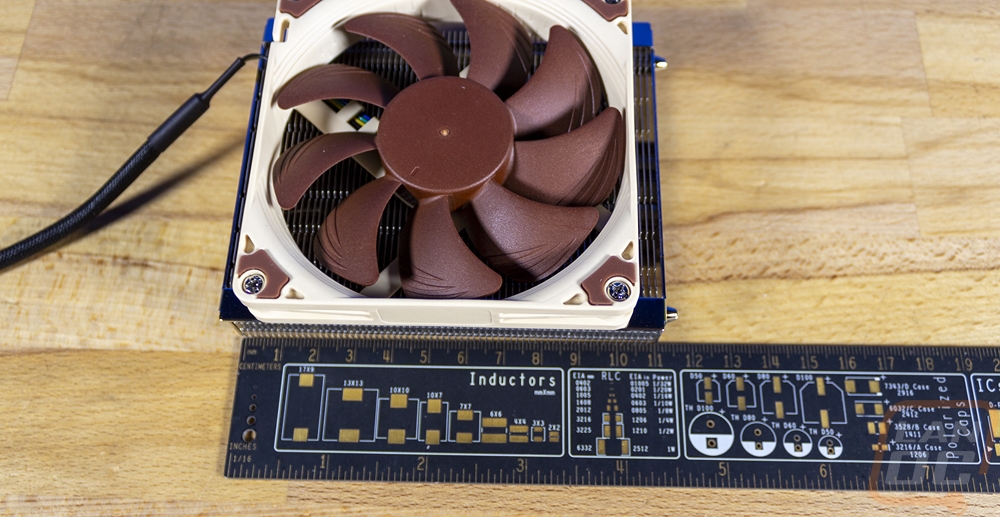
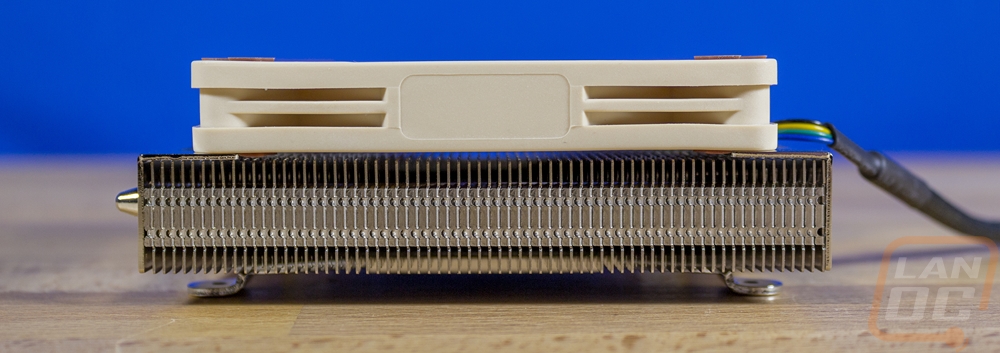
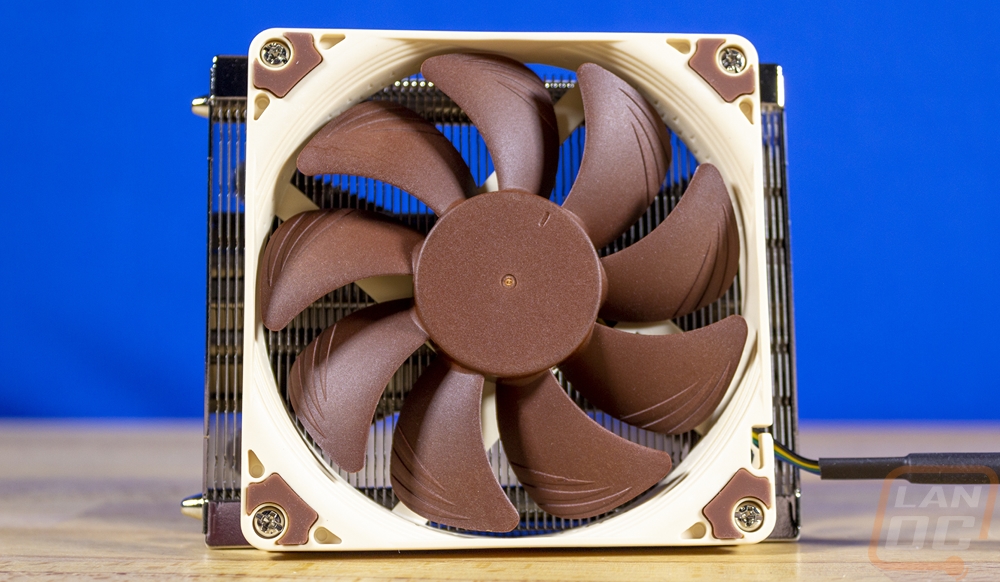
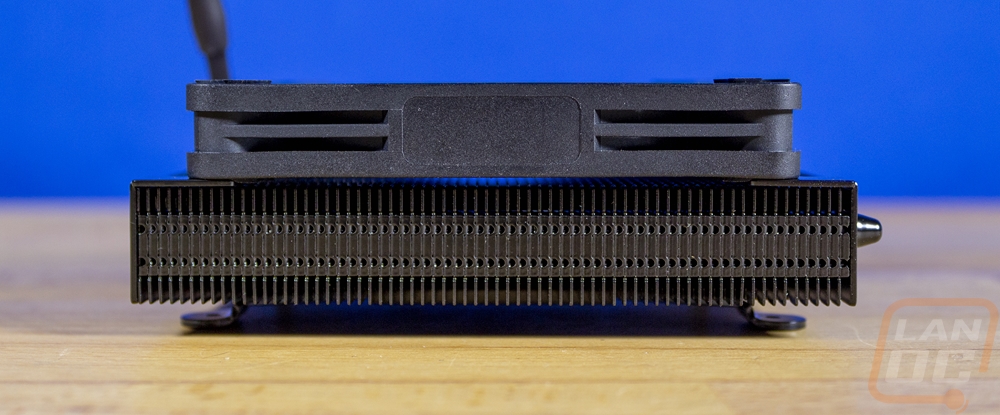
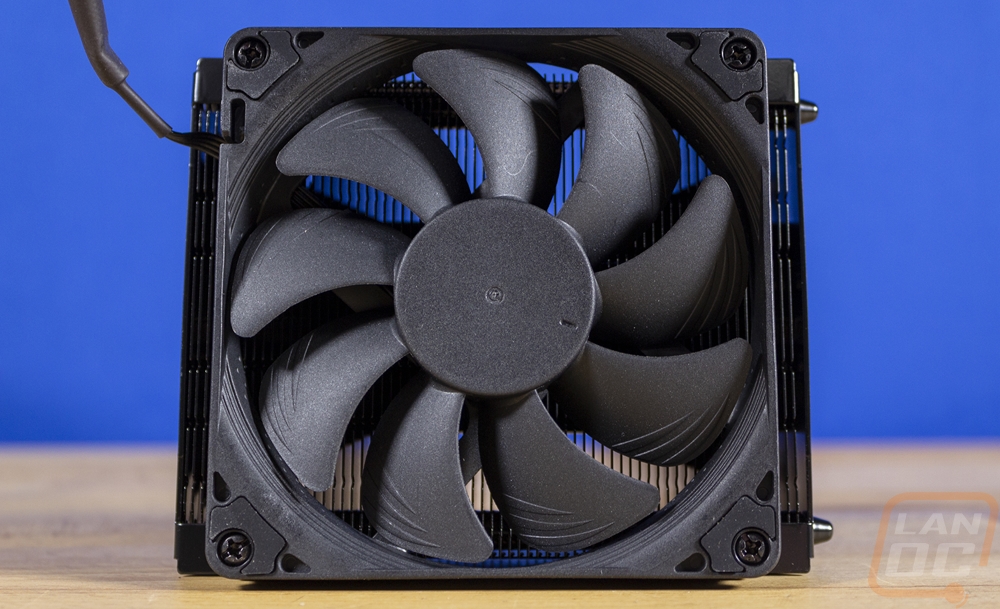
Both of the NH-L9a-AM5 coolers have the same overall design. This is 114 mm wide, 92 mm deep, and then 23 mm tall without the included fan and 37 mm with the fan included. It is 390 grams without the fan and 465 grams with it. Their aluminum cooling fin design uses a copper base and heatpipes to pull the heat out across the cooler and has nickel plating and soldered joints. Really the overall design isn’t any different from the NH-L9Aa-AM5 or the original NH-L9A which supported AM3 CPUs. This design is different from what Noctua uses for their Intel design, the AMD coolers have a longer length. The fan comes preinstalled on top which blows down into the cooler. Noctua uses the NF-A9x14 HS-PWM for the standard cooler and the Noctua NF-A9x14 HS-PWM chromax.black for the chromax model. Both have an SSO2 bearing which helps get the MTTF up over > 150.000 h. They can run up to 2500 RPM or 1800 RPM when using the L.N.A. adapter that is included. They can also run down to 600 RPM for their lowest speed.
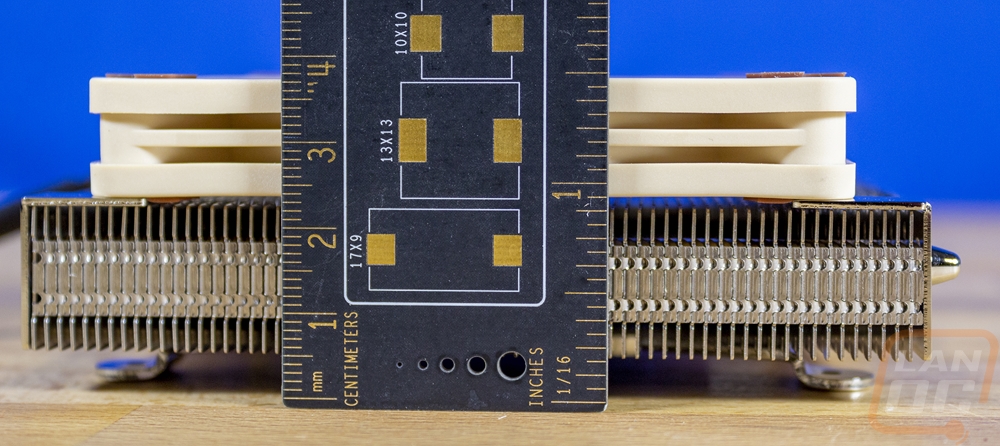
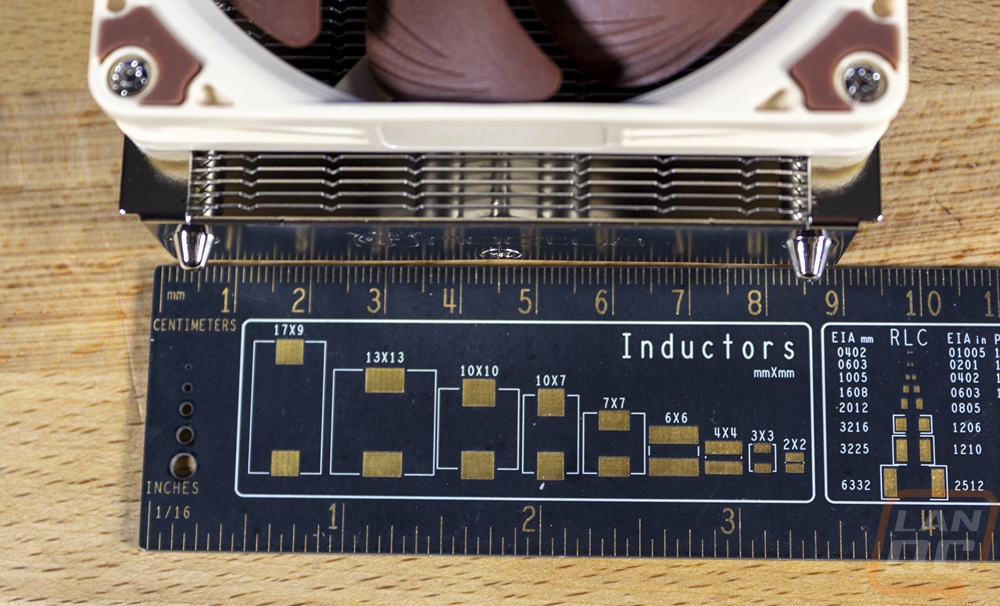
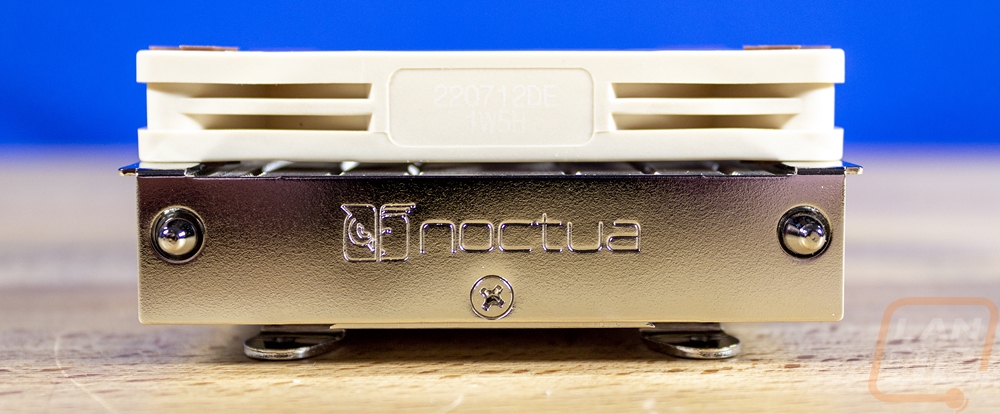
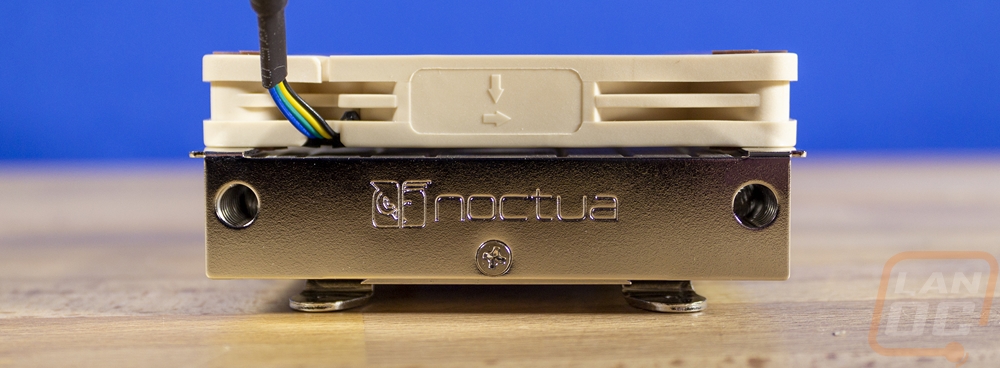
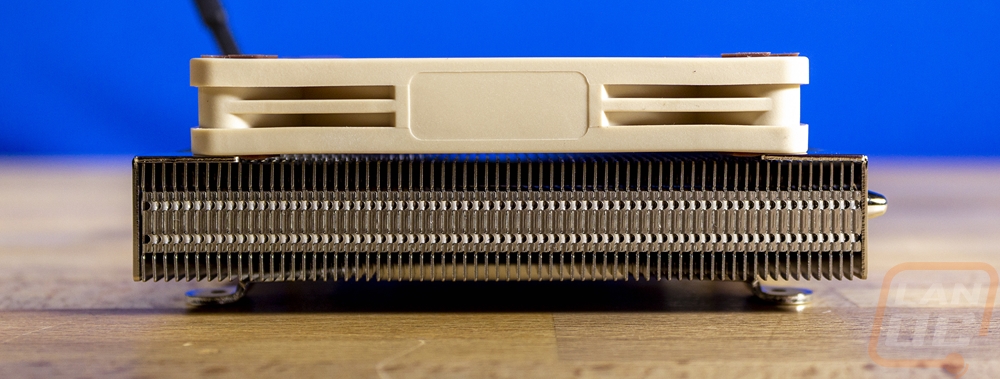
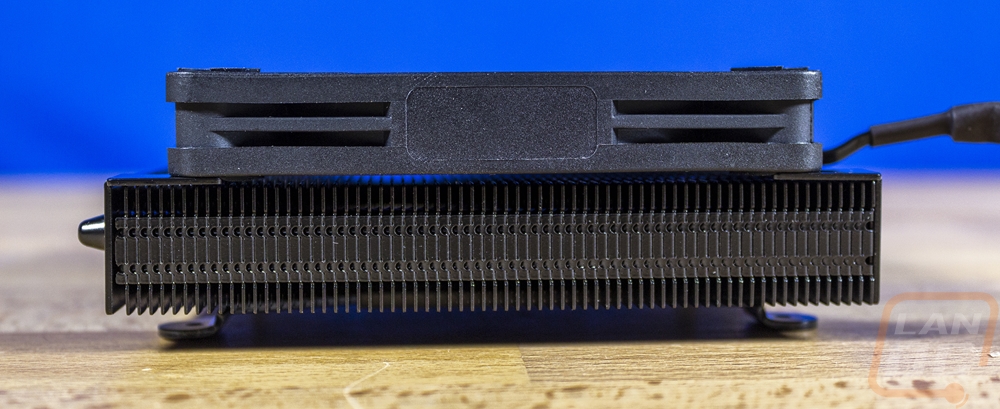
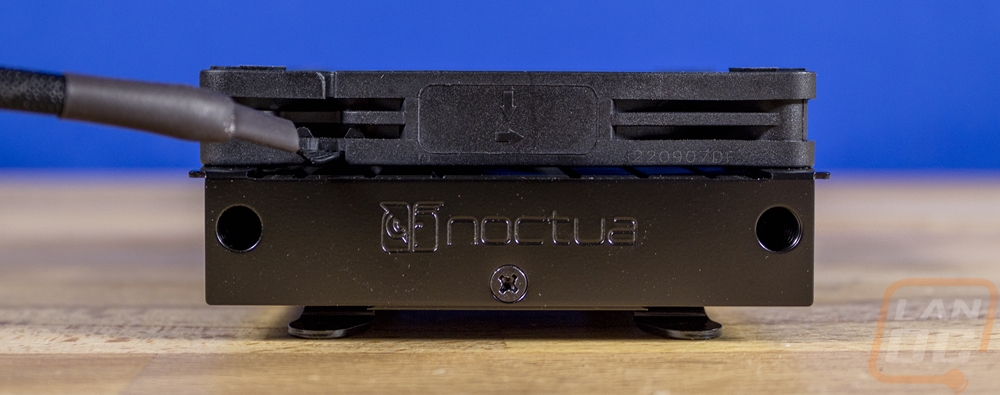
Noctua is able to get the overall height so low because they use the specific CPU brackets, not their universal design which has a bracket that then attaches to another bracket on the cooler. You can really see this when looking at both from the side profile. The bracket is just below the heatsink and the fan is nearly as thick as the cooler as well. Both ends of the cooler have holes for the heatpipes but they only stick out on one end. The heatpipe design is U shaped with two in total. They sit over the CPU then run to the end where they don’t stick out and turn around and run near the outside and out the other end. You can see them slightly in the pictures later looking from the bottom. The extra length of the cooler does extend past the size of the fans and the fan brackets start on the ends and have the Noctua branding on them and wrap around the top tightly. The standard model has the nickel-plated finish for the heatsink whereas the chromax model has it all blacked out including the fins themselves which Noctua is careful to make sure it is all black brackets and all.

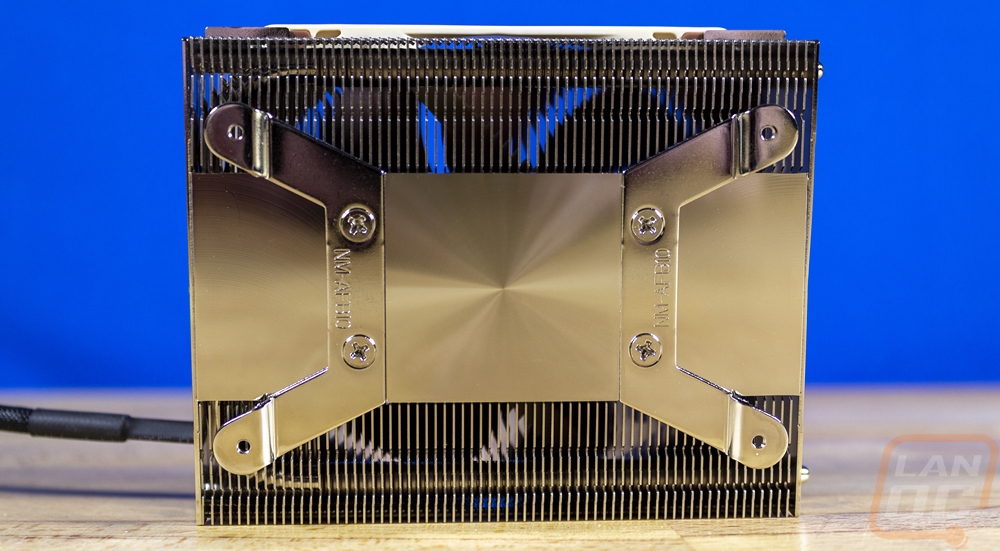
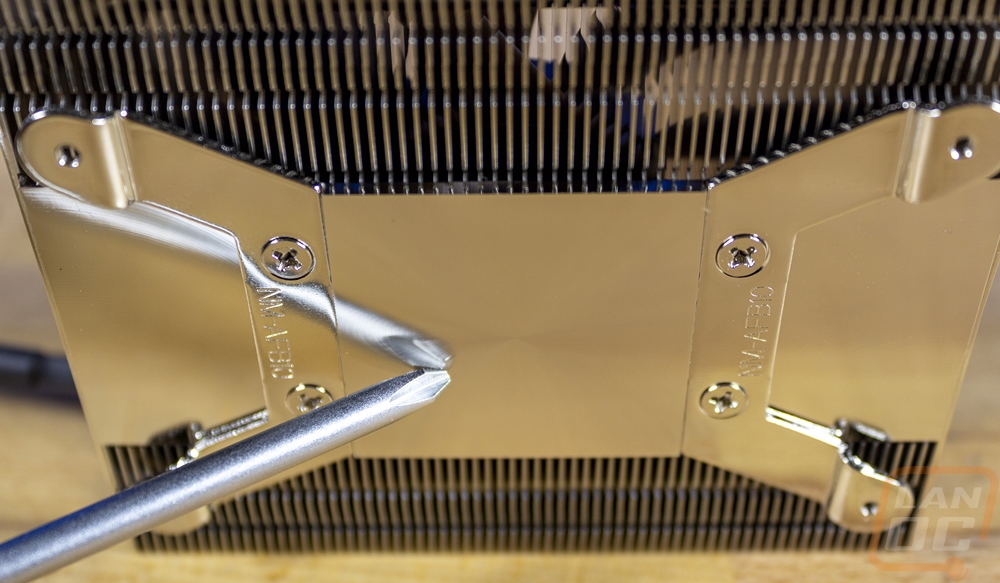
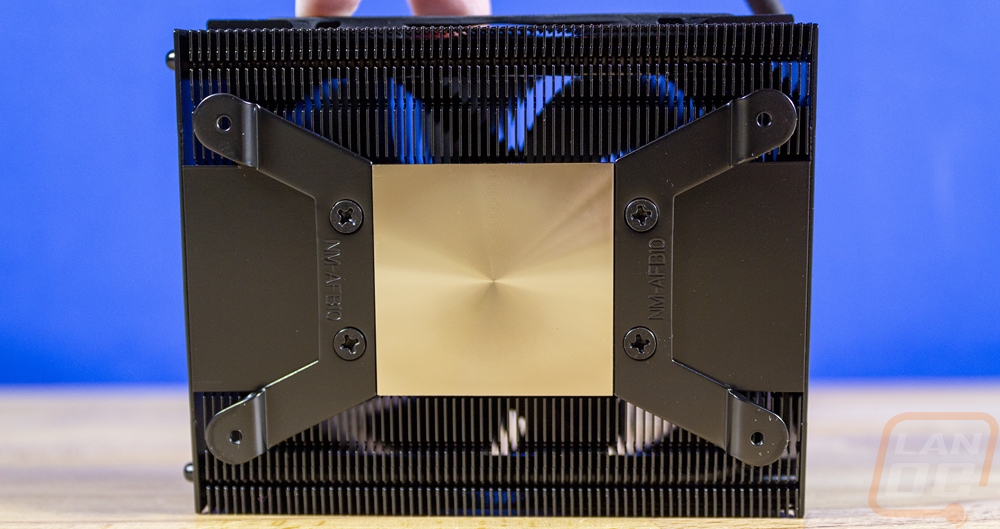
The bottom view gives us a peak at the heatpipes through the heatsink itself. But it’s really interesting to see the bracket design with how flat and compact it is. They are screwed on and can be changed out. Noctua has offered upgrades for these with new sockets as well which can be comforting if you are worried about being locked into one socket. That said at this point AM5 is still very new and we know it will be around for a while. The chromax model is blacked out across the brackets with just the CPU contact surface being the only area that isn’t blacked out. The finish, like with other Noctua coolers, isn’t a full mirror finish as you can see the machined circle design in it but it does still have a good reflection when you put things up against it.
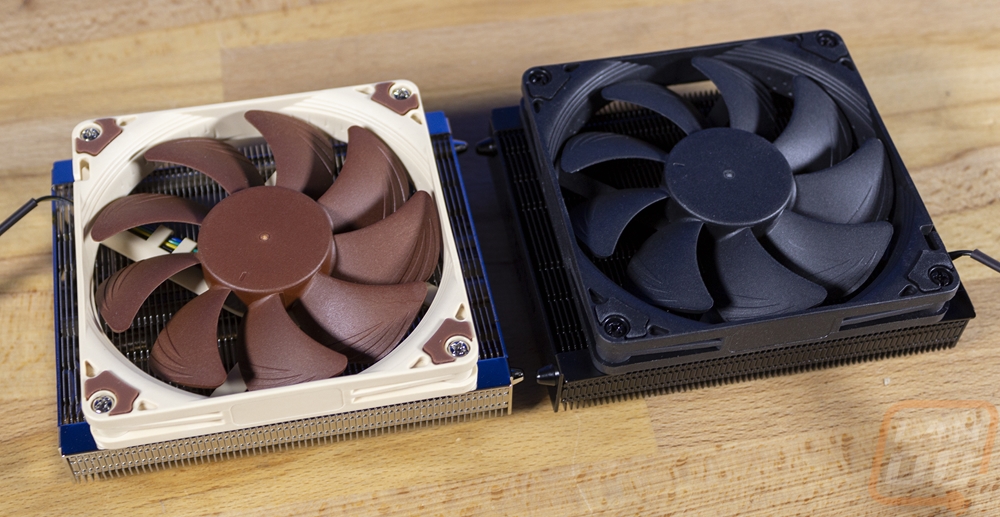
Comparison shot between the NH-L9a-AM5 and the NH-L9a-AM5 chromax.black. While the standard Noctua design has grown on me over the years, I do really dig the lengths they will go to make sure the entire cooler is blacked out and that is going to look better with most builds.
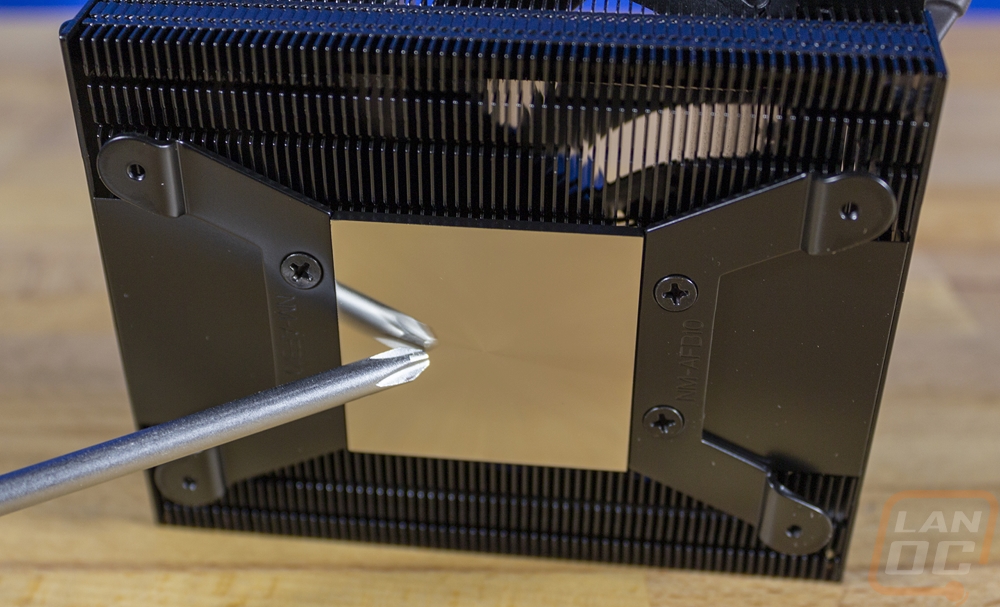
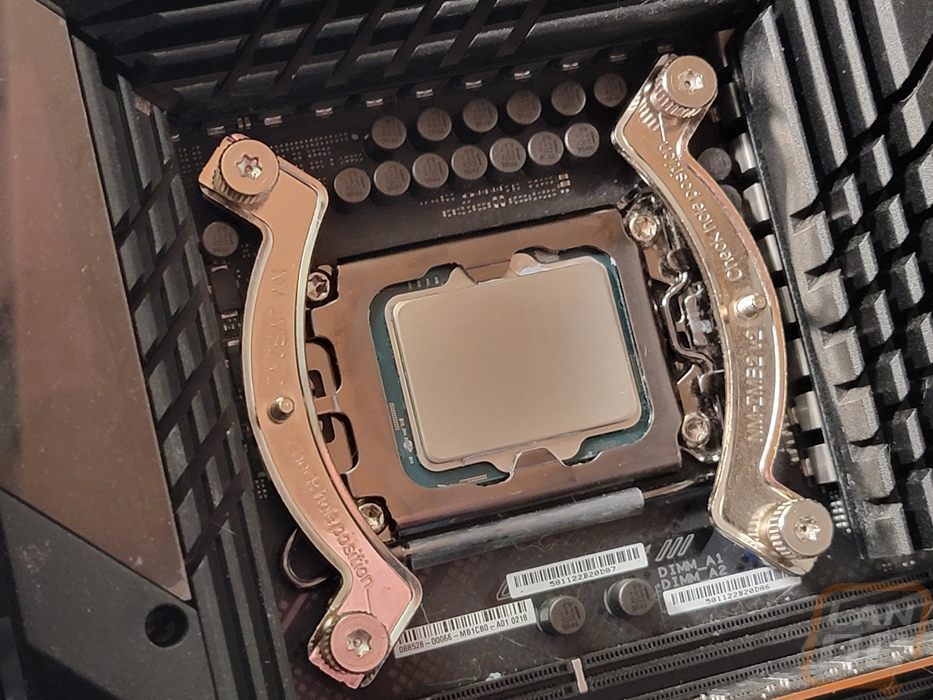
Installation of both of the NH-L9a-AM5 coolers is exactly the same. The new AM5 design is a little different than in the past, however. Part of keeping it so compact, they drop the bracket you install on the motherboard altogether and you just put your thermal paste on the CPU and run screws from the bottom. In the past, you would remove the AMD brackets and backplate and use the included backplate replacement but with AM5 you can’t remove the backplate anymore. The four screws that hold the plastic clip holders have to be removed. But there are still four screws that hold the new LGA bracket which screws into the backplate as well. So the normal thick Phillips screws that past NH-L9a coolers used wouldn’t work this time around. The new screws are thinner and have an Allen head. This is because they slide in through the screw holes in the bracket for the stock tie down.
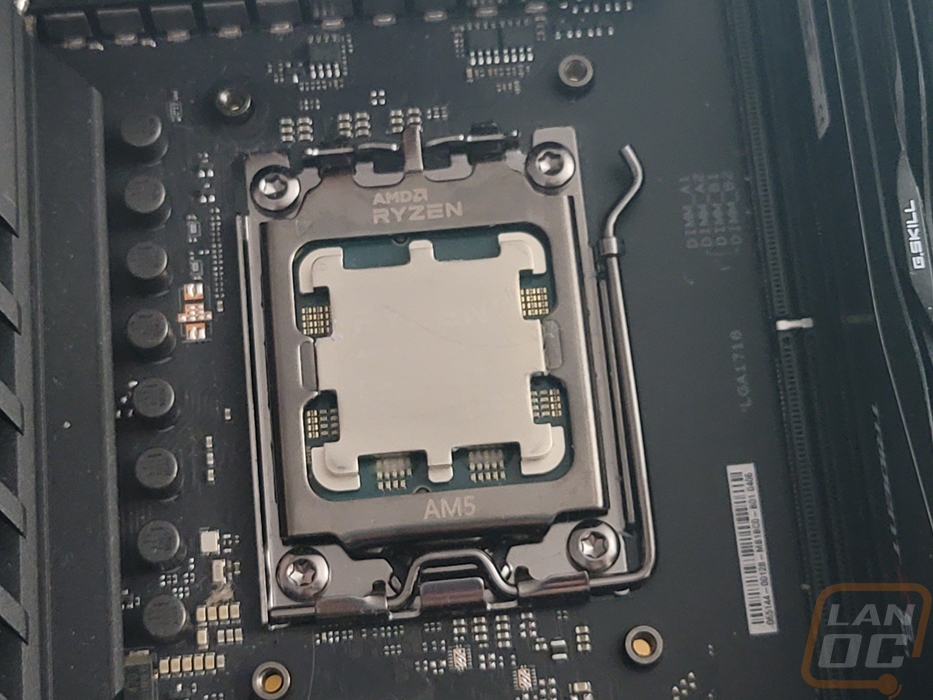
Now I’m testing the NH-L9a-AM5 on a full-sized board which makes it look even smaller. But the design is great in that you don’t have to worry at all about memory fitment or anything else because it fits over the CPU socket area and nothing else. It is as short as memory without heatspreaders so height isn’t an issue as well. So when used with an ITX motherboard you make a compact design with the cooler and ram no higher than the rear I/O height.
The NH-L9a-AM5 isn’t designed to work with the higher-end 125-watt or even 170-watt CPUs but Noctua does have a comprehensive breakdown of CPU compatibility for the two coolers. I didn’t want to go through each and every model but I did get out the Ryzen 5 7600 and the Ryzen 7 7700 which are both 65-watt CPUs to get a look at the cooler's performance. There wasn’t any point in testing both so I went with the base NH-L9a-AM5. For testing, I tested using the AIDA64 Stress Test with the CPU workload and again with the FPU workload. In my experience, the CPU workload is more like what you will see when gaming and other normal activities and the FPU is more like rendering and other heavy workloads. I did document both temperatures as well as clock speeds because cooling makes a big difference in overall clock speeds on these CPUs especially. The NH-L9a-AM5 handled both CPUs with the CPU workload but you can see how the FPU workload put a strain on things. I did also test with the stock fan profile and at 100% fan speed but that didn’t make any difference with the 7700 and the difference was small on the 7600 as they are both still pushing the NH-L9a-AM5 close to its limits. The 7700 has a boost clock of p to 5.3 GHz and the 7600 is 5.1 GHz so you can see in the clock speeds that both don’t reach their maximum potential in the tests but the 7600 does get close when it comes to the CPU workload.
|
Fan Speed |
CPU Diode Temperature |
Clock Speed |
|
Ryzen 5 7600 CPU Workload |
||
|
Stock Fan Profile |
84c |
4975 MHz |
|
100% Fan Speed |
79c |
5000 MHz |
|
Ryzen 5 7600 FPU Workload |
||
|
Stock Fan Profile |
95c |
4398 MHz |
|
100% Fan Speed |
95c |
4425 MHz |
|
Ryzen 5 7700 CPU Workload |
||
|
Stock Fan Profile |
85c |
5073 MHz |
|
100% Fan Speed |
84c |
5073 MHz |
|
Ryzen 5 7700 FPU Workload |
||
|
Stock Fan Profile |
88c |
4173 MHz |
|
100% Fan Speed |
87c |
4173 MHz |
When testing I also took a look at noise levels and documented them. I tested at 50% and 100% fan speeds themselves then also tested what the noise levels were when using the AIDA64 CPU workload after a half hour. The NH-L9a-AM5 isn’t loud even with the fans cranked up, which is good because when run under constant load with the AM5 CPUs it does push the coolers limits and has it running close to 100% fan speed for the 7600 and at 100% fan speed for the 7700 as you can see.
|
Fan Speed |
Decibels |
|
50% Fan Speed |
34.4 dB |
|
100% Fan Speed |
41.5 dB |
|
Under Load w/Ryzen 7600 |
40.2 dB |
|
Under Load w/Ryzen 7700 |
41.6 dB |
NH-P1 Passive CPU Cooler
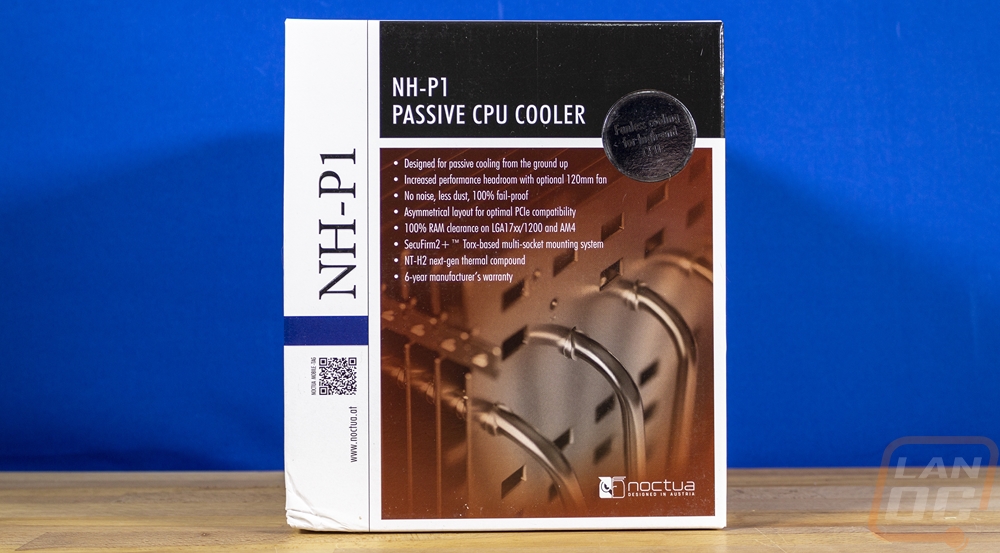
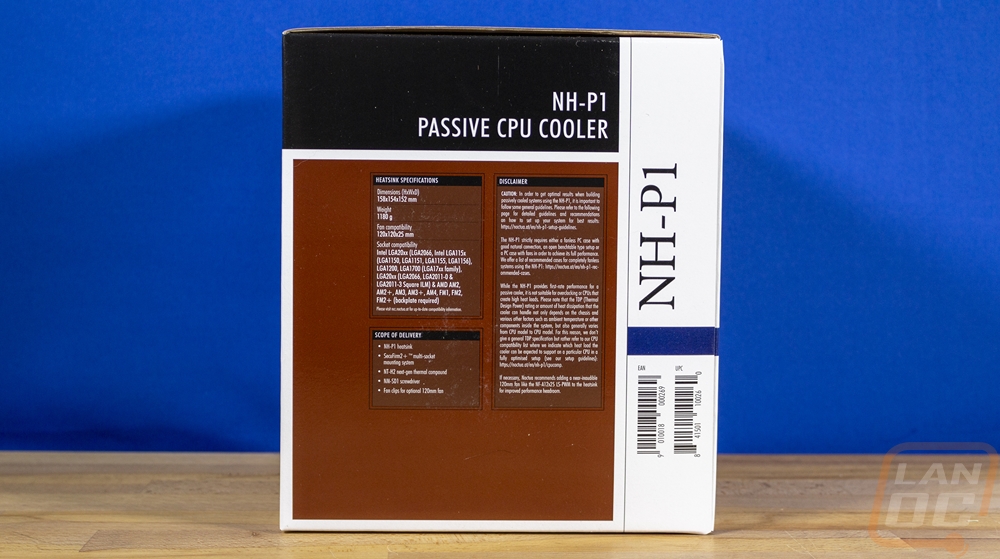
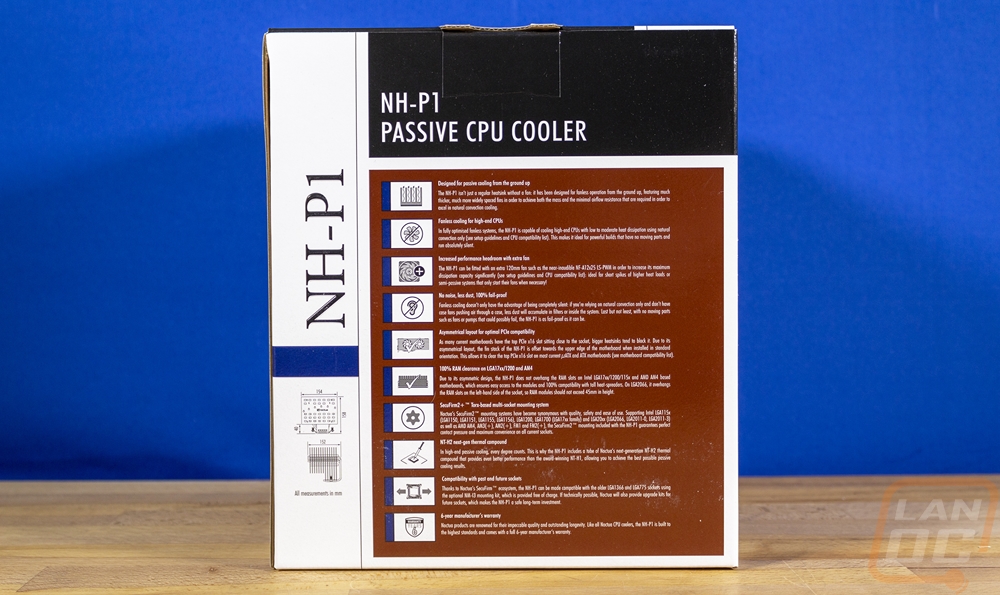
The box for the Noctua NH-P1 cooler is huge, which shouldn’t come as too much of a surprise. It also has the standard Noctua theme on the outside. This includes a zoomed-in photo of the heatsink which has been given a brown tint and has a list of the coolers key features listed down it on the front of the box. The NH-P1 model name is on the left in the white and is repeated again in the black at the top along with the “Passive CPU Cooler” portion that better describes what you are getting. Around on the side Noctua has included some of the specifications which at least give you an idea of what you are getting including CPU sockets supported, the dimensions, weird, and a list of what you will find in the box. The back takes the list of features on the front and expands on them with small line drawings and descriptions.
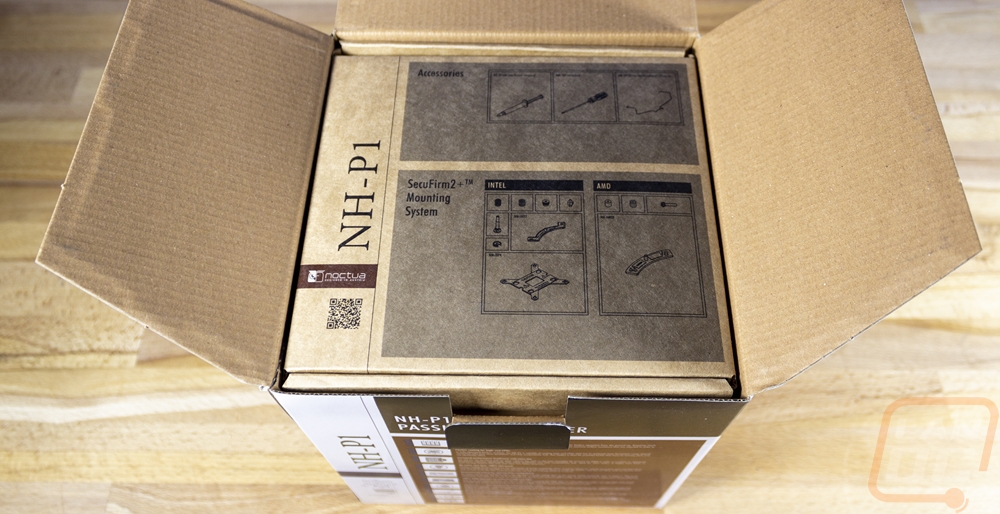
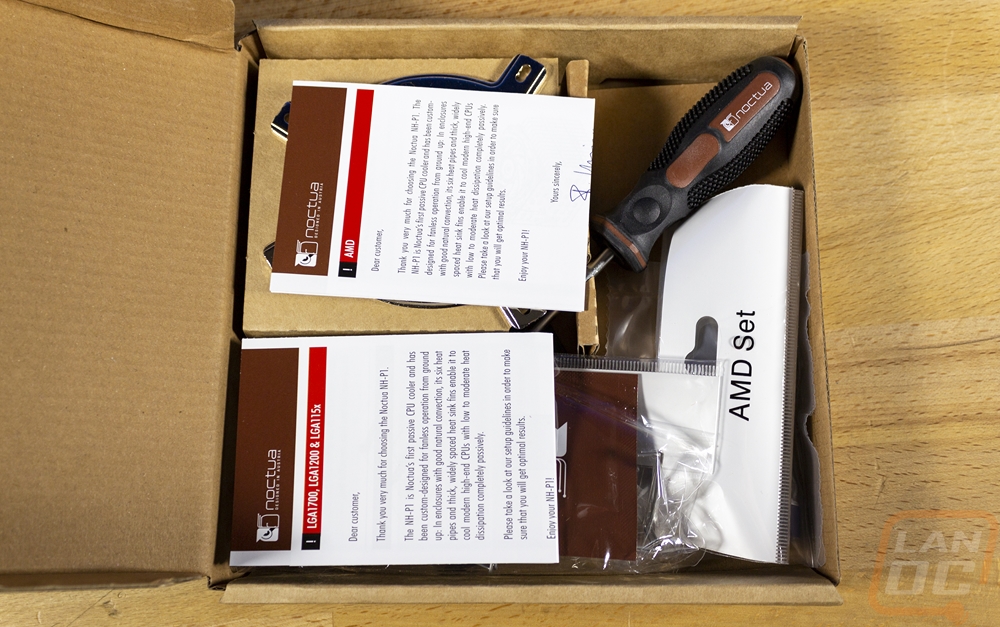
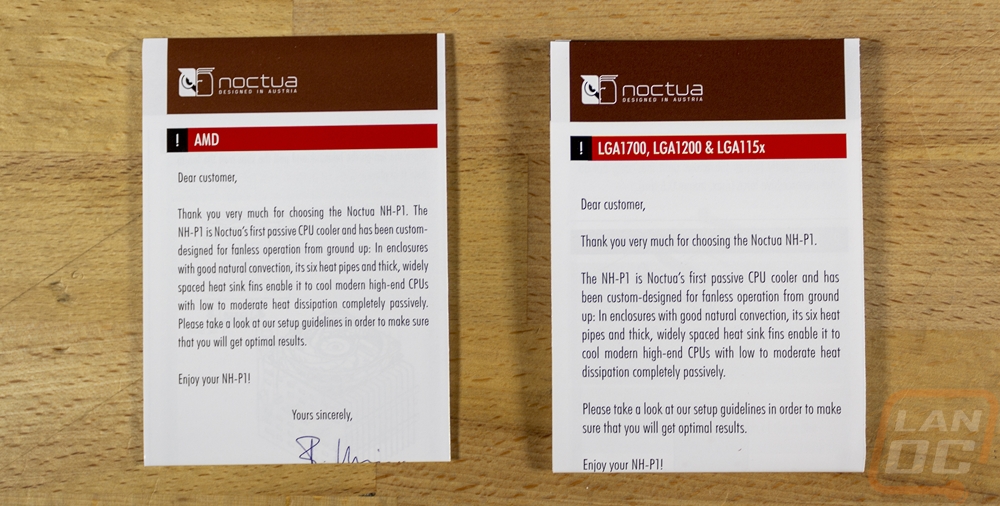
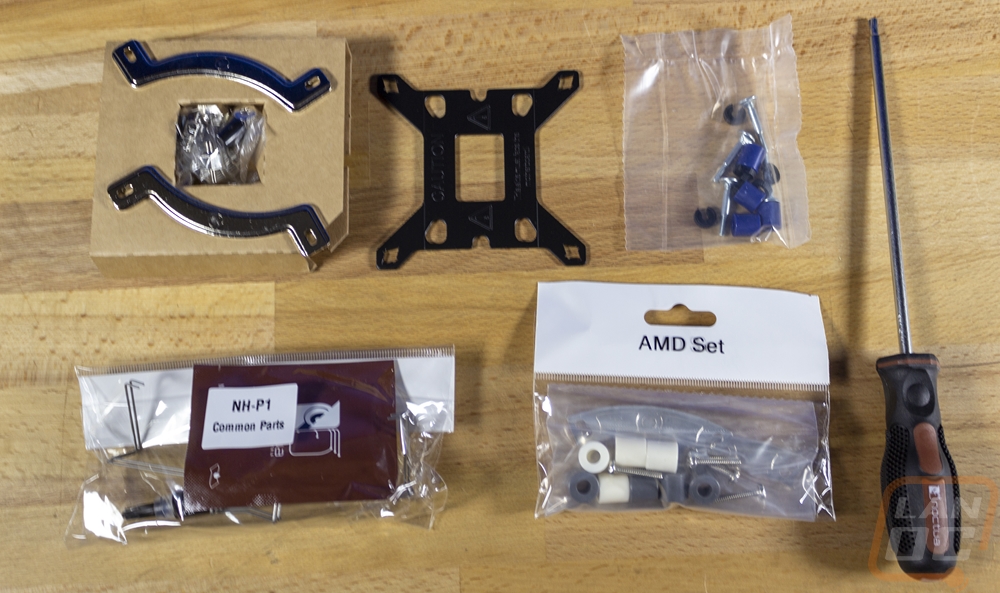
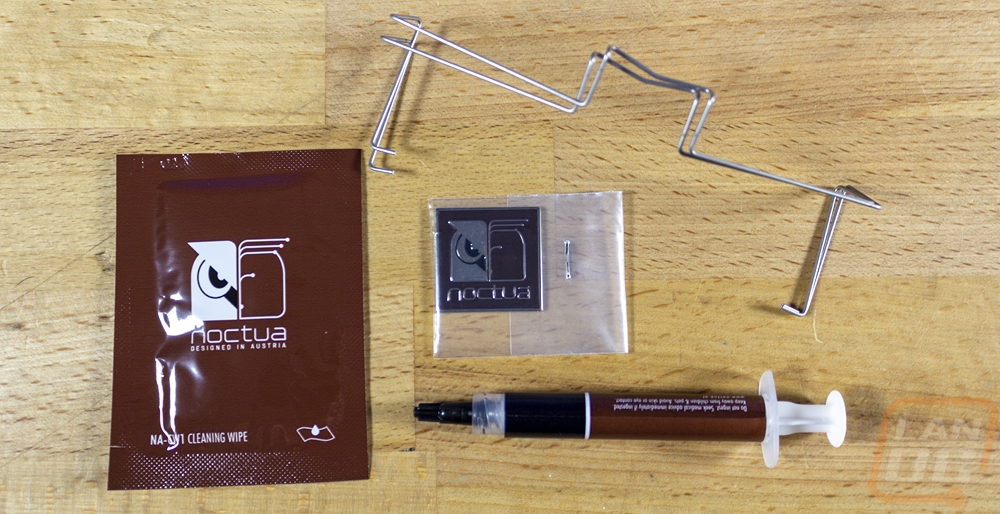
When you open the P1’s box up you will see the accessories box right up on top. Under that is a top cardboard divider that wraps around the top half of the cooler to keep it from moving around and there is a second half which is at the bottom of the box doing the same thing to keep it all secure and safe. The accessories box options up and has two folded-up papers right on top. One is the installation instructions for AMD and the other is for Intel installations. Below that they have three different bags, one backplate, and a cardboard box which has brackets poked into it at the top and a fourth bag stuffed into the hole in the center. Normally Noctua has everything divided up and labeled and you can see they still managed that with the common parts bag and the AMD bag but the Intel mounting parts are spread across two bags, the backplate, and the brackets in that box. There is also a T20 Torx screwdriver, this was a big surprise to me. Noctua always includes a basic screwdriver without a handle but because of the length needed for the NH-P1, this cooler has its own full screwdriver with a nice Noctua-themed handle. The common parts bag comes with one full tube of thermal paste, two fan brackets, one cleaning wipe, and the metal case badge. Noctua’s case badge is always a few notches ahead of everyone else's with its thick painted metal design. But they also go above and beyond with the full tube of thermal paste and a cleaning wipe which can clean things up if you want to refresh your paste.
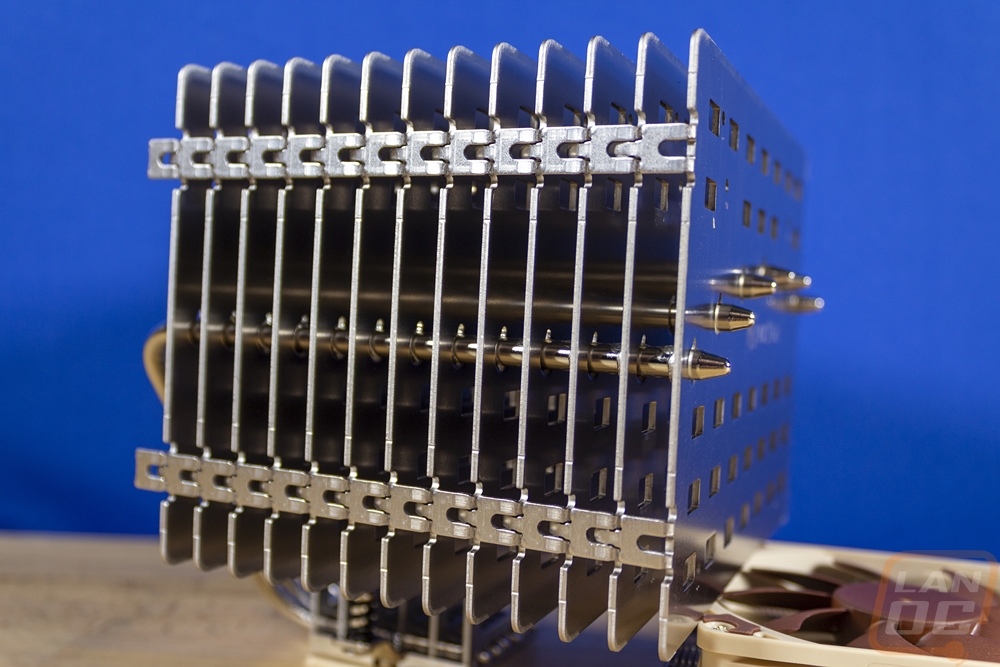
The Noctua NH-P1 is a completely passive heatsink and doesn’t come with any fans though it does have fan brackets included for additional cooling. It manages this with its overall size which is well behind the size of other Noctua heatsinks. It is 158 mm tall, 154 mm wide, and 152 mm deep and the overall size combined with much thicker aluminum fins has its total weight at 1180 grams.
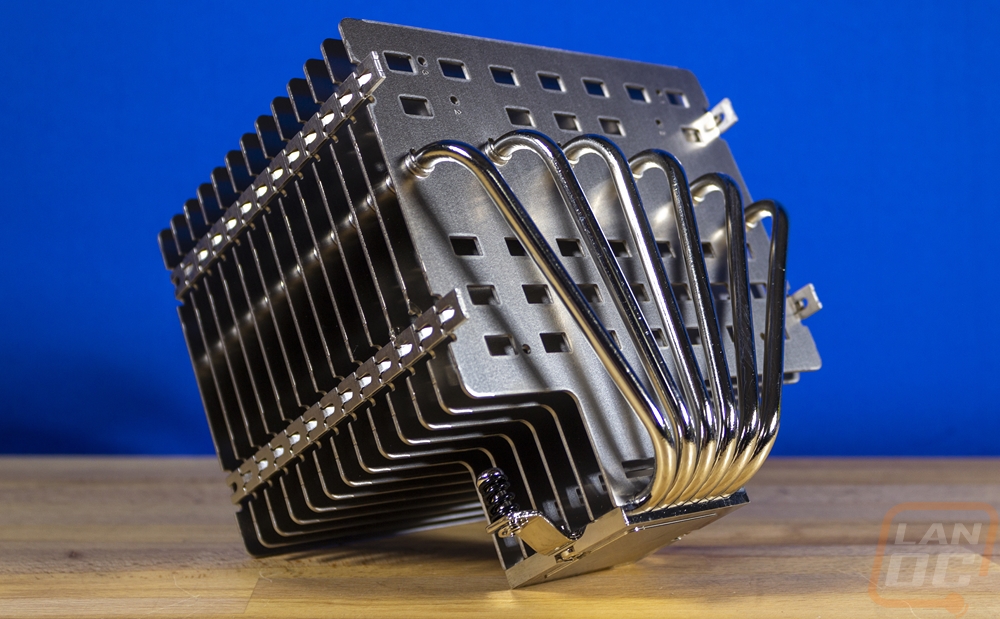
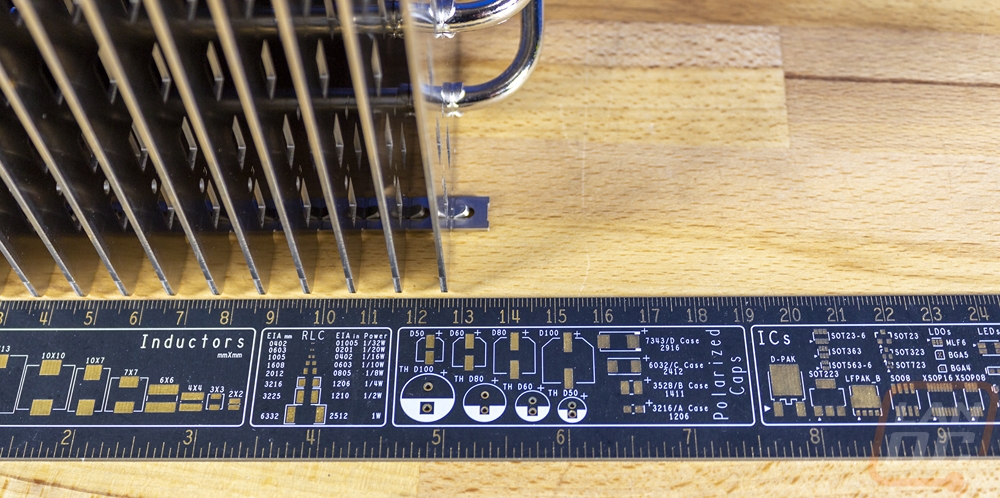

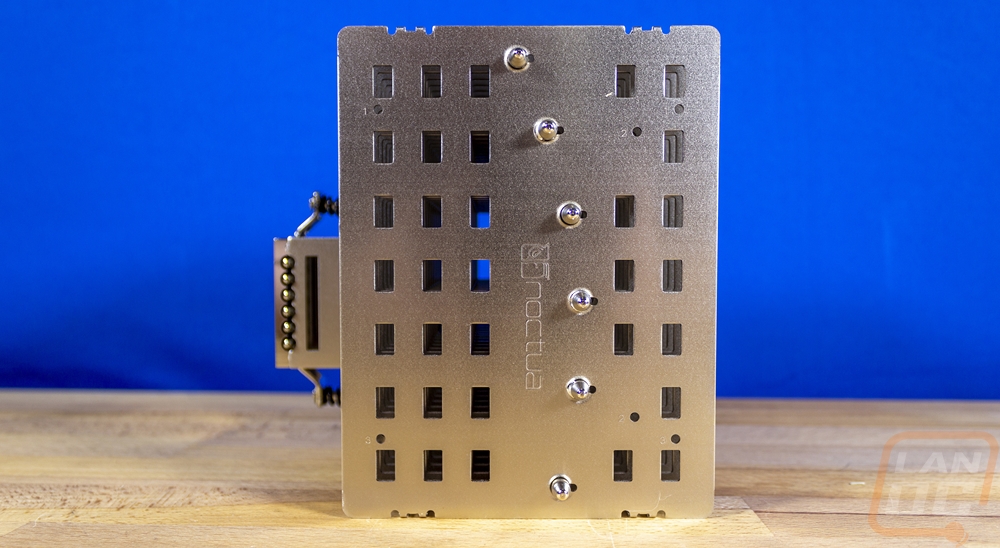
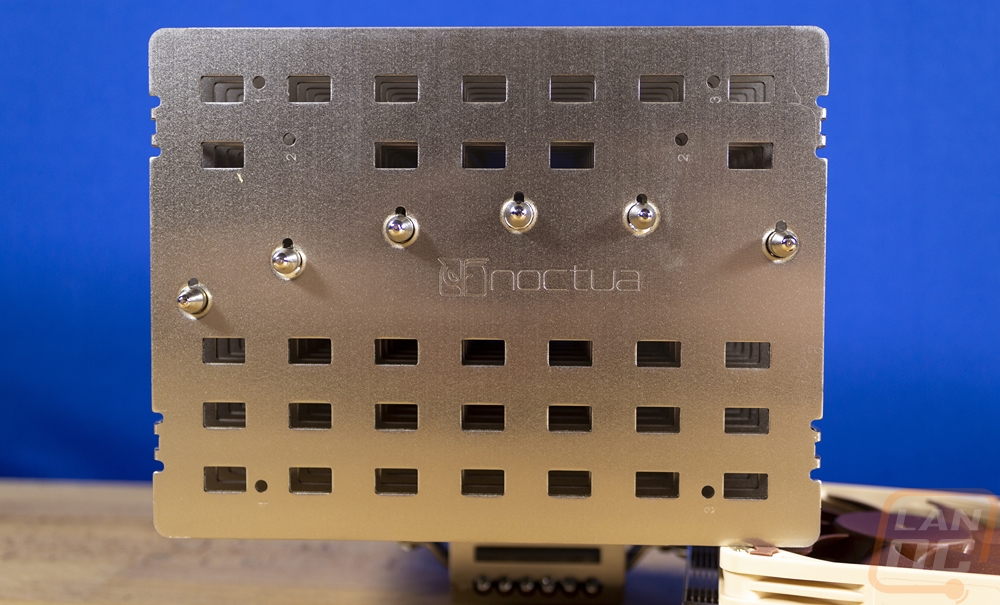
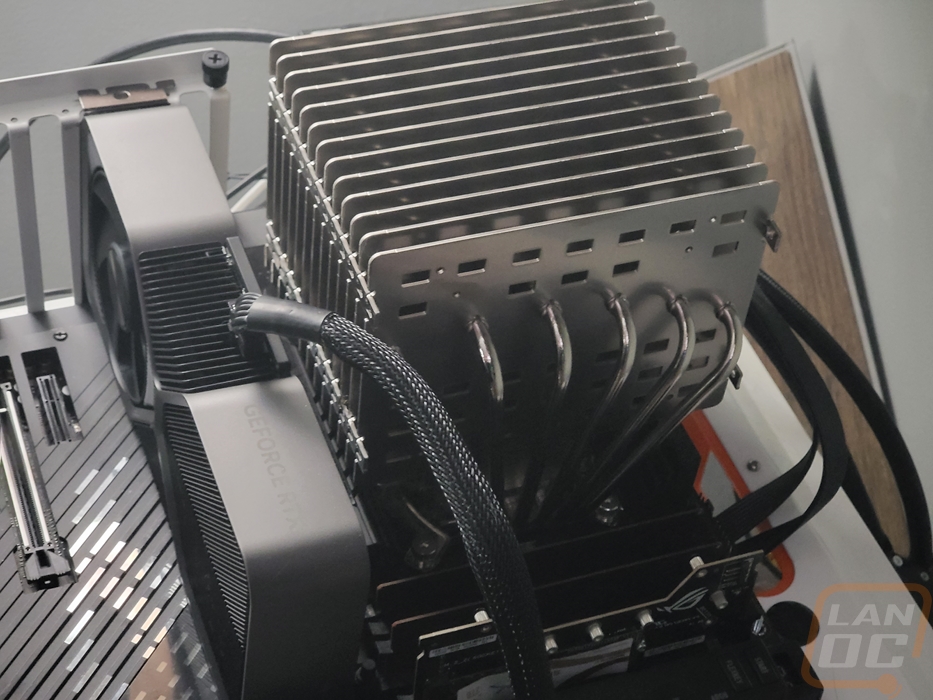
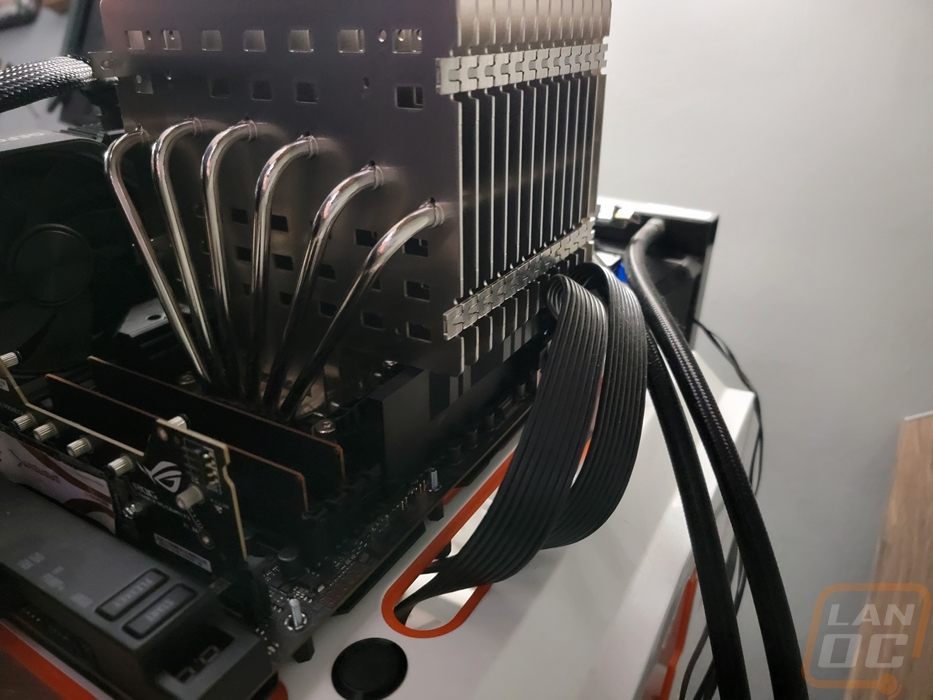
The much thicker heatsink fins were the most notable change from a normal Noctua heatsink but with that, the fits also have very large gaps between them. Where a normal cooler is designed to get the most surface area for the fan to blow through and pull the heat out, this design needs to have room for passive airflow, hence the much larger gaps. They use six large nickel-plated copper heatpipes to pull heat out from on top of the CPU socket and out across the large heatsink and those heatpipes run directly up from the CPU area with a design that doesn’t jet out over top of the memory at all. Instead, the heatsink design goes over top of your rear I/O some and over the top of your motherboard's top VRM heatsink as well. The large aluminum fits have a layout of rectangle holes cut in them which give some airflow side to side if for some reason you get air blowing that direction. The aluminum fits have a natural aluminum finish, not the polished finish that other Noctua heatsinks have, and on the far end just under the end of the heatpipes, it does have the Noctua logo etched in it.


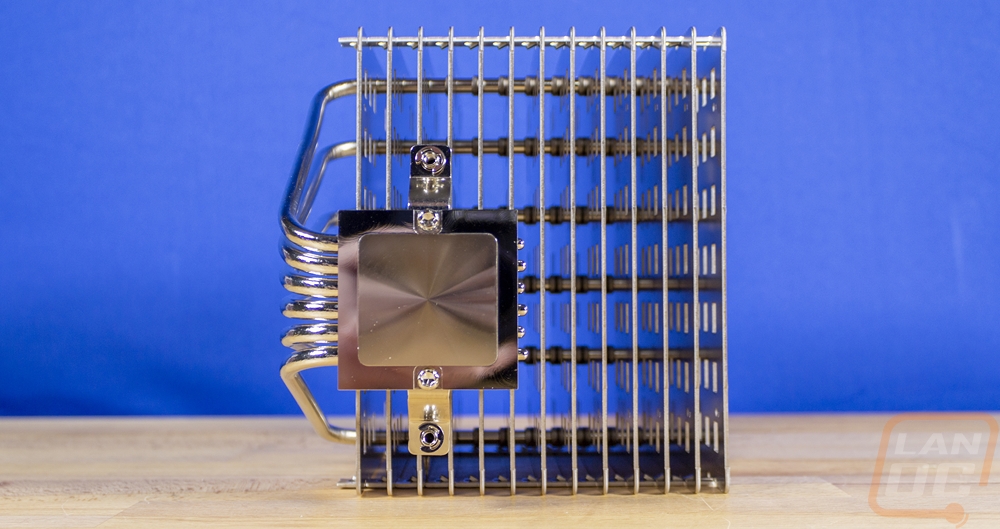
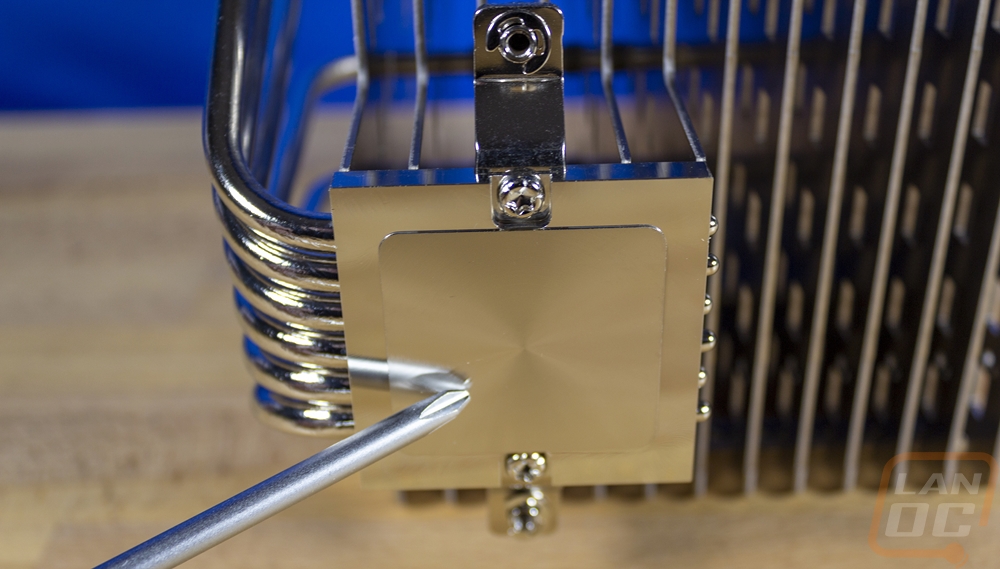
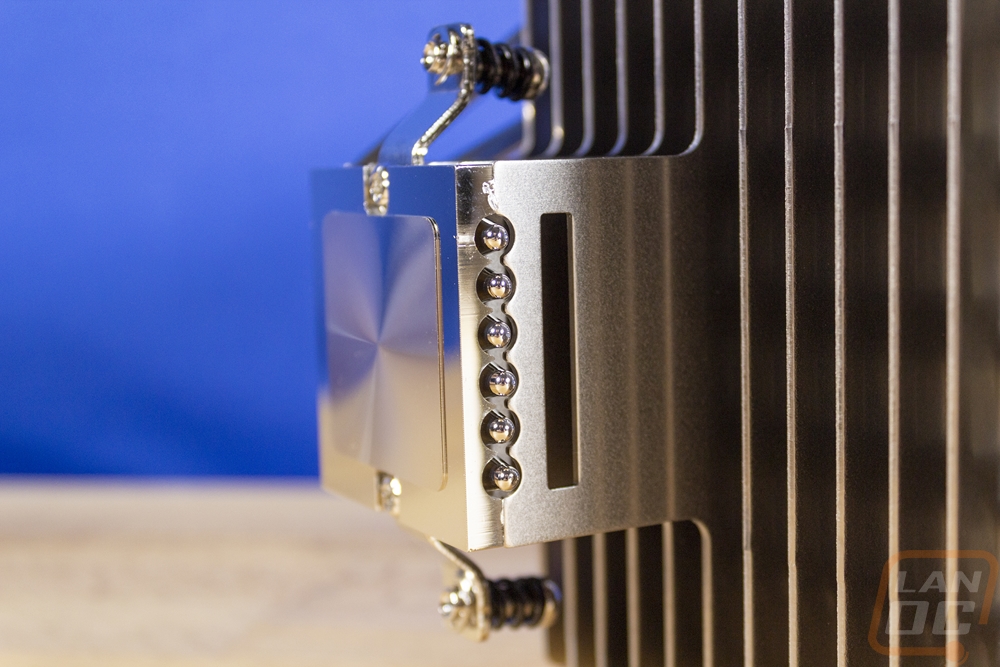
The CPU contact surface has the same machined finish that all Noctua coolers have which isn’t a mirror finish but is close enough to still see a good reflection in it when you put something up against it. The CPU contact area has two brackets coming off of it to mount to the brackets you install on the motherboard. Those have spring-loaded screws to keep the mounting pressure perfect. Beyond that, you can see that the six heat pipes all run right to the top of the contact surface with the nickel-plated copper surface pulling the heat up into the nickel-plated copper heat pipes. On top of that the heatsink itself does drop down on top of that area with a few of the fins to pull any extra heat that ends up in that area up into the heatsink. If you look closely in the last picture you can see that each of those is soldered to the top of the copper heat plate to get the best contact.
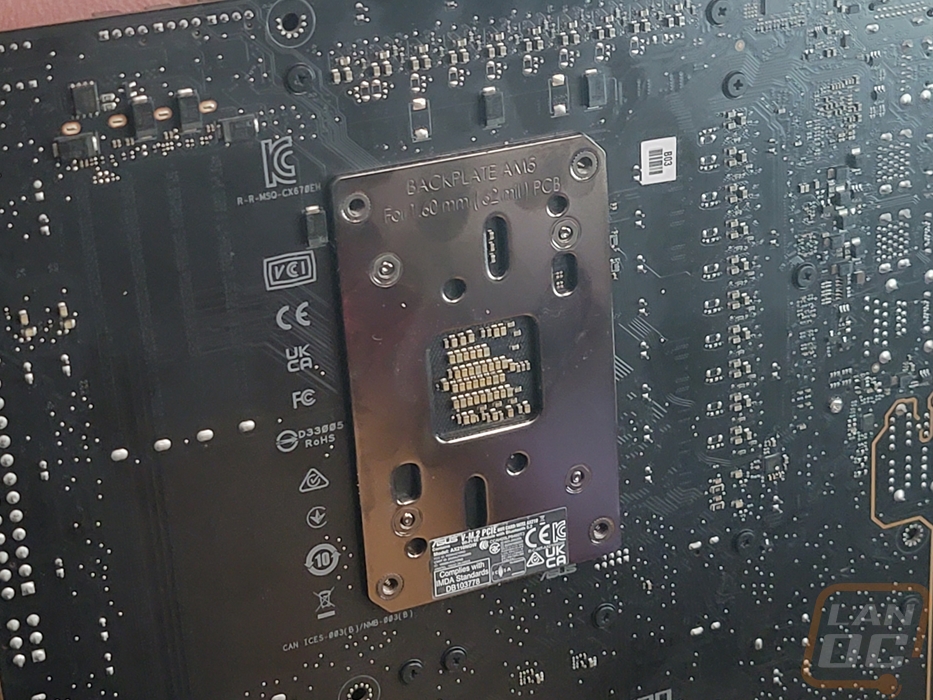
Installing on our Z790 test bench with the LGA 1700 socket uses a mounting bracket design that Noctua has used for years. It has changed over the last few years slightly to better support the multiple socket sizes. In the past, the backplate came with the posts preinstalled but now to fit more sizes you do have to install the posts in the bracket, spinning them around depending on what socket you are using. Once done that pushes up through the holes around the CPU and you have plastic standoffs and then the two mounting brackets that are held on with nuts at the top. The nuts have the T20 Trox head on them that matches the included screwdriver which makes them easy to install. That said with Intels socket getting larger changing out CPUs with this new design now requires taking it all back apart because the brackets cover it up. Not Noctua’s fault really but unavoidable with the larger CPU size and the center mounting locations for the coolers.
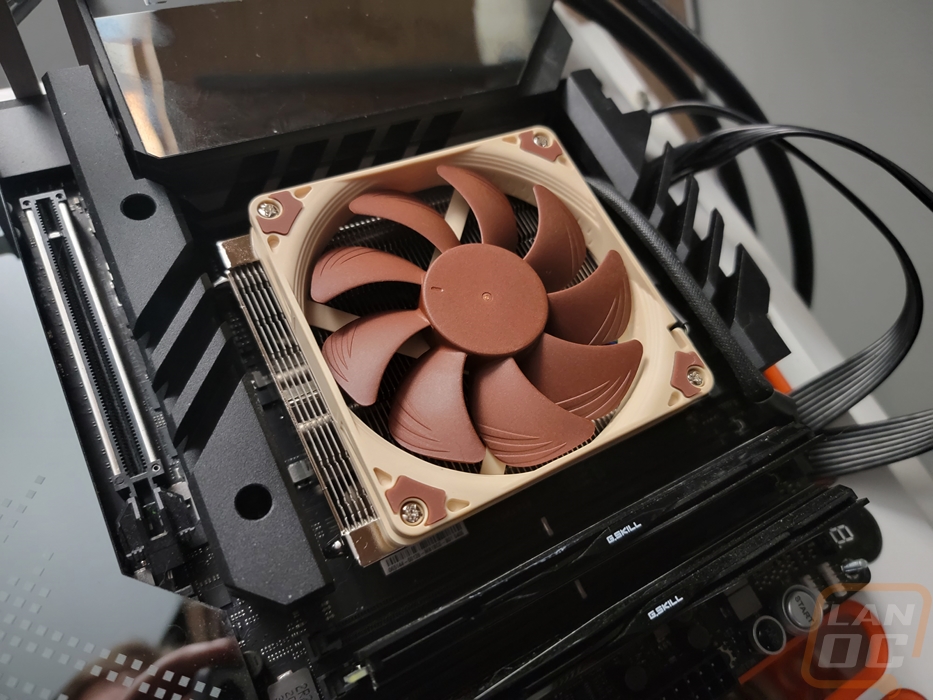
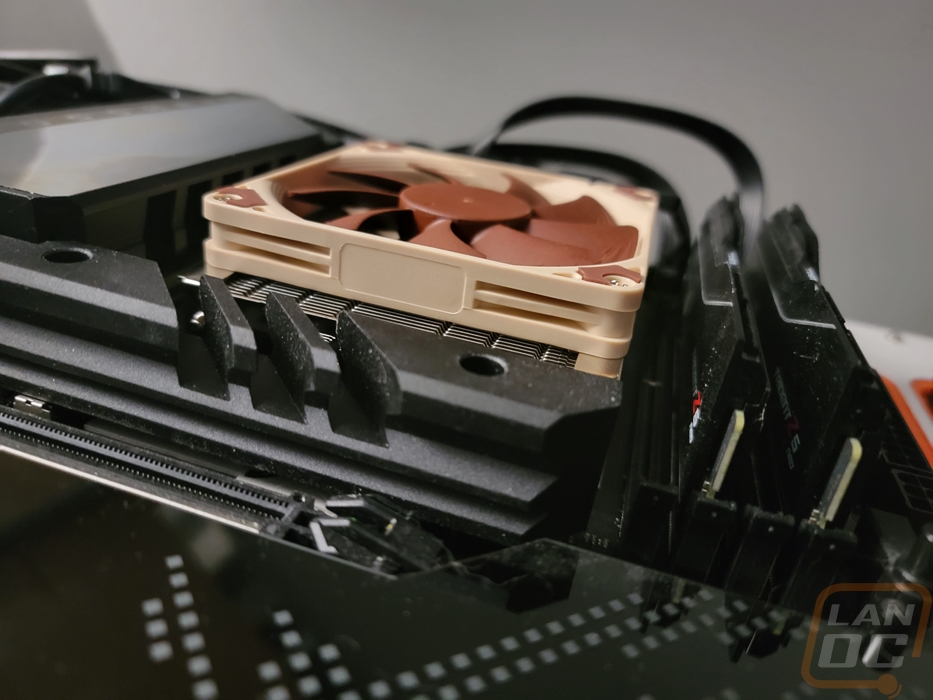
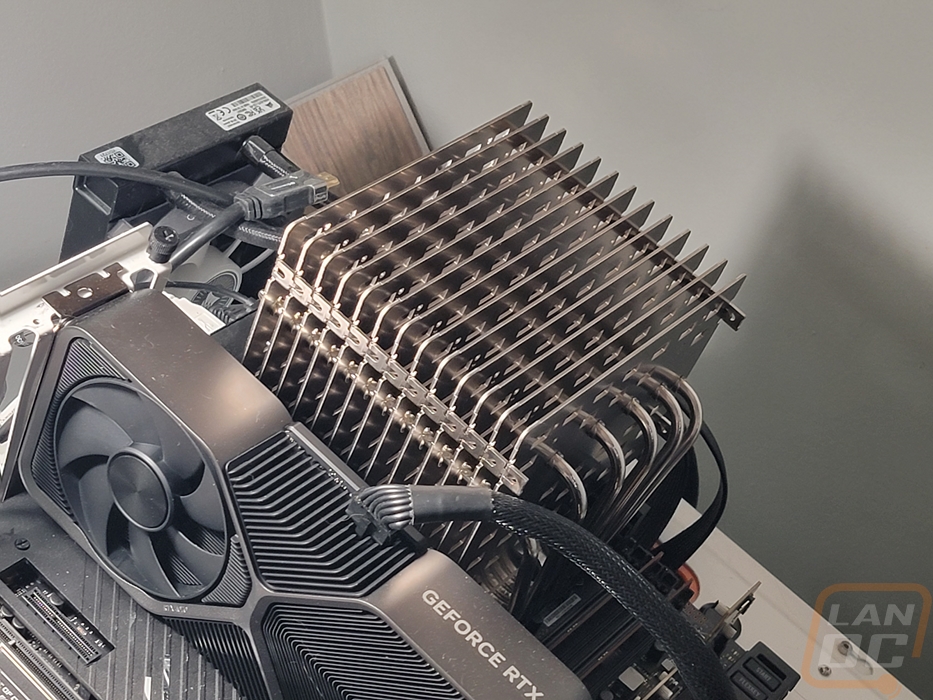
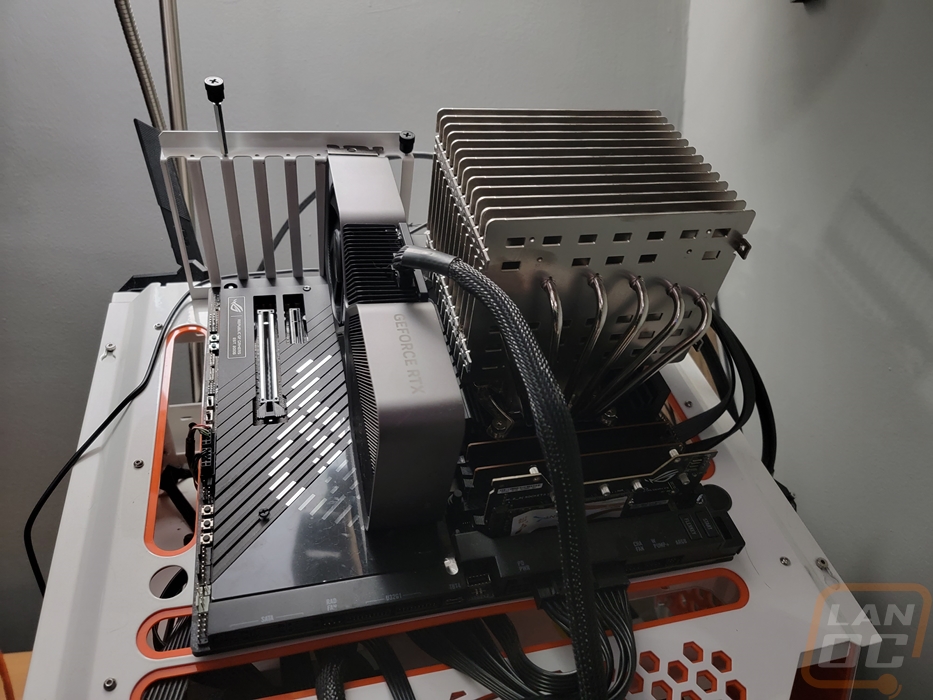
The cooler when installed on our test bench didn’t look any smaller than it did on the table. A few things to note though, the design doesn’t go up over your memory at all so you will always have access to those, I’m surprised that Noctua didn’t try to use at least some of that space though to get even more cooling. With our Asus Z790 Extreme motherboard, the NH-P1 was a tight fit with the heatsink basically touching the VRM heatsink above the CPU socket once it was tightened down. This didn’t cause any fitment issues, but it was tight. Installing the heatsink was a little cumbersome as well with its size and struggling to see down around the mounting brackets. Not having the video card in place helped to see better on the bottom screw at least but this was all on an open air test bench, I imagine it would be even harder in some cases.
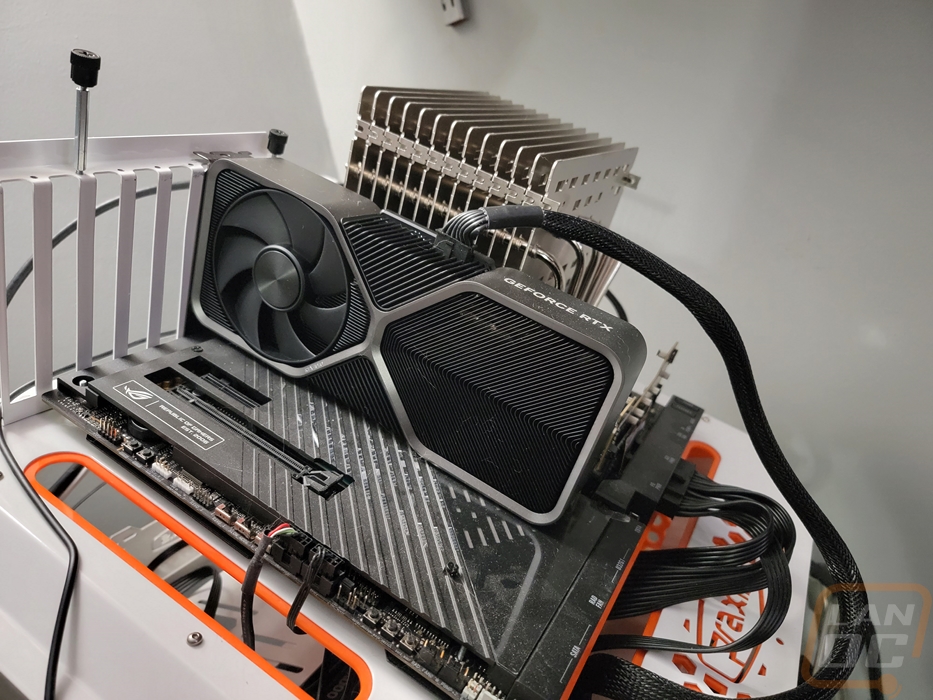
The Noctua NH-P1 is a unique heatsink that isn’t designed to replace your everyday large heatsink or water cooling. This is a passive cooler designed for specific builds where sound is the highest priority and with that Noctua has gone into detail on their CPU support lists for what CPUs are supported and which aren’t I decided to test this on our Intel Z790 test bench and while I didn’t expect to have good results I tested it with the Intel i9-13900K as well as the 13600K. The 13900K struggles with cooling on just about any cooling solution but I was curious if the 13600K might be able to handle things. For my testing, this was on our open-air test bench which is one way to use the NH-P1 cooler but I think the best situations for this cooler are semi-passive setups where you maybe have a case fan that comes on from time to time that will help give some airflow when needed but isn’t direct airflow.
Anyhow for my testing, I should make my settings very clear. These are the same settings I did for our CPU testing as well. Both CPUs have their wattage set for short and long-duration power limits in the BIOS. So for the 13900K that is 253 watts and for the 13600K that is 181 watts. On top of that the current limit or IccMax is set to 307A for the 13900K and 200A for the 13600K. XMP with the 5600 MHz memory kit was on and Asus MultiCore enhancement is disabled to keep the CPU from trying to randomly overclock.
I then tested using AIDA64’s Stress test with the CPU and FPU workloads. The CPU workload is close to what I normally see in gaming and everyday use whereas FPU is more like heavy workloads like rendering. These were run for a half hour until CPU temps leveled off or in some cases until the clock speeds leveled off. This brings me to the last part, for all tests I also documented the clock speeds because these CPUs will quickly max out their temps and then just downclock until things run smooth. This is fine for a cooler like this because a lot of times your heavy CPU loads aren’t going to be for over a half hour long like I am doing here and for those quick bursts you will still get to use the higher clock speeds.
I tested the NH-P1 with both CPUs and both workloads as well as with an added fan to see what that would change. You can see that both workloads with both CPUs did eventually lead to them sitting at 100c package temp and 89c for the CPU temp. The 13900K dropped down to 4600 MHz for the CPU workload and 3900 MHz for FPU where it can normally boost up to 5800 MHz. The 13600K did better at 5000 MHz with the CPU workload, just 100 MHz lower than its 5100 MHz max boost and 4800 MHz with the FPU workload. Adding the fan into the mix helped of course which is why I think a semi-passive case setup is best for the NH-P1 where the case fan can help with that extra airflow when needed but letting the heatsink do its thing for the smaller bursts of CPU load when you open things up and use a PC normally. That said if I were going to run this I think a CPU like the 13600K would be the highest I would want to go but some of AMDs 65 watts CPUs or Intel’s i5’s which use less wattage would be more ideal. Especially if you were looking to run full passive all of the time.
|
|
CPU Package Temp |
CPU Temp |
Clock Speed |
|
13900K Without Fan |
|||
|
CPU Stress Test |
100c |
89c |
4600 MHz |
|
FPU Stress Test |
100c |
89c |
3900 MHz |
|
13900K With NF-F12 industrialPPC-2000 PWM Fan |
|||
|
CPU Stress Test |
84c |
73c |
5200 MHz |
|
FPU Stress Test |
94c |
83c |
4700 MHz |
|
13600K Without Fan |
|||
|
CPU Stress Test |
100c |
89c |
5000 MHz |
|
FPU Stress Test |
100c |
89c |
4300 MHz |
|
13600K With NF-F12 industrialPPC-2000 PWM Fan |
|||
|
CPU Stress Test |
69c |
58c |
5100 MHz |
|
FPU Stress Test |
79c |
68c |
4800 MHz |
|
Idle Temps No Fan |
|||
|
13900K |
51c |
40c |
5800 MHz Max Boost |
|
13600K |
48c |
39c |
5100 MHz Max Boost |
|
Idle Temps with NF-F12 industrialPPC-2000 PWM Fan |
|||
|
13900K |
40c |
36c |
5800 MHz Max Boost |
|
13600K |
40c |
33c |
5100 MHz Max Boost |
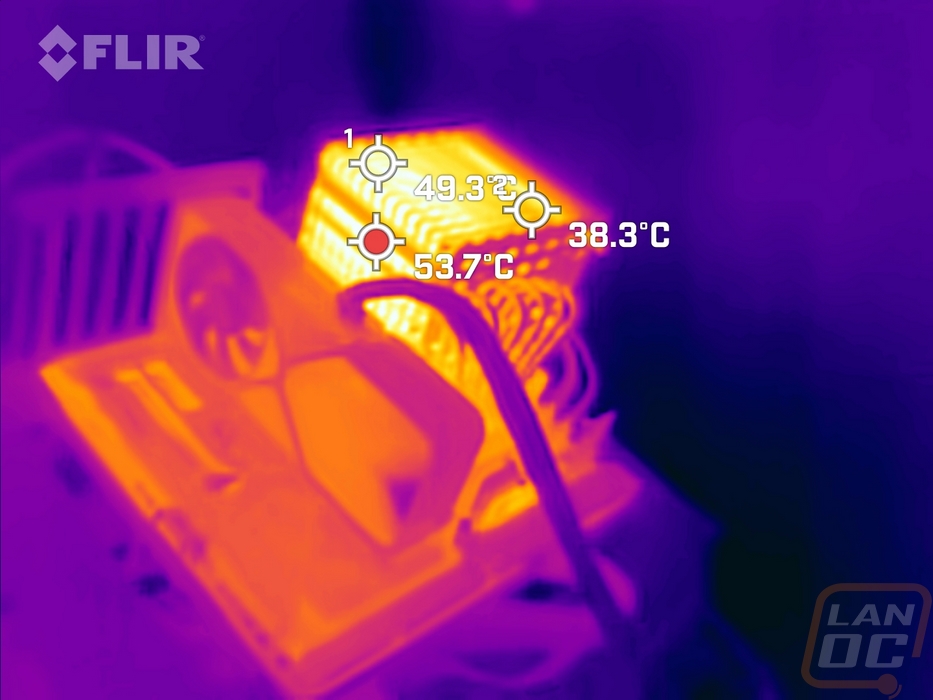
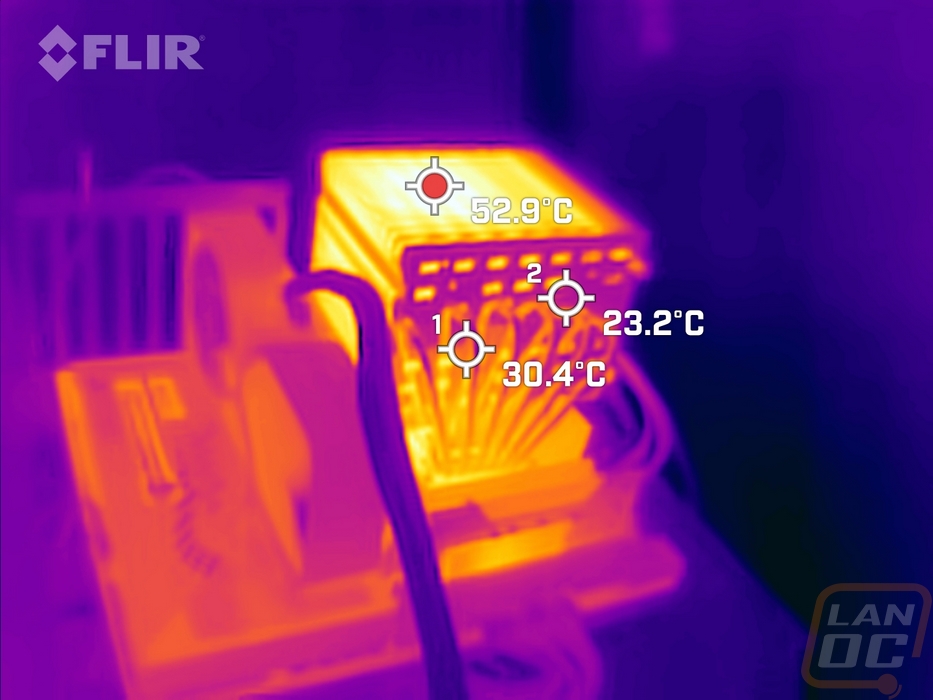
While testing the 13900K with the CPU workload I did get a few thermal images just to get a peak at what the NH-P1 looks like when warmed up. The hottest area is in the center which isn’t a surprise, the outside is getting at least some passive airflow even with our test bench setup which is in a corner with very little airflow.
Inlet Spacers and Gaskets
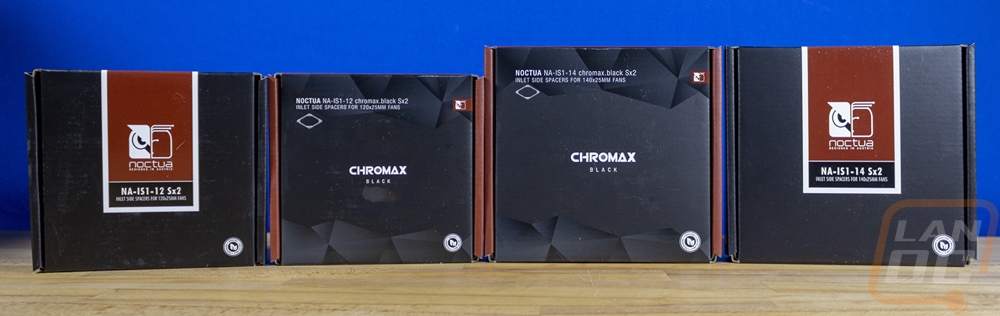
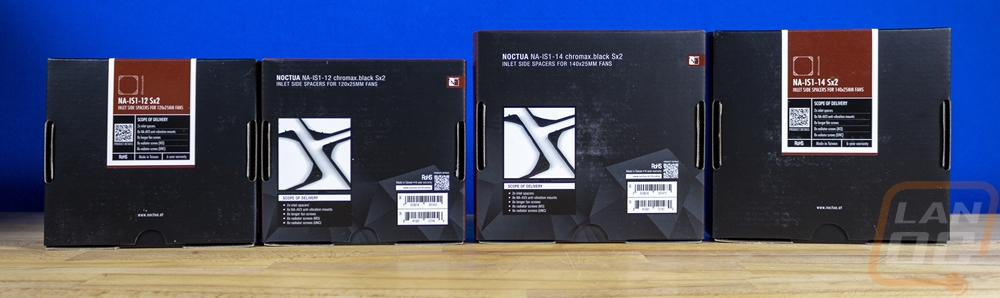
As somewhat of an extension of the foam fan duct kits that Noctua came out with. They have also introduced a few spacers and gaskets. Like the duct kits, these are all designed to help get the perfect fit depending on your setup. For the inlet spacers, Noctua has four different models. They have the NA-IS1-12 Sx2, the NA-IS1-12 chromax.black Sx2, the NA-IS1-14 Sx2, and the NA-IS1-14 chromax.black Sx2. In short, they have a 120 mm size and a 140 mm size with each having a standard Noctua brown model and a chromax model in black. For their packaging, the chromax models have that same blacked-out box with an angular design and brown on the outside edges. The back of the boxes have a picture of the spacers and a list of what comes in the box. The standard Noctua spacers also have black boxes, but that is normal for Noctua accessories. But these don’t have any other design on the box and the only picture is a line drawing on the sticker that wraps around to the back.
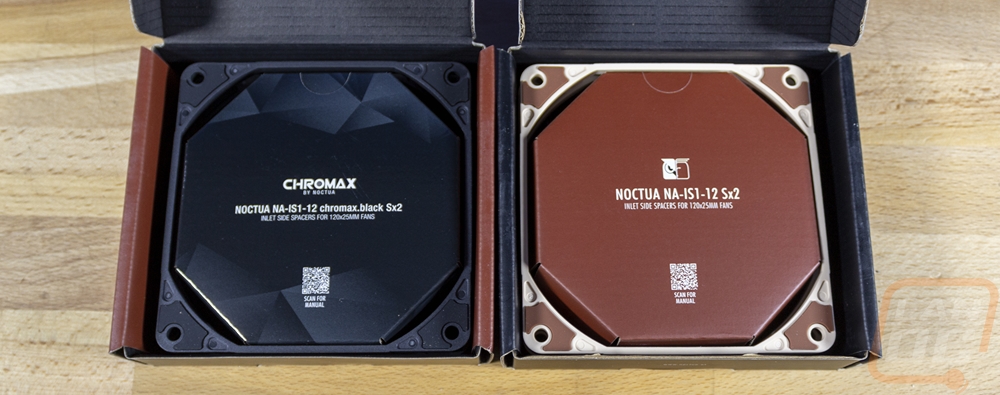
Now while the chromax and standard versions have a different box design on the outside, inside when you open things up the layout is very similar. There is an insert in the middle that covers up all of the accessories. The chromax versions have a black cover and the others have a Noctua brown. These also have the model name and description in the middle along with the Noctua logo and a QR code that you can scan for the manual if you need it. Around that, the spacer itself sits.

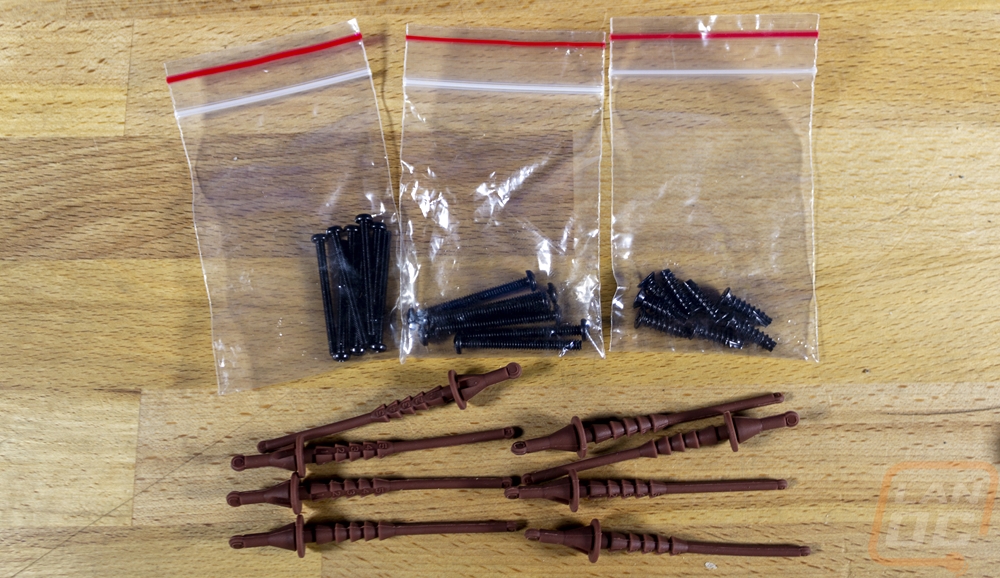
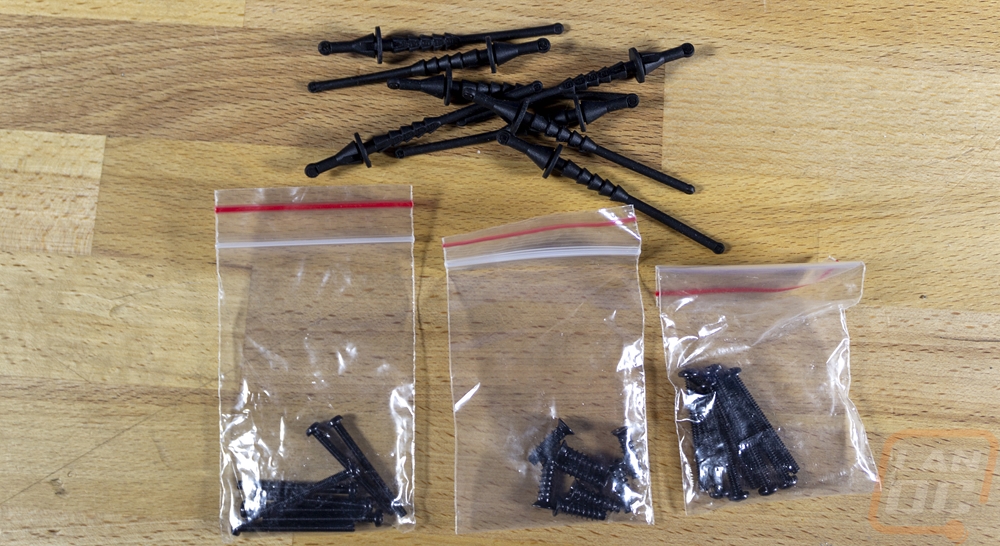
For accessories, they all have the same setup as well. Three small baggies each have four black screws inside. Each of the screws are longer than your standard because they have added the extra thickness of the spacer to the length. One of the screws is your standard fan screw only longer. Then you have two sets of radiator screws. One set is M3 and the other is UNC or a standard course thread. This covers any of the possible screw types you might need and also means you don’t have to worry about trying to figure out what screw and screw length you need. You then also get eight of the NA-AV3 anti-vibration mounts. For those the standard spacers get brown anti-vibration mounts whereas the chromax models get black to match.
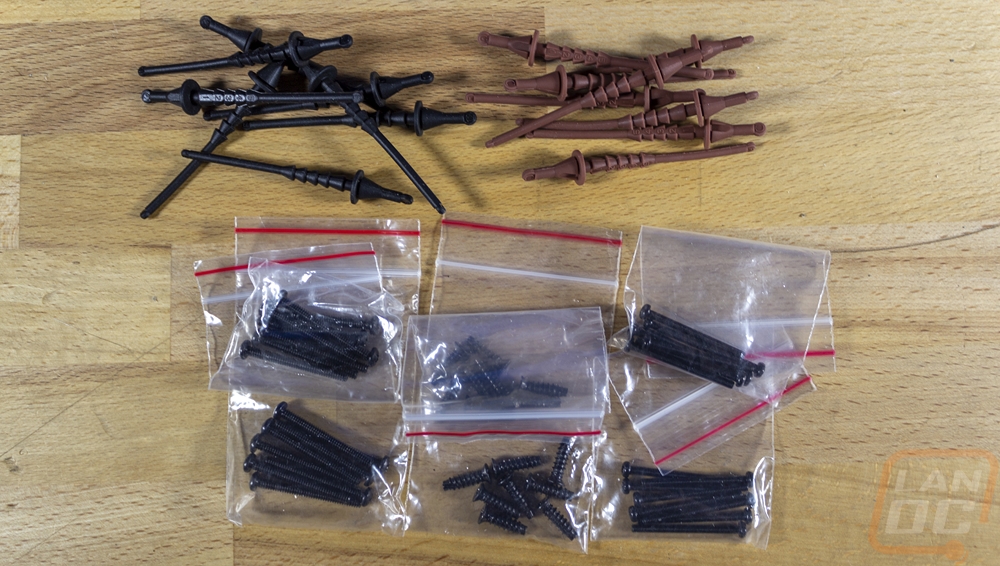
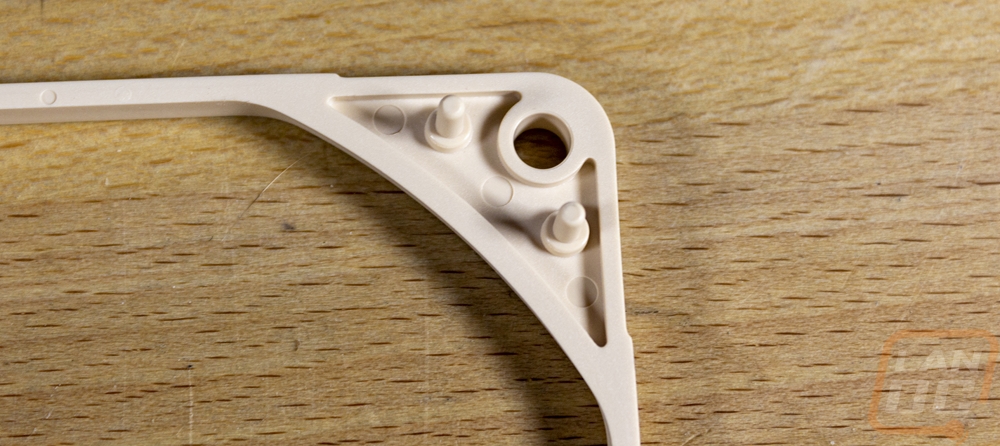
Then from there, you have the spacers themselves. Each pack comes with two spacers and they look a lot like if you just cut the outside edge of a Noctua fan off. All four models have preinstalled rubber vibration pads which aren’t swappable like most of the Noctua fans, they are the thinner stick-on design that Noctua’s thinner 15mm fans use. The standard spacers have dark brown to go with the tan spacer and the chromax models have black pads on the black spacer. From the looks of it, you would be able to swap these out with the chromax NF-A12x15, at least for the 120mm spacer. The back of the spacer is unique however, it has two pegs in each corner which pop into the holes used for your normal vibration pads on the non-15 mm models. This lets the spacer lock into place. Each space is 5mm in total and Noctua has a few specific uses in mind for them. When you are running fans on radiators but flipped to pull air through not push air down through the radiator the spacers offset the fan to help prevent turbulence. The same goes for the same situation with cases and grills which can cause the same issues. Noctua put together some great examples comparing the noise and performance improvements you can see when using a spacer with round holes, hexagonal holes, and slit-style holes as well as radiators. Both are a situation that you might not suspect that performance or noise could be affected.

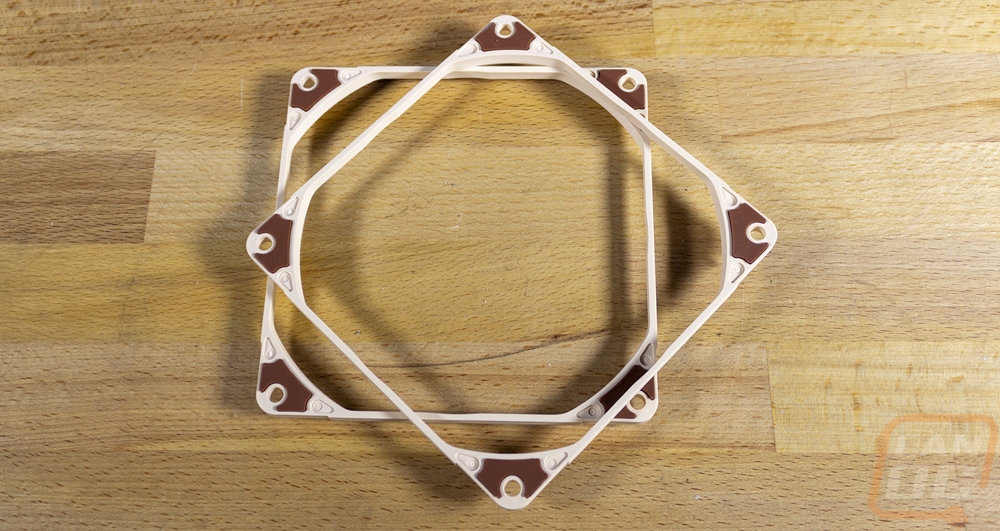
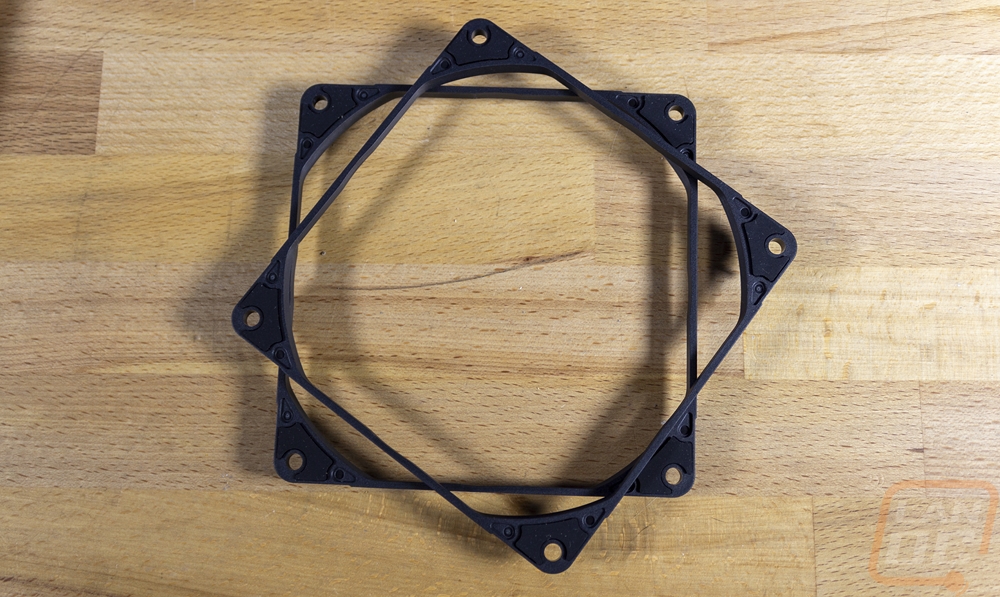
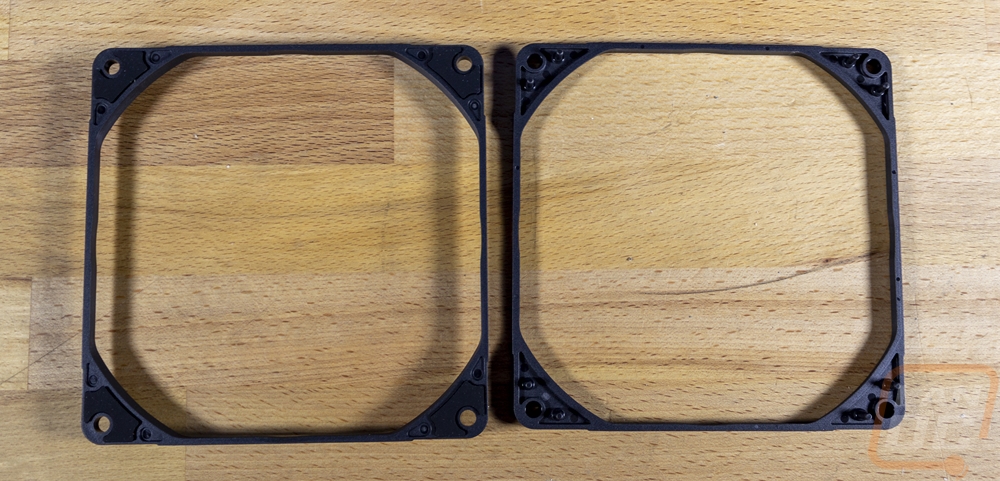
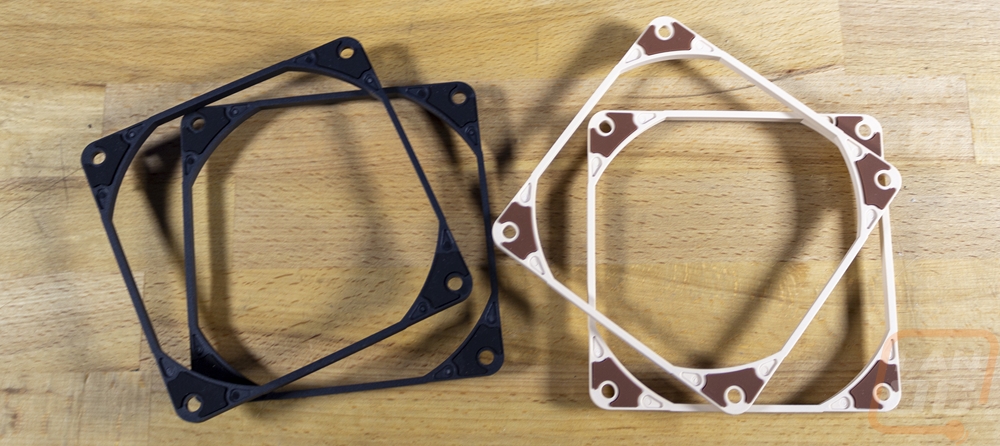
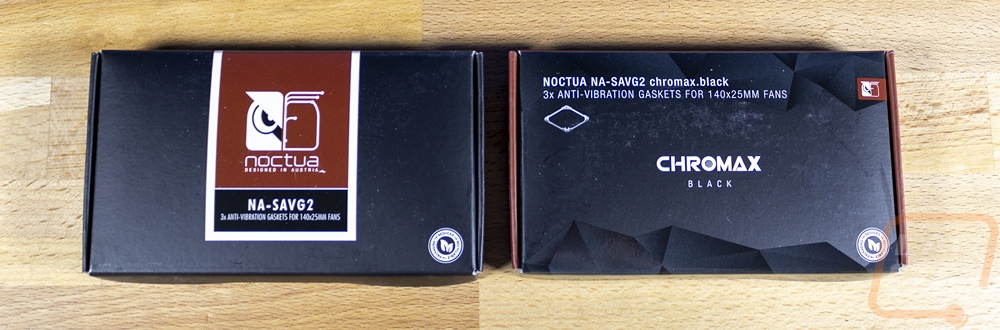
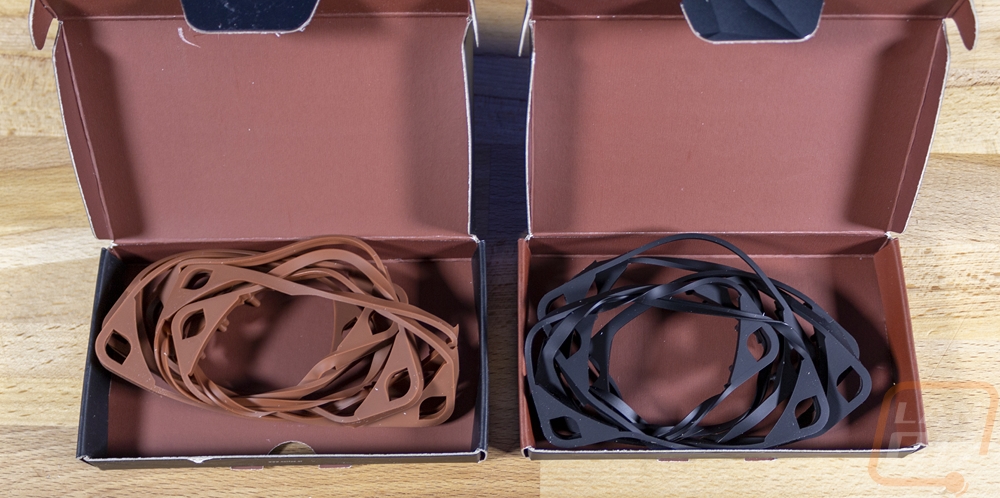
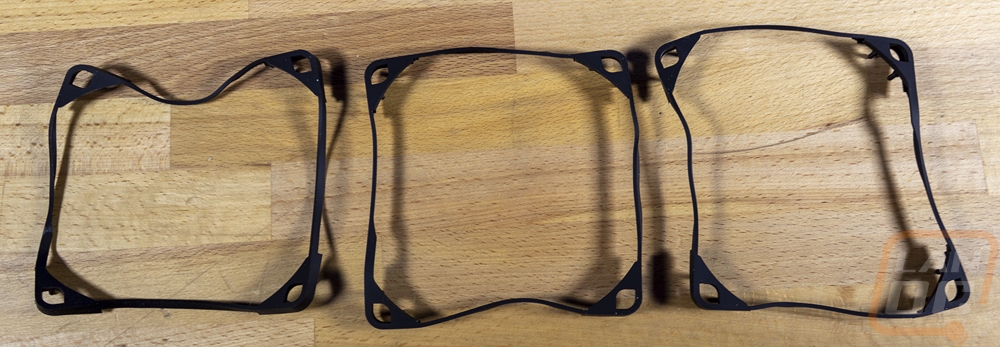
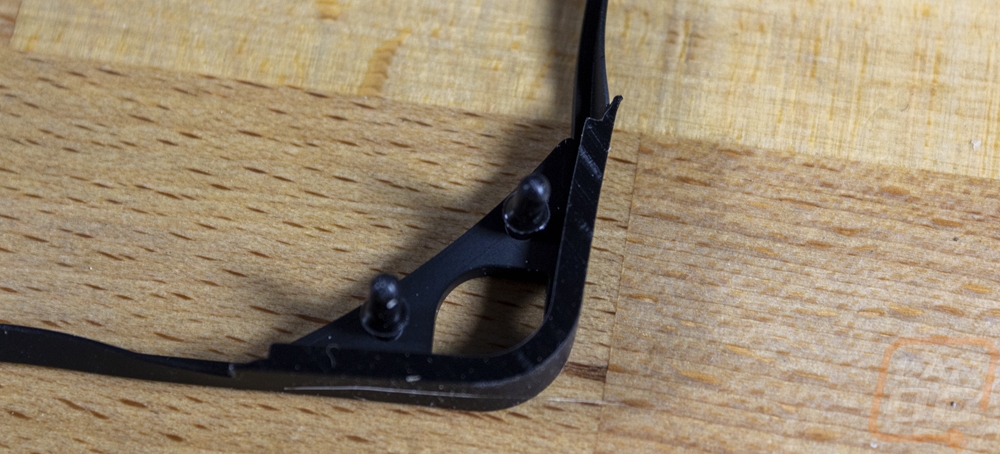
Noctua also has new anti-vibration gaskets which like the spacers are available in 120 mm and 140 mm sizes as well as standard and chromax for colors. I only have the 140 mm models which are the NA-SAVG2 and the NA-SAVG2 chromax.black so that is what we are checking out today. Each pack gets you three gaskets with the standard being the standard Noctua dark brown and the chromax model being black. The gaskets are made of the same silicone rubber material as Noctua’s normal anti-vibration pads. In fact, the overall design is exactly the same as the anti-vibration pads only rather than getting four pads you have one gasket that goes to all four corners with one piece. The idea is to create a full seal to cut down airflow losses when mounting a fan to a radiator. Like the spacers or the anti-vibration pads, the gaskets attach with the dual pins in the corners that match up with the fans which still leave the center screw hole open.

Noctua Screwdrivers and NA-TPG1
Noctua has been known for including a screwdriver with most of their coolers which was always a nice addition but the screwdriver was a simple all-metal design that didn’t have a handle but instead had a bent end for grip. The NH-P1 that I took a look at earlier in this article did have an upgraded screwdriver with its T20 Torx head. But Noctua did also bring out two new screwdrivers independent of what they include with their coolers and it is an upgrade over even the great screwdriver in the NH-P1.
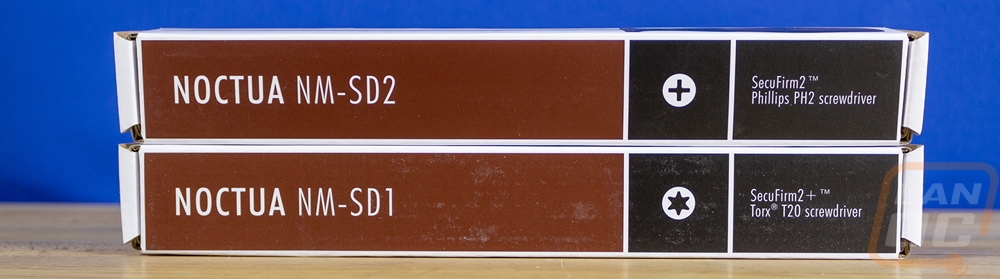
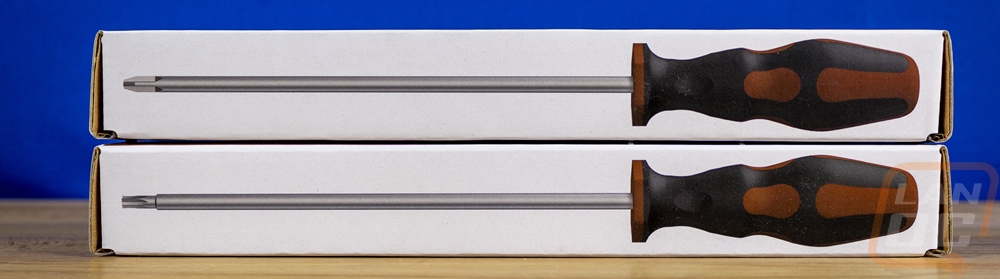
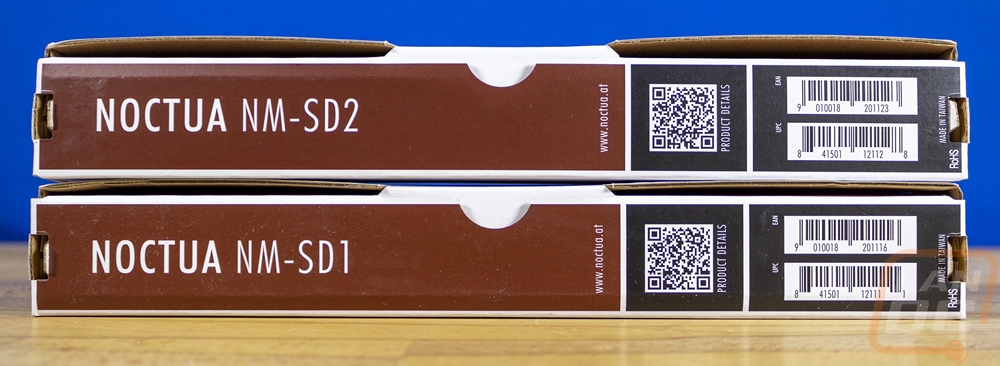
In fact when I saw the two drivers that Noctua announced I was excited because the design looked very similar to the screwdrivers that I use in the office. So I’ve been hoping to get these in the office for a while now. The driver model names are the NM-SD1 and NM-SD2 and their boxes have the same brown, white, and black styling that traditional Noctua coolers have. The box has the model name across the brown and then the driver head picture in the black next to that along with the screw head type listed out. They also show that the SD2 is a driver for the SecuFirm2 connection type on their coolers and the T20 Torx head is for the SecuFirm2+ connection type. The boxes do have pictures of the screwdrivers on the sides with each side showing a different side of the driver. Then on the back, they have the UPC and then a QR code with product details.
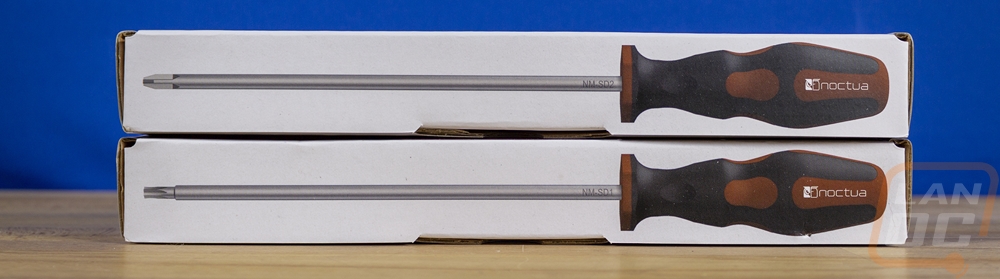
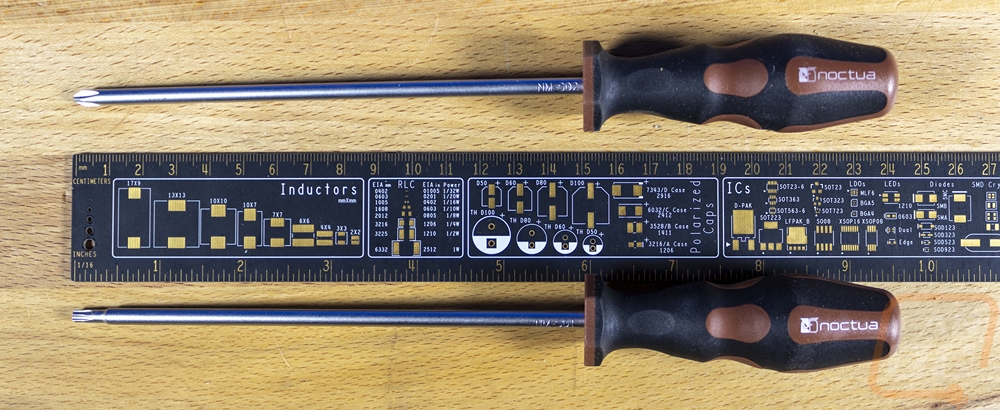
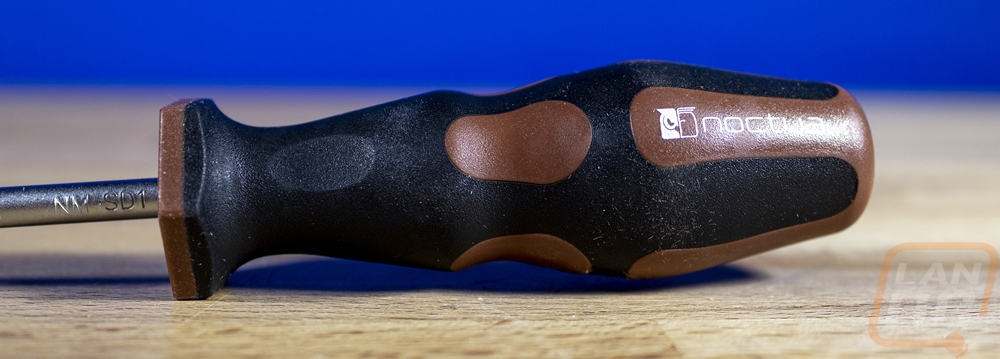
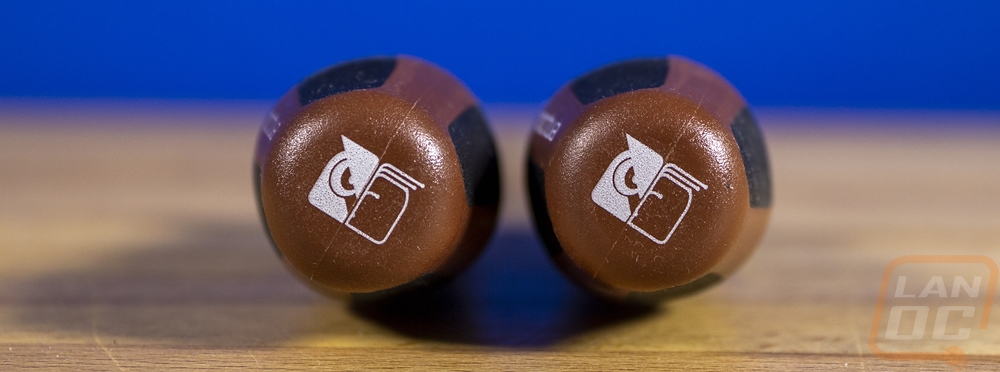
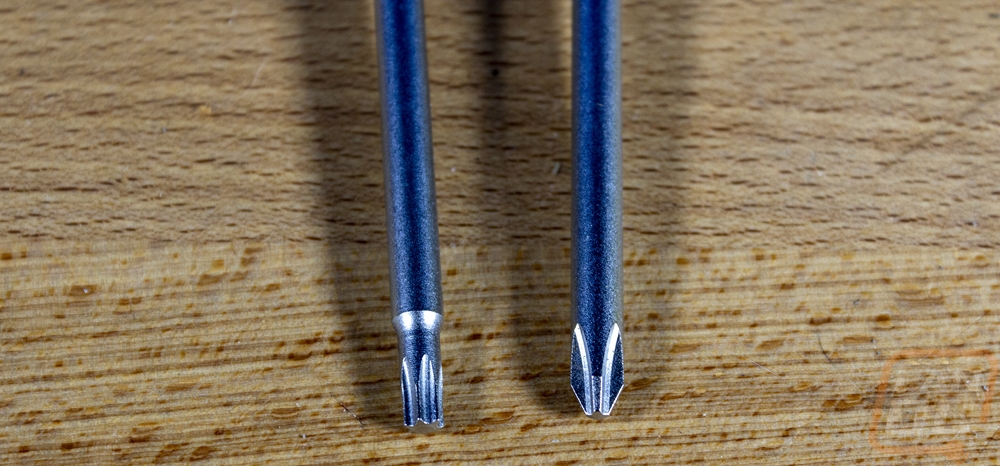
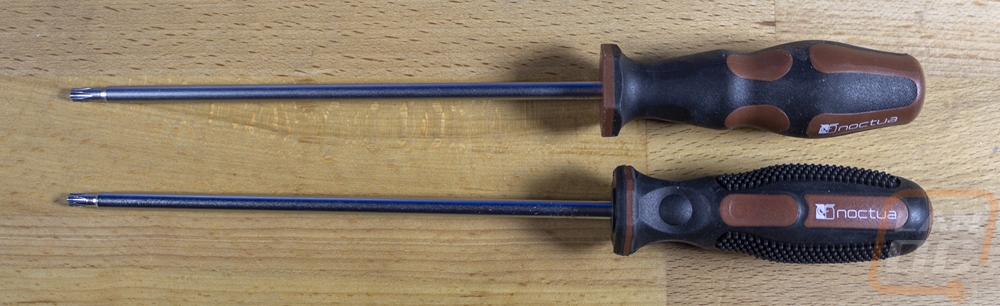
The SD1 and the SD2 both are the same length at 150 mm but that is the length up to the base of the handle. They are then closer to 242 mm in overall length with the handle and all. The model name is stamped into the metal just before the handle. But it’s the handle that makes these stand out. They look similar to the Wera screwdrivers grip type which is formed to fit your hand and the base of the grip has a hexagon shape that keeps the screwdriver from rolling off when you sit it down. The grip of course has that Noctua splash with it being black with brown mixed in and the Noctua logo is printed on the brown. They have the Noctua Owl logo printed on the end as well. As I mentioned before for connections the NH-SD2 is the Trox T20 driver end and the NH-SD1 has a Phillips PH2.
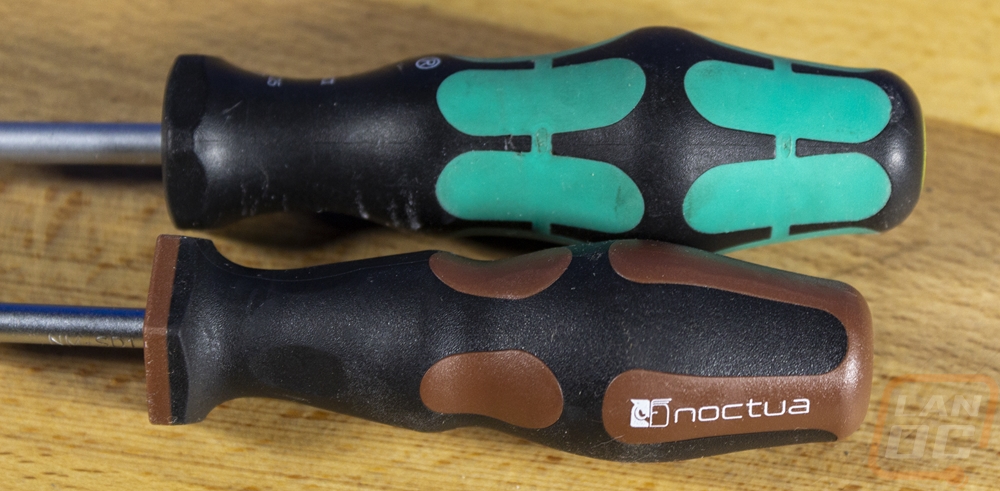
Both drivers look like Weara drivers until you get them next to each other then the differences are a lot more obvious. The Noctua handle design is shorter and its grip shape is different. More importantly, the Wera design has black rubber and then foam for the green but Noctua doesn’t have foam at all it has plastic and hard rubber. My dream of slipping a longer Noctua compatible driver in and my Wera drivers not noticing isn’t going to happen. Frankly, if you want you can use the drivers that come with your Noctua coolers without any problems, but if you want something nicer they now have something available that is long enough to reach through the long heatsinks. Or if you install a lot of Noctua coolers, having these on hand would be a nice addition and will be easy to spot with the Noctua brown handles.
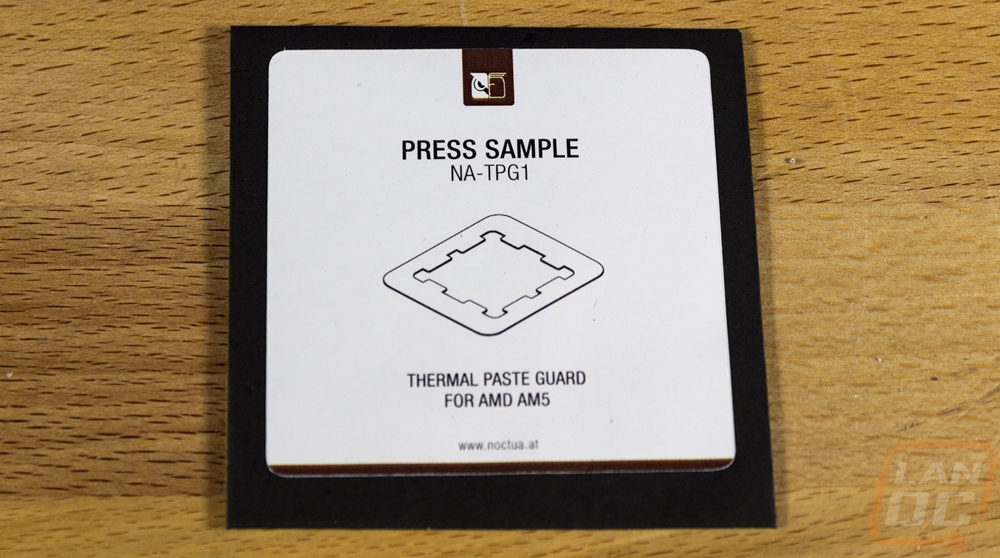
This last product, the Noctua NA-TPG1 is a unique one and it doesn’t go with anything so I included it in with the screwdrivers. This came out because of AMDs new AM5 CPU design which has a weird X-like shape to the heatspreader. I have no idea what the packaging for the NA-TPG1 looks like but in retail, it comes alongside 10 of their cleaning wipes and is branded as a cleaning solution to keep things clean. The press sample here just came with a few of the guards and I’ve already got some of the cleaning wipes.
I also did get a comparison shot of the screwdriver included with the passive NH-P1 cooler. They both have the black and brown theme and the P1’s driver also has the hexagon shape at the base of the handle to keep it from rolling off. But the grip is very different and also had small rubber bumps on it for traction.
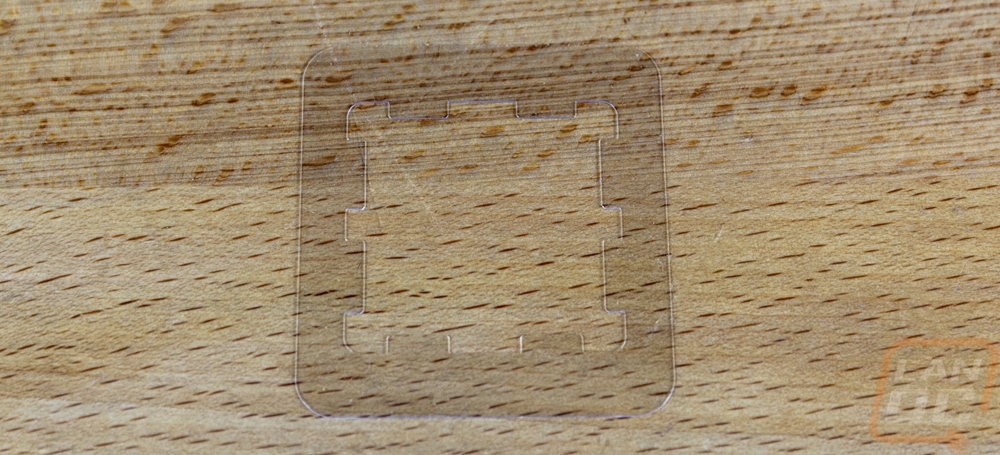
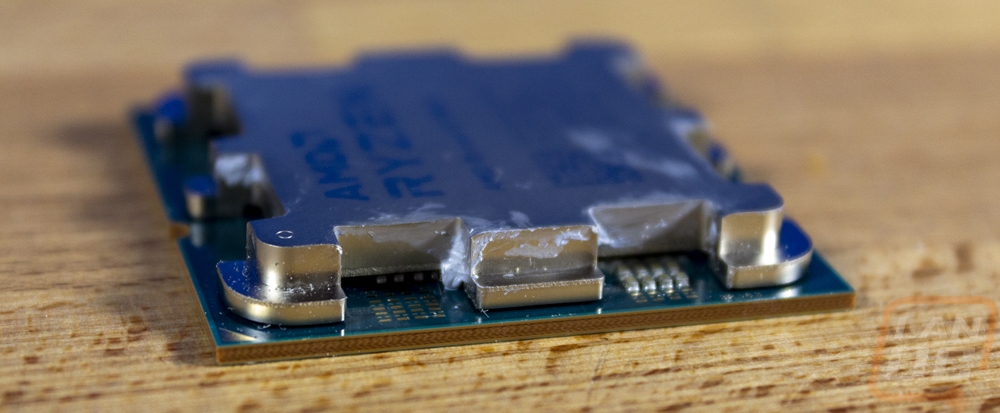
The design is as simple as they come though. This just goes on the CPU and is clear plastic with a cutout in the shape of the heat spreader to cover and not allow thermal paste to get down into the hard to reach spots on the new CPUs. Having spent a lot of time testing the AM5 CPUs already I knew exactly why this is needed. Each time I use one paste ends up down into the corners and a towel or Noctua cleaning wipe isn’t enough to get it all. I have been using up toothpicks cleaning them up personally but preventing it from happening at all is a better option. If you never pull your heatsink off this won’t be needed. But anyone who is taking things apart more often than the average user could use these.
Overall
It’s great to catch up with what Noctua has been up to recently and what they have released isn’t focused on any one area. They of course have the new NH-L9a-AM5 coolers which are updated with support for the new chipset, that is a big one for anyone looking at extremely compact SFF builds especially now that AMD has brought out the 65 watts CPUs that help make that possible. Both the standard version and the chromax model both look great and performed as well as to be expected given the compact design. Then on the other end of the spectrum, Noctua has their largest heatsink out now, the NH-P1 which is their first passive cooler with a design that is a complete departure from a traditional heatsink. That is another that I wouldn’t be looking to pair up with the highest-end CPUs which put out far too much heat but is a unique design that opens up extremely quiet passive or semi-passive build possibilities.
The rest of what I took a look at was focused on fine tuning other aspects of the normal Noctua lineup. Things like the spacers which help with the turbulence that can happen when the intake side of a fan is up close to a restrictive case fan grill or a radiator. They also have gaskets that help tighten the seal between the Noctua fans and a radiator. The addition of Noctua screwdrivers was also a big surprise but could be a big help for anyone who works with Noctua coolers often because they have the length to reach through the Noctua heatsinks like the screwdrivers that Noctua has included with their coolers but with an easier to use a grip that shares a little with my favorite line of screwdrivers.
Overall Noctua who is well known for their extreme detail and sometimes painfully long product release cycles has been increasing the number of products designed to complement their current product lineup while also bringing out unique products like the NH-P1 and keeping their lineup up to date with support for new CPU sockets like AM5. Computex is coming up so I’m sure we can expect to get a look at what they are working on soon. Noctua is also one of the very few companies that is really open about their product roadmap even having most of it right on their website for anyone to check out. That helps a little with the wait, especially when you see things like “white Fans” coming which sadly seems to always be at the end of that chart.
Live Pricing:
NA-IS1-12 chromax.black Sx2 Inlet Spacer
NA-IS1-14 chromax.black Sx2 Inlet Spacer
AM5 thermal paste guard NA-TPG1


