Installation and Performance
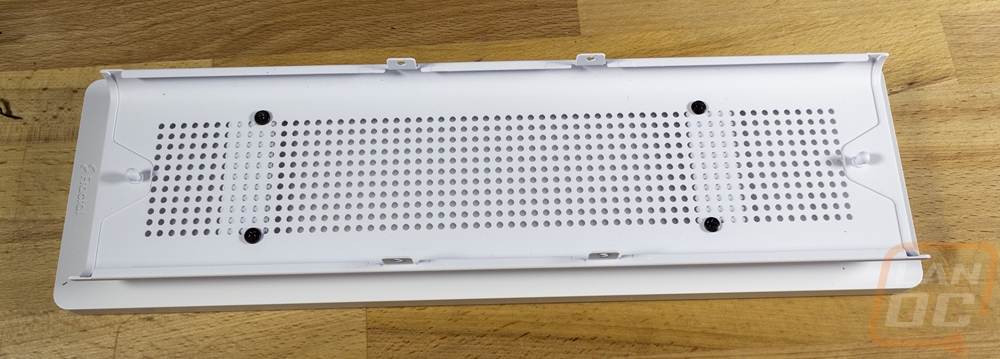
When I first was checking out the layout on the Fractal Ridge I didn’t expect to have to pull it completely apart to build in it like most SFF cases require but as soon as I started to dive in it was clear a few things would need to be opened up. The biggest is pulling the bottom end of the case off and depending on your configuration of the top half you may need to remove the top panel as well. These are held in place with four screws each, two on each side. Then on top of that, they also have the snap-in latches as well. This does help with one of the concerns I had with the design, I thought you might have to lock in if you want the foot installed on the bottom or side before installing components, but being able to remove the bottom panel means you can install or remove it at any point. The bottom panel helps give you access around the motherboard for wiring and to get around the PSU mount which also has to be removed to build in the case. I went ahead and install the stand on the bottom while I had that out as well.

For our test system I had planned on running a current generation CPU and motherboard but I had delays in getting an ITX AM5 board in and our Z760I would work but I didn’t have a cooler that would work with it on hand. So I went with the old setup that was in our Sentry 2.0 giving me a chance at least to compare how it works in both cases. Installing the motherboard which already has the CPU and cooler installed as well as the M.2 drive and ram wasn’t too bad. I did however have to remove the screws for the rear power plug and pull that out to get the space needed to fit the motherboard. You also have to remove the PCIe riser card which can be a bit of a challenge depending on what tools you are using. With the cooler already installed getting the three screws that hold the riser back in place is hard to reach, a stubby screwdriver would be best for getting at them. You can also just remove the entire middle bracket to screw the riser to the bracket outside of the case, but I like to make things more difficult on myself.
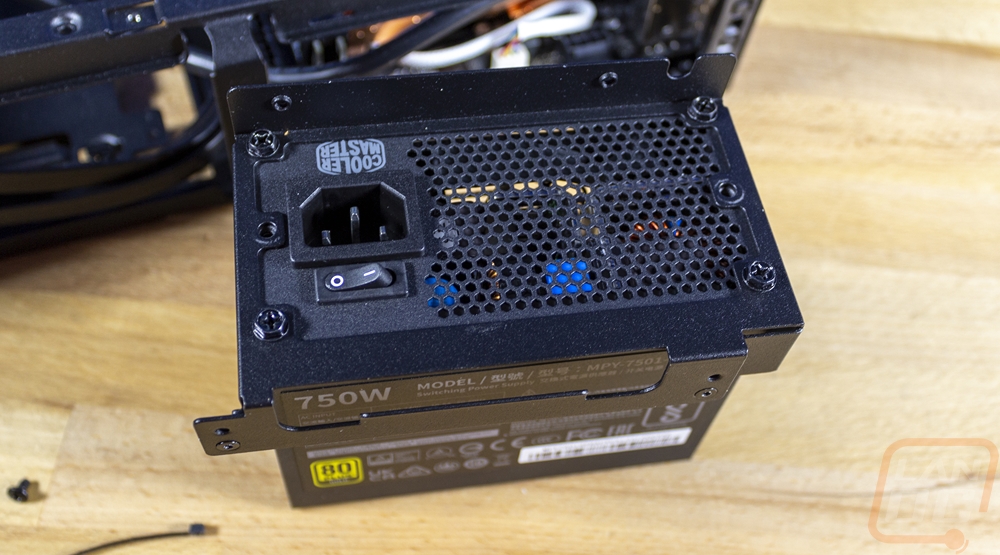
The Silverstone 600-watt SFX power supply that I intended on using also ended up causing problems as well. You can mount your SFX flipped in either direction, but only one way will have airflow. That specific model has the power plug flipped around upside down compared to the orientation on newer SFX power supplies. Because the Ridge has a right-angled connection for the C13 plug I couldn’t plug that in and fit the Silverstone SFX, switching to the Cooler Master V750 SFX fixed the issue simply because the plug is flipped, once I had that worked out the power supply installed in the mount and the mount went back in with no problems.
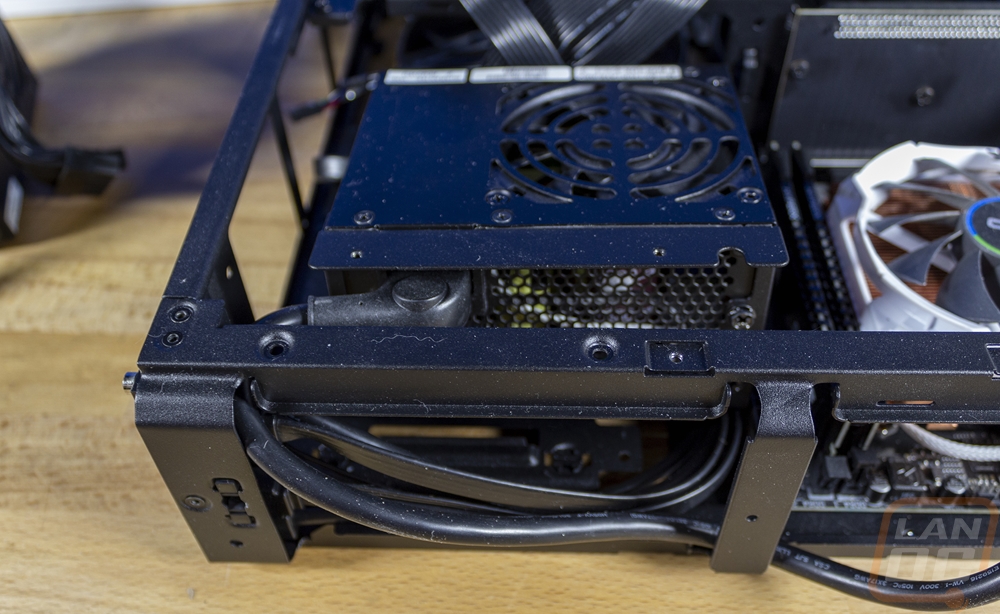
From there it was mostly just getting all of our wiring handled which in any SFF case can be a challenge. But the Ridge was a lot easier than I thought it would be because of the gap between the SFX power supply and the back panel. I was able to tuck a lot of the extra wiring in back there out of the way and out of the way of airflow leaving just a few wires to clean up as I hooked them up. Fractal left enough length on all of the cords to reach the far end of the board when needed which with ITX can be important because they all have different layouts and with the Ridge being larger than the Sentry 2.0 I didn’t have to be as careful with where each and every wire was run.
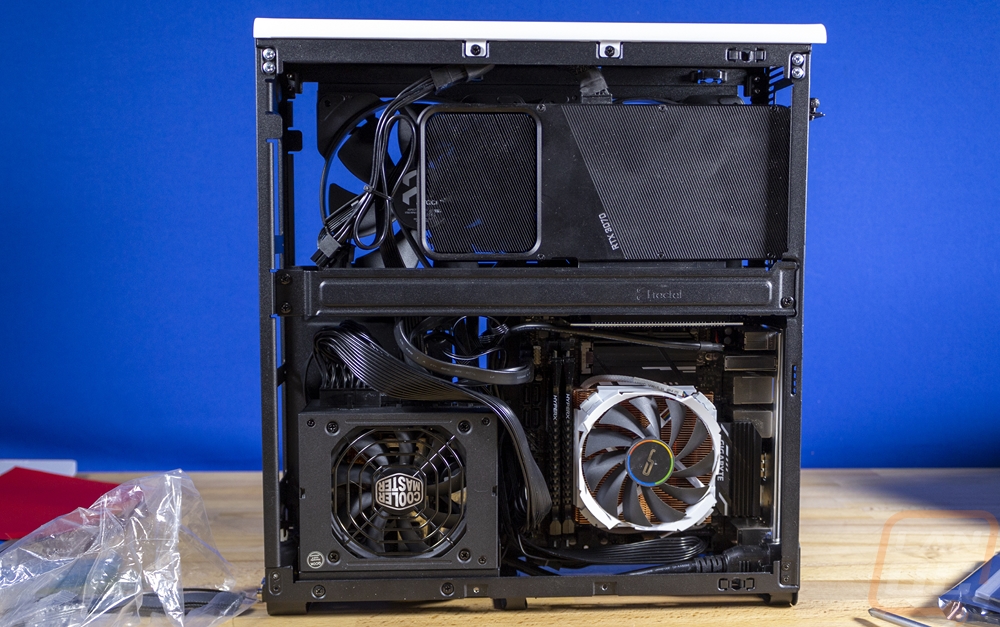
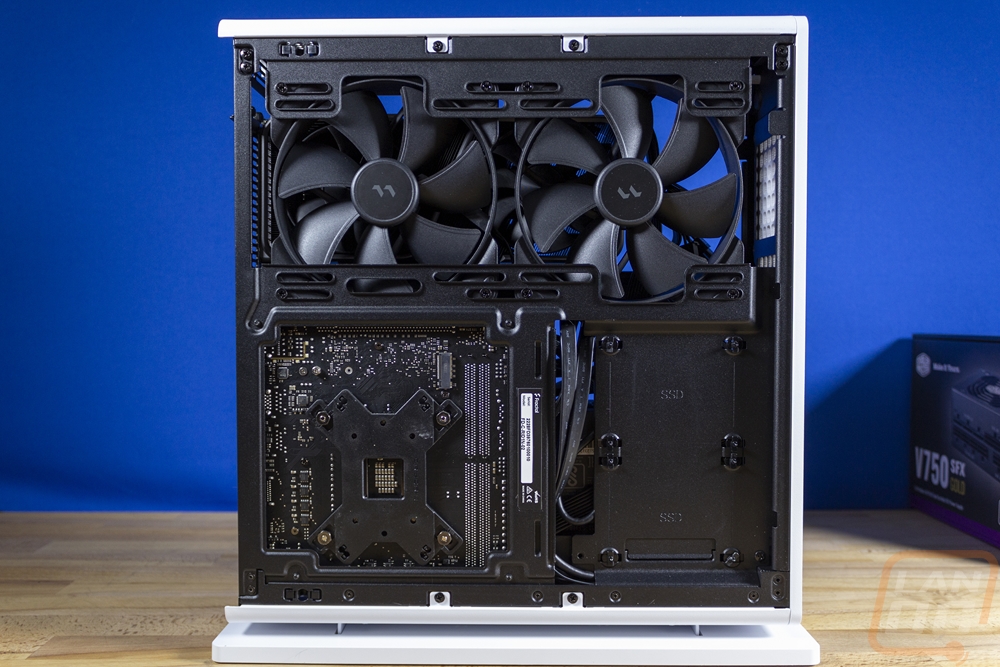
Installing the video card up top was easy and there is plenty of room for larger cards up in that space when you aren’t using any of the top half for anything else and having the two fans pushing cool air in right there to the card should be great for keeping all of that cool. I’m happy overall with building in the Ridge but can’t wait to update things and get a newer modern CPU and motherboard in along with a larger heatsink that takes advantage of the 70mm cooler height that is supported. In my ideal build, I would still love to have room for a 240mm AIO cooler as well as a standard-sized GPU.
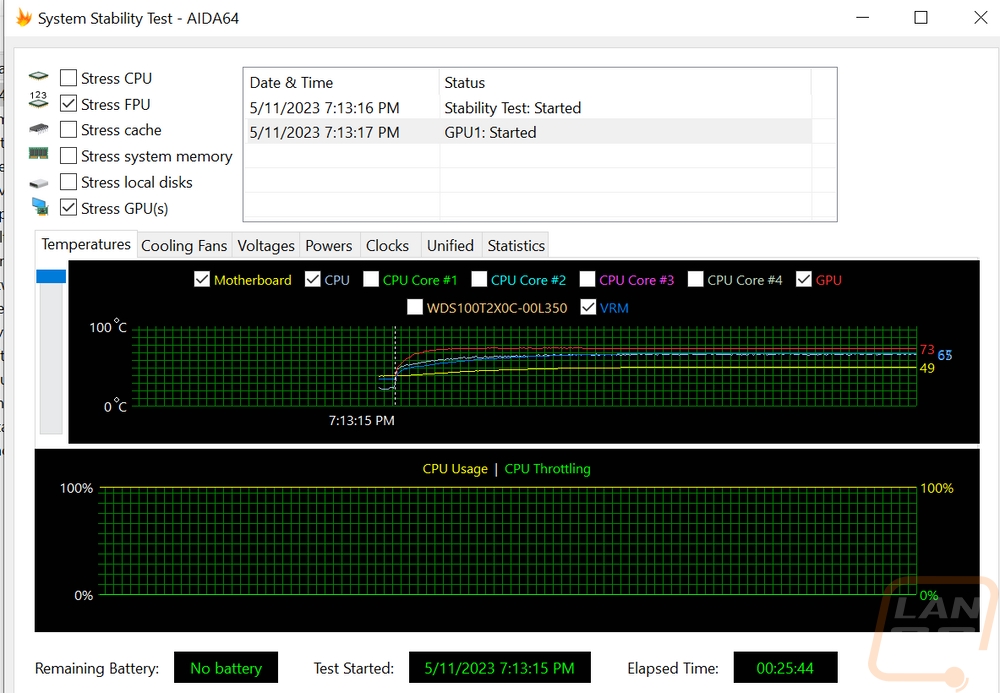
With our test setup installed and running I went right to putting the system under a heavy load. For this, I used AIDA64’s Stress Test using the FPU workload to put the CPU under extremely demanding load, and did the same with the GPU. Letting that run for just about 30 minutes. At that time the GPU was running at 73c and the CPU which for some reason AIDA64 wasn’t picking up was running at 50c which was right in line with what I saw on the Sentry 2.0 when testing with the same motherboard/CPU setup. The motherboard and VRMs were a few degrees hotter in the Ridge, however. I think this is because the Ridge is a wider case and the low profile cooler which in the Sentry was pulling air in right from the side panel. But for the Ridge a taller cooler would be more beneficial, putting the fan up closer to the side panel. When I switch to a newer motherboard/CPU configuration I will be also switching the cooler to the Noctua NH-L12S or the Noctua NH-L12 Ghost S1 edition as sometimes the power plug on the Ridge can get in the way of the larger fan depending on your motherboard.
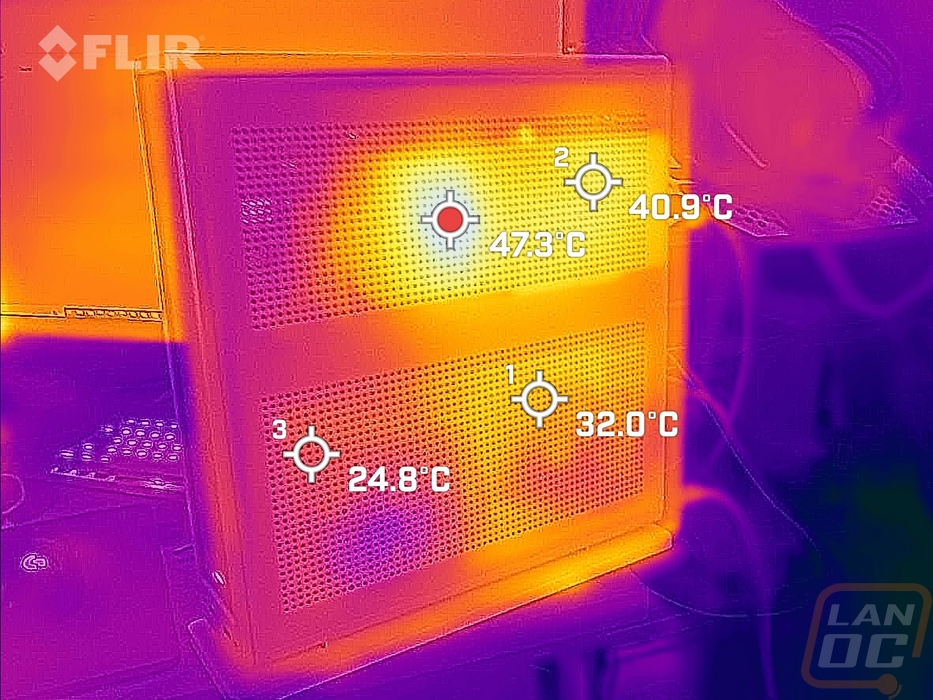
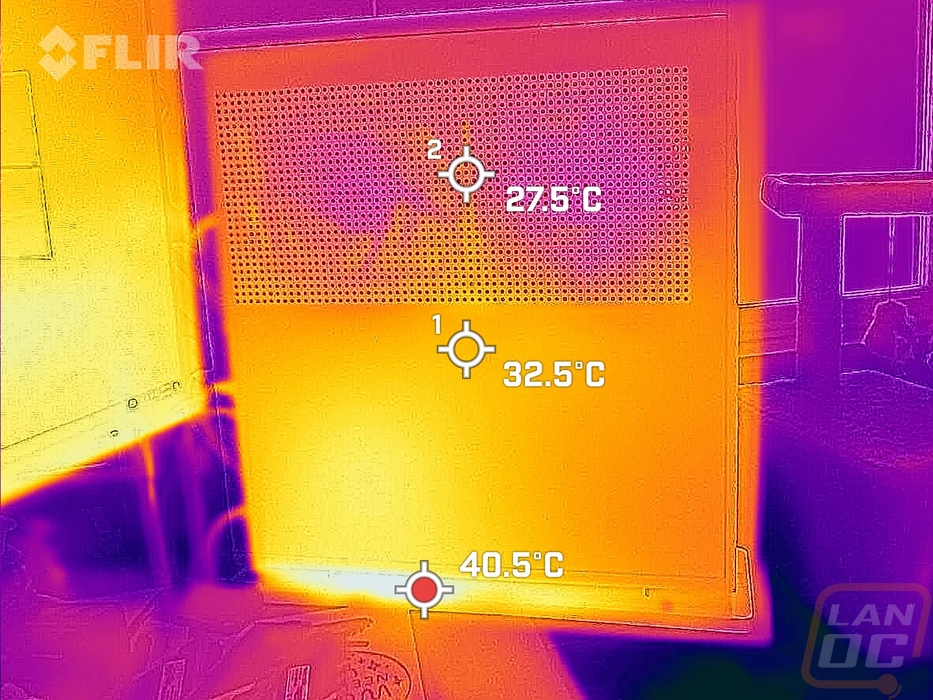
While doing those thermal tests I did also use the thermal camera to get a look around the Ridge. It’s no big surprise where the hotspots are with some over top of the motherboard and a lot on the exhaust out side on the video card up top. Up top having the two fans blowing through helps keep the card running cool but does push that heat out on this side. Then on the back side, things are a lot cooler but you can see the heat from the motherboard on this side as well. Especially down on the bottom foot. This is from the CPU heatsink pushing air out in this direction.
Our side fans were hooked up to the motherboard which was working hard to keep the CPU cool. This kept the fans running at or near their highest speeds which isn’t the most ideal configuration. Being able to tone the GPU fans down slightly would be great, even better would be linking them to the GPU temperatures which you can do on some configurations. Asus for example has a few motherboards with fan headers right on the board or it can be done on the software side of things. This would be important because the side fans made a majority of the noise in the system. Especially when the system was idling and not under a stress test. When under our heavy stress test the system was running at 47.9 decibels from 18 inches away. I wouldn’t say it is screaming, but much louder than I would prefer. The stock fans can do the job with adjustments on the fan profile but when I upgrade this system I will most likely upgrade to a quieter fan as well.
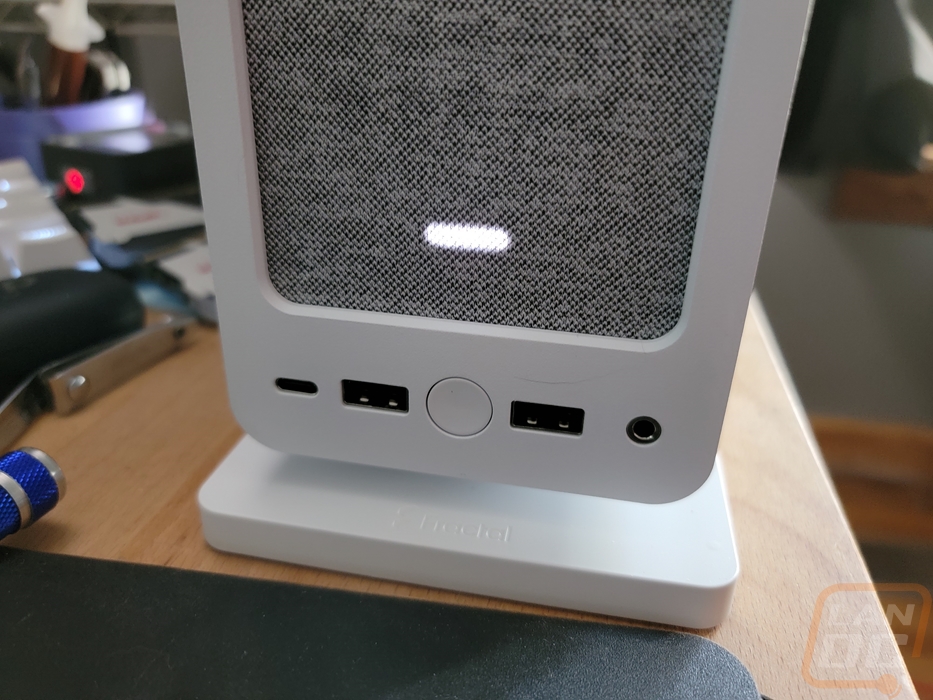
While testing I did also get a picture of the front status LED that is hidden behind the cloth front panel on the Ridge. It was surprisingly bright and I dig that it stays hidden until the system is on.