For those of you who have been around for a while, you will most likely know that I have had a thing for small form factor builds going back before small form factor builds were a thing. We did our Lunchbox build series starting 14 years ago when we were building in a Shuttle. The options for compact builds with video cards have improved significantly over the years and a few companies have played big roles in that including Fractal with their Node 202 which helped bring the “console” form factor into the mainstream with a reasonably priced case option. Well, the Fractal Ridge is the first time that Fractal has been back to that form factor and while I am late to the party, I’m excited to see what they have changed. Especially now with PCIe 4.0 risers being available which address compatibility issues that some people ran into. So let's dive into the Ridge and see what it is all about and build a system in it to get the full experience.
Product Name: Fractal Ridge
Review Sample Provided by: Fractal
Written by: Wes Compton
Amazon Affiliate Link: HERE
|
Specifications |
|
|
Color Options |
White and Black |
|
Dedicated 2.5" drive mounts |
4x included, 4x positions total |
|
Expansion slots |
3-slot |
|
Front interface |
1x USB 3.1 Gen 2 Type-C, 2x USB 3.0, 1x Combo jack – Audio/Microphone, power button, power LED |
|
Total fan mounts |
2x 120/140 mm and 3x 80 mm |
|
Side fan |
2x 120/140 mm (2x PWM Aspect fan 140 mm included) |
|
Top fan |
3x 80 mm (not included) |
|
Cable routing space |
13,8 mm (behind PSU) |
|
Tool-less slide with thumbscrew lock |
Side panels |
|
Captive thumbscrews |
Side panels |
|
Left side panel |
Steel |
|
Right side panel |
Steel |
|
Compatibility |
|
|
Motherboard compatibility |
Mini ITX |
|
Power supply type |
SFX, SFX-L |
|
Side radiator |
120 mm when ≤175mm long GPUs are installed (280 mm without GPU) |
|
PSU max length |
SFX-L |
|
GPU max length |
325 mm with SSD installed. 335 mm without SSD installed. |
|
GPU max height |
125 mm with top fan(s) installed, 137 mm without top fans |
|
GPU max thickness |
57 mm with 2x 140 mm fans installed, 82 mm without side fans |
|
CPU cooler max height |
70 mm |
|
Dimensions |
|
|
Case dimensions |
Vertical: 374 x 110 x 395 mm Horizontal: 360 x 375 x 115 mm |
|
Case dimensions w/o feet/protrusions/screws |
355 x 95 x 375 mm |
|
Net weight |
4.3 kg |
|
Gross weight |
5.5 kg |
|
Volume |
12.6 liter |
|
Other |
|
|
Package contents |
Case, Accessory box, Manual |
|
Warranty |
2 Years |
Packaging
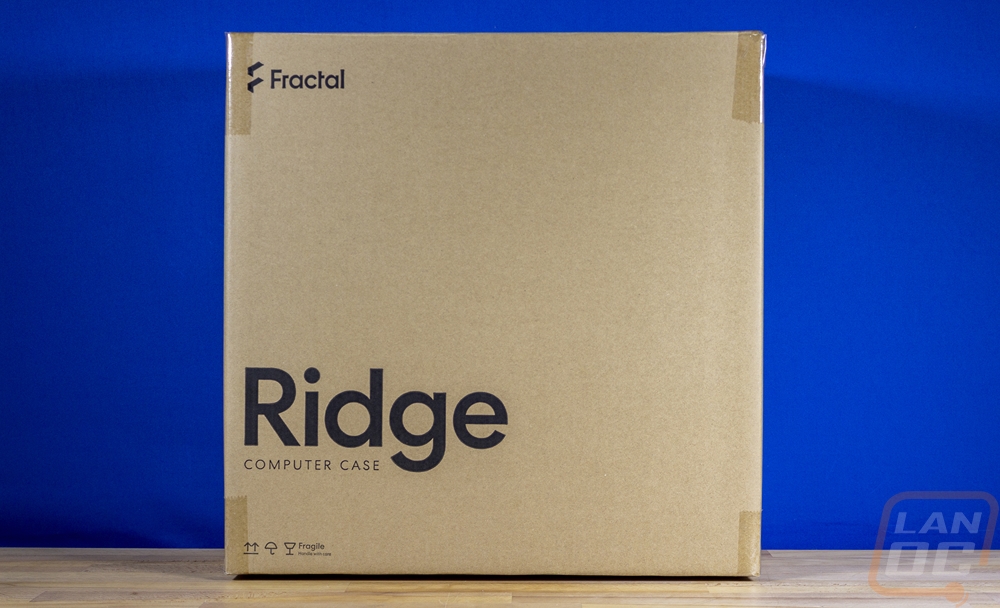
Being a small case, the packaging for the Fractal Ridge is equally small but I was surprised to see that Fractal also kept things simple for the Ridges box. They stuck with a brown box which is better for recycling with the front of the box having the Fractal Logo and the Ridge branding in black. It is simple but you can see exactly what it is, the only downside of course is if you are shipping in a retail store you don’t have a picture to know what is inside. The back of the box has the same branding as the front and only on the side of the box is there anything else. It has stickers for the serial number and the UPS as well as one letting you know what color the case is because it comes in black and white, ours is the white model.

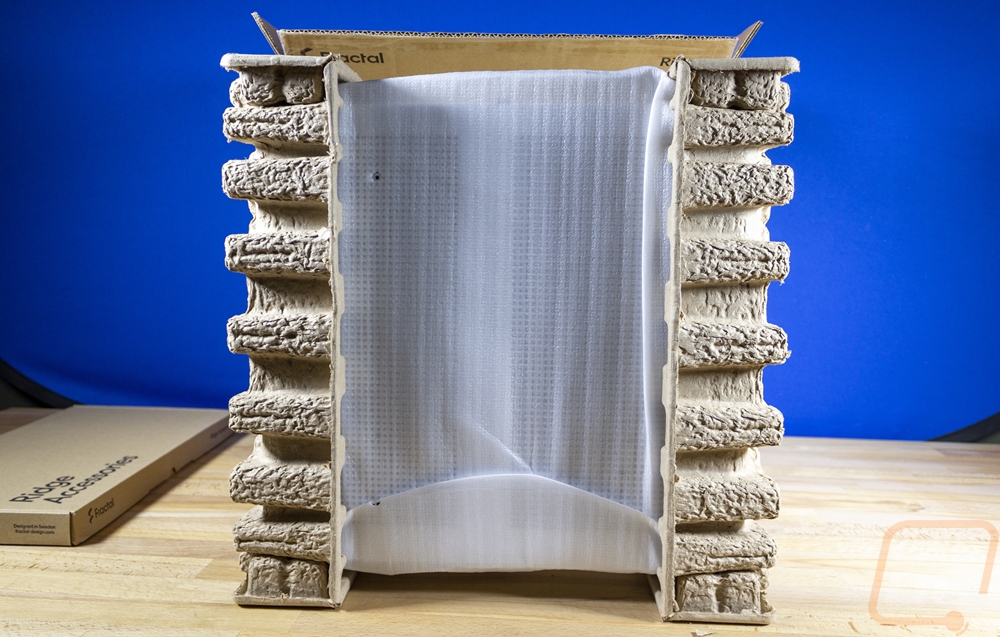
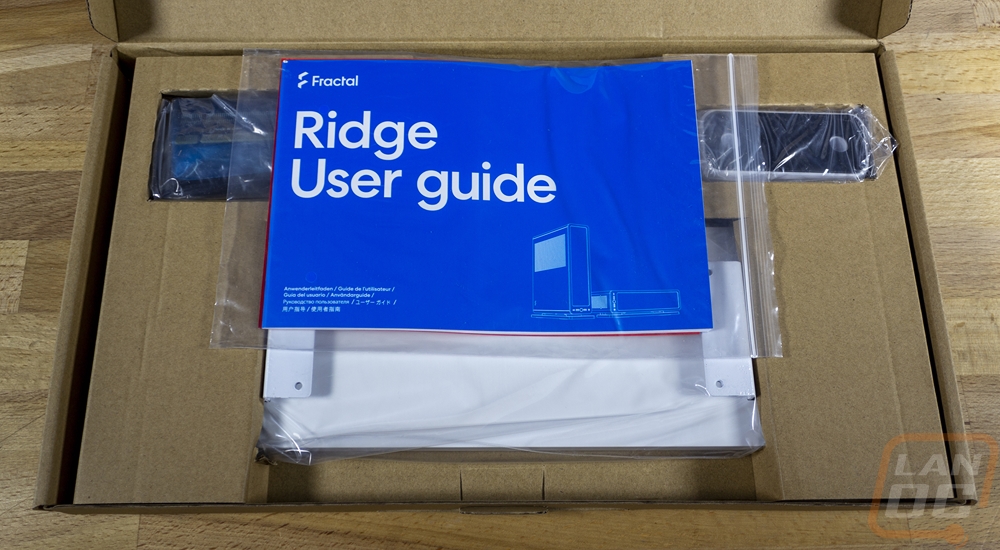
When you open the Ridge’s box up right up on top it comes with two huge silica gel baggies to keep things dry, significantly bigger than what I’ve seen with other full-sized cases let alone one this small. The Ridge is wrapped in a foam bag to keep it from getting any scratches and it has cardboard caps on both ends that hold it in the middle of the box to keep it safe. There is also an accessory box that you can access here from the top before pulling the case out.

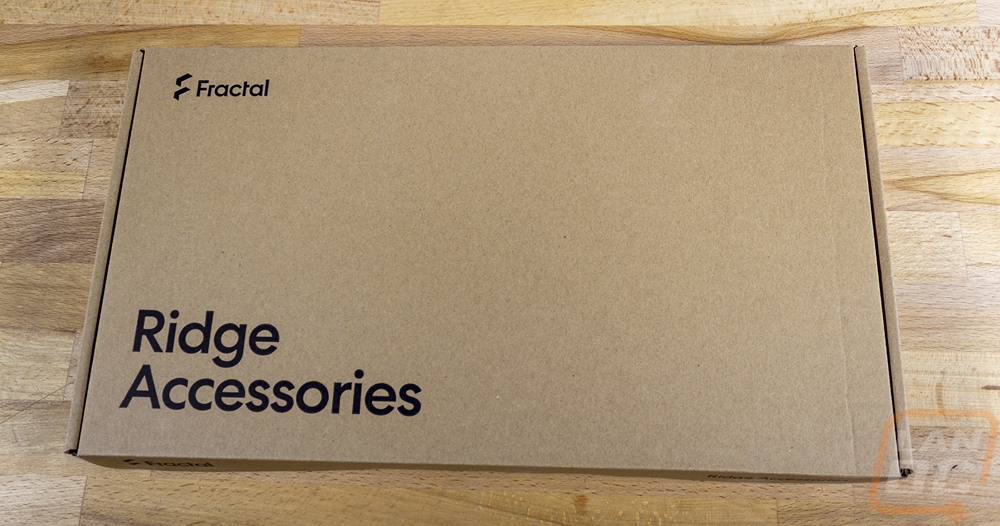
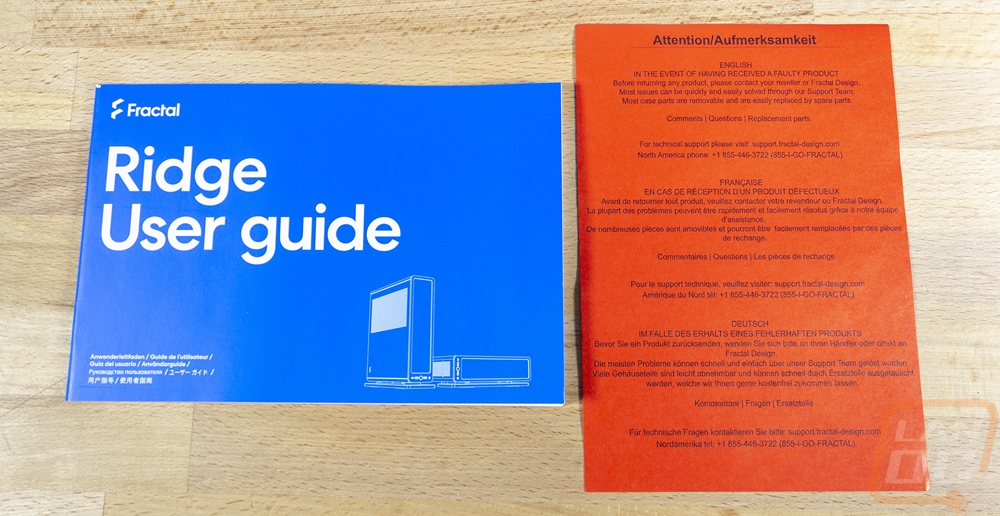
The box of accessories has the Fractal branding on it and has Ridge Accessories printed in black as well right on top. Then when you open it up right up on top is a bag that has the user guide and a warning paper asking to contact Fractal if you have a faulty part inside.
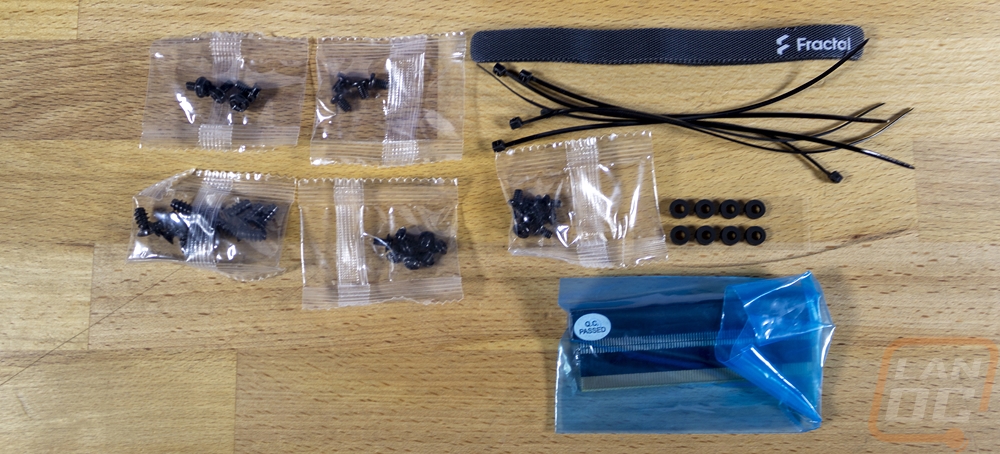
There are also a few accessories as the box name implies. You get a bag that comes with all of the screws and a few other small components. Each of the screws is bagged individually. There is also a bundle of zip ties and a stack of a few reusable Fractal branded Velcro wire straps. There is a set of small rubber spacers and in the blue bag is a PCIe riser. Even before getting into everything I do wish they would have used reclosable baggies or at least one to put any extra screws in. Once you open the screw bags up there isn’t any good way to keep them from being lost. I would also love to see those same screw bags get labels just to help anyone who doesn’t know what each does.


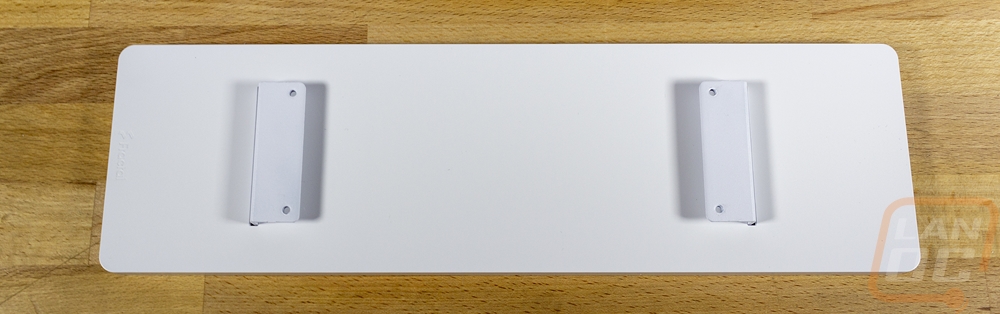
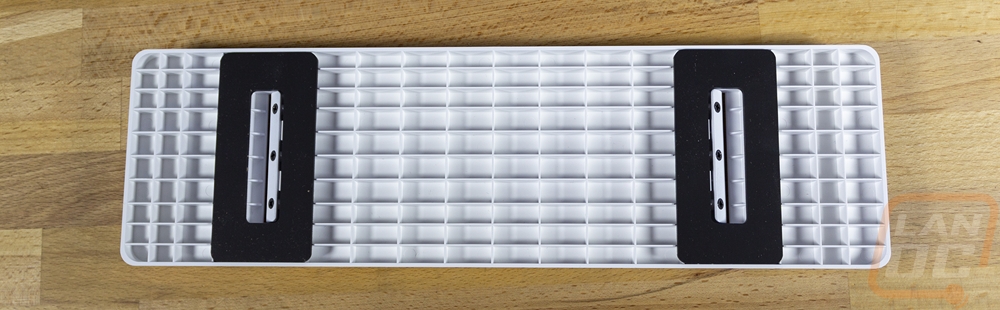
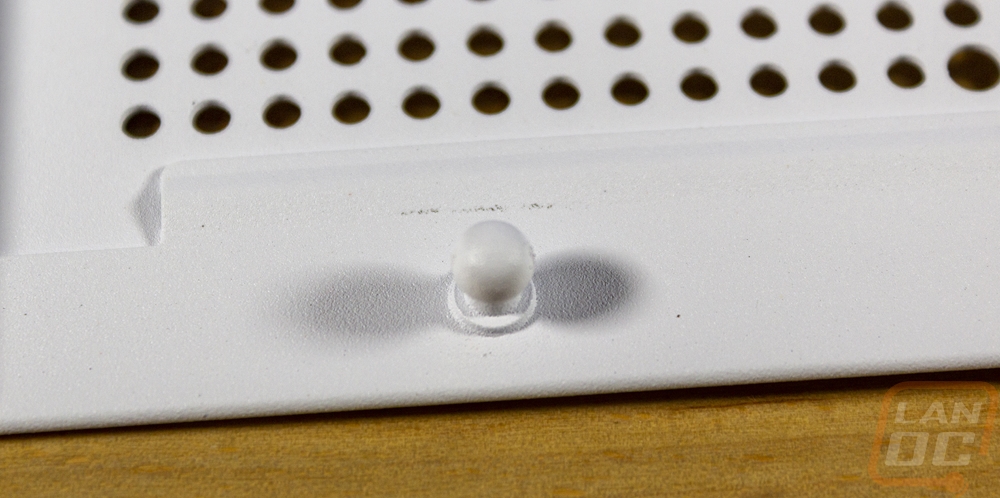
For the larger accessories, you have a large plastic panel, this is the main stand that can be attached to the case for a vertical layout or to raise the case off the ground when laying it horizontally. Horizontally is why there is a second white plastic stand, this goes with the main stand when laying the case on its side to support the rear. They both have rubber grips on them and the main stand has two metal brackets built in for attaching it. It’s hard to see but the stand also has the Fractal logo debossed into the plastic.
Outside
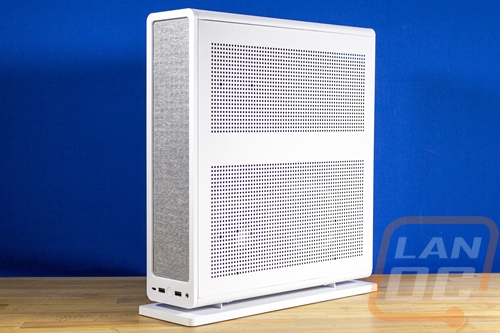
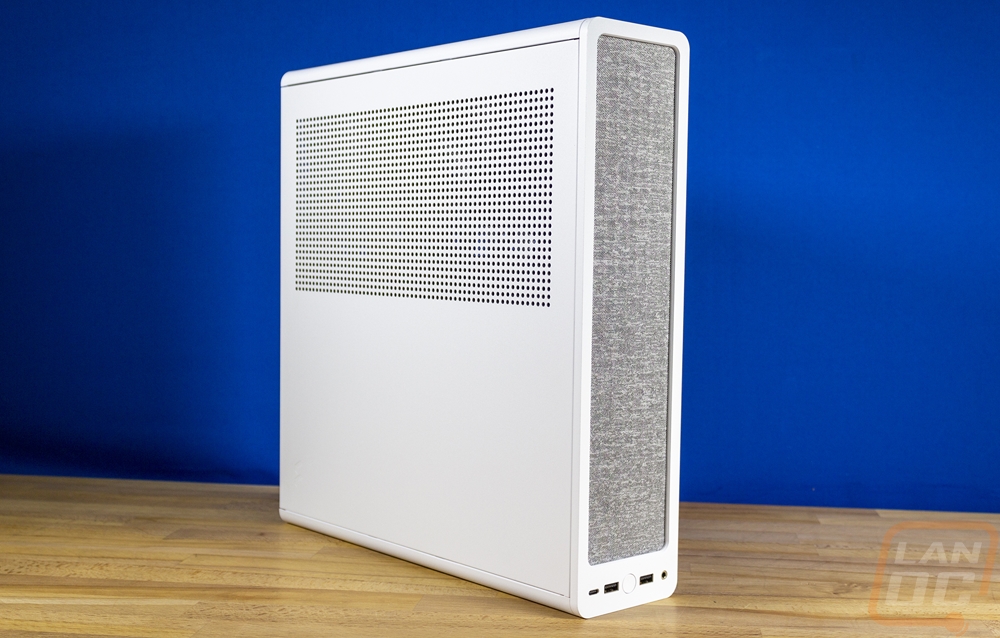
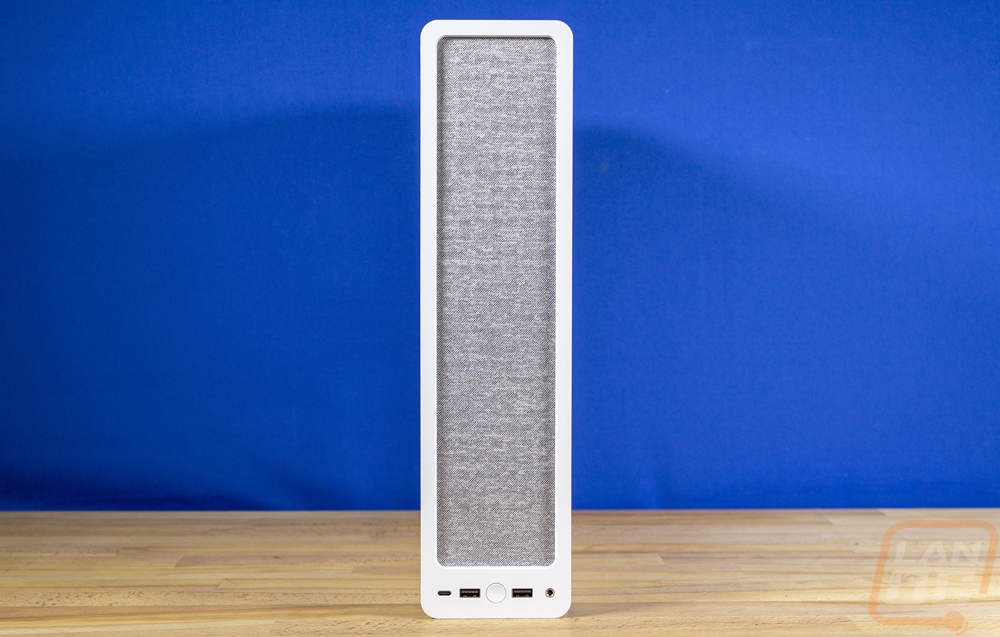
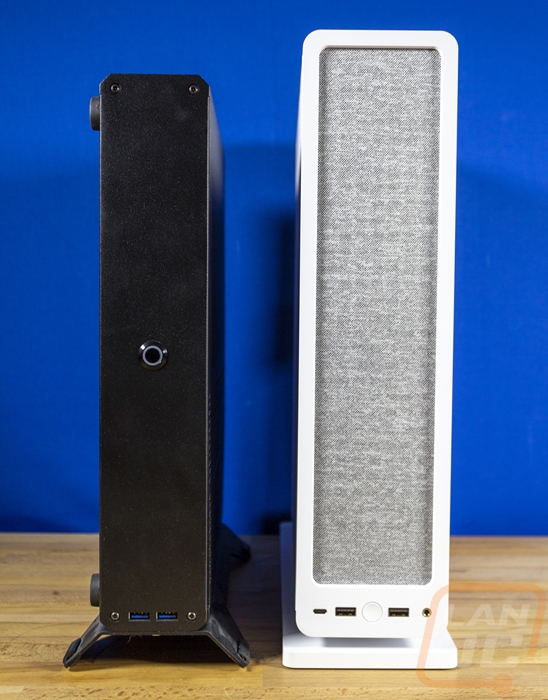
The Fractal Ridge is an ITX case designed to be relatively compact and has a unique layout that I would consider to be a lot closer to a modern gaming console than to a traditional case. The Ridge isn’t the first case to have that layout, it isn’t even the first case from Fractal. Its total size is 12.6 liters which is how most SFF cases are measured, using the overall dimensions and for a case from a mainstream case company that is very small with just a few cases that are more compact that also still support a full-sized video card. Once you get into some of the nitch companies there are more in that range but it is great to see mainstream options at that size. To get to that size, the case without its feet attached comes in at 355 x 95 x 375 mm. Once you figure in the feet it adds to that with the horizontal layout being 360 x 375 x 115 mm and with it laid out as a vertical orientation it is 374 x 110 x 395 mm. It comes in both black and white color options and like with a lot of Fractals cases its styling incorporates fabric into the front panel which for the white model that we have here is a heather grey but on the black case has a darker almost black color to it. I’m a big fan of this because it makes the case unique without having to resort to the flashy in-your-face “gamer” styling that you see on some larger cases.
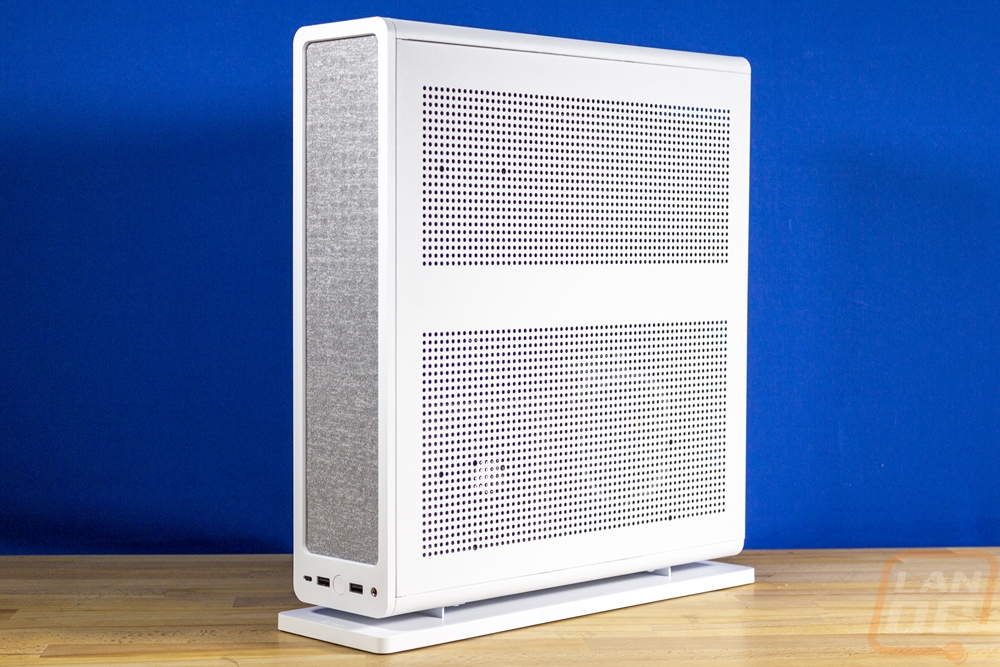
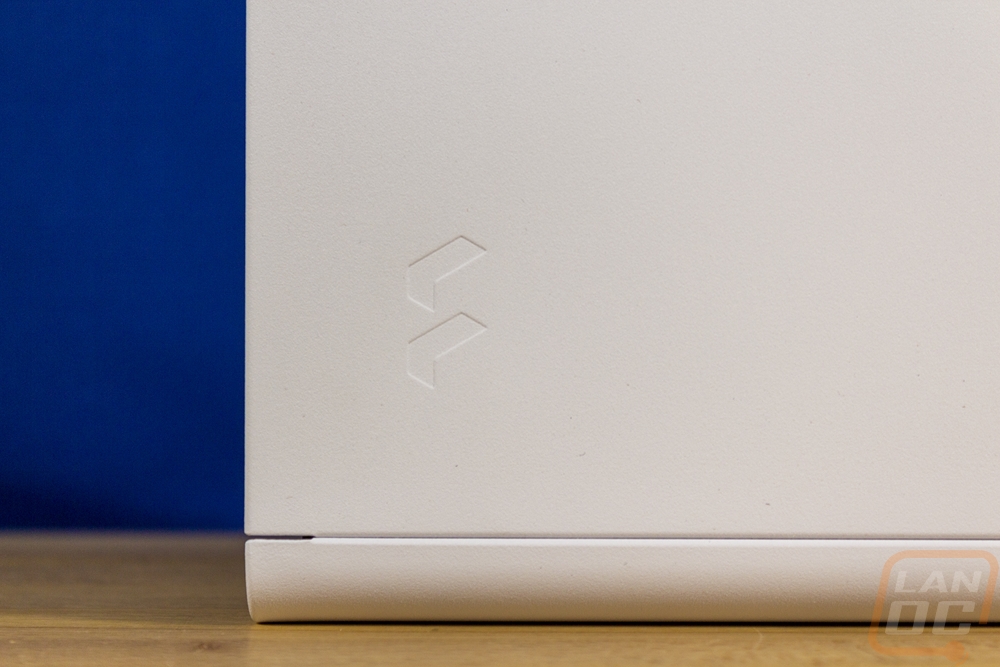
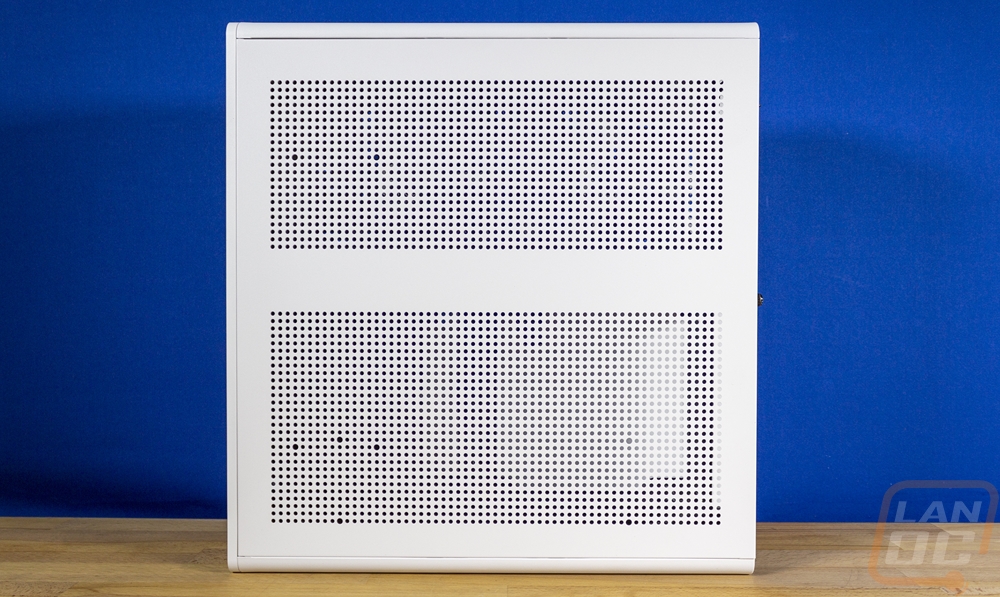
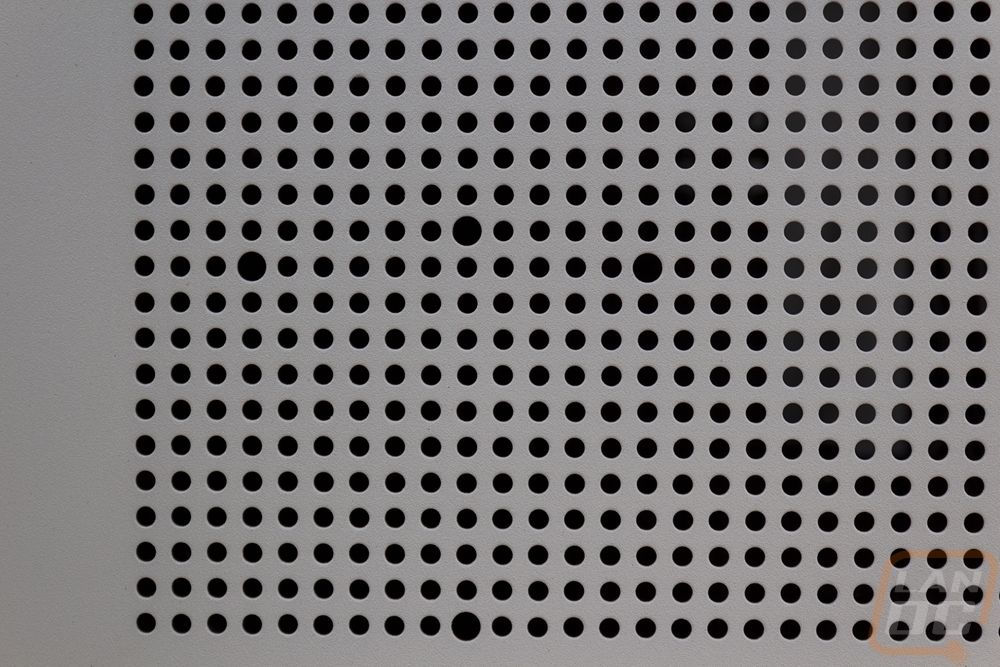
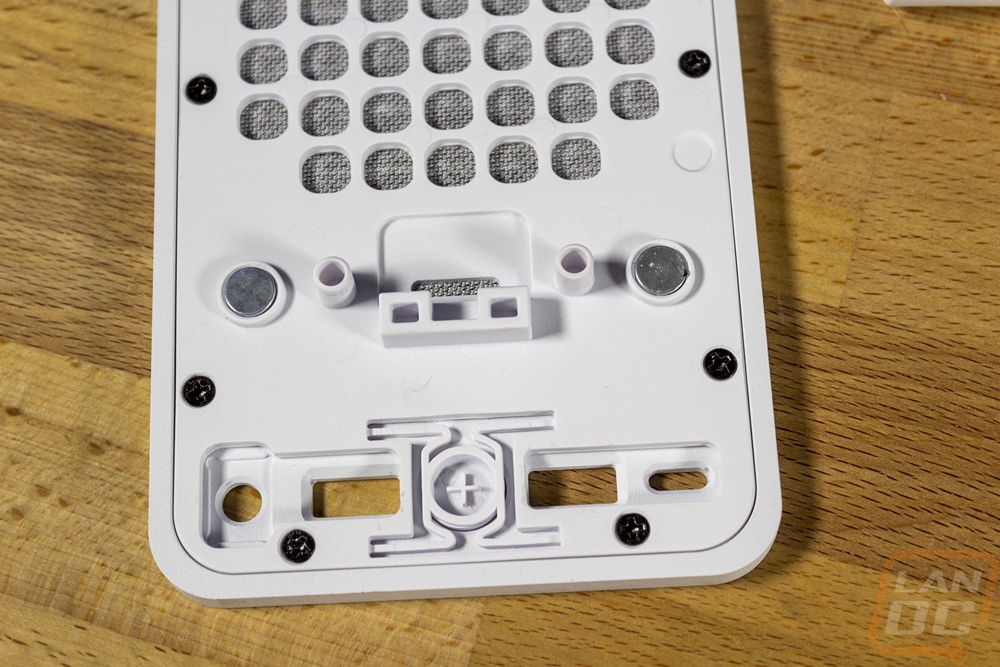
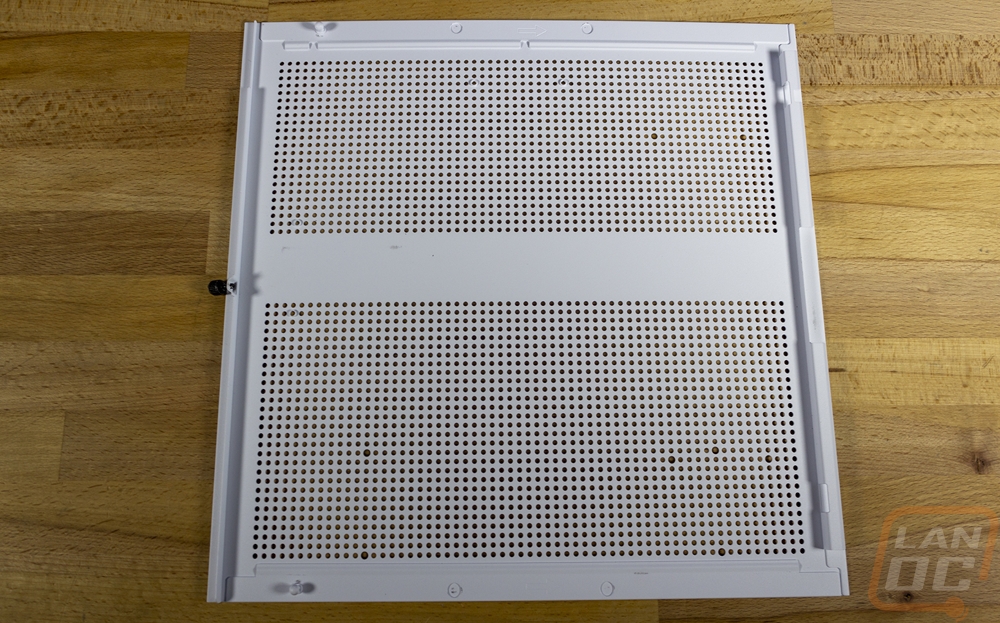
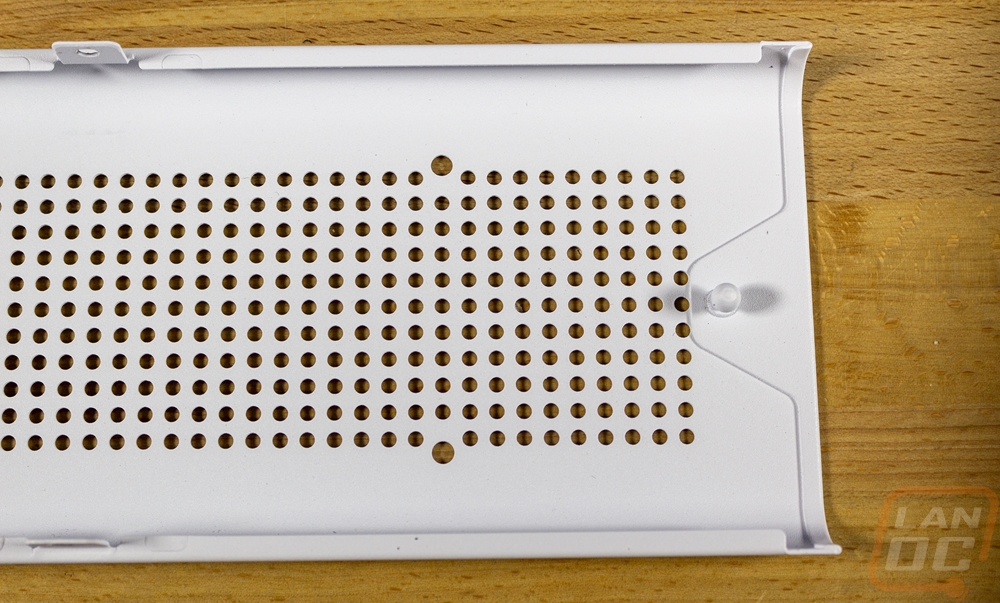
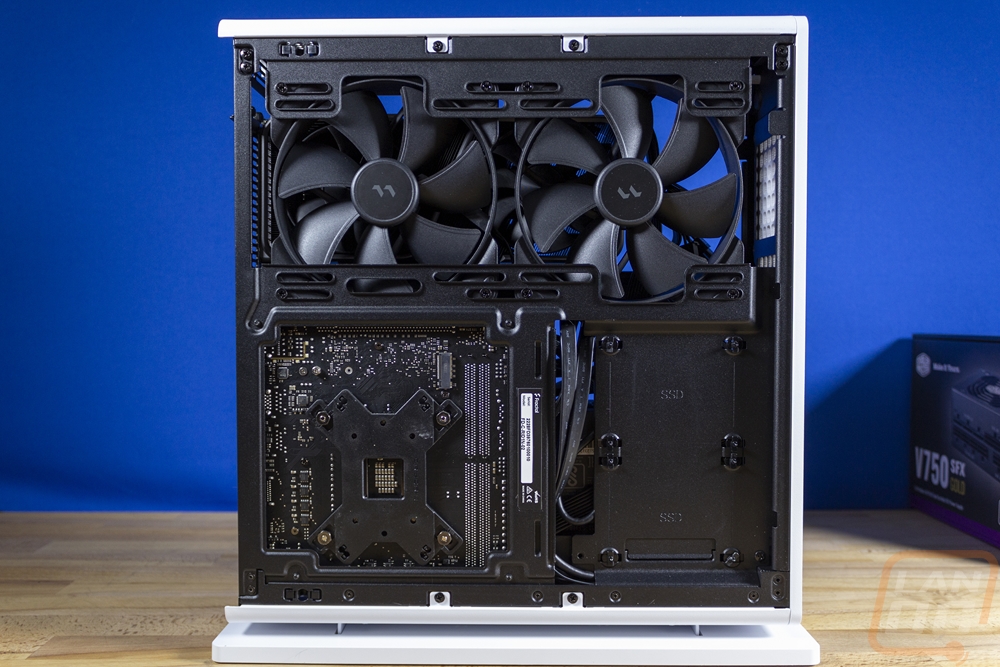
Both sides of the Ridge have steel side panels that have been powder-coated white. They have the fractal logo debossed into the left panel and both have an array of ventilation holes. The left side just has half of the panel covered in ventilation. The right side panel on the other half has most of the panel covered in vent holes. The holes are standard circles and on the right side, you can spot a few holes that are larger than the rest. These are for mounting the stand that was included when you do the horizontal layouts. You can put the stand in two different layouts on this side panel.

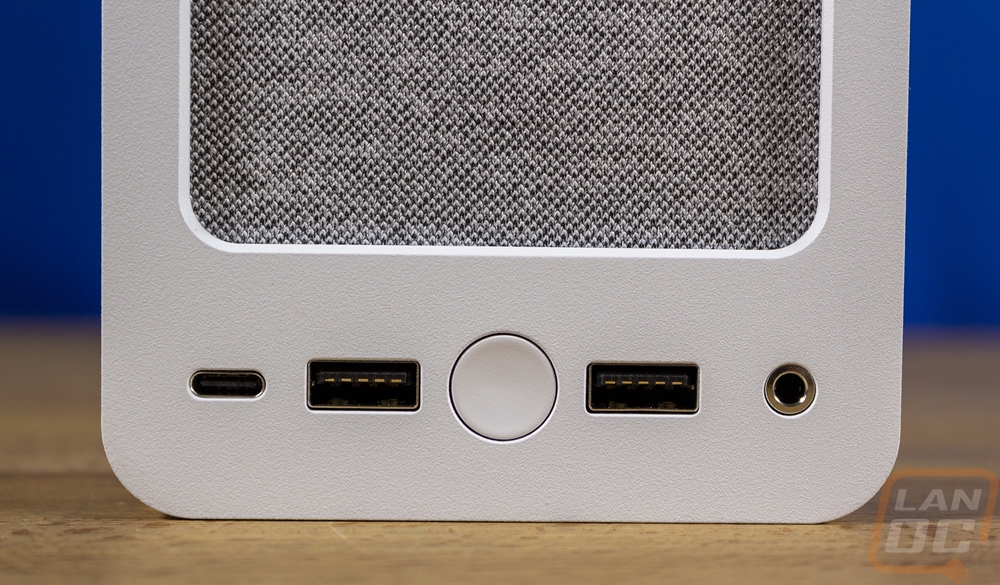
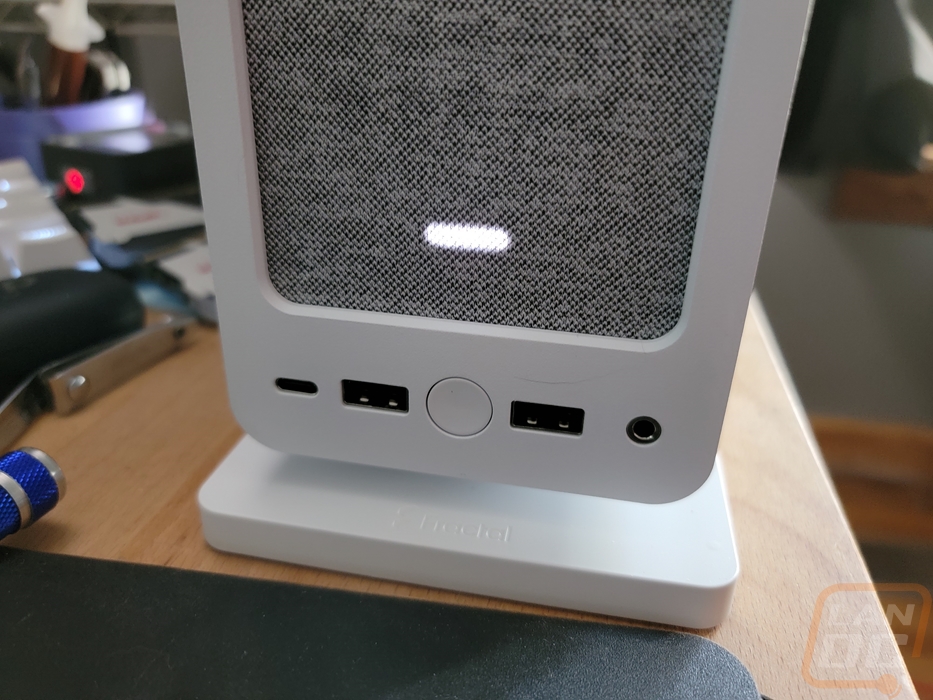
The front of the Ridge gives a better look at the overall shape which has rounded corners that wrap around the top and bottom to the side panels. The front however is flat, none of the rounded edges wrap around on to it. The fabric hides the ventilation that runs up the front of the case and the front panel is plastic and is removable. It is held in place with magnets making it easy to pop off when needed. Down at the bottom, they have the front I/O and power button. The power button is in the center and is white to match the case, it also has a status LED about an inch above the power button behind the fabric on the front panel keeping it hidden completely until it powers on. On both sides, it has USB 3.0 plugs. Then on the far left is a Type-C plug and on the far right is the audio jack. That is a combination of audio and microphone plug.

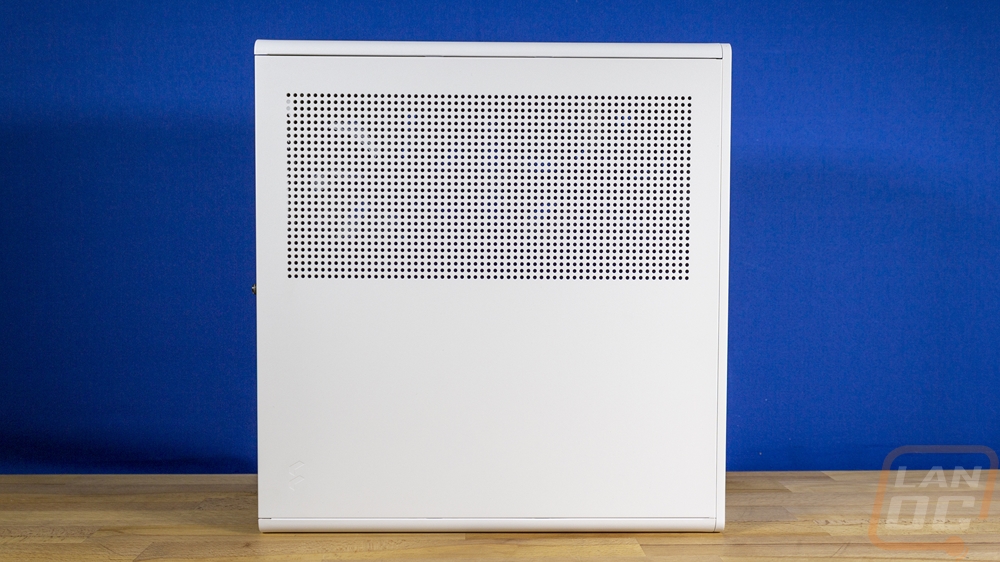
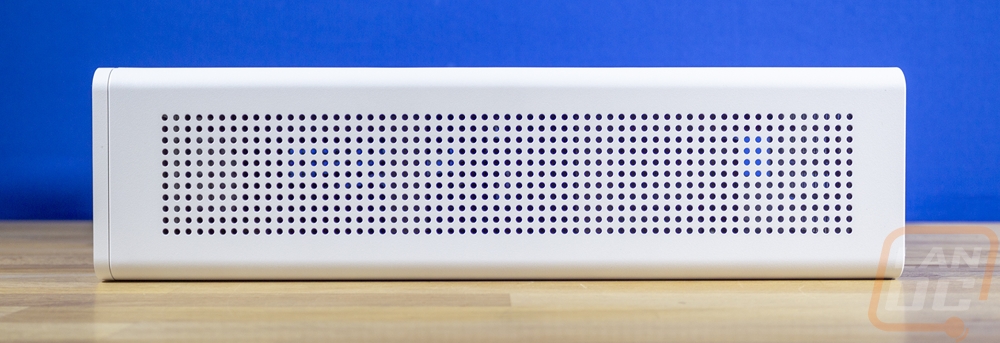
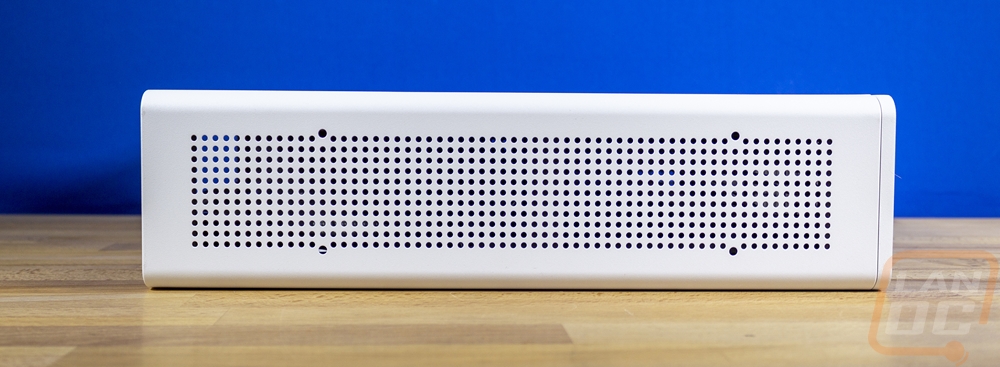
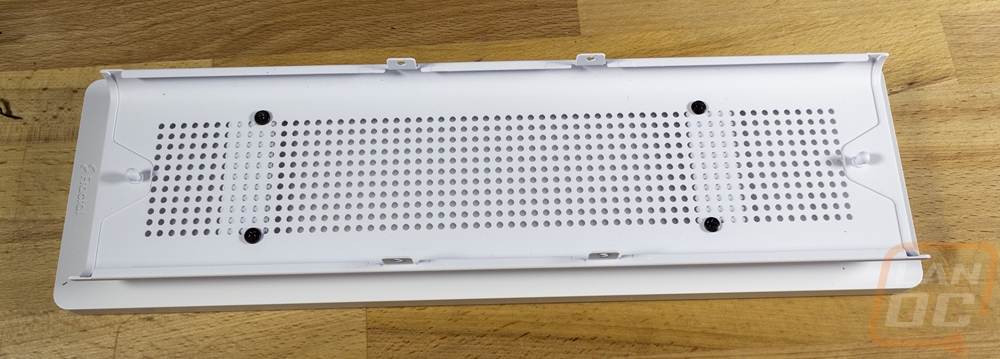
The bottom and top of the ridge look similar, these are both steel as well and have the round vent holes running the length of the panel. You can spot the bottom side though because it does have those four holes that are larger to mount the stand. I do wish that these holes were threaded, the stand mounting design has you mounting it from the back of the panel which for the horizontal layout is fine but means you do need to take things apart a lot more to get to it for the vertical layout, so swapping between the two is possible but could be easier.
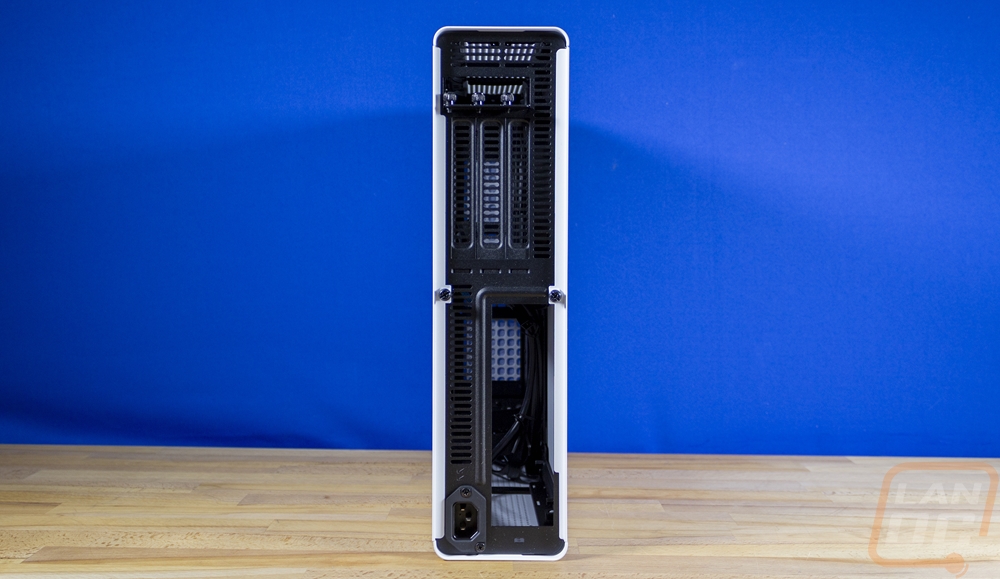
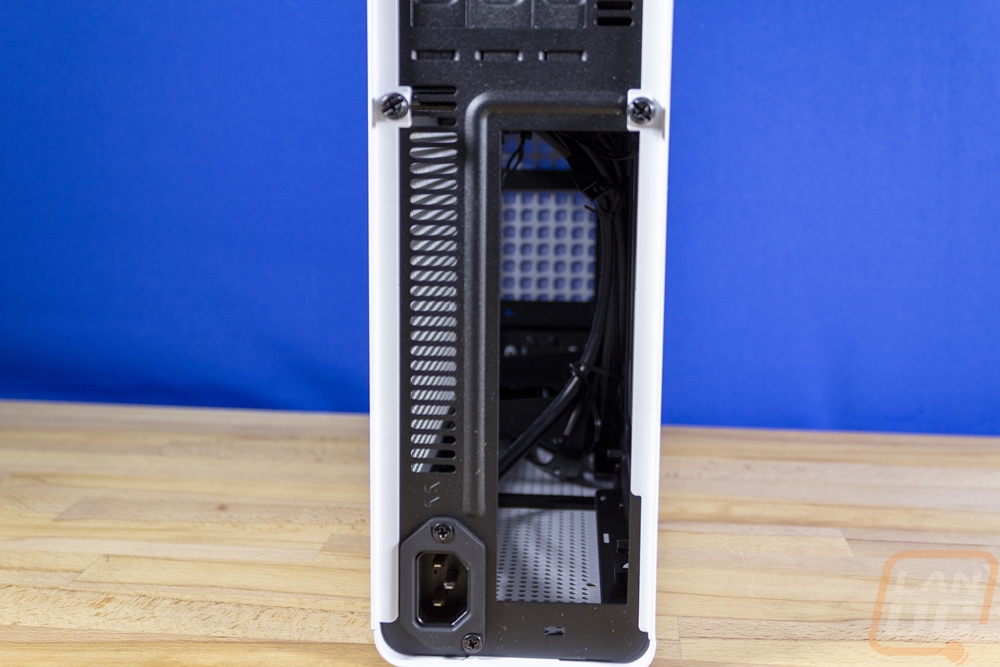
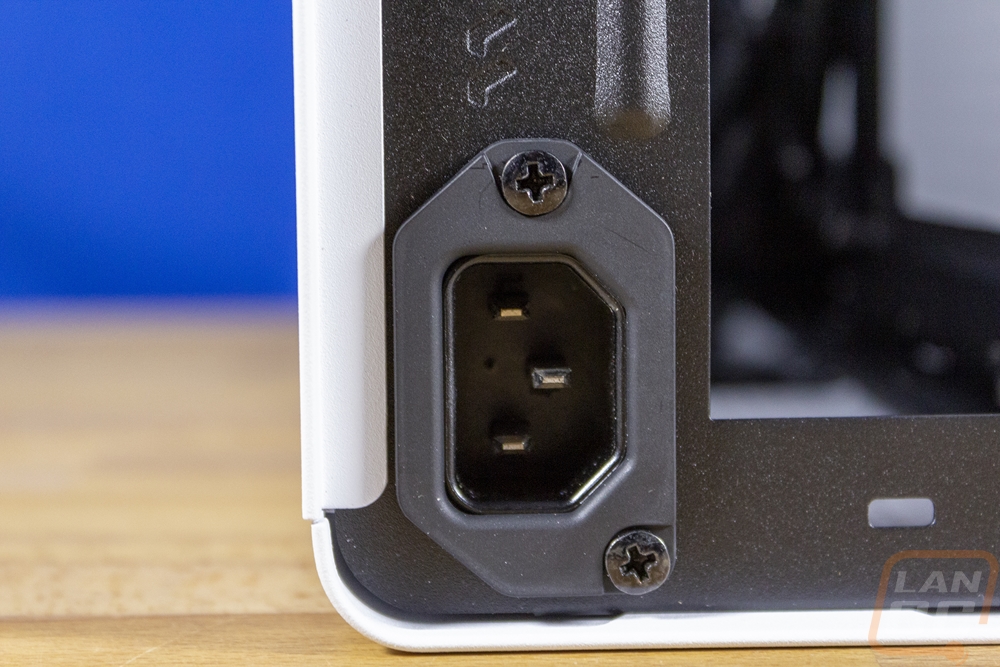
The back of the Ridge is the only area on our white model that doesn’t have that bright white finish. The back, like the inside of the Ridge, has a black finish. The view of the back gives us a lot better look at the overall layout though. The rear I/O for the motherboard is at the bottom here or on the left if we had it laying in the horizontal layout. Right up against the rear I/O is the power plug. Then up in the top half are the PCI brackets which you get three in total. The PCI brackets and the area all around it is all ventilated as well with slots and the area above the brackets is left open where some cases would have a bracket to cover that opening. It’s clear that they are looking to get airflow anywhere they can. Down at the bottom below the I/O opening, there is also a small slot which I almost missed. This is a security lock slot just in case the Ridge is set up somewhere that you are worried someone might take off with it. Given the size, it's a valid concern.

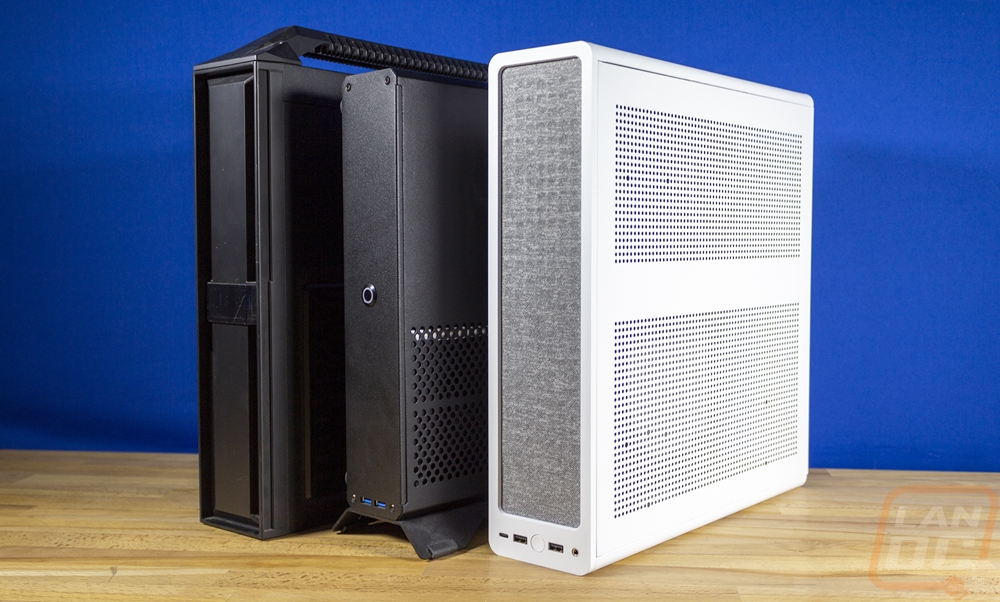
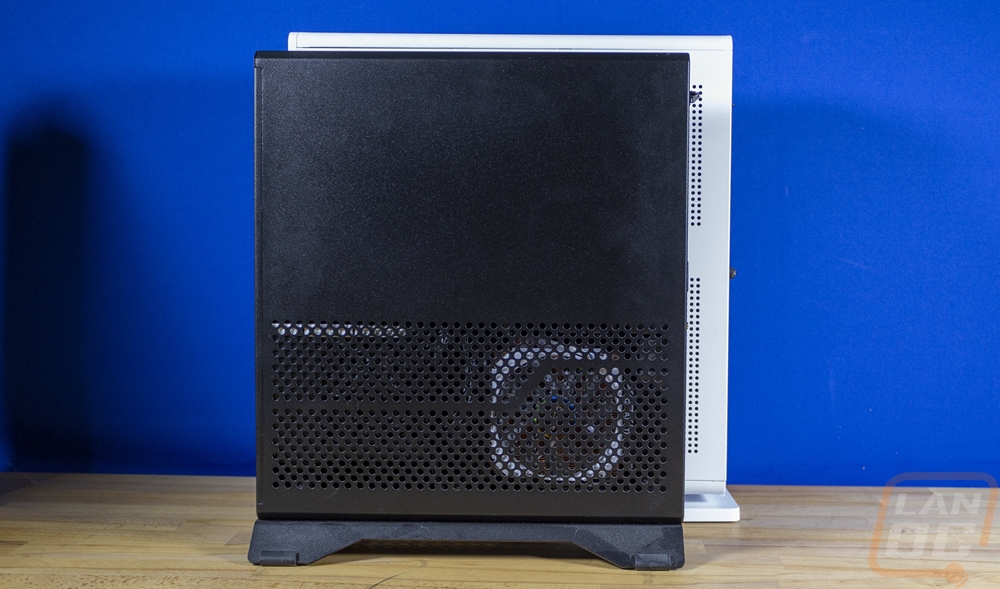
For comparison, I did put the Fractal Ridge next to a few other cases that share a similar design. Namely the Silverstone ML-08 which has the top handle and the Sentry 2.0 from Dr Zaber. The Ridge doesn’t have its base installed in one of the pictures and you can see how the Ridge would end up being taller. Even without the stand, you can see how much bigger the Ridge is compared to the Sentry 2.0 but it and the Silverstone Ml-08 are very close in size. The styling of the Ridge is a lot nicer than the Silverstone case, however.
Inside
Opening up the Ridge is interesting, both side panels have the same design which has a single attached thumbscrew at the back of the case. With that I expected the side panels to slide off, but they have two pegs at the back on each side panel that you have to pull out. This flexes the side panel a little but also holds it tight. I’ve always liked the simplicity of the pegs, I think I would prefer that the Ridge just use four on the side panels and drop the thumbscrew all together but at least with just one thumbscrew on each panel, it is quick and easy to get inside. The front panel can also come off and this is held in place just with magnets making it even easier to remove. With the side panels off it gives us a good look inside the case
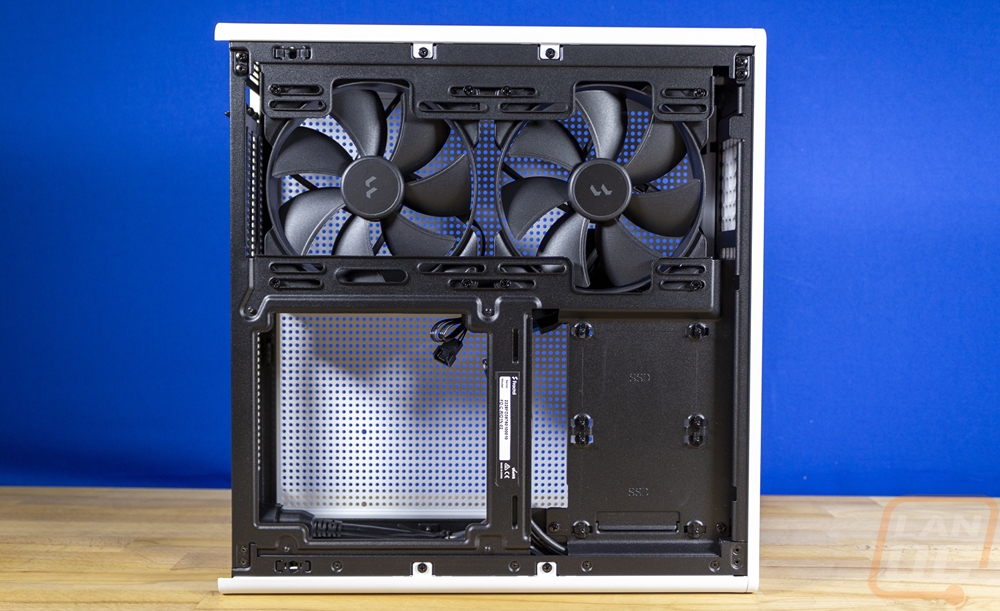
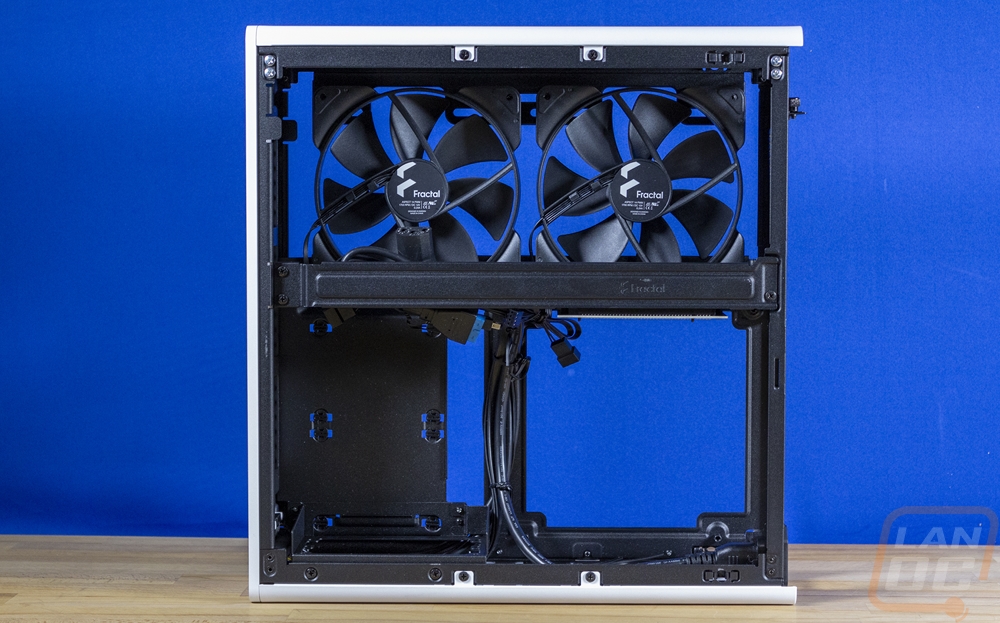
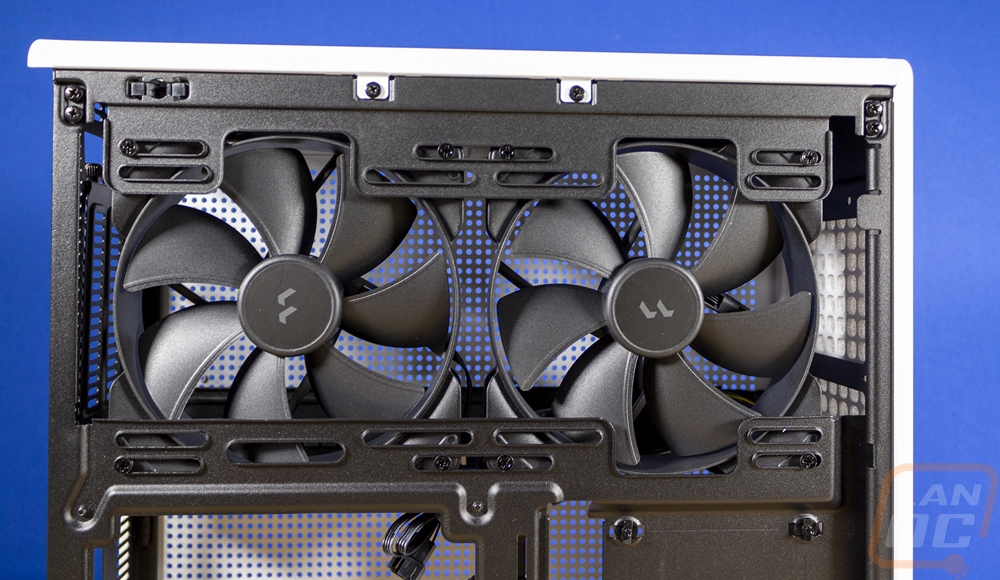
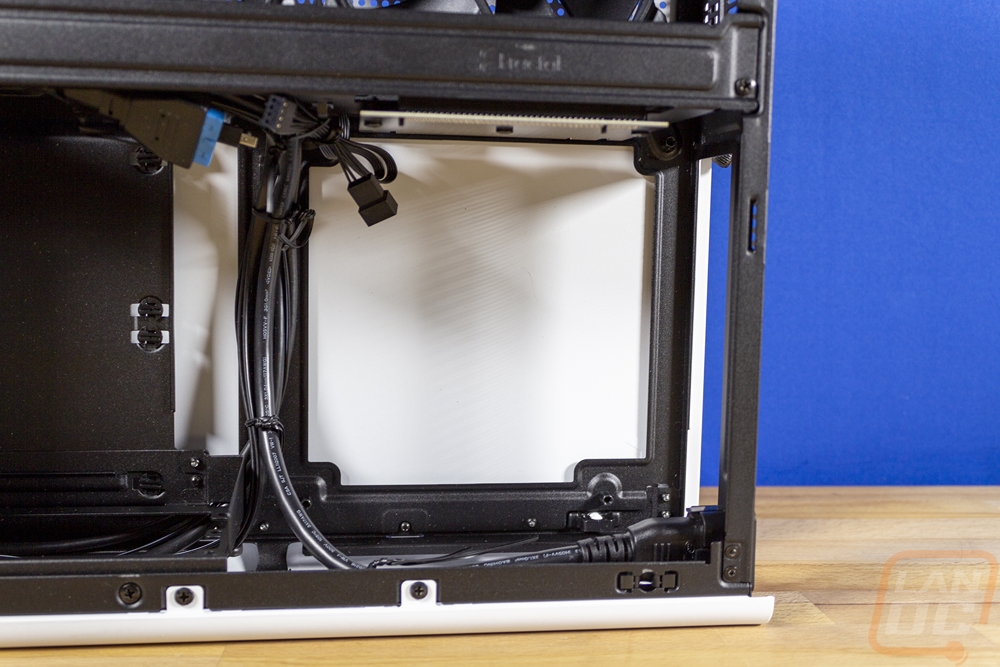
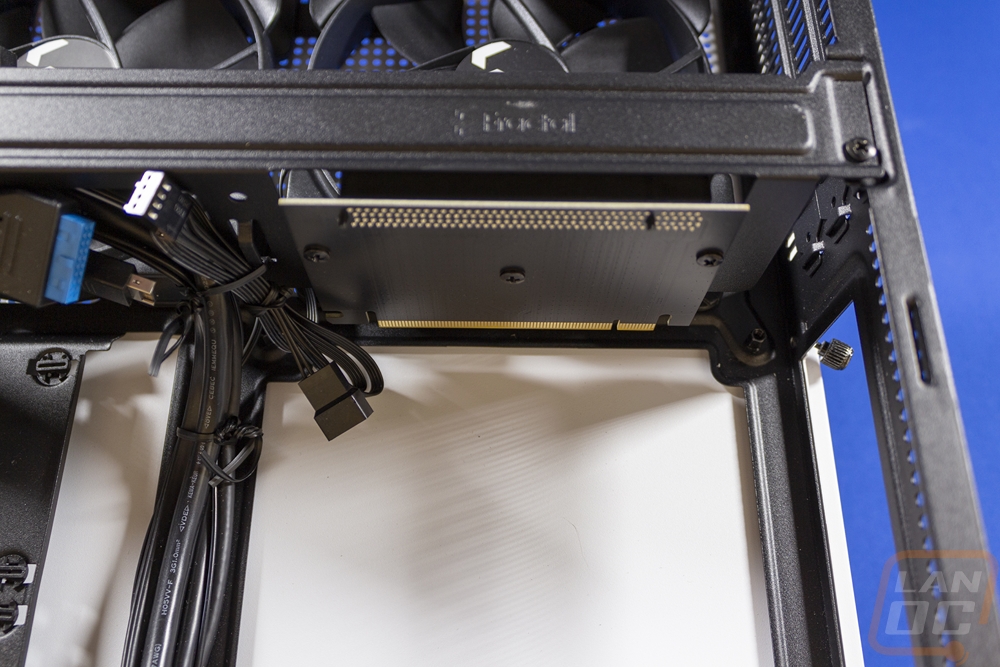
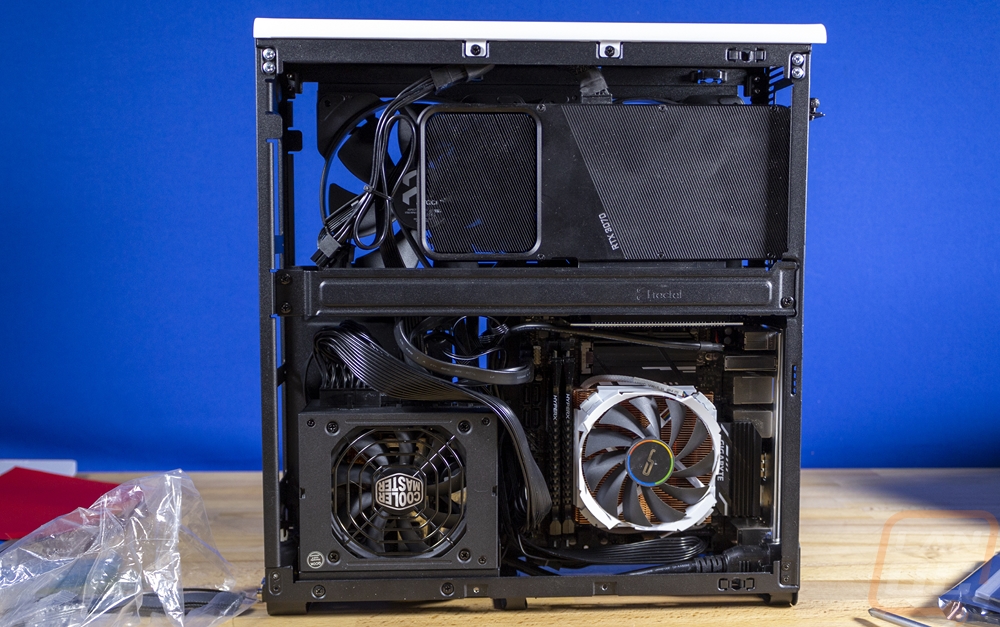
The ridge is divided up into two halves a little past the midpoint. The top half comes with two Fractal fans installed. These are both 140 mm fans and to match the interior they do have an all-black design. They run at 1700 RPM and have a surprisingly thin housing which is mostly just the ring around the fan blades and then tabes in each corner to reach out to the standard mounting holes. This fan location can also support two 120mm fans as well. The top half of the case is also where you will install your video card. In total, you can fit a card up to 335 mm long or 325 mm long if you install a 2.5-inch SSD at the front of the case. GPU max height is 137 mm in total unless you use the three 80mm fan mounts at the top which then will limit you to a max height of 125 mm. Then for video card thickness you can go as wide as 82 mm thick with the pre-installed fans removed or 57 mm with the two 140 mm fans installed. The design does also allow you to fit a 120mm water cooler if you use a short 175mm or shorter video card, which let’s be honest are extremely rare these days sadly. This is similar to the Sentry 2.0 with that shared space only the Sentry can only support a 92mm AIO cooler because of its smaller size. If you aren’t planning on using a dedicated GPU the entire top of the ridge can support a full-sized radiator, up to 280mm in length.

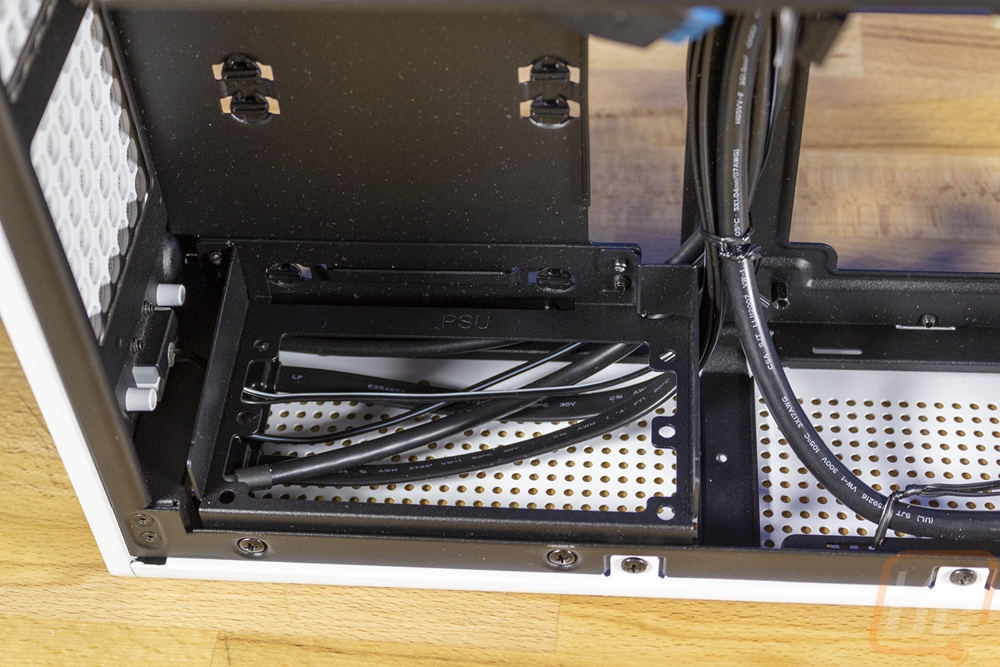
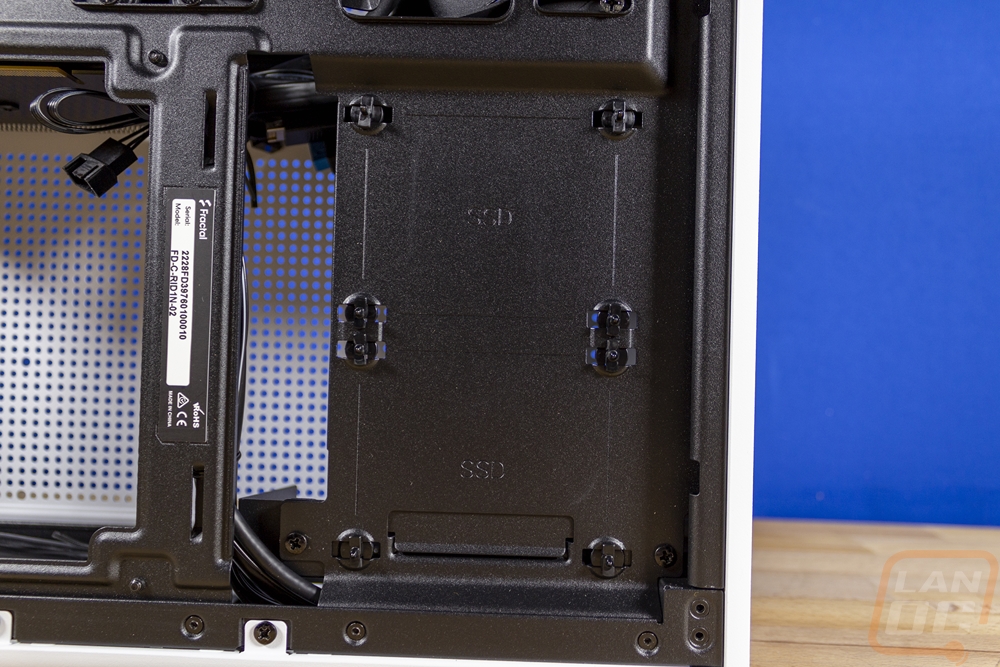
The bottom half of the Fractal Ridge then is where you will install your motherboard and the power supply. The power supply can be an SFX or SFX-L and that mounts into the removable bracket on the bottom of the left side. You can also mount another 2.5-inch SSD on the front panel next to the power supply. The last two of the four total SSD mounts go on the back of the case right behind the power supply. Then on the bottom right portion of the ridge you of course install your ITX motherboard. It supports a total height of 70 mm and you can go nearly the entire size of your motherboard except for the power plug in the bottom right corner that goes to the rear of the case. Up at the top of the motherboard location, the Ridge does come with a PCB-style riser card to flip your PCIe slot up and into the correct location for the top section of the ridge. The original Ridge cases support PCIe 3.0 officially but Fractal has a new PCIe 4.0-friendly riser that you can get from Fractal and I think will be included with new cases soon to officially bring support to PCIe 4.0.
Installation and Performance
When I first was checking out the layout on the Fractal Ridge I didn’t expect to have to pull it completely apart to build in it like most SFF cases require but as soon as I started to dive in it was clear a few things would need to be opened up. The biggest is pulling the bottom end of the case off and depending on your configuration of the top half you may need to remove the top panel as well. These are held in place with four screws each, two on each side. Then on top of that, they also have the snap-in latches as well. This does help with one of the concerns I had with the design, I thought you might have to lock in if you want the foot installed on the bottom or side before installing components, but being able to remove the bottom panel means you can install or remove it at any point. The bottom panel helps give you access around the motherboard for wiring and to get around the PSU mount which also has to be removed to build in the case. I went ahead and install the stand on the bottom while I had that out as well.

For our test system I had planned on running a current generation CPU and motherboard but I had delays in getting an ITX AM5 board in and our Z760I would work but I didn’t have a cooler that would work with it on hand. So I went with the old setup that was in our Sentry 2.0 giving me a chance at least to compare how it works in both cases. Installing the motherboard which already has the CPU and cooler installed as well as the M.2 drive and ram wasn’t too bad. I did however have to remove the screws for the rear power plug and pull that out to get the space needed to fit the motherboard. You also have to remove the PCIe riser card which can be a bit of a challenge depending on what tools you are using. With the cooler already installed getting the three screws that hold the riser back in place is hard to reach, a stubby screwdriver would be best for getting at them. You can also just remove the entire middle bracket to screw the riser to the bracket outside of the case, but I like to make things more difficult on myself.
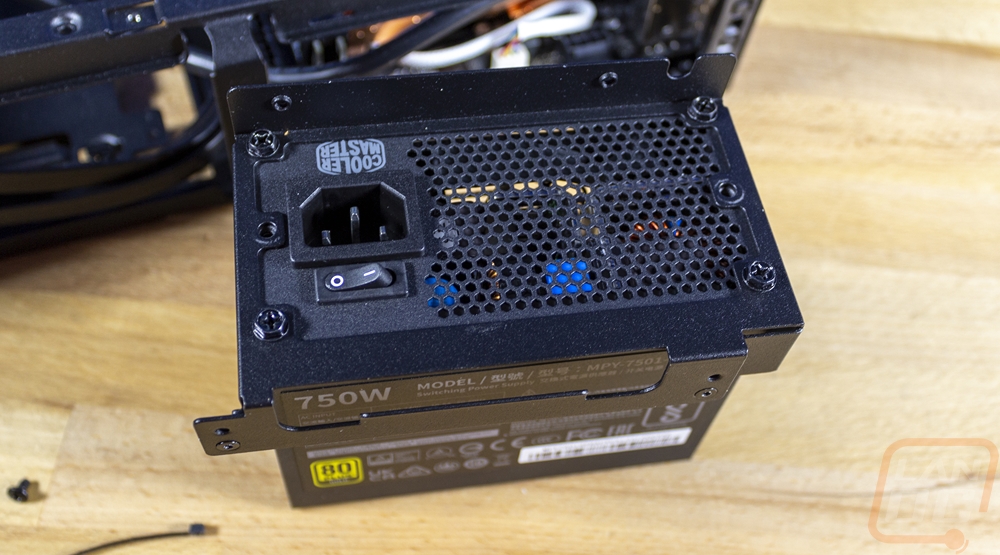
The Silverstone 600-watt SFX power supply that I intended on using also ended up causing problems as well. You can mount your SFX flipped in either direction, but only one way will have airflow. That specific model has the power plug flipped around upside down compared to the orientation on newer SFX power supplies. Because the Ridge has a right-angled connection for the C13 plug I couldn’t plug that in and fit the Silverstone SFX, switching to the Cooler Master V750 SFX fixed the issue simply because the plug is flipped, once I had that worked out the power supply installed in the mount and the mount went back in with no problems.
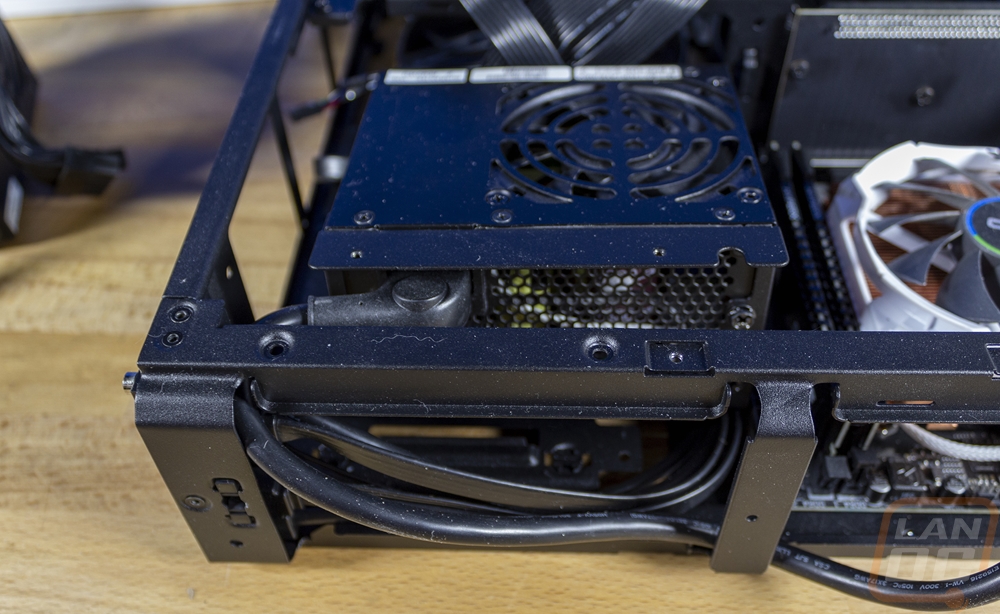
From there it was mostly just getting all of our wiring handled which in any SFF case can be a challenge. But the Ridge was a lot easier than I thought it would be because of the gap between the SFX power supply and the back panel. I was able to tuck a lot of the extra wiring in back there out of the way and out of the way of airflow leaving just a few wires to clean up as I hooked them up. Fractal left enough length on all of the cords to reach the far end of the board when needed which with ITX can be important because they all have different layouts and with the Ridge being larger than the Sentry 2.0 I didn’t have to be as careful with where each and every wire was run.
Installing the video card up top was easy and there is plenty of room for larger cards up in that space when you aren’t using any of the top half for anything else and having the two fans pushing cool air in right there to the card should be great for keeping all of that cool. I’m happy overall with building in the Ridge but can’t wait to update things and get a newer modern CPU and motherboard in along with a larger heatsink that takes advantage of the 70mm cooler height that is supported. In my ideal build, I would still love to have room for a 240mm AIO cooler as well as a standard-sized GPU.
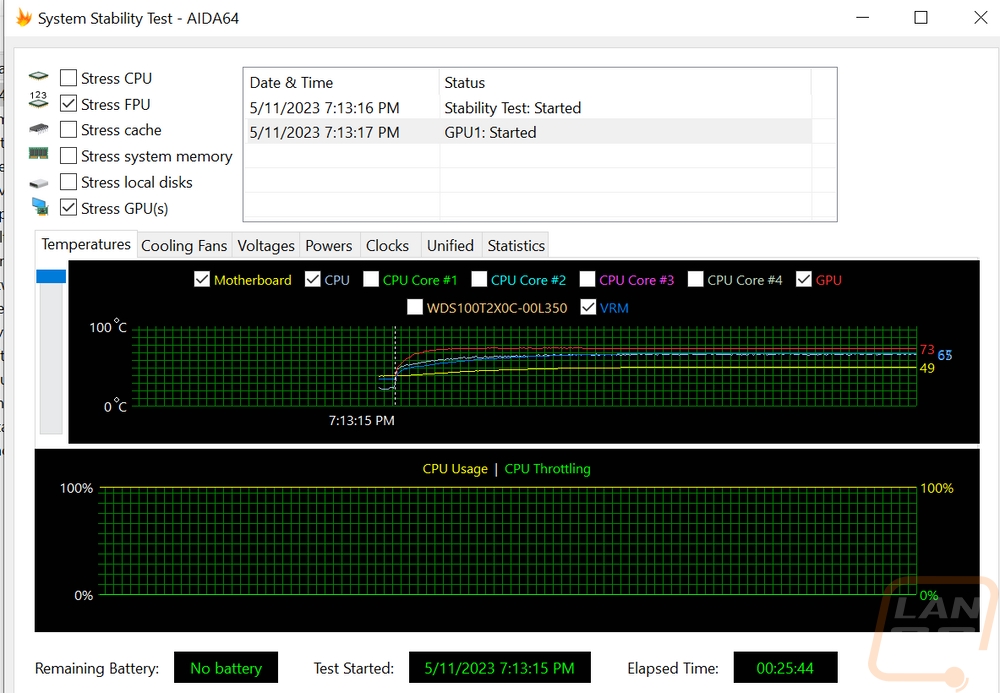
With our test setup installed and running I went right to putting the system under a heavy load. For this, I used AIDA64’s Stress Test using the FPU workload to put the CPU under extremely demanding load, and did the same with the GPU. Letting that run for just about 30 minutes. At that time the GPU was running at 73c and the CPU which for some reason AIDA64 wasn’t picking up was running at 50c which was right in line with what I saw on the Sentry 2.0 when testing with the same motherboard/CPU setup. The motherboard and VRMs were a few degrees hotter in the Ridge, however. I think this is because the Ridge is a wider case and the low profile cooler which in the Sentry was pulling air in right from the side panel. But for the Ridge a taller cooler would be more beneficial, putting the fan up closer to the side panel. When I switch to a newer motherboard/CPU configuration I will be also switching the cooler to the Noctua NH-L12S or the Noctua NH-L12 Ghost S1 edition as sometimes the power plug on the Ridge can get in the way of the larger fan depending on your motherboard.
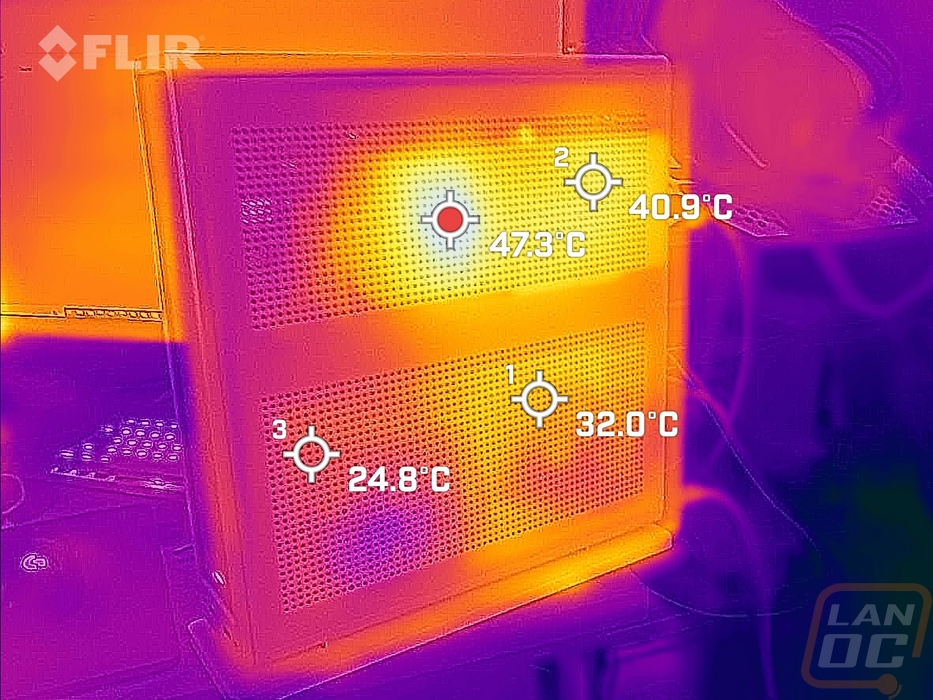
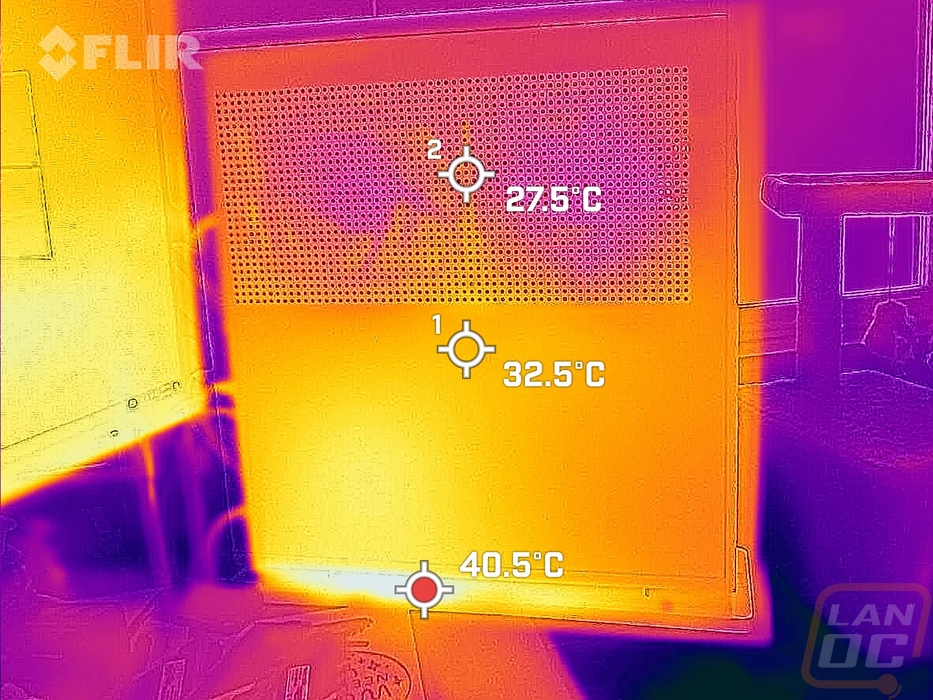
While doing those thermal tests I did also use the thermal camera to get a look around the Ridge. It’s no big surprise where the hotspots are with some over top of the motherboard and a lot on the exhaust out side on the video card up top. Up top having the two fans blowing through helps keep the card running cool but does push that heat out on this side. Then on the back side, things are a lot cooler but you can see the heat from the motherboard on this side as well. Especially down on the bottom foot. This is from the CPU heatsink pushing air out in this direction.
Our side fans were hooked up to the motherboard which was working hard to keep the CPU cool. This kept the fans running at or near their highest speeds which isn’t the most ideal configuration. Being able to tone the GPU fans down slightly would be great, even better would be linking them to the GPU temperatures which you can do on some configurations. Asus for example has a few motherboards with fan headers right on the board or it can be done on the software side of things. This would be important because the side fans made a majority of the noise in the system. Especially when the system was idling and not under a stress test. When under our heavy stress test the system was running at 47.9 decibels from 18 inches away. I wouldn’t say it is screaming, but much louder than I would prefer. The stock fans can do the job with adjustments on the fan profile but when I upgrade this system I will most likely upgrade to a quieter fan as well.
While testing I did also get a picture of the front status LED that is hidden behind the cloth front panel on the Ridge. It was surprisingly bright and I dig that it stays hidden until the system is on.
Overall and Final Verdict
It’s always exciting to see more of the mainstream case brands bring out SFF cases, in this case Fractal was already in the market years ago with the Node 202, and the Ridge has improved on the styling and brought updated features into the same form factor. Both with the black and white color options the Fractal Ridge has a simple but good looking design that completely avoids looking like a “gamer” design. Who knew all it took was a little fabric to give a simple case a little style and help it look at home in your office or living room? Like with the Node 202 and the Sentry 2.0 as well, this “console-like” form factor has advantages by being able to fit in a TV stand or in a vertical orientation it has a small footprint that makes it great for offices with little space or LAN parties as well. Because the design is larger than the Sentry 2.0 it has support for a larger heatsink and can fit more of the modern larger GPUs which are most of what you will find. The extra space helps when building in the system as well, wiring was a lot easier with space to hide some of it behind the power supply. With that space, Fractal was able to make sure the wires that come with the case can reach anywhere on the ITX motherboard to work with any design. Fractal has also addressed the PCIe 4.0 issues with an updated riser which will help now that most motherboard and GPU options using it.
I did run into a few issues when building in the Ridge that you will have to keep in mind. The power cable that runs from the power supply to the back of the case gets in the way with some coolers when used on some motherboards. That same power cable with its right-angled connection to the PSU also caused issues with our older 600 watts Silverstone SFX power supply, switching to another brand that had the power plug flipped around fixed that issue. I also found the two included fans to be a touch loud when in use. This can be fixed by making sure they aren’t tied to the CPU temperatures for their fan profile, with the fans being up in the top half with the GPU they would be more useful being tied to GPU temperatures. The biggest issue with the Ridge is just an issue that you will run into with all SFF builds as they get smaller and smaller. Current generation CPUs put out a lot of heat and to deal with that you need a big heatsink or water cooling. Even though the Ridge does open up space and supports water cooling, the tradeoff is that it goes in the space for your video card. A short GPU and a short radiator could work, but none of today's GPUs are coming out in the ITX form factor as well. I would love to see a mainstream option like the Ridge that is similar in size that could make the AIO and GPU setup work with a standard length 2 slot GPU. This way we wouldn’t be limited to just the lower wattage CPUs and worrying about heatsink/motherboard compatibility.
As for pricing, the Fractal Ridge has an MSRP of $129.99 which these days isn’t too bad. The original Node 202 was a great value at $79.99 and while the Ridge isn’t priced badly, it isn’t targeting a value like that these days. The build quality has improved, as has styling, and overall compatibility. Overall the Ridge is a great case if you want to build a crazy GPU-less PC with amazing cooling or if you are willing to work around some of the constraints that the size offers you can piece together a monster build by utilizing the 70mm cooler height with a wide cooler and avoiding a few of the crazy wattage CPU offerings. Any of the new 65-watt AMD Ryzen 7000 CPUs for example would be perfect paired up with a good cooler leaving plenty of room for one of today's large video cards. If you need more storage than your motherboard can support in M.2 drives the Ridge can also pack in up to four 2.5-inch SSDs as well adding to the flexibility in build options.

Live Pricing: HERE


