Installation and Performance
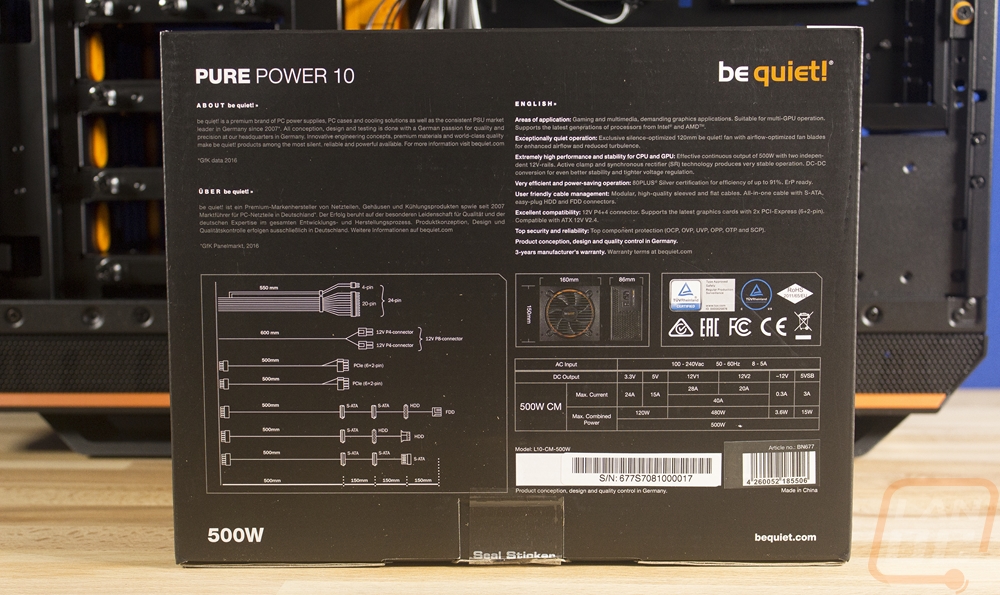
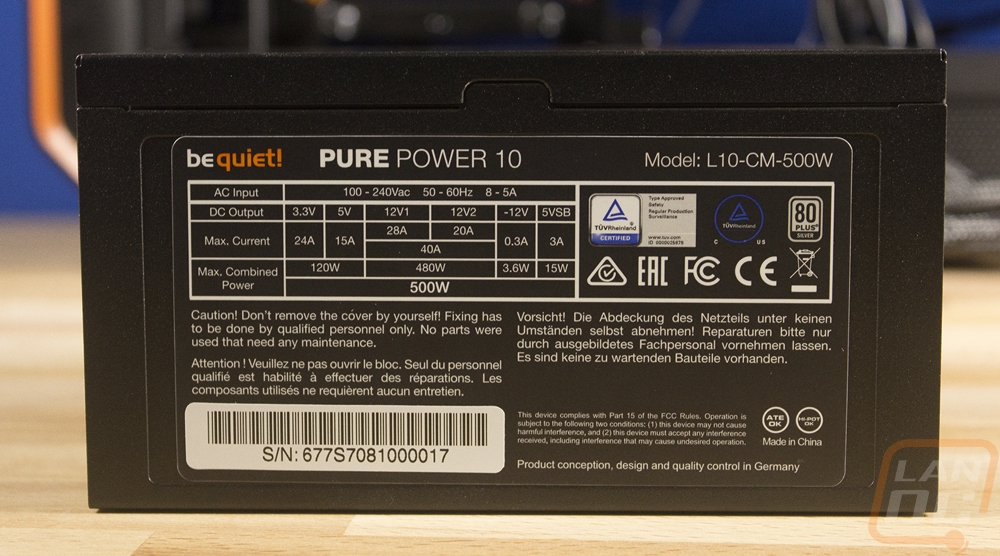
Before I could get into testing the performance of the Dark Base Pro 900 I did have to build a PC in it. But I ran into an issue, all of my test power supplies were tied up in project builds. Be Quiet! was gracious enough to send over a power supply so before I get to building let’s take a quick look at what they sent over. They sent over the Pure Power 10 500w model and the box matches the same look of the Dark Base’s packaging, all blacked out, photo on the front and simple and to the point branding. Inside the power supply, itself is wrapped up in bubble wrap and the cables are twist tied up next to it. This is a basic 80 plus silver power supply and they didn’t waste any packaging with fancy velour bags or a bag for the extra modular cables, though I wish they did include a cable bag for later.
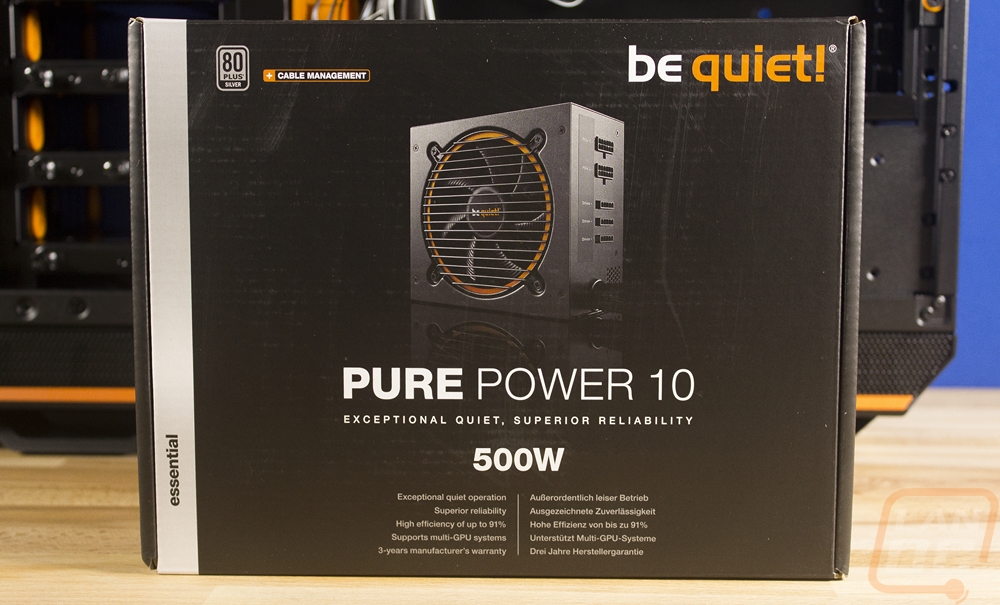
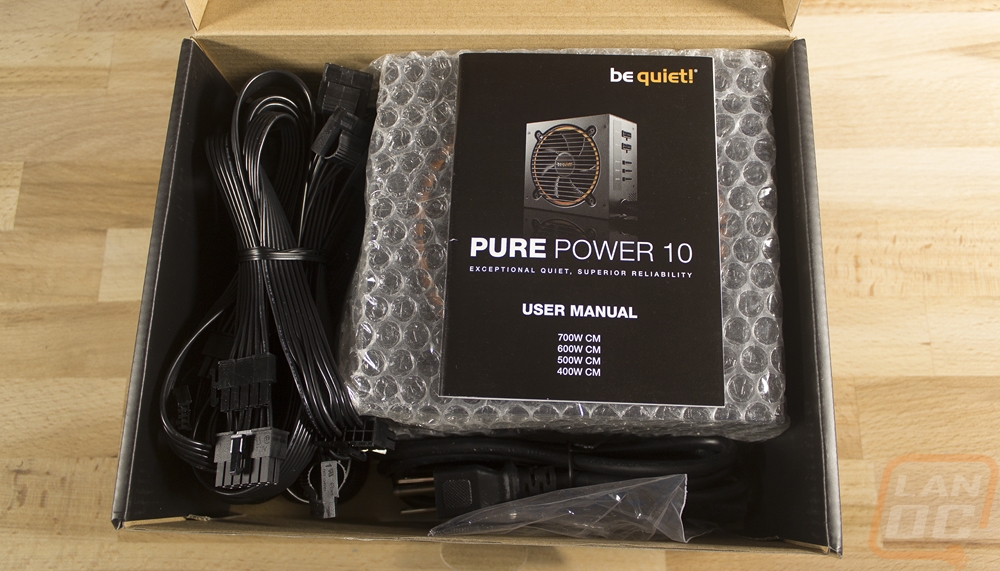
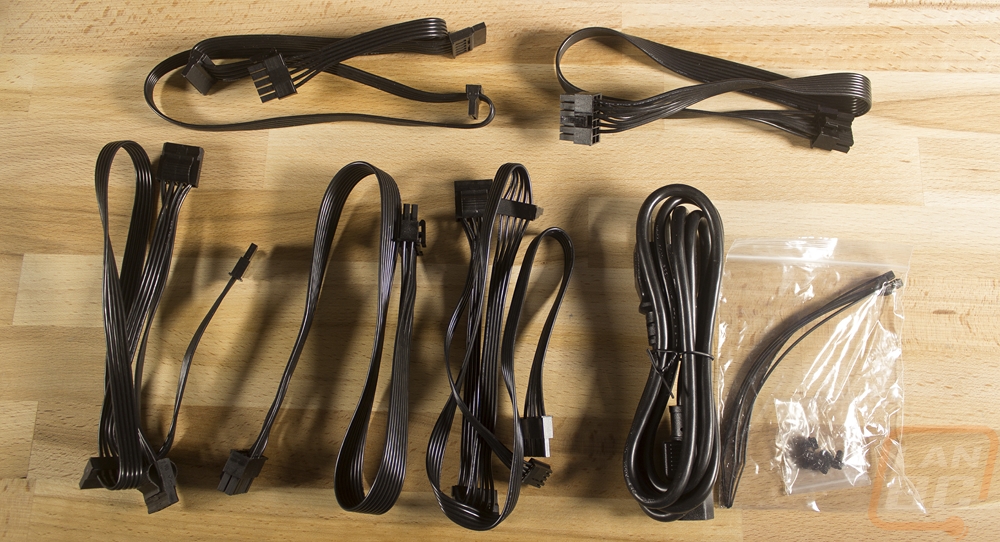
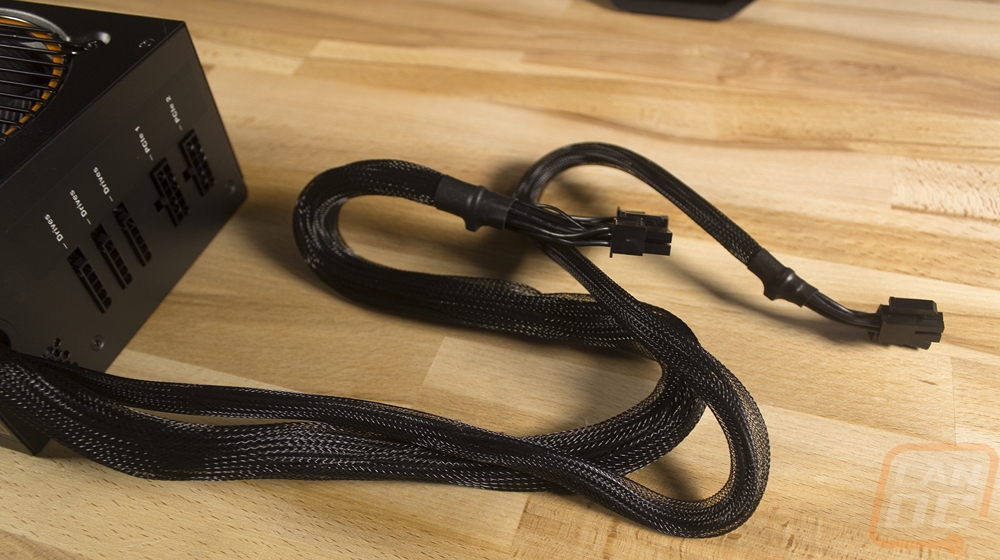
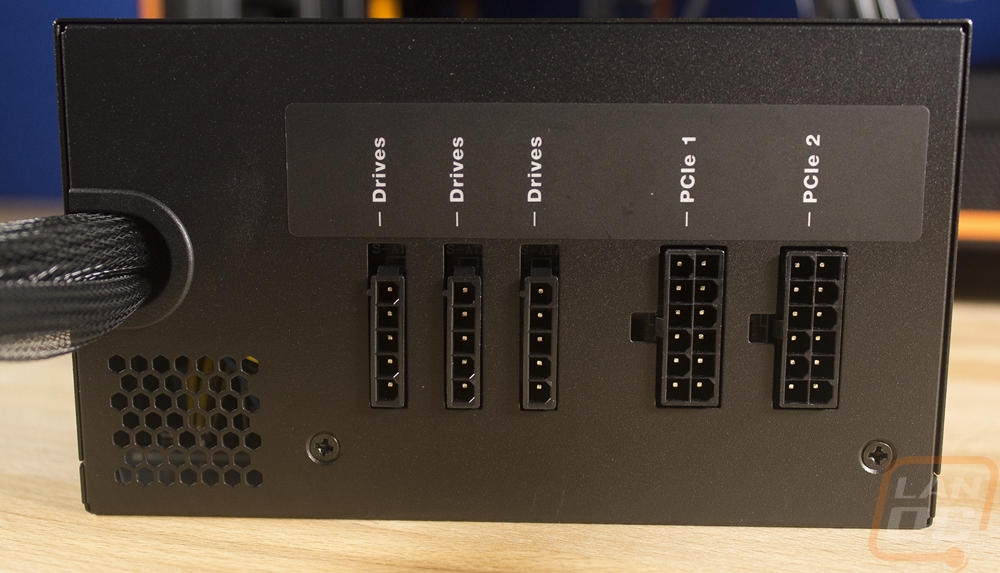
It is only semi modular so the main 24 pin and the CPU power are hard wired. For the rest of the cables you get two PCI cables and they are both labeled 1 and 2. There is one cable for Molex connections and then two SATA cables, one having an additional FDD (floppy) connector as well. Then you also get a power cord, four black screws, and a small bag of zip ties to clean up your wiring when you get it installed.
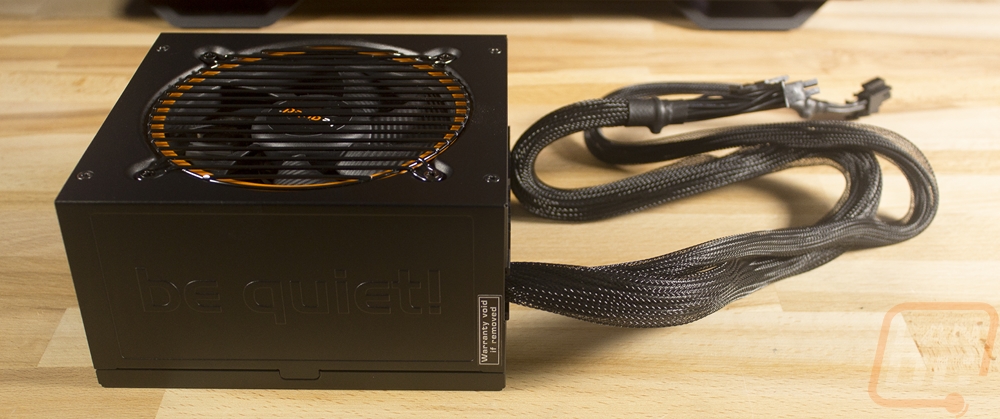
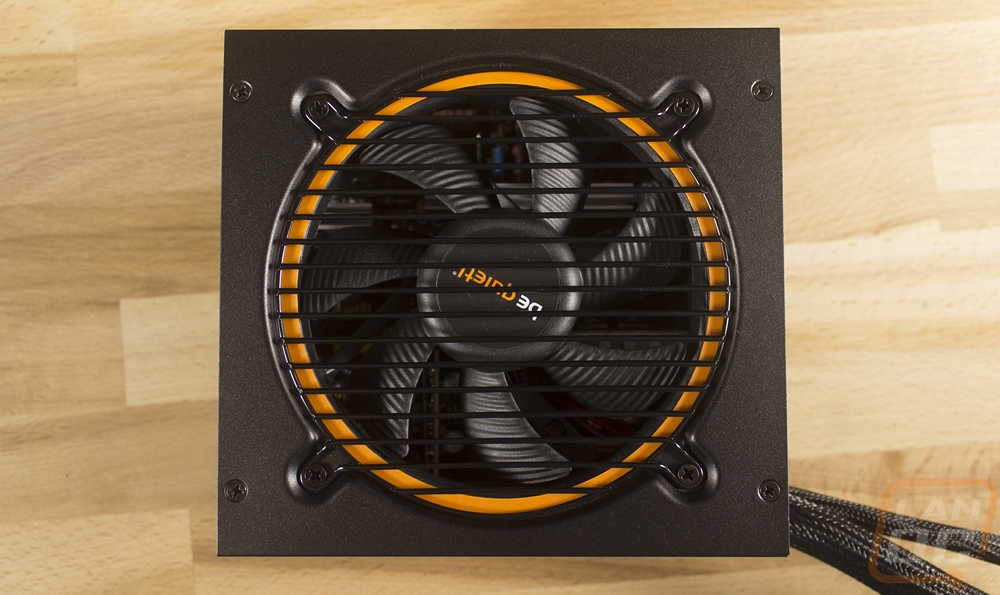
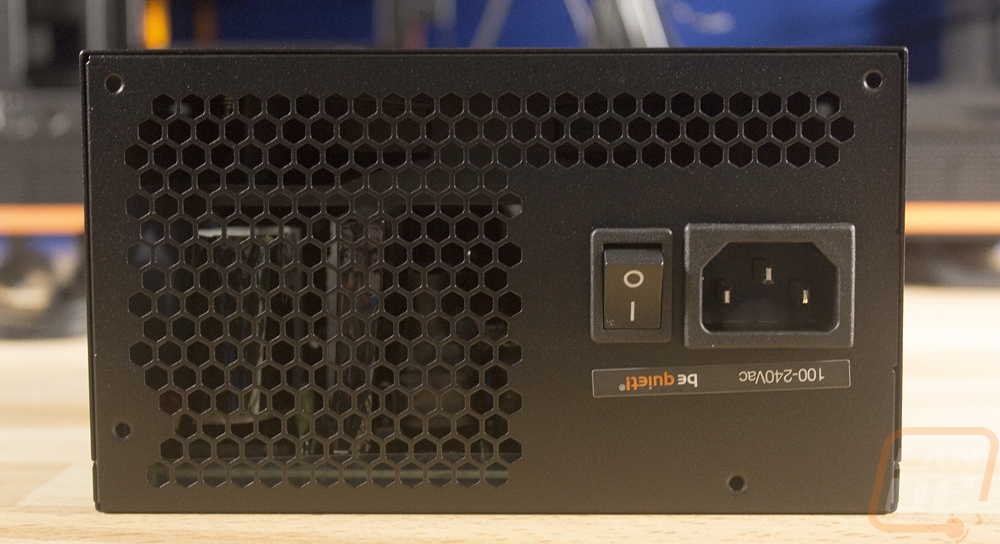
The power supply itself looks great for a basic power supply like this. There are just the connections needed on the modular end and the outside has a switch and the power connection with some venting. It has a nice looking 120mm Be Quiet! fan inside with an orange ring around it that perfectly matches the Dark Base Pro 900 Orange. One side of the power supply has a clean look with the Be Quiet logo embossed in it and the other side has a huge sticker with all of the details on it. Sadly it looks like if you install the power supply fan down in most cases the good looking side will be hidden and you will have to pull that sticker off to keep a clean look. I would prefer it be opposite of the fan side and leave both sides clean.
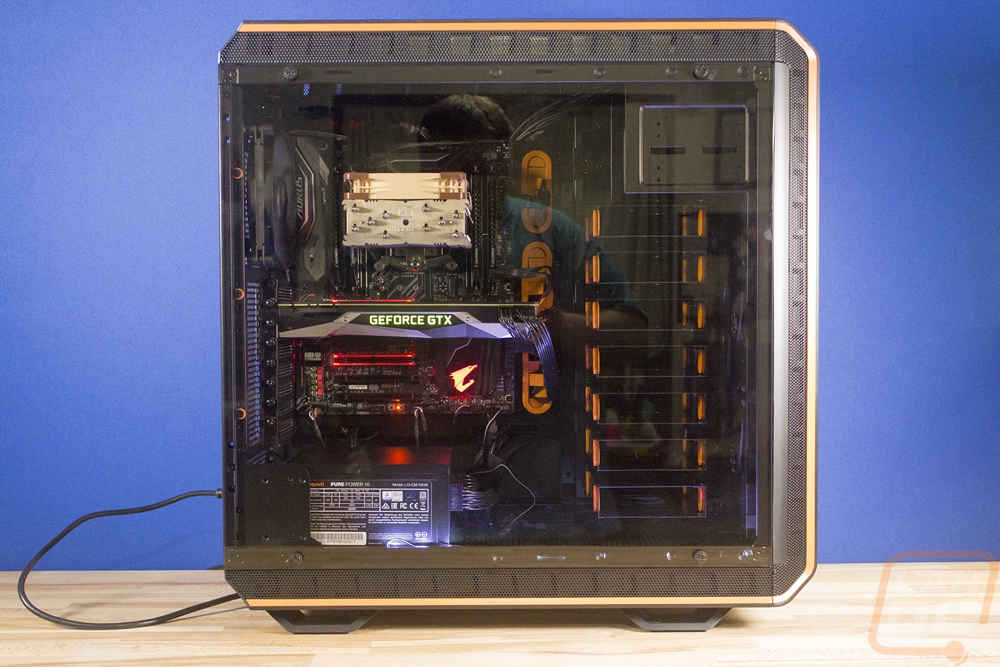
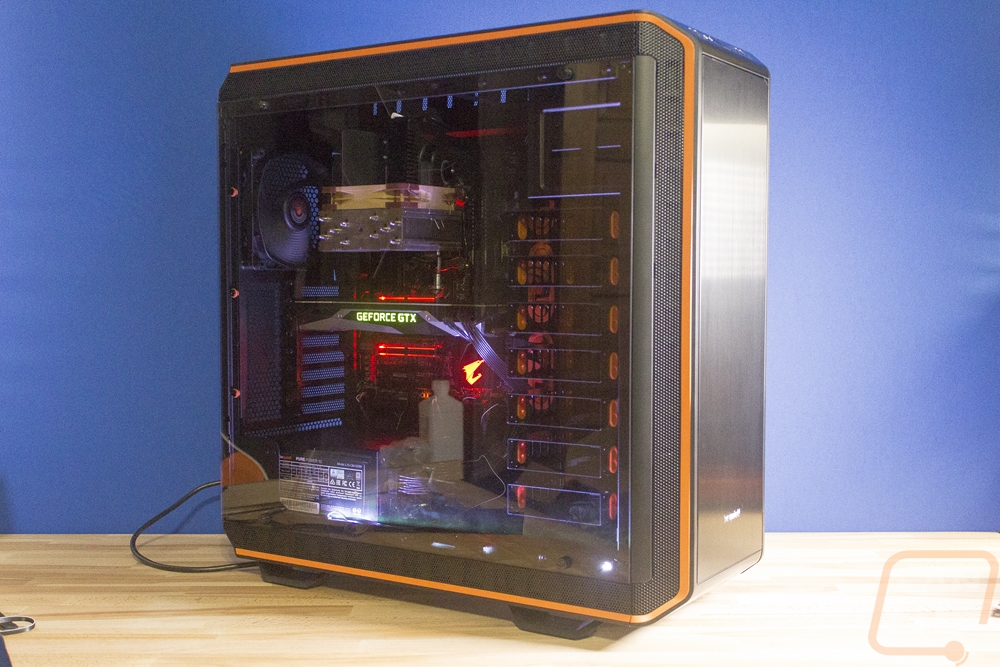
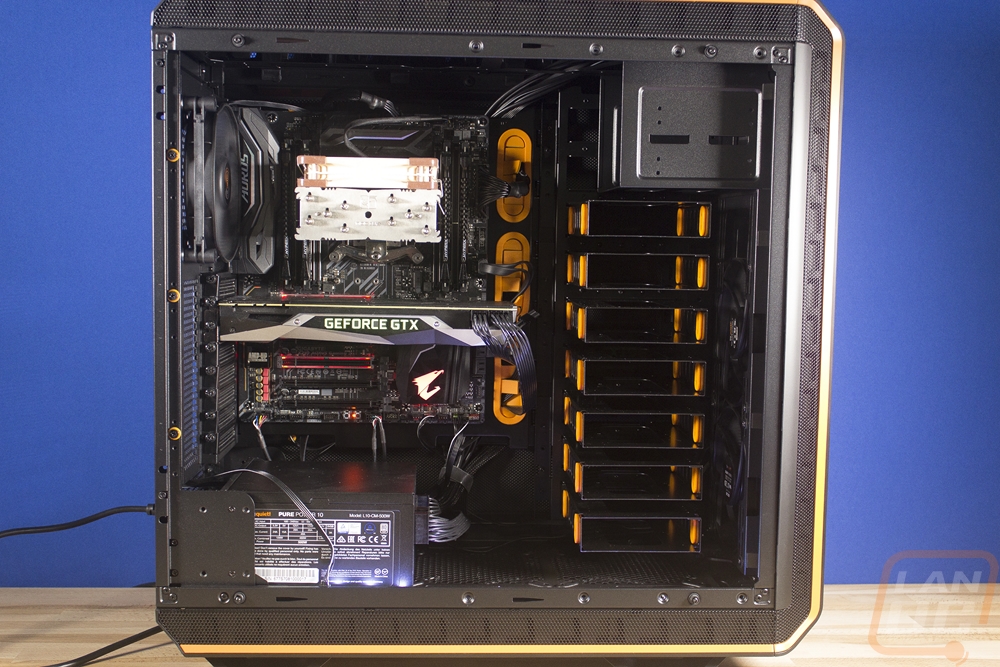
Okay now let's get a PC built in this huge case! I grabbed our X299 test setup and it already had the i9-7900X installed with a Noctua tower cooler, and 32 gigs of HyperX memory. That alone saved a bunch of time, not that getting that stuff installed in this case would be an issue, there is enough room to get at all of the sides of the CPU for the heatsink install for example. I then dug out a GTX 1080 Ti, it might not be Threadripper but the X299 and 1080 Ti is still a monster setup and that is exactly what this case needs. Now the power supply, it has enough power but it does stand out a little in this build. Speaking of the power supply, getting it installed required me to dig out the book and figure out a few things. I originally thought I would need to pull the two panels off the rear to get at the four power supply screws. They actually provided thin thumb screws specifically for this but even with the two inches of space using the middle mounting location, this was a little tight and not as easy as I would have liked. Here is a view of the three PSU mounting locations, that left one is jammed all the way over to the left. For that one, you might want to remove the bracket and install the PSU to it first then mount it.
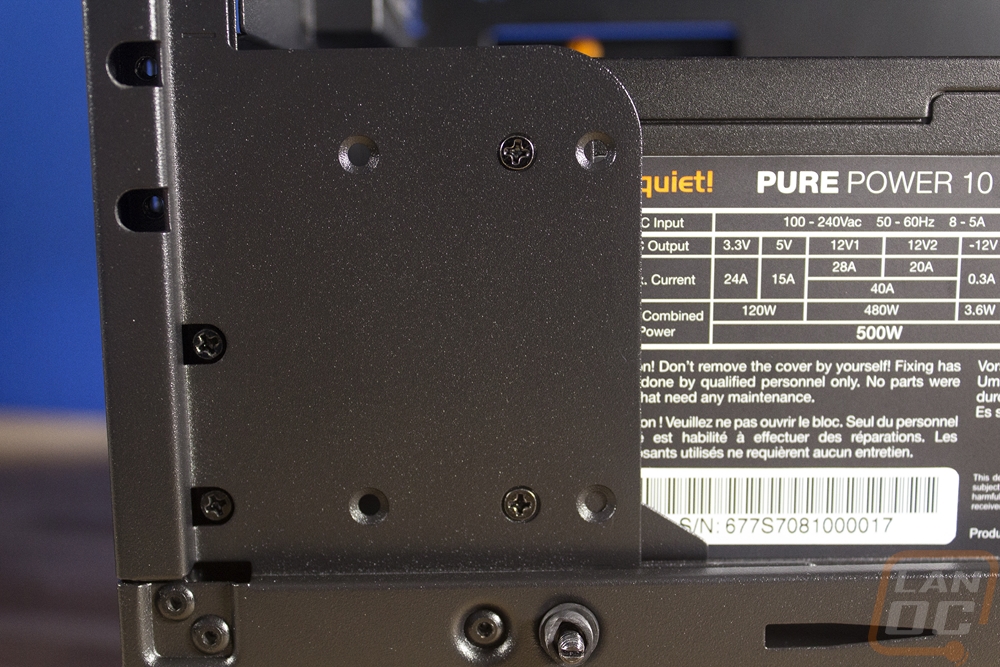
Now in doing all of this, I did remove a few of the long screws for those rear modular brackets and I made a grave mistake. When I went to reinstall the screws I dropped one down into this rail. From what I can see the rail is riveted in place and has four walls all around it. I think that screw is going to be rattling around in this case for the rest of its life. So be VERY careful if you are installing these.
From there I went around back and installed our SSD and then started getting everything wired up. While the power supply itself doesn’t have a shroud to cover up the wires, the rest of the wire management isn’t too bad. The space behind the motherboard tray is tight so you will have to be careful about overlapping any cables. I used the included Velcro strips and cleaned up most of the wiring. Sadly I forgot to install the LEDs until everything was done. I had a hard time running the wire without it being right in the way. If I had the wire stick out the right side it wouldn’t reach the PCB on the back and on the left, it was up next to the power supply so it would be visible run on the front or back of it. I might even consider using the lighting on the sides to make things easier rather than the traditional top and bottom.
So with everything installed and running, I then set off to see what life would be like with the Dark Base Pro 900. The most obvious thing was just how quiet it runs. The Noctua cooler isn’t a loud one but with three fans plus the power supply and GPU this setup should make a little noise. The 140mm SilentWings fans on the front and back of the case though were quiet and the thick padding on the front and the side panel kept things quiet as well. Now all of that made the whole thing really heavy. The case itself was almost 32 pounds before adding everything inside of it. Imagine a bigger power supply and one or two custom water cooling loops. It’s obvious this isn’t the case for someone who moves often or is taking their main rig to LAN events.
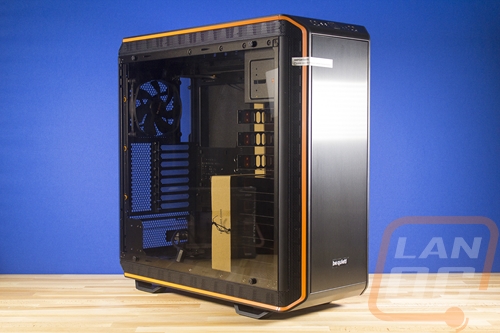
The tempered glass side panel looks amazing in person. It is so reflective that all you can see in photos is me or everything in the background. While I toyed with the modularity, my test setup didn’t really require it at all. I did like messing around with those hard drive cages though, the drives would slide right in and out.