When you just have one computer in the house storing your data and putting together a backup solution can be as simple as an external hard drive and a basic cloud storage account. But what I have found is that as you have more computers being used, especially when you also start running HTPCs or in my case Shield TVs on all of your TVs you need a better solution. For around my house, we run multiple NAS. One with critical data on it and others with stuff like our backed up media files for access at the televisions. That is where companies like Qnap come into play, they have developed low power usage NAS that goes WAY beyond just storing your data. They have a lot of media integrations and a variety of ways to back everything up. Qnap sent over the TS-453Be, a quad-core NAS designed to be expandable for M.2 or 10GbE support while keeping the costs down without fancy external screens. So today I’m going to see what kind of feature Qnap is offering and check out its performance and their software.
Product Name: Qnap TS-453Be
Review Sample Provided by: QNAP
Hard drives Provided by: WD
Written by: Wes Compton
Pictures by: Wes Compton
Amazon Affiliate Link: HERE
Packaging
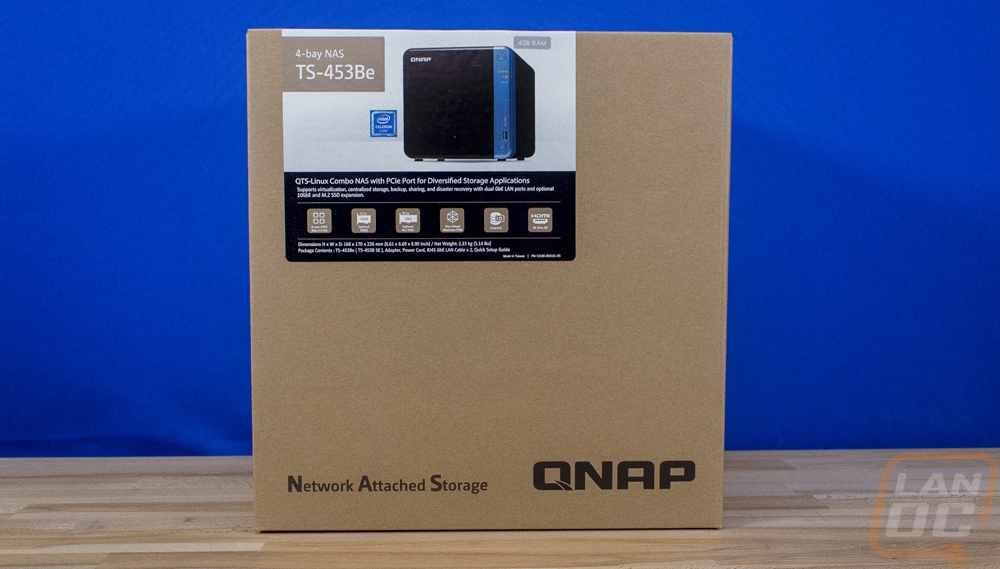
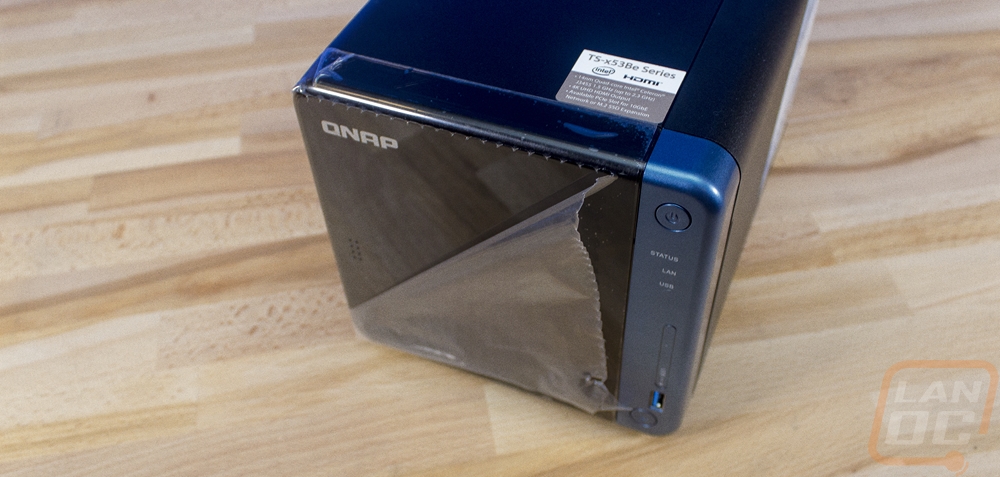
The box for the TS-453Be looks a lot like the last QNAP NAS to come in to the office. That is because QNAP uses a simple brown box design with their branding on it for the main box that can be used on multiple models. This is a great idea and a way to not have to make new boxes for every single small model change. They then have a large color sticker that wraps from the front to the top of the box. That sticker has the model name and a photo of the NAS on it. It also dives in with a description and a bunch of icons for the model's features.
Inside of the box, the NAS comes enclosed in a thick plastic bag then inside of inch to an inch and a half thick foam all around it I doubt they are having any issues with these being damaged in shipping.
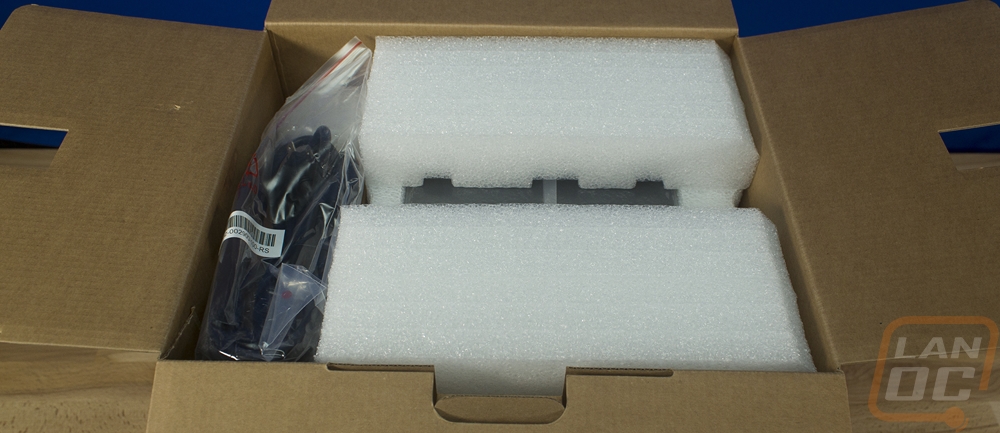
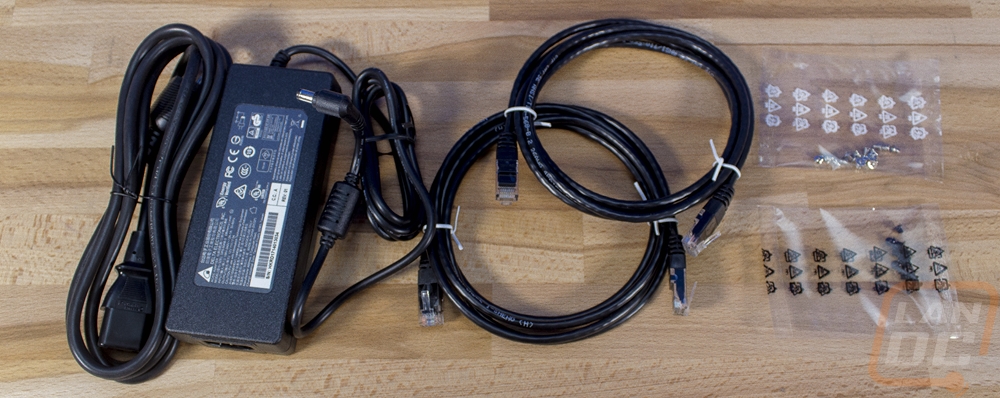
Beyond the NAS there is also a smaller box inside with all of the accessories and documentation needed to get started. For accessories and hardware, you get two network cables for the TS-453Be’s two NICs, two bags of screws, and the power supply. The Power Supply isn’t a big wall wart but it does show that the NAS doesn’t have the PSU inside so the power supply is inline. The main cord is a traditional PSU cable so if you move later and need a different plug type it should be easy to change. The included screws are for installing the hard drives in the trays.
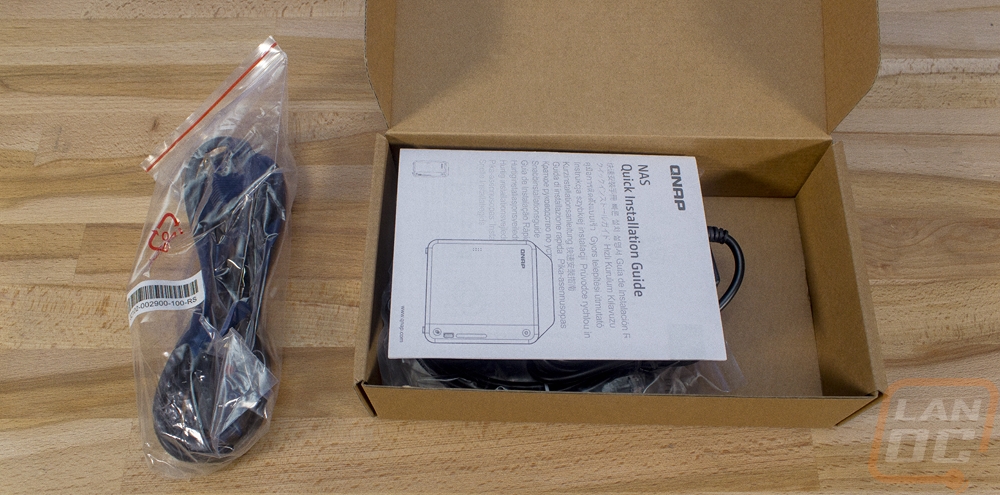
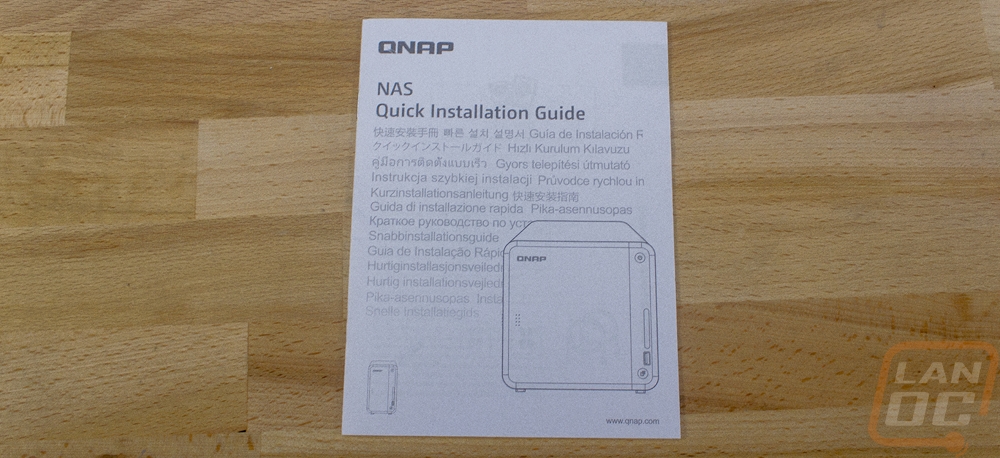
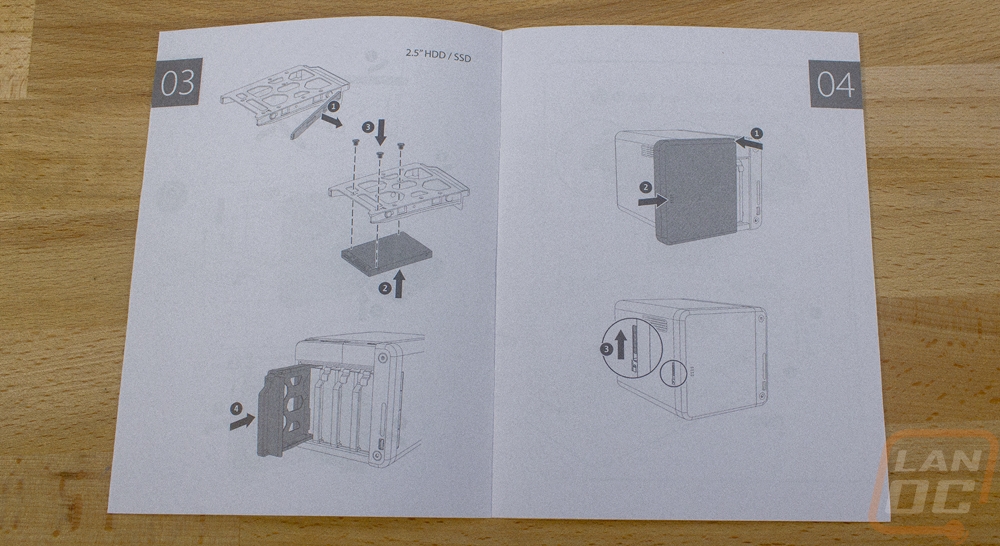
For documentation, they include a quick installation guide. It isn’t large at all but you don’t really need much. They avoid having to print 10 different languages by just not including any text in the instructions, Ikea style. The pictures aren’t too hard to follow through as you can see. Slide the front panel off to the side, pull the trays out, and install the hard drives using the built-in clips or the bottom mount screws.
The last part of the packaging is just making sure to get the plastic off the NAS itself. The tinted front panel had plastic on it to protect its glassy finish from scratches and fingerprints.
Photos and Features
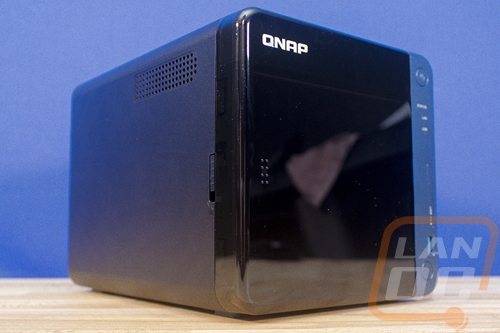
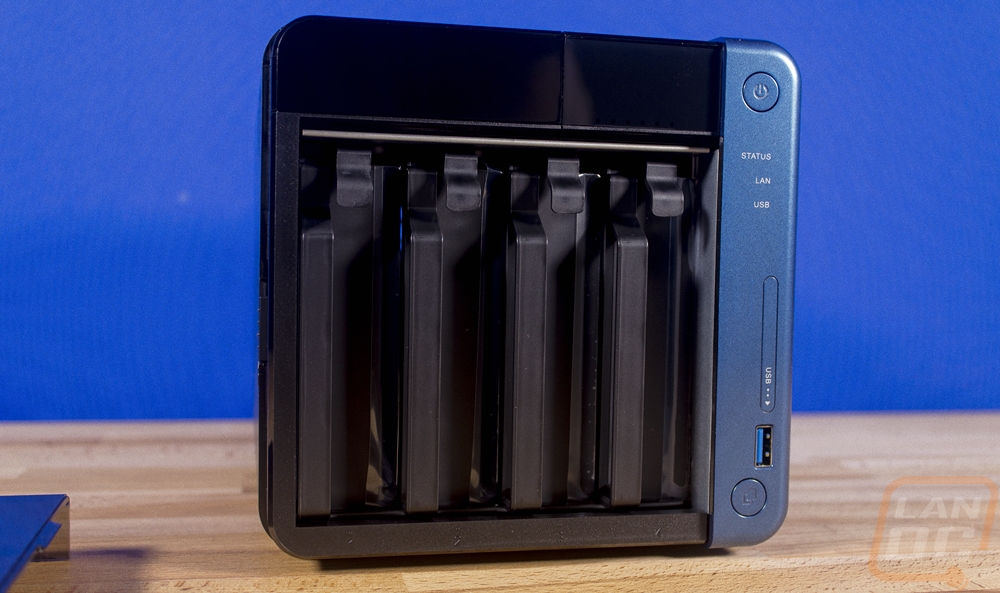
So the last QNAP NAS we had come in the office was the TS-451+ and it was designed to be a relatively budget-friendly NAS and the TS-453Be that we have in today is similar. They both have simpler designs that avoid the expensive stuff like front mounted status screens. The two drives end up looking completely different though, even with the other similarities. The new TS-453Be has a completely different look. Everything is a lot more rounded including all of the corners. Also, the front doesn’t have the drive bays exposed, this time around they are behind a panel. Oddly enough you would think from the looks that this is a home and office focused product, but the TS-453Be is actually part of QNAPs small business lineup. Of course, a lot of the small business do start at home.
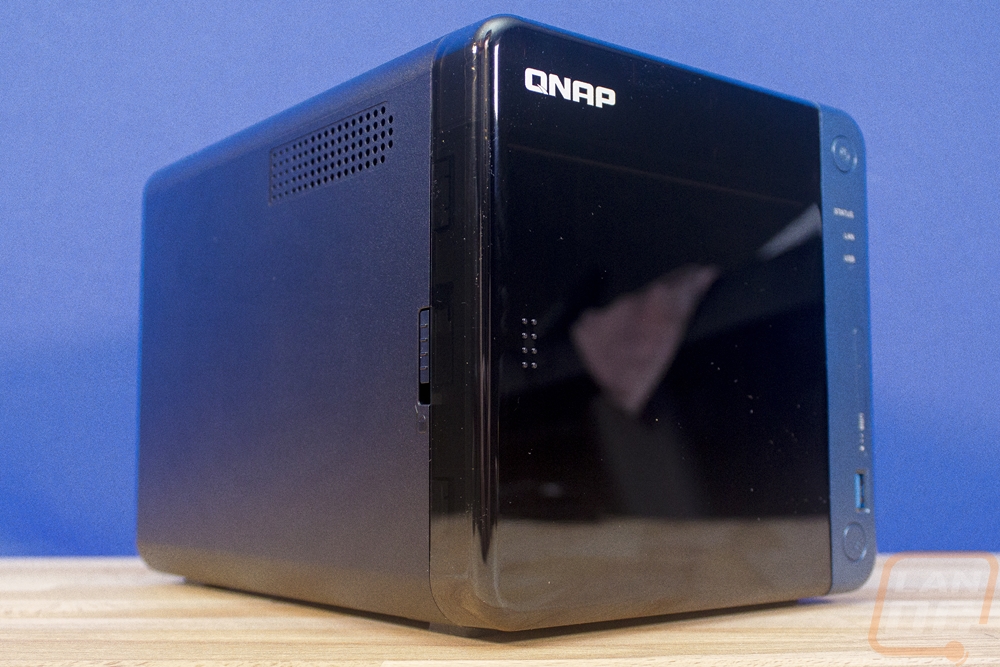
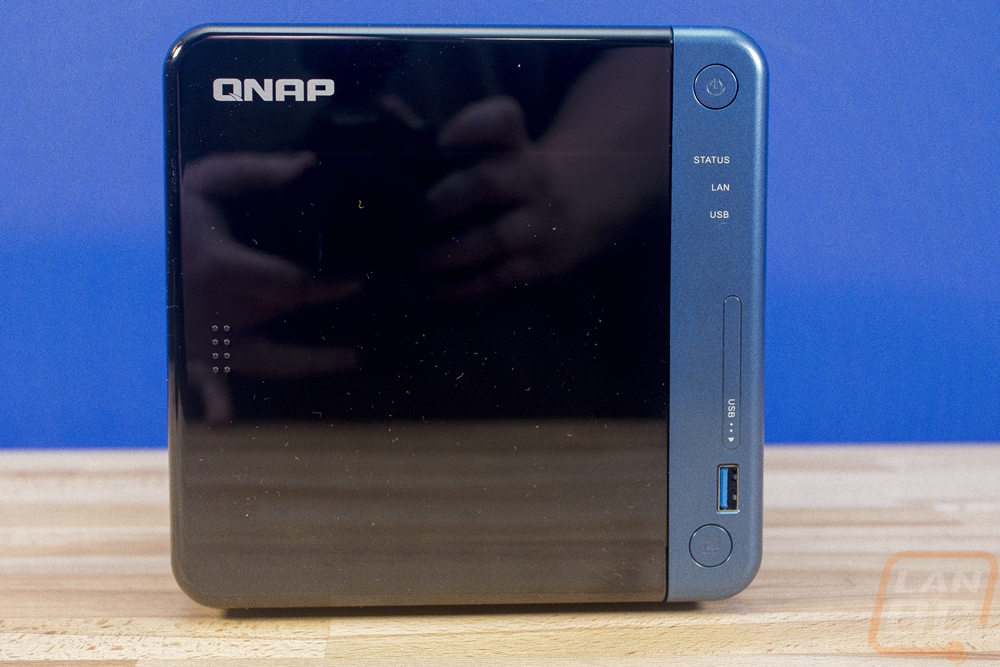
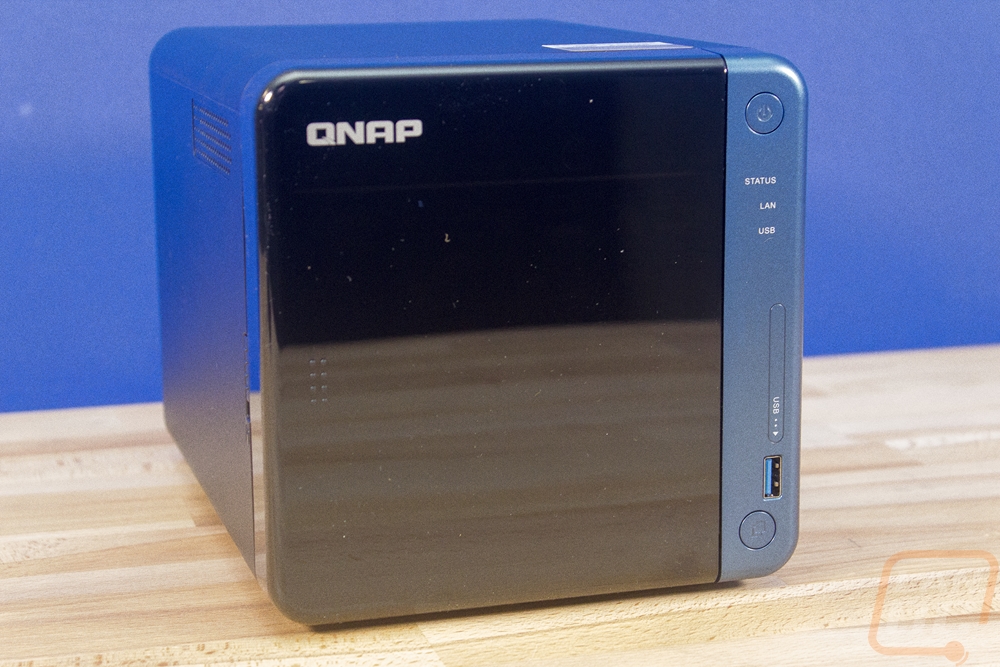
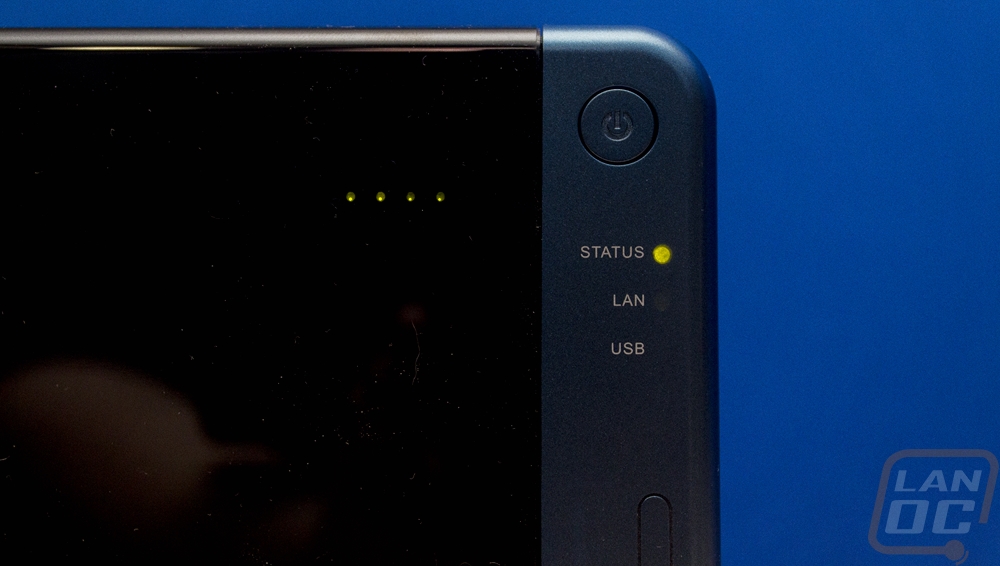
So the front of the TS-453Be is most of what gives it that new look. Most of the front is covered in a slide off plastic panel. It is slightly transparent but you can’t really tell by looking at it. But the other part in the new clean look is the use of the new color. The case is all black but the front panel has a cool metallic blue finish on the side. This is where all of the front I/O is as well. They kept things simple with a power button up top and three status LEDs below that with labels that show what each is. The button down on the bottom is the USB sync button that works with the one USB 3.0 plug on the front down at the bottom. Now the original TS-453B (no little e) did have a USB Type-C and an SD card slot in the round area above the USB port, I do wish those were still on here for more backup options, like plugging your camera SD in and copying it all over quickly. But the USB 3.0 should be all most people need.
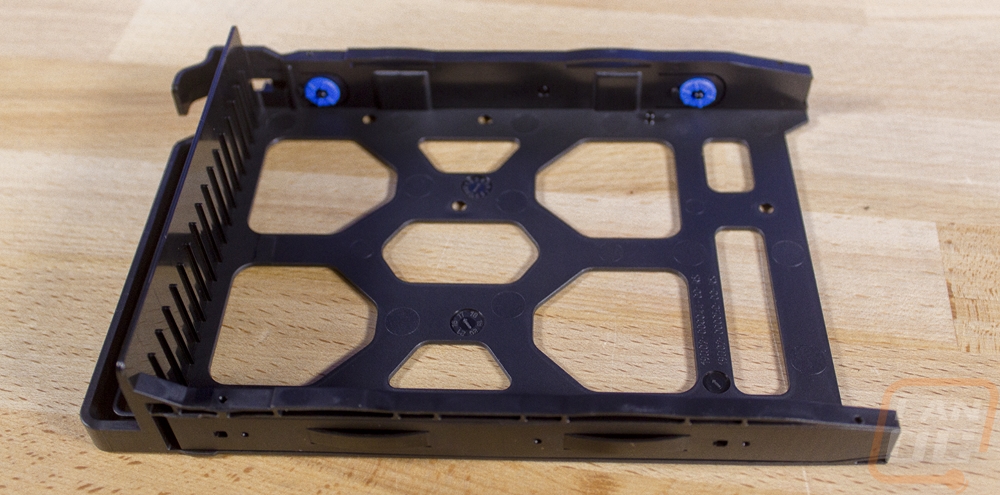
With the front panel pulled off you gain access to the four drive bays. There aren’t any locks or special latches here, the trays themselves are plastic and have a thumb latch built in at the top. From there they just slide in and out on the tracks.

Each tray as removable clips on the sides that push inside of the side screw mounts on a standard hard drive. There are rubber pads to help keep the vibration down but overall the entire design is tool-less. That is unless you prefer to use screws or if you want to use 2.5-inch drives or SSDs. In that case, you use the included screws to mount the drives to the tray.
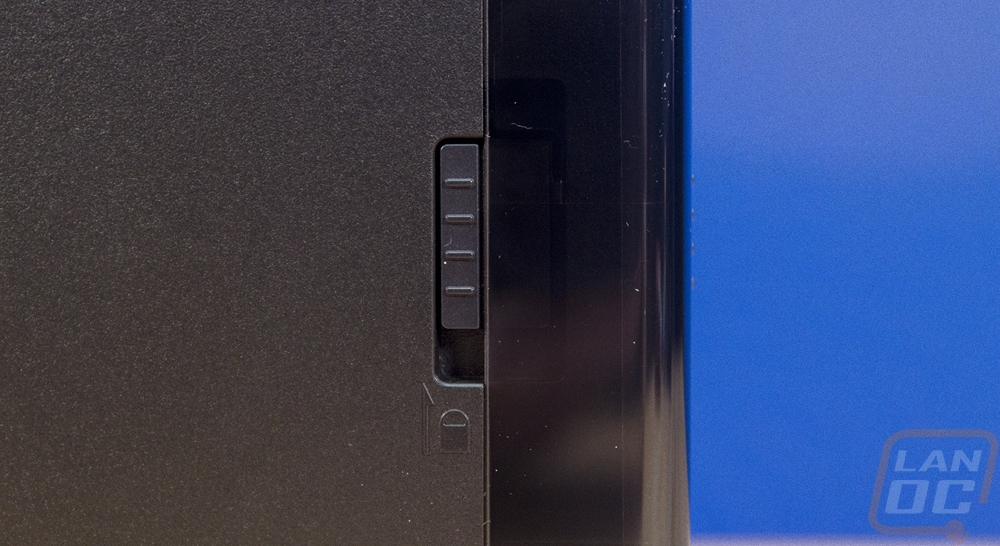
Now there is one lock that will prevent someone from just pulling your drives out. It is on the left side of the TS-453Be and it latches that front panel in place. So to remove the front you flip this than you can slide it off. Other than that there isn’t much going on here. Just a small vent.
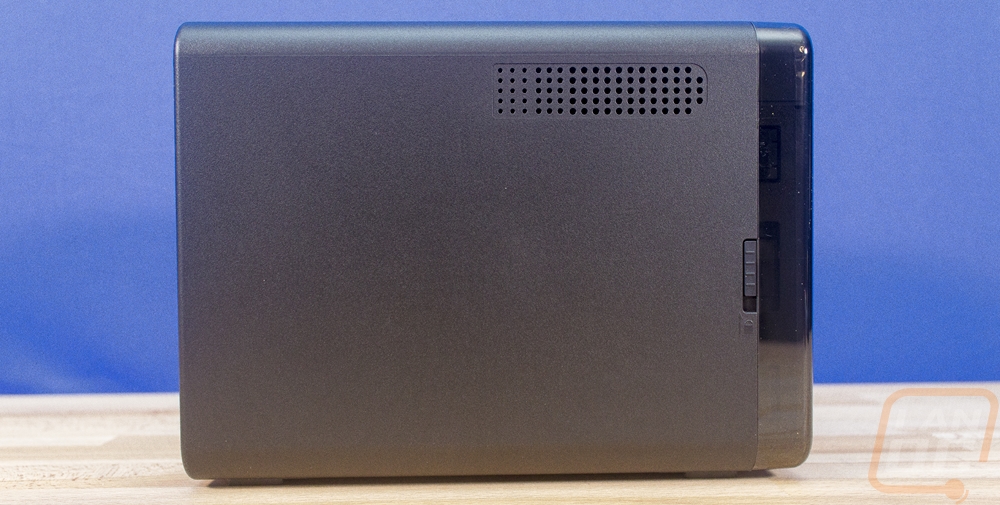
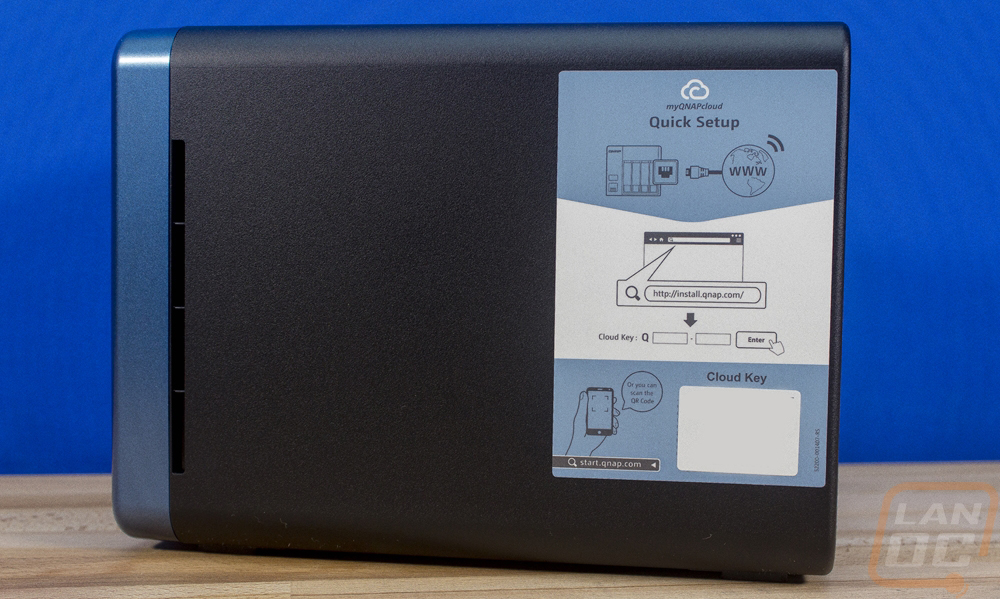
The other side of the TS-453Be has even less going on. There is a vent near the front and then there is a large sticker. The sticker has quick setup instructions explaining how to log into the NAS and it has a QR code for quick setup for the cloud. For obvious reasons I blanked that out, I don’t need people gaining access.
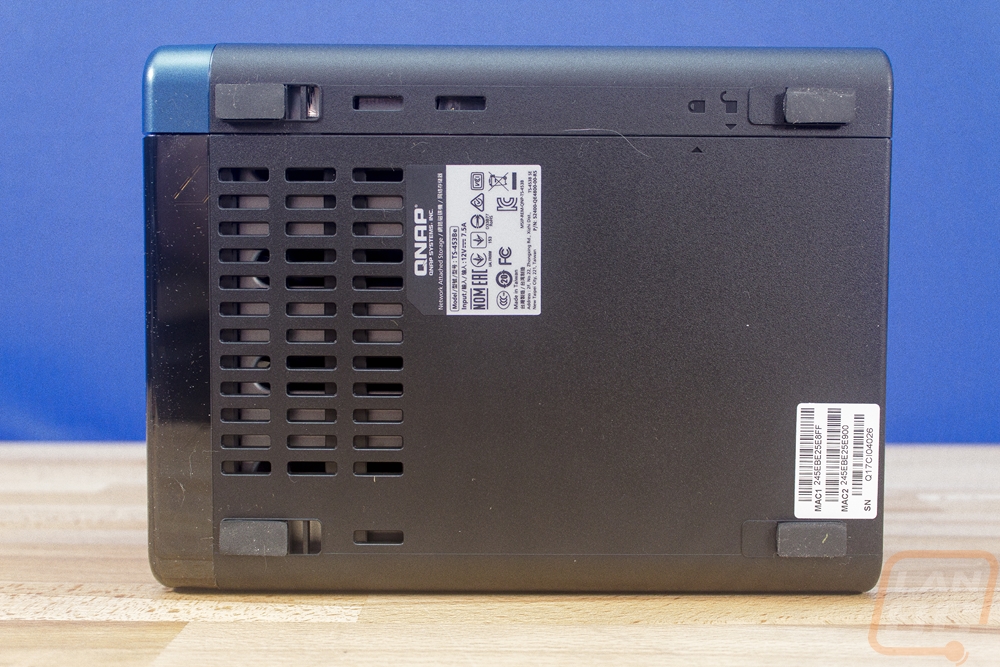
Now the bottom of the TS-453Be has a lot more ventilation with a large one taking up about 1/3 of the bottom. There are the normal regulatory stickers as well as the model information. Then you have four rubber feet keeping everything from sliding around. If you look, you will also notice a small lock and unlock with an arrow, this is the latch for taking the casing off the NAS to get inside. I will touch on that in just a minute.
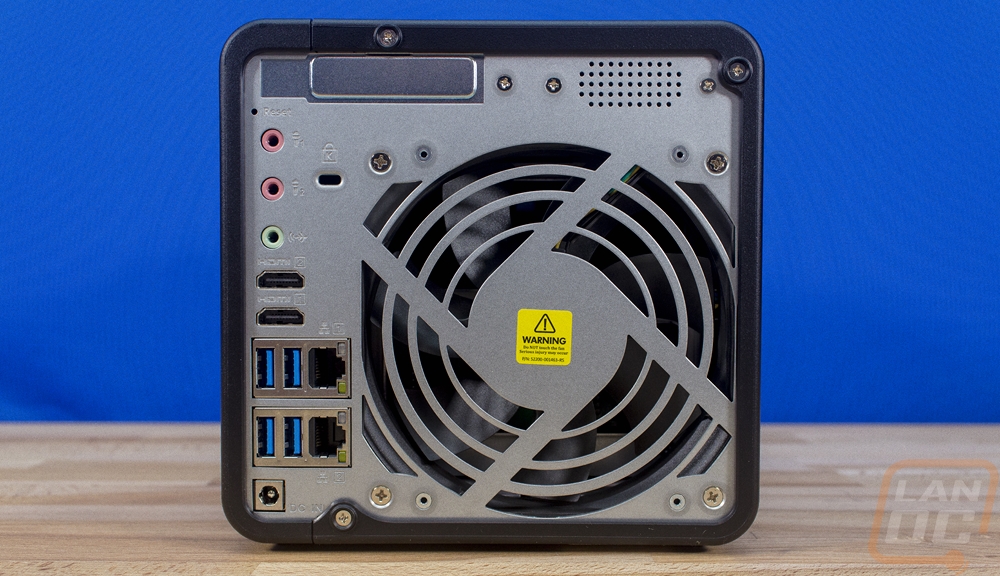
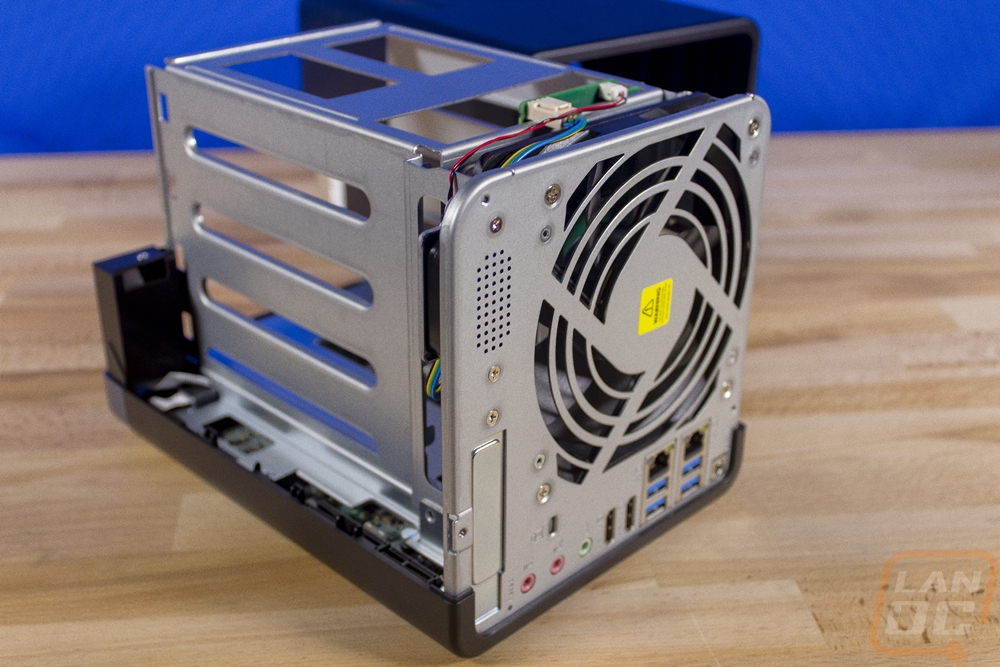
Now the rear of the TS-453Be has more going on than any other area. For starters, there is a large exhaust fan here that pulls air in from all of those different intake locations across the four hard drives to keep things running cool. There is also a Kensington lock that looks a little like a USB Type-C, this is if you need to secure the NAS to a table/wall/rack. For the rear I/O you have a few connections. Down at the bottom is the power plug. Then just above that, you get four USB 3.0 ports and two NICs. This should be more than enough for any external USB drives that you want to backup too or from. They also go well with the audio out and two microphone in ports as well as the two HDMI ports. You can hook the TS-453Be up and use it as a media center. But I still don’t really understand the need for two microphone ports. The other big thing back here is the PCIe slot up at the top. Actually, it’s a half-height slot, but this is one of the big features of the TS-453Be as it allows you to install a 10GB NIC or a dual M.2 adapter to add some ultra-fast NVMe storage.
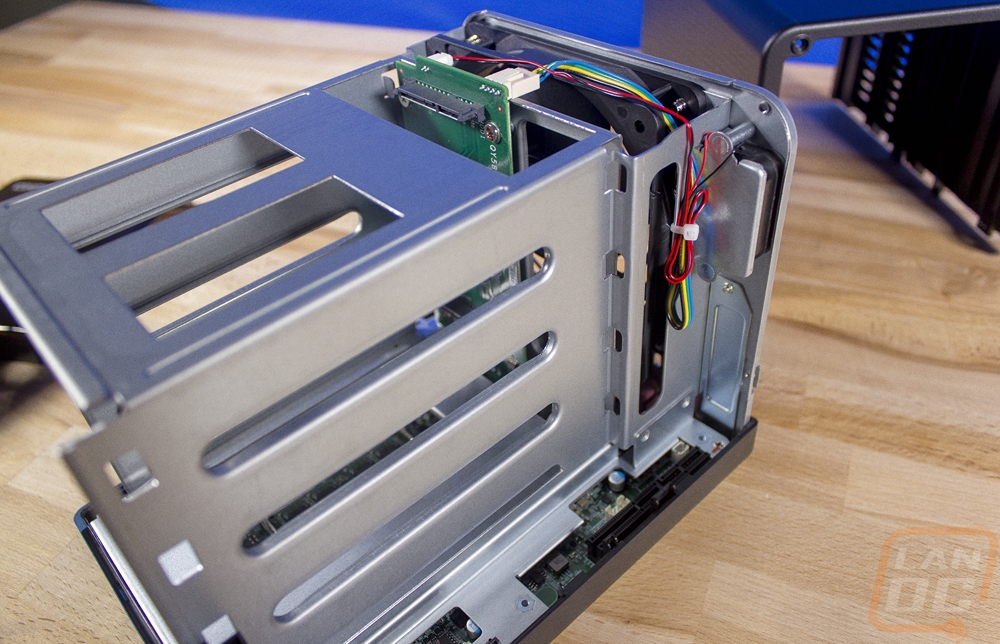
I had to dive inside of the TS-453Be to see what Qnap had going on inside as well. To do that I started by pulling the four drive cages out and taking a look in there. They have a PCB backplane with all of the SATA connections in the back so the drives plug in when they are locked in place. But what really caught my eye is that the two SODIMM slots for the ram are accessible from in here. That means to upgrade the memory you don’t have to pull the casing off, you just pull the drives out. Once you have a RAID all configured that might make you a little nervous but as long as you place the drives back in the same slots you should be fine. Our sample came with just the one 4GB stick or SODIMM DDR3L but dropping a matching one in would be really easy.
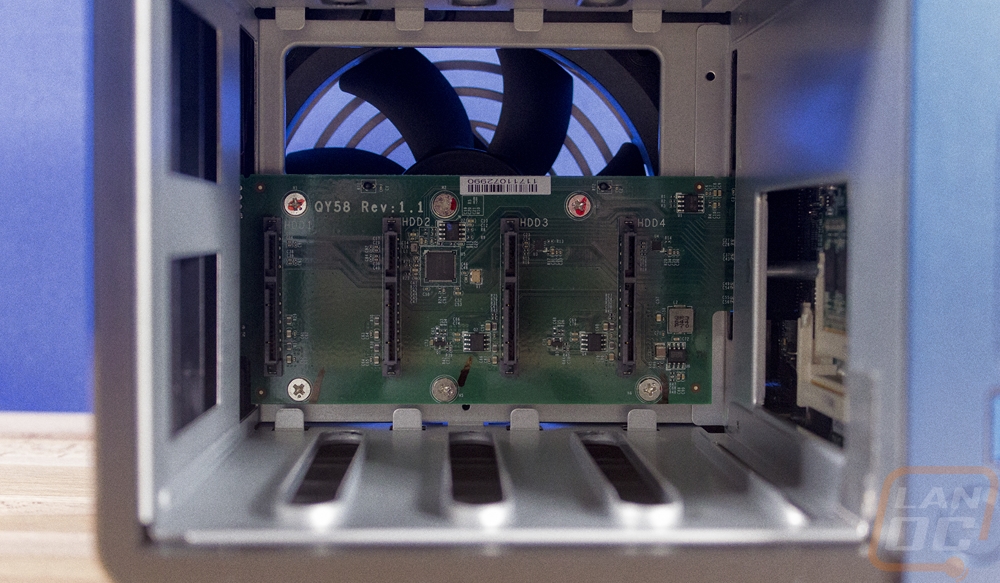
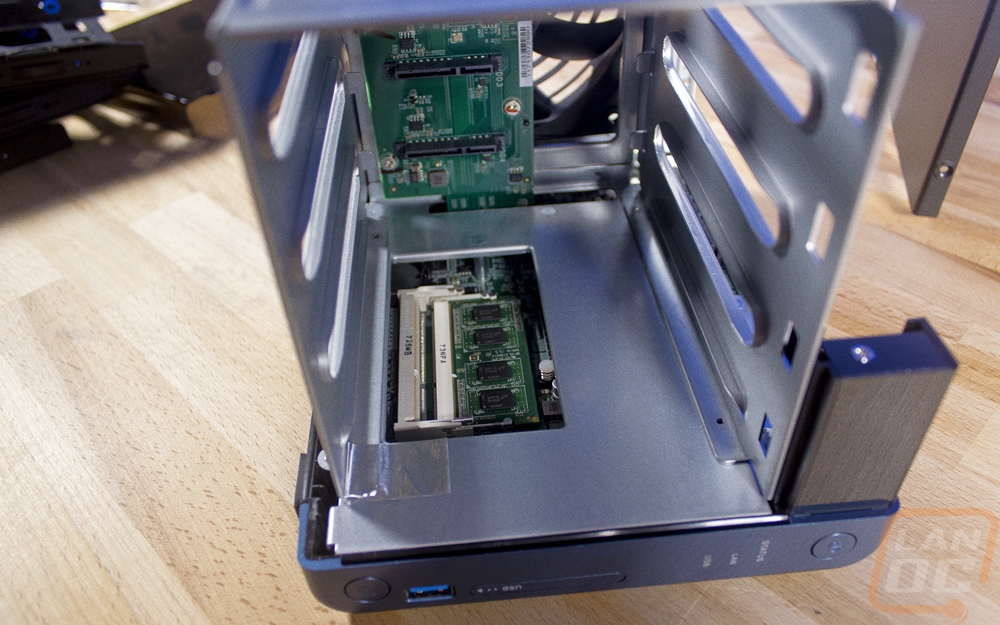
I took the screws out of the back of the TS-453Be and slid the main part of the casing off to get all the way inside. The main motherboard is up under the drive cage so you can’t see all of it. But we do know that it has the same Intel Celeron J3455 that the last Qnap we had come in had. It is a quad-core that runs a 1.5 GHz base clock and goes up to 2.3 GHz for boost clocks. For graphics using the built-in display outputs, the NAS has HD Graphics 500 for the onboard GPU. The J3455 CPU with onboard graphics has a TDP of 10 watts so power usage isn’t bad at all. The big thing here though is the PCIe slot that is exposed on the side of the drive cage. One of the big features of the TS-453Be is its expandability. The slot looks like a PCIe x4 slot but is an x2 slot and the slot mount is a half-height design. There is actually room for a full height card here but Qnap has mounted a speaker facing out the back of the NAS in the area above the slot. Qnap offers a dual M.2 card that you can install here to add two NMVe drives that you can use as a cache or for fast storage. They also have a few different 10GbE options depending on if you need an SFP+ or 10Gbase-T port with dual and single port options. There is also a USB card that I don’t think most people will need. In the past they also allowed wireless but they don’t have a card for that so you will have to find another option if that is what you need.
Picking your hard drives
Beyond picking out a NAS, you will also need to fill up the device. That means you will most likely be shopping for hard drives. The TS-453Be does support 2.5-inch drives as well including SSDs but even at the highest capacities, you would be giving up a lot of space potential to run all four drives with them. That is where the add-on M.2 card can come in handy if you need the ultra high speed. But for most people, including me, the most important thing here is reliability. So there are two big things to keep in mind if that is your goal. For starters, you need to take a look at the drive compatibility listing on Qnaps website. In the past, there have been some drives with some NAS that just didn’t go well together and it causes weird issues with the RAID failing and data loss. If you are looking at a NAS I’m guessing the main reason is to prevent data loss so you don’t want any of that trouble.
The other thing to keep in mind is that you are best going with drives that are designed for NAS use. It might seem crazy because from the outside a hard drive is a hard drive right? But really drives are designed for their usage. For example, WD offers fast and normal drives for PC usage depending on how you are going to use them. But diving deeper than that, hard drives start to have interesting things going on when you have a lot of them combined. One drive will vibrate everything around it, even with rubber mounts. So putting four together, they start to affect each other. It shows the most in overall reliability.
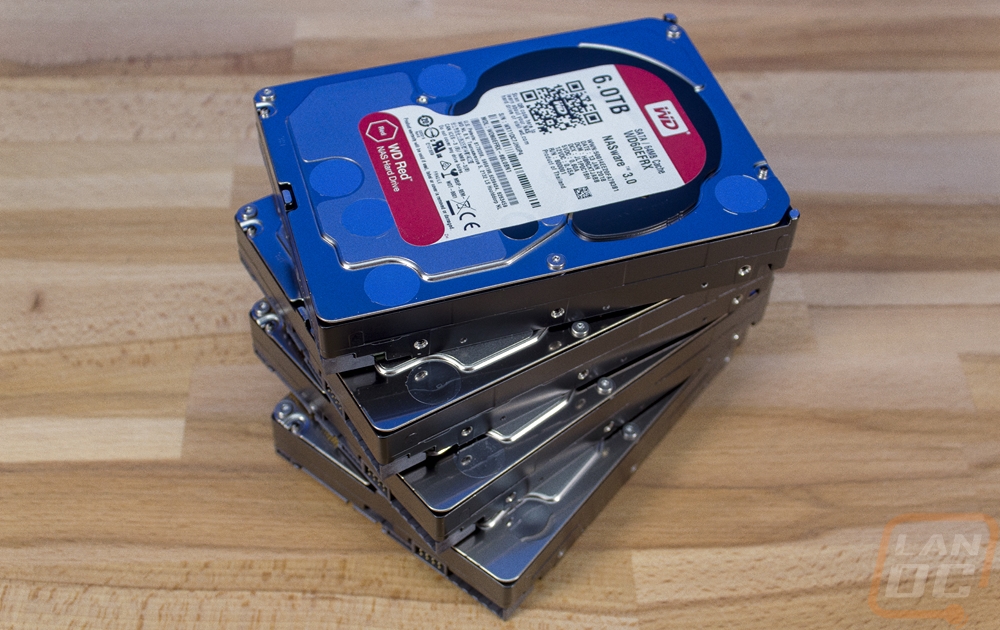
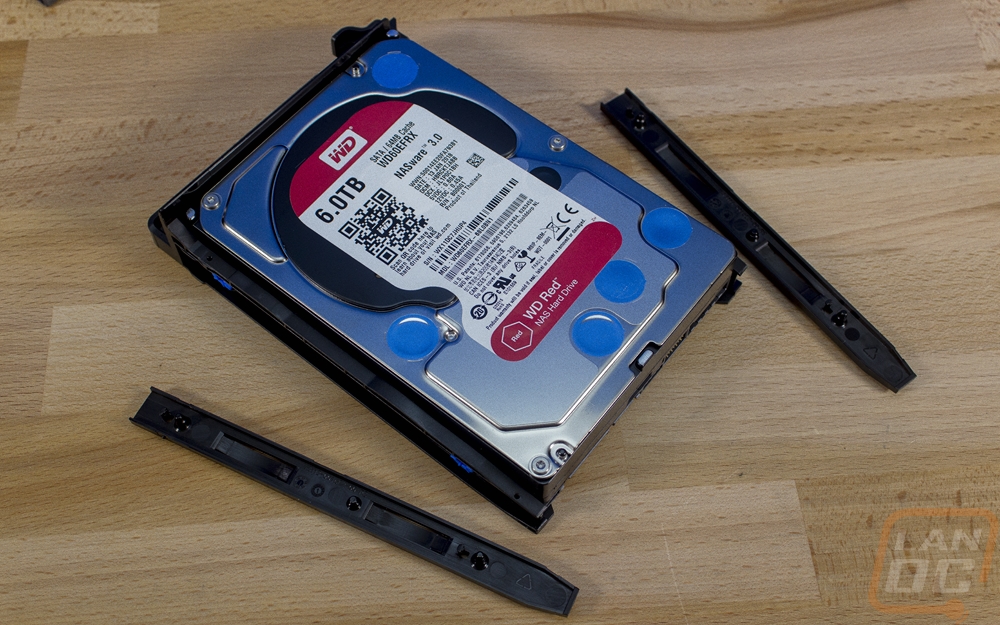
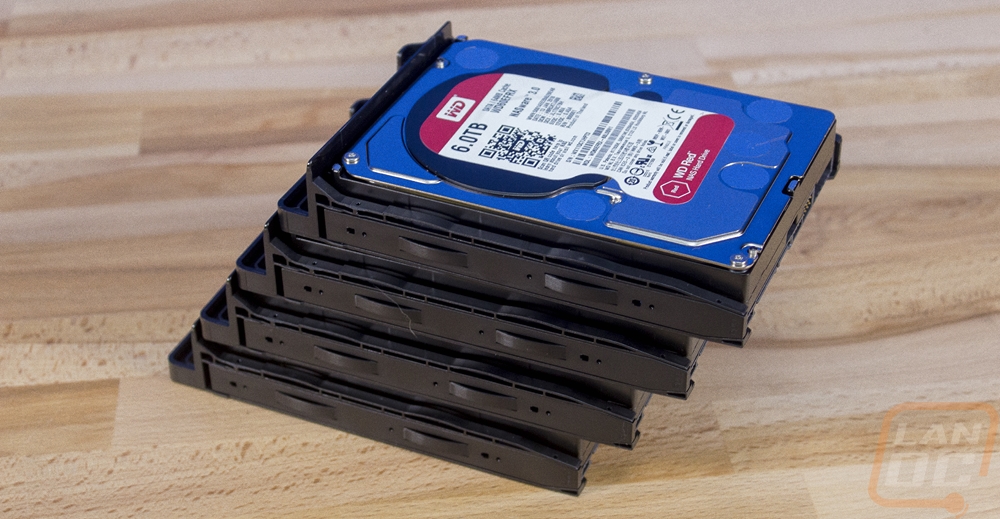
That is why I like to go with a NAS focused drive when building a NAS. Both Seagate and WD have them. In this case, I reached out to WD and they sent over four drives to test in the TS-453Be. They sent their 6TB Red drives, this is their NAS focused lineup. Specifically, they sent the WD60EFRX drives. They run at 5400 RPM and have a 64MB cache. 5400 RPM might sound like a bad thing, but it helps with the vibrations and these drives are still designed to be quick for their RPM. You can get drives up to 10TB and down to 750GB and they have a few duplicate sizes like at 1TB and 8TB that have different cache sizes.
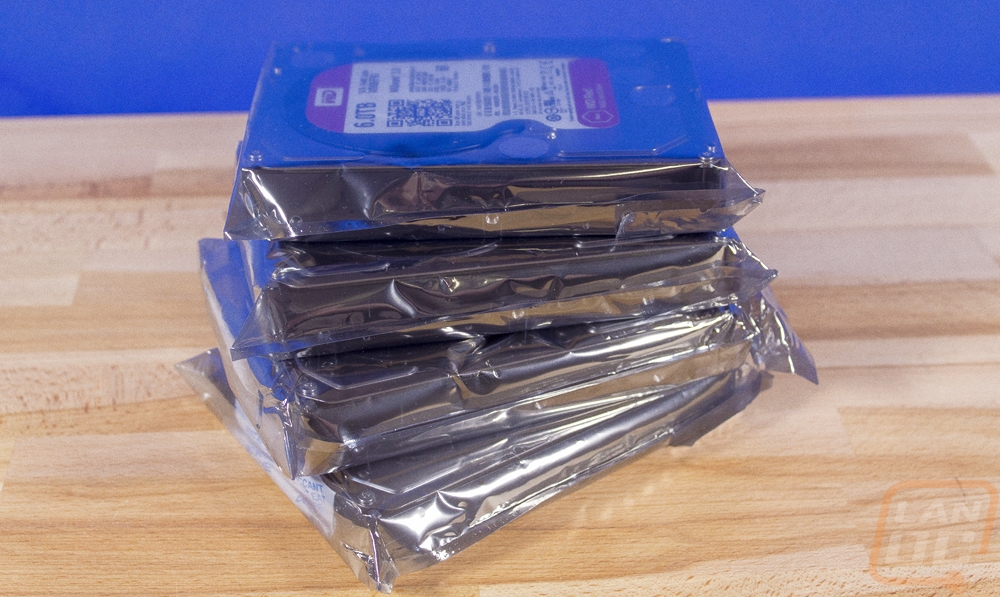
To deal with the vibration the red drives have what they call 3D Active Balance Plus, a dual plane balance control to help keep the vibration down and to help outside vibration from affecting the drives. The Red drives are also designed for 24/7 operation where a desktop drive isn’t actually designed and tested with that in mind. I know I keep my PC on all of the time, but the normal expectation is that it turns off or goes to sleep sometimes.
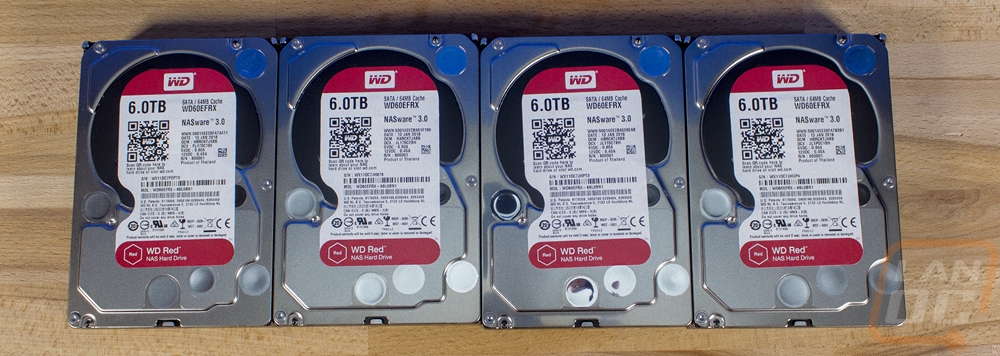
The other big thing with NAS specific drives is just how the drive handles errors. This is where a lot of the weird compatibility issues pop up because a raid controller expects the drive to handle errors in a specific way. If a hard drive takes longer than expected it will drop the drive from the raid all together to prevent the rest of the RAID to be compromised. As you can imagine if this happens when the drive isn’t bad, it can be a huge headache. WD has their NASWARE firmware for this and they are currently on their 3.0 version. This optimizes power usage for NAS use to keep temperatures down, has better error recovery, and also handles power loss a little better as well.
Software
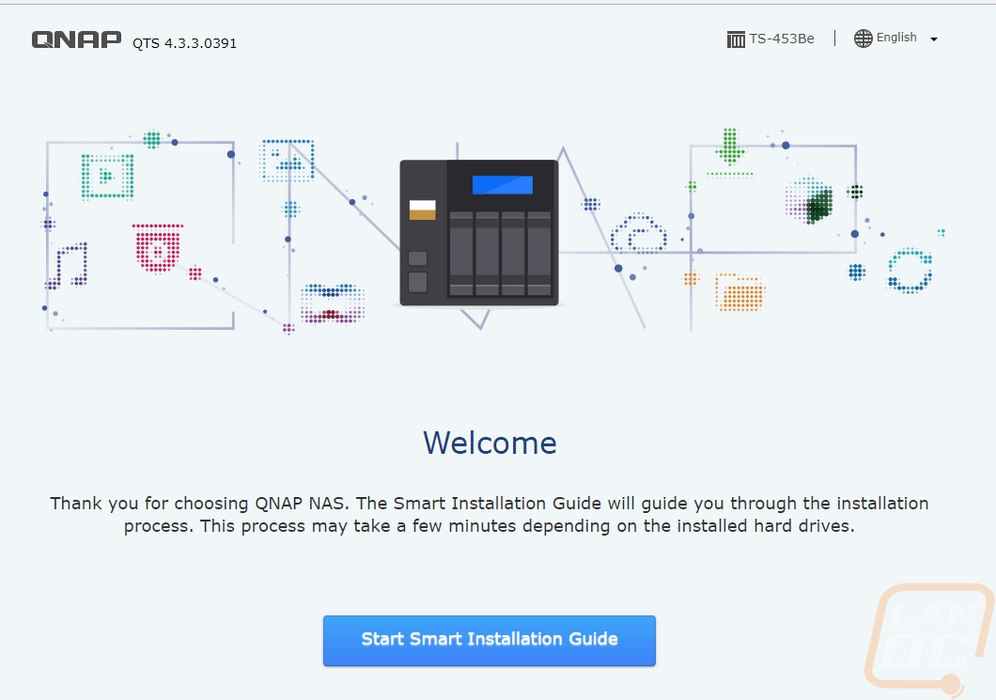
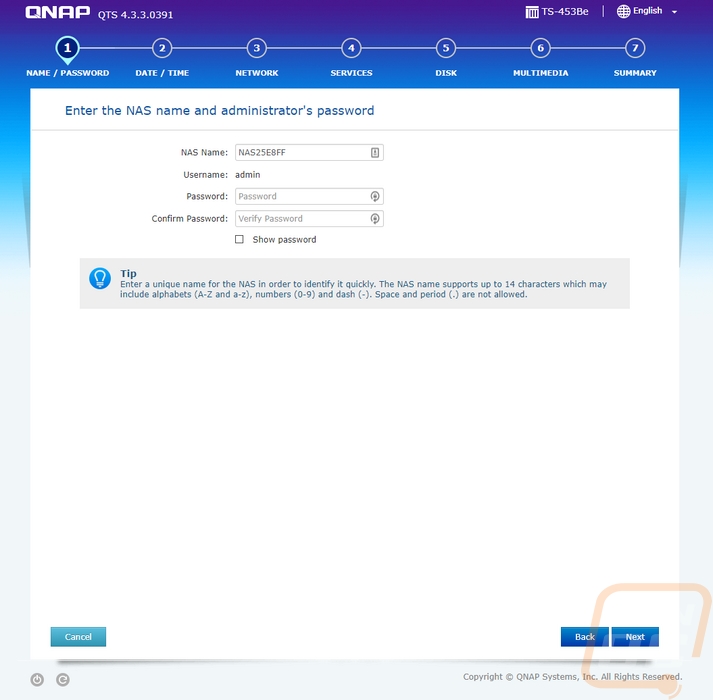
Before you can use the TS-453Be you do have to get everything set up. I will talk about getting the hard drives installed in the next section but as far as the software goes you do have to go through a short installation process. Basically once powered on you log in to the NAS via its IP and when you get there you have an install wizard to run through. The first page will have you give the NAS a proper name and set up your admin password. Then from there, you have to tell it your time zone and get your network configuration setup.
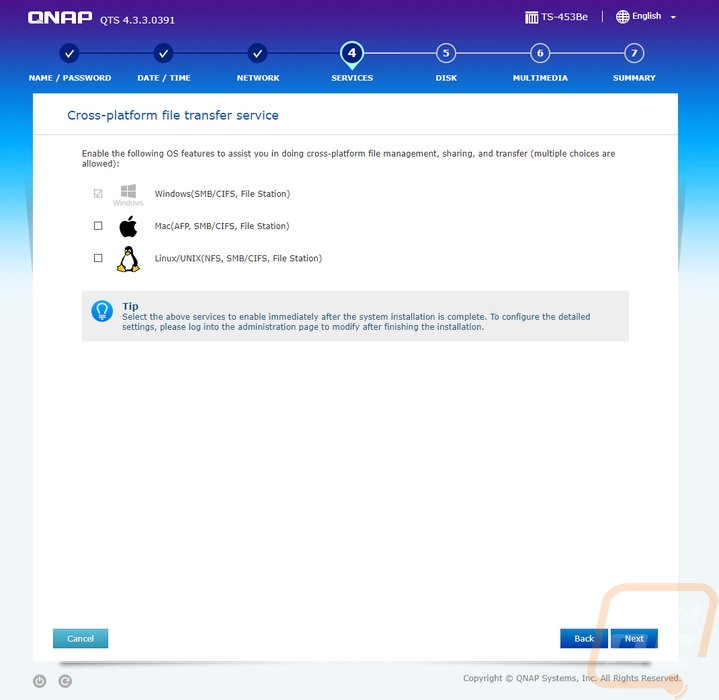
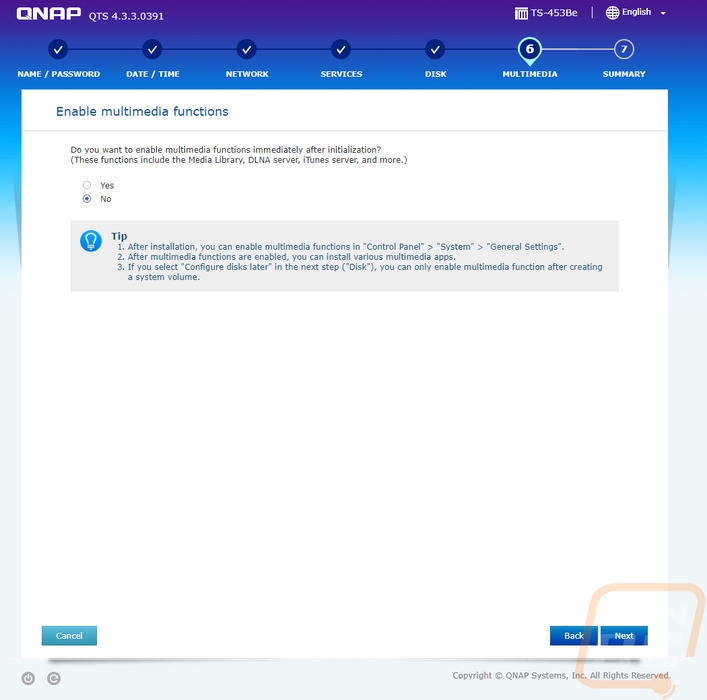
Then you have to tell Qnap what types of services you need to be running. In my case, I will only be connecting to it via Windows so I didn’t need to set up the Mac and Linux file services. You will also have the option to turn on multimedia functions, for me, I don’t need those as well. There is also a page for you to set up the disks but I skipped that setup because for performance testing I will be going through and testing using a few different RAID configurations.
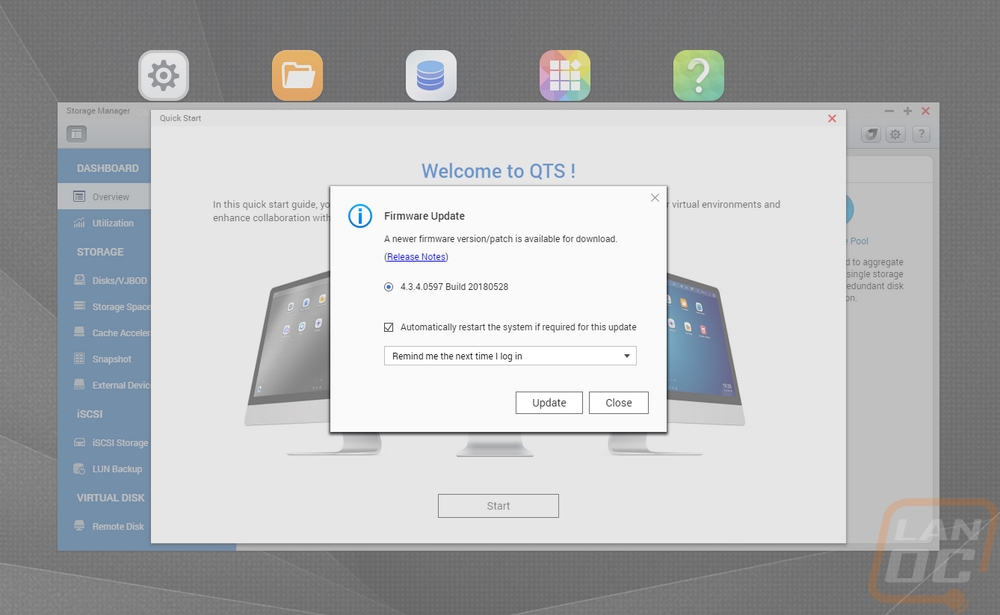
Once you are done the NAS will reboot and you can log into it with your network settings. The first thing that will pop up is a firmware update. In my experience, Qnap is very busy with firmware updates. Thankfully the update is easy, you just have to click update and it will download, install, and reboot for you.
Now beyond performance, the software experience with a NAS is going to play a big role in what you think about it. Normally you tuck the device away in a closet or out of sight in your office so the software is where you interact with it. In the past, I get screenshots and run through some of the software but this time around I recorded a basic video showing all of the options. I did this so you can pause on any page and see what options you might have.
So with Qnap constantly updating their software has changed a lot in the past two years from our last review. They still have the OS like interface where you can flip through your apps and options and have multiple windows open at once. That might seem simple, but a lot of the NAS I have used in the past didn’t have this and it does make it a lot easier to work on things. Especially when you are waiting for a RAID to be created, for example, you can still flip through and make other changes.
I love that you can see your resources quickly by clicking right up in the top right corner and the time and date are always shown (but hidden a little by the LanOC logo in this video). The Control Panel is a little confusing, it feels like they are still transitioning from one design to another. When you open it up it is just like the windows control panel, but if you click anything it all opens up a slightly older design where everything is on the left. I don’t mind either design but it is weird to have to click through one to get to the other.
Beyond that, the apps make or break the experience. This is where you can download and install just about any feature you want beyond the standard file storage and backup features that are part of the OS. Qnap has a store where they have everything sorted out from utilities to entertainment. You can also expand things like backup functionality with add-ons here. Each is easy to install with one click it will download and install. Then later it will let you know when each needs updated and let you update one at a time or all at once, just like your phones app store. You can install things like WordPress to run on the NAS or even chat software to keep your in-house or in business chat on the network and off the cloud.
You also have instructions on how to setup your virtualization. This includes some apps that let you set things up. Basically, the TS-453Be is a full Linux based server and you can setup and run full VMs on it. Obviously, the quad-core CPU is going to be the biggest limitation here, but you should be able to spin up a few things without issue.
Performance
Before getting into performance testing I did want to show how you install the hard drives. It is really simple and assuming you are using 3.5-inch drives like I am you won’t need any tools. Basically, the hard drive fits in the plastic tray. Before doing that you remove the clips on the sides then once the drive is in you add them back on. These stick into the screw holes on the sides of the drive.
Once you have them all installed you just have to take each tray, one at a time, and install it into the NAS. They slide on the built-in rails. You do have to make sure the locking clip is facing up and when you push them in make sure they snap into place. From there reinstall the front panel and then plug everything in and power it up with the power button on the front.

Once up and running it will give you a status light showing it is on. The LAN light will light up when you have that connected. Also visible from the front are four lights behind the front door. These show the status of each of your installed hard drives.
So for my testing, I didn’t really compare NAS to NAS because different hard drives will play a big role in that. I just wanted to get an idea of the overall experience depending on which raid configuration you go with. Before looking at the performance I did want to touch how each will affect your capacity in case some of you don’t know what each Raid is.
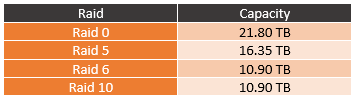
RAID 0 - So the first one is Raid 0, this is striping of the data across the drives so that you get the best performance. You get the full capacity of the four drives, but there is no data redundancy. In fact, if any of the drives fail you lose ALL of the data, not just what is on that one drive.
RAID 5 – So raid 5 is block level striping but with distributed parity. Basically, all of the data stored is backed up across the other drives. You need three drives at a minimum to do raid 5 and you can have one drive fail without any data loss. The downside here is that when rebuilding an array you have to read from every drive, increasing the odds of a second drive loss during the rebuild.
RAID 6 – Raid 6 is actually a lot like raid 5 only this one requires four disks and you can have two drives fail without data loss. So you notice the original 21.80 TB capacity drops down to 10.90 TB. Basically two of the four drives. On the plus side, you are a lot less likely to lose the three drives needed to lose your data all at once. Unless you ignore a failed drive.
RAID 10 – Raid 10 is a little different than the others. It is actually called raid 1+0 and basically, you create a raid 0 striped volume for speed and then raid 1 double the data. This also requires 4 drives just like raid 6 and it can lose two drives before data loss but only if no mirror loses all of its drives. In other words, it can lose one drive with a 50/50 chance that the second drive might still be good. In theory, this should be the fastest with any redundancy but we will see.
So I was originally going to track how long each raid took to be created, but I ran into two issues. For one, when you create a raid on the TS-453Be there are two levels of creation to track. One is how long the initial format takes. The other is how long it takes for everything to sync and be 100% ready. The second half being what took most of the time. The other problem was that sometimes other aspects like the NAS updating an app took CPU power away from the sync causing them to be inconsistent. So I went back and instead tracked the sync speed. It just so happens you can set that sync speed to three settings. By default, it is set to medium. High puts all of the CPU focus on the sync and low is if you want to use the CPU power for other things. Low would be ideal if you, for example, run other servers on the TS-453Be that you don’t want to slow down. What I found and it wasn’t a big shock was that the raid 10 configuration was faster in all of the tests. The raid 5 and raid 6 are similar in performance just like they are similar in configuration.

Next, I finally got into actual performance. I decided to go with real-world tests. I did do some synthetic benchmarks but I felt real file transfers were a better look at what you can expect. To do that I put together a large folder filled with the largest movie files I had as well as folders full of all of the photos and word documents from my current work log. I tracked the overall transfer time and then kept track of the speeds both when it was doing the large movie files and when it got into the movies. The end result had all four raid configurations right in the same area in the overall time and with the large files. The smaller files were noticeably faster with the raid 0 configuration but not with the raid 10 like I would have expected.

I did the same tests as before, but this time it was moving the same folder from the NAS back to my PC across the network. This time the tests were all a little slower by 10/20 seconds. With the large files, the raid 5 and 6 tests were a touch higher but they were all in the same range, just not exactly at the same number like before. The same for the smaller photo files. I learned a few things from my tests, for starters I learned all of the testing I did didn’t really show as big of a gap between raid configurations as I hoped. It’s a shame it takes a day between each test for the raid setup. But I did learn that moving files to the TS-453Be is faster than pulling them from it. That said the transfer speeds were solid, especially when transferring large files. Lucky for me I was putting movies on this NAS, giving me the best possible performance.

Now beyond the performance testing, I did want to talk a little about my experience with the TS-453Be. When doing my testing I had the NAS in the office and I was a little worried that noise and vibration would be an issue. When transferring files to it, I could hear a little vibration but overall it was quieter than the single 10TB drive in my main PC. File transfers were quick over the network with the gig connection being a limitation. It really makes me want to start moving to a 10GbE network.
Moving all of my data on to the network has a few big benefits for me. For one I don’t have to keep every PC in the house on any more. With the 10-watt TDP of the CPU in the TS-453Be, the overhead to keep the NAS up is a lot lower. This means our data can be accessed anytime or even remotely if I want to configure it that way.
By getting the hard drives out of my PC and on to the network with more than one NAS I have more room for drives allowing me to finally look at proper backup options. My personal configuration is a little on the extreme side because we have a lot of media files stored. But I also have all of our personal and business files on the network as well. All of my TV shows and Movies are backed up and have redundancy in a raid configuration. In the past, I didn’t bother with redundancy with those files, but I don’t have to worry about having to go back through backing any of those up again if a drive fails, and one will eventually like it has before in the past. For more important data like all of our photos and all of my work files, they are all on a raid 6 configuration. This way I can lose two drives without losing anything. They are in a slightly larger NAS and I actually have two drives set up as a hot swap so the NAS will actually automatically replace any failed drives right away. Beyond that I also have those files getting backed up off-site in case anything bad were to happen here. I’m still not following the full 3-2-1 backup rule but I intend on adding a portable backup drive into that mix soon.
I know it's going to sound crazy, but the TS-453Be also had a few other features that are interesting. The big one being the addition of the speaker facing out the rear of the NAS. I didn’t really understand why Qnap did that until I powered the NAS up and was running a firmware update. The NAS actually talks to you, letting you know it is updating the firmware and to not unplug the power. It does the same when rebooting and when powering up as well. When doing testing at 4 am in the middle of the night by yourself, talk about a scare! You don’t expect someone to talk to you. I told my wife about it and then later that next day the NAS rebooted and scared her, twice! Most just beep and you don’t know what the beeps mean so I do like the speaker. But it was such an interesting feature that I couldn’t forget to talk about it. I imagine that if you have a drive fail, this would be especially informative and scary at the same time.
I didn’t spend too much time playing with it, but the built-in media center ability is also nice. There isn’t an included remote this time around. But using a mouse and keyboard you can hook the TS-453Be up to a monitor or TV and control it directly or run the built-in media center to have direct play of videos and music on the NAS. Basically, if you want, you could use it as an HTPC doubling the functionality. For me, though I intend on keeping the NAS down in my basement so I didn’t really have the use for that feature as nice as it is.
Overall and Final Verdict
So the TS-453Be wasn’t my first NAS or even my first Qnap NAS, in the past, I’ve had a set it and forget it mindset with my NAS. But when I tested our last Qnap NAS I was impressed with how they had improved the user experience. You get a lot of additional functionality with things like full VM support and even the ability to use the NAS itself as a media center with your TV. I was curious a few years later how things had changed and for the most part hardware, wise things are about the same. Most of the NAS are still running the same Intel J3455 quad core but that is because it has the power needed for both the basic file storage as well as handling all of the additional apps and functionality that Qnap is offering. The TS-453Be has a little different look that does protect the drives a little more. But that front cover is also going to get fingerprints on it if you have it in an area where it gets touched at all.
Performance was great with the main limitation that I ran into being the network bandwidth itself. That is one of the big features for the TS-453Be. Qnap has made sure to leave expandability with a PCIe slot that you can use to add 10GbE or even add two M.2 drives. Given that this NAS is on the lower end of their SMB lineup, it is nice to know that you can add some of the higher end functionality later if you decide you need it. You still don’t have the expandability of a home built server, but for an all in one solution, it isn’t bad. You are also going to have a hard time matching the 10 watt TDP on that CPU.
They also added a cool speaker that now talks to you to let you notifications rather than just the standard beep. I did find it useful, but it was equally scary when it catches you off guard. Qnap really pulls ahead when you look at all of the apps that you can one-click install. Especially for a basic SMB NAS, you are most likely not going to have IT at that level. This seems to be where Qnap excels. They have an easy to setup NAS both on the software and hardware side, so just about anyone could get rolling. Then all of the apps will let business owners run some CMS, Wiki, Chat, and other functions right on the network with a click.
Now the price of the TS-453Be depends a lot on where you get it. Right now Amazon is expensive, but you can pick it up for $468 at B&H Photo. That is still a touch high but you are getting an Intel-based NAS not an ARM like most of the cheaper 4 bay NAS. Linux based NAS with Intel CPUs aren’t the cheapest but the performance is solid and you get the expandability both with the hardware and in the software where you can even go as far as setup VMs if what you need isn’t available in the app store. It’s the simplicity and expandability though that really sells it for me. Or in my case, sure I could build my own NAS but there is no way I would get close to how low the power usage is. So if you are on the market for a NAs this is one I would consider.


Live Pricing: HERE
