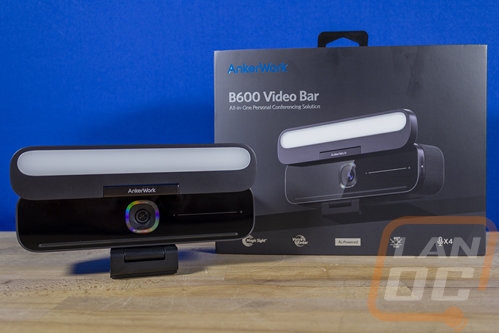
You can go with a simple webcam like the AnkerWork PowerConf C200 that I recently reviewed and for a lot of people maybe that is all they need. But AnkerWork has other webcam options like the B600 Video Bar that I’m going to check out today that have integrated additional features. The B600 has speakers, lighting, more microphones, and integrates a few AI features as well. Looking at the spec sheet it comes off as an all-in-one studio. So I’m curious to find out what all the B600 Video Bar has to offer and see if it is worth the extra money that it demands so today I’m going to check it out.
Product Name: AnkerWork B600 Video Bar
Review Sample Provided by: AnkerWork
Written by: Wes Compton
Amazon Affiliate Link: HERE
|
Specifications |
|
|
Resolution |
2K |
|
FPS |
Up to 30 fps |
|
Sensor Size |
1/2.8 Inches |
|
Auto Exposure |
Smart Auto Exposure |
|
Auto White Balance |
Smart Color Enhance |
|
Frame Function |
Solo Frame |
|
Auto Focus |
Smart Auto Focus |
|
Light |
Color Temperature Brightness Level Control |
|
Microphone |
4-Mic Array |
|
Speaker |
2 ? 2W |
|
AGC |
Keeps voices at the same level up to 2 m away |
|
AEC |
Auto Echo Cancellation |
|
ANC |
Smart Noise Cancellation |
|
USB Type |
2 ? USB-C (data and charging) |
|
What's In the Box |
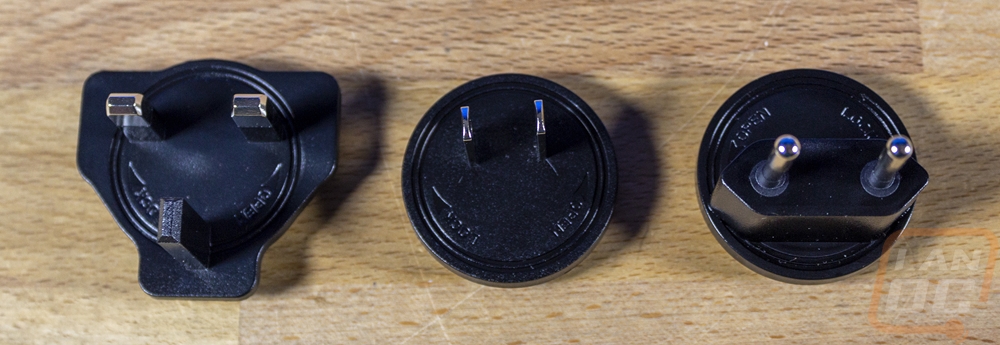
AnkerWork B600 Adapter Adapter plug for UK / US / EU / AU USB-C to USB-C cable |
|
Warranty |
18 Months |
Packaging
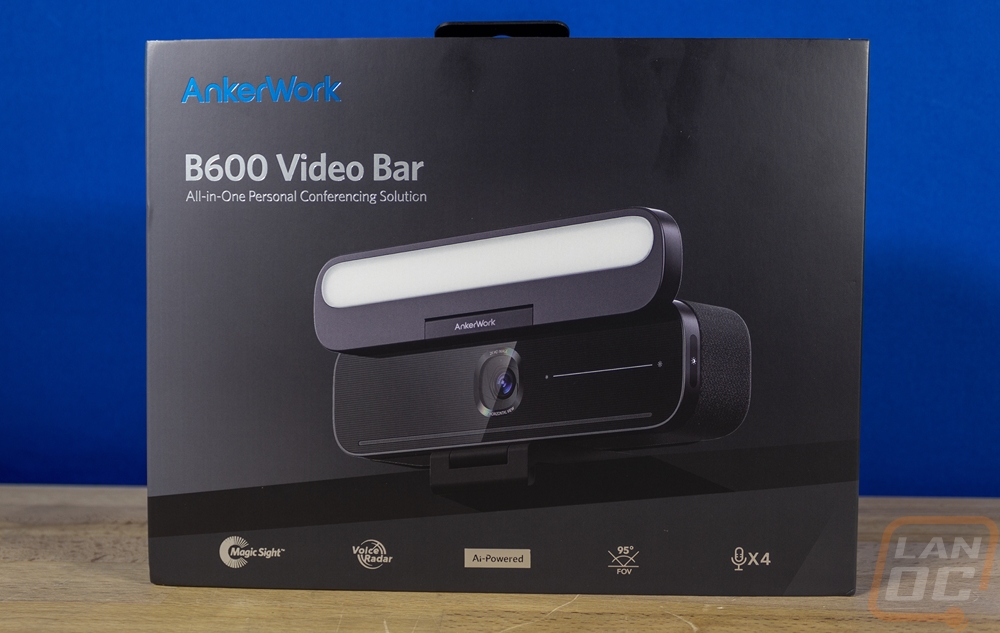
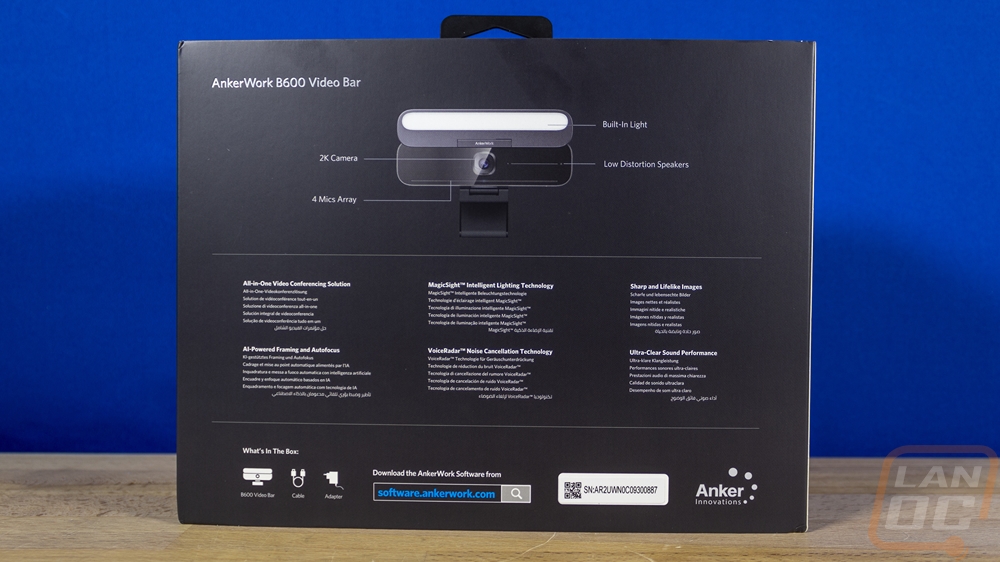
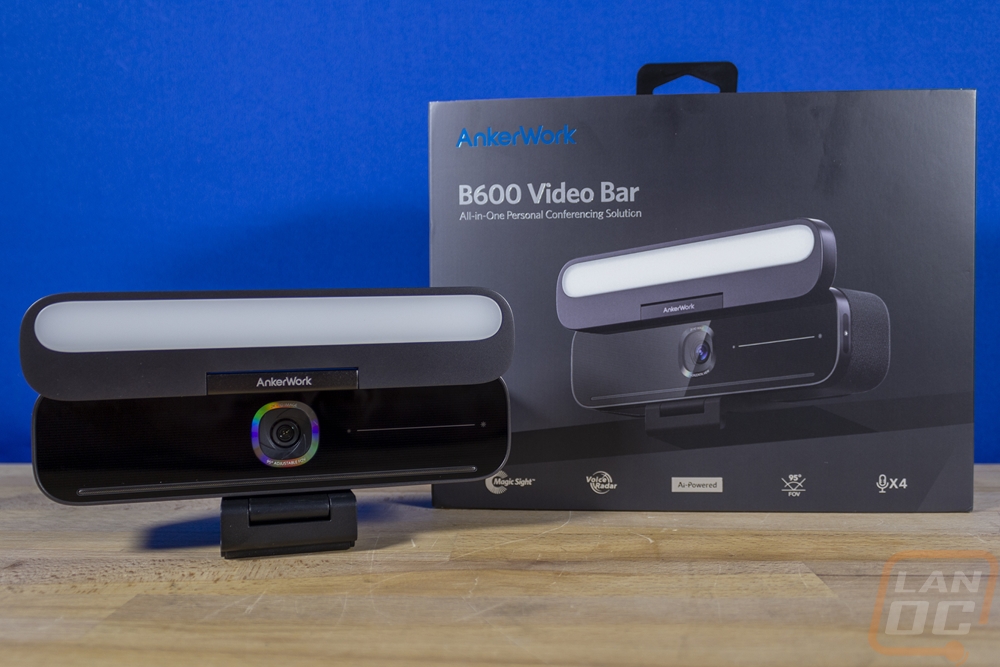
The box for the B600 Video Bar was completely different than the AnkerWork PowerConf C200 that I previously took a look at. This box is much larger for one and it has a black background whereas the C200 had a white background. AnkerWork does still feature a full picture of the camera on the front which is hugely important when shopping in normal retail. They have the AnkerWork brand in a bright blue in the top corner and then below that in a bigger silver font they have the B600 Video Bar model name as well as a short description below that that lets you know this is an All-In-One personal conferencing solution. At the bottom, they have icons to represent a few of the features like the 95-degree FOV, the 4 microphones, magic sight, and voice radar. The back of the box has another picture of the B600 Video Bar with lines to a few features. Below that they have descriptions of the features highlighted on the front as well as your serial number on a sticker and a drawing of each of the three items included inside the box.
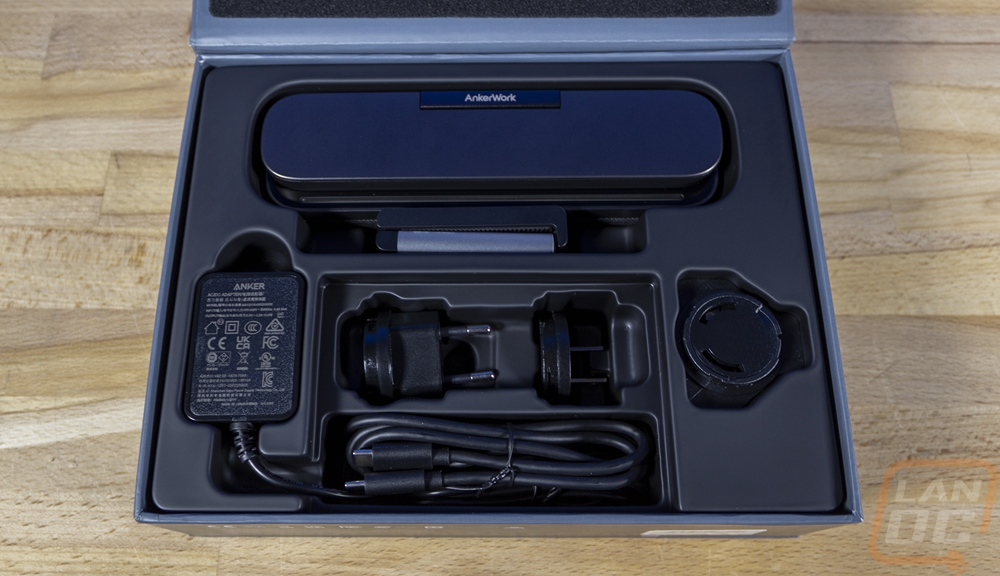
The outside cover comes off and the main box is grey, this has a slogan on the front “AnkerWork Work Your Way”. This box lid flips up and inside everything is sitting in a formed plastic tray. The B600 Video Bar itself is up top and also has a plastic wrap on the stand. Then below that, you have the power cable and a stack of plugs for different regions' power plugs. There is a card with the software URL to download the software and below that is the rest of the power cord as well as a USB cable as well.
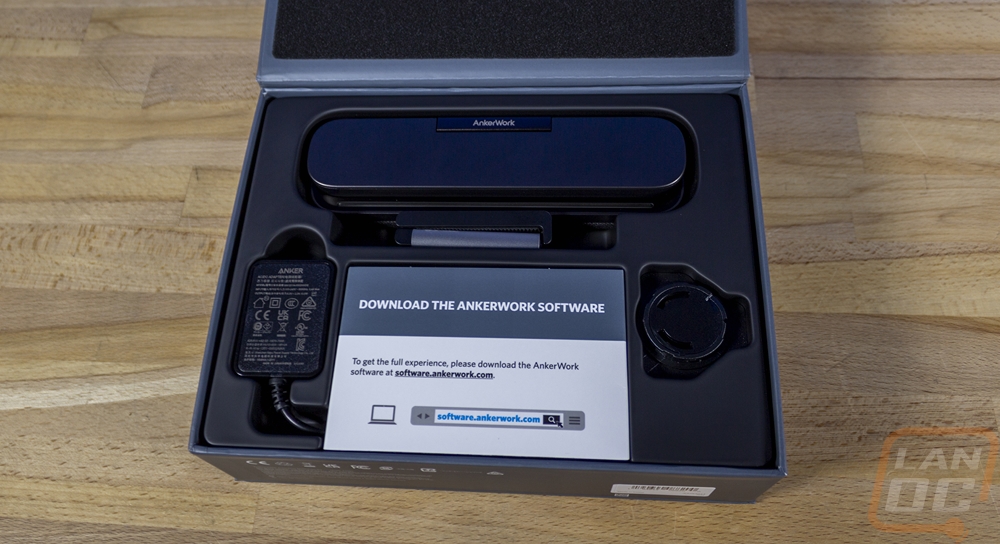
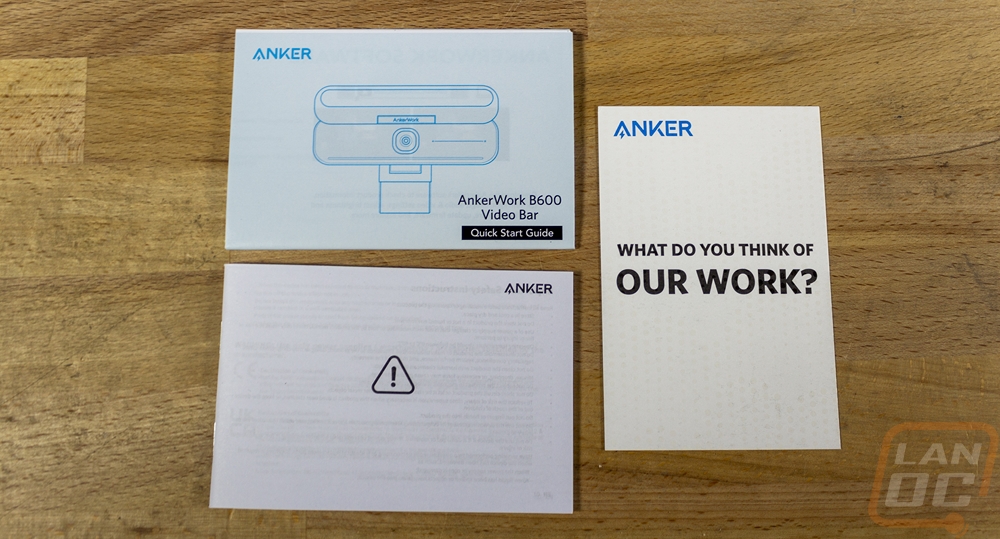
For documentation, the B600 Video Bar comes with a quick start guide, a warranty book, and a card asking your opinion of their work.
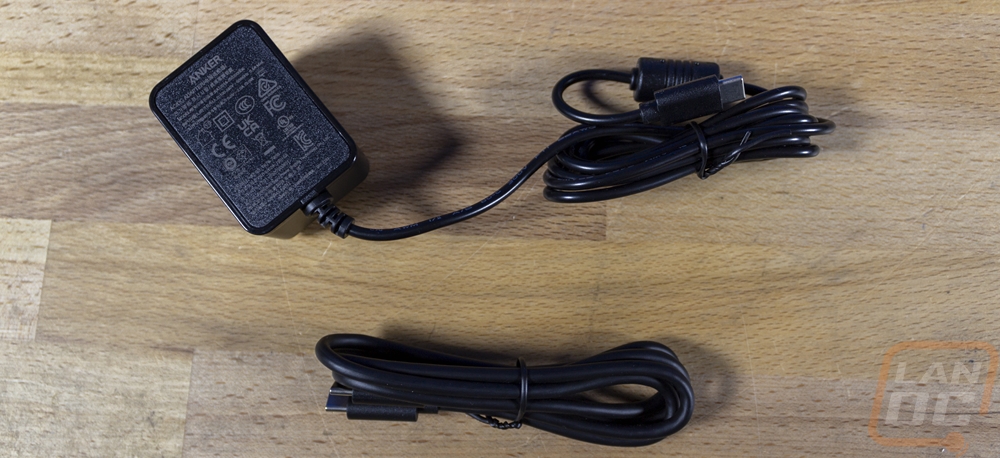
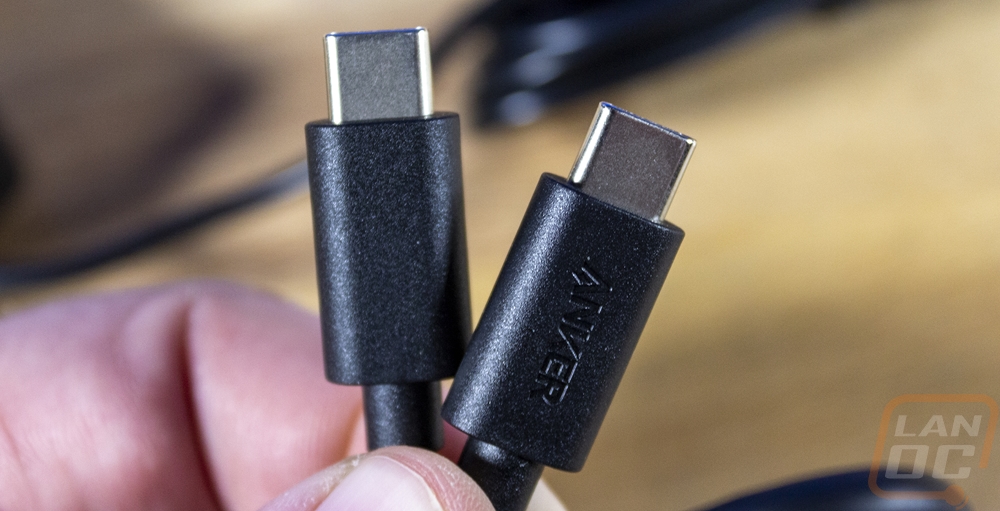
Along with the B600 Video Bar itself, it comes with two different cables whereas the C200 only needed one. You have a power cable that has an AC to DC adapter at one end and a USB Type-C connection at the other end. The second cable is the data cable which has USB Type-C connections on both ends. This means that you will need a Type-C connection and AC power to run the B600 Video Bar.
Photos and Features
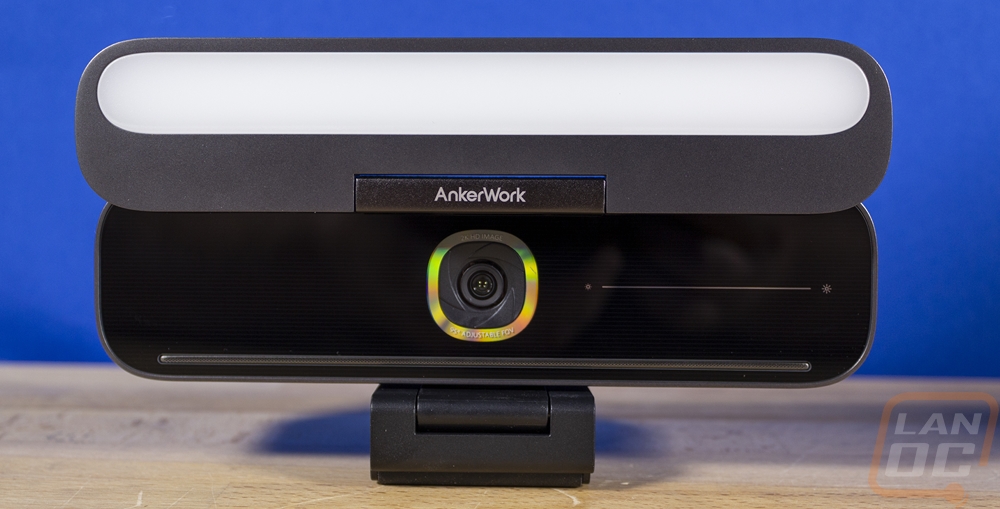
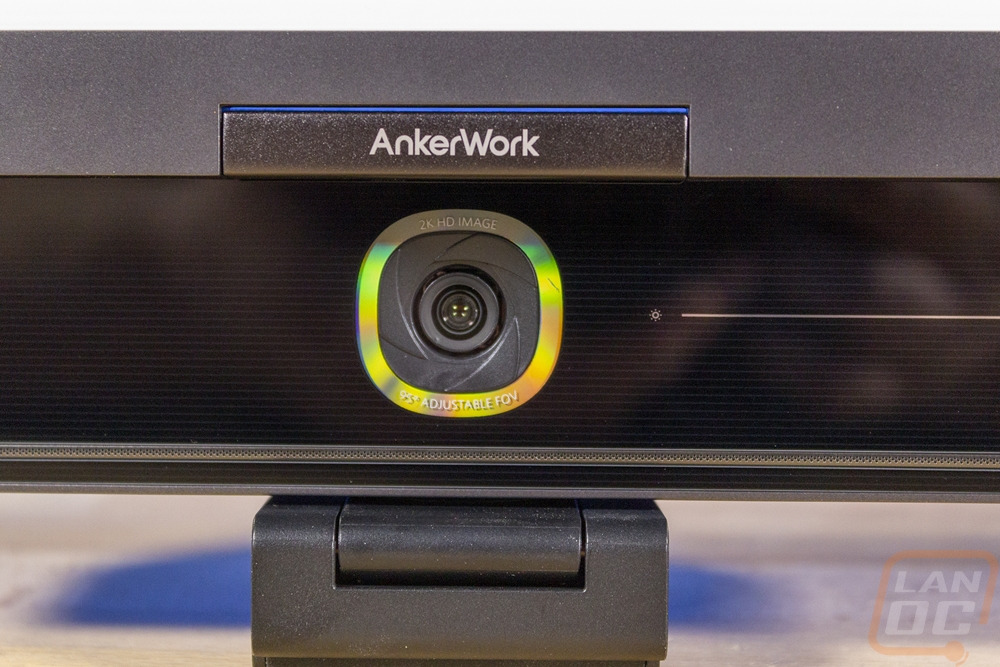
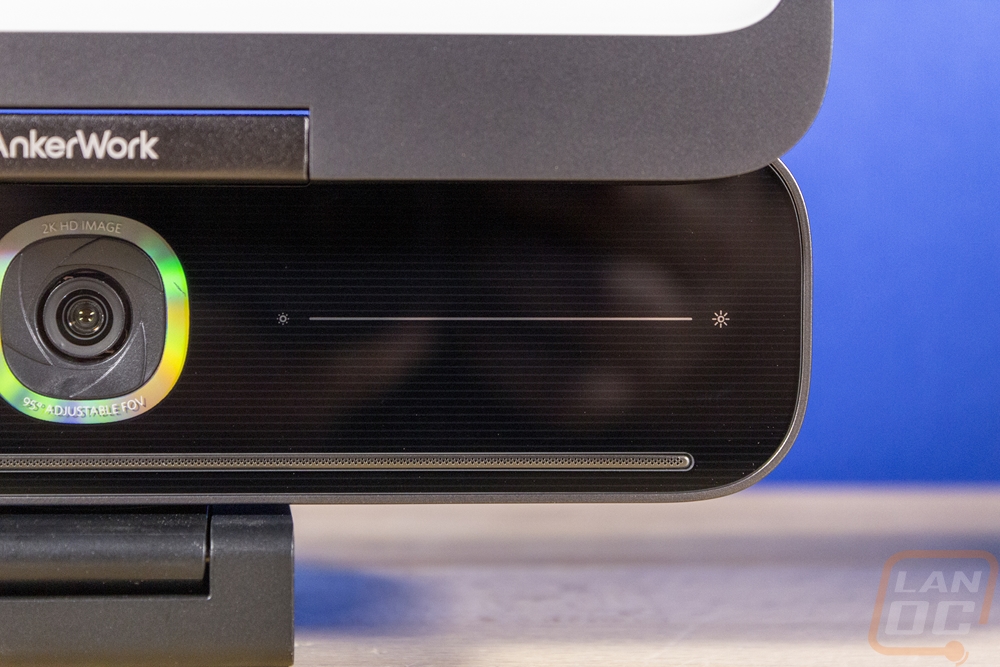
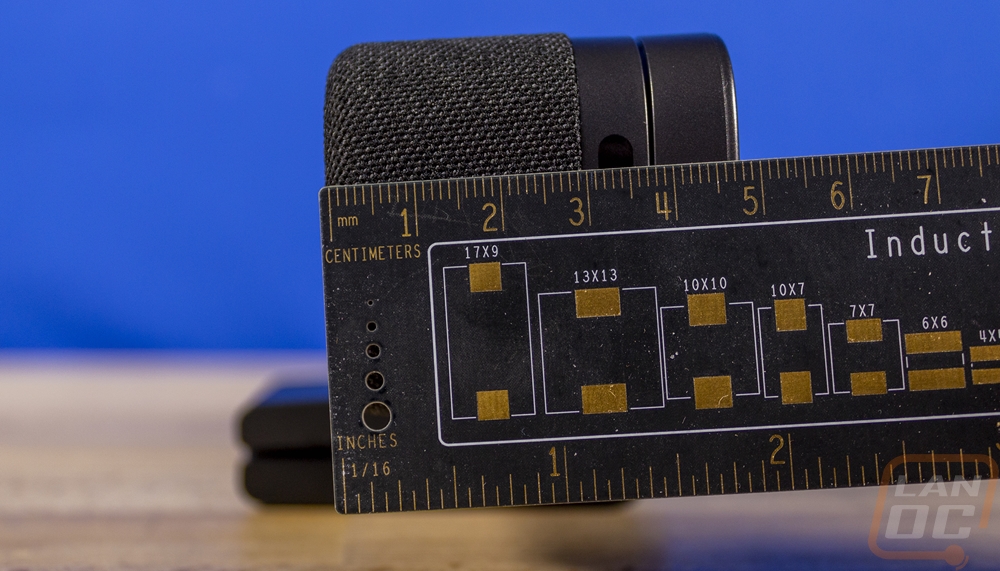
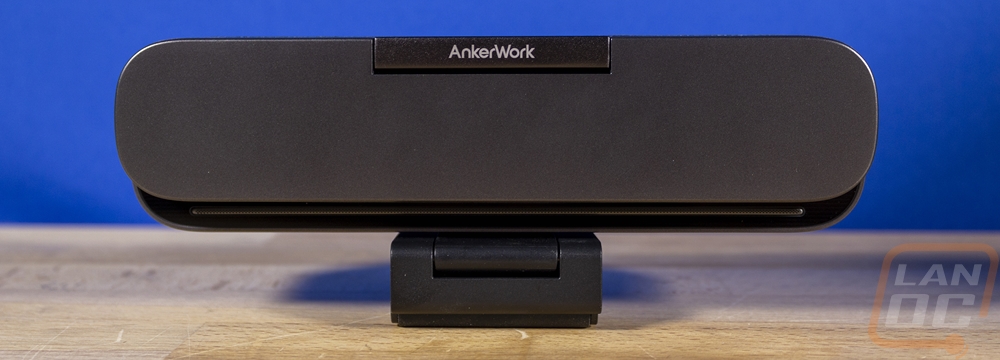
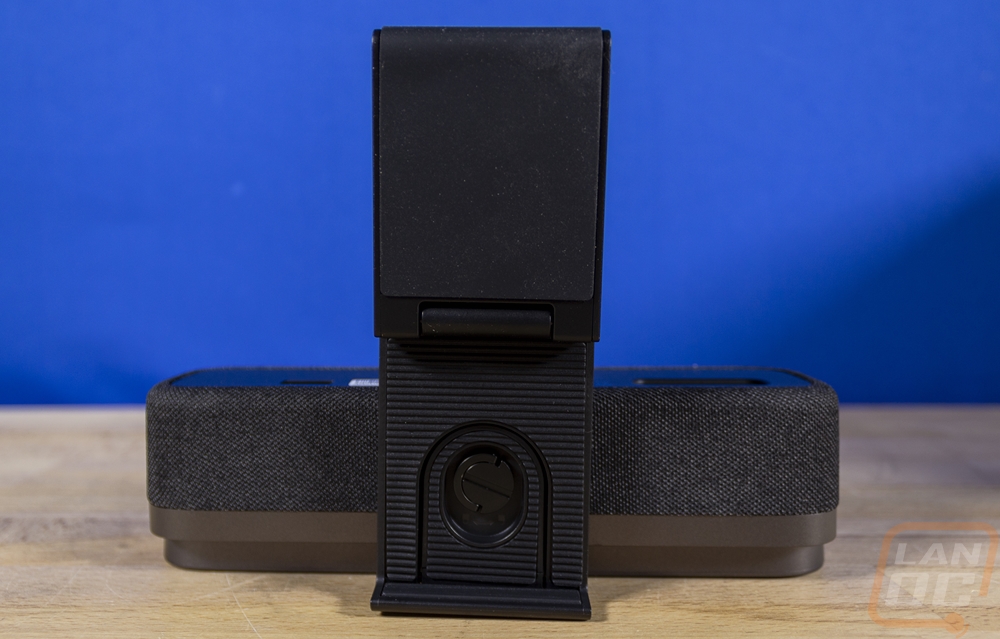
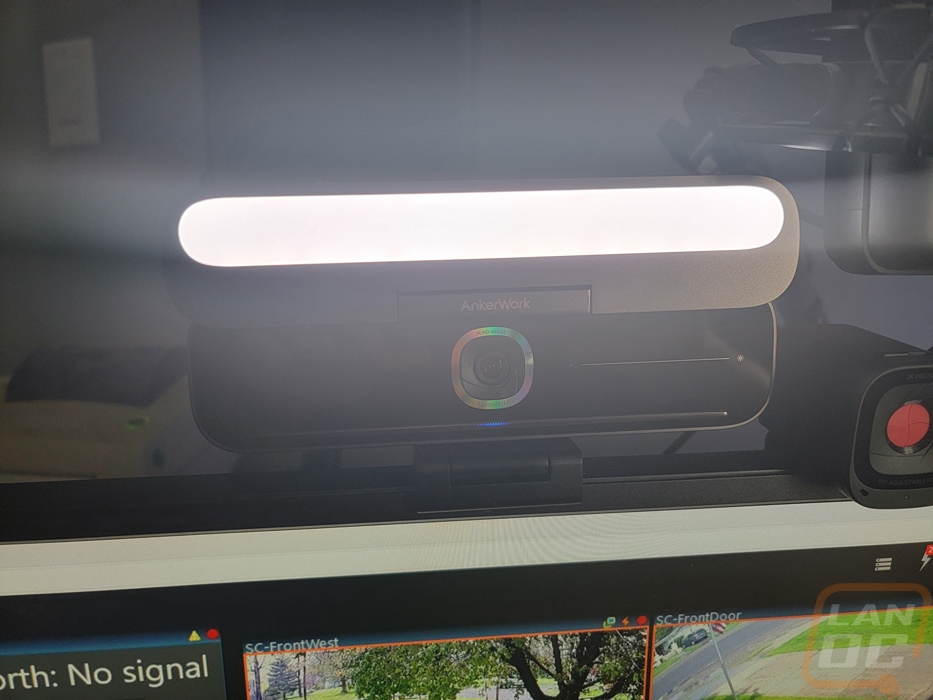
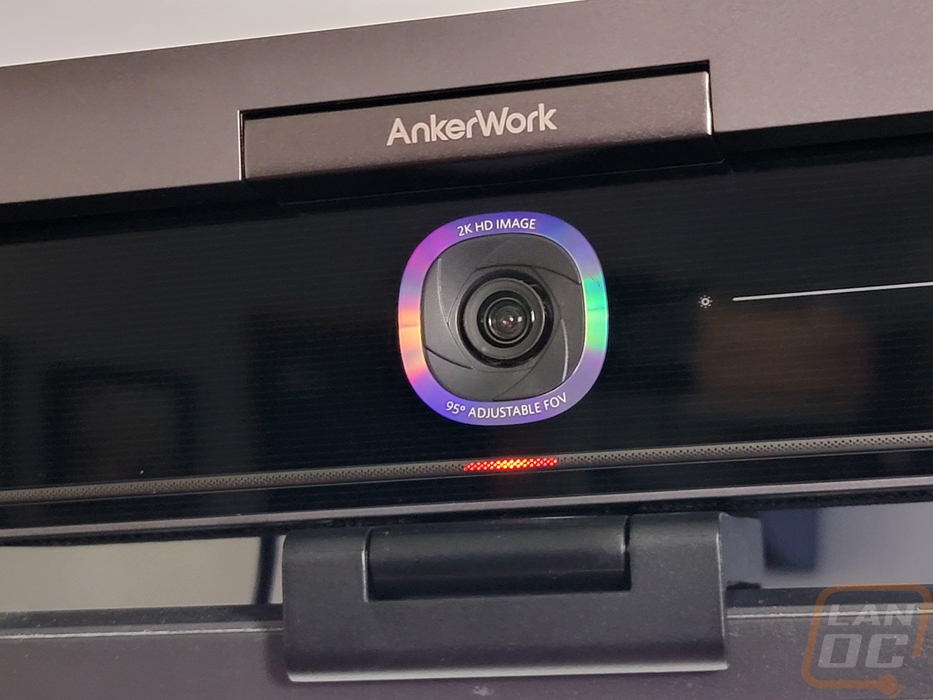
Coming from the PowerConf C200 to the B600 Video Bar the difference between the two is staggering. The B600 Video Bar is significantly larger for one. But beyond that it has a clear different focus, the C200 was a simple standard webcam but the B600 is an all-in-one studio. This is obvious once you see the front of the B600 with its large flip-up privacy guard. When down this covers up the camera and makes the B600 a little more compact with compact here being relative. But flipped up there is a LED light with a diffuser across the entire guard to light up your face. The B600 has what looks to be the same image sensor as the C200 with its 25 or 1440p resolution and 30 frame rate cap. The sensor is 1/2.8 inches and has the same 95-degree FOV as a base as well. The front of the camera on the right has a capacitive touch sensor that lets you adjust the lighting brightness from completely off to full brightness by sliding your finger to the left or the right.
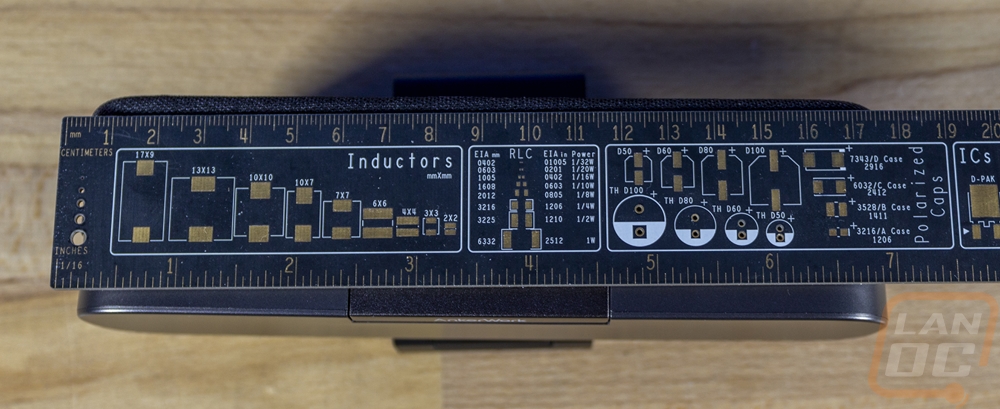
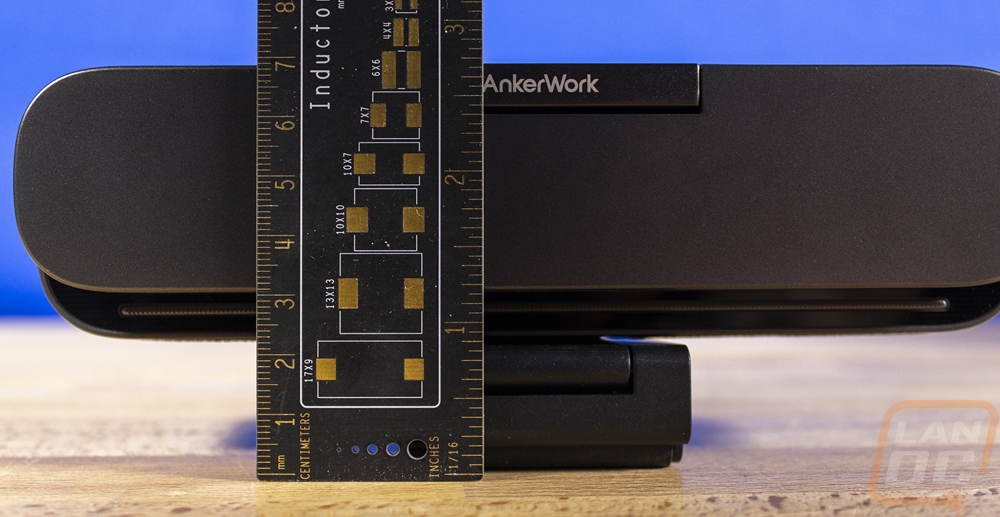
The B600 Video Bar has to be the biggest webcam I have ever seen with its width coming in at 7 inches wide. Its overall height including the stand being folded up is 70 mm or 2 ¾ inches tall but the actual camera itself is a little less at 50 mm tall. Then the camera is 47 mm deep not counting the stand which sticks out beyond that when folded up.
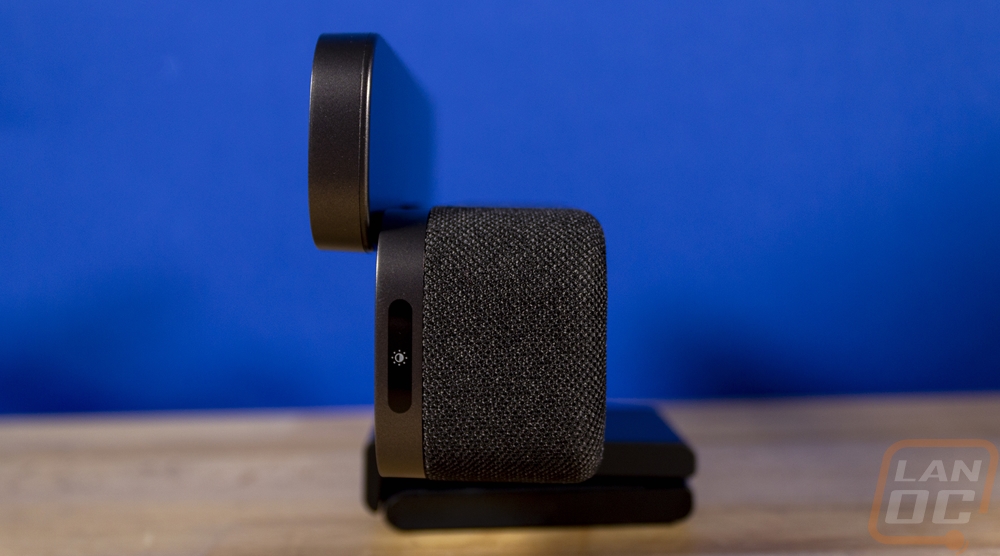
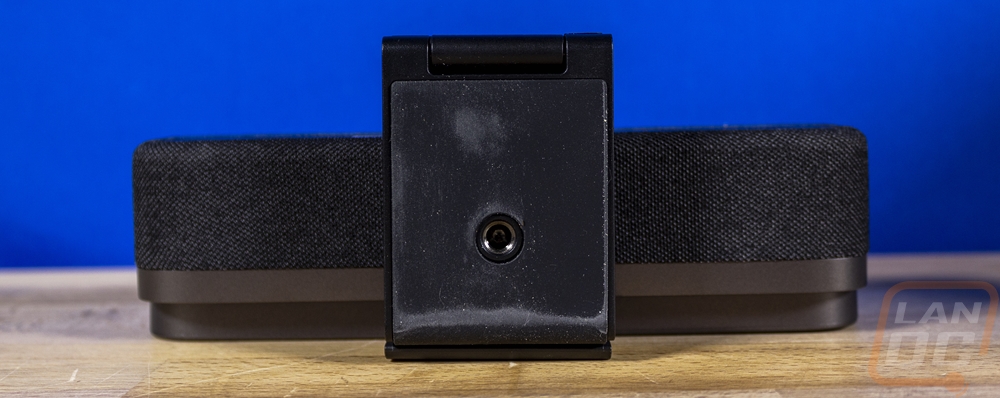
Here is a look at the B600 Video Bar with the light flipped down, this puts the light away and also doubles as a privacy guard to cover the camera as well which is nice.
The side views of the B600 Video Bar give us a look at the fabric finish that wraps around the sides, top, and bottom. This helps cover up the four-microphone array that the B600 uses for the stereo audio as well as its voice radar to pick up your voice and cut out background noise. The B600 also has two 2-watt silk speakers integrated which is the last part of its all-in-one setup that gets you lighting, camera, microphones, and surround audio. On both sides of the B600, there are more capacitive touch sensors. On the left, there is a microphone mute sensor that will mute the microphones and turn on a half-inch wide red LED at the bottom of the front of the B600 to let you know the microphones are muted. Then on the right, you can instantly turn the lighting on and off if you have the brightness all set up using the front slider and you don’t want to lose your setting.

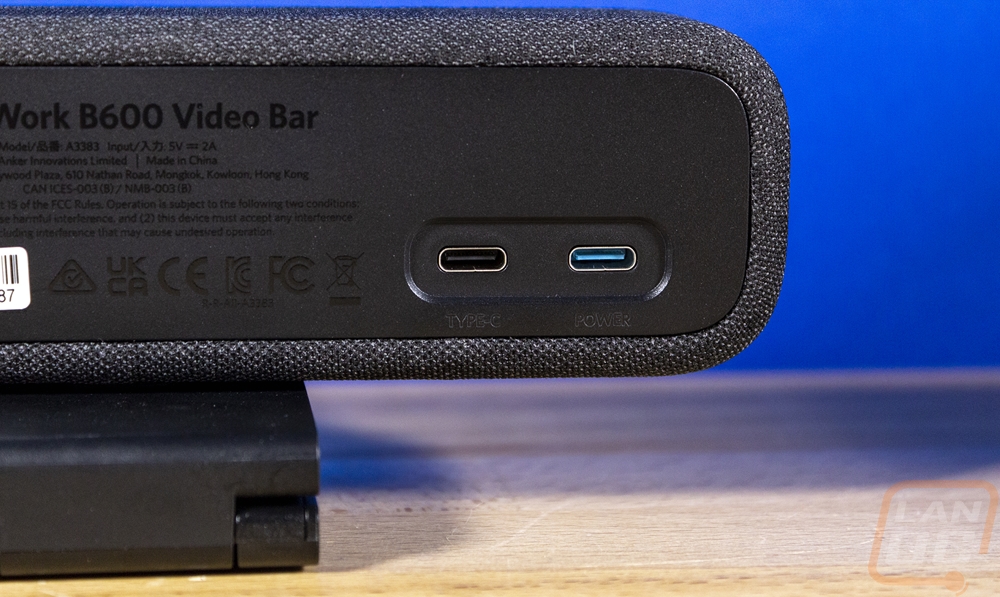
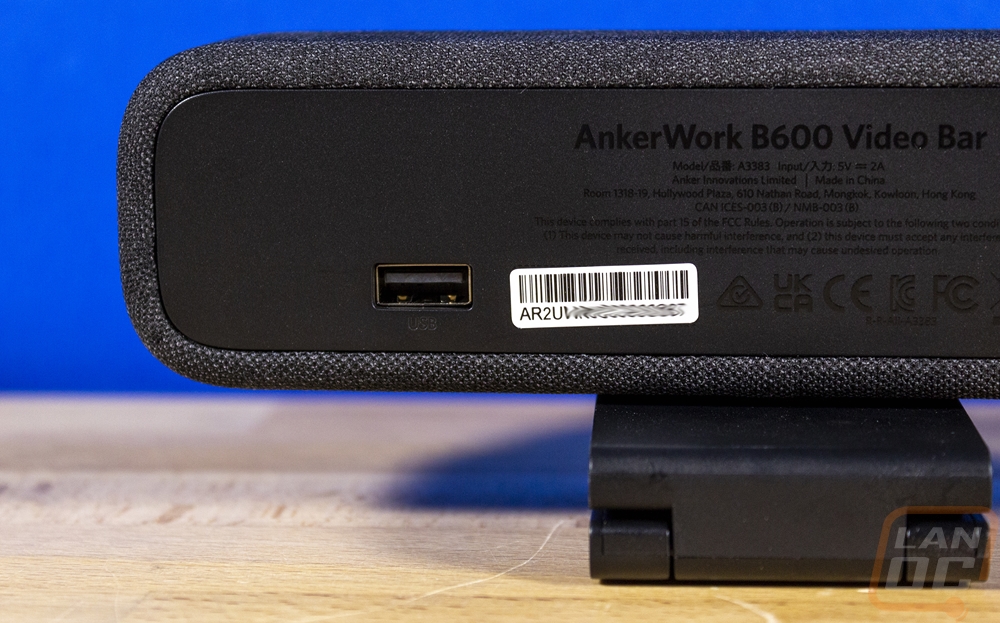
The back of the B600 Video Bar has some of the fabric from around the sides along the outside edge of the back. Then in the center, the flat black finish is flat across the back with the model information printed on the center in a gloss black. Along with that, it has the standard manufacturing information and certification logos. There is a white sticker with the serial number as well. The main thing on the back are the three USB ports. On the right, there are two Type-C ports in a slightly recessed area. Both are labeled and one is black and the other is blue. The blue is for the power cable to plug in and the black is for the data cable. On the other end of the B600 Video Bar, there is a single Type-A connection which is a pass-through plug to give you an extra USB plug up at your desk level. This side view also gives a good look at the thickness of the privacy guard and light bar when it is flipped up or closed.
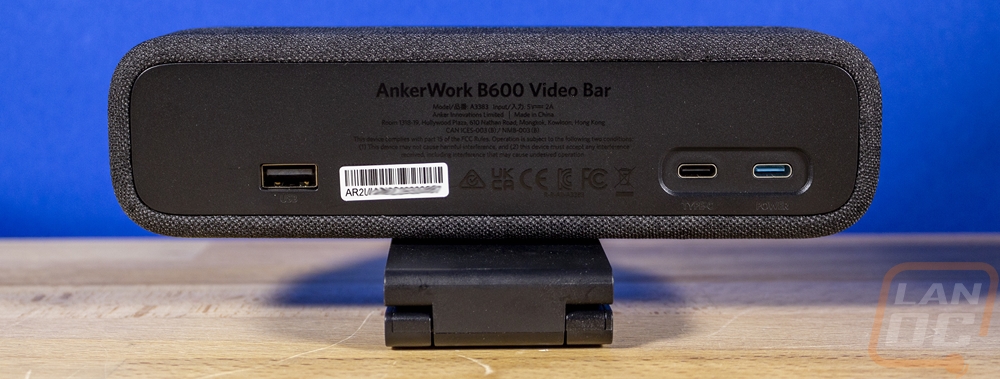
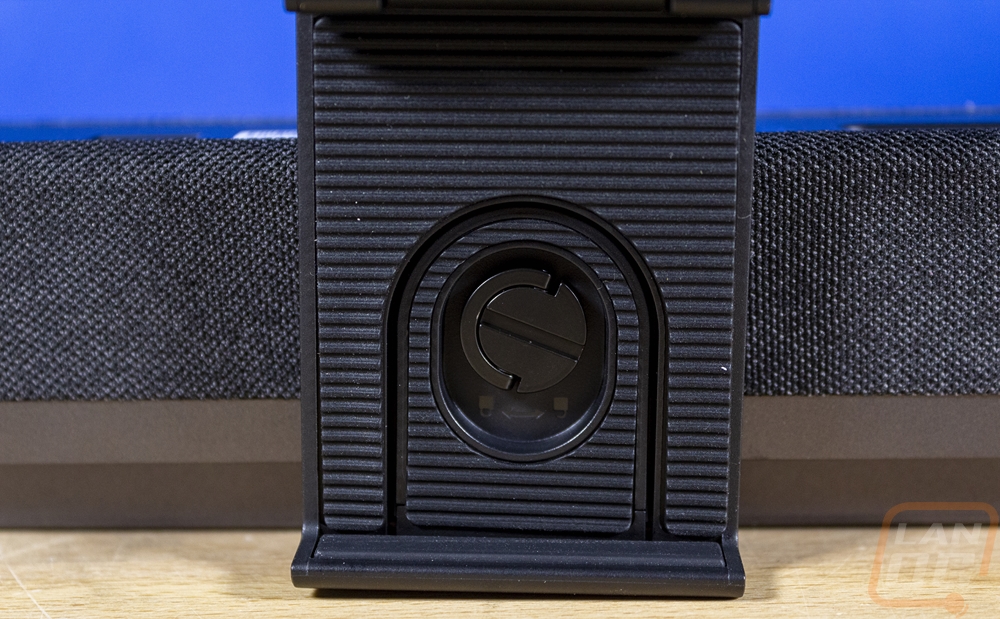
The stand on the bottom of the B600 Video Bar is similar to the C200 in that it does have a screw-on tripod/camera mount which given the size of the B600 could come in handy. The bottom also has a full rubber grip on the bottom to keep things from moving around if you sit the B600 directly on a table or shelf. The mount then flips out and has rubber on both sides. The top side which would grip the top of your monitor has groves as well for a little more traction. Also to note the stand has a flip-out thumbscrew where you can remove the stand altogether from the B600 Video Bar which then also has a second threaded mount directly on the camera for mounting to a tripod or stand.
Performance
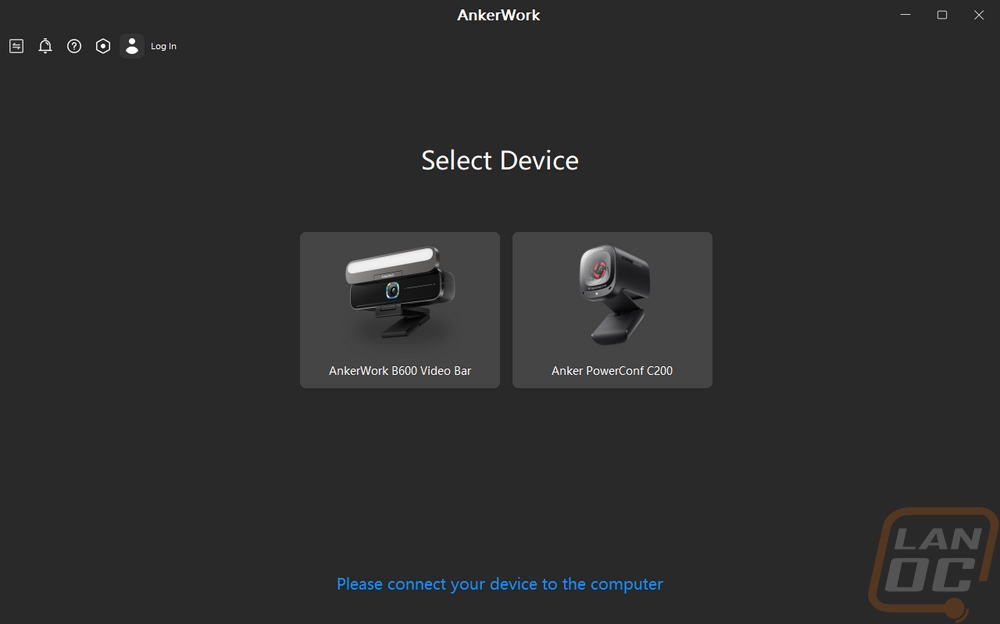
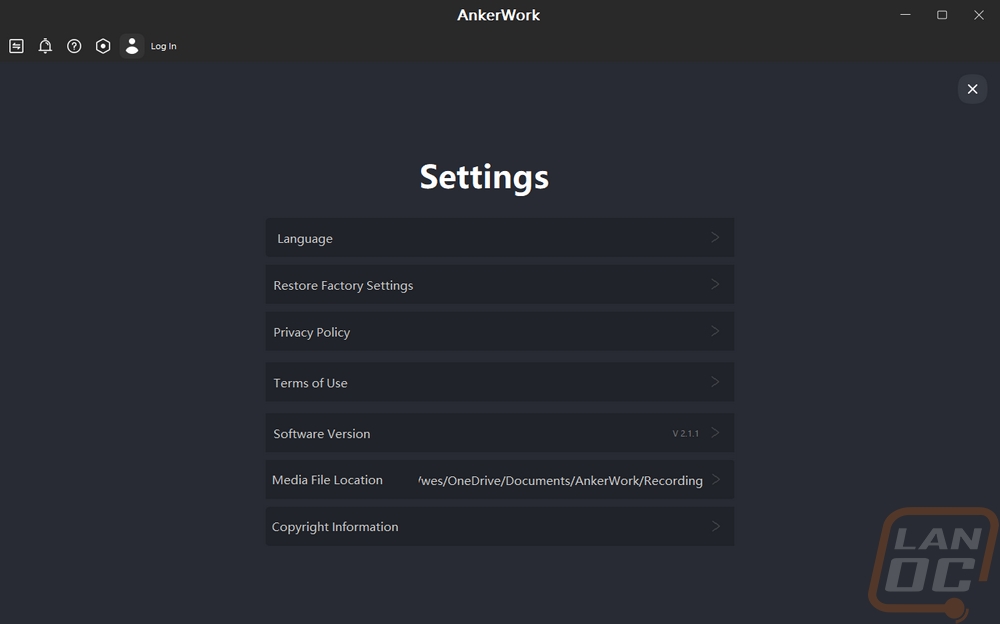
To start the performance testing we do need to check out the software for the B600 Video Bar. Not only do some of its key features rely on the software, but without the software, you also can’t get the B600 up to date and running. AnkerWork provides the download link and this is the same software that the C200 uses so when we first get into the AnkerWork program it picks up any supported devices so we have both the B600 and the C200 listed here with pictures. Up in the software settings you can change the language settings, factory reset the software, or change the media location. Beyond that, the rest of the options all get you into legal info on different aspects like the terms of use, copyright, and the privacy policy.
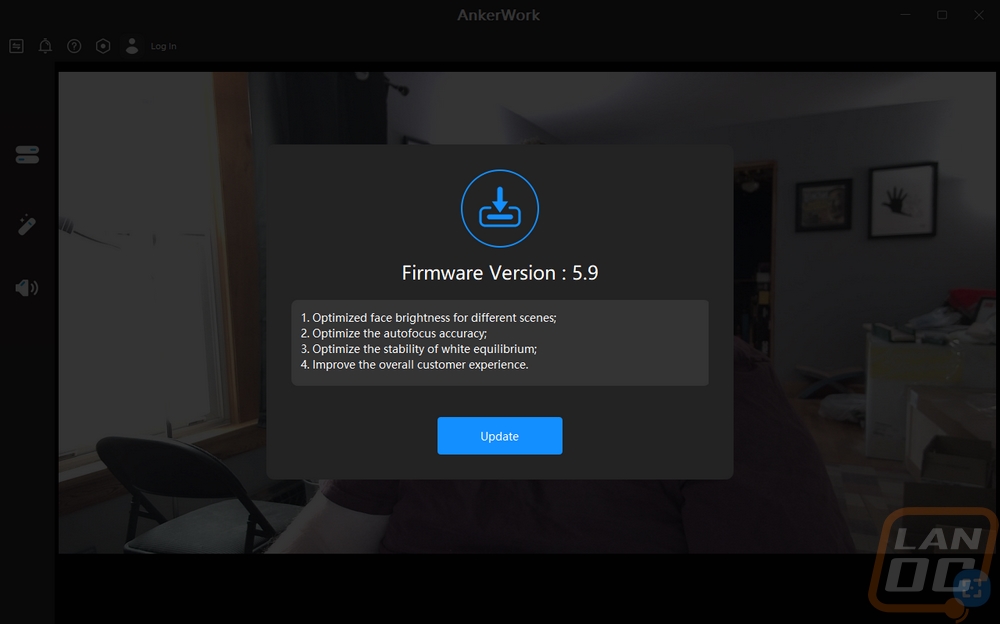
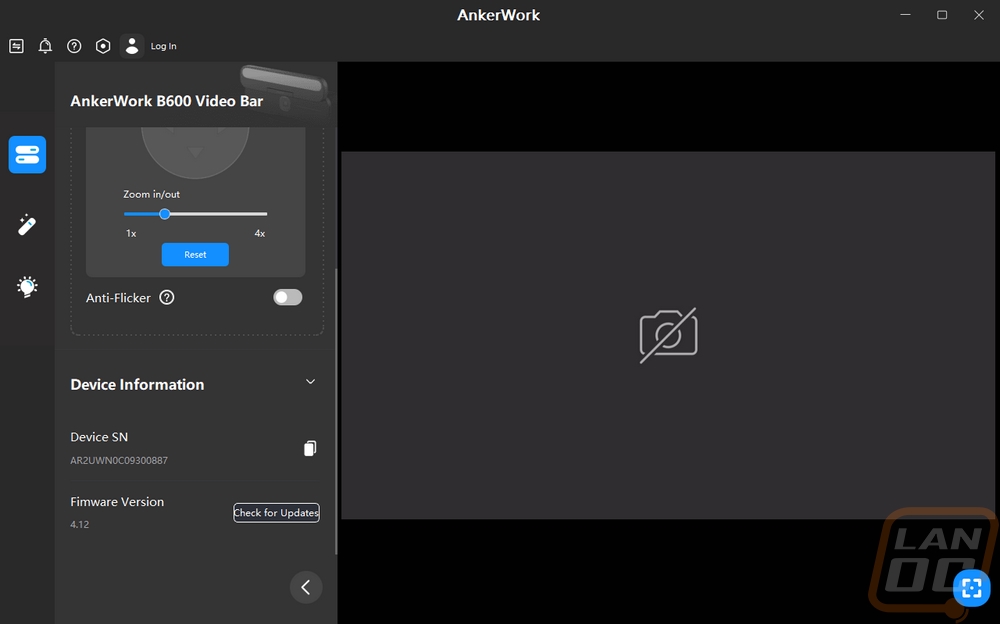
Once you select your camera it will check and make sure everything is up to date. When I first set up the B600 it prompted for a firmware update and there was another not long ago so it looks like they are staying on top of updates. From what I can tell you can’t skip the update, you have to do it to get into the software settings.
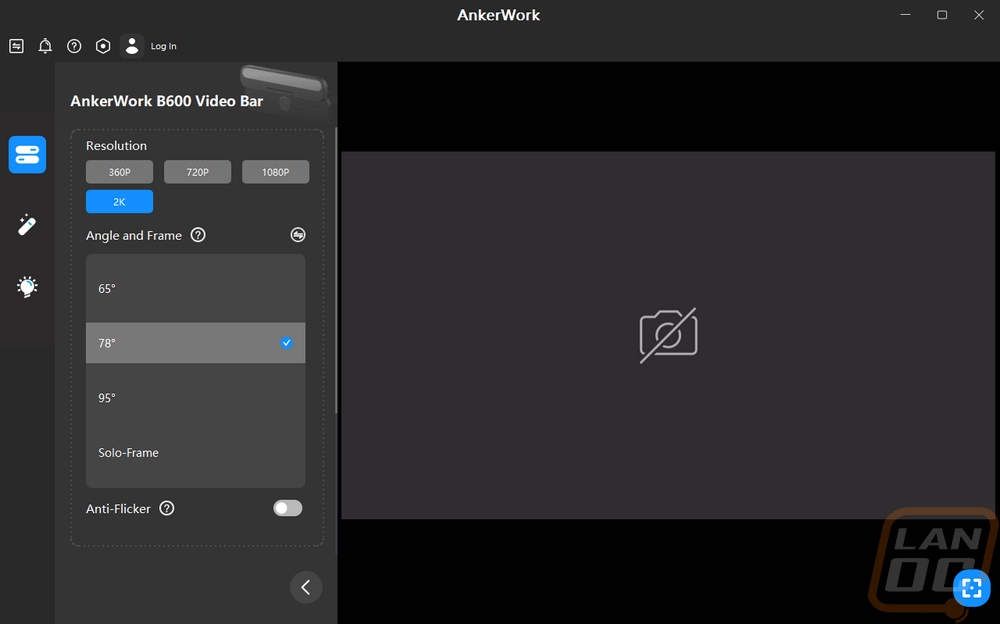
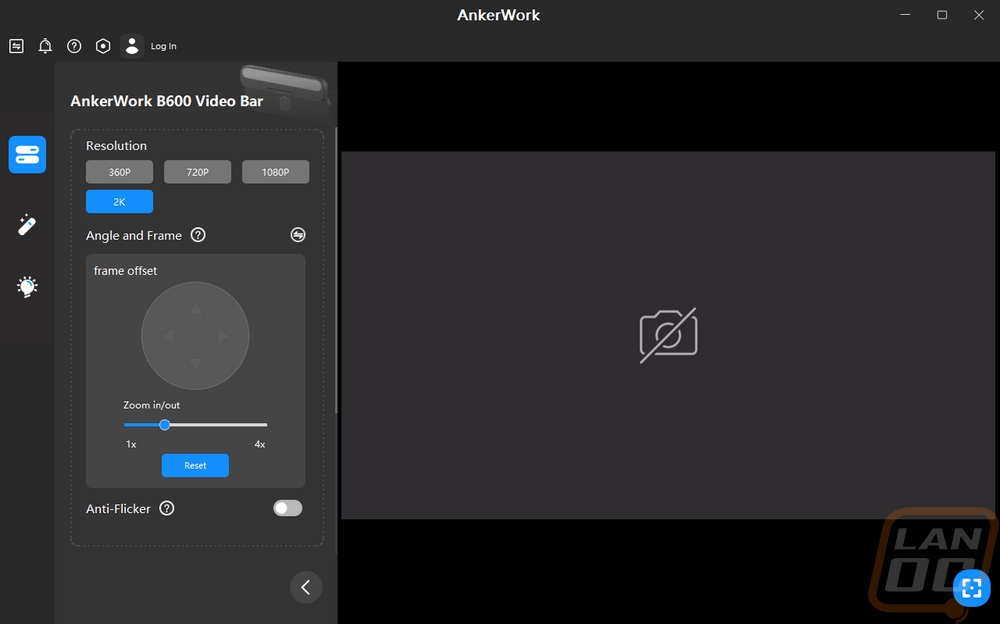
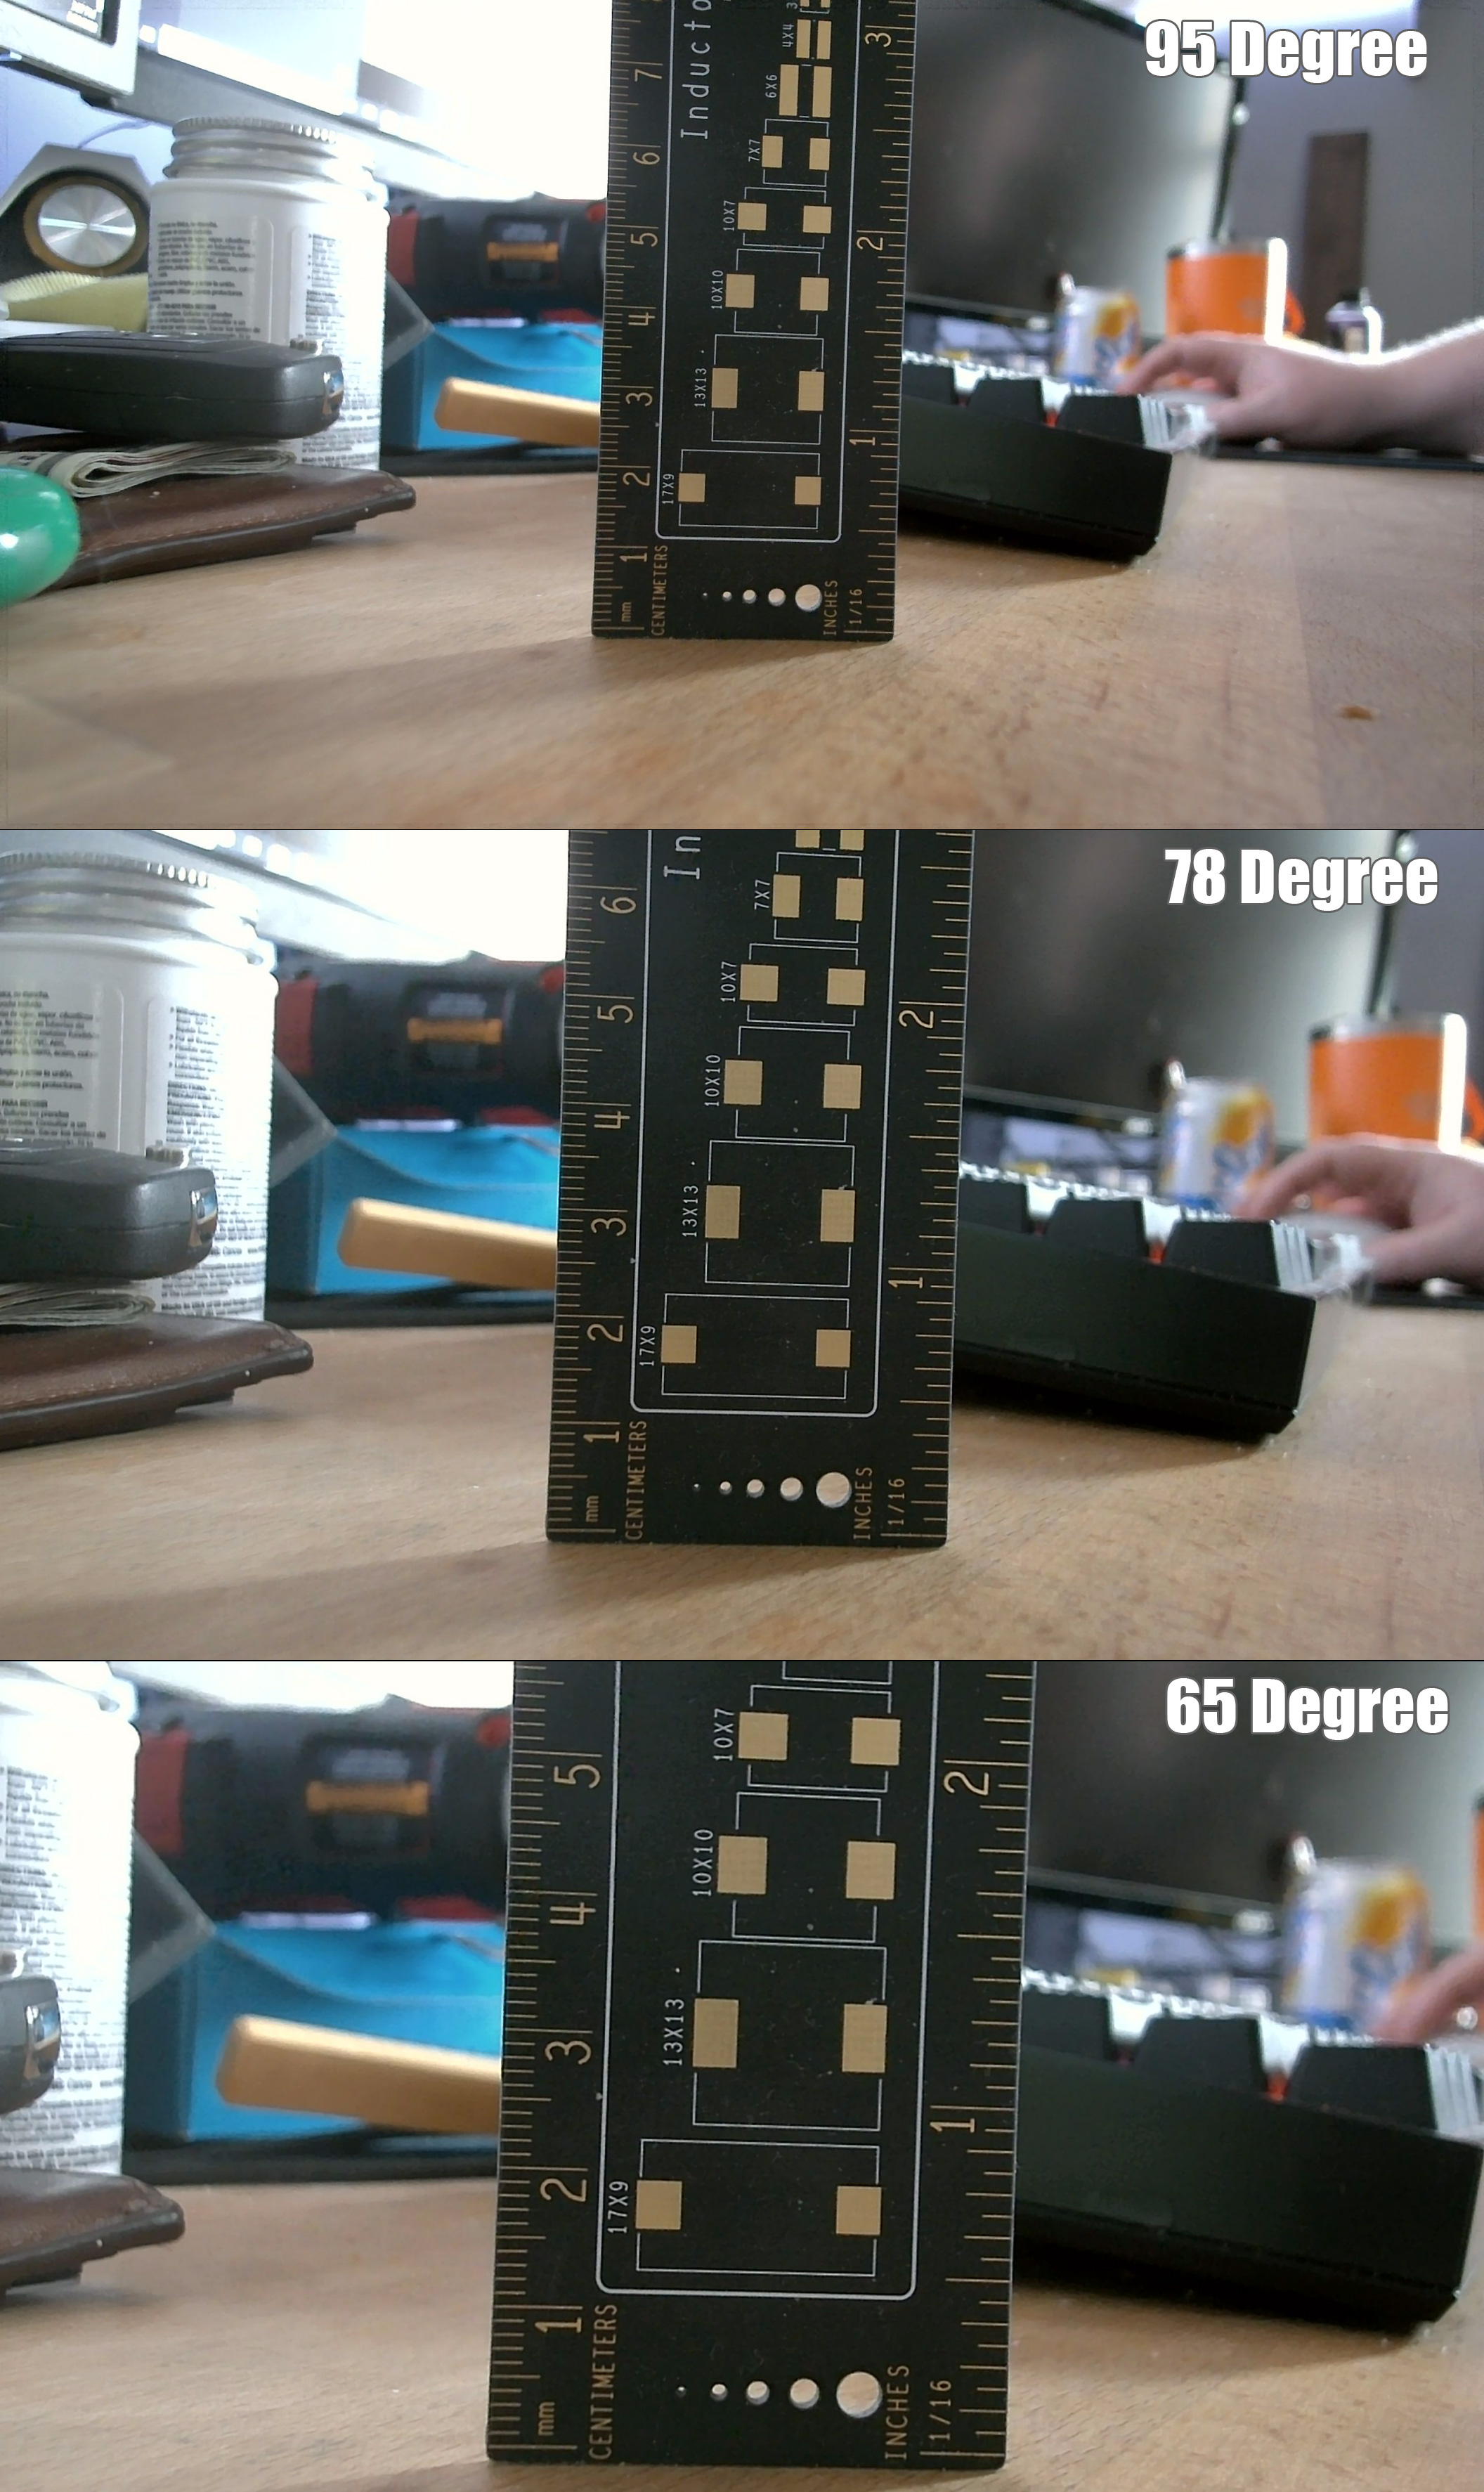
Like with the C200 all of the settings are on the left under three different pages and once you click on one a bar will slide out on the left side. The camera video is on the right so you can see how your adjustments change things. The first page is the biggest where you can select the overall resolution or set the field of view. You can switch between the default options like the C200 had for 65, 78, and 95 degrees but the B600 now adds a fourth called Solo-Frame. There is also the switch button to the top right of this that lets you switch to manual control of zoom and a direction arrow to move the view up/down/left/right once zoomed so you can zoom in on a specific area where the default FOV settings zoom in at the center. The new Solo-Frame setting will auto-frame you by using AI to find your face and zoom and center on you even if you move around which is nice. This page also has an anti-flicker setting and the option to check your device serial number and force check the firmware as well.
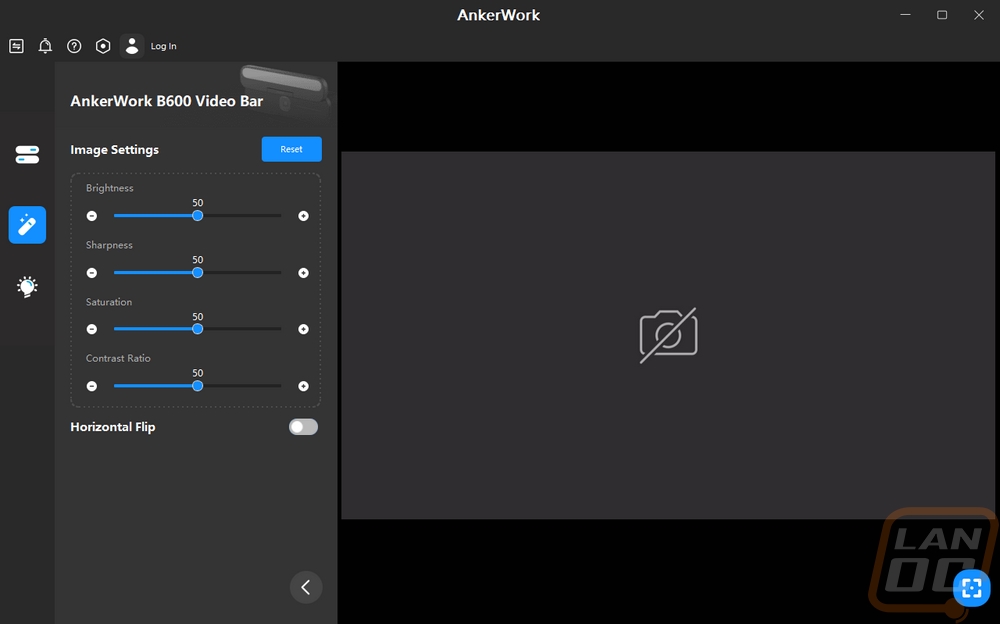
The next page is your standard image settings page. This has brightness sharpness, saturation, and contrast bars which can be slid or you can use the plus and minus buttons for detailed control. There is also a horizontal flip option here as well.
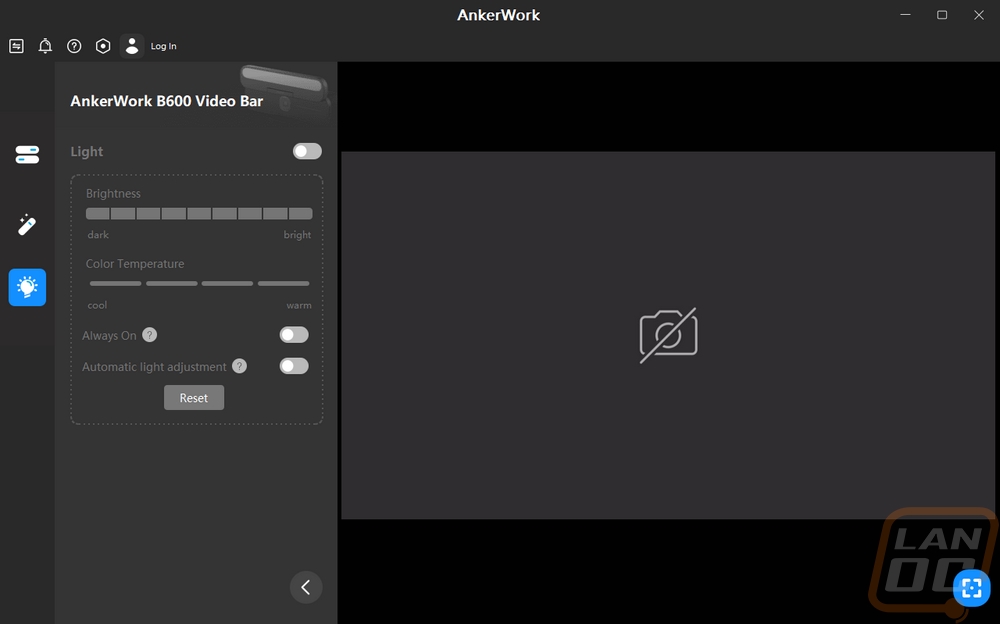
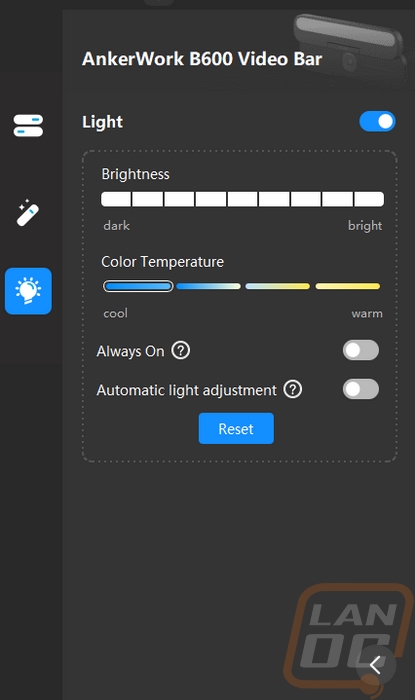
The last page is the lighting page and this is completely different from the C200. Here you can dive into the lighting settings and there are more than you might expect. Up top, you can turn the light on and off of course. Then below that, you have a brightness bar with 9 different settings. Next are the color temperature settings. You have four settings between cool and warm. Next, you can set the lighting to be always on even if the camera isn’t and you can also set the camera to run the lighting for you which detects when you need lighting.
Here is a look at the lighting in the warm and cool settings though my camera takes away some of the difference here. IMO blue is bluer and the warm is yellower but in the middle, you do get a nice sunlight option. This setting is a nice way to add or take away color from your face and or match up better with your room lighting.

Like with the C200 I was curious about the focal range because the C200 was able to focus a lot closer than the AnkerWork specifications indicated. The B600 doesn’t have a focal range listed but did focus down to around 2 inches on our sharpy and with some surfaces, it would focus in even closer, especially with the built-in light that would light that space up better. The 2-inch range was right in line with what I saw on the C200 as well.
With the same base camera the three base FOV settings were the same for the B600 Video Bar as well so we have the same comparison image here as the C200. The AI-powered solo frame is a much better option however and I would highly recommend it because it allows you to move around and it will follow you using the 78-degree range. I do wish you would have the option to maybe set the solo-frame to zoom in even more.
Here is the status LED which when red lets you know that the B600’s microphone is muted. A blue light lets you know that the camera is running as well but I did notice that if you have the microphone muted it completely overrides the camera status LED. An improvement that would be nice in the future would be setting these apart so you can see both. I keep the microphone muted all of the time for example just in case it gets switched from my main microphone but I would still really like to know when the camera is in use as well.
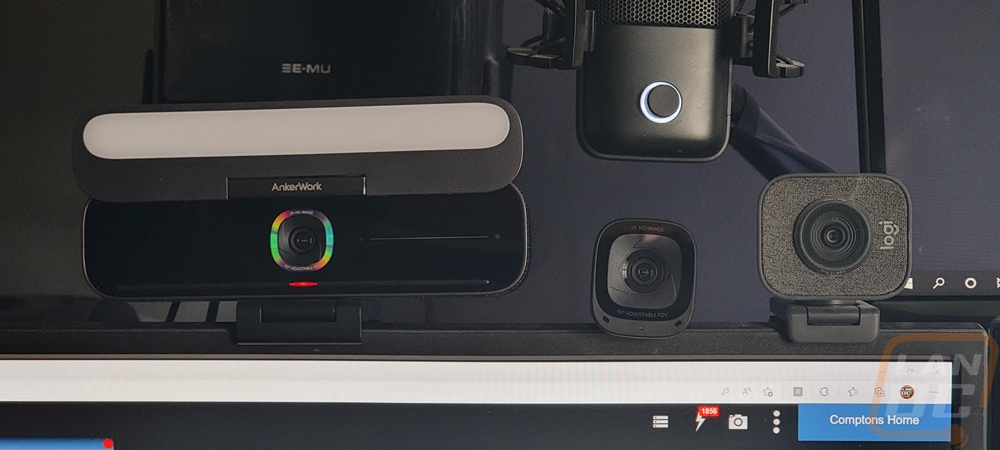
I also have a size comparison of the B600 Video Bar alongside the PowerConf C200 and the StreamCam. The B600 is in its own world when it comes to sizing. Of course, none of the others have the lighting and speakers built in. Speaking of the speakers, while they aren’t in the same performance range as a full-sized set of speakers I was impressed with the overall output that they were capable of doing.
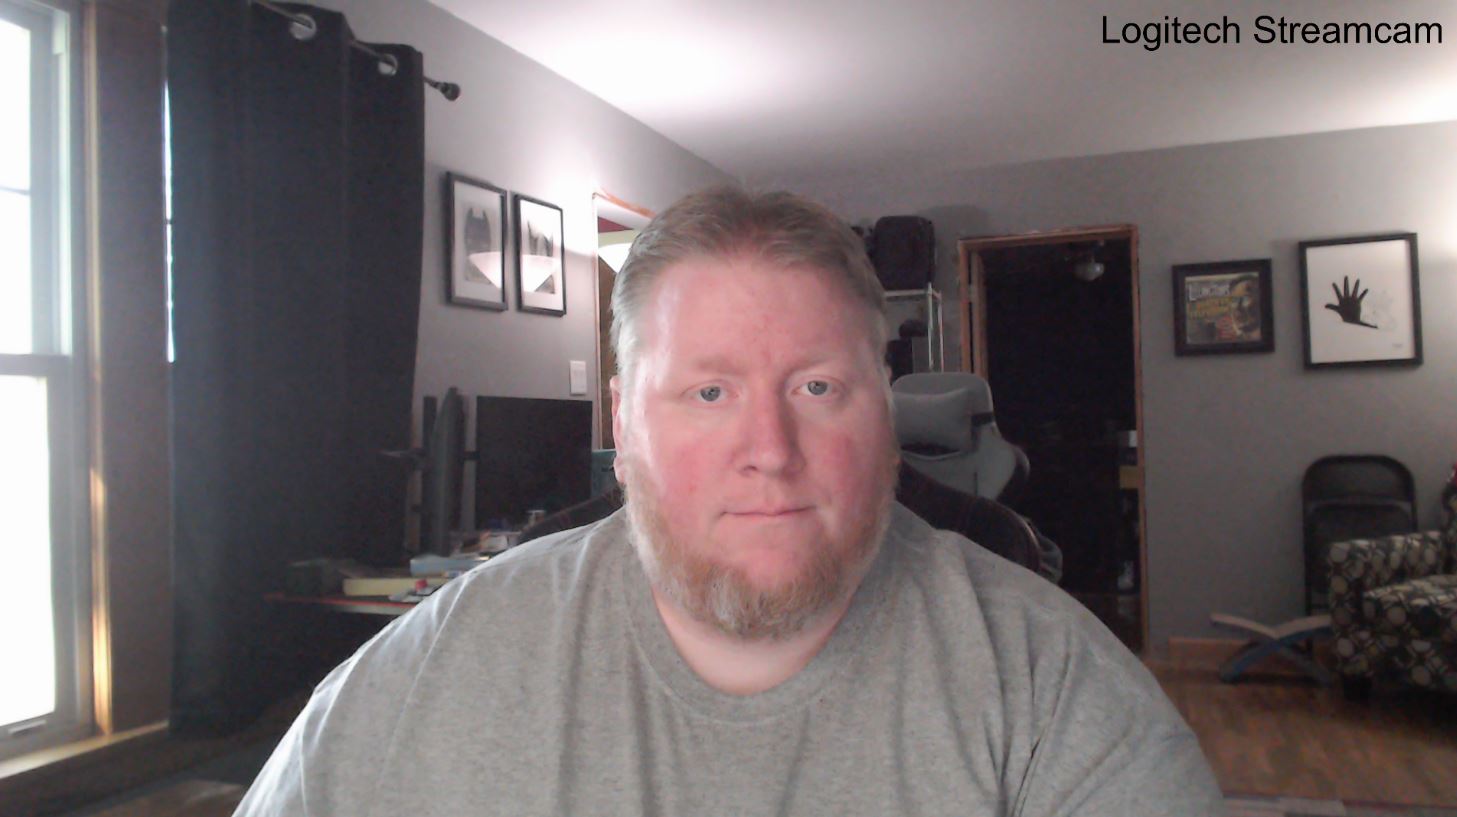
For audio testing, I put together a comparison putting it up against the C200, Logitech StreamCam, and Brio, as well as a list of gaming headphones and condenser microphones that we have tested in the past. There is a noticeable difference between it and the C200 and it does pick up your voice well. There is still a little bit of an echo and while it does put my voice ahead of the background noise I was hoping for a little more reduction on the background noises. A higher-end microphone is still going to be the better option, but the B600 does at least improve on the webcam microphone experience by a good amount.
As for the video performance, the C200 and the B600 do still share similar specs on the camera itself so the performance between the two was similar. My video does seem to drop the video quality down more than I expected, this could be a setting from recording in OBS or because this is my first time using Premiere Pro. I’ve got picture comparisons below as well. You can see how the built-in lighting can help even when I looked lit up without it, getting that lighting right in your face helps drop shadows and puts the lighting where you need it, not just all around the room.
Here are the picture comparisons and you can see how much the resolution difference makes between the StreamCam and the C200 and B600. The B600 photo is also using the solo-frame feature. You can see it has me right in the frame and zoomed in just slightly compared to the C200 which is running at the 95-degree FOV that the B600 would also be capable of doing stock.


Overall and Final Verdict
Being happy with the PowerConf C200 that I previously took a look at from AnkerWork I was interested in seeing what was different with the B600 Video Bar that would justify its larger size and much higher price. For the camera itself, the B600 Video bar has basically the same image sensor as the C200. Its 1440p or 2k resolution like with the C200 helped it stand out against the Logitech StreamCam which capped out at 1080p. It is limited to 30 FPS which if you are a gaming streamer may not be ideal, but it is perfect for business or even school use, zoom and similar software is typically limited to 30 FPS anyhow. AnkerWork did a good job with their software making the B600 easy to use and specific to the B600 the software allows you even more FOV options than the C200 had, specifically what they call Solo-Frame which uses AI to keep your face centered in the frame. The B600 has a base FOV of 95 degrees which allows you to be set up extremely close to the camera if needed or can work well for a presentation or if you need a full body shot.
Where the B600 Video Bar stands out is with the built-in lighting which has adjustable brightness settings as well as can be set between cool and warm color temperatures. Having the lighting right on the camera means fewer shadows and you don’t need to worry about setting up any other lighting to get started. Like with the solo-frame FOV setting, you can also set the lighting to adjust automatically as needed if you would prefer. The flip-up light bar also doubles as a privacy guard, when it is folded down it completely covers the camera. The B600 has four built-in microphones which did improve on one of the weaknesses of the C200 and the multiple microphone design is also used to cut out background noise and focus in on your voice. In my testing, it was an improvement, but it didn’t cut out keyboard noise but it did cut out some other background noise. The B600 also has two 2-watt speakers built in which would be an improvement on a lot of laptop speakers.
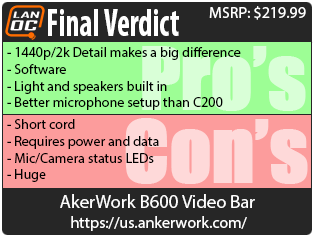
As for issues that I ran into, like with the C200 the USB cord for the B600 was surprisingly short. I ended up having to get a USB extension cord to get the camera up on my monitor even with my PC sitting right next to that monitor. The B600 due to its extra features also needs AC power to run everything so plan on having to plug that in as well, thankfully that cord was at least a little longer and I didn’t have issues there. The only other issue I ran into was with the status LED for the camera and microphone mute. When you mute the microphone it turns on a red LED and when the camera is on you have a blue LED but they are in the same location. As it turns out, when the microphone is muted it overrides the camera status so you don’t know if the camera is on or not. I like to keep the microphone muted when not in use, during that time I would have no idea if the camera was in use which is important. Thankfully there is the privacy guard, but having both the microphone and camera status LEDs visible at the same time would be a nice improvement in the future. I would also put the overall size of the B600 down as a con, it is huge.
So the AnkerWork B600 Video Bar has an MSRP of $219.99 and from looking at the pricing history on Amazon it has stayed there a majority of the time. The combination of a 2k webcam, the adjustable lighting, multiple microphones, and built-in speakers without a doubt makes this a simple all-in-one solution for someone needing a portable “studio” so to speak for zoom use. With the business focus, I can see this being an easy pickup for IT to get some people rolling with work from home without having to walk them through too many steps. So I was a little torn on the pricing and let me break down what I’m seeing. If you just need a basic webcam with an integrated light there are a few options for that that are cheaper like the Razer Kiyo but you aren’t going to get 1440p/2K. Elgato’s ring light alone is $199 or Logitech has a light for $59.99 that goes with the StreamCam which is between $100 and $150. So as much as I feel like the B600 is too expensive, it isn’t THAT far off from the current competition. Of course, we could argue that they are all too expensive and that is true. Overall the B600 is more than I would want to spend on a webcam even though it is a cool all-in-one studio setup. But when the cost is less of a concern like in a business when your CEO wants a good camera for their work from home setup and you don’t want to set up multiple products this may still be the way to go. Just be sure to get a longer USB cord along with it or you are going to be stuck with the camera sitting on top of their PC.
Live Pricing: HERE
