That last time we worked on the Icyu project build, which is a rack-mounted upgrade to our Blue Iris security camera server, I put together our cooling and cleaned up our server rack. With that out of the way, it’s finally time to dive into the big hardware. So today I’m going to talk about what CPU I went with, which motherboard, and the memory we are going with and then I get it all installed. So let’s jump in and see what will be powering the new server and get things up and running.
Title: Project Icyu– Blue Iris Build Part 3
Written by: Wes Compton
Build Sponsors/Supporters: Silverstone, Intel, Noctua, Cooler Master, MSI, Kingston
Amazon Affiliate links:
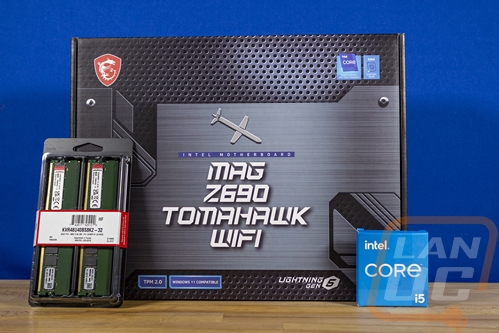
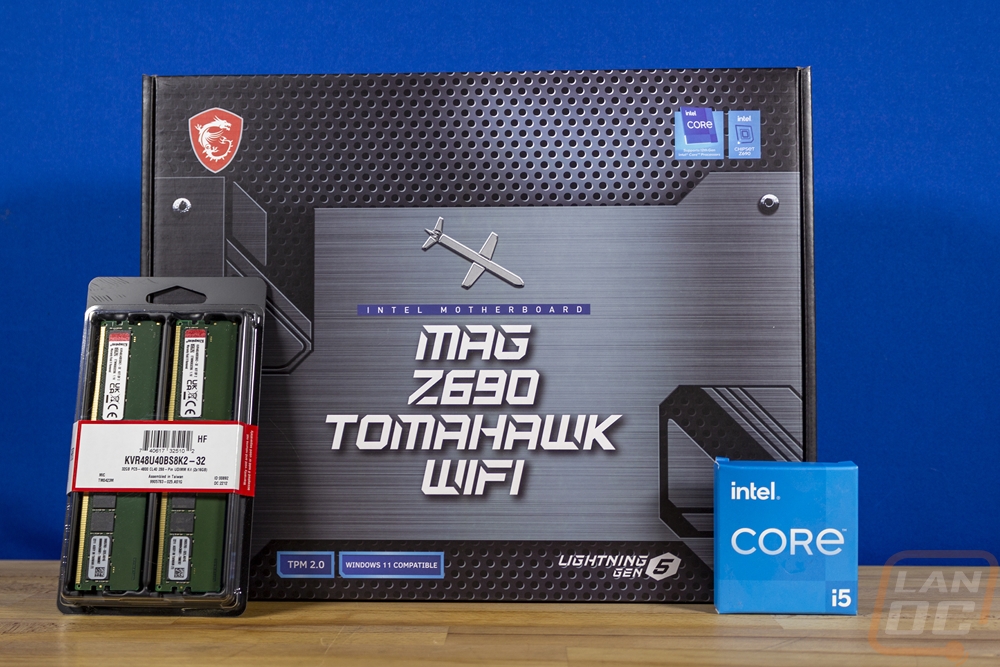
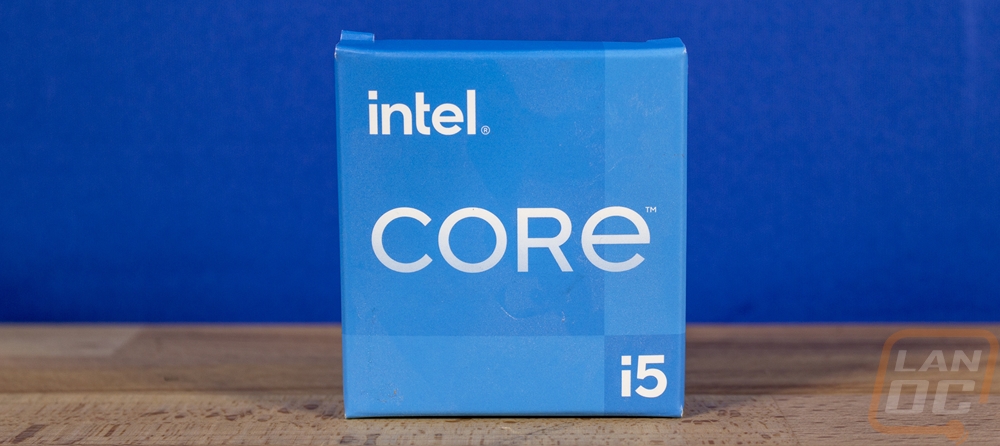
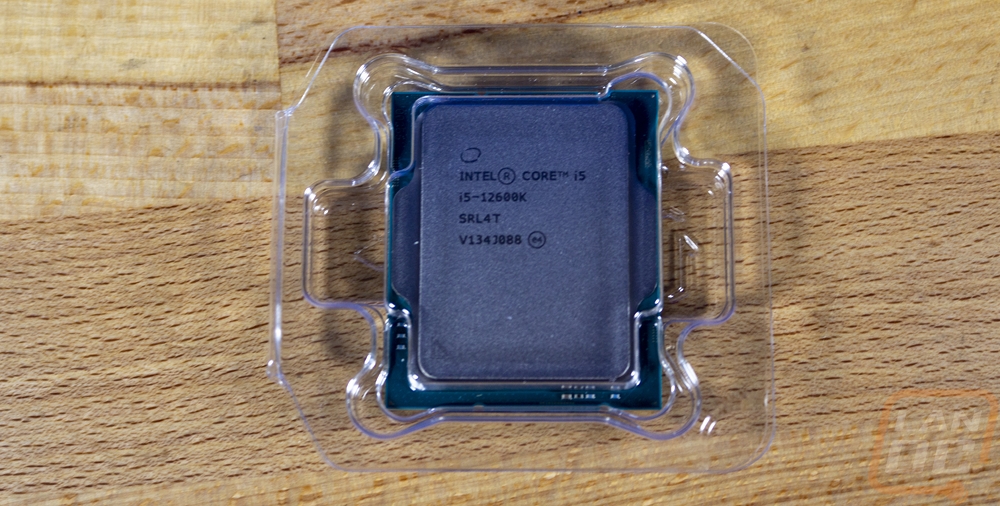
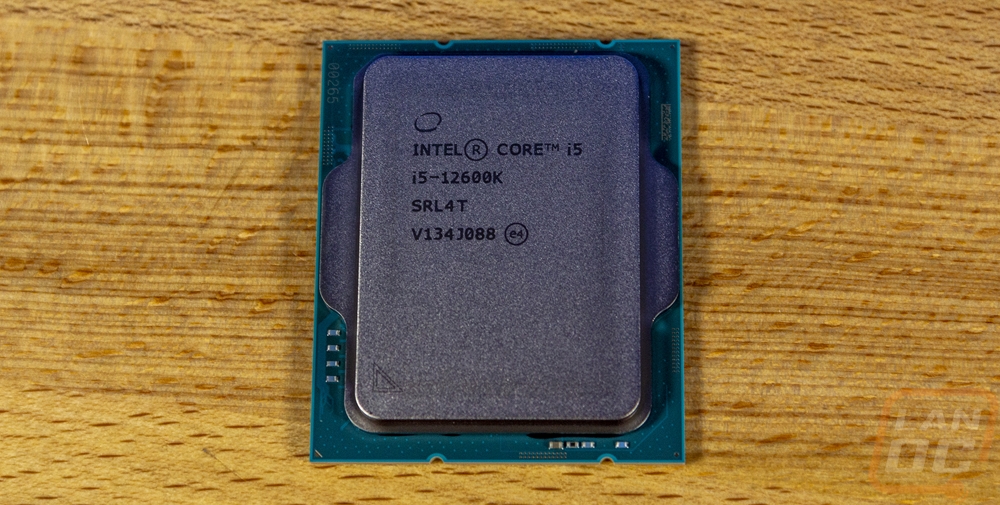
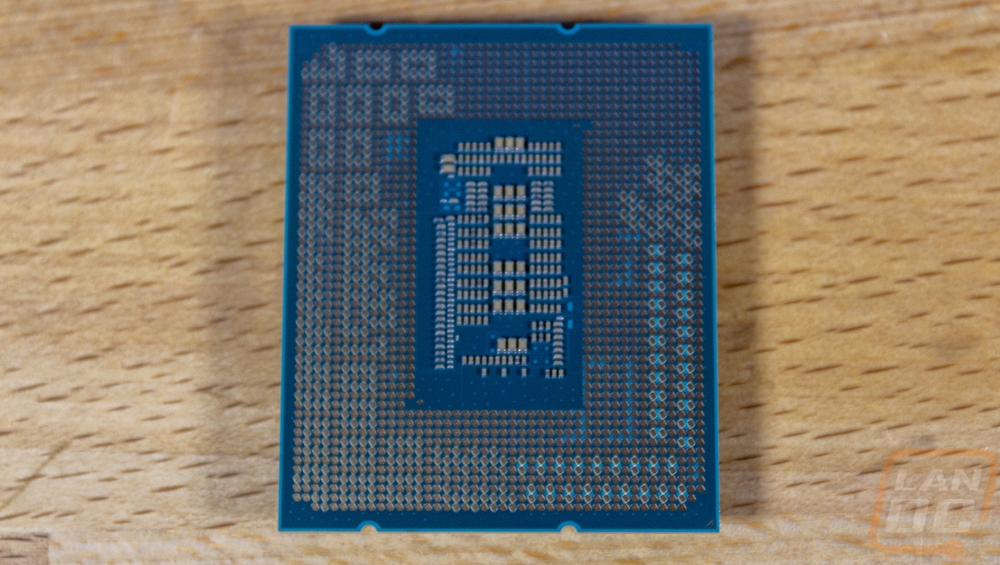
Intel I5-12600K
MSI MSG Z690 Tomahawk WiFi
Kingston ValueRAM KVR48U40BS8K2-32 2x16GB 4800MHz DDR5
Links to the rest of the project: Part 1 - Part 2 - Part 3 - Part 4
CPU
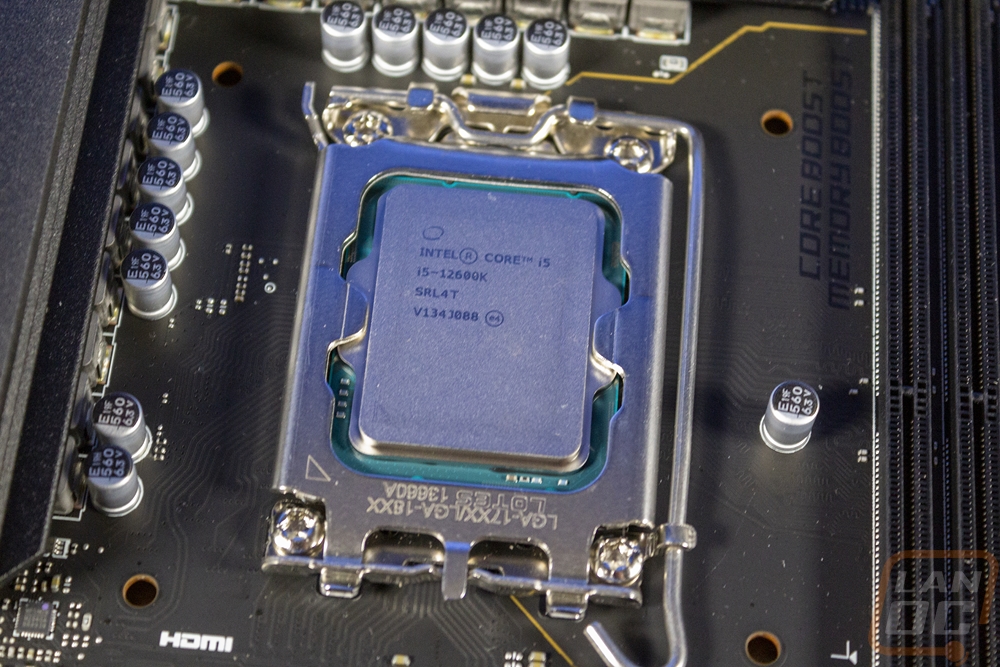
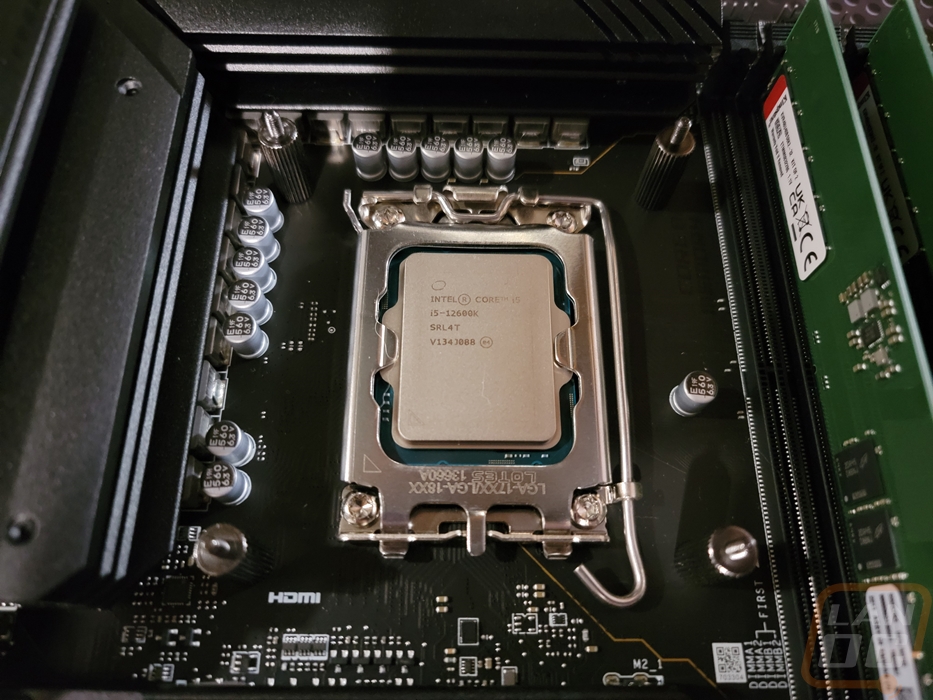
So when I went over what areas that our old out-of-date security camera server needed improved on, one of the issues that I have been running into is that it is often pushing the CPU at 100% which not only has caused issues with slow processing of images, it is also creating a lot of heat. So going into this I knew we would need to give the CPU a little bit of a bump. The old CPU is an Intel i7-7700K and anything newer would most likely be enough to get the small amount of performance needed but by going with a 12th generation CPU I could drop down from the flagship CPU down to the i5-12600K and still be worlds above our older 7700K in performance. The i5-12600K has a total of 10 cores with 6 being performance cores and 4 of the new efficient cores whereas the 7700K has just 4 altogether and the 12th generation architecture is significantly improved as well. Both run at a max of 4.9 GHz as well. The additional cores should help a lot with processing the AI requests which is the issue I’m currently having and I’m also really curious to see how Blue Iris handles the lower power efficient cores.
As far as performance goes though from my launch review of the Andler Lake CPUs the i5-12600K scored a 6510 in the multicore Cinebench R20 test whereas the i7-7700K was a third of that at 2359 so it should do a great job keeping the CPU usage lower. The i5-1600K does have a higher wattage so if we do manage to max it out the power usage will be higher, but I don’t see that happening. As for cooling the water cooling setup, we went with should keep things running cool under load or not.
Motherboard
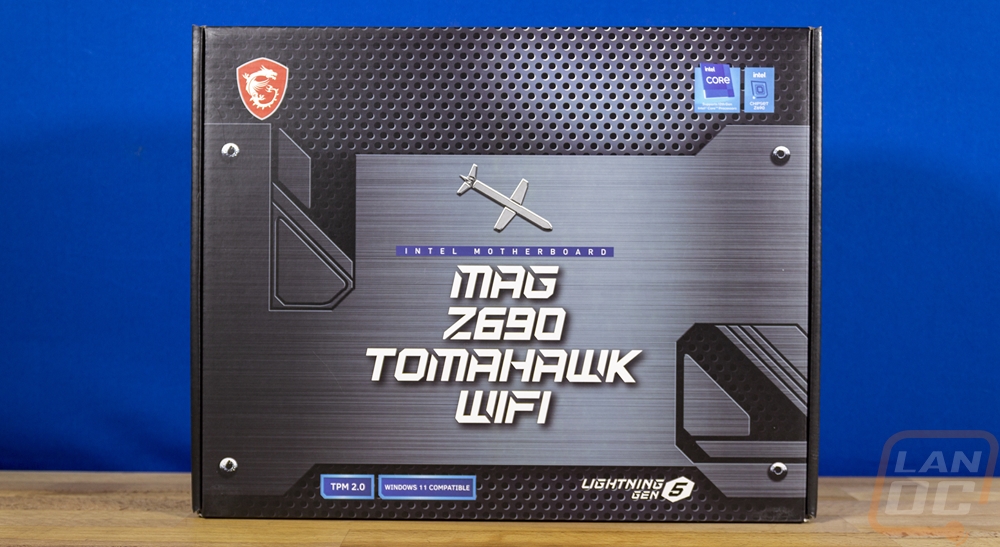
As far as picking out a motherboard for the Icyu build I did have a few things I was looking for but given the number of motherboards available for the 12th generation CPUs from Intel, it left me with a lot of options. Going in I knew I would want an ATX motherboard which could offer expandability. An ITX motherboard would give me the 2 ram slots I would need and the one PCIe needed in case we decide to go with a video card to handle AI processing but with that in mind, I wanted to also have the option to add a faster network card in the future if needed. Beyond that, the board would need at least three SATA ports, two or more M.2 slots, and it would need to have at least a 2.5G network connection. Overclocking wasn’t needed but I would need it to support integrated graphics. In the end, I decided to stick with Z690 or H670 chipsets simply because they would give us more PCI lanes which would come in handy if I ended up running a GPU and a network card as well as the M.2 drives. But I was flexible when it came to DDR4 or DDR5 and in the end, I ended up with the MSI MSG Z690 Tomahawk WiFi. A lower-end board would have fit the bill as well, but this was what MSI had on hand at the time, and while it didn’t have a 10G NIC which would have been a nice bonus it did have everything we needed and a LOT more. So let's take a closer look at what all it has going on.
|
Specifications |
|
|
Processor |
Supports 12th Gen Intel® Core™, Pentium® Gold, and Celeron® processors Processor socket LGA1700 |
|
Chipset |
Intel® Z690 Chipset |
|
Memory |
4x DDR5 memory slots, supporting up to 128GB Supports 1R 4800 MHz (by JEDEC & POR) Max overclocking frequency: 1DPC 1R Max speed up to 6400+ MHz 1DPC 2R Max speed up to 5400+ MHz > 6000+ MHz 2DPC 1R Max speed up to 4000+ MHz > 5600+ MHz 2DPC 2R Max speed up to 4000+ MHz > 5600+ MHz Supports Intel® XMP 3.0 OC Supports Dual Controller Dual-Channel mode Supports non-ECC, un-buffered memory |
|
Expansion Slot |
3x PCIe x16 slots PCI_E1 (From CPU) Support up to PCIe 5.0 x16 PCI_E3 (From Z690 chipset) Support up to PCIe 3.0 x4 PCI_E4 (From Z690 chipset) Support up to PCIe 3.0 x1 1x PCIe 3.0 x1 slot (From Z690 chipset) |
|
Multi-GPU |
Supports AMD® CrossFire™ Technology |
|
Onboard Graphics |
1x HDMI 2.1 with HDR port, supports a maximum resolution of 4K 60Hz 1x DisplayPort 1.4 port with HBR3, supports a maximum resolution of 4K 60Hz |
|
Storage |
6x SATA 6Gb/s ports (From Z690 chipset) 4x M.2 slots (Key M) M2_1 slot (From CPU) Supports up to PCIe 4.0 x4 Supports 2242/ 2260/ 2280/ 22110 storage devices M2_2 slot (From Z690 chipset) Supports up to PCIe 4.0 x4 Supports 2242/ 2260/ 2280 storage devices M2_3 slot (From Z690 chipset) Supports up to PCIe 3.0 x4 Supports up to SATA 6Gb/s Supports 2242/ 2260/ 2280 storage devices M2_4 slot (From Z690 chipset) Supports up to PCIe 4.0 x4 Supports up to SATA 6Gb/s Supports 2242/ 2260/ 2280 storage devices Intel® Optane™ Memory Ready for M.2 slots from Z690 Chipset Supports Intel® Smart Response Technology for Intel Core™ processors |
|
Raid |
Supports RAID 0, RAID 1, RAID 5, and RAID 10 for SATA storage devices Supports RAID 0, RAID 1, and RAID 5 for M.2 NVMe storage devices |
|
USB |
Intel® Z690 Chipset
Hub-GL850G
|
|
Audio |
Realtek® ALC4080 Codec
|
|
Lan |
1x Intel® I225V 2.5Gbps LAN controller |
|
Wireless Lan & Bluetooth® |
Intel® Wi-Fi 6E The Wireless module is pre-installed in the M.2 (Key-E) slot Supports MU-MIMO TX/RX, 2.4GHz/ 5GHz/ 6GHz up to 2.4Gbps Supports 802.11 a/ b/ g/ n/ ac/ ax Supports Bluetooth® 5.2 |
|
Internal Connectors |
1x 24-pin ATX main power connector 2x 8-pin ATX 12V power connectors 6x SATA 6Gb/s connectors 4x M.2 slots (M-Key) 1x USB 3.2 Gen 2 10Gbps Type-C port 1x USB 3.2 Gen 1 5Gbps connector (supports additional 2 USB 3.2 Gen 1 5Gbps ports) 2x USB 2.0 Type-A connectors (supports additional 4 USB 2.0 ports) 1x 4-pin CPU fan connector 1x 4-pin water-pump fan connector 6x 4-pin system fan connectors 1x Front panel audio connector 2x System panel connectors 1x Chassis Intrusion connector 1x TPM module connector 1x Clear CMOS jumper 1x TBT connector (supports RTD3) 1x Tuning Controller connector |
|
LED Feature |
1x EZ LED Control switch 1x 4-pin RGB LED connectors 3x 3-pin RAINBOW LED connectors 4x EZ Debug LED |
|
Back Panel Ports |
DisplayPort 1.4 USB 2.0 Port USB 3.2 Gen 2 10Gbps Type-A 2.5G LAN Port Wi-Fi / Bluetooth Antenna HD Audio Connectors HDMI 2.1 Port Flash BIOS Button USB 3.2 Gen 1 5Gbps Type-A USB 3.2 Gen 2 10Gbps Type-A USB 3.2 Gen 2x2 20Gbps Type-C Optical S/PDIF OUT |
|
Dimensions |
ATX Form Factor 12 in. x 9.6 in. (30.5 cm x 24.4 cm) |
|
Box Contents |
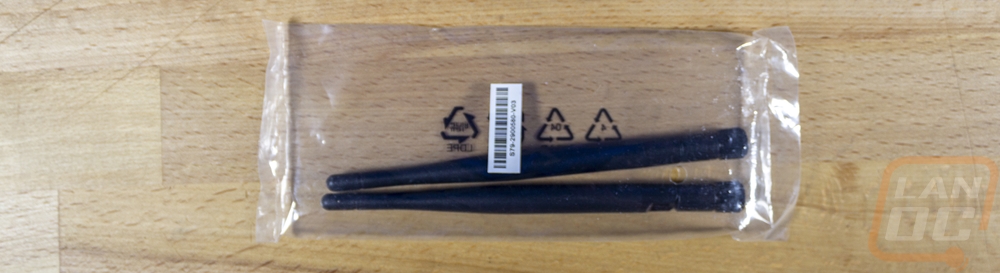
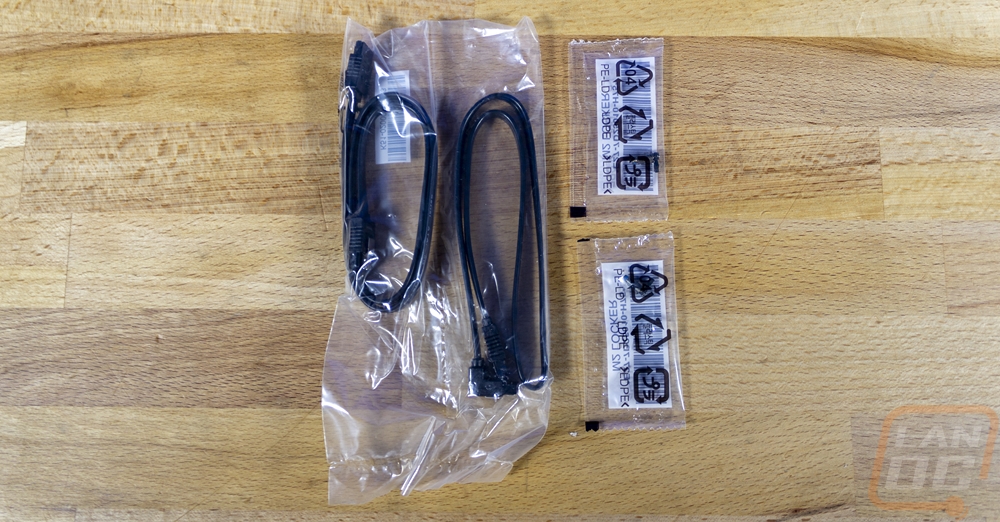
2x SATA Cables MSI Case Badge Product Registration Card |
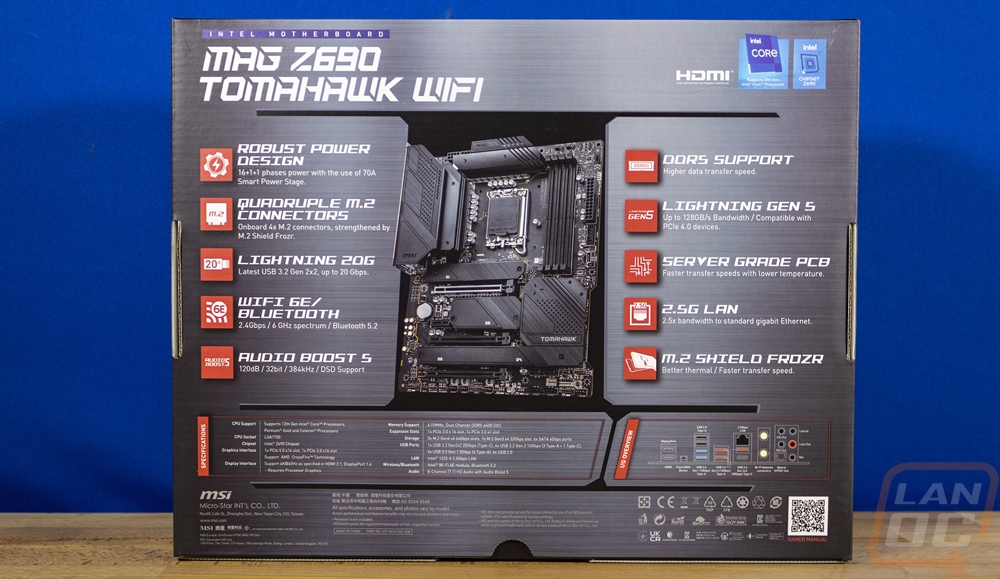
Like with the Tomahawk DDR4 model the MAG Z690 Tomahawk Wifi comes in a box that looks like it has metal plating printed on top which is bolted to a mesh panel. They have a Tomahawk missile in the center to go with the branding and the model name is in a huge font all across the middle of the top. They have the MSI gaming logo up in the top left and the required badges from Intel to let you know this is a 12th Gen CPU compatible board in the top right. The most surprising thing to me though is that the MSI name isn’t written out on the top of the box at all. Around on the back, we have a picture of the board in the center which I was really happy to see. Around it, they have listed off some of its key features with short descriptions below each one. Then towards the bottom, they have a basic specification listing and a line drawing of the rear I/O so you can see all of the connections it has, which is all of the information you would need to learn about this board if in a retail store.
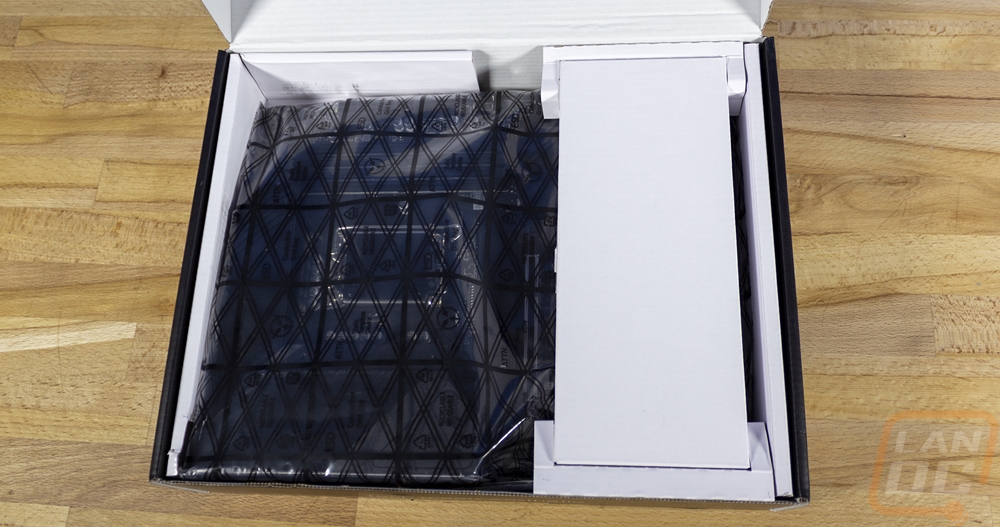
When you open the box up the MAG Z690 Tomahawk Wifi comes wrapped up in its static protective bag and sits in a cardboard tray which keeps it up off of the accessories and documentation under the tray. There is also a cardboard box wedged in above the board to keep it from moving around.
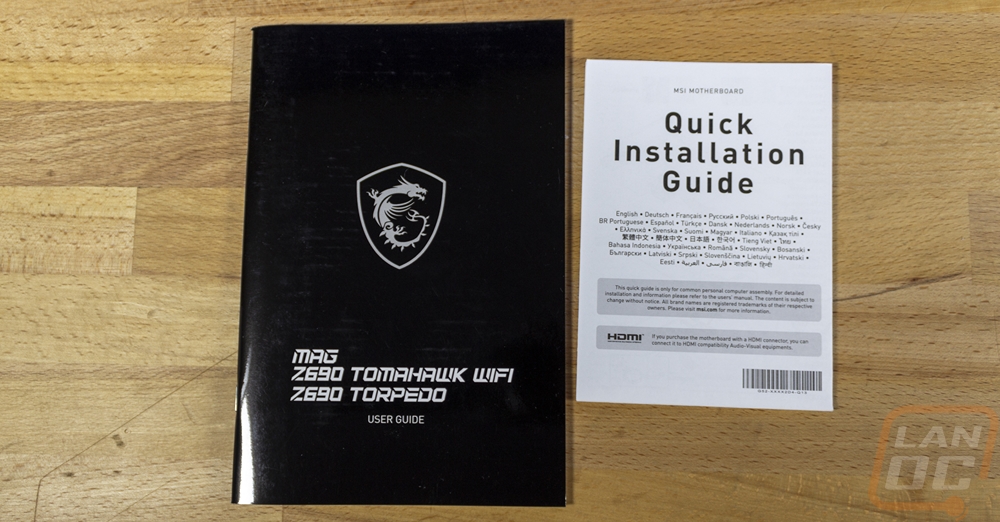
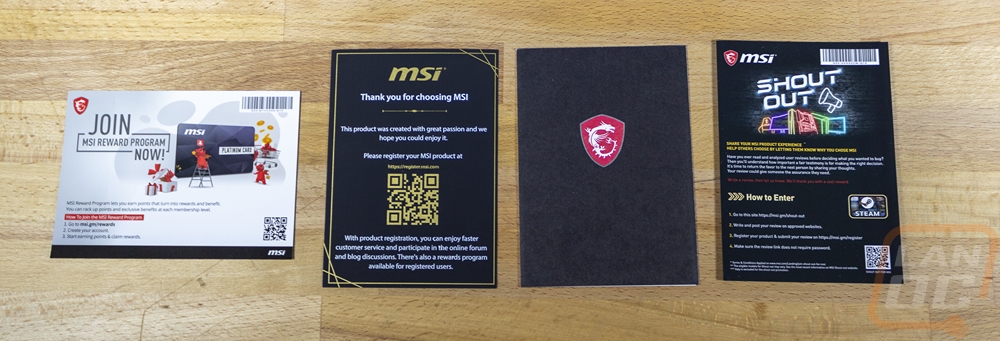
For accessories, the MAG Z690 Tomahawk Wifi comes with a basic set of wireless antennas to go with the Intel 6E wireless built-in. You also get two black SATA cables which is one short of what we will need. One has a right-angled connection on one end and the other is straight on both ends. You also get two small baggies with the tiny M.2 screws in them. For documentation, you get a quick installation guide as well as a larger user guide. The MAG Z690 Tomahawk Wifi also comes with a sticker pack which is designed with two forms of camo that you can stick on a few areas of the motherboard itself to change the look up. You get a metal MSI Gaming case badge and an MSI aluminum USB drive which has the drivers and software on it which is a nice touch. There are also a few other cards which let you know about the reward program, thank you for choosing MSI, show how you can give feedback and register your board, and one that shows some of the rest of MSIs lineup.


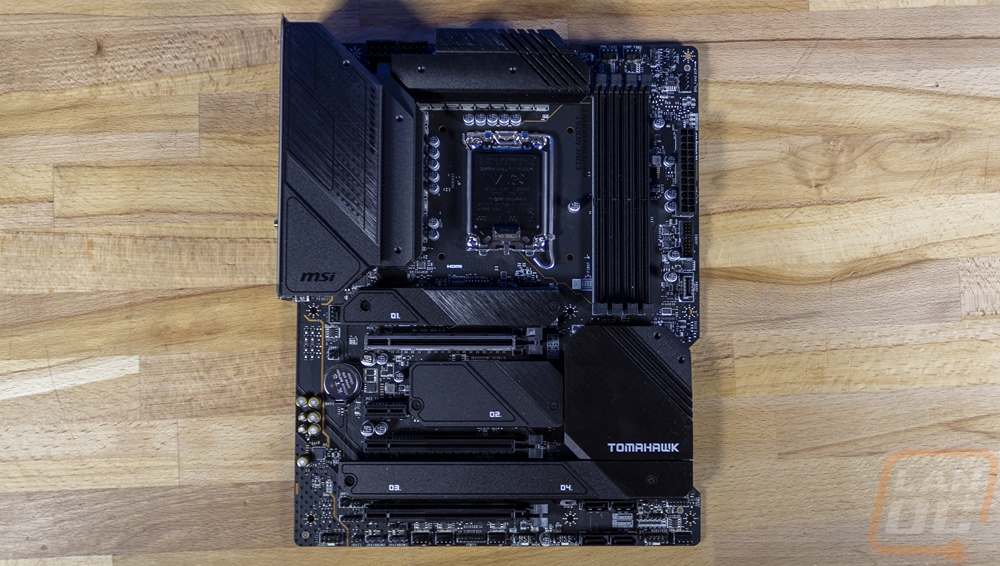
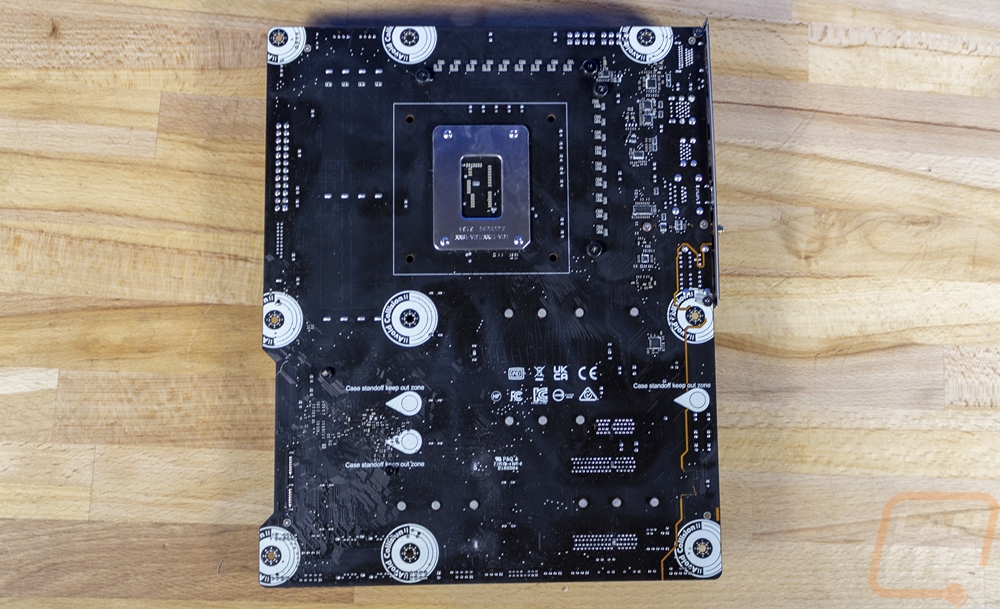
Without using the included camo-themed stickers the MAG Z690 Tomahawk Wifi has a blacked-out look at its base which I really like. It doesn’t have as much of the mix of greys and black like some motherboards. The PCB is black, the heatsinks are all black and except for the Tomahawk branding and the numbers on the M.2 slots, the rest of the print on it is black as well. It isn’t a crazy high-end board which has a backplate and heatsinks covering the entire board but with it having the rear I/O cover combined with the heatsinks around the CPU and with it having so many M.2 heatsinks a lot of the board is covered.
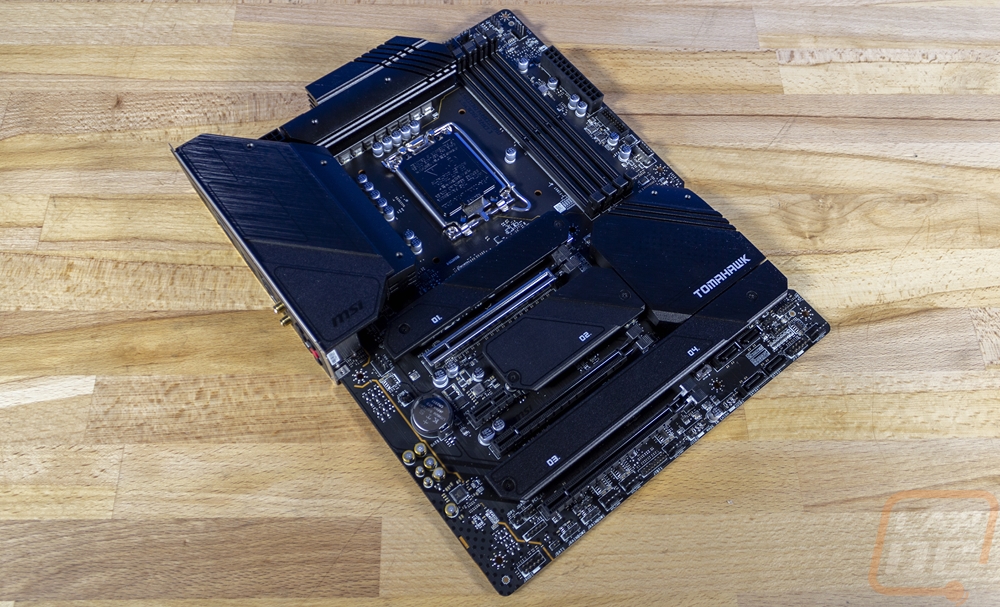
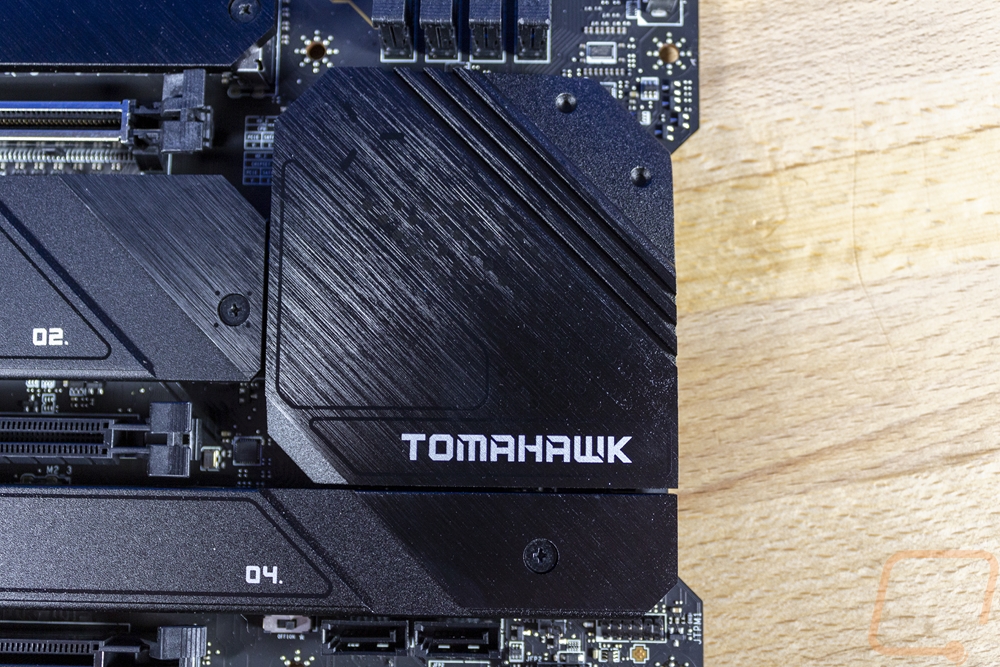
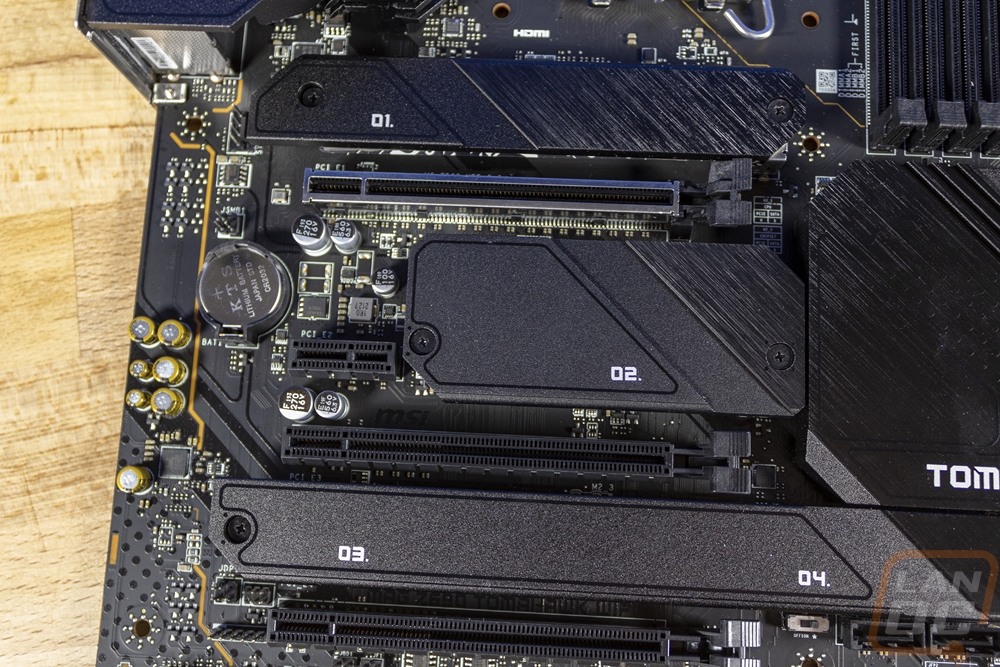
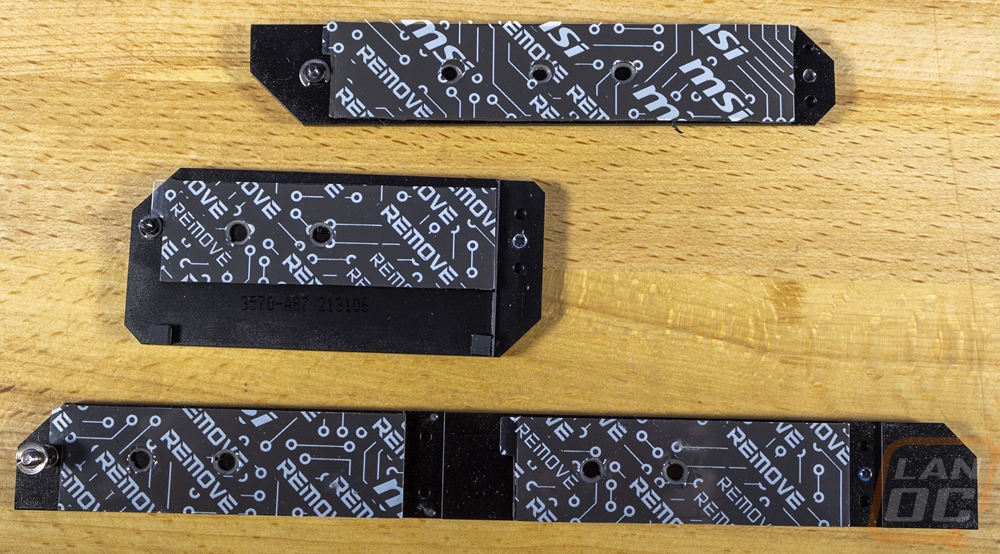
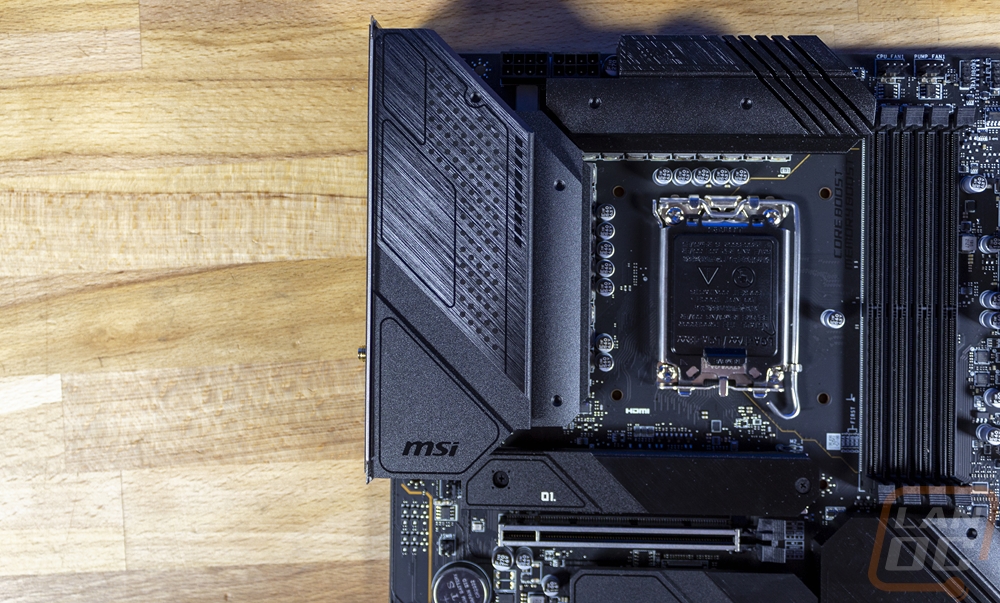
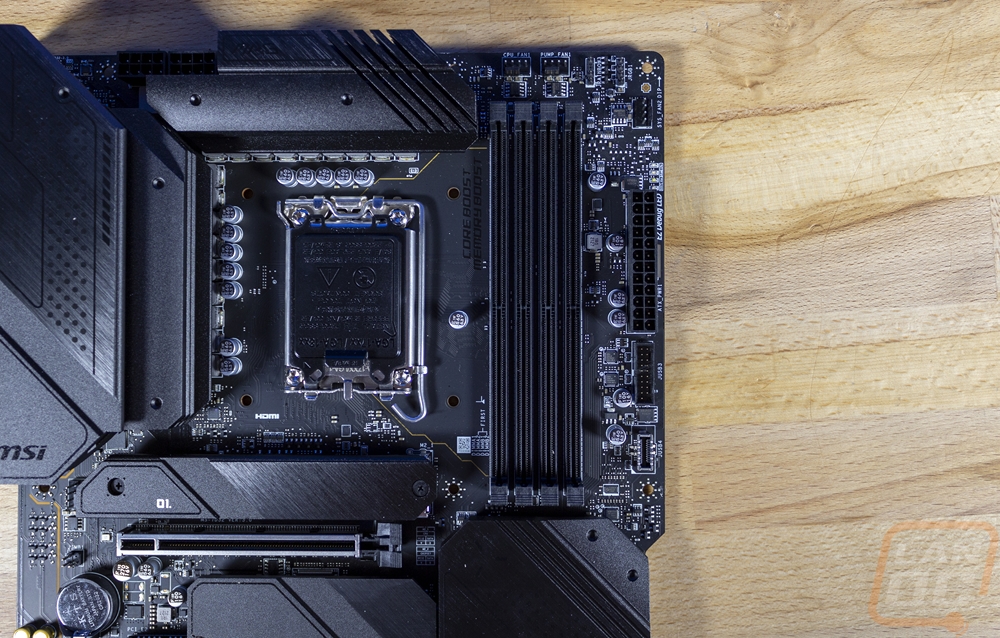
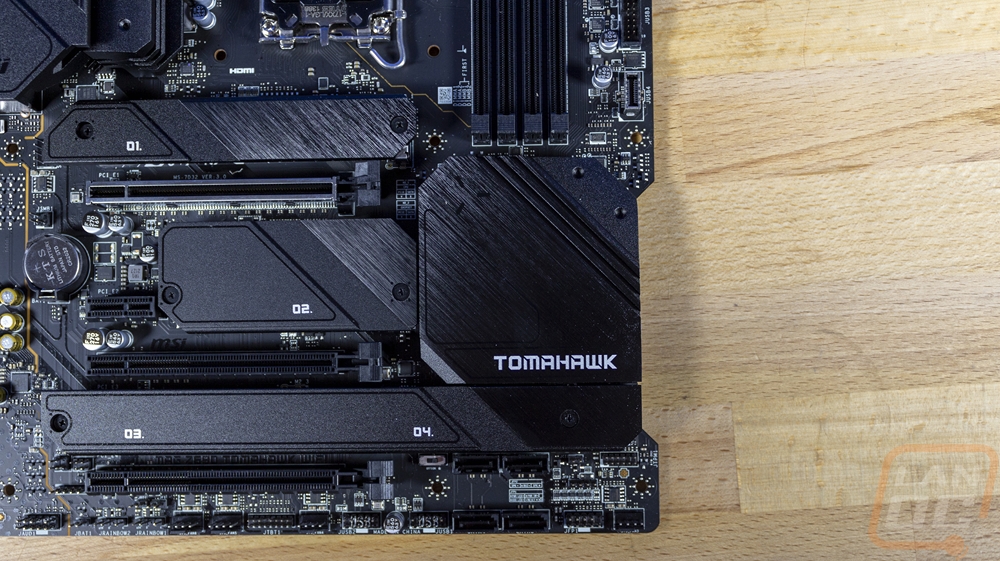
Around the CPU socket, the MAG Z690 Tomahawk Wifi has a 16+1+1 duet rail setup for its VRM configuration, and to keep that cool it does have two large heatsinks that are linked together with a heatpipe over top of all of them. Like with everything on the MAG Z690 Tomahawk Wifi they are blacked out and they are aluminum with groves around the sides to gain more surface area and groves cut in at an angle on the top heatsink from the top. Those angled groves match the groves machined into the heatsink sitting over the chipset on the bottom right. This is where you can see MSIs combination of a brushed finish in some areas and the texture in other areas for contrast as well as the black printed lined on everything that can only be seen from some angles. The chipset heatsink ties in with all three of the M.2 heatsinks with the brushed finish continuing on to the M.2 heatsinks. I get why the Tomahawk branding would be in white but I think the numbers for each of the four M.2 slots being in white isn’t as needed. I think those being in black like the rest of the accents would have looked better but I do like that they are all labeled. The top two M.2 heatsinks cover just one M.2 slot each as the numbers show and the middle one is thicker than the others. Then the bottom heatsink is longer and covers two slots. Each heatsink has thermal tape on the bottom which if you install an M.2 you want to remove the plastic film before using it to get the most out of the heatsinks. Each heatsink is held in place with two screws which wasn’t too bad for quick access to the M.2 slots.
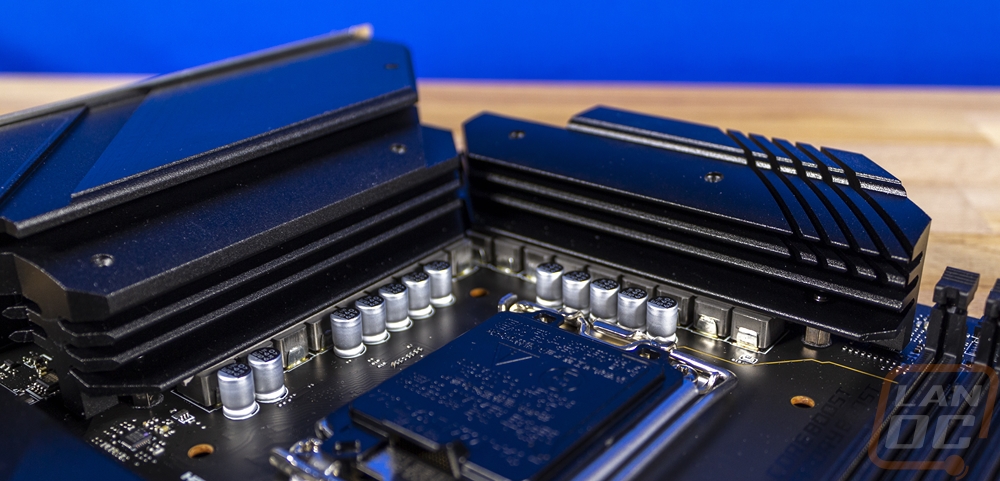
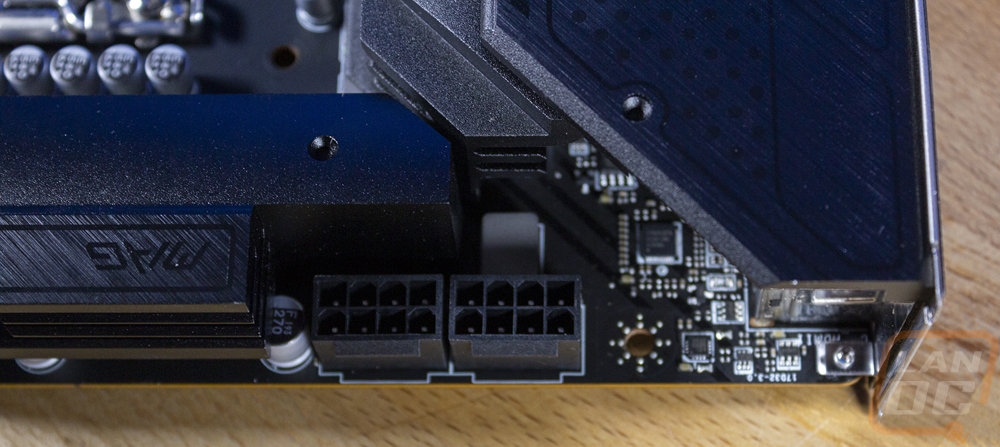
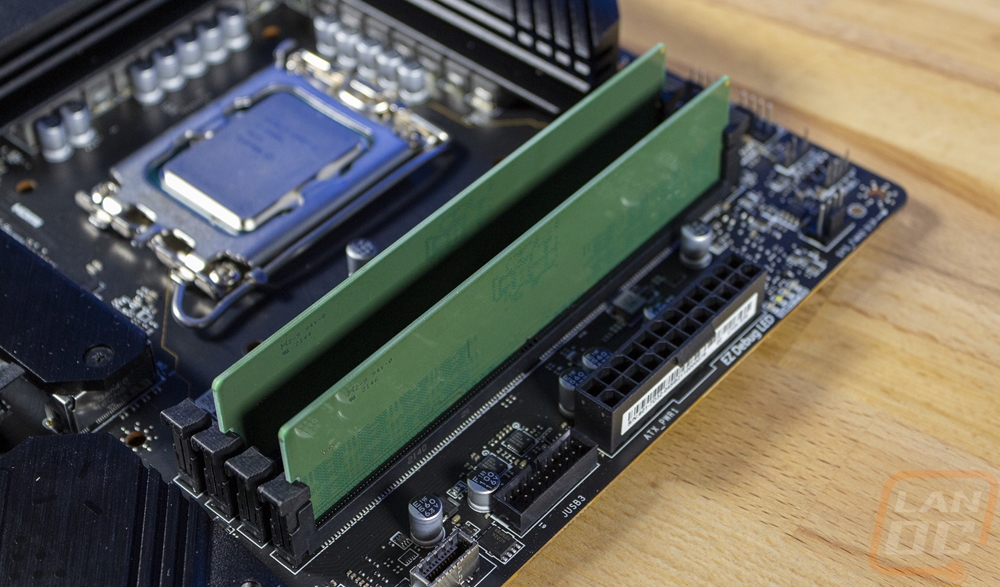
Starting up in the top left section of the MAG Z690 Tomahawk Wifi the VRM heatsinks, the CPU socket, and the cover over the rear I/O take up most of the space here. There is a PWM fan header just under the rear I/O and up on the top edge, the MAG Z690 Tomahawk Wifi has two 8-pin power plugs for the CPU power tucked in next to the heatsink.
The top right section has the MAG Z690 Tomahawk Wifi’s four DDR5 DIMMs which are all black and above those, they have two more PWM fan headers, one is for your AIO pump and the second is for the CPU fan and there is a third at the corner for a system fan. The corner also has two RGB lighting hookups, one for a standard four-pin RGB connection and another with three pins for addressable RGB lighting, both are controlled by MSI Mystic Light software. Then to the right of the ram along the edge of the board, there are four status LEDs that MSI calls the EZ Debug LEDs which light up as they go through the boot process and will give you an idea of what component is causing an issue. Below that, you have a 24-pin power connection for the motherboard power. Then there are two USB connections. One is the older USB 3.2 plug and the second is the new style which is for a front panel Type-C connection and supports USB 3.2 Gen 2.

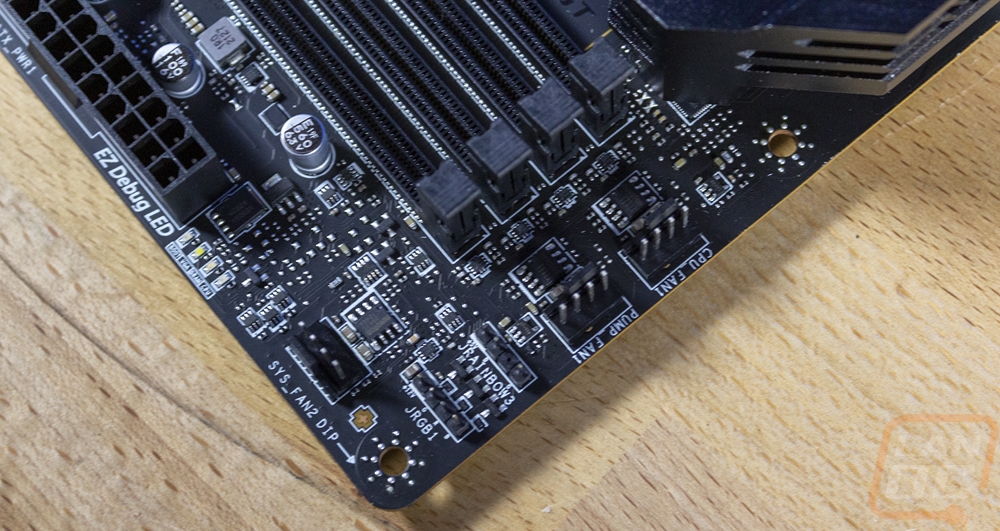
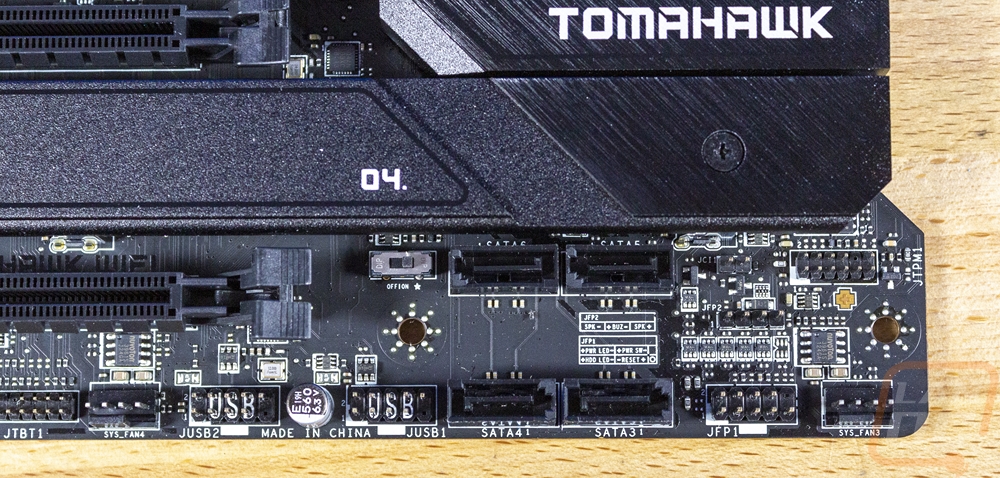
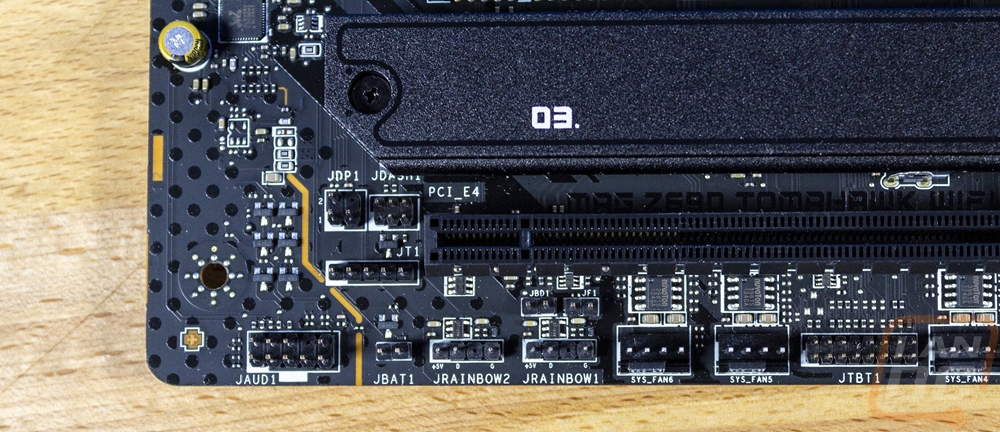
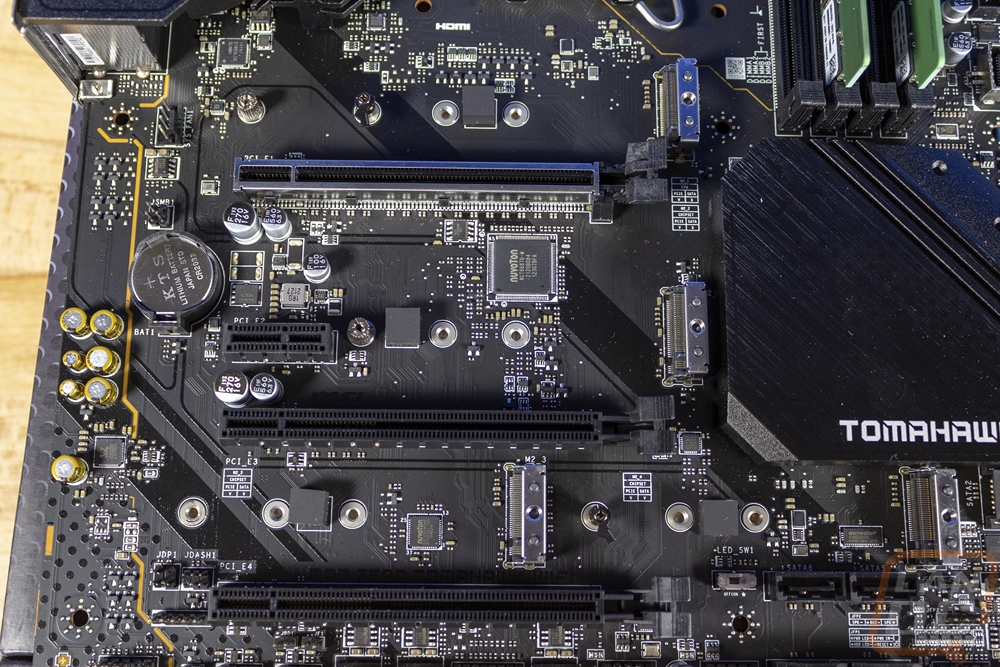
The USB connections on the top right corner are the last connections along the right side until you get down to the bottom corner. The bottom right ¼ of the MAG Z690 Tomahawk Wifi has the chipset cooler and the longer dual M.2 heatsink that run to the end and the motherboard is notched in for this area where it lines up with the heatsink. There are two SATA ports hidden under the heatsink that I didn’t even notice when taking pictures or when building things. In the bottom right corner, the JTPM1 plug is the trusted platform connection, and next to that the JCI1 is the chassis intrusion header which given that we are building a server could come in handy if I was worried about anyone being near the hardware physically. There is a PWM fan header in the far right corner and a second one further to the left for a total so far of 6. Then next to that is the front panel connection and a secondary header for a speaker. There are labels for the front panel connections but there are over more to the left sitting in between the four SATA headers which are away from their normal location. Next to those is a small switch which is the “EZ LED Control switch” which is a nice addition but it could use some labeling on the board to make it easier to find. There are two USB 2.0 headers and then on the far left the JTBT1 header is a thunderbolt add-in card connection.
The PCIe slots and the M.2 slots take up most of the bottom left but even with that there is a lot still going on along the bottom edge and on the left edge as well. The bottom edge has two more PWM fan headers for a total of 8 on the MAG Z690 Tomahawk Wifi. Then next to that are two more addressable RGB lighting headers. Both of the two pin headers above those aren’t listed in the MSI documentation at all and seem to be diagnostic headers and the one along the bottom edge labeled JBAT1 is the clear CMOS jumper. The JDASH1 header next to the bottom PCIe slot is for hooking up a tuning controller module and the JDP1 next to it is also for debugging. Then on the left edge, all the way up you can see the gold line goes around the onboard audio and normally shows that the onboard is split onto its own PCB but this one seems to be printed on. It may be over top of the actual split in the PCB but I can’t tell for sure but the MSI documentation does specify that they used different PCB layers for the left and right channels and that the onboard is on a “reserved motherboard section and electrically isolated”. The Tomahawk runs a Realtek ALC4080 Codec and has a 7-channel layout. The gold caps are Nippon Chemi-Con caps and the ALC4080 controller has a DAC that can output up to 32-bit/384kHz.
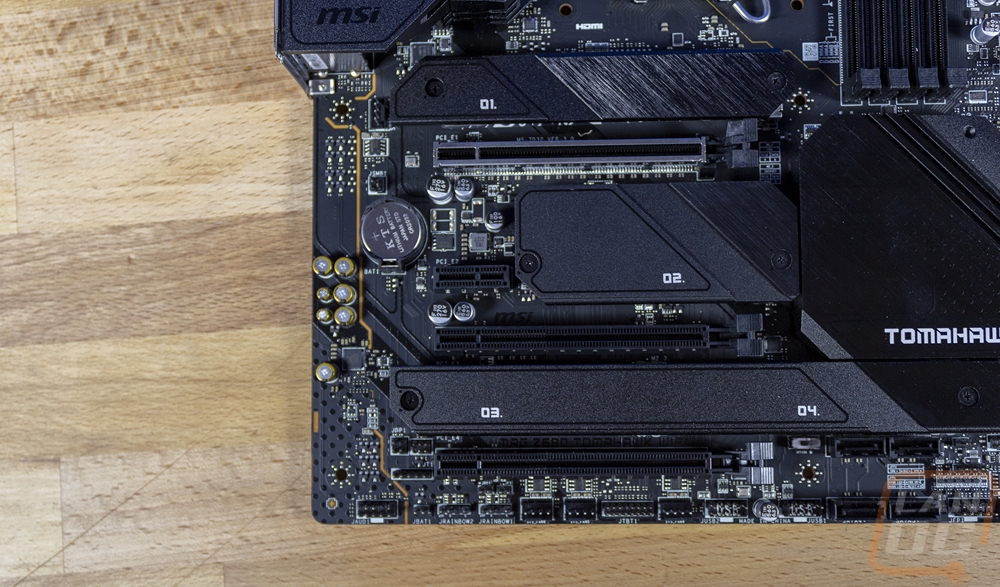

The bottom right corner is also where all of the PCIe and M.2 connections are and the MAG Z690 Tomahawk Wifi is decked out in both. It has four PCIe slots with three of those being the full PCIe x16 length and one shorter X1 length slot. They break down like this. The top slot which MSI has given their armor shield as well that gives the slot more strength, that is a PCIe 5.0 compatible slot running directly off of the CPU with 16 lanes. The other three all run off of the Z690 chipset and are all PCIe 3.0 with the second slot supporting PCIe 3.0 x4 and the bottom only 3.0 x1 and the X1 length slot is also a PCIe 3.0 x1 slot as well if it wasn’t obvious. With this layout, the MAG Z690 Tomahawk Wifi isn’t designed for multiple GPUs or to have the video card in any slot but the top but this layout also means you don’t have to worry about slots not working if you are using another. It also leaves room for the four M.2 slots as well. There is one M.2 sitting above the top PCIe slot, this is the M2_1 slot and it runs directly off of the CPU and is PICe 4.0 x4. It also supports longer 22110 length devices as well if needed and is one of two slots that has an easy-to-use latch rather than having to mess with the tiny M.2 screws. The other three M.2 slots are all run off of the Z690 chipset and are all three PCIe 4.0 x4 and the bottom two also support SATA M.2 drives not that I have seen any of those in a while now.
For the rear I/O, I love that on top of having a full cover over top of the I/O that the MAG Z690 Tomahawk Wifi has an integrated I/O cover. For anyone who has built a system with a cheaper motherboard or anyone who built systems years ago, you don’t have to worry about preinstalling the I/O cover because it comes on the board. The I/O shield for the MAG Z690 Tomahawk Wifi is blacked out to match most PCs and does have the MAG logo. On the far left it has two display connections with a DisplayPort and HDMI and next to that is a BIOS flash button for updating the BIOS without booting everything up using a flash drive in the white labeled USB port. Next to that, you have two stacks of USB connections with three different colors. The two up top are normal USB 2.0 ports and then below that the two blue ports are USB 3.2 Gen 1 ports. Next to that, the two red ports are twice as fast as USB Gen 2 ports and there is a third matching port in the next row over as well for a total of 7 Type-A connections. Then there is one Type-C USB 3.2 Gen 2x2. Above that is the Intel 2.5G ethernet port and then the Intel WiFi 6E antenna jacks. Lastly, on the far right, you have a standard audio layout with an optical SPDIF on the bottom left and five audio jacks including one red one which stands out because it is the main audio out.

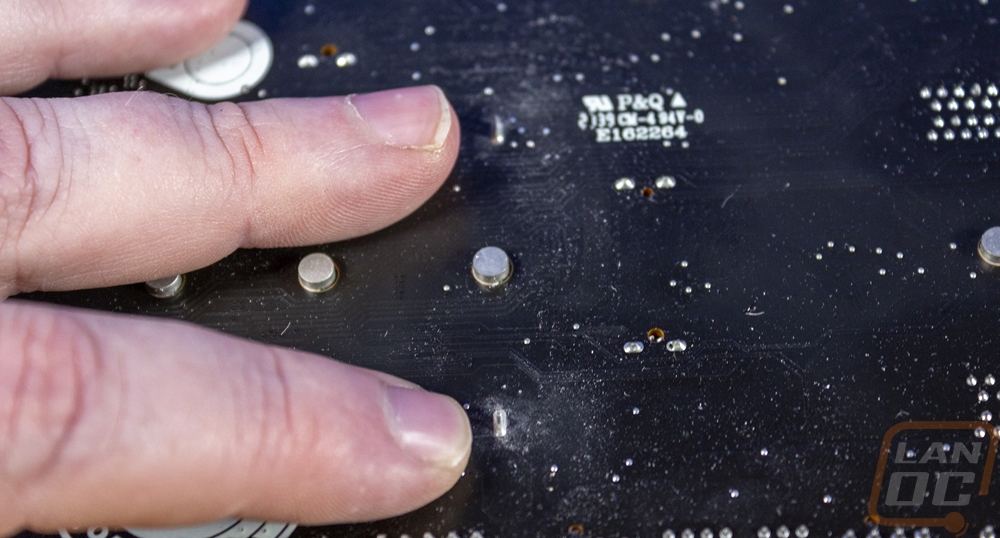
The back of the MAG Z690 Tomahawk Wifi is all blacked out as well but MSI has printed huge white warning circles around each of the mounting screw holes. Another thing I noticed is that under the PCIe brackets there were huge mounting posts poking through which even for our board rubbed a lot on the cardboard tray inside of the box through the static bag that the MAG Z690 Tomahawk Wifi came in. These are a lot longer than anything else on the back of the board so be careful to not damage anything with them.
RAM
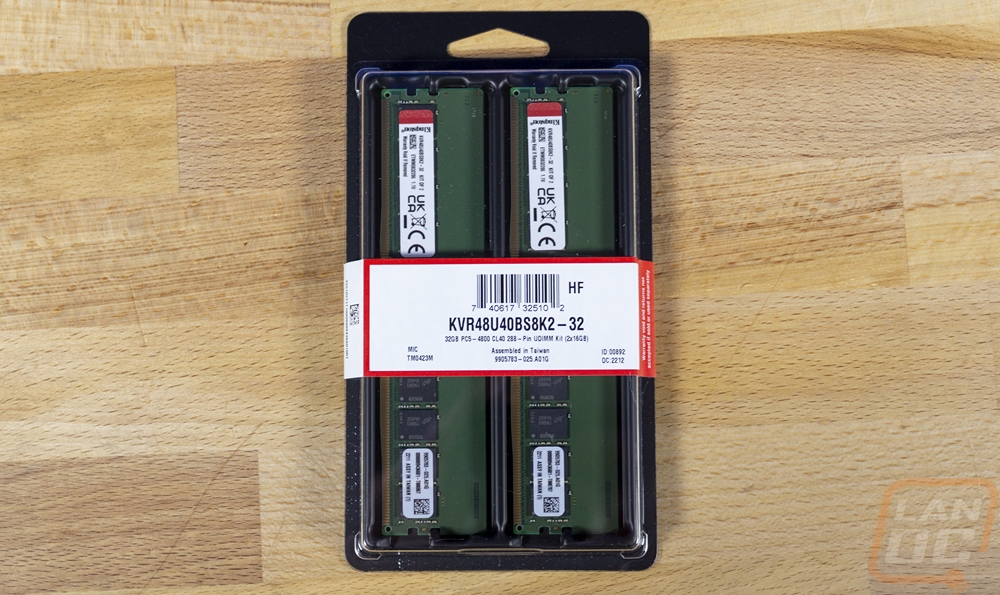
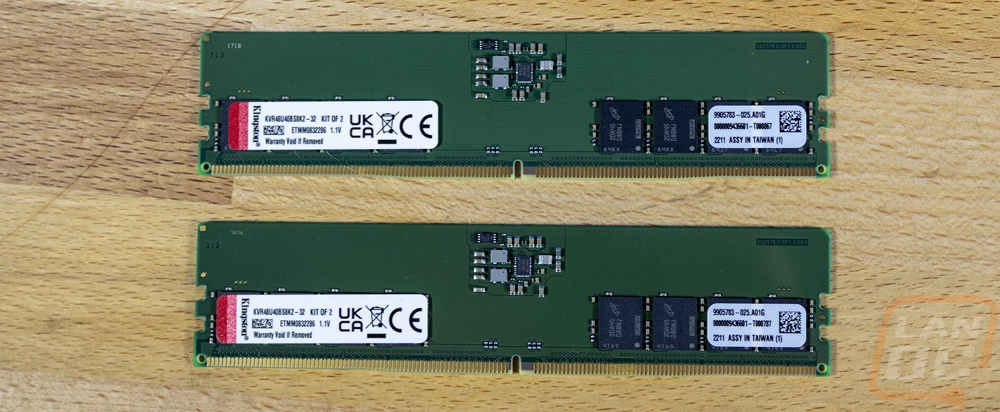
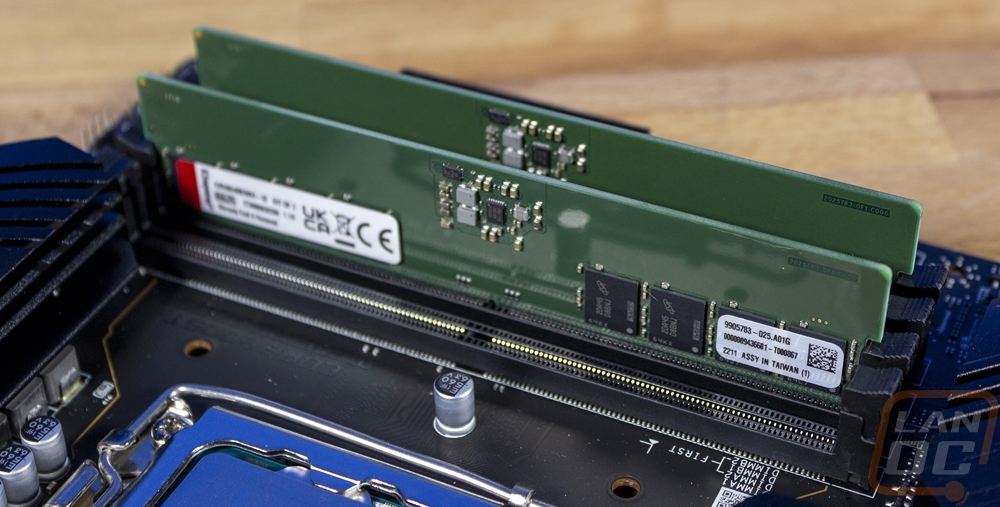
Once I had a motherboard picked out I could also pick out our ram. With the 12th Generation CPUs depending on what board you go with DDR4 or DDR5 can be supported. The MAG Z690 Tomahawk WiFi that MSI sent over is a DDR5 board but they have the exact same board as a DDR4 board as well for example. I knew for our memory that I wanted to go with Kingston because they have always been reliable for me but with this being a server I didn’t need anything crazy or high-end. The main thing is that I did want to double up from the 16 gigs of memory our current setup is using just to have a little more headroom. So I went with a kit from the Kingston ValueRAM lineup which doesn’t have heatspreaders, lighting, or anything else that we don’t need. I have the KVR48U40BS8K2-32 kit which has two sticks of 16GB DDR5 memory for dual channel performance and both running at 4800MHz which is a stock memory speed for the Intel CPUs. This is a reminder that not every build needs the highest end components, reliability is more important and for me sticking with a brand that I know has been around and will be around is important along with the lifetime warranty to go with it.
The Kingston ValueRAM kit comes in a plastic tray with a black bottom and a clear top so you can see the memory without opening the box up. This is the same setup that they have come in for years, I remember buying ValueRAM for my first PC back in the 2001-2003 range in the same layout. The packaging has a white strap around it which has the model number printed on it as well as all of the details of the memory and all of the required certification logos on the back.
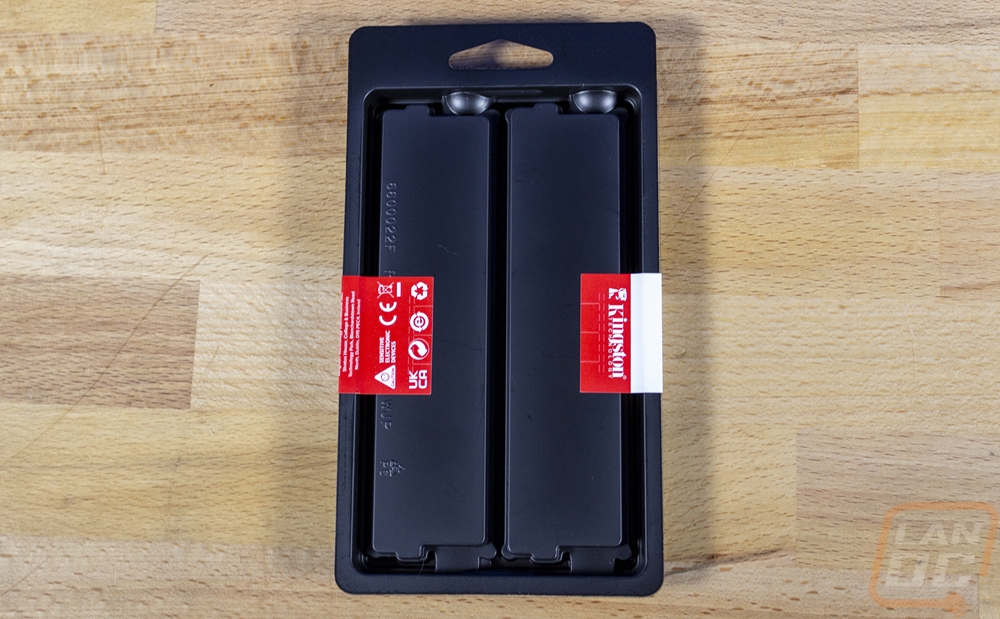
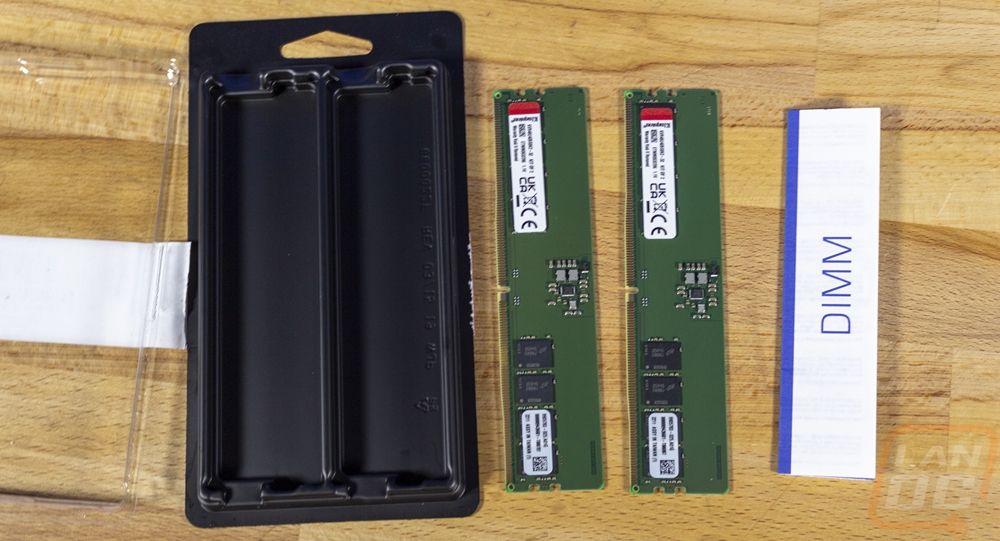
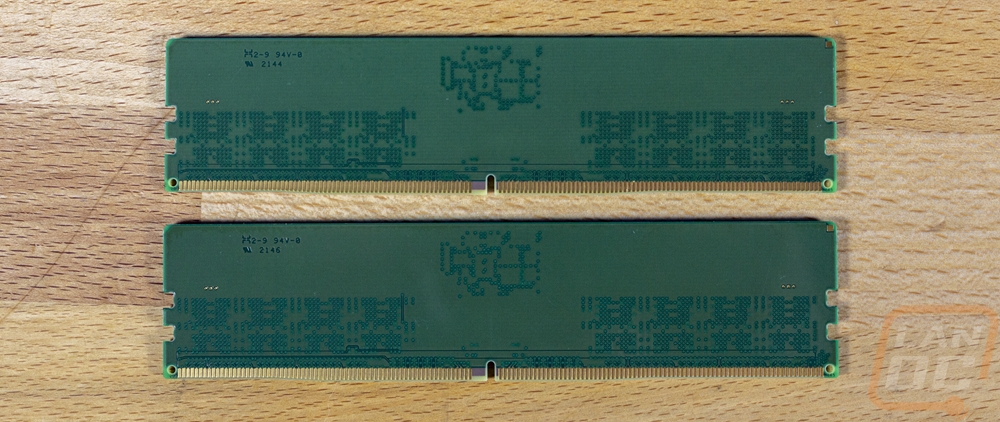
Beyond the memory itself, the only thing that comes in the packaging once you open things up is a stick-shaped folded-up piece of paper with legal information on it. Beyond that, the memory like I said is as basic as it comes with a traditional green PCB. The back side of the memory has nothing going on and even on the side with things going on it is relatively blank with a bundle of things in the top middle and four ram chips on the bottom row on both the left and right. DDR5 has a stacked layout which is why they are able to fit everything down on the bottom row and each has the micron logo on them. For branding, both sets of memory have stickers on them but the left sticker has the red ValueRAM branding like the packaging and the Kingston logo as well as the model name.
Installing everything in the system
While we still need to get our storage setup, like with the previous components I wanted to get the motherboard, CPU, and ram all installed in the system. With the CPU and RAM that was simple, I was able to get those installed in the Tomahawk motherboard before moving things around. They dropped in with no issues and while the Kingston Valueram doesn’t exactly go with the blacked-out MSI Tomahawk, performance wise they are what we need and this is a server build where performance is the only concern.
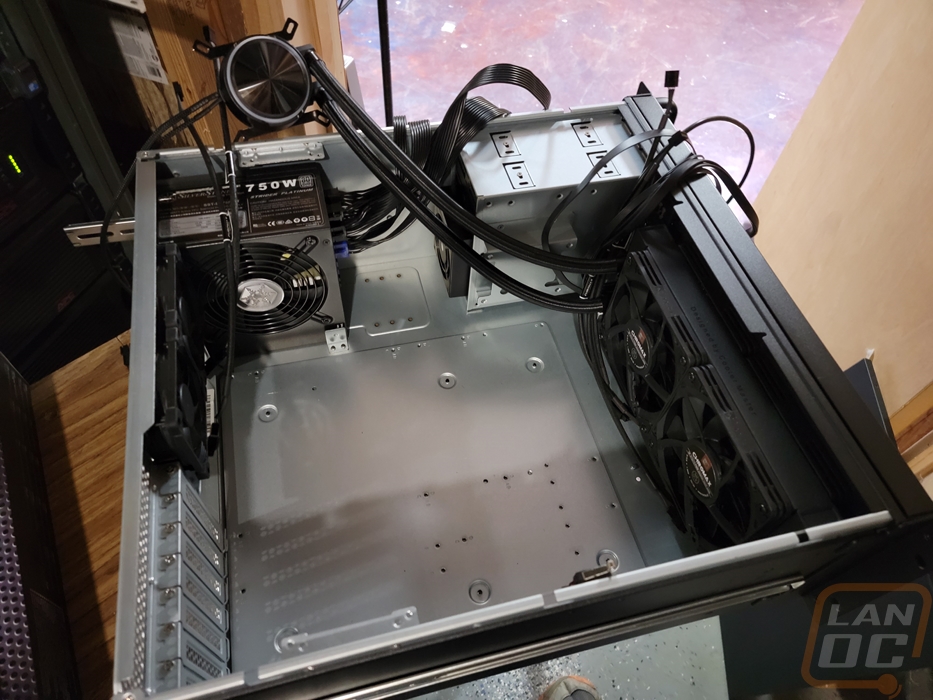
With the motherboard all prepped I pulled the Silverstone RM42-502 back out of our rack and pulled the top cover off again so I could get things installed. In our first article, I installed the power supply and the hot swap cage in the RM42-502, and in part 2 all of the fans from Noctua were installed along with the and the Cooler Master MasterLiquid PL240 Flux AIO cooler were mounted and the Flux was prepped with the mounting bracket for Intel LGA 1700. I just needed to install the standoffs because the RM42-502 doesn’t come with those installed and get the motherboard in.
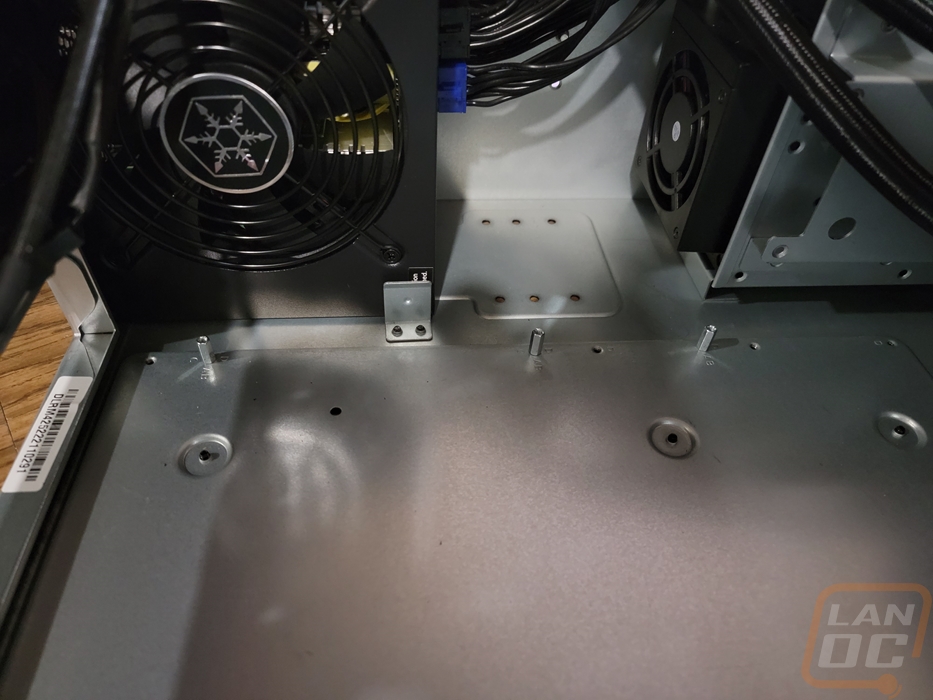
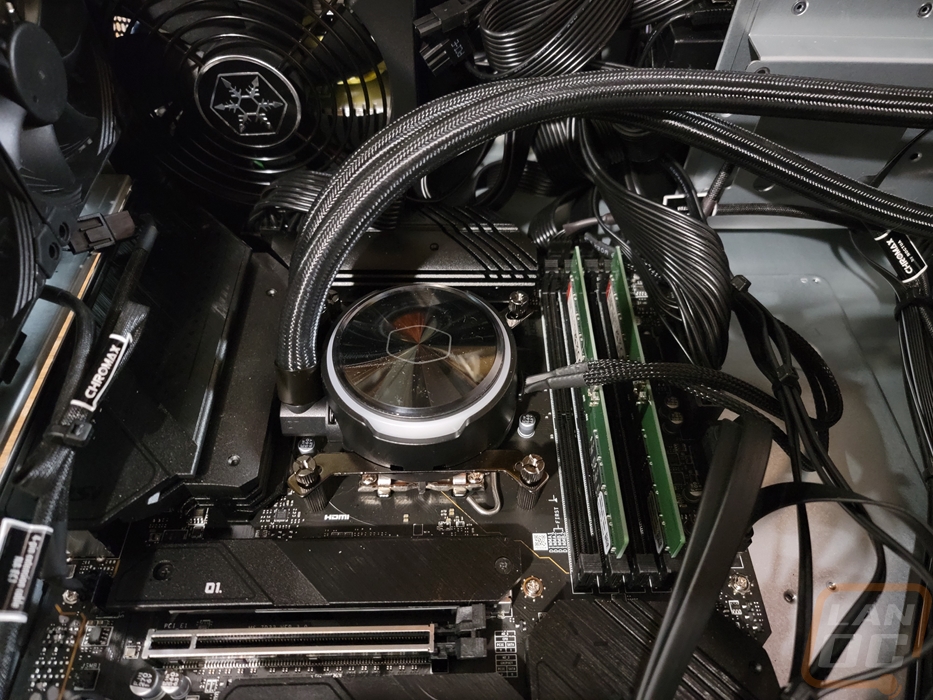
I did get everything situated and ended up forgetting to install the bracket for the Cooler Master AIO so I did have to pull it back out and put the backplate in. Cooler Master’s design just uses a backplate and four large standoffs that the pump/block mount to so it was easy to handle. At this point I didn’t mount the pump, I just put it on top of the CPU knowing that I would have to move things around when wiring.

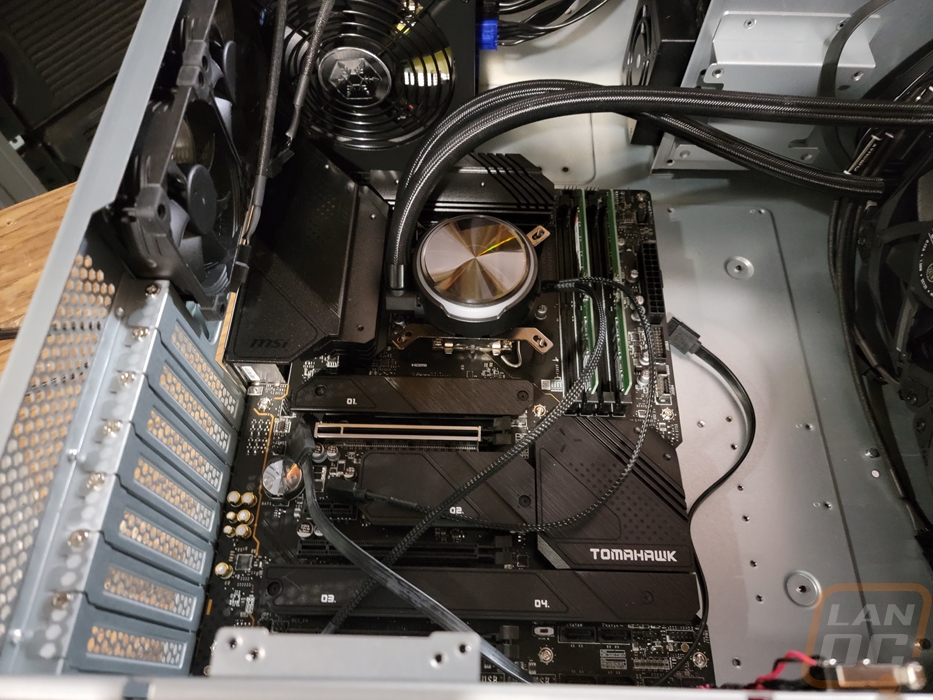
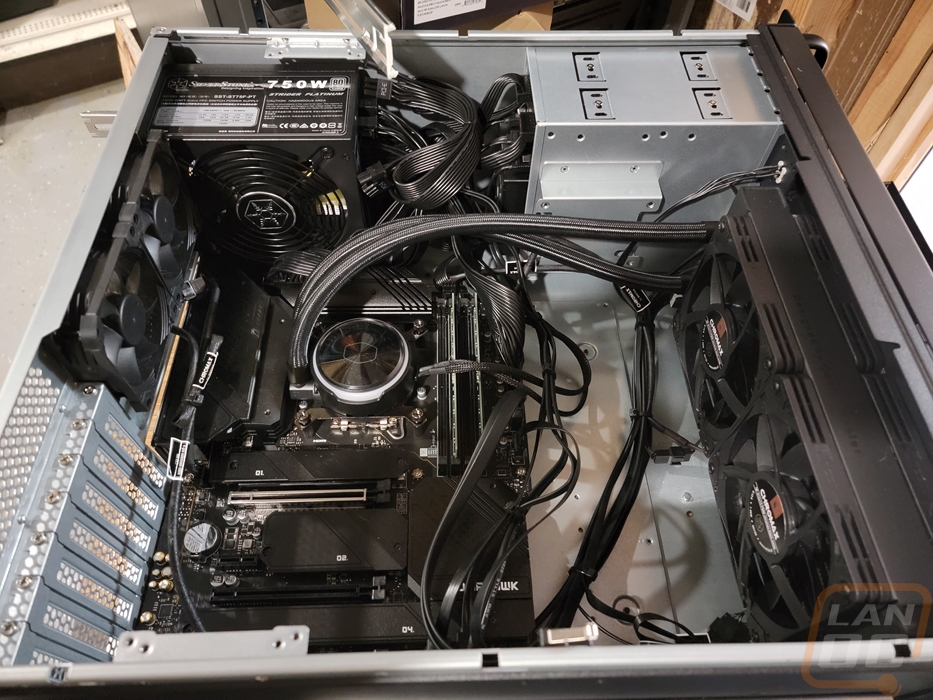
Starting with the cases front panel connections I started going through and running the wires where I thought they would work and hooking things up as I went. I wasn’t doing any wire management because with all of these wires you do need to move things around and rearrange. A few things to note, having the USB connections on the right side of the board meant that the long cables that the case has to reach the bottom of your motherboard left those wires with a lot of extra length. The same happened with the power supply cables, all of them are longer with the expectation that most power supplies are mounted at the bottom of the case these days so a majority of those cables were a huge mess of extra cable with all of those connections being right there at the top next to the power supply. Custom length cables aren’t worth it for a server build, but it would make a world of difference in this situation. With the four AIO mounted Noctua NF-A12x15 PWM chromax.black.swap fans and the Noctua NF-A8 PWM chromax.black.swap at the back of the case along with the pump wire for the AIO itself made things interesting when finding plugs for each of those connections. The MSI motherboard has 8 PWM headers so it did have it covered, but finding headers that could reach meant a few wires running in places I would have preferred they didn’t like the one wire that goes across the PCIe slots. If I do run a GPU for the AI processing in the future I should be able to run this under the card or I can use a splitter to pair it up with the other rear case fan. In total, I used 7 of the 8 fan headers.
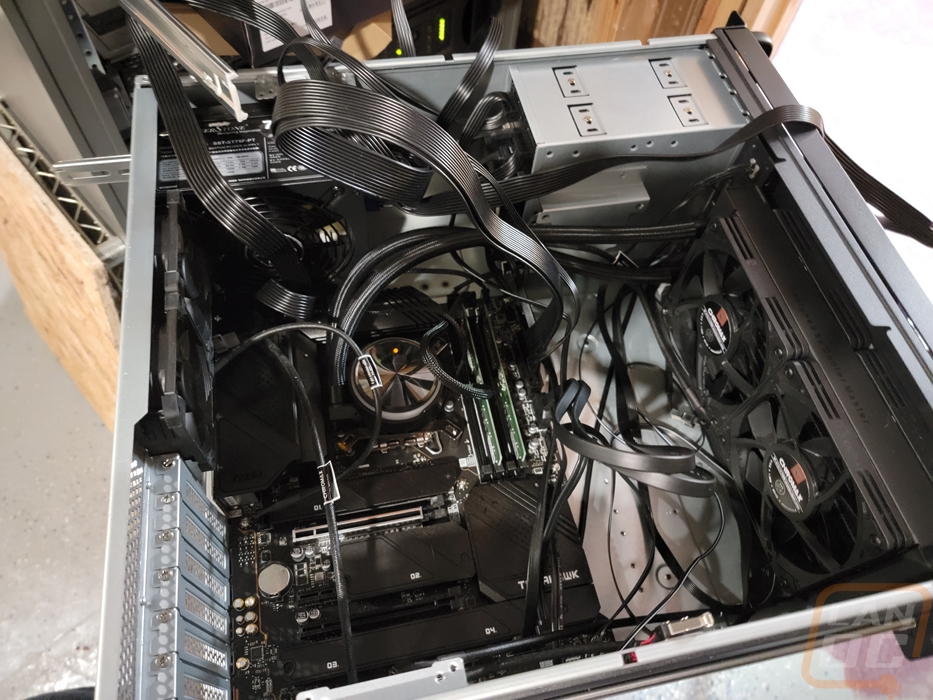
Once I had everything wired up I started cleaning up the wiring with zip ties which helped get rid of some of the mess. It did mean a huge bundle of cables were stuffed in between the power supply and the hot-swap to tuck away all of those power supply cables. I also would love to have longer SATA cables and to be able to clean up some of those front panel cables a little better. But my end goal was to make sure we would have good airflow and less about how things looked. I did notice that the rear I/O area on the RM42-502 could have lined up with the I/O better, you can see a gap between them when everything is installed. Thankfully we have the preinstalled rear I/O cover, but if you have one that you have to install this could make some of the rear I/O connections hard to plug in later on.
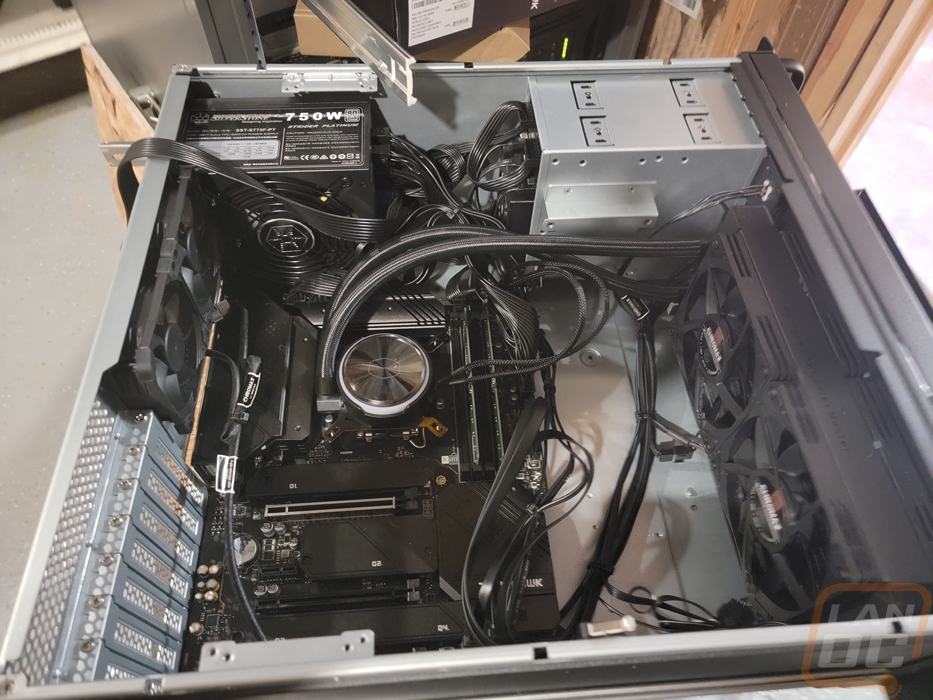
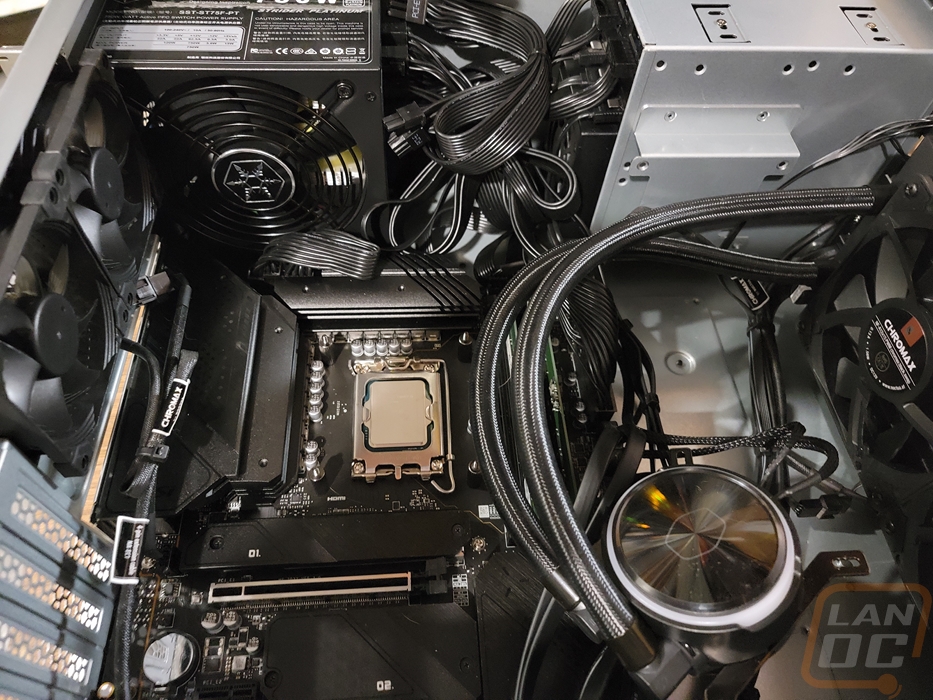
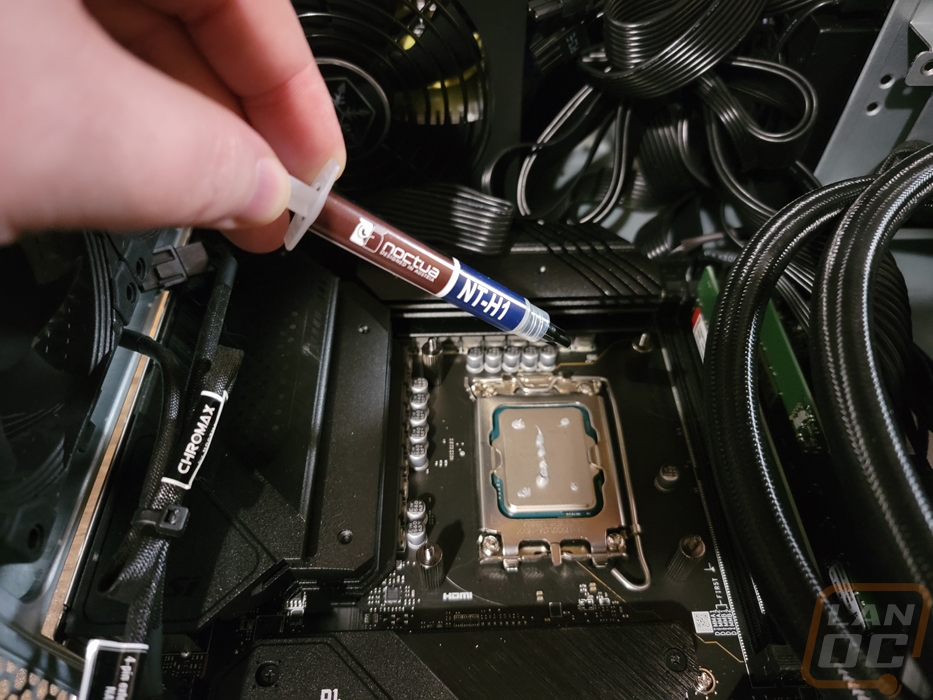
With the wiring handled I just needed to put thermal paste on the CPU which I used Noctua’s older NT-H1 paste and then I installed the Cooler Master Flux on top using the four thumbnuts to tighten it down to the standoffs I had previously installed. We still need to get the storage installed, but other than that the system is ready to boot up and get started!