Software and Performance
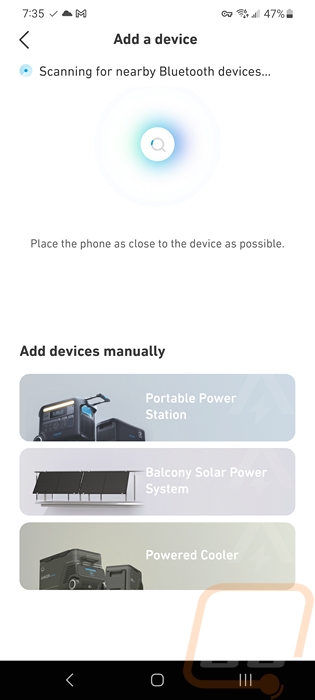
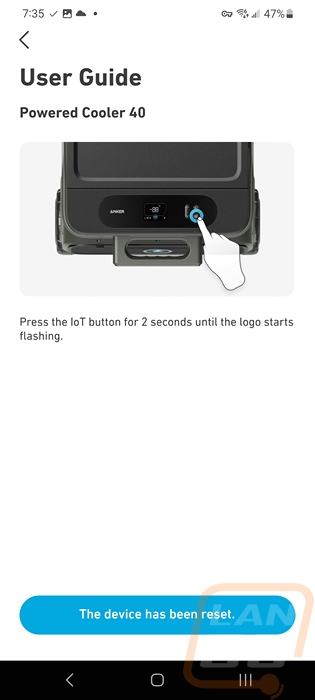
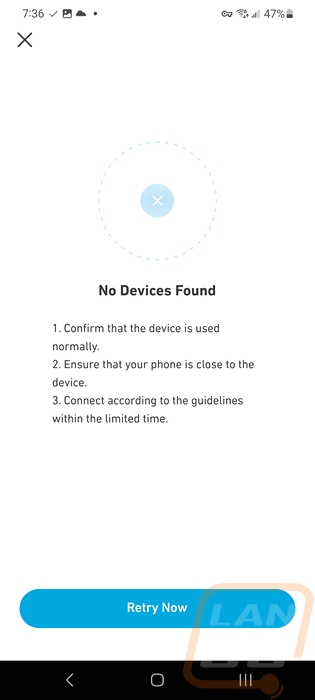
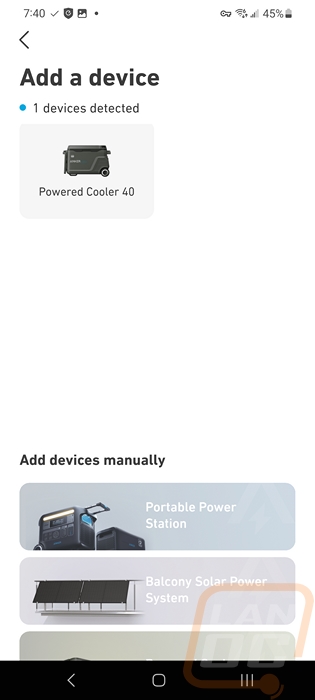
You wouldn’t expect a cooler to have an app, but the EverFrost Powered Coolers do work with the Anker app, so before getting into my main testing I did want to check out what the app offers. You will need to add the cooler to the app and I did have initial issues with this but eventually, it cleared up and the cooler was picked up and connected. The app will guide you through resetting the cooler to put it into search mode.

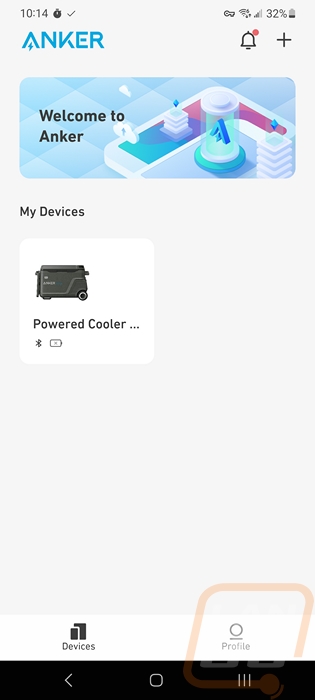
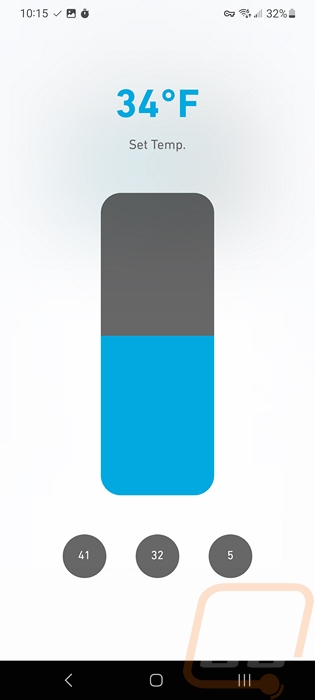
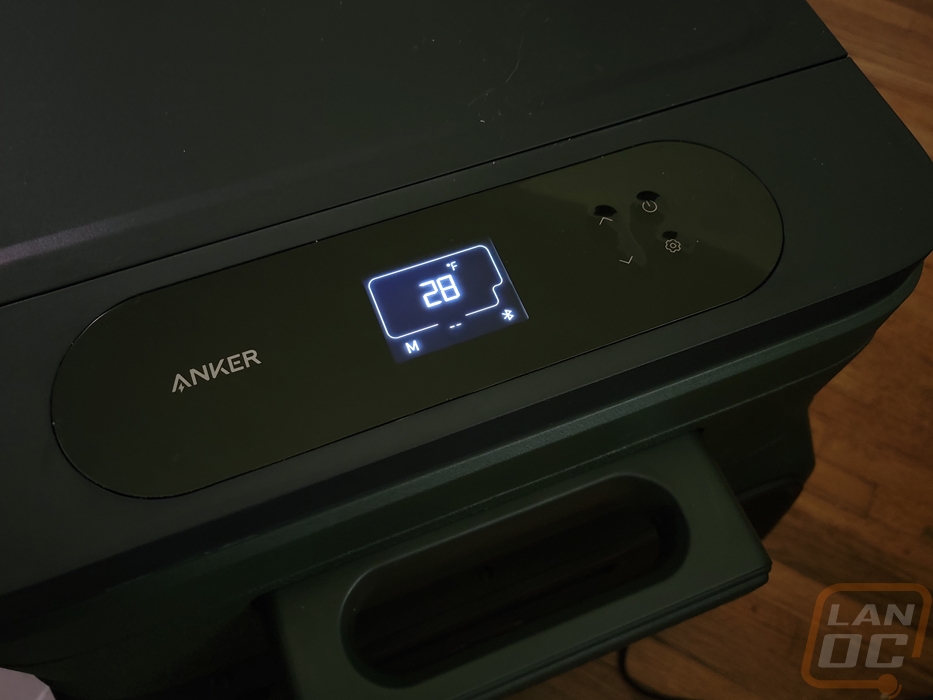
Once you have it connected it will be listed under your devices along with any other Anker-branded devices. The main page once you open up the coolers page has a picture of the cooler up top which shows you what temperature it is currently at. Below that you can open up a page to set the temperature. This has a few default temperatures down at the bottom. For me, I would love to also have the option to set one custom preset as well because if I was carrying meat I would want to keep it below 40 degrees but above freezing but there isn’t an option in that range at all. Beyond that, you get one at 32 and one at 5 degrees as well for a deep freeze. The main page also shows you the battery level and below that small graphs show the battery input and output levels to show you usage and if you are charging.
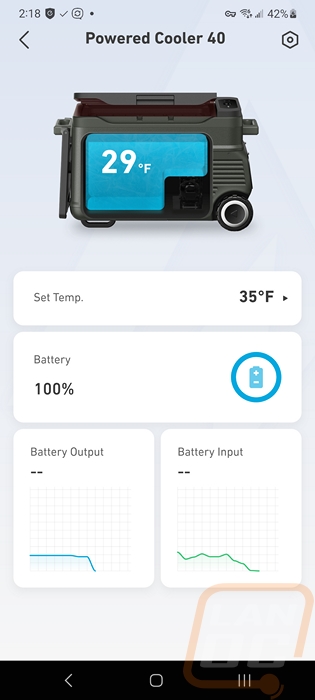
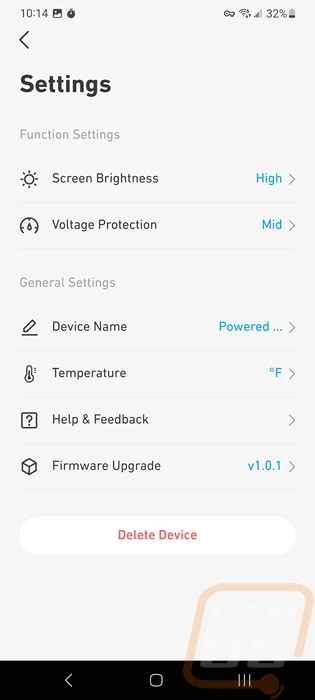
There is a settings menu as well. This has settings to adjust the screen brightness and the voltage protection levels for the USB outputs. You can also rename the device for the app here and switch between Fahrenheit and Celsius if you prefer that. You can also update the firmware, but our cooler didn’t require an update. Overall the app lets you keep tabs on things like the temperature and power levels of the battery but you can also get away without the app as well. You can change temperatures and check the temp on the display screen and the battery itself does have the basic pinhole LED readout.
To start my actual testing I started the EverFrost and set it to -2 degrees. It started at 70f and was inside a room sitting at 74f for this test. I wanted to check out how long it would take for the cooler to reach below zero. This test ended up taking 77 minutes in total and once it reached -2 degrees the cooler did continue on beyond that down to -5 before turning off. When doing this I also took a look a the noise level of the refrigeration unit on the cooler. Much like my own home fridge which when you have a lot of activity going on you would never notice it is on, the EverFrost does still get noisy when cooling down in a quiet room. This was especially true when it initially turns on which was noticeably louder on our unit, but they may be an issue with it being pre-production. The room's noise level base was 34.2 but on startup the cooler ran at 46.2 decibels. Once the initial noise was over that dropped down to 43.9 decibels. To be fair this isn’t too loud, but it is enough that when camping you might not want it next to your head in the tent.
Our battery came completely discharged, in fact, the cooler wouldn’t even pick it up until I charged it. But this gave me a chance to see how long charging the battery would take. For this, I went with charging it over USB Type-C which as we know is the lowest wattage charging option. Type-C is capped at 60 watts whereas the included power supply or the car adapter can charge at 95 watts, so those will be faster. But from being dead the big 299 watt-hour battery took 3 hours and 42 minutes to charge completely. It charged at 60 watts until 2 hours and 50 minutes in where it slowly dropped in charging wattage until it was completely charged. The full battery on the EverFrost does get you a surprisingly long amount of cooling time, however. From Ankers numbers which they set it to 39 degrees in an ambient temperature of 77f the 33L can last 42 hours, the 43L can last 35.8 hours, and the 53L can last 27 hours. That will change depending on the temperature that you are targeting as well as if it is hot outside. Sadly here in Ohio, it has been cold and raining and not hot enough to put the cooler to the test at a temperature higher than 77f like Anker tested. But getting a day to two days of cooling out of one charge is enough for a weekend trip, especially if you don’t mind things warming up for the last few hours. You can also extend that by recharging from your card for example. Anker is also planning on selling additional battery packs which could make longer trips completely off grid easier to do or even easier would be recharging with the 100-watt solar panel that is supported.
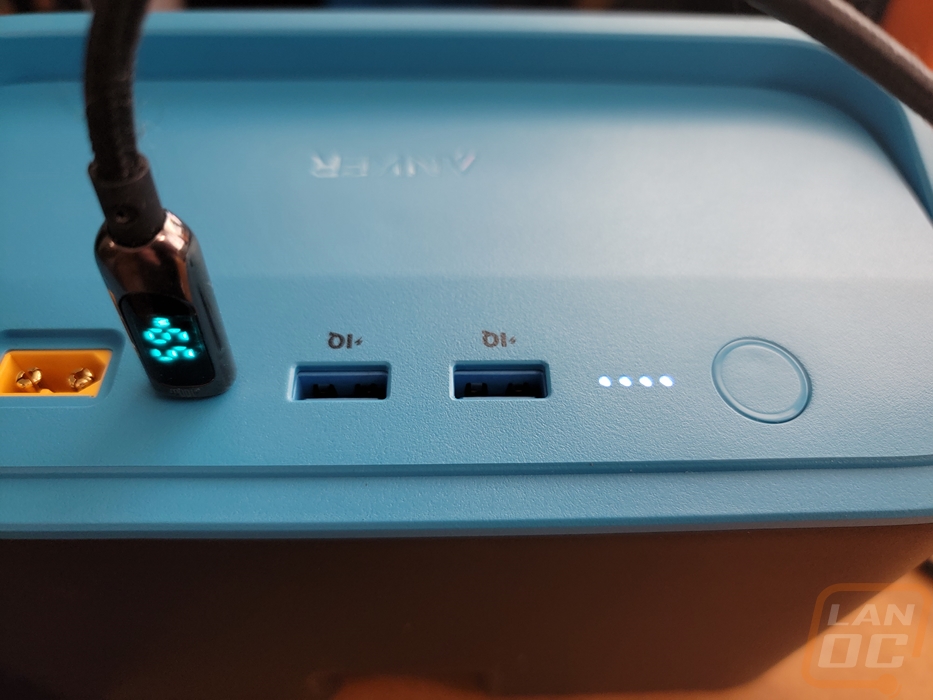
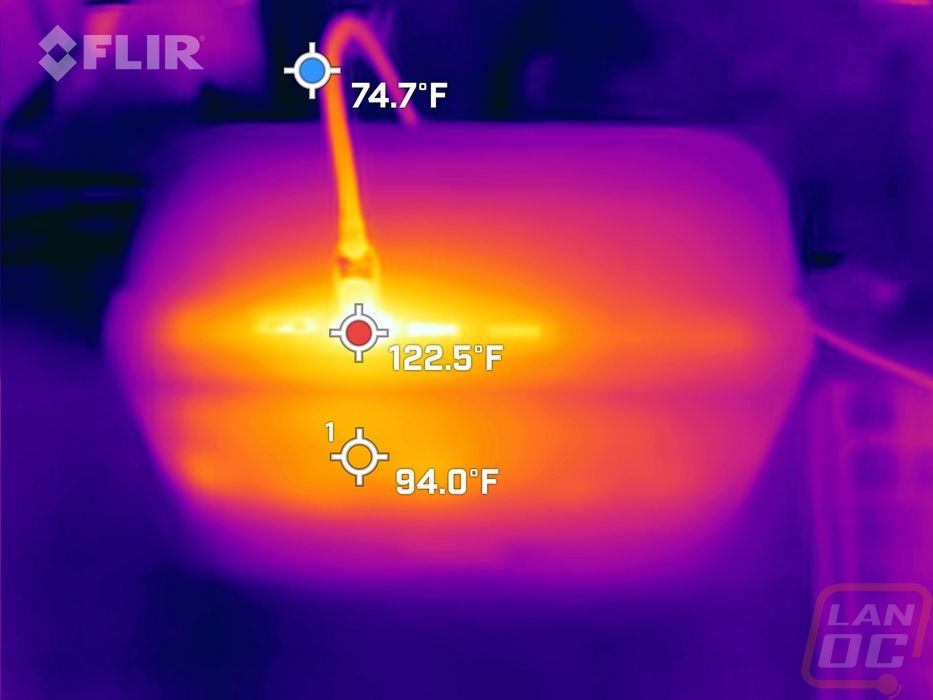
When charging the batter I did also check things out with our thermal camera. I was curious to see how hot the battery was getting with how much power it was taking in for such a long time. Especially because the plug on our cable was getting hot. Most of the heat was at that cable but you can see that there is some heat being generated below the power connections as well
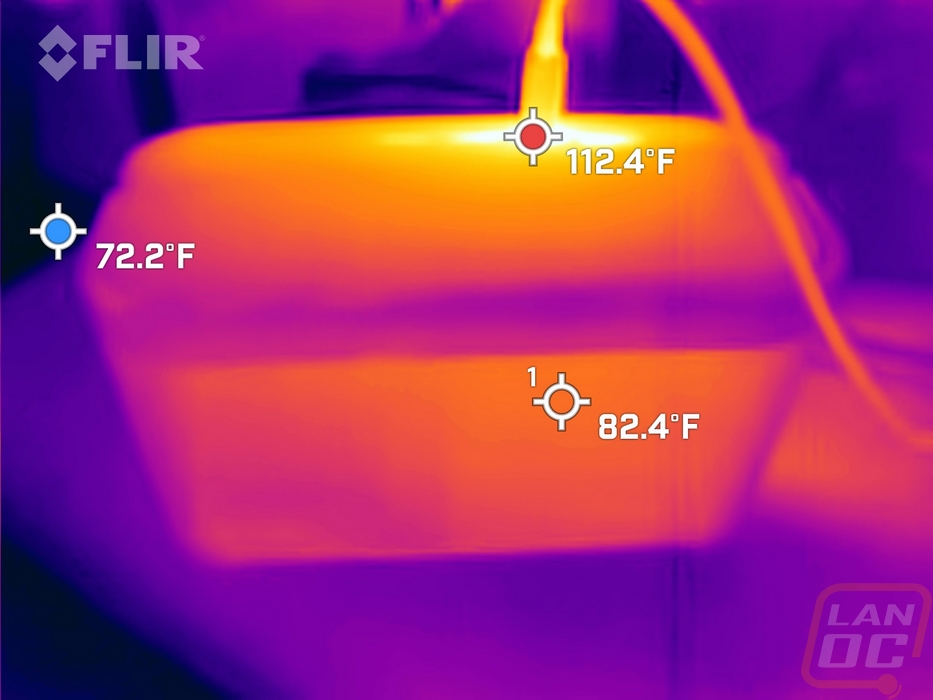
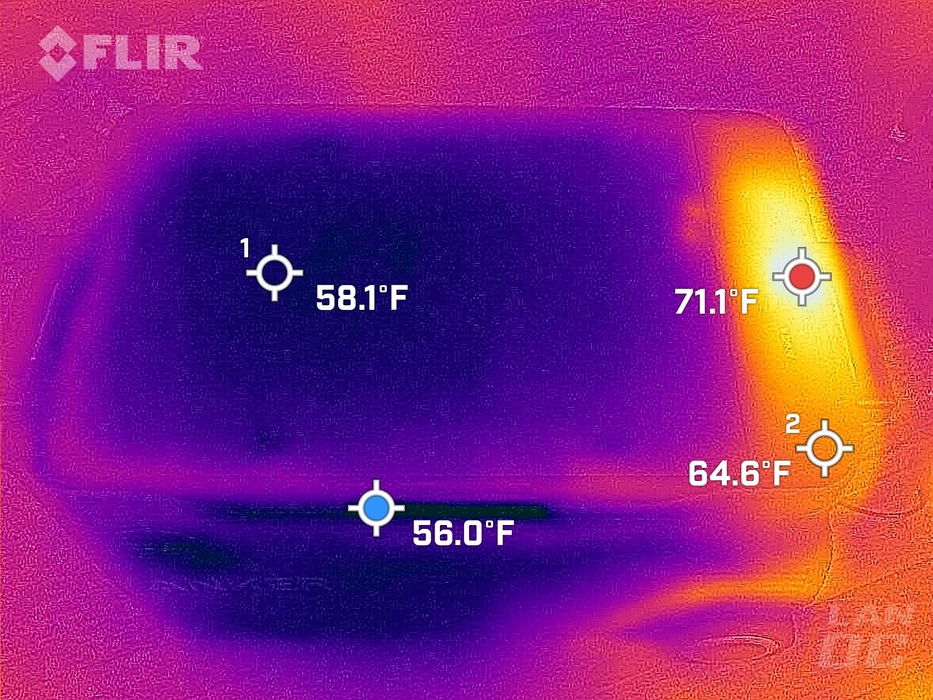
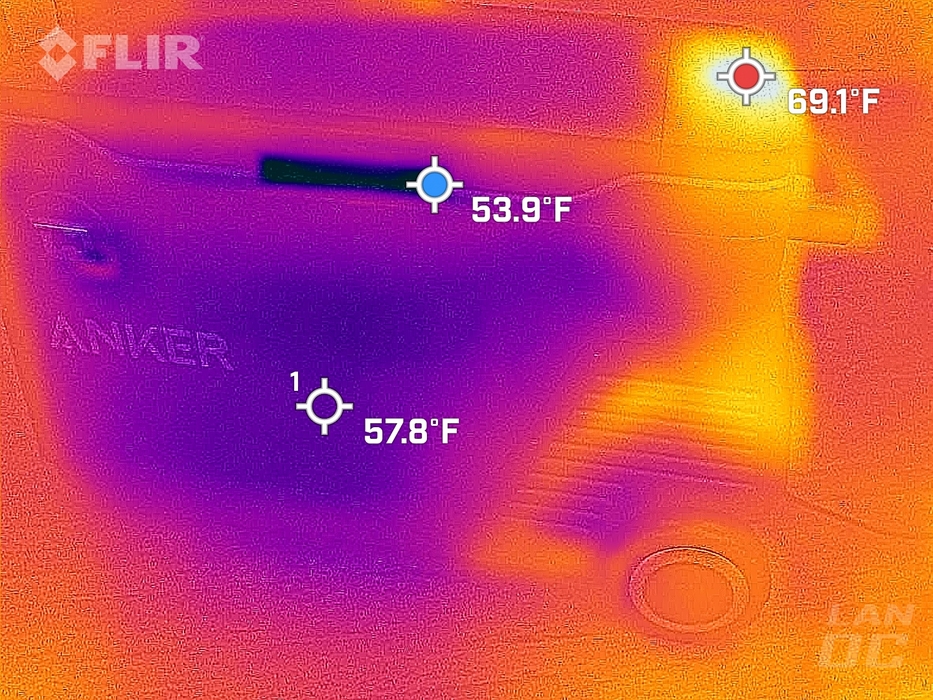
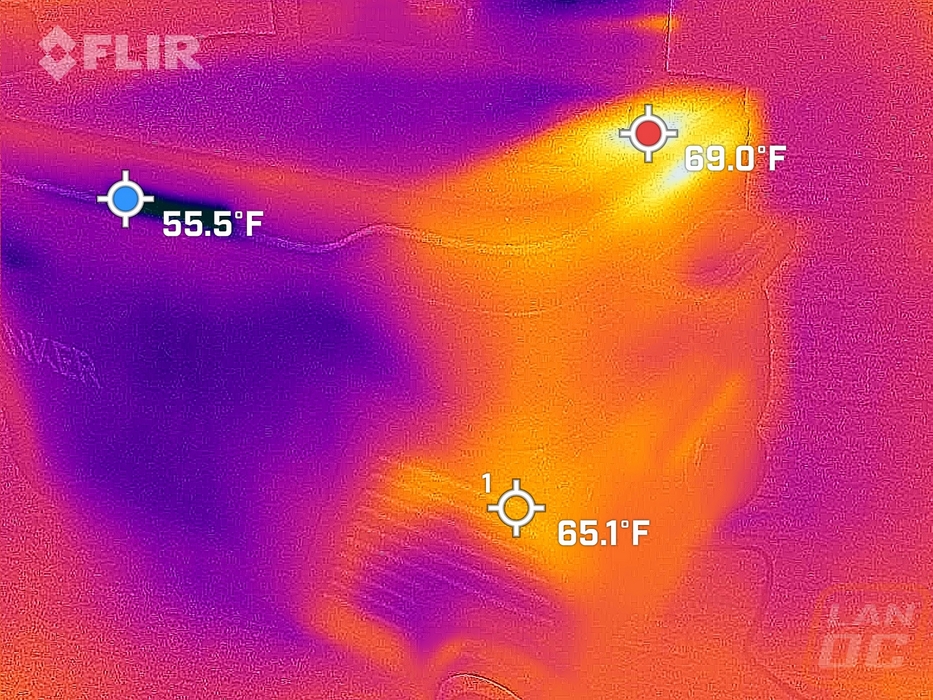
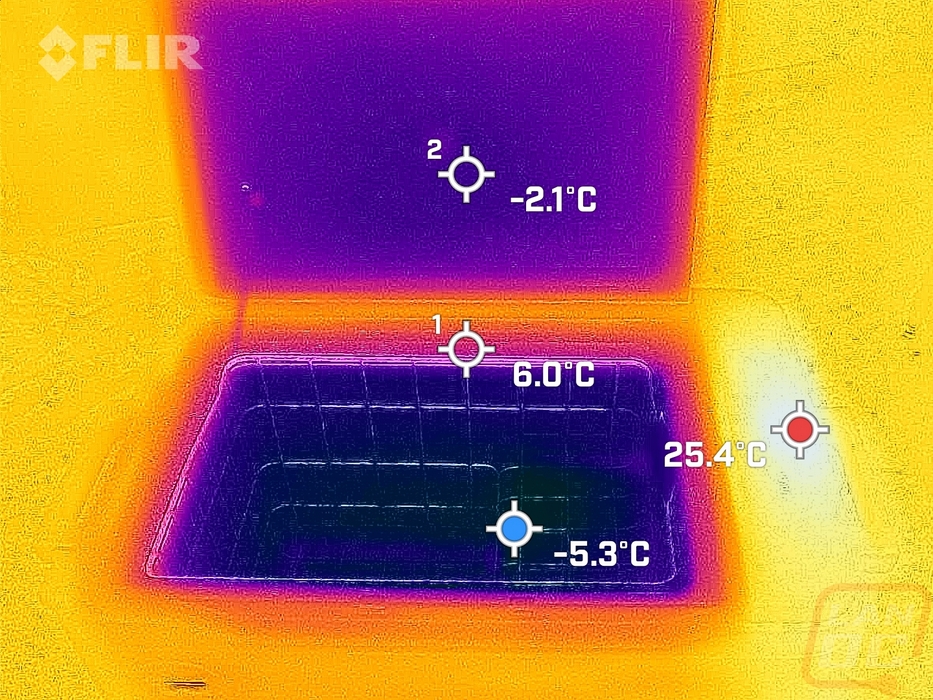
I also put the thermal camera to the test to check out the cooler itself when it was running. With the lid open you can see deep down in the bottom it was -5c or 23f at the time. But I was more interested in what the thermals looked like on the outside with the lid closed. You can see a clear difference in the insulated cooler sections from the area of the cooler that has the refrigeration and electronics which runs much warmer. There is some air being leaked into the latch area of the lid. Beyond that, the insulated cooler section was down to 58f which was lower than room temperature but the cooler had previously been running at down to -2 and this was when it was warming back up.

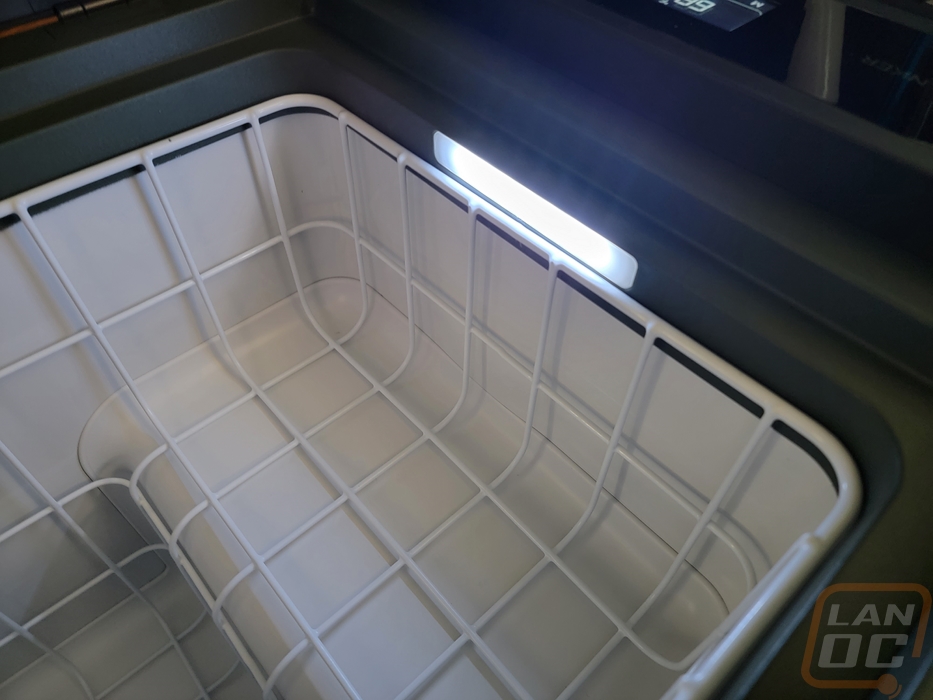
Before loading the EverFrost I did check out the performance of the LED light inside which does a great job of lighting everything up even in a dimly lit room.
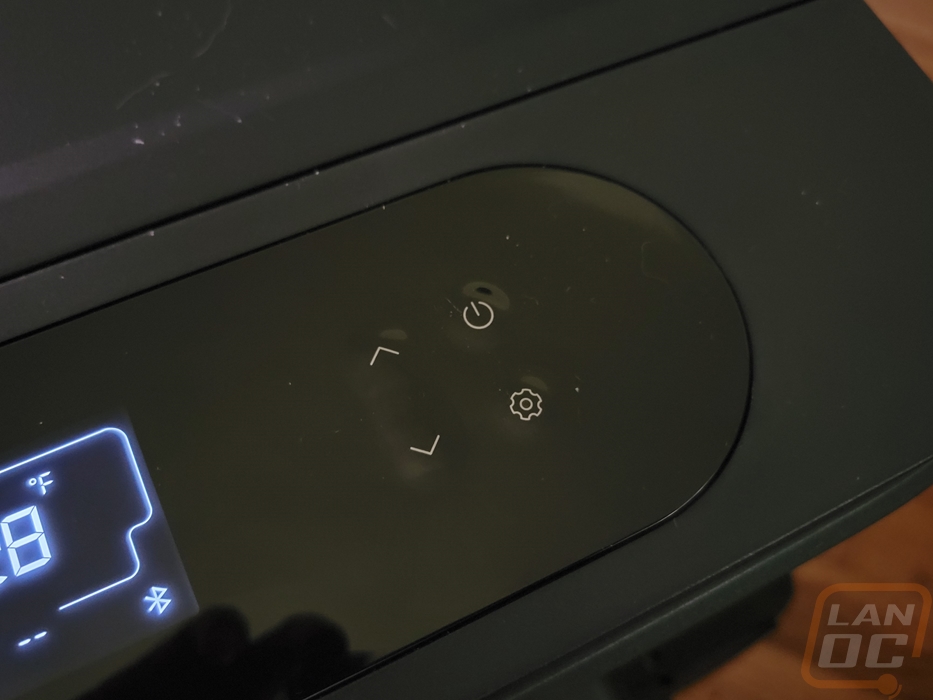
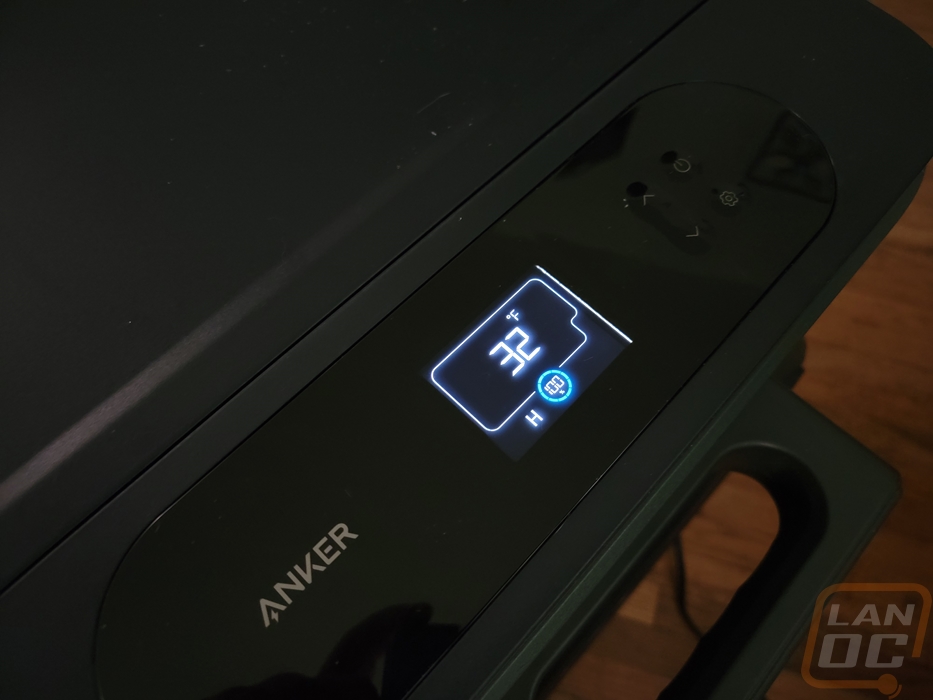
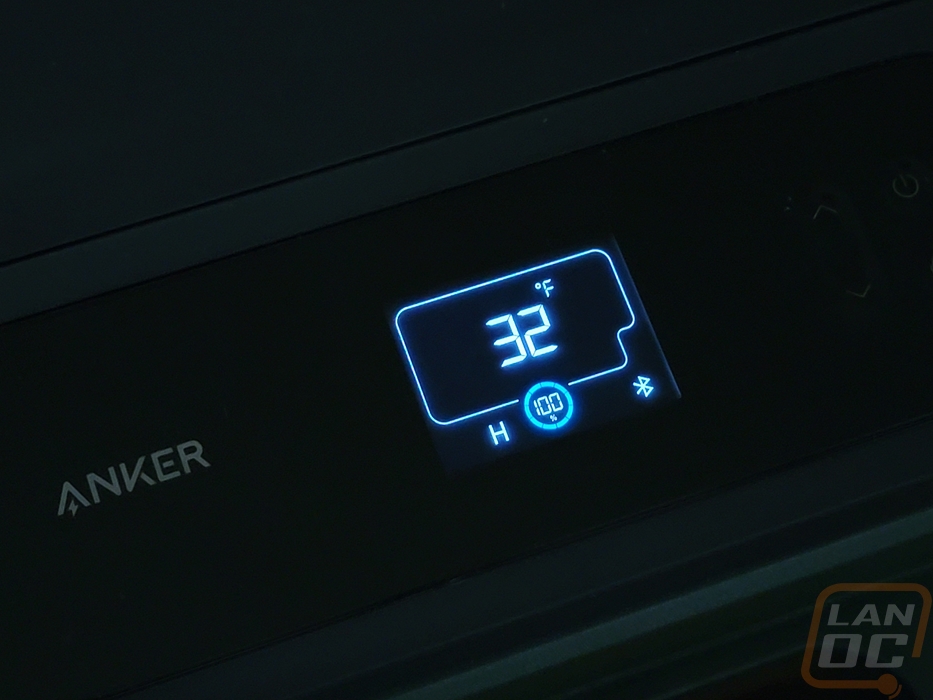
As for the onboard display and controls. I have some doubts on how the bubble-like touch controls will hold up through abuse over the long term. But they work well and give some feedback where a capacitive control wouldn’t. The onboard display is simple, showing your current temperature and the batter level at all times which is all you need along with the ability to change the cooler temperatures which you can do with the controls.
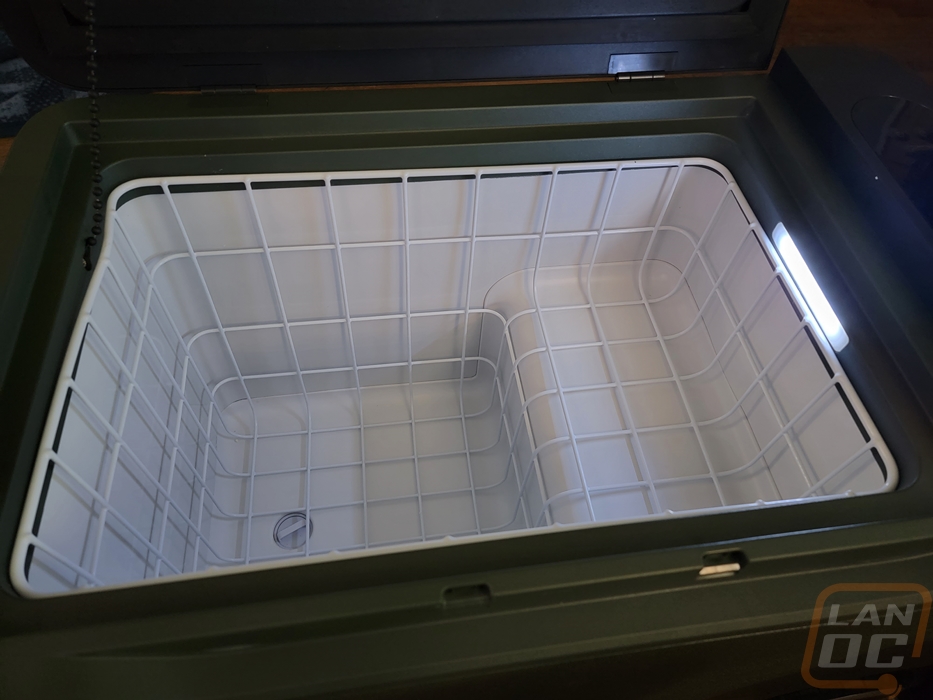
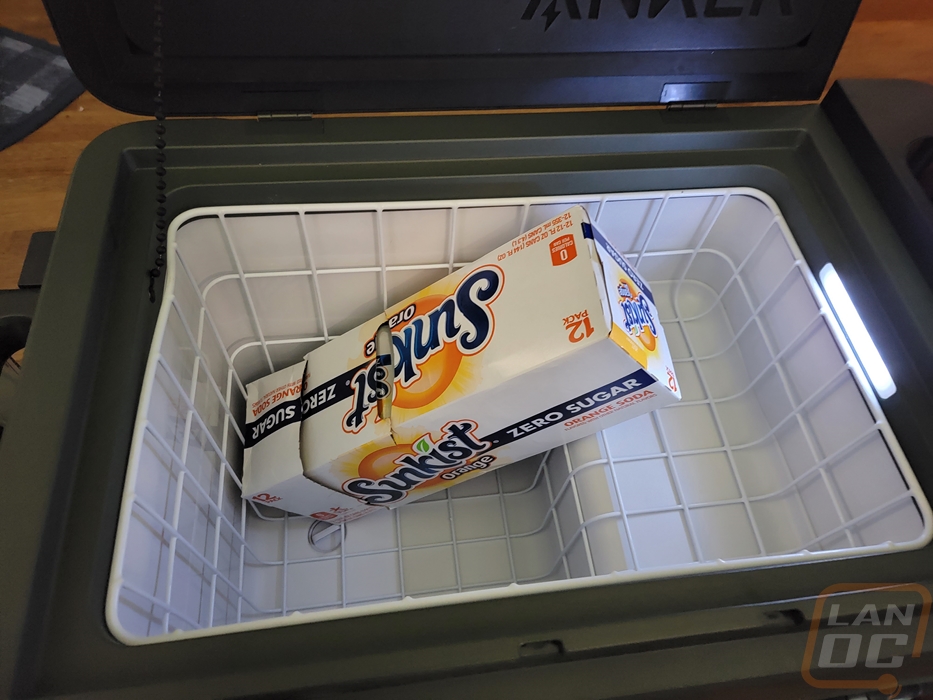
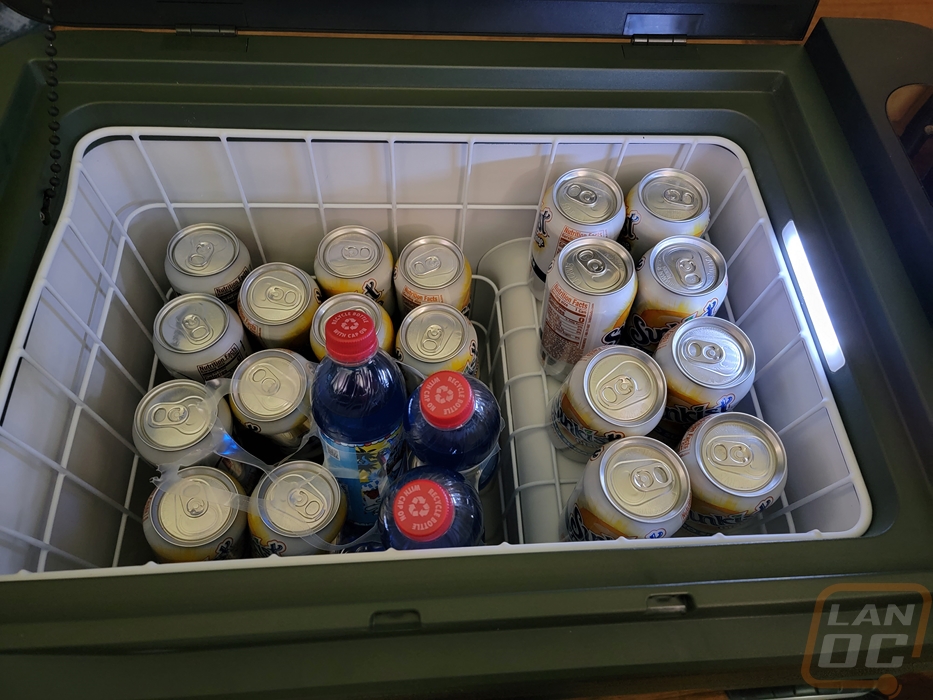
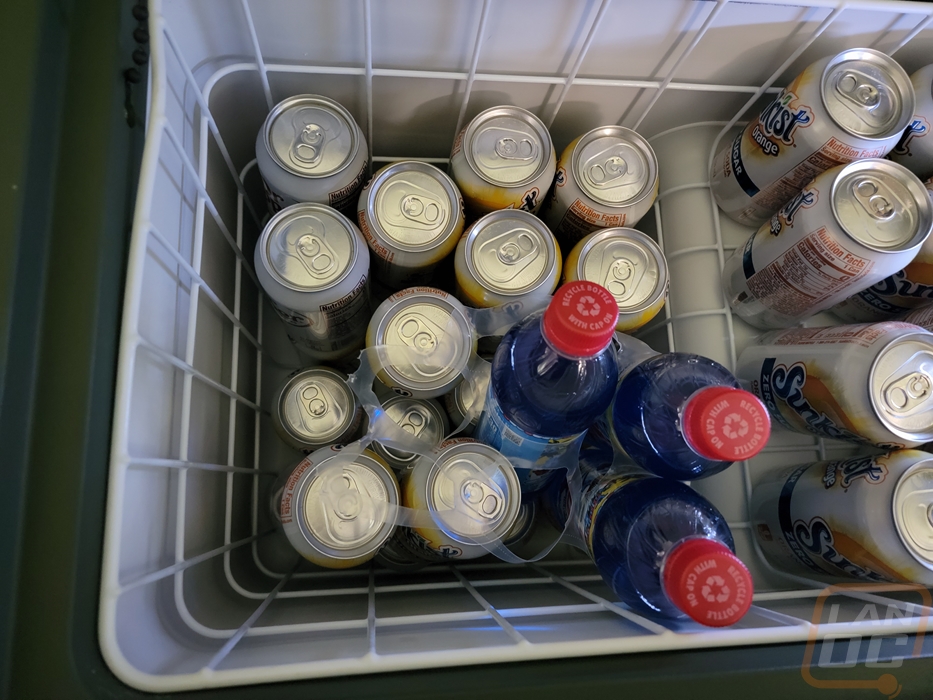
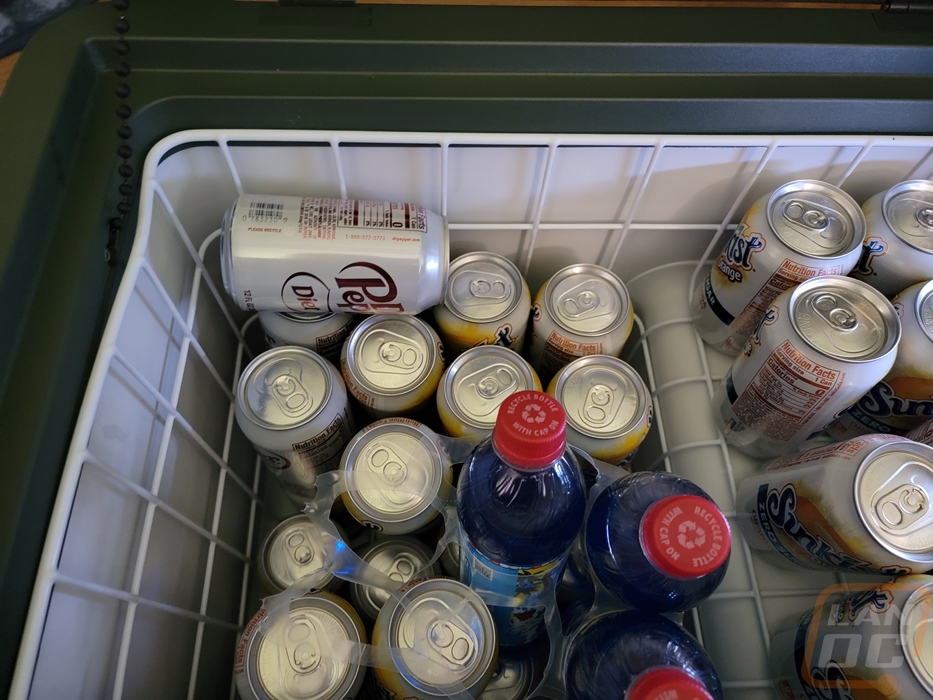
Last on my list for testing things out I did need to fill the cooler up and see how much it could hold. One of the main issues that we run into with our normal ice cooler is that you have to plan around adding ice into the mix. So whatever you put in you need to leave half of the space for ice and with a lot of foods, you have to make sure things are sealed and can’t get wet and also make sure those things are down in the middle of the ice. This also leads to you digging around with a frozen hand trying to find that last (insert your favorite soda name here) or when my wife and I took our last trip there were multiple foods that we had to burry to keep them from going bad that we couldn’t find until we unloaded the cooler. That isn’t going to be an issue with this setup, you can fill it to the top and not have to worry about adding ice, and without ice and with the light you should be able to find what you are looking for. The stepped bottom shape of the cooler does mean that you can’t just throw in your soda by the 12 pack however as you can see below. Well you can, but it's going to waste a lot of space. Unloading them, however, I was shocked at how much could fit in the cooler. In the deeper section, I could fit 16 cans per layer with two layers deep before you get to the wider upper level. In total, you can fit 48 normal cans and still have a layer to put a few small items in as well. But for my pictures, I put in 3 12 packs and a few bottles with room for plenty of other things. In short, even with the middle-sized 43L cooler that we have here, you can keep an entire cookout or trip cooled inside.
Having the option to switch to keep things frozen opens up even more options as well. With an ice cooler, the best you can expect with anything frozen in the cooler is to slow down the defrosting. But with the EverFrost Powered Coolers, you can maintain frozen things. Ice Cream or ice pops can be ready to go for your kid's sports or as a treat when camping and for those who have a long drive to the grocery things can stay cold or frozen.
