 With X58 motherboards ranging in price from just over $150 to a crazy $600, it can be daunting to find a nice mix of features and quality without breaking the bank. Gigabyte has a range of X58 boards separated with the UDx moniker. The UD stands for Ultra Durable and the 'x' indicating the number of special features, making it easy to spot the more expensive and features filled boards. Today we are taking a look at the X58A-UD5, a mid-range 1366 socket motherboard from Gigabyte. With a price point less than half of their UD9, it has the potential to be a perfect mix of value and performance. Let’s take a look.
Product Name: Gigabyte X58A-UD5
Review Sample Provided by: Gigabyte
Review by: Wes
Pictures by: Wes
Specifications
|
CPU |
Support for an Intel® Core™ i7 series processor in the LGA1366 package L3 cache varies with CPU |
|
QPI |
4.8GT/s, 6.4GT/s |
|
Chipset |
North Bridge: Intel® X58 Express Chipset South Bridge: Intel® ICH10R |
|
Memory
|
6 x 1.5V DDR3 DIMM sockets supporting up to 24 GB of system memory(Note 1) Dual/3 channel memory architecture Support for DDR3 2200/1333/1066/800 MHz memory modules Support for non-ECC memory modules Support for Extreme Memory Profile (XMP) memory modules (Go to GIGABYTE's website for the latest memory support list.) |
|
Audio
|
Realtek ALC889 codec High Definition Audio 2/4/5.1/7.1-channel Support for Dolby® Home Theater Support for S/PDIF In/Out Support for CD In |
|
LAN
|
2 x RTL8111E chip (10/100/1000 Mbit) Support for Teaming Support Smart Dual LAN |
|
Expansion Slots |
2 x PCI Express x16 slots, running at x16 (PCIEX16_1/PCIEX16_2) (Note 2) 2 x PCI Express x16 slot, running at x8 (PCIEX8_1/PCIEX8_2) (Note 3) (The PCIEX16_1, PCIEX16_2, PCIEX8_1 and PCIEX8_2 slots conform to PCI Express 2.0 standard.) 2 x PCI Express x1 slots 1 x PCI slot |
|
Multi-Graphics Technology |
Support for 2-Way/3-Way ATI CrossFireX™/NVIDIA SLI technology |
|
Storage Interface |
South Bridge: 6 x SATA 3Gb/s connectors (SATA2_0, SATA2_1, SATA2_2, SATA2_3, SATA2_4, SATA2_5) supporting up to 6 SATA 3Gb/s devices Support for SATA RAID 0, RAID 1, RAID 5, and RAID 10 Marvell 9128 chip: 2 x SATA 6Gb/s connectors (GSATA3_6, GSATA3_7) supporting up to 2 SATA 6Gb/s devices Support for SATA RAID 0, and RAID 1 * SATA3 RAID 0 4x and SATA3 2x performance are maximum theoretical values. Actual performance may vary by system configuration. 1 x IDE connector supporting ATA-133/100/66/33 and up to 2 IDE devices 2 x SATA 3Gb/s connectors (GSATA2_8, GSATA2_9) supporting up to 2 SATA 3Gb/s devices Support for SATA RAID 0, RAID 1, and JBOD JMicron JMB362 chip: 2 x eSATA 3Gb/s connectors (eSATA/USB Combo) on the back panel sup- porting up to 2 SATA 3Gb/s devices Support for SATA RAID 0, RAID 1, and JBOD iTE IT8720 chip: 1 x floppy disk drive connector supporting up to 1 floppy disk drive |
|
USB |
Integrated in the South Bridge Up to 10 USB 2.0/1.1 ports (6 on the back panel, including 2 eSATA/USB Combo, 4 via the USB brackets connected to the internal USB headers) NEC chip: Up to 2 USB 3.0/2.0 ports on the back panel * USB 3.0 10x performance is a maximum theoretical value. Actual performance may vary by system configuration. |
|
IEEE 1394
|
T.I. TSB43AB23 chip Up to 3 IEEE 1394a ports (2 on the back panel, 1 via the IEEE 1394a bracket connected to the internal IEEE 1394a header) |
|
Internal I/O Connectors
|
1 x 24-pin ATX main power connector 1 x 8-pin ATX 12V power connector 1 x floppy disk drive connector 1 x IDE connector 8 x SATA 3Gb/s connectors 2 x SATA 6Gb/s connectors 1 x CPU fan header 3 x system fan headers 1 x power fan header 1 x North Bridge fan header 1 x front panel header 1 x front panel audio header 1 x CD In connector 1 x S/PDIF In header 1 x S/PDIF Out header 3 x USB 2.0/1.1 headers 1 x IEEE 1394a header 1 x power button 1 x reset button |
|
Back Panel Connectors
|
1 x PS/2 keyboard port 1 x PS/2 mouse port 1 x coaxial S/PDIF Out connector 1 x optical S/PDIF Out connector 1 x clearing CMOS button 2 x IEEE 1394a ports 4 x USB 2.0/1.1 ports 2 x USB 3.0 ports 2 x eSATA/USB Combo connectors 2 x RJ-45 port 6 x audio jacks (Center/Subwoofer Speaker Out/Rear Speaker Out/ Side Speaker Out/Line In/Line Out/Microphone) |
|
I/O Controller |
iTE IT8720 chip |
|
H/W Monitoring |
System voltage detection CPU/North Bridge temperature detection CPU/System/Power fan speed detection CPU overheating warning CPU fan fail warning CPU/System fan speed control (Note 4) |
|
BIOS |
2 x 16 Mbit flash Use of licensed AWARD BIOS Support for DualBIOS™ PnP 1.0a, DMI 2.0, SM BIOS 2.4, ACPI 1.0b |
|
Unique Features
|
Support for @BIOS Support for Q-Flash Support for Xpress BIOS Rescue Support for Download Center Support for Xpress Install Support for Xpress Recovery2 Support for EasyTune (Note 5) Support for Dynamic Energy Saver™ 2 Support for Smart 6™ Support for Auto Green Support for eXtreme Hard Drive Support for ON/OFF Charge Support for Q-Share |
|
Bundle Software |
Norton Internet Security (OEM version) |
|
Operating System |
Support for Microsoft® Windows® 7/Vista/XP |
|
Form Factor |
ATX Form Factor; 30.5cm x 24.4cm |
Features
-Support for 6 core CPU’s
-Intel Core™ i7 Processor and X58 Chipset support
-Dual Power Switching
-16 Power Phases
-On/Off Charge USB port
-USB 3.0 Support
-SATA 6 Gbps Support
-3x USB Power Boost
-Dynamic Energy Saver™ 2
-Cloud OC
-Hotkey OC
-Smart 6 Software
-AutoGreen- Greening your PC via Bluetooth cellphone
-XHD (eXtreme HardDrive)-Accelerating hard drive performance with ease
-Integrated Memory Controller featuring triple channel DDR3 support
-QPI , 25.6GB/sec of bandwidth
-Intel Turbo Boost Technology
-Multi-display support with 3 way CrossFireX and 3 way SLI™
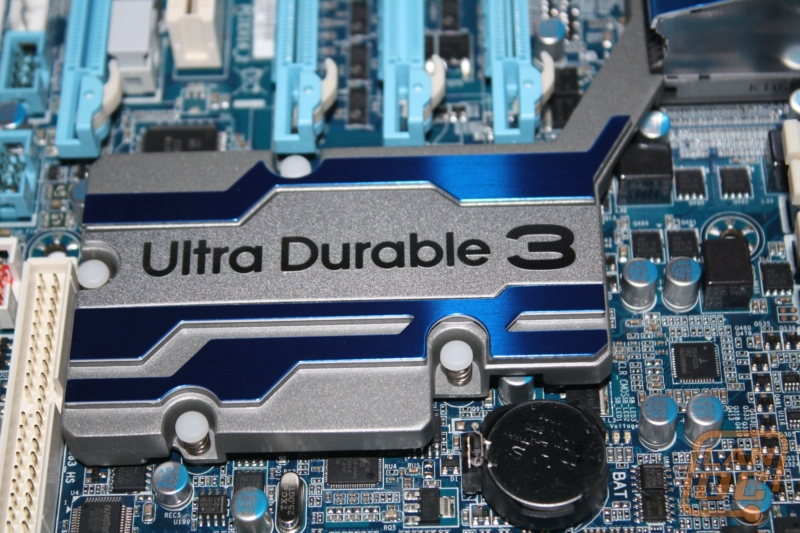
-Ultra Durable 3 with 2 ounces of copper
-50,000 Hours Japanese Solid Capacitors
-Quick and Effortless Overclocking with One Click
-EasyTune6
-DualBIOS™ - Patented Dual Hardware BIOS Protection
-2 Gigabit LAN
-Hardware OverVoltage Control IC - Enabling Extreme Overclocking
-Debug LEDEmbedded
-OV-Alert LED
-Visible Temperature Reminder
-Onboard Power, Clear CMOS and Reset buttons
-Dolby Home Theater® - Enjoy a Rich Home Theater Surround Sound Experience
-Qualified for Windows® 7
-ErP Lot 6 support

Packaging
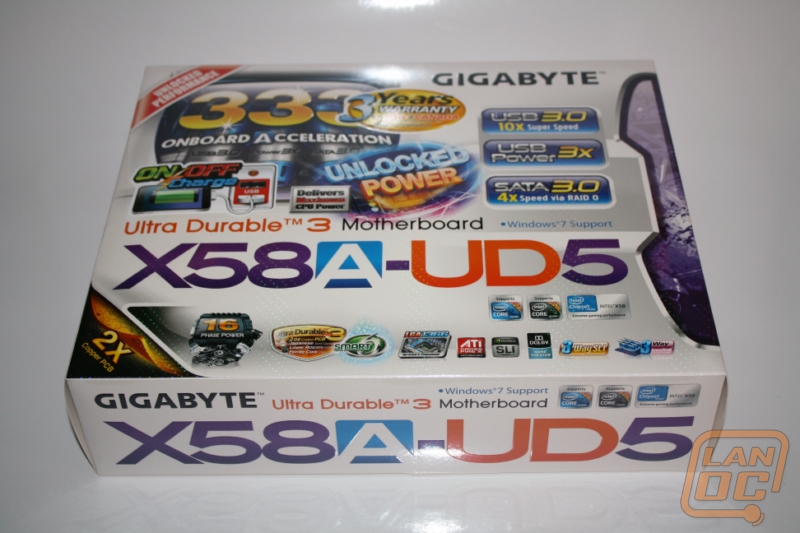
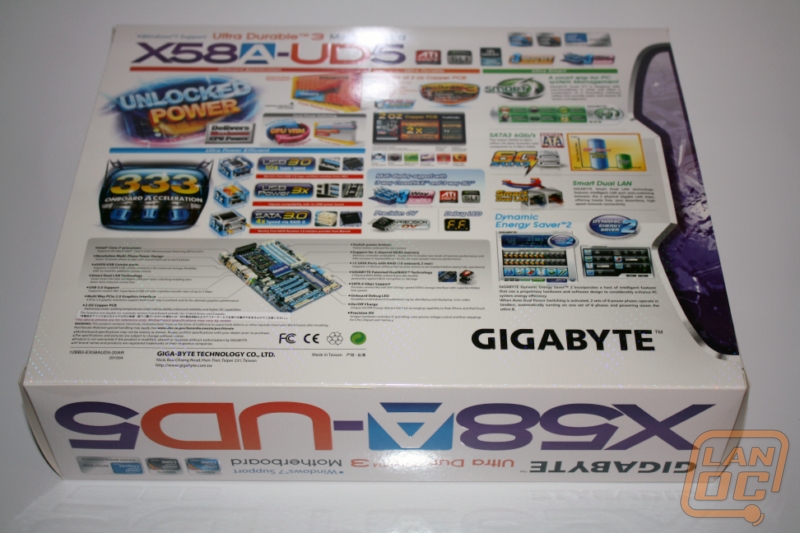
Gigabyte uses a fairly standard layout for their packaging while fitting as much as possible on the cover. That may be the understatement of a lifetime, with over twenty different logos or comments on just the front showing off features, there is no way you will put it down due to a lack of information. If that isn’t enough you can flip it over and find even more information including a photo of the UD5 with a bullet point list showing the location of key parts.
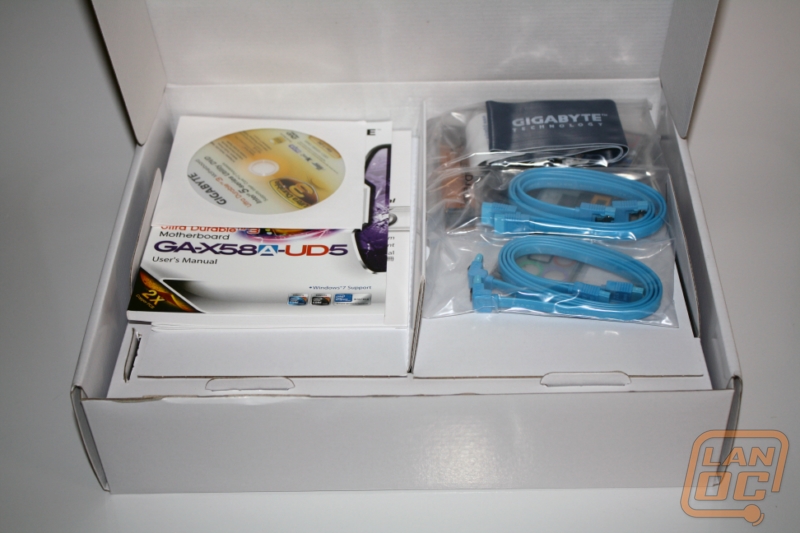
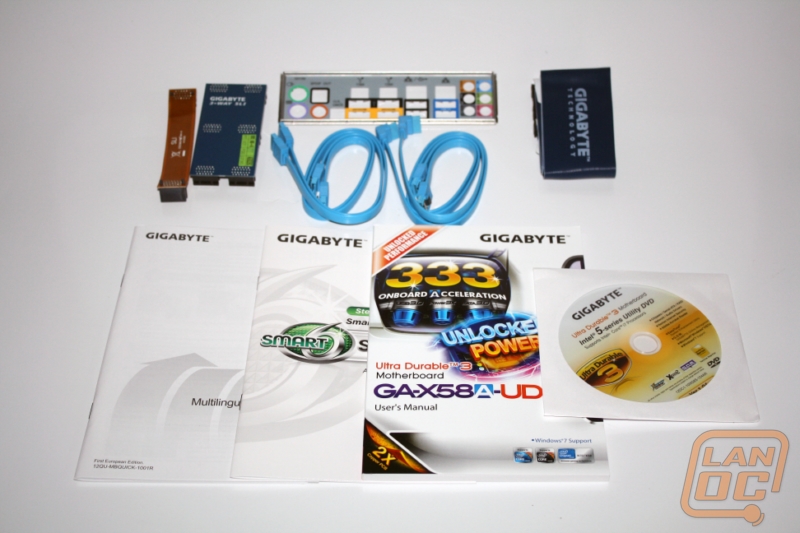
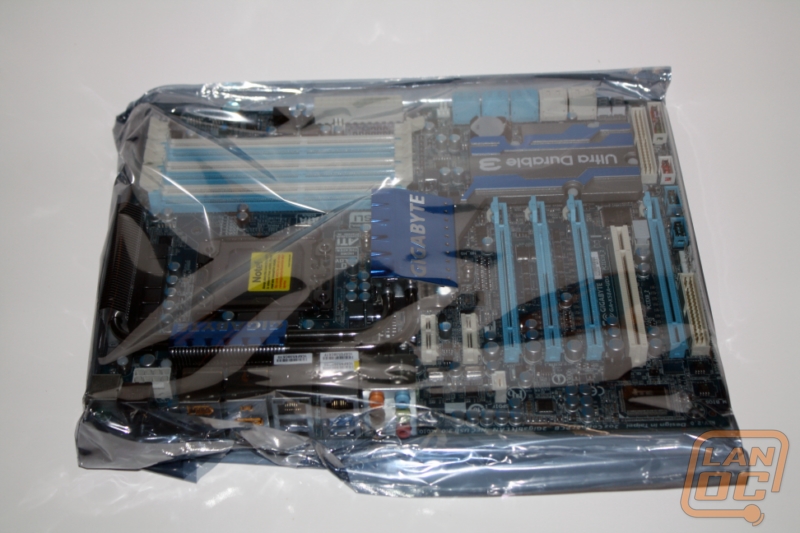
Inside you will first be greeted by the manual, software disc, and accessories. The accessory pack includes two normal SATA cables, two right angle SATA cables, one IDE cable, one flexible crossfire cable, a ridged SLI connector, and your I/O panel. Under a layer of cardboard and inside of an anti-static bag you will find the UD5 itself.
Board Layout
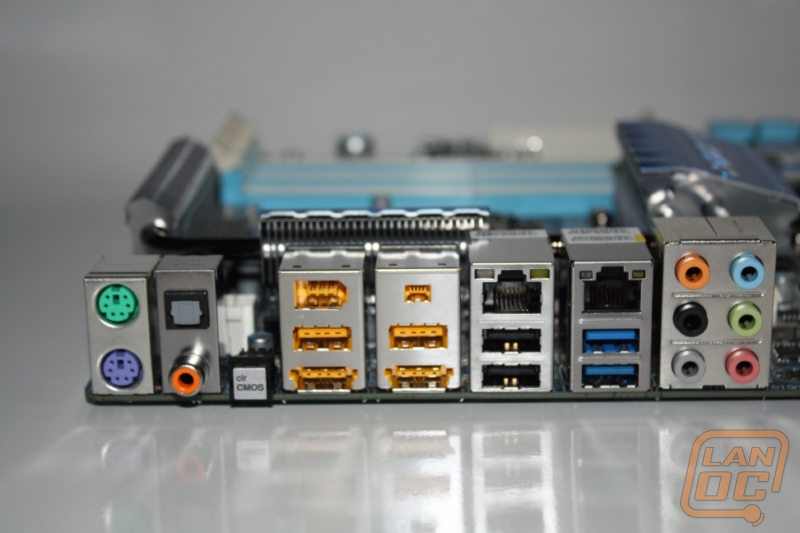
The back I/O panel is laid out in a fairly typical way. Starting from the left you will find both a mouse and keyboard PS2 port for anyone still sporting an older motherboard or an old IBM Model M keyboard like a few of our members. Moving on you will find both optical and coaxial S/PDIF connections with a clear CMOS button tucked in next to them. Four double stacks of USB ports including two USB 3.0 ports, color coded with blue, can also be found, accompanied by two 1394a ports, one 4 circuit and one 6 circuit above the USB ports, and two gigabit Ethernet ports. On the right side you will find the six color coded audio jacks (Center/Subwoofer Speaker Out/Rear Speaker Out/ Side Speaker Out/Line In/Line Out/Microphone).
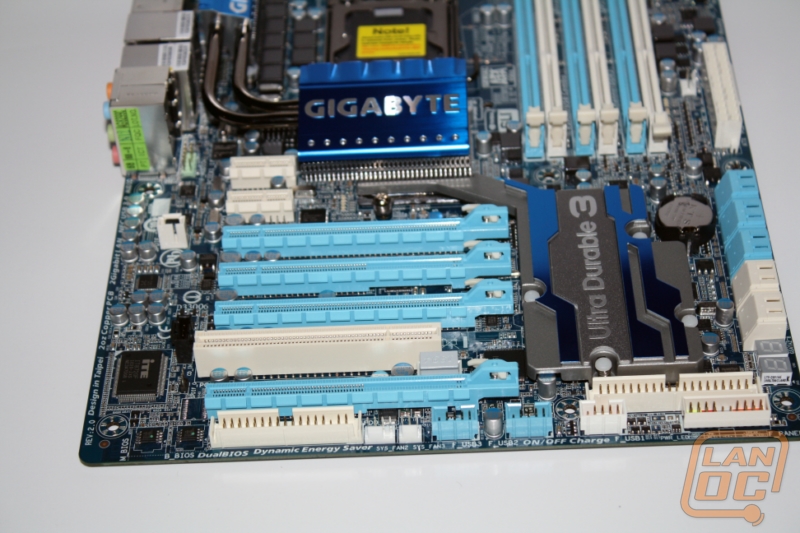
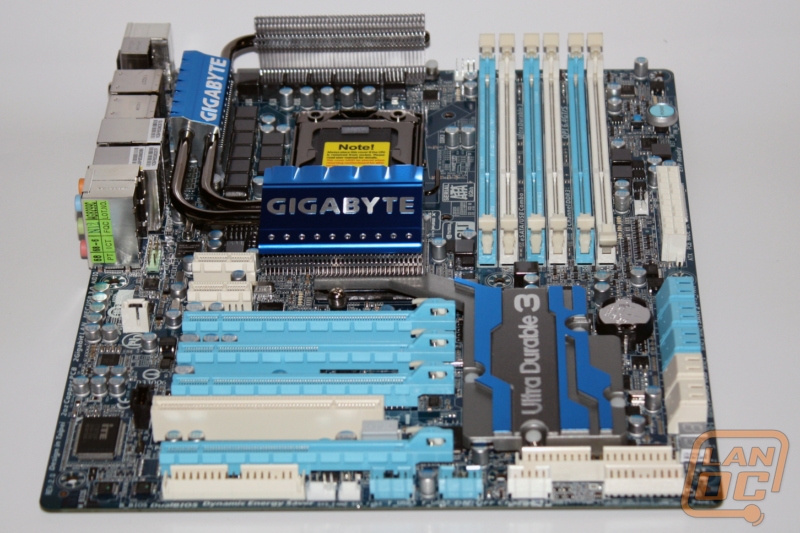
The overall board layout is good with most everything spaced out. The first PCI Express x1 slot is up against a heatsink, limiting you to short x1 cards for that port. Having a second x1 slot should help that issue though. My other complaint is the placement of the audio header, being above the top PCI slot and up against a heatpipe. It would be nice to see it down at the bottom of the board, the current setup makes it difficult to reach and impossible to hide your wiring.
The four PCI Express x16 slots are next to each other beside the PCI splitting up the last two, giving you room to install three dual slot video cards in Crossfire or SLI. Combine that with the two x 1 slot and you have 7 total card slots.
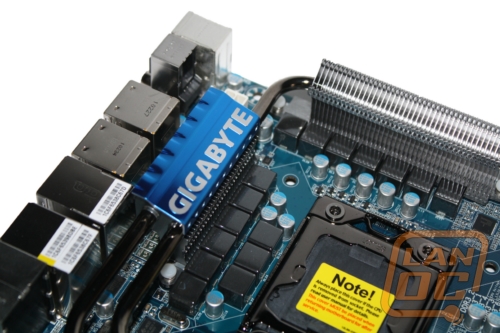
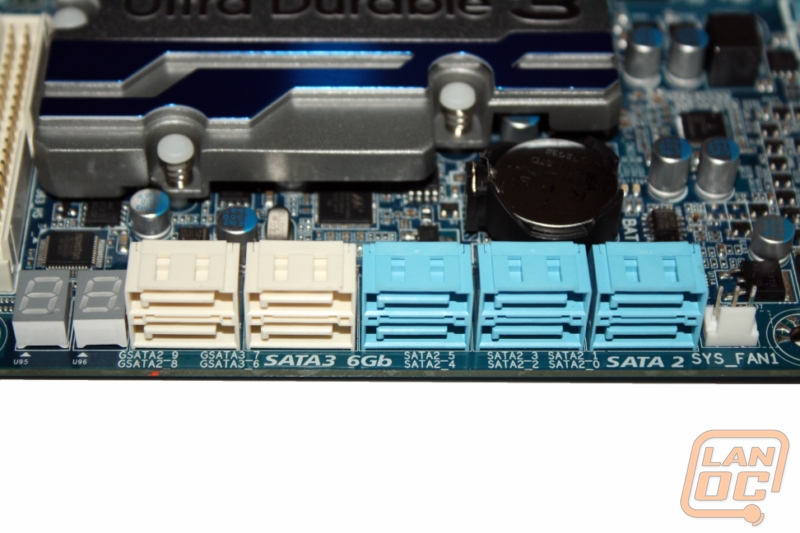
The UD5 comes with an amazing 10 SATA ports, all right angled for great wire management. Of the 10 ports, the four on the left at SATA3 and 6 on the right SATA 2. You can also see the Debug LED just below the ports.
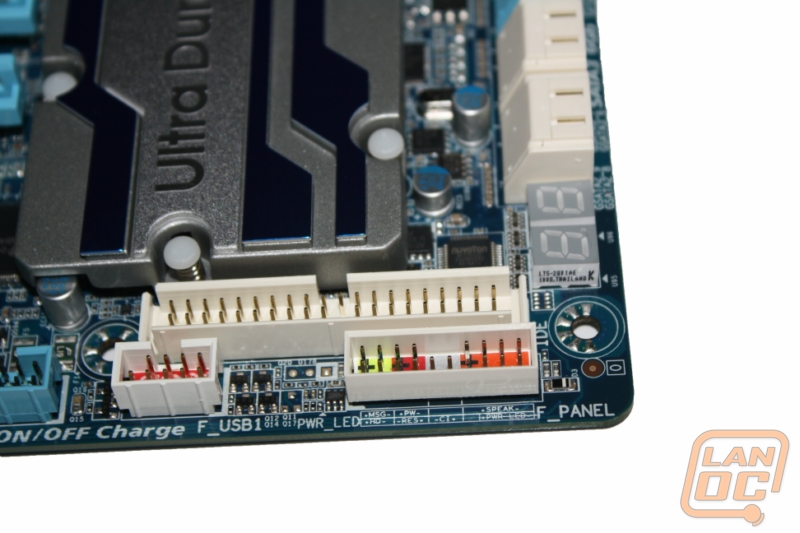
Along the bottom of the motherboard you will find the front panel connections, three USB connections (one with the ON/OFF charge feature, labeled with a red color), a floppy drive connection, IDE connection, and two system fan connections.
BIOS
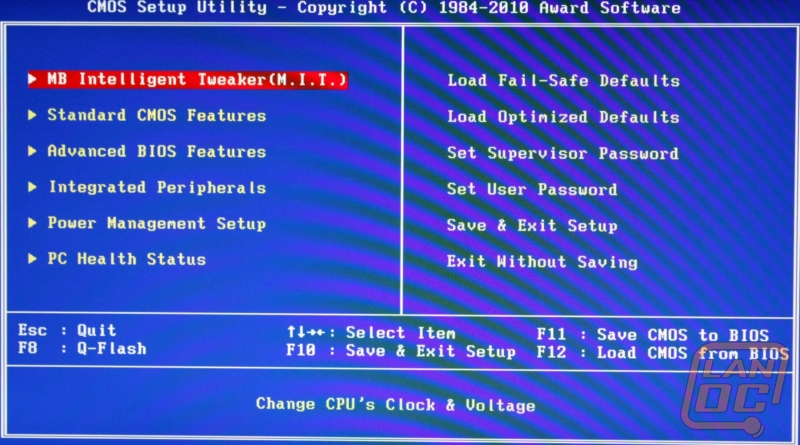
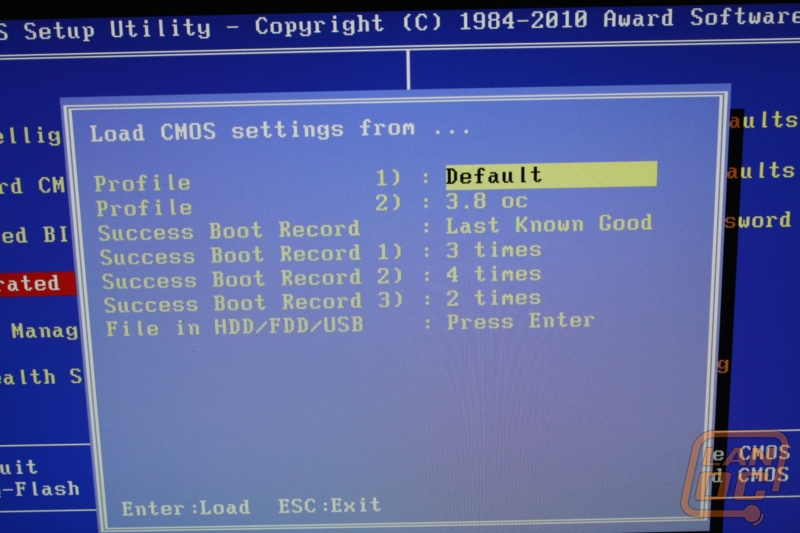
Gigabyte uses a Phoenix AWARD based BIOS to control everything, just like what we have seen before in the past. Most enthusiasts will spend the majority of their time adjusting under the MB Intelligent Tweaker (M.I.T.). MIT is where you will find all of your overclocking and voltage adjustments in a nice organized package. When you open it up there are 5 options: Status, Frequency, Memory, Voltage, and Miscellaneous. Each are easy to navigate.
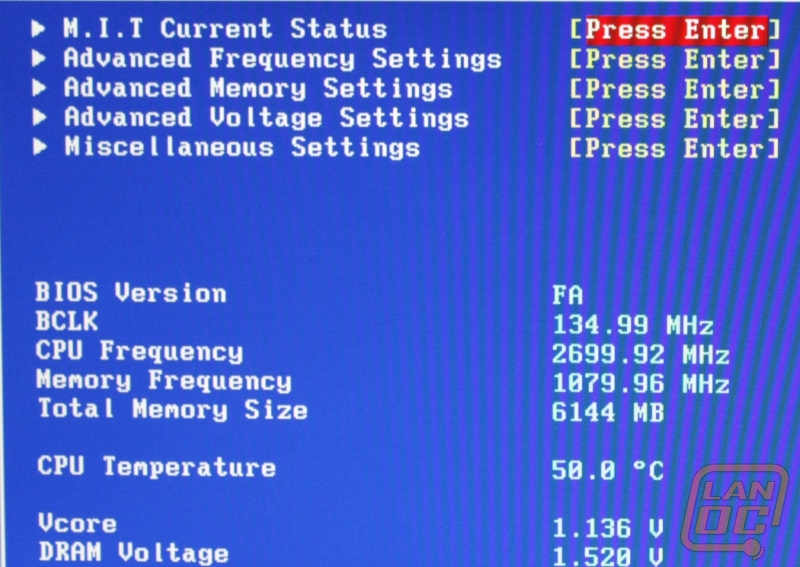
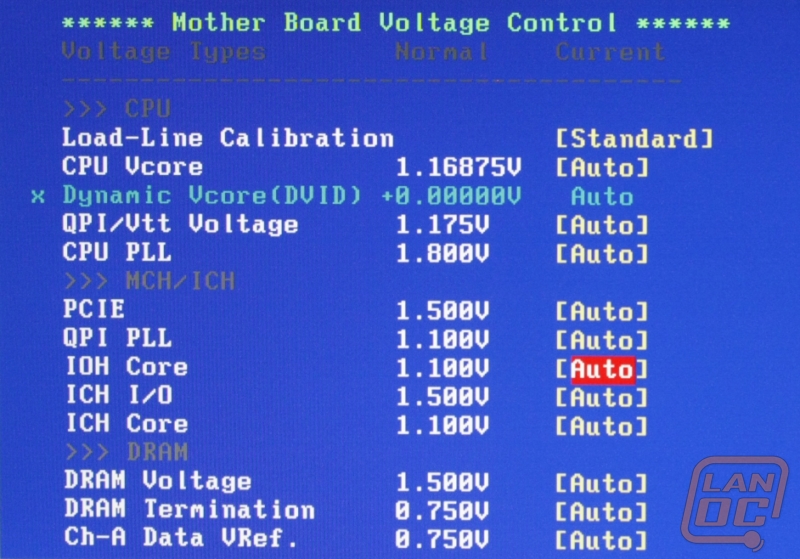
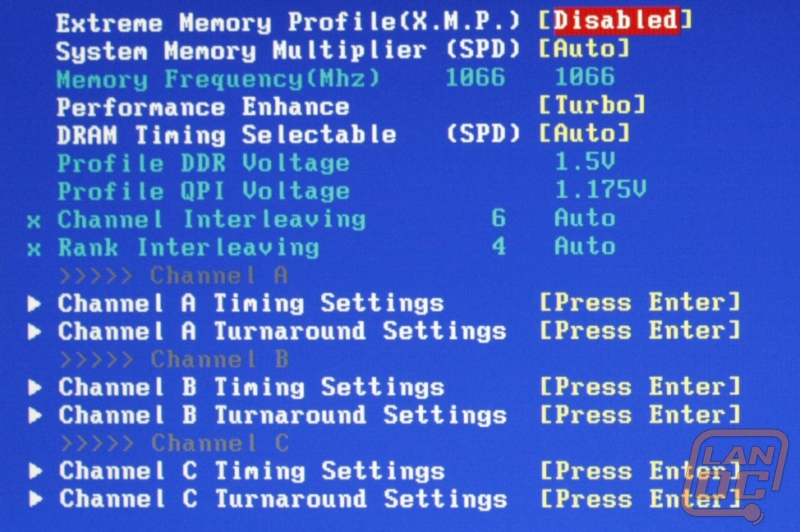
Frequency has your CPU clock right at the top with the current Frequency just below it to show you how your changes affect your clock speed. Base Clock control can be enabled and adjusted about half way down the screen for those who don’t have unlocked CPU’s. Oddly enough this is also where you will find your XMP memory profile settings; you can also find that same setting in the Advanced Memory Settings page. While you are there you can adjust the timing of each channel individually along with viewing the QPI and DDR voltage, they are only adjustable on the Advanced Voltage Settings page. Along with those options you can adjust the voltage for your Vcore, PCIE, and countless other options. When adjusting voltage they have tried to help by having the color change as you go up to give you an idea on when you are reaching dangerous amounts of voltage.
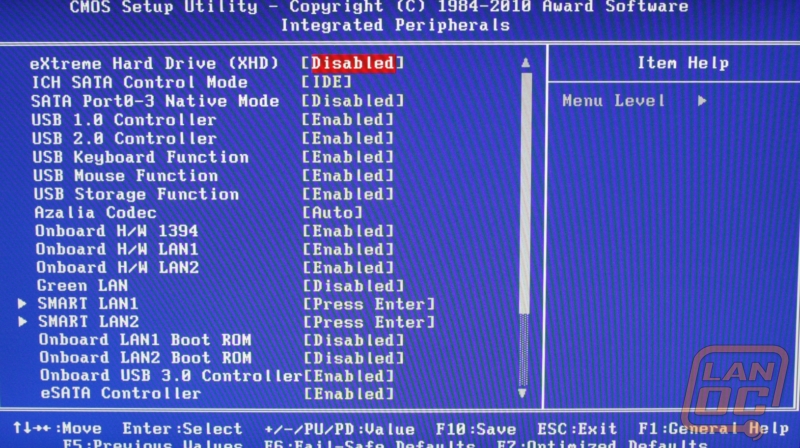
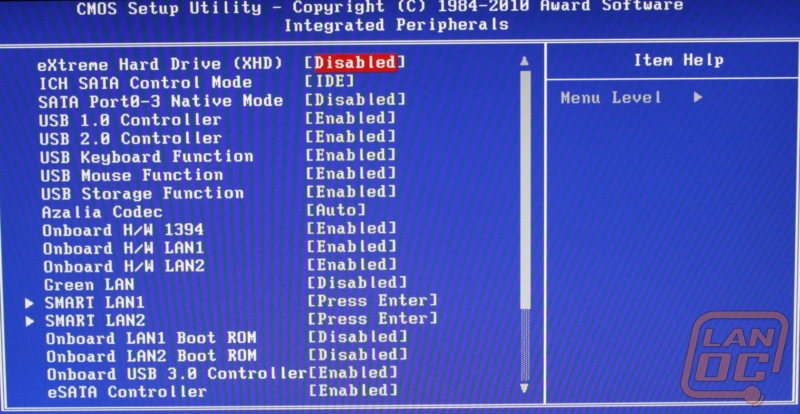
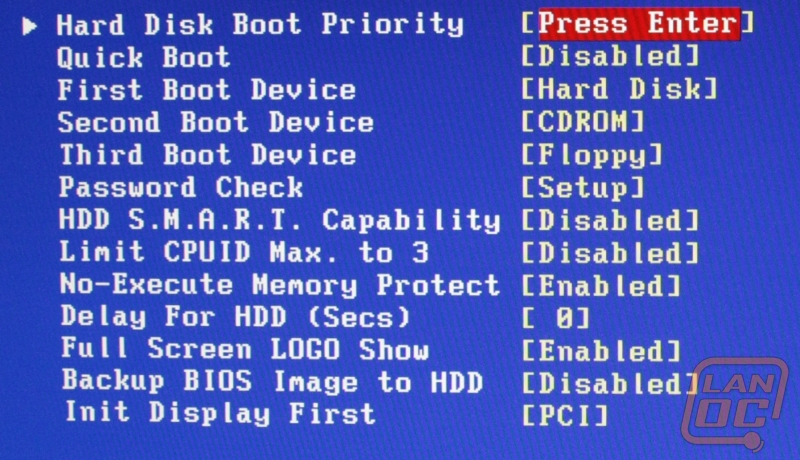
Beyond the MIT, the BIOS is standard fare. The Integrated Peripherals option will allow you to enable and disable any and all peripherals on the UD5. The Advance BIOS Features option is equaly bland with your typical, but important options, likg Hard Disk Boot Priority and the ability to set your boot devices. While you are in here I would recommend that you take the time to turn on HDD S.M.A.R.T., this way you can get a warning before a drive fails on you.
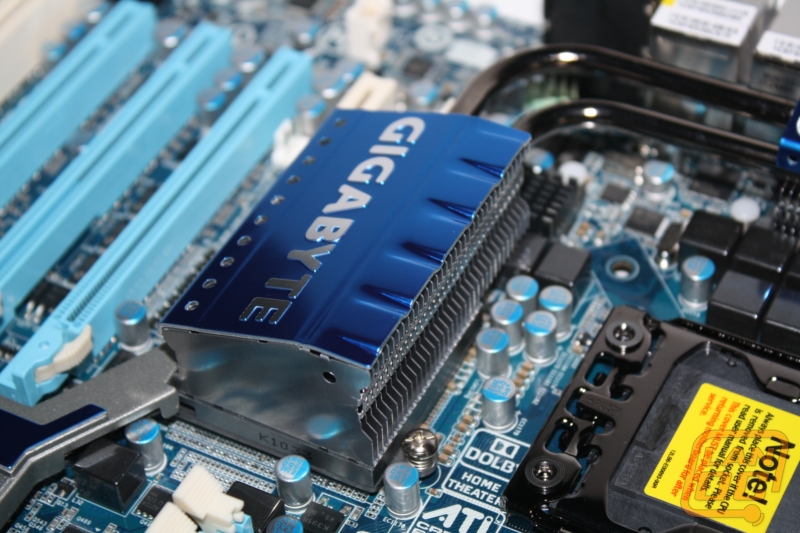
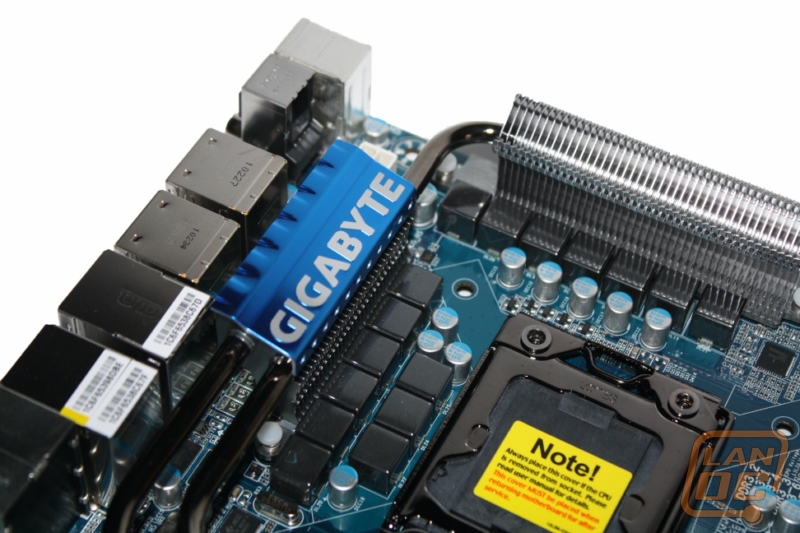
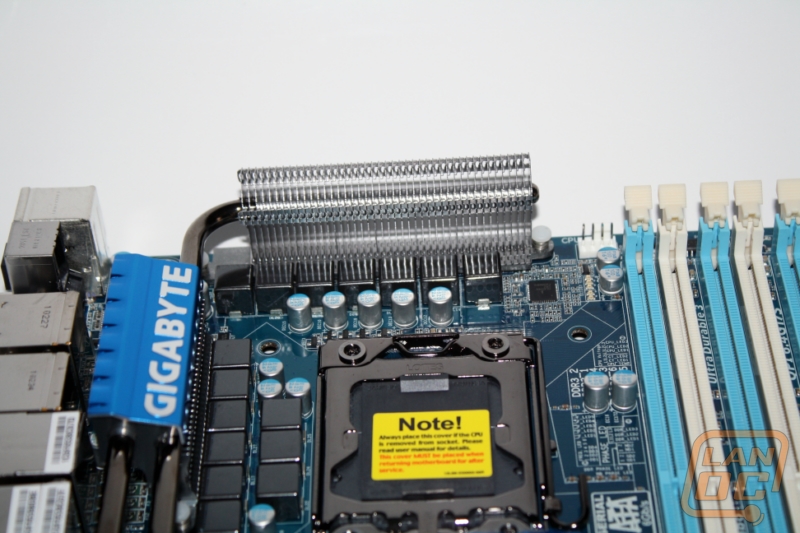
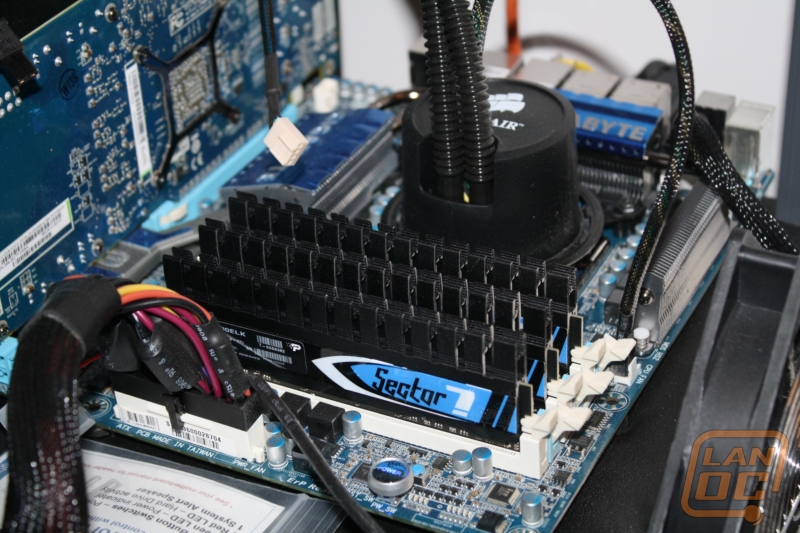
Cooling
I talked about it a little bit in the board layout section but Gigabyte has put together the UD5’s cooling setup using a couple heatpipes and three heatsinks. Each of the three heatsinks are located above, below, and beside the CPU socket. In between each has a heatpipe to connect them along with the low profile heatspreader in front of the PCI Express x16 slots. This setup is very close to what you see on all Gigabyte X58 boards short of the UD7 and UD9’s special setups. This setup during all of our testing was more than enough to keep things cool. It may not have built in water cooling or a PCI slot heatsink like their higher end models, but true to its mid-range price point this cooling is more than enough for all but the most hardcore enthusiasts.
Overclockability
Jumping right into the M.I.T. screen in the BIOS, I found my way to give the Base clock a bump up to 191 with the multiplier set to x21. OPI Voltage set at 1.35 along with my CPU Core voltage bumped up to 1.35 also, I booted it up. Everything seemed fine and then it crashed; opps. Going back into the BIOS I realized I forgot to turn off Intel Turbo boost. With turbo turned off I retried with success. Wasting no time I jumped into prime95 running 8 threads and let the system sit overnight, checking it periodically of course. The next day everything was nice and warm, but still running wonderfully. Success, it will run 4.0GHz without any issues.
Our Test Rig
Intel i7 930 CPU
Patriot Sector 7 Ram Triple Channel
Seagate Constellation 2tb Hard drive
Corsair H50 Water Cooling
Sparkle Gold Class 750 Watt PSU
Sapphire HD6850 Toxic
http://www.highspeedpc.com/ Test Bench
Performance
The performance of the Gigabyte X58A-UD5 obviously depends a lot on the components used with it. Currently our test bench is a good representation of a build that someone looking for a mid-range motherboard would be looking at. The i7 930 and AMD 6850 are not top of the line products, but both give you great performance for the amount spent on them. As you saw before the i7 930 is a great overclocker when combined with the UD5 and adequate cooling. Of course this wouldn’t be a full test unless we put everything through a few synthetic and in-game benchmarks.
PC Mark Vantage
PCMark Score: 8542
Memories: 7017
TV and Movies: 5107
Gaming: 9540
Music: 7335
Communications: 7311
Productivity: 7645
HDD: 5190
3DMark Vantage Standard Setting
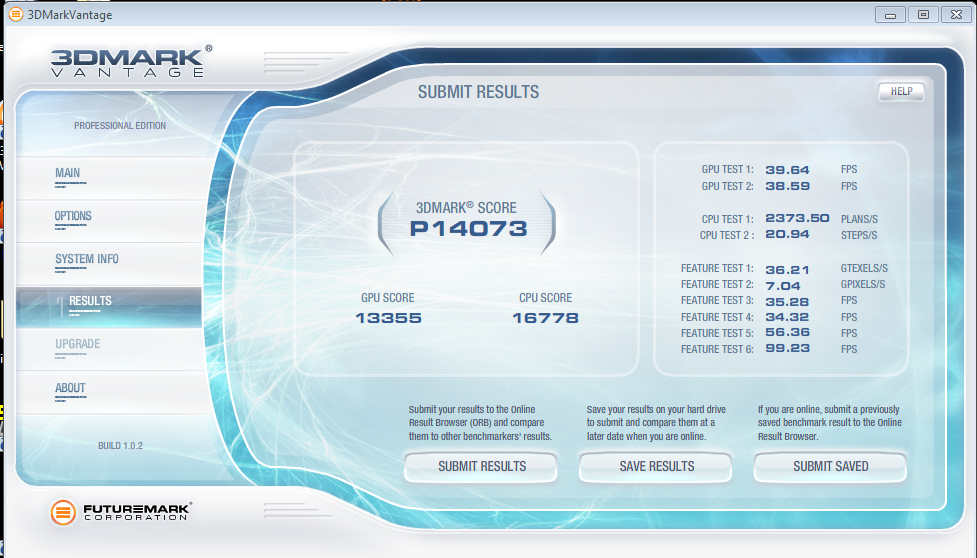
3DMark Vantage Performance Setting

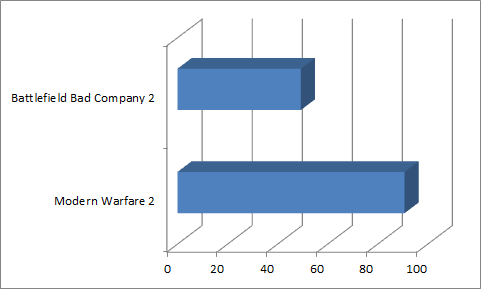
In Game Performance Frame Rate Average 1080p High settings
As you can see the X58A-UD5 paired with the i7 930 and an AMD HD 6850 is a potent combination at a reasonable price. The CPU Score of 16778 on 3DMark Vantage is very respectable, as is the 8542 score on PC Mark Vantage. You would be able to edge out even more performance simple by turning up the CPU to the 4.0 Ghz that we reached in our overclocking testing. All of our benchmarking was done using stock clocks.
Of course benchmarks don’t cover everything. The UD5 has onboard 7.1 audio using a Realtek ALC889 chipset. They advertise High Definition Audio along with support for Dolby® Home Theater and a S/PDIF In/Out. Although I tend to avoid the 5+ speaker setups due to the mess of cables that normally comes with them. I did hook the UD5 up to my Klipsch Pro Media 2.1 speakers to test out the audio along with a little bit of testing using my Steel Series Siberia v2’s to test out the microphone. The audio quality with the Klipsch’s was top notch giving me no reason to want to run out and pick up a dedicated sound card. In fact the audio was noticeably better than on my EVGA Classified that I use day to day. To test the performance of the microphone I turned the input volume to its max but turned off the microphone boost and recorded a little audio. When playing it back the audio was noticeably quiet but otherwise had good audio quality. With the boost on it was more than loud enough but was a little boomy causing me to have to adjust the other settings down to compensate. After all of the adjustments the microphone performed very well. Not bad for onboard audio!
Overall
Considering the good luck I have had with Gigabyte boards in the past it wasn’t a shock to once again be pleased with the X58A-UD5’s performance and features. The initial price may give you sticker shock if you are looking to put together a low budget build until you realize that ALL of the X58 boards are costly. When compared to other X58 boards the UD5 comes in at a reasonable price considering the features. Short of high end overclocking I can’t imagine any reason why you would need anything beyond this really. That is why this will be used as our 1366 socket test rig. If you are on the market for an X58 motherboard, Gigabytes X58A-UD5 will do the job, and some.