Performance and Software
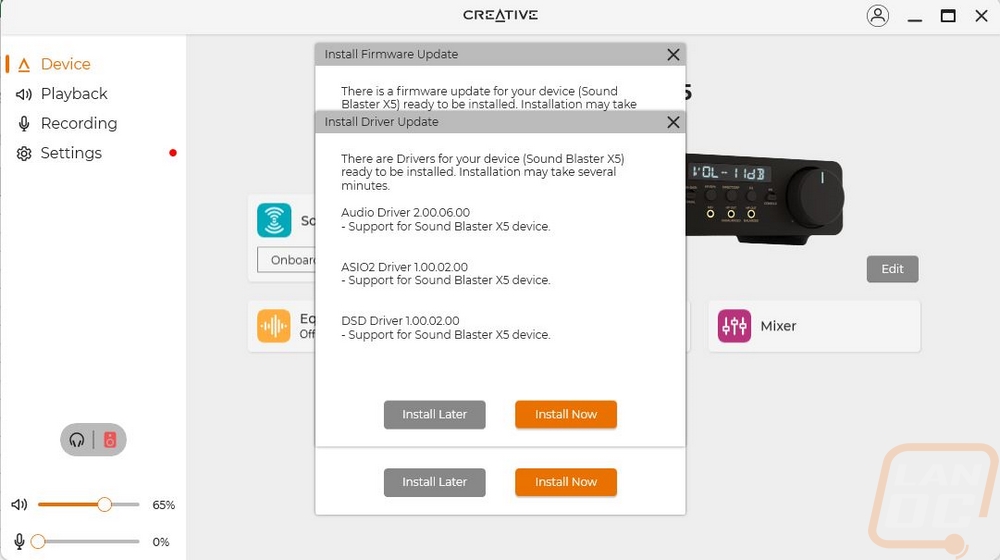
Before getting into how the Sound Blaster X5 performed I did want to show what software Creative has put together for it. They call it the Creative App and it's available for your PC or mobile phone. This is the same software that worked with the Sound Blaster Katana V2 that I previously covered. When you first install the software it does check for firmware updates and also makes sure you have the drivers needed to be installed. You can see below the popups that helped get those updated.
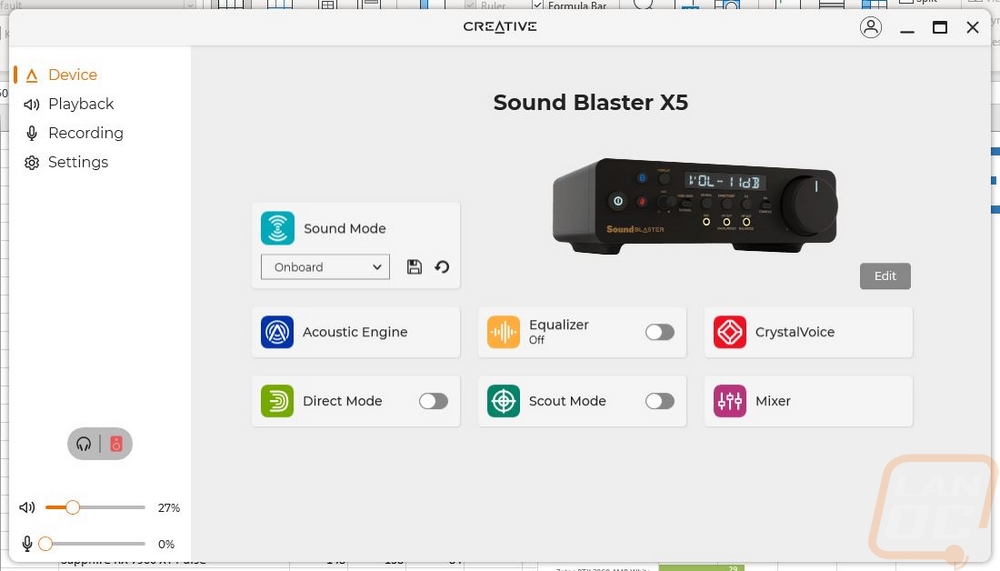
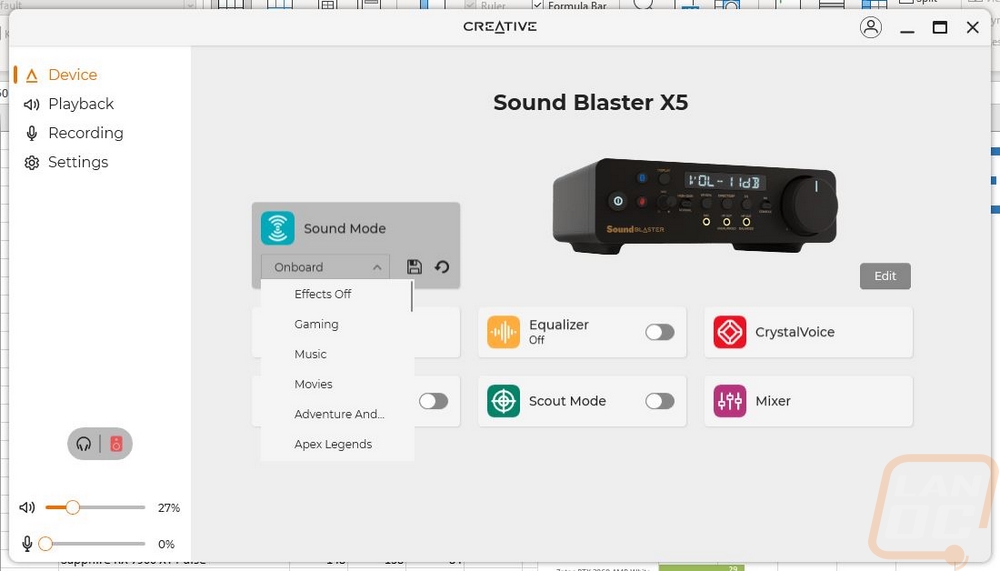
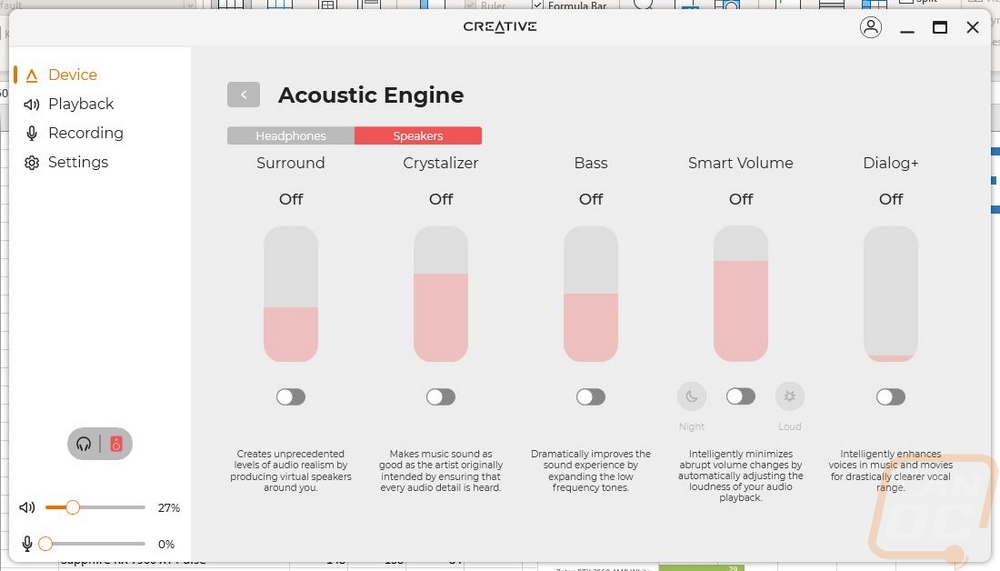
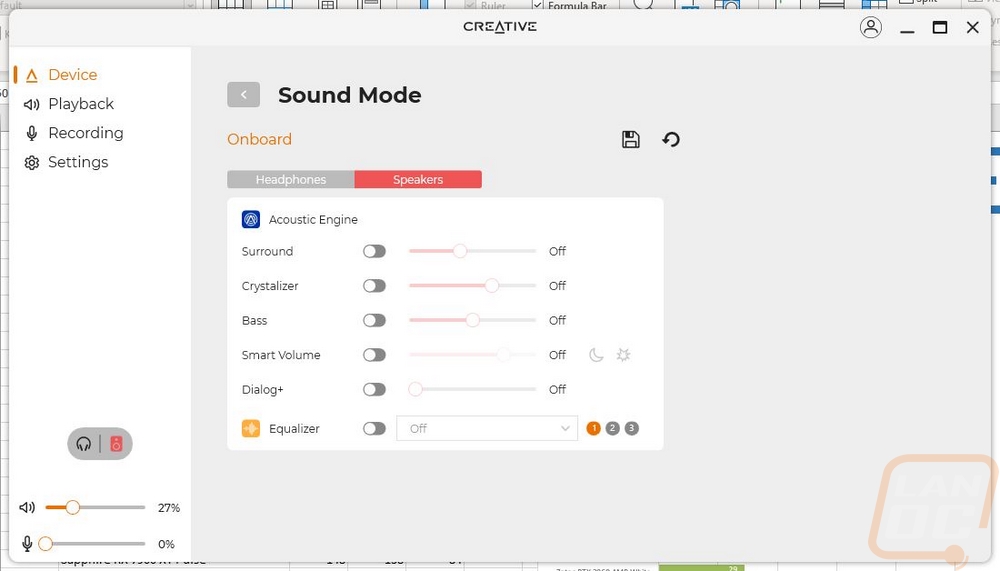
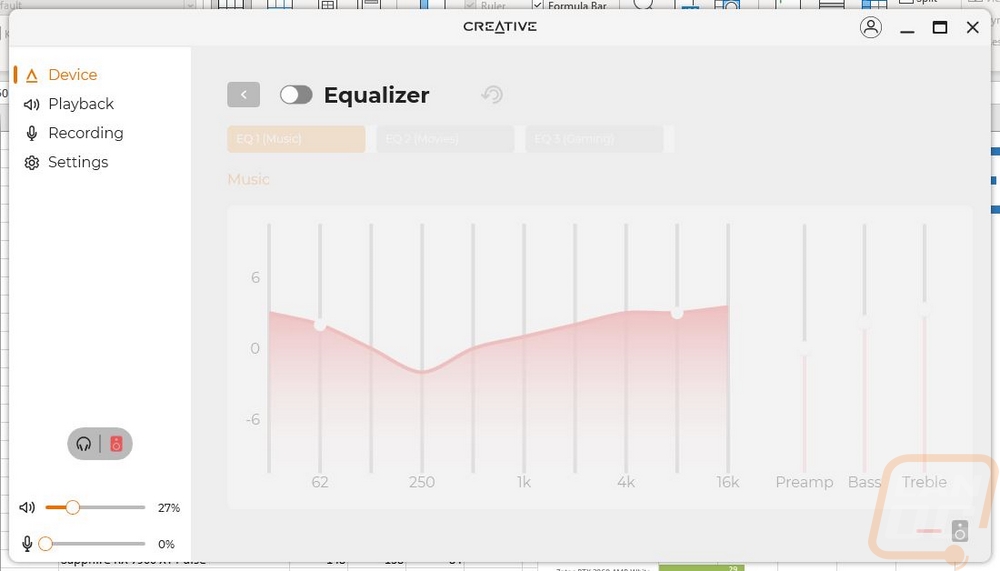
The main menu has a picture of the Sound Blaster X5 on it as well as quick volume settings on the left for output and microphone as well as icons you can switch between headphones and lineout/speakers. Below the X5 picture, there are small app-like options that you can move around using the edit button. These give you quick access to different sound settings like the sound mode which has the standard music, games, and movies, but also has a long list of games or game types to help tune the sound to what you are doing. The acoustic engine opens up another page where you can turn on effects like the surround effect, bass boost, smart volume, etc as well as adjust the strength of the effect. The sound mode at the start also has its own page where you can tune some of those same settings depending on the game or use. There is of course a full equalizer and multiple default eq settings.
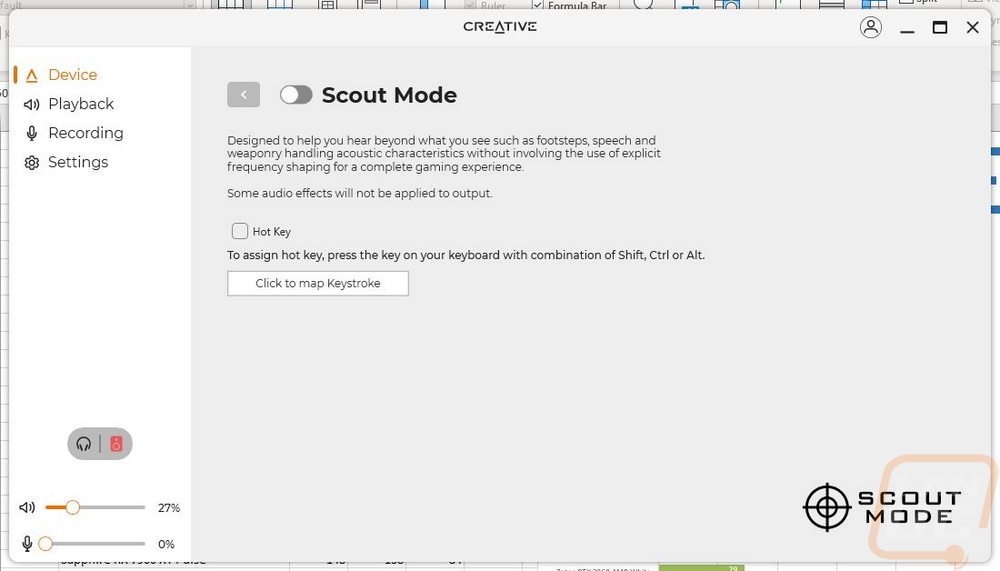
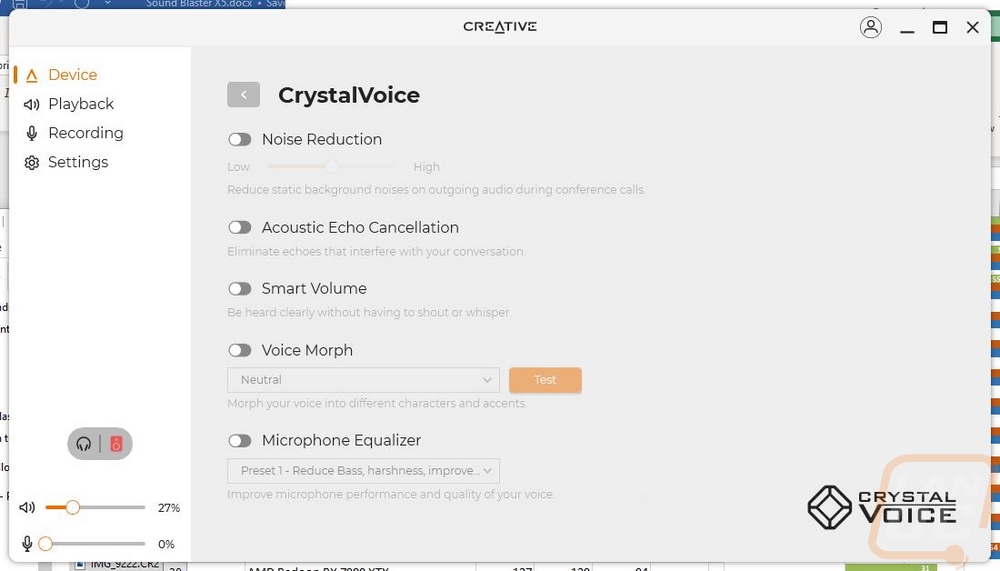
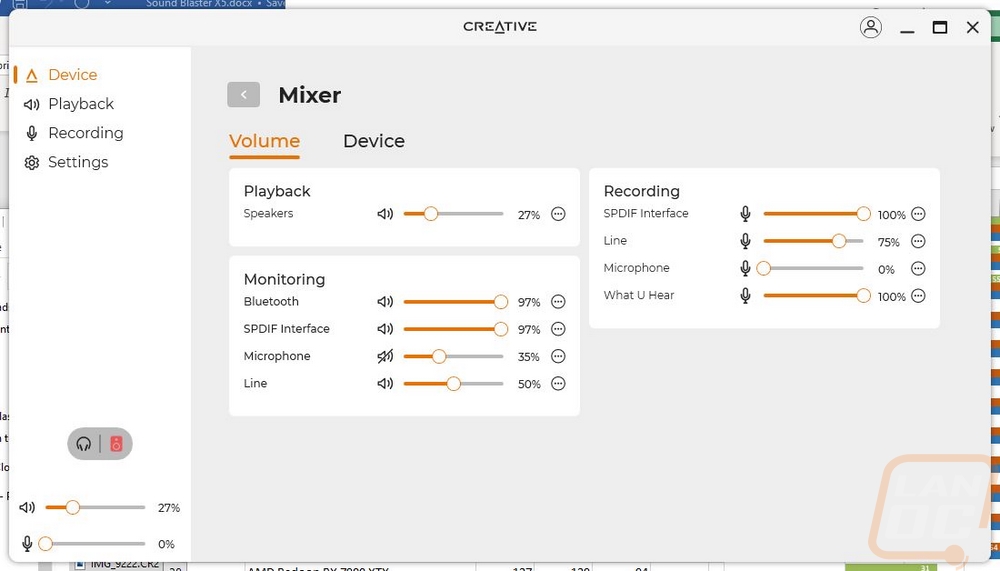
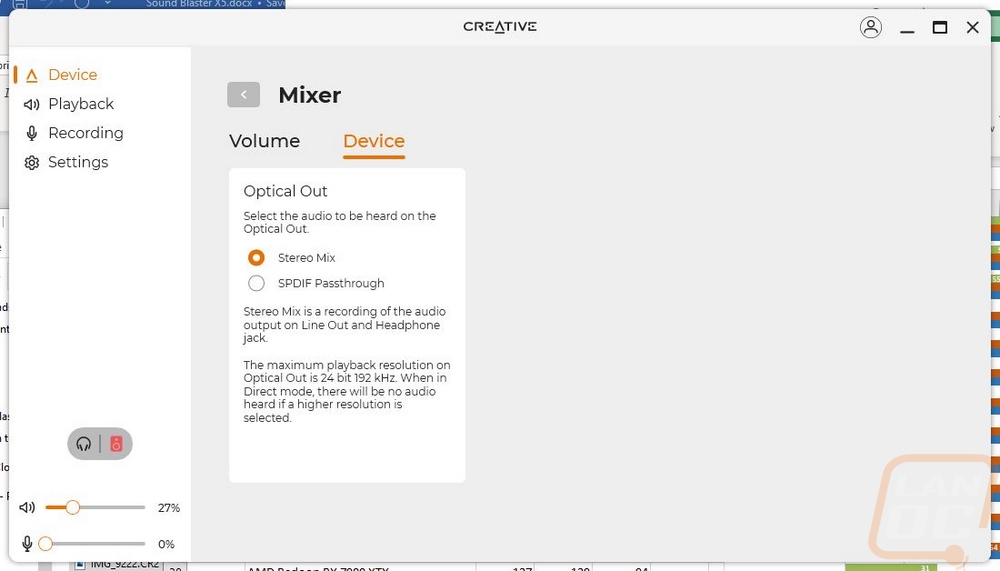
Scout mode is a gaming-specific setting that can increase the tones that footsteps, weapons, and speech use, and you can even set this to only be active with a button press to hear things when needed. CrystalVoice is all microphone settings similar to the acoustic engine settings. You have noise reduction settings, can cut out echoes, and run smart volume that will increase or decrease gain to keep you heard. There is even an equalizer for microphone inputs but the most interesting option here has to be the voice morph which can change your microphone input to sound like a girl, kid, deep, old, and many more. Then the mixer page is where you can go in and tune the volume levels for all of the different inputs and outputs. You can also turn on SPDIF passthrough to get the default audio output to your amp or run a stereo mix which is a recording of the lineout and headphone jacks.
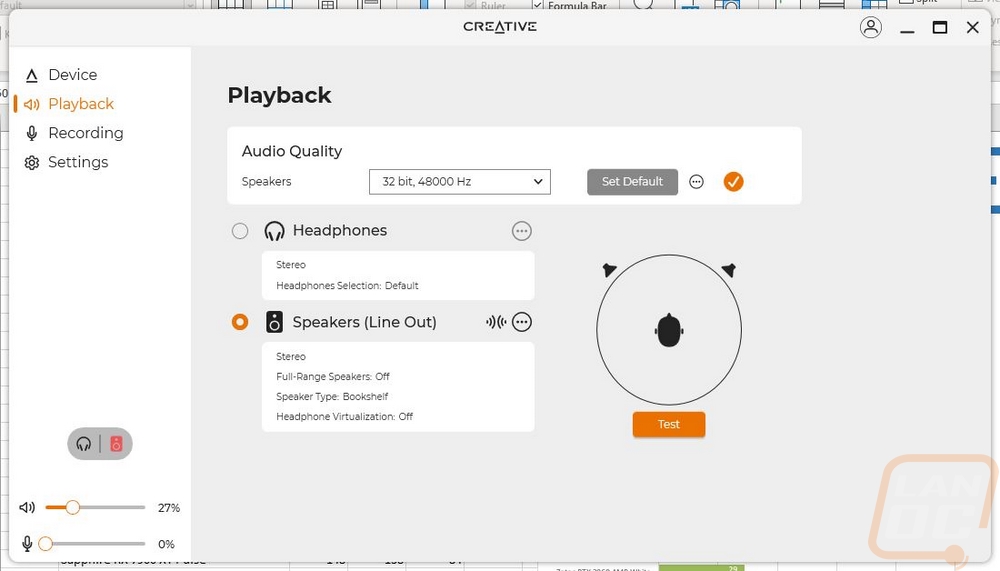
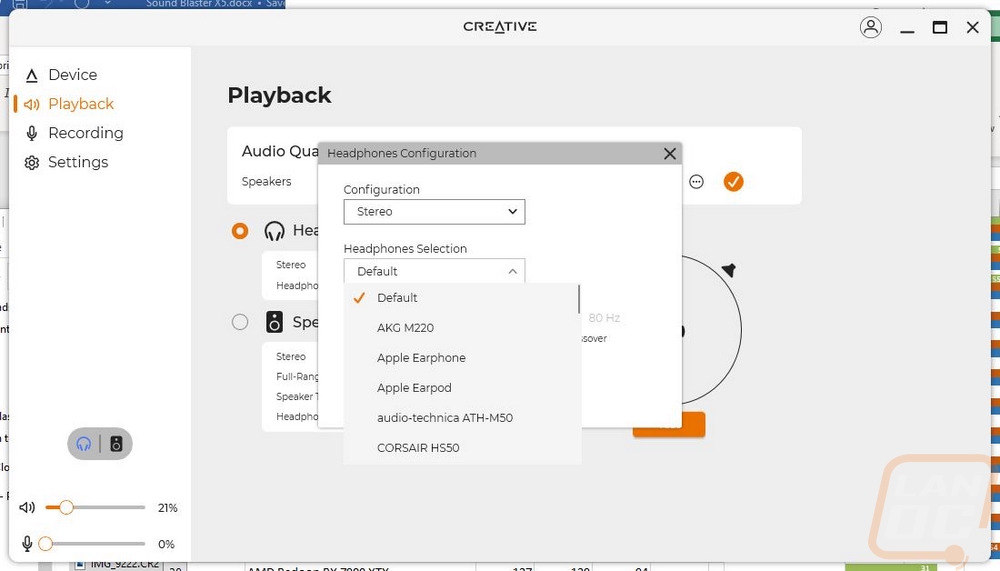
The playback tab covers all auto out settings. Up to you have the speakers which also has a drop-down where you can set the bit rate and frequency range. Next to that, you can force windows to set the device as default and with the three dots you can do that individually for communication devices. Below that you can pick from headphones and speaker outputs. Clicking the three dots on the headphones setting opens up a smaller menu where you can go through a long list of headphones to tune things to your specific headphones, sadly they didn’t have the Fidelio X3s that I will be testing with but they did have the X2HR. The speakers option also has a side menu, which lets you pick if you have full-range front speakers, copy the headphone virtualization settings to the line out, and you also have a small list of speaker types for tuning as well. There aren’t any models or brands like for the headphones, you just can pick desktop, bookshelf, tower, or custom.
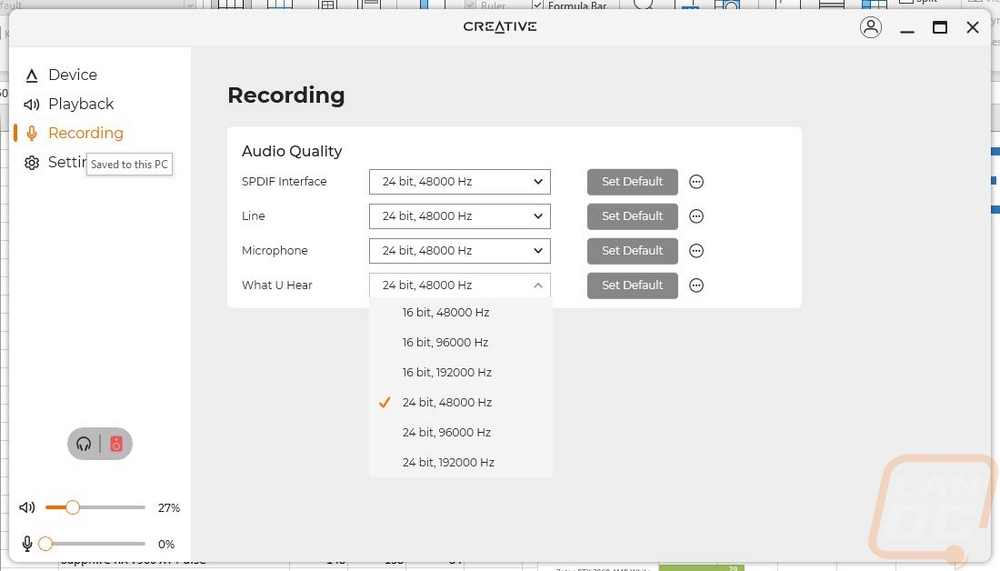
The recording page is similar to the playback page only with a focus on the inputs and microphone settings. You have options for the SPDIF, Line in, and Microphone jacks as well as one for what you hear which is the playback loop channel. Each has a drop-down menu where you can pick the bit rate. Bluetooth will also show up here once set up. You can use the set default button to force windows to set it as the default and the three dots next to that will also let you individually set devices depending on if it is communication or not just like on the playback tab.
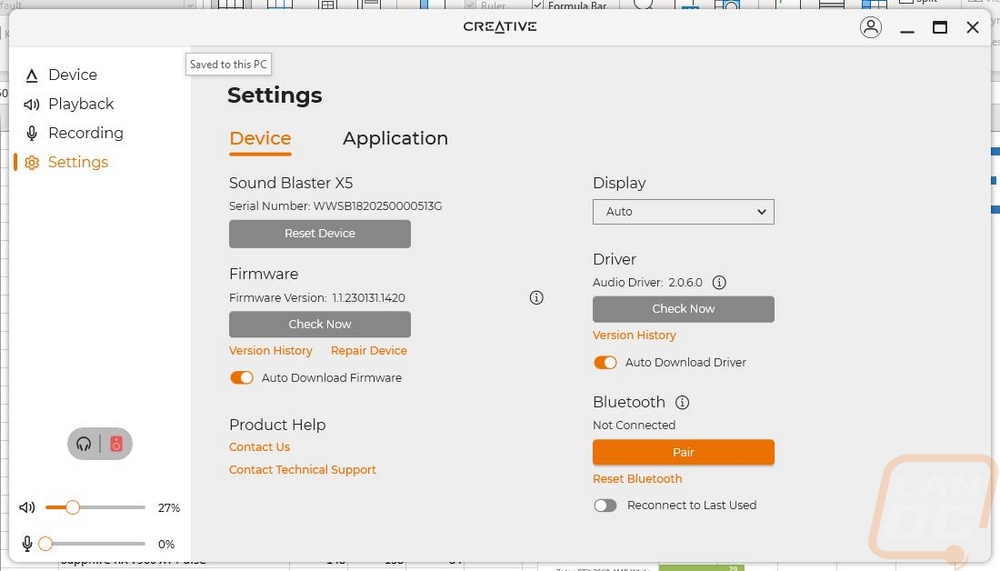
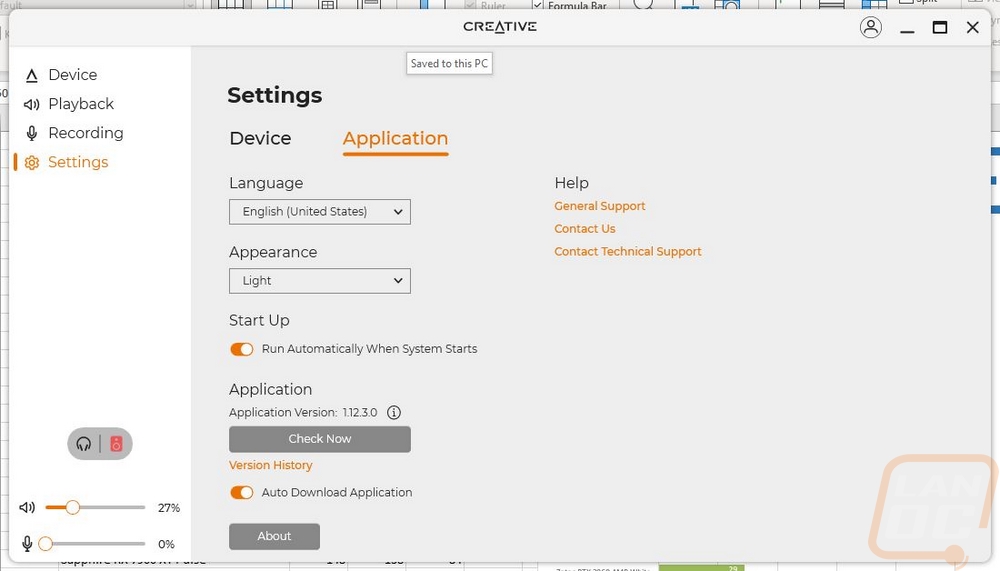
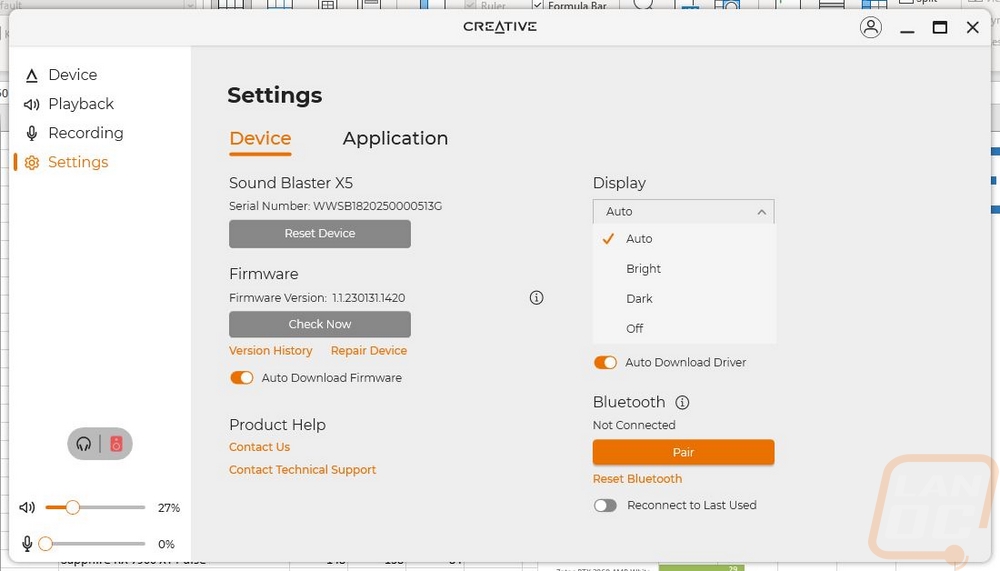
The settings menu is exactly what the name implies. Creative has this split up between the device itself and the application settings. For the device page, you can reset the X5 and check the firmware. There is also an option to repair the firmware as well. The main settings available are for the display which lets you pick from auto, bright, dark, and off and you can do these using the button the X5 as well. You can also pair Bluetooth devices here and remove devices if needed. The application portion is where you can set the language and pick from light and dark modes. You also have the option to pick if you want the software to boot with windows at the start and check for app updates.
When I first set the Sound Blaster X5 up with the Creative App it prompted me to update the firmware and while that is normally not a big deal there were a few things that stood out. The first one that surprised me which was a nice touch is that when updating the screen does show the status of the update. The other thing to note and I’m not completely sure what to make of it was that our Sound Blaster X7 was also hooked up and when the firmware update started it not only took the X5 offline but the X7 went offline as well indicating that its firmware was updated as well. Given how close the features of the X5 are short of having the amp to power speakers it makes me think that they may share a lot of the same hardware. With how great the X7 has been over the years, I wouldn’t consider this a bad thing. But it would be great if the new Creative App would add support for the X7 along the way because the old software is dated.
Once everything was set up I hooked the X5 up with two different outputs for testing. Obviously, I had my headphones, I went with the Philips Fidelio X3 that I reviewed a few years ago. Then like the manual shows, I did also hook the Sound Blaster X7 which I use as a DAC and to power my speakers up as well. For that, I used the optical connection but RCA was an option as well. The Sound Blaster X5 can output to anything with an RCA, TOSLINK, or a 3.5 mm jack with that last one using the RCA to 3.5 mm adapter that comes with the X5. I also have it hooked up using the Type-C connection to my PC as the audio source but you have flexibility there as well including consoles. You do need to also set up the X7 to use its input. But things do and will get weird as the volume controls for the X5 will change the volume in the X7 software and the X5 at the same time, a standard amplifier of some sort would work better.
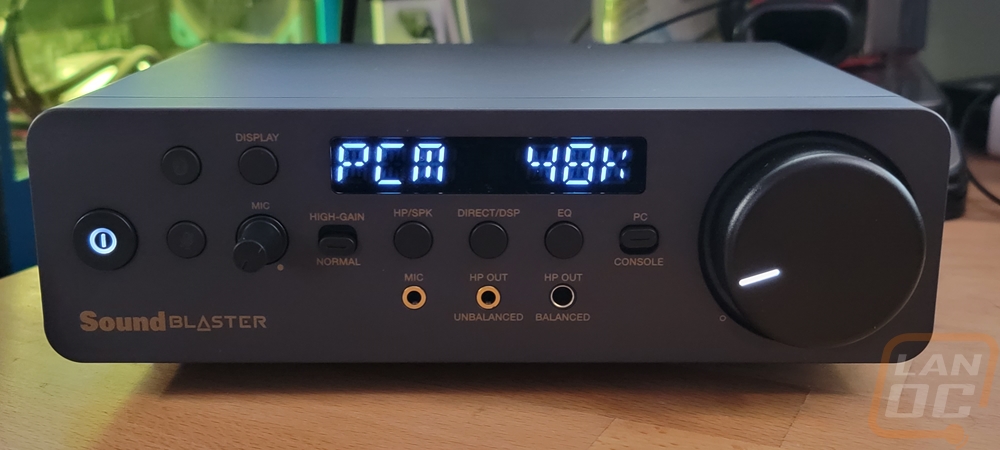
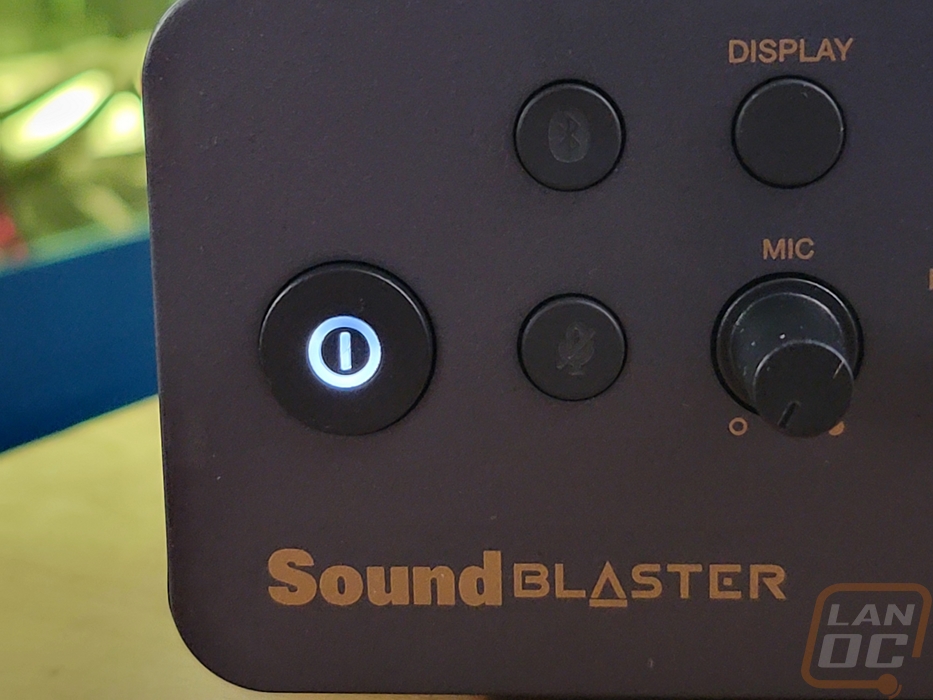
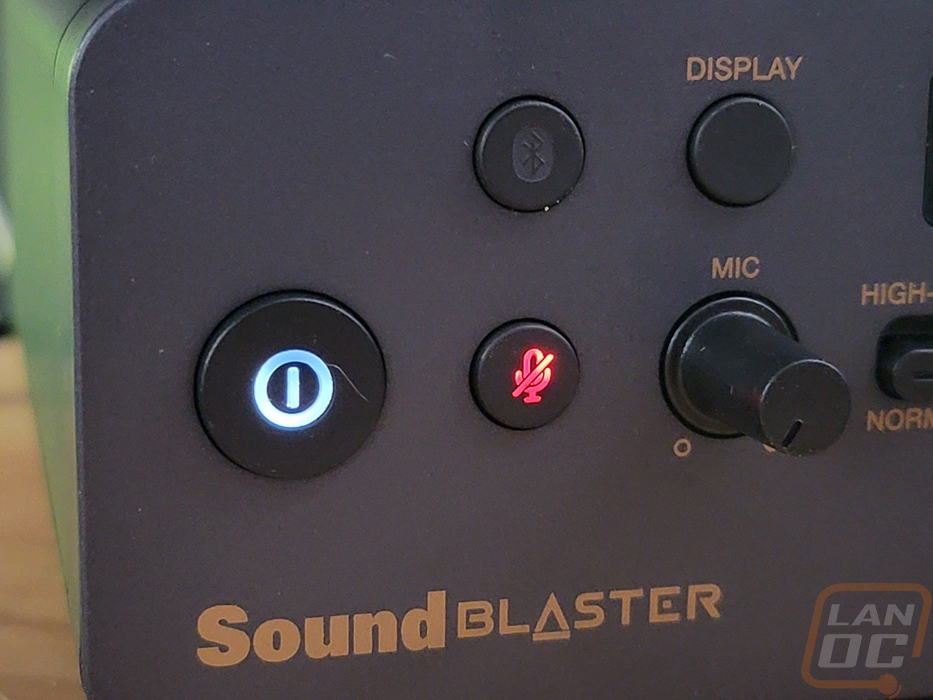
Creative did a good job of getting all of the controls you might need right on the front of the X5 and important functions like the volume knob, the power button, and the microphone mute button all back backlighting as well. But I did find that other than the volume which has its backlit on all of the time, if you have the X5 powered off you can’t see the power button because it is only lit up when it is turned on. The same goes for the microphone mute which lights up red when muted but without that, you can't see it. In fact, none of the legends are easy to see. The gold looks great when in the light but I can’t be the only person who would tuck the Sound Blaster X5 up under a monitor where it gets less light but isn’t in the way. A few changes here would go a long way.
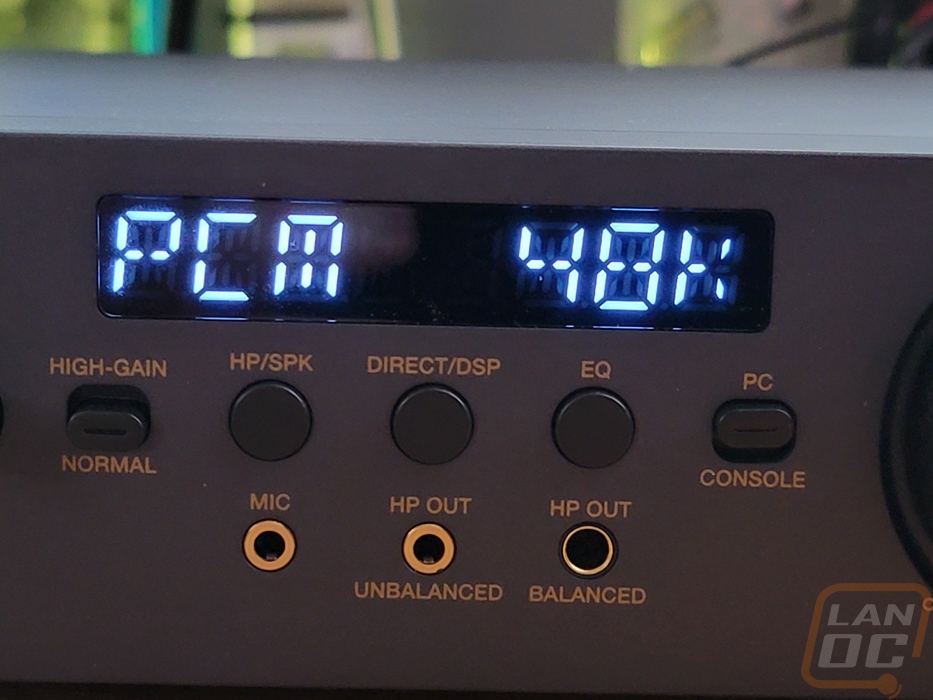
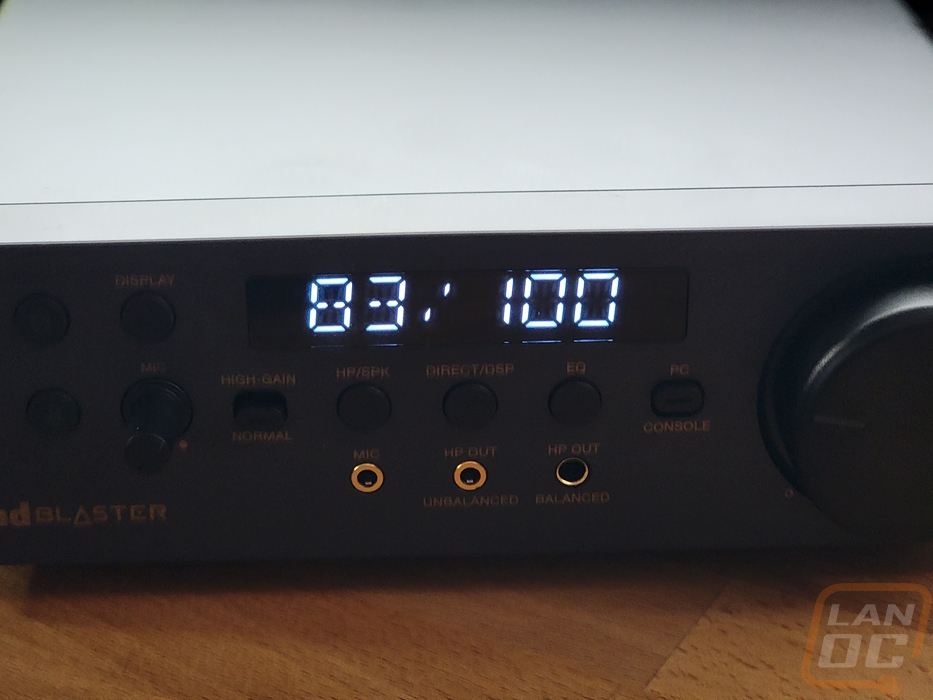
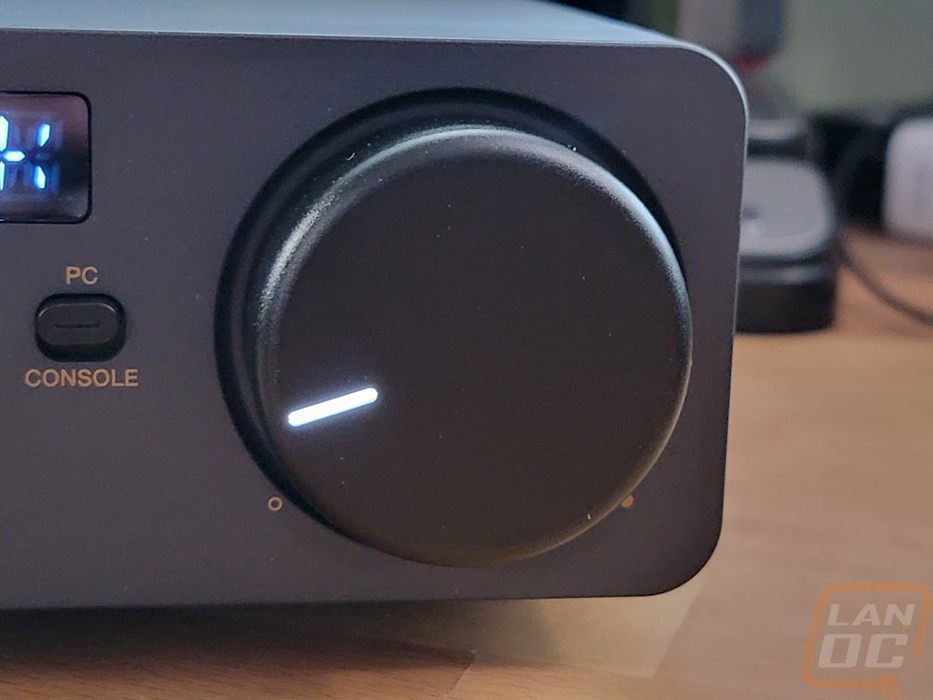
The large volume knob though is great and with it having a starting point and a stopping point it gives more feedback than the X7 did with its infinite knob. Something to note, if you change the volume in the app or with windows it will adjust the X5’s volume but the knob doesn’t change so you do sometimes need to reset it by going back to zero and then back up. When you adjust the volume the display will show the dB reading which at full volume goes to zero and at the lowest setting sits at -90dB. Having the readout is great, but for the average person though it’s a little confusing, especially when your windows volume and even the Creative app both show the volume as 0-100%.

One issue that I ran into with my specific setup that was completely avoidable if you output your speakers through the RCA rather than optical is how the mixer handles things. In the settings on the app you have the option for the optical out to use the stereo mix or do SPDIF passthrough. Doing passthrough means you have the limit the optical out to 24-bit and 192 kHz, but when you use the stereo mix it mixes the line out and headphones. The reason this is important to know is to avoid what I did, when listing to music on your headphones with stereo mix and the line out being optical your speakers will still get some audio. So I was testing things on the headphones with it cranked up only to realize my speakers and sub were also playing the music. Thankfully it didn’t wake my wife! Going with RCA or setting the passthrough up avoids this issue
Bluetooth is also another connection option that the X5 provides and that did work. Holding the Bluetooth button puts it into pairing mode where you can see and connect to the X5 using your phone. Given the higher-end focus though it is surprising that the X5 only uses the SBC Bluetooth codec so while Bluetooth 5.0 is supported there is room for improvement there as well, I would love to see LDAC support but even aptX HD would nearly double the bit rate. Once paired, you do have to click connect on your phone to reconnect to the X5. It doesn’t auto-connect as some devices will.

When it comes to hooking up to a PC or console, the Sound Blaster X5 can connect through the Type-C connection on the back. The specs interestingly don’t list what connection speed this is or needs. This is also where the X5 gets its power so to check that I hooked it up under power and saw 2-3 watts of power draw. The DAC uses two Cirrus Logic CS43198 high-resolution DACs, one for each channel which is 32-bit with up to 384 kHz playback and has a dynamic range of 130 dB. The X5’s other main feature is the headphone amp which has two outputs on the front, one for standard unbalanced devices, and then the larger 4.4 mm connection is for balanced headphones. The X5 supports regular low-impedance headphones as well as high-impedance headphones and it outputs more mW than most setups but there are still going to be some planar magnetic drivers which would prefer a little more. For my testing, the Fidelio X3s are neither high impedance nor have planar magnetic drivers so it's no surprise that the X5 had no trouble pushing them and the performance was great. Performance was very similar to the Sound Blaster X7 which is still amazing and sought after with the exception that it doesn’t have the full amp for speakers or outputs for things like a powered sub. As a whole its base tune is relatively flat which is what I prefer, I like being able to add in my own EQ rather than having it tweaked from the start, and with the Creative App you have full EQ control for both the headphone out and the microphone in as well which is cool.