Board Layout and Pictures
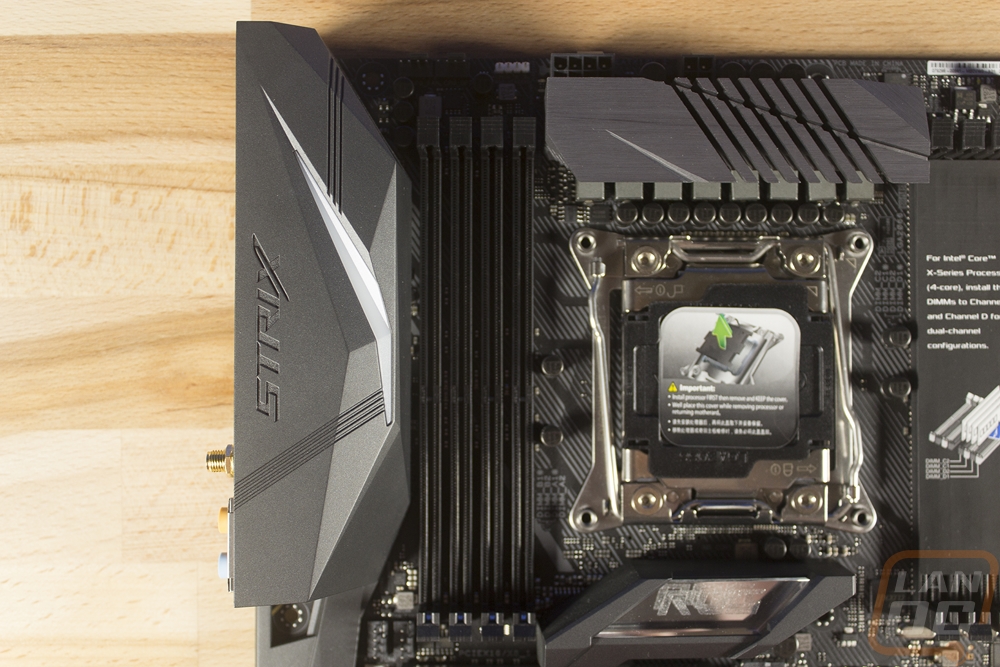
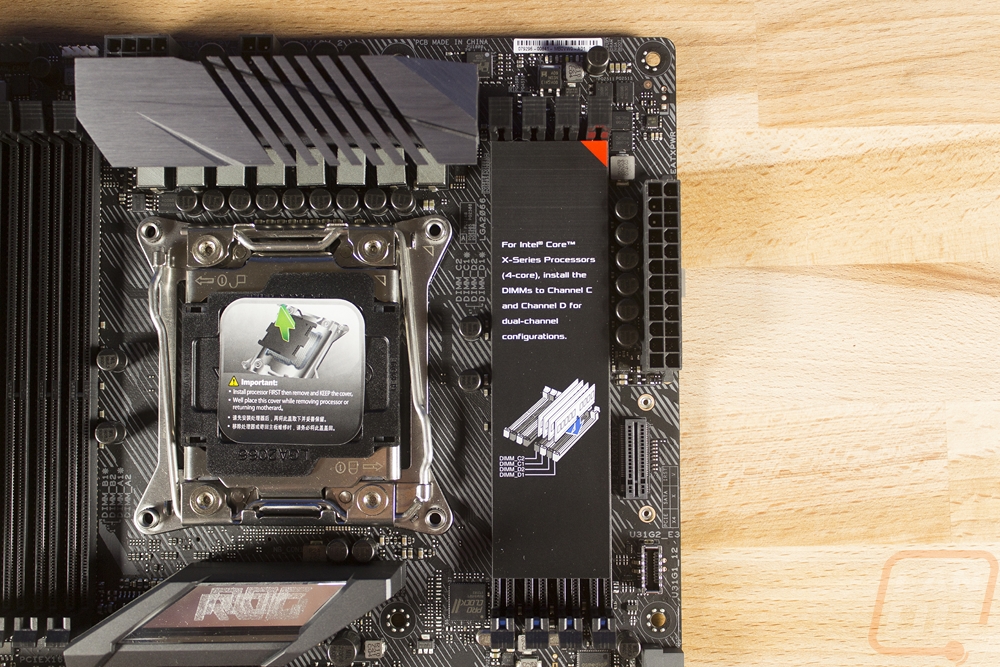
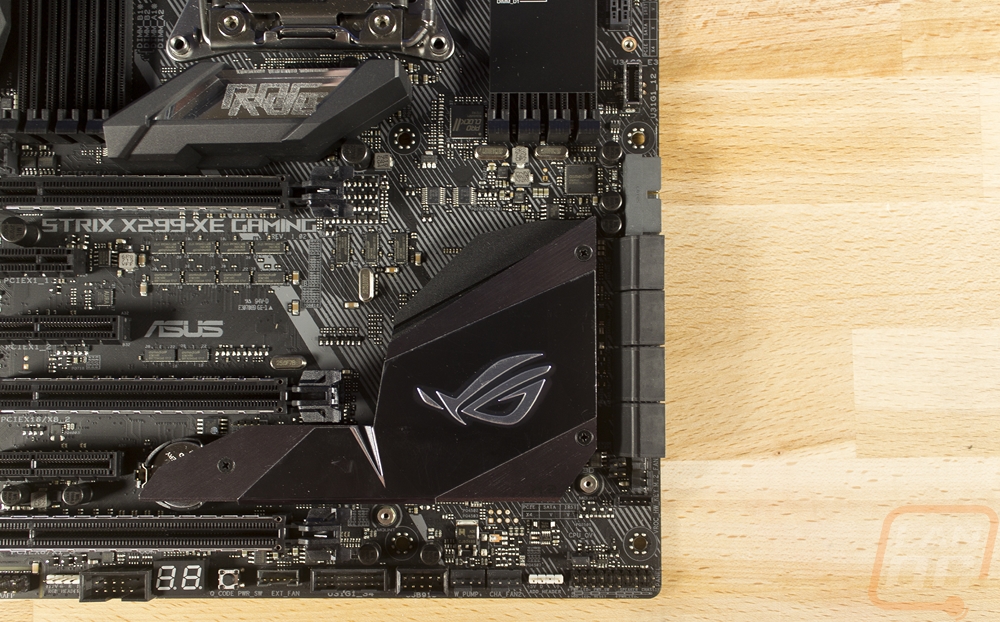
So Asus has a very specific look going with all of their Strix boards no matter if they are AMD or Intel low or high end. The X299-XE Gaming is a high-end board but you get the same black and dark gray look. The good side to this is all of their boards look awesome and are color neutral. The downside, in this case, is that the X299-XE Gaming doesn’t really stand out nest next to cheaper boards. There are a few things that are different though, namely the crystal looking ROG logo down below the CPU that is backlit. Being an X299 board it also has two sets of quad memory DIMMs. One comes covered as a reminder that some of the lower end CPUs don’t support quad channel memory.
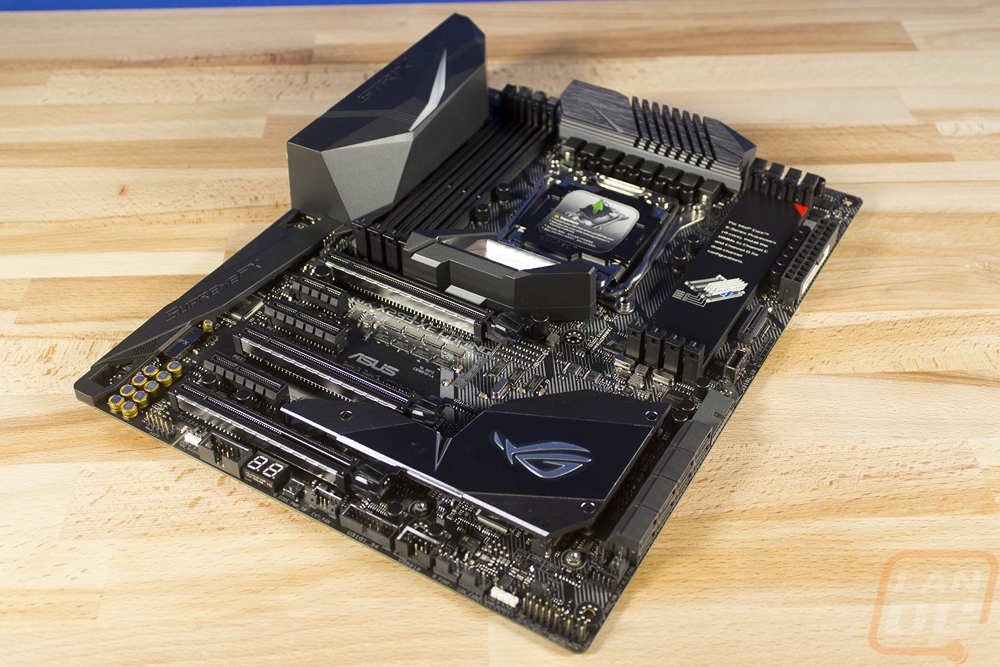
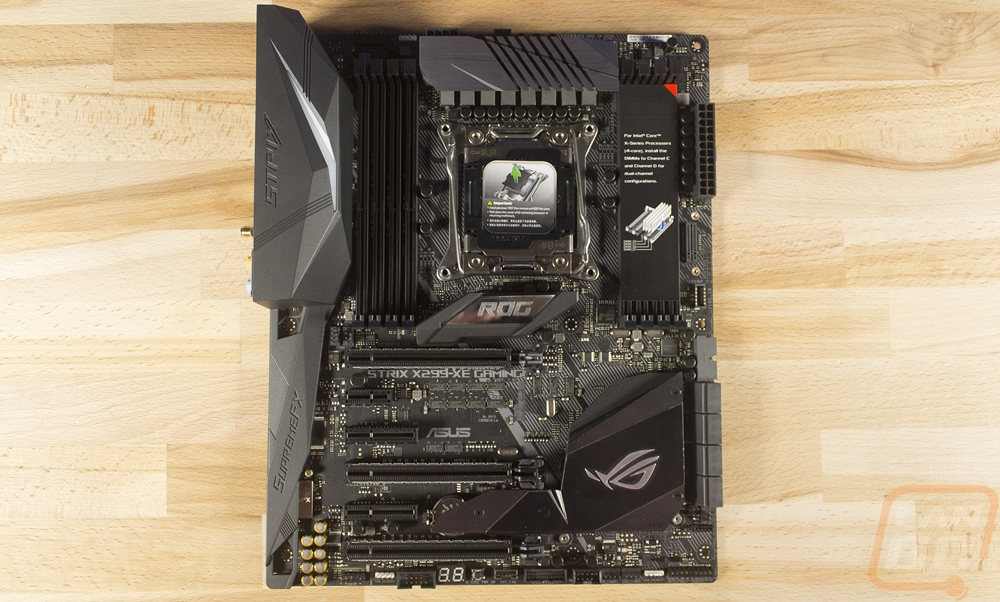
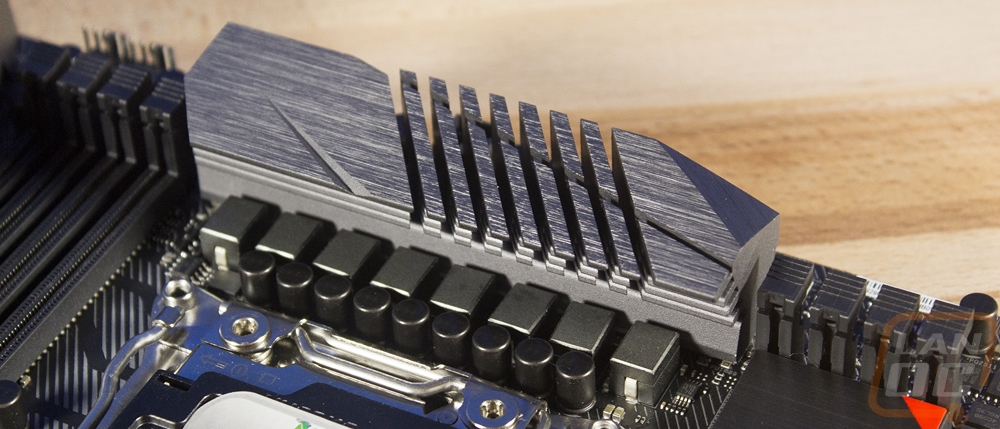
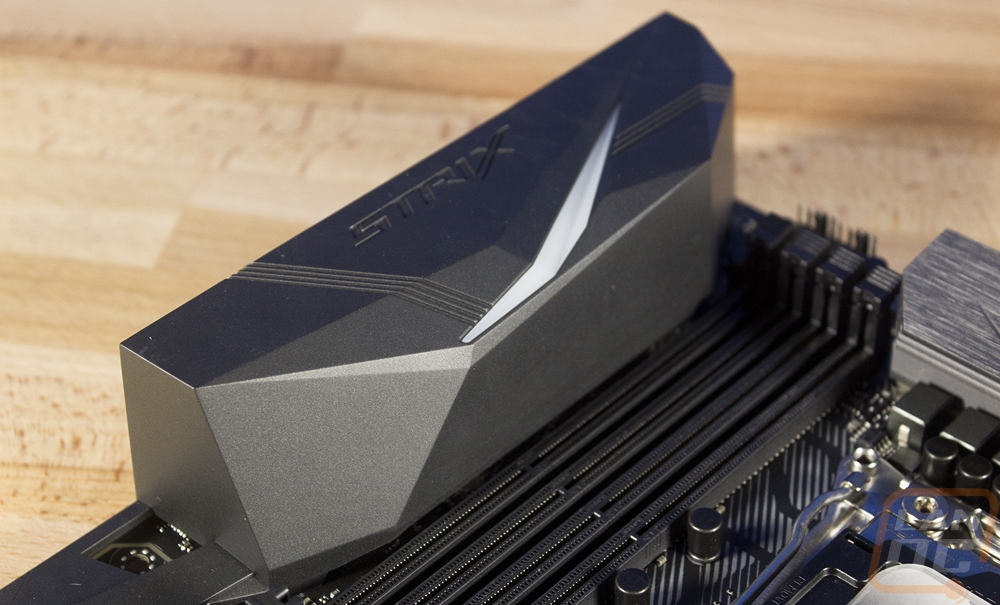
Recently cooling has been less important and aesthetics have become more important. But after the X299 launch, we found out that with overclocking X299 needed more cooling on a lot of boards. The X299-XE Gaming doesn’t have the same level of cooling that the X299 Apex that I took a look at has, but Asus also didn’t completely skimp as well. Up above the CPU socket, you have a single inch thick aluminum heatsink for the VRM. If you plan on heavily overclocking a high-end CPU this might not be enough but for most CPUs and with the level of overclocking the average user might do this is more than enough.
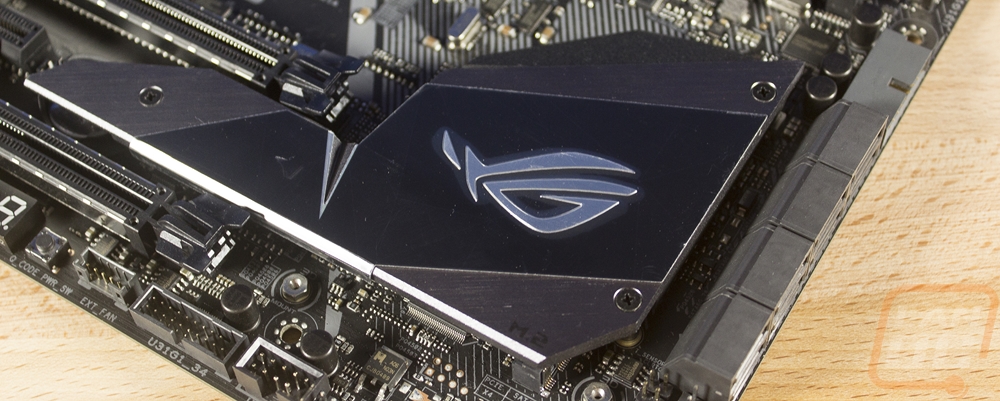
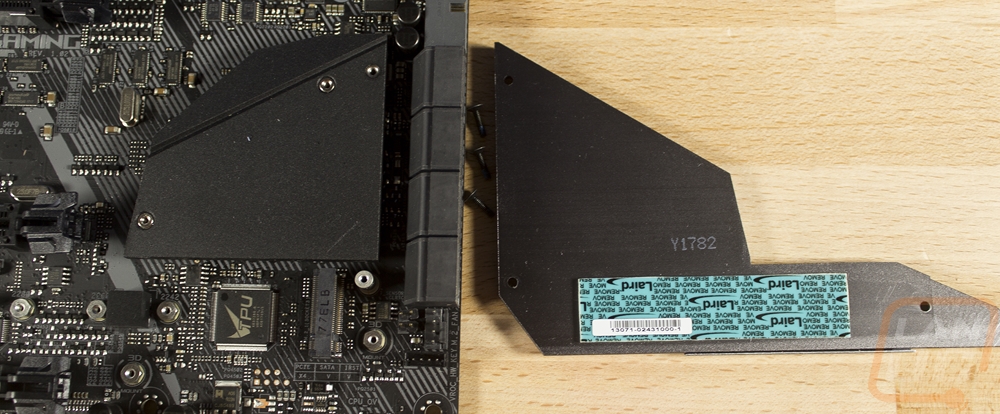
Then down in the bottom right corner of the board is a dual function heatsink. This is where the chipset is. The heatsink is split into two parts and can be pulled apart. The top half has all of the aesthetics including the dual gray finish of the Strix look and a ROG logo on it. This is the M.2 cooler. Then up under that when you pull the top half off you can find another piece that covers the chipset. Given the split design, I’m not really sure how much cooling this really does, but the chipset doesn’t need much. For the M.2 drive, they at least have thermal tape to help transfer the heat.
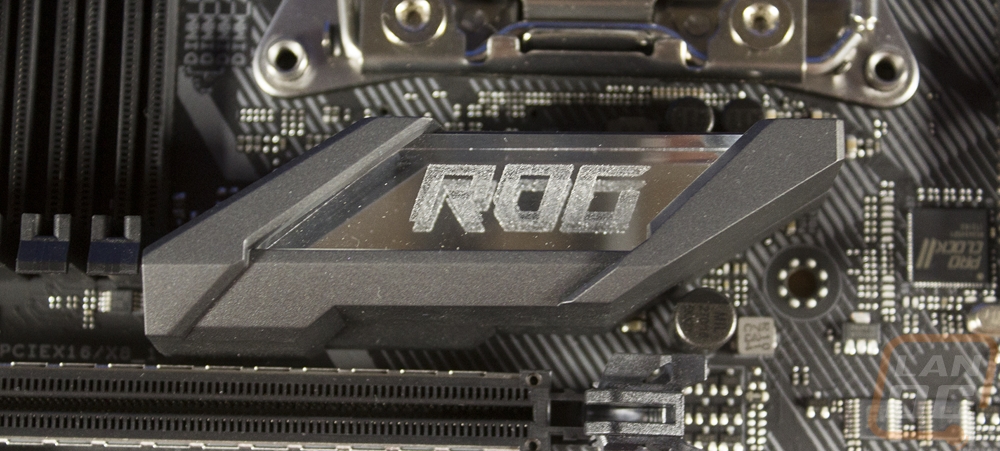
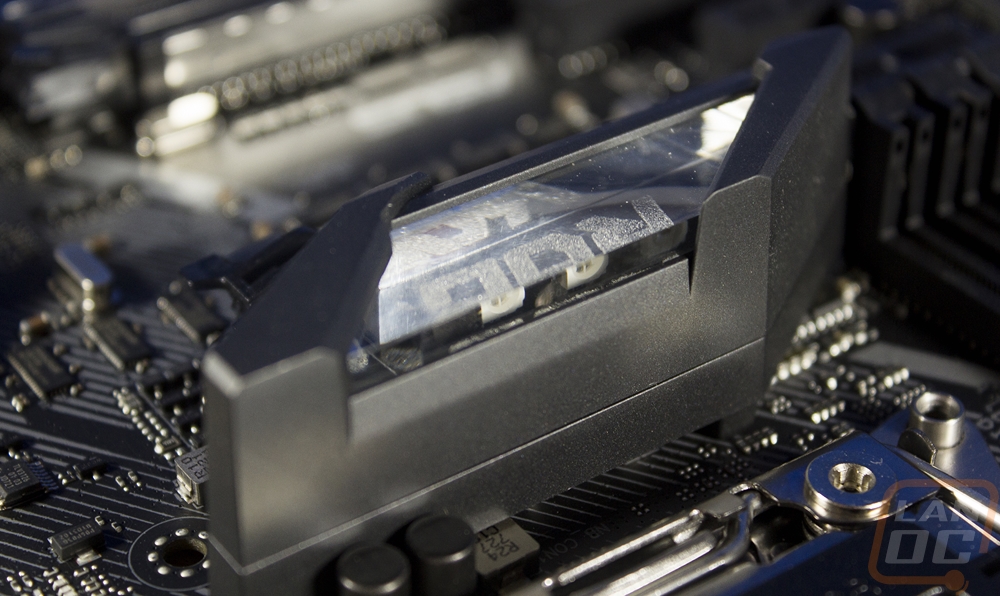
Up under the CPU socket, Asus also slipped in another “heatsink” but it is more aesthetic than anything. This is the RGB backed ROG branding inside of a crystal block. I’m sure most of you have seen laser etched things before, when you put lighting under them it is a cool effect so this is something unique from Asus.
Being a higher end board I would consider it a requirement, but I was glad to see that Asus didn’t forget to include a rear I/O cover. This keeps the clean look by covering up the shiny I/O parts. The photo below though shows just how tight up against the left DIMMs the cover is though.
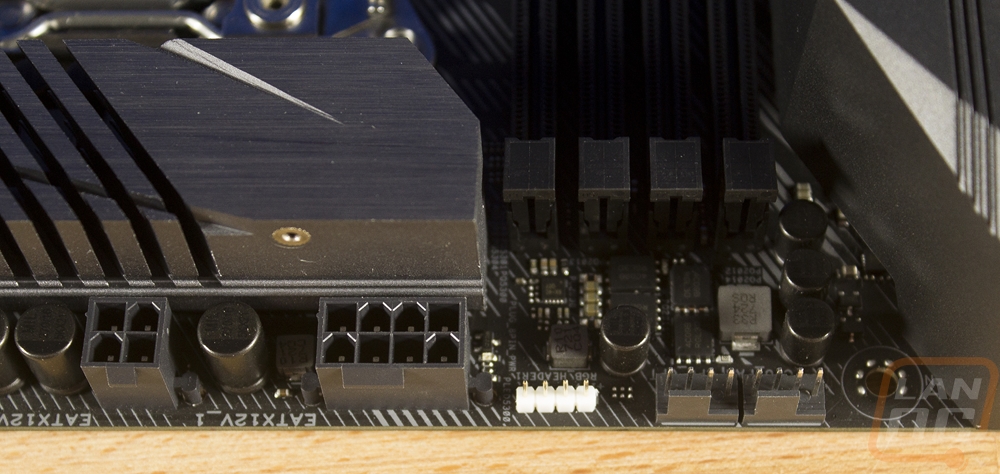
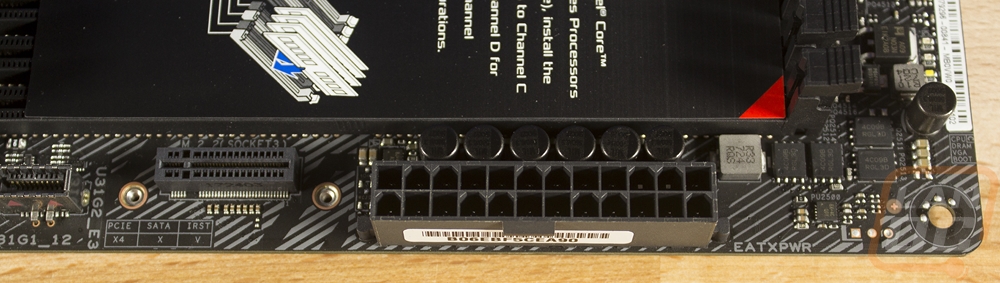
So starting up in the top left corner of the board we have already touched on a few of the biggest features in this area. You have the I/O shield that also runs down the left side of the board and the two heatsinks at the top and bottom of the CPU socket. Tucked up above the heatsink are two CPU power connections, you get an 8 pin and a 4 pin. Then next to that is a single RGB lighting header and two four pin PWM fan headers for the CPU. Also in this area, just under the left ram DIMMs are two more PWM headers as well.
So the top right corner is a little crowded as well with the second set of four RAM DIMMs but Asus did fit a few things here. You have the 24-pin motherboard power of course. Then below that is a vertical M.2 slot. Asus really likes this vertical design that uses an included bracket because it offers the best possible cooling for the drives and it takes up a lot less room on the motherboard. Of course, it also sticks up in your case so it could get in the way of water cooling. There is also a new style USB 3.1 Gen 2 header. Not many cases support this yet but with Type-C and Gen 2 connections becoming more popular it should improve this year.
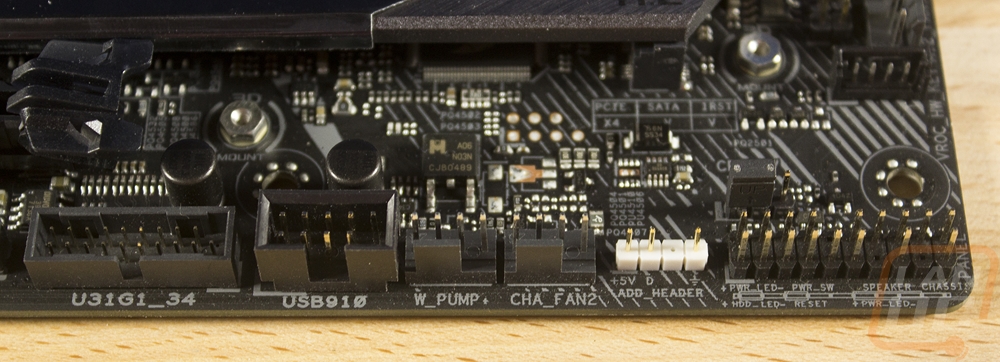
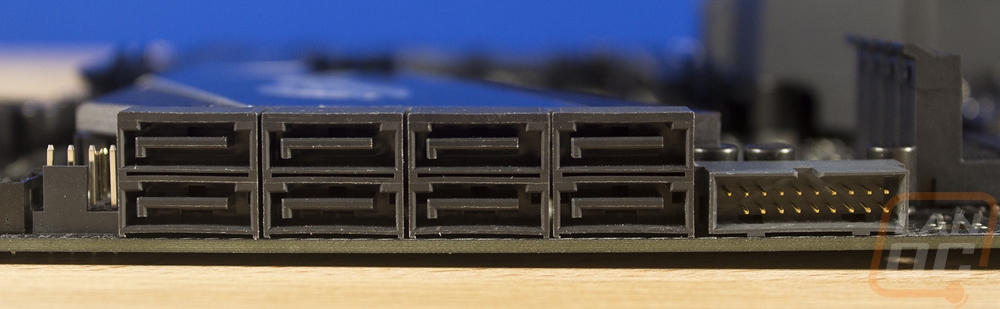
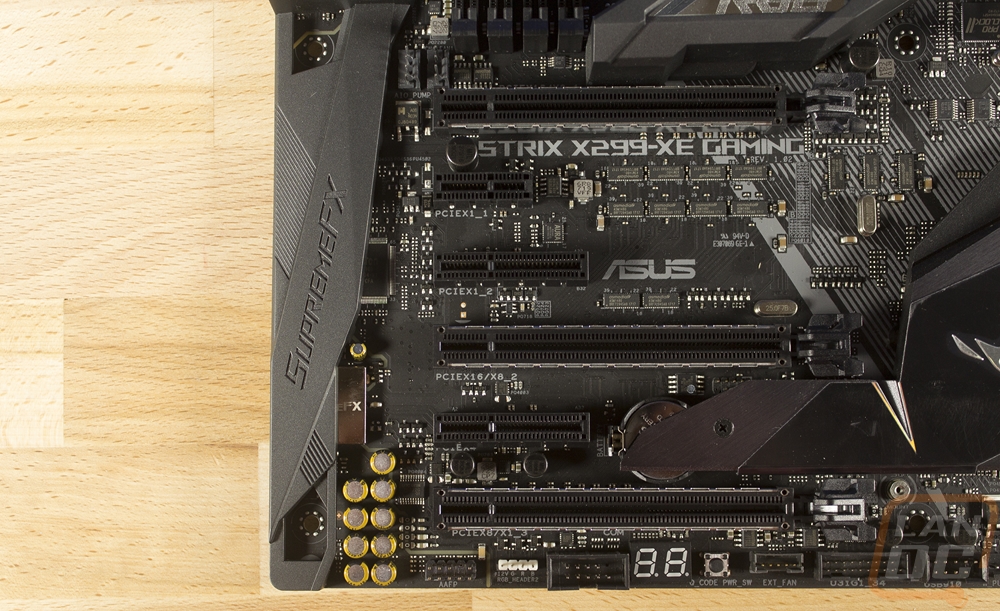
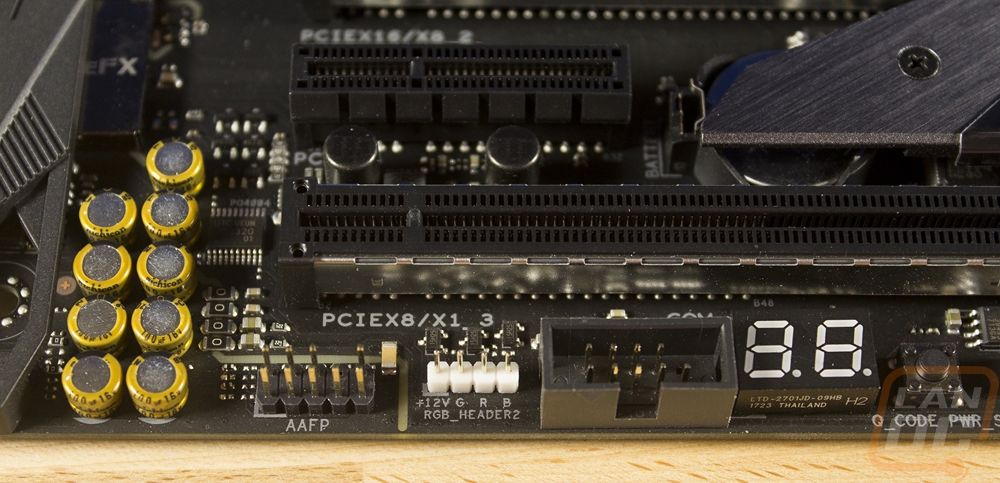
Down in the bottom right portion of the Strix X299-XE the chipset heatsink that also doubles as an M.2 heatsink takes up most of the space. On the right edge, you do have two sets of right-angled connections. There are eight SATA connections along with a USB 3.0 header. The USB headers rarely are right-angled light this and it can be good or bad for your wire management depending on your case layout but this is one of two headers so it is nice to have the option. The M.2 that is hidden under the heatsink does support SATA or PCI drives with PCI drives having up to x4 bandwidth for the fastest of drives. Then down on the bottom edge, this is where Asus tucked in most of the other connections. There was a fan header just under the SATA ports as well as two down on the bottom. They are all four pin PWM headers and the pump header is designed for higher amperage as well for better support of water pumps. In the corner the long header has all of the front panel connections, Asus included that nice adapter cable to make plugging everything in easier, but if you do it old school they are also printed below on the PCB. The white header is the addressable RGB header and then over on the left, we have a USB 2.0 and a USB 3.0, both facing up this time.
In the bottom left section, Asus has carried connections on down along the bottom. There is an external fan header along with a power button. Then next to that is an LED debug so you can see where you are in the boot process, diagnose boot issues, and see your CPU temperatures when your PC is up and running. There is the second white regular RGB header and next to that is the front panel audio connection. You can see that Asus has tried to split the PCB up a little here to keep audio cleaner and they did go with high-quality caps. They also covered up the audio circuitry with a metal cover to help keep interference down as well. Being an X299 board the Strix X299-XE does, of course, have a lot of PCI lanes, Asus took advantage of this to give you three x16 length slots, two x4 length slots, and one x1 length slot. The shorter slots all run at there normal speeds. For the x16 slots, the top slot is always x16 and the bottom two can run at x16 if you are only using one of the two but when you fill them both they share that x16 to give each x8.
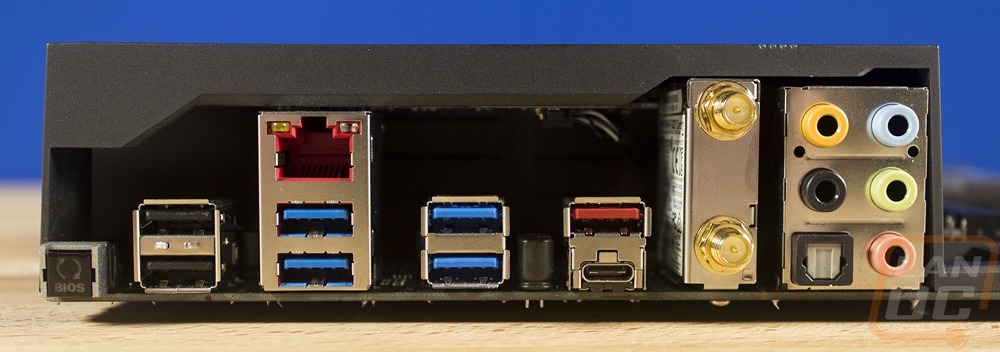
So the rear I/O has that fancy cover on it but at first glance, you would think that a board like this would have filled up all of the available space. What you end up getting is a normal 5 plus optical sound layout on the far right. Then the board does have built-in wireless with an 802.11 a/b/g/n/ac Intel card that also has Bluetooth v4.2. The red NIC is an Intel I219V and being red shows that it has Asus’s Anti-Surge protection built in. I was surprised that there was only one NIC, though I never use the second one when I have it. Then for USB, you get two black USB 2.0 ports on the left for your mouse and keyboard. The four blue ports are all USB 3.1 Gen 1 running on the Intel controller. The red port is a Type-A USB 3.1 Gen 2 port and the Type-C connection below it is also USB 3.1 Gen 2 (the faster standard), both running on an ASMedia controller. Last but not least is the BIOS reset button over on the left, I love that this is included. I feel like just slipping in four more USB 2.0 ports would fill up the extra space and help give more needed connections to power users.
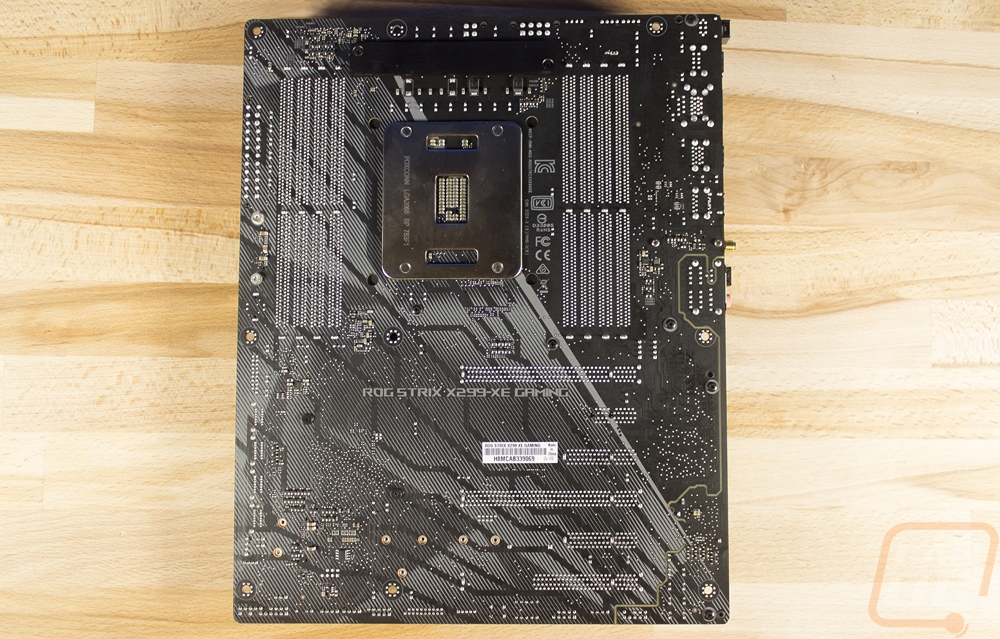
The back of the board gives a much better look at the weird striped layout that Asus printed on to the black PCB. I personally like a nice clean black board and I think the striped look kindof clutters up the board. But I’m sure some will like it. Beyond that, you can see the fat backplate for the LGA-2066 socket. The back also gives us a better look at how the audio chipset is split, some companies fake it and looking at the back is a dead giveaway I’m glad to see Asus didn’t do that.