So the X299 has been an interesting one. Intel introduced high-end CPUs at the last minute, there was a lot of drama at the launch about VROC, cooling issues post-launch, along with strong competition from AMD with the Threadripper launch. A lot of the board manufacturers have been revising and making changes but EVGA has been waiting to get things right before putting their X299 lineup into the wild. While as of writing this I don’t see any for sale in regular retail stores, EVGA did finally send over a board. Today I’m going to check out the X299 Micro, their Micro ATX board. Given the performance X299 is capable of, I’m excited to see if this board could be a good mATX build option to pack a lot of performance in a smaller package. EVGA typically keeps things simple with a blacked out look and little to no lighting for those who just want a clean good performing board. Let’s find out if that is the case again.
Product Name: EVGA X299 Micro
Review Sample provided by: EVGA
Written by: Wes Compton
Pictures by: Wes Compton
Amazon Affiliate Link: HERE
|
Specifications |
|
|
Form Factor |
M-ATX Form Factor |
|
Length |
9.6in - 244mm |
|
Width |
9.6in - 244mm |
|
Chipset |
Intel X299 |
|
SLI |
2-Way |
|
SATA |
6 Native SATA 6.0Gb/s Ports |
|
RAID |
0, 1, 5, 10 |
|
USB |
8 Native USB 3.0 / 4 USB 2.0 |
|
Memory Support |
Up to 4 DIMM Quad-Channel (up to 64GB) DDR4 3600MHz+ (SKX), or 2 DIMM Dual-Channel (up to 32GB) DDR4 4133MHz+ (KBX) |
|
Capacitors |
Solid State |
|
Ethernet |
1x Intel® Gigabit NIC |
|
Audio |
8 Channel High Definition Audio + Optical |
|
Fan Headers |
6 (2 PWM, 4 DC\PWM) |
|
PCB |
8 Layers |
|
PCI-E Slot Arrangement |
2x16, 1x16 |
|
NVMe Support |
Yes (PCI-E) |
|
Features |
EVGA E-LEETX Tuning Support Highly Efficient 12 Phase Digital VRM Onboard CPU Temp Monitor Onboard Power, Reset, and Clear CMOS |
|
Operating System Support |
Windows 10 64bit |
|
Product Warranty |
3 year |
Packaging and Accessories
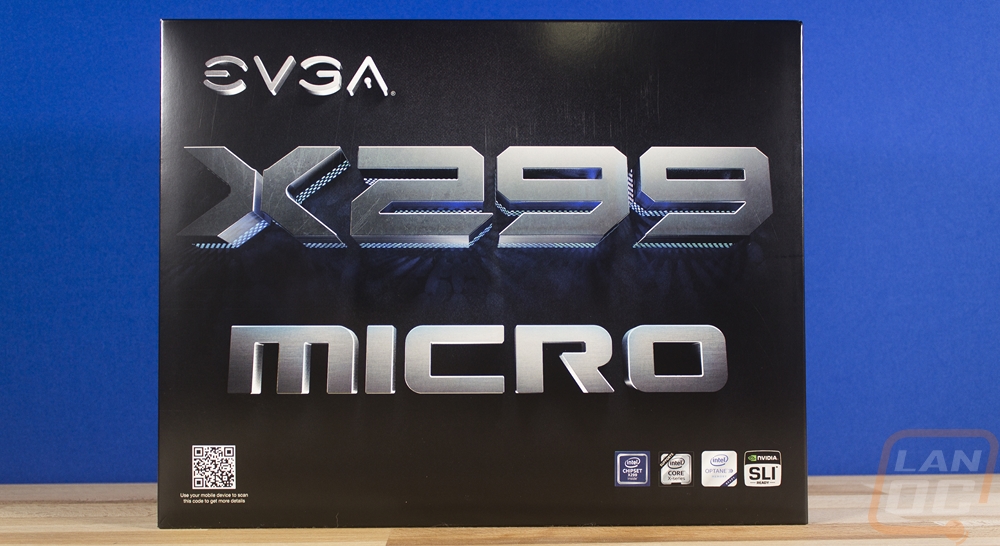
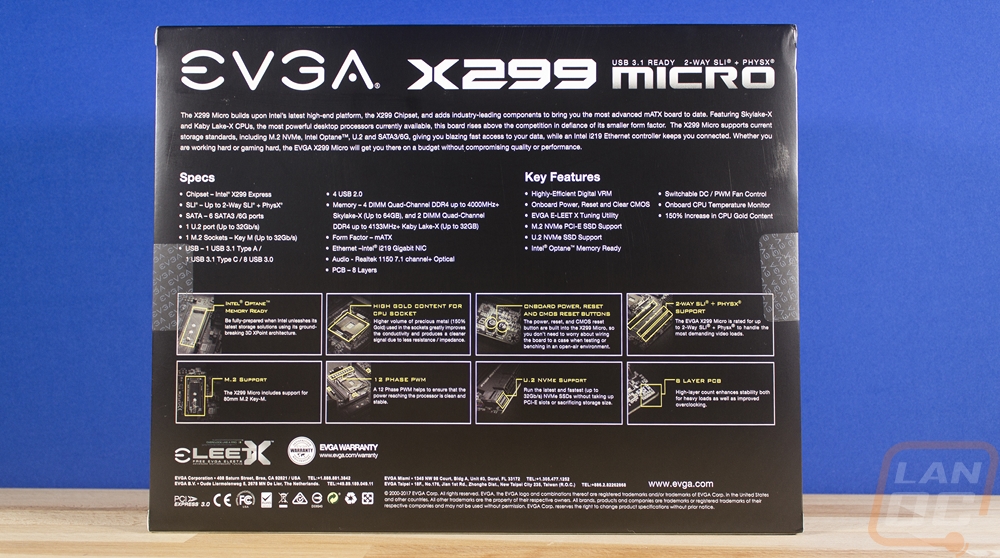
I love that EVGA gets right to the point with their packaging. The front of the box has their logo in the top left corner and then the X299 Micro model name in HUGE letters across the front. It is on a black background and the X299 has a little style added to it but it is as simple as it can get. On the back, they do have a specification listing and a feature list along with a small breakdown of a few of the board's features. They don’t go crazy with marketing fluff or anything else. Really the only thing missing is a photo of the board itself to let people know what it looks like when buying in a retail store.
When you open the box up and pull out the main box that is inside you will find all of the accessories and documentation sitting on top of a tray inside of the box. The board itself is wrapped up in a static protective bag with a thick layer of foam under it for extra protection.
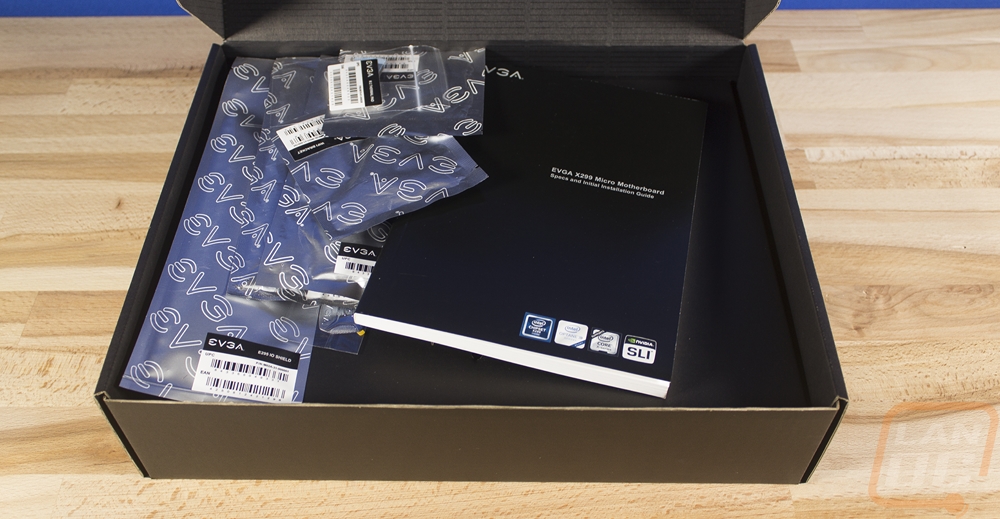
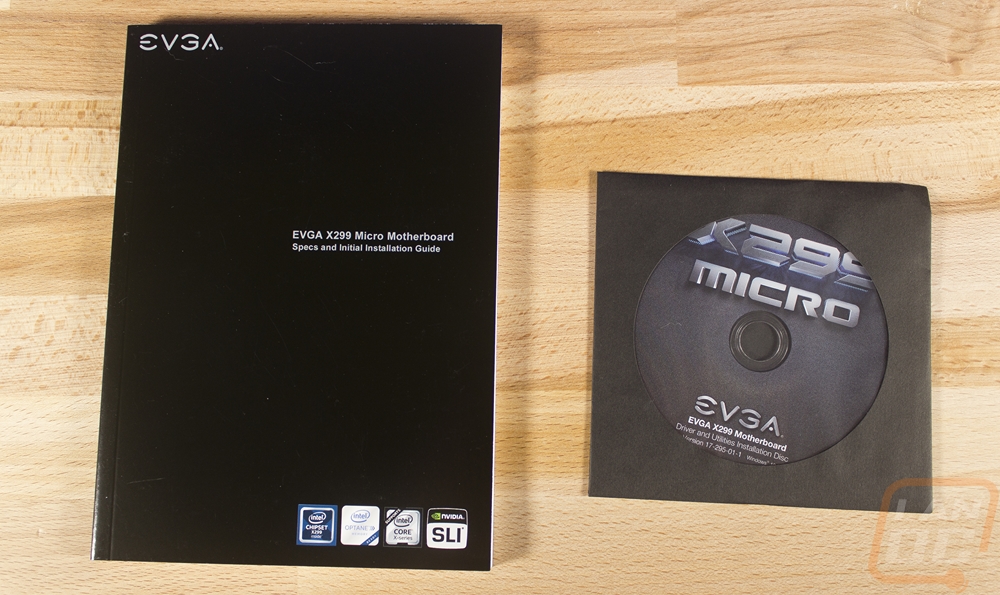
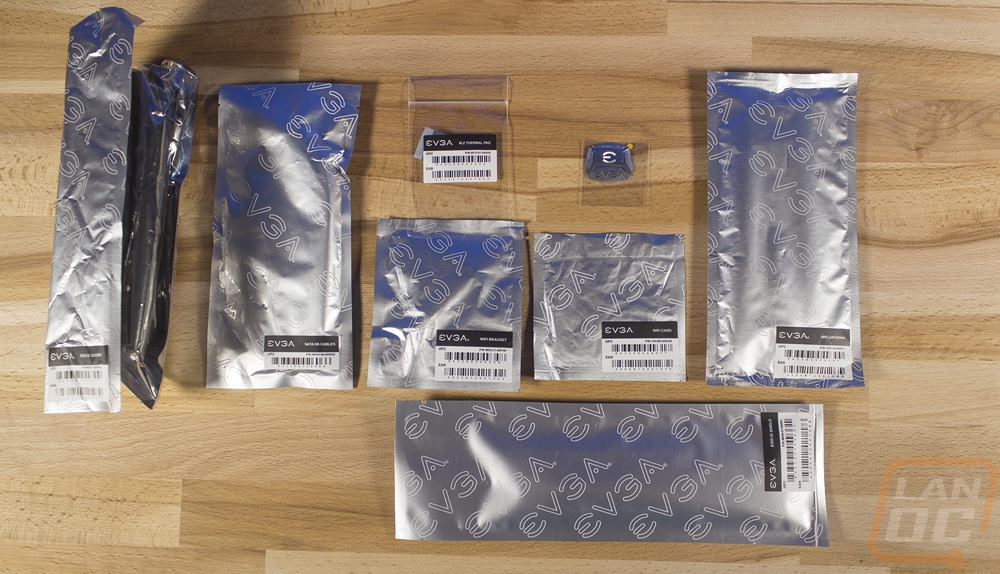
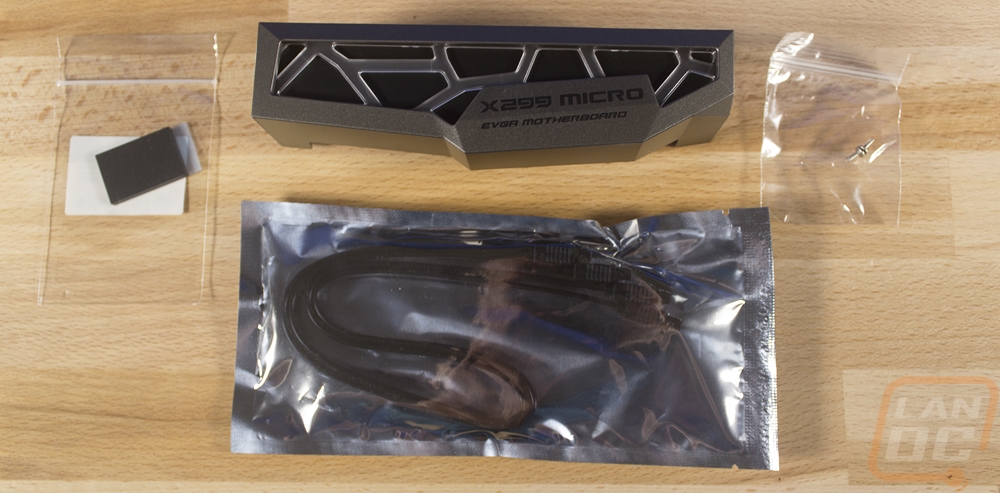
For documentation, you get a thick box that has the board specifications and an initial installation guide. Along with it, they have the driver and software disk. As for the accessories, everything comes in its own static protective bag with the EVGA logo all over it. You will have to open up a bunch of stuff to get at everything. Don’t worry though, each bag is labeled and from the back side you can see in. You get a really nice metal EVGA case bad to put on your build.
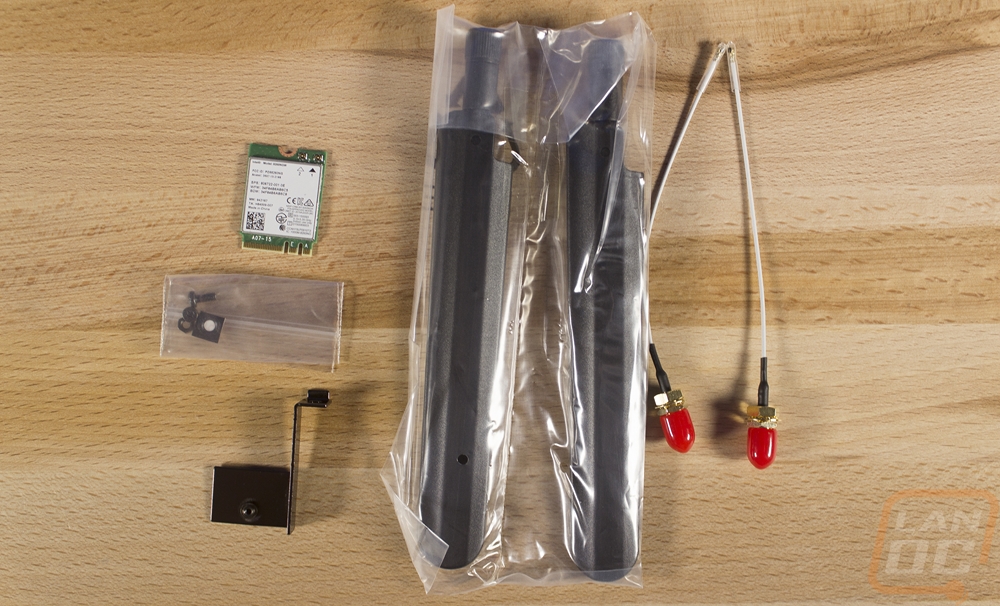
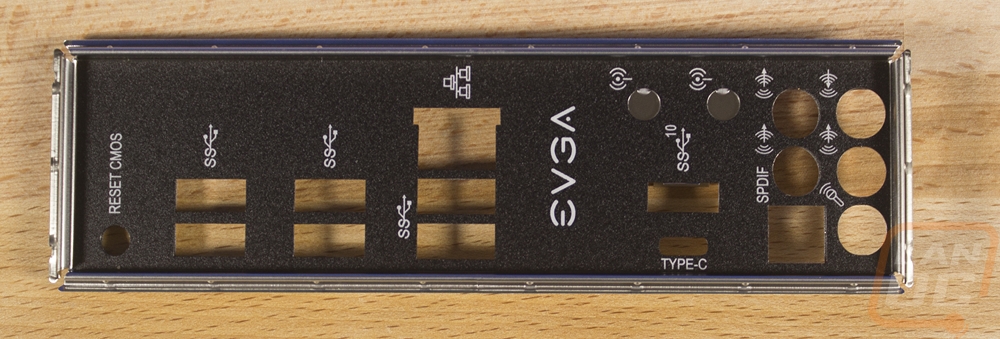
So one bag has the normal SATA cables but most of the others are actually focused on the WiFi. They ship the WiFi card apart from the board so they have bags with the antennas, the card itself, brackets and screws, and the small antenna cables. Because this needs installed they also don’t ship the board with the rear I/O cover on so you get that and the screws needed to attach it as well. The rear I/O shield, much like the rest of the packaging, is right to the point as well. They have blacked it out and put white labels on each connection along with the EVGA logo in the middle. There are spots to mount the included WiFi antennas as well.
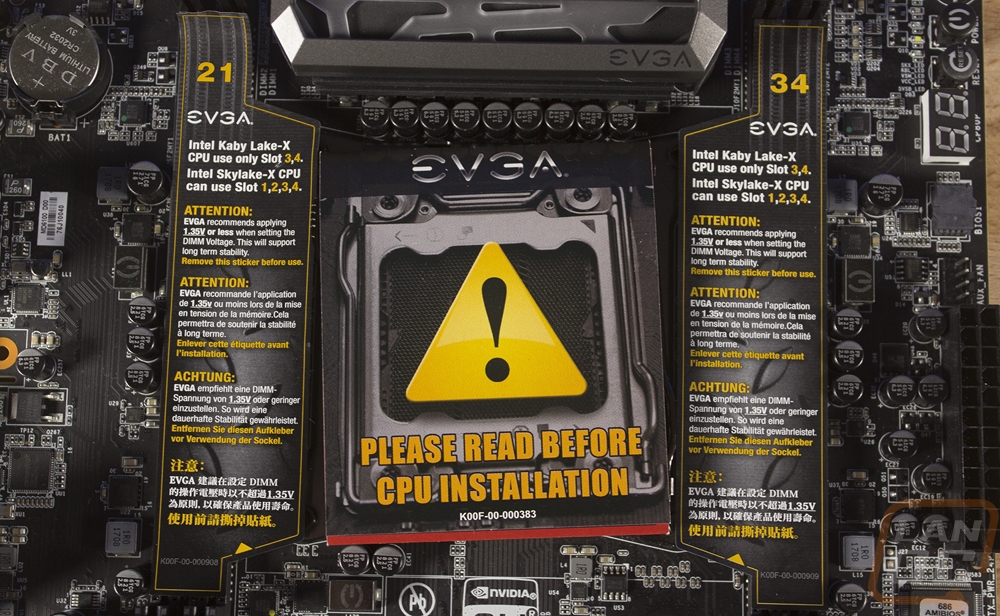
To protect the board from inexperienced users EVGA also shipped it with a little install guide stuck to the CPU cover. The four ram slots also had stickers but these explain which slots you need to use depending on if you are using Kaby Lake X or Skylake X.
Board Layout and Pictures
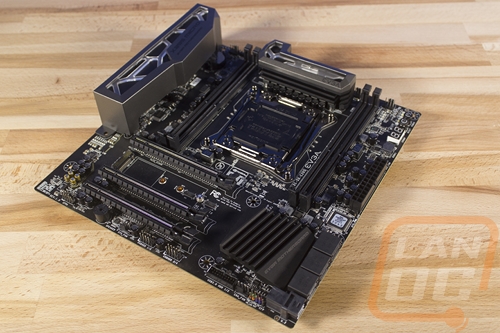
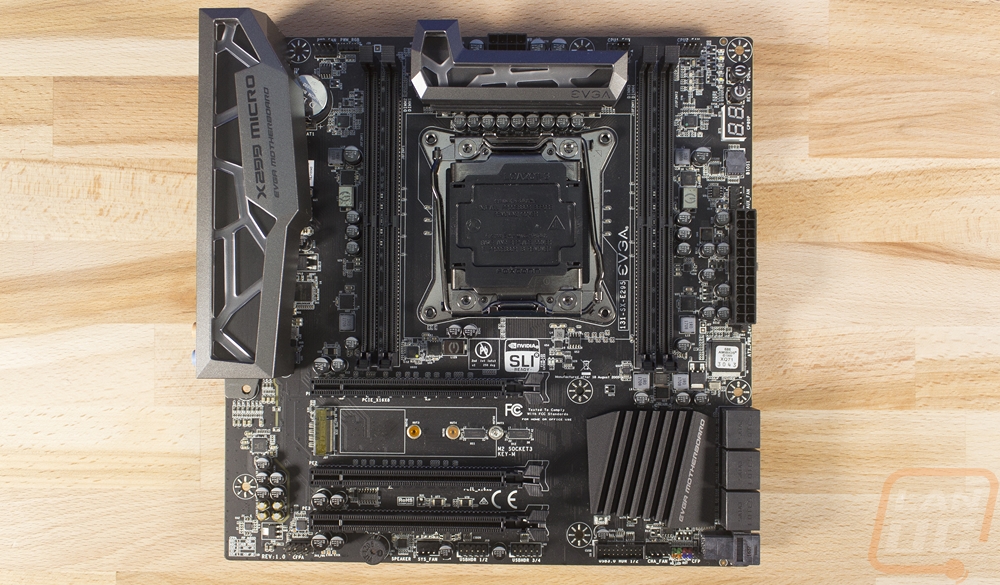
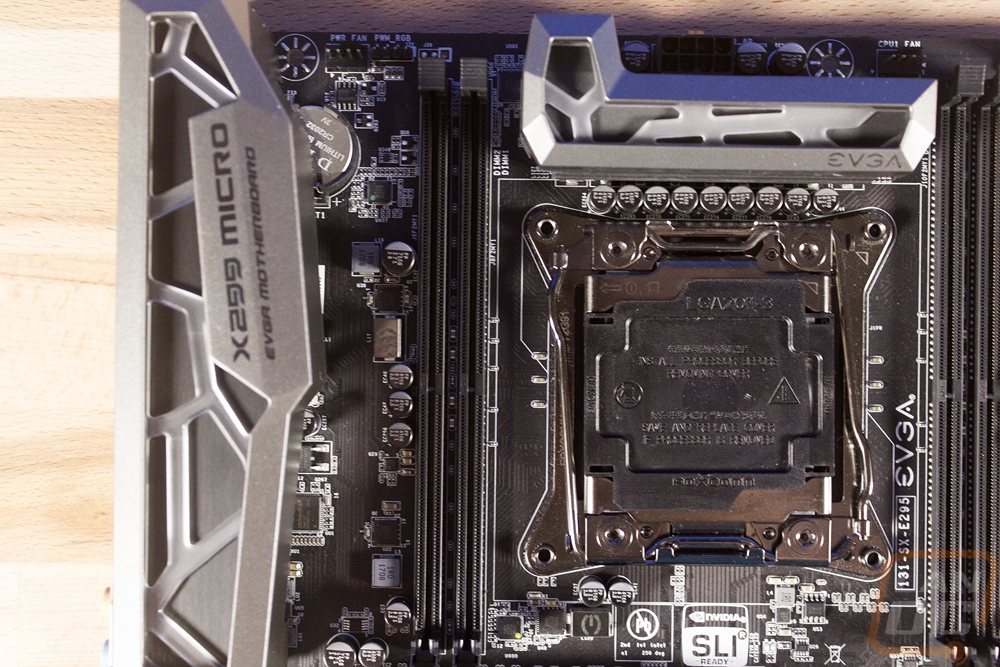
Love it or hate it EVGA doesn’t care at all about the RGB trends going on right now, just like they have avoided in the past the “gaming” focused styling. They have always done their own thing and as everyone else has gone flashy with lights they have toned things down even more. The X299 Micro Is mostly blacked out with just a few exceptions of gray. The board looks like it would be loaded up with lights, it is color neutral and it has a few accents in transparent plastic that any other company would light up. The style is simple but I dig it. Your motherboard doesn’t need to be a feature point in your build. This blacked out look should hide really well behind other components or if you put it in a bright white case it could contrast as well. If the name itself didn’t give it away, this is EVGAs X299 board in the Micro ATX form factor. This kept the name simple and tells you exactly what you need.

So like I mentioned before, you do have to install the included wireless AC adapter yourself as well as the rear I/O shield. You have to plug the card in and then use the two screws along with the bracket. That wasn’t too difficult but getting the tiny antenna cables on is a huge pain. That is made even more difficult because you have to attach them to the rear I/O where most other companies use a board mounted bracket so they aren’t hanging loose when the board is out of the case. Plus if you remove the board you have to remember to remove them as well. Once installed though, the I/ shield looks amazing. It has the board name on it and it is one of just two components that aren’t black. They went with gray and then up top is a transparent design that is similar to the new video card designs. I suspect modders will be getting lights on these as well.

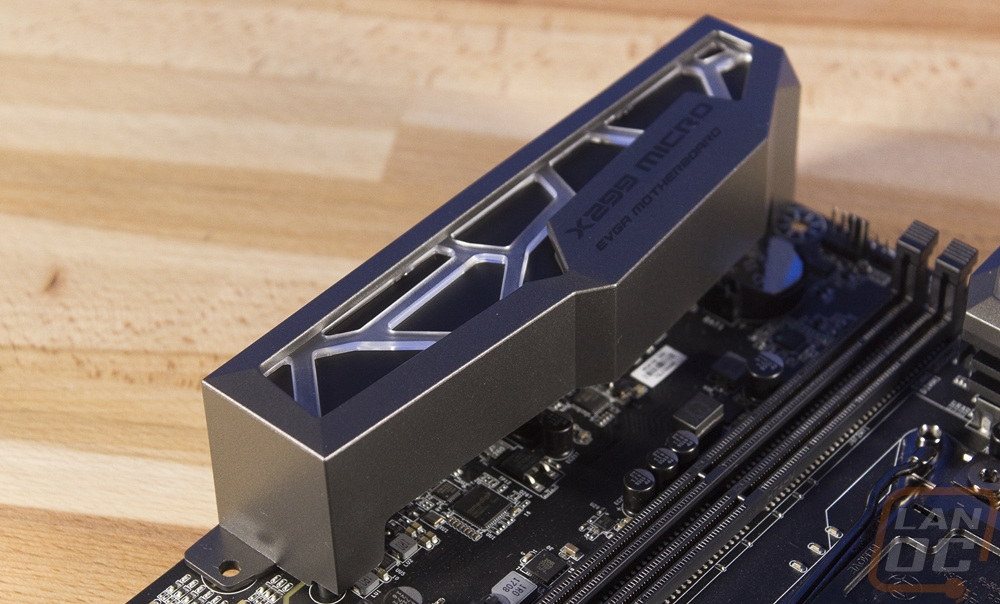
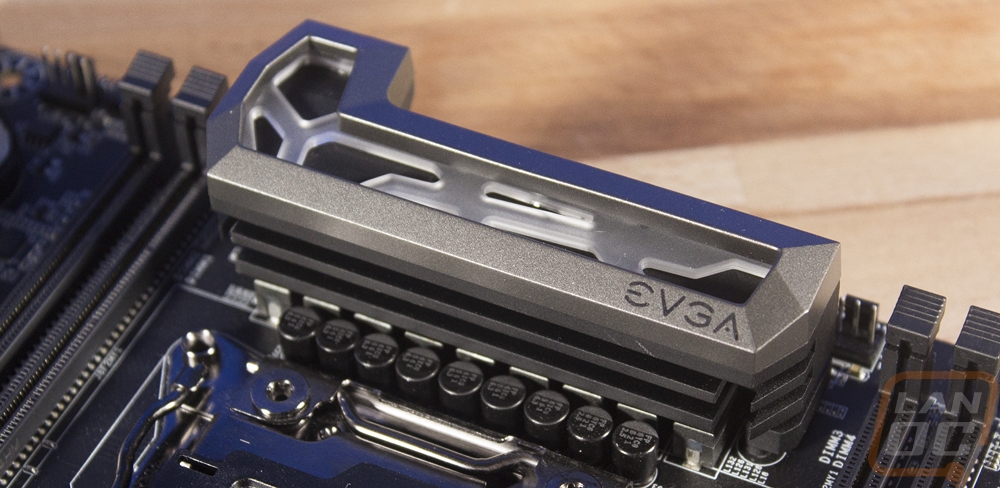
For cooling there are two heatsinks, one up above the CPU socket sitting on the power chokes and the other is down at the bottom of the board on the chipset. The choke cooler is only as wide as the CPU socket because of the quad channel memory slots on each side and if you look at it from the side there are grooves cut into the side to increase the surface area. It also has the same gray with the design on top like the I/I shield. I’m actually surprised they didn’t carry the same theme over to the chipset heatsink. It has grooves cut in the top and it is finished in a rough flat black finish. Its only accent is the EVGA Motherboard screen printed on it.

Working my way around the board, starting in the top left corner there are only a few things going on. The CMOS battery is tucked up behind the rear I/O for starters. Then just above it is a PWM fan header and then a four pin RGB header to hook up your own lighting if you want. The large LGA 2066 socket takes up a ton of room here as does the first two of the four DDR DIMM slots. Up above the heatsink though you can see that EVGA slipped in an 8-pin power connector for the CPU power. Then next to it is the PWM CPU fan header.
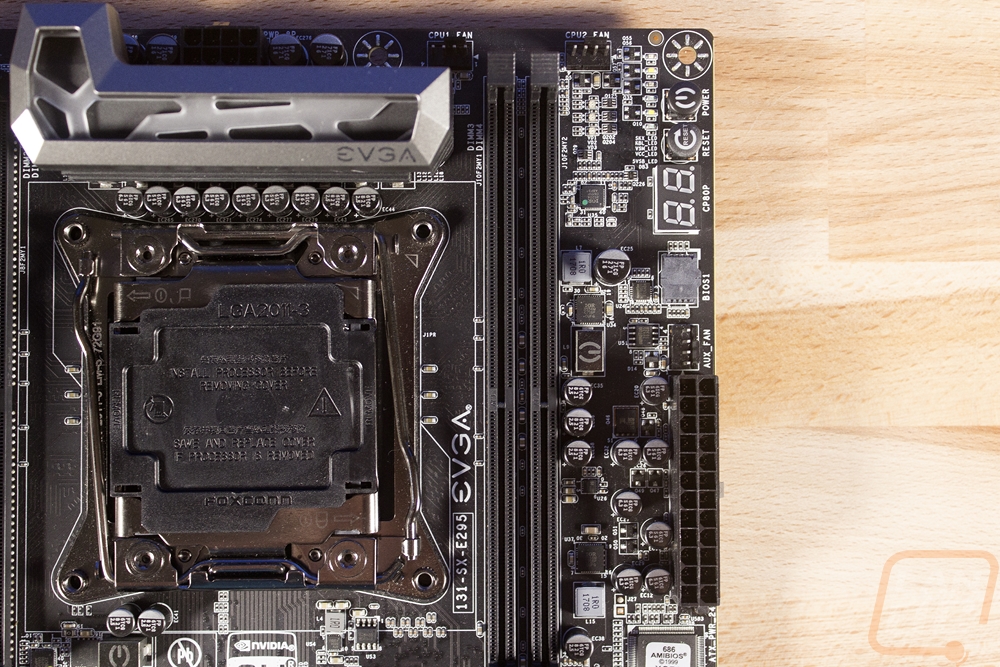
On the top right corner, we have the other two DDR4 DIMMs. Then right next to them is a second PWM CPU fan header. The topmost corner of the board near the screw hole has five different surface mounted LEDs that help show what the problem is if your PC doesn’t boot. Just below them are the labels letting you know what each does. Then right next to them you have power and reset buttons on the board. EVGA is big into overclocking and with overclocking these help a lot. I know I prefer them when testing as well but even normal users can put them to use sometimes. Say for example your PC won't boot when you first hook everything up, pressing this power button might show you have the front I/O connection hooked up wrong. Just below them is an LED readout for more diagnostics and after booted it shows your CPU temperature. There is another PWM fan header just above the 24-pin motherboard power plug. If you look really close you can also see a small surface mounted component with the EVGA logo on it as well.
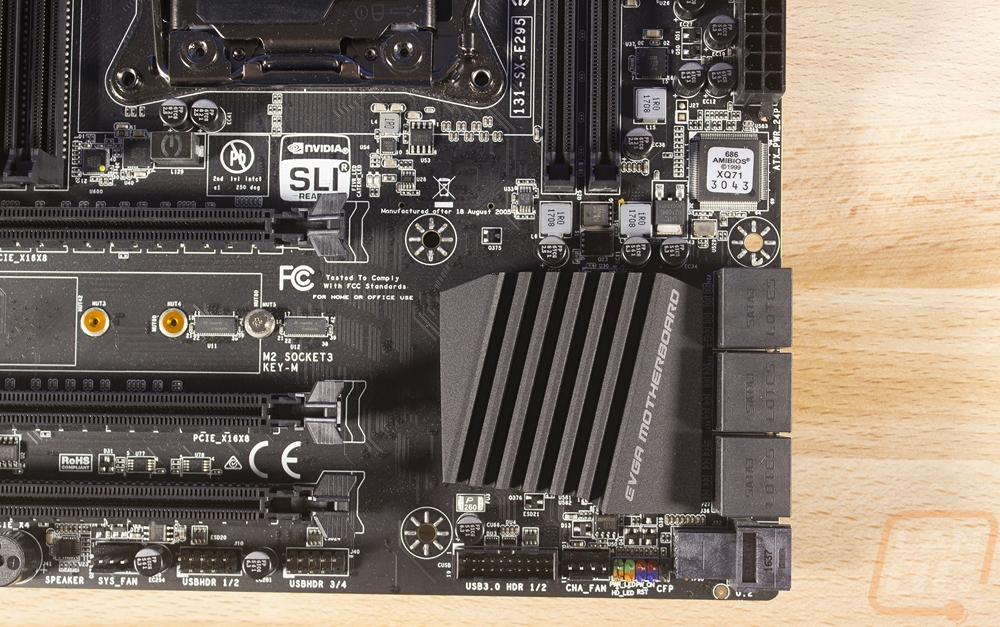
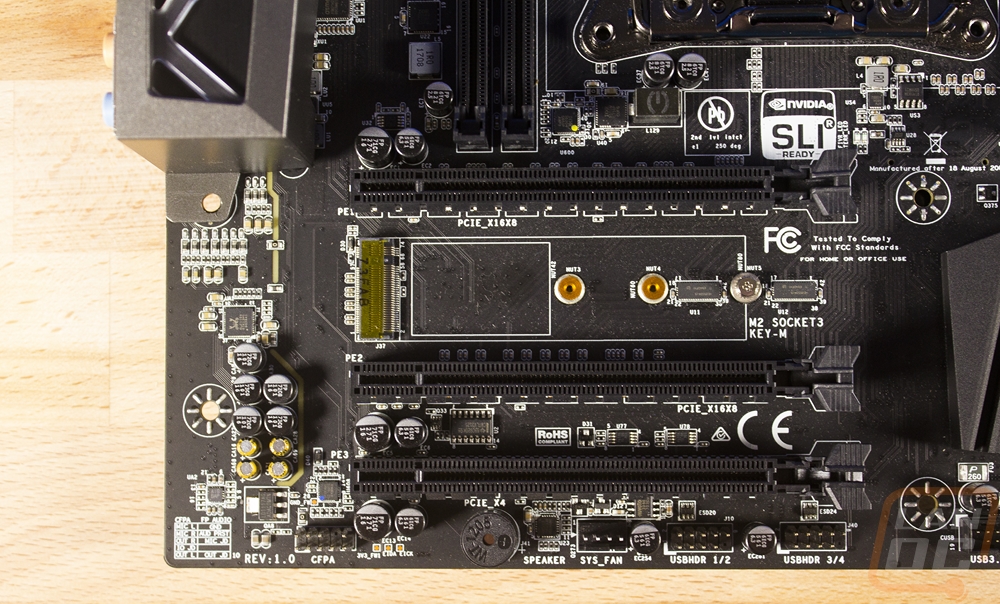
Being mATX this isn’t a big board so the bottom right corner does have the chipset heatsink taking up a lot of the space. EVGA did still fit in four right-angled SATA connections on the right edge as well as a new U.2 port. I love that board manufacturers seem to be on board with U.2 even though there aren’t many drives out. Down on the bottom edge are a few more connections. This is where they have tucked away the front I/O connections. They are color coded to make figuring out where to plug everything in easier. Next to them is our fifth PWM fan header as well as a standard USB 3.0 internal header. I would have liked to of seen a second new USB 3.1 header as well to make things a little more future proof but those are still slow to come out right now in cases.


Continuing along the bottom left edge there are two USB 2.0 headers and then a sixth and final PWM fan header. You can’t say EVGA skimped on fan headers that’s for sure. The board actually has a speaker built in, almost always anymore it seems like the speaker is just a header connection forcing you to go without or to use an unsightly one hanging off the board. Then over on the left is the front panel audio connection.

EVGA did partially separate their audio circuitry, from the rear I/O panel down to just under the bottom right cap. Speaking of the used high-quality Japanese caps. Most of the bottom left corner is filled up with PCI based things though. There is a PCIe x4 M.2 slot below the top PCIe slot but I should also note that the wireless adapter plugs into a second E key M.2 slot should you really need two. Then there are three PCIe x16 length slots. I was a little confused about the layout. On the board, they are marked as x16 or x8 slots for the top two and x4 for the bottom. The specifications say 2x16 and 1x16. I read that as you get full x16 on the top two. I’m assuming the difference is if you are running Skylake-X or not. Kaby Lake-X with its lower lane count forces the drop down, not that x8 isn’t more than enough still honestly.
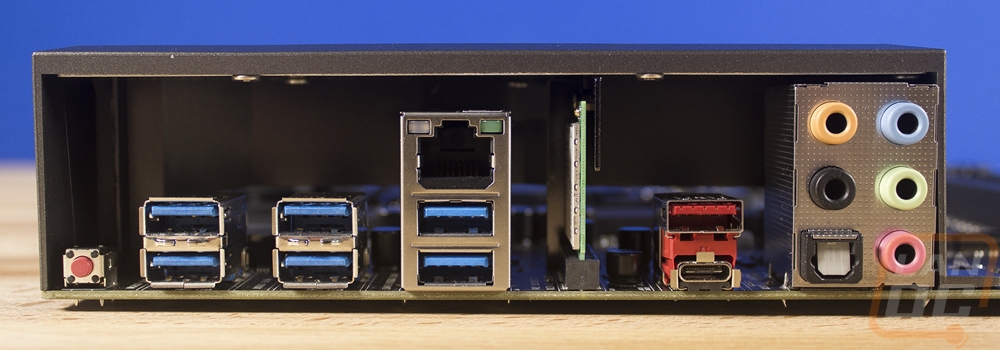
Like most EVGA boards the rear, I/O is also a little bare. So you have a clear CMOS button over on the far left. Then you get six USB 3.0 ports. They used Intel for the wired NIC and the wireless one that you install yourself. Then you have a single Type-C and Type-A, both running USB 3.1 Gen 2. Then on the right is your standard 5 port audio array with the optical port.
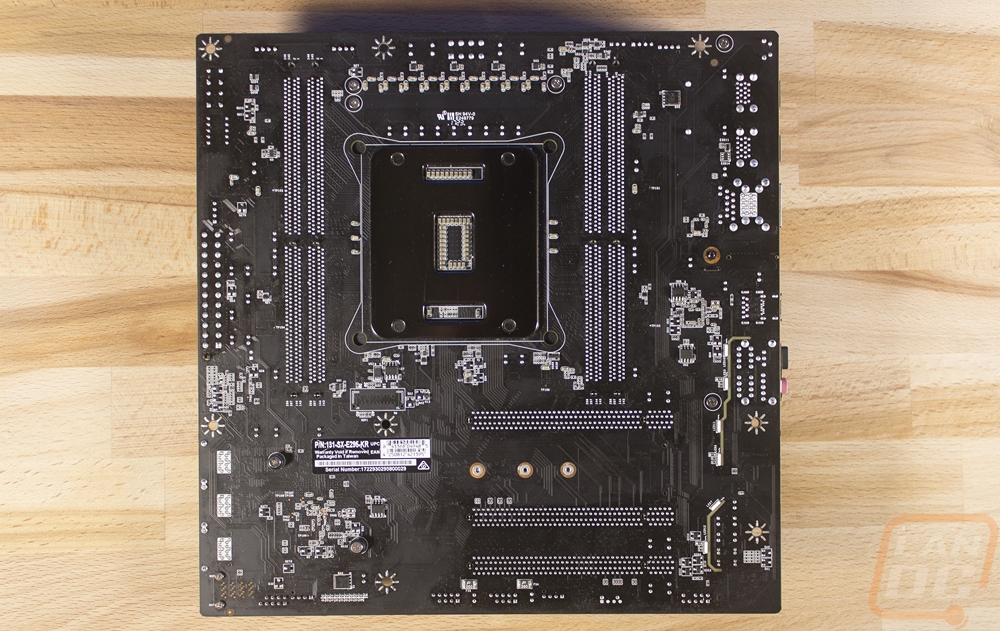
Flipping the board over to check out the back of the PCB we mostly just see more black. The two heatsinks are both attached with screws though, that is good news if you need to remove them for any reason. From this side, we can also see that the split PCB for the audio chipset also has a half inch wide gap in the break for some reason.
BIOS
For the BIOS, rather than take pictures of each of the screens like we have done in the past I went through the BIOS and recorded it all on video. This way you can pause on anything you need to see in detail and allow me to flip through more of the details to fit more in. I love the X299 Micro boot screen that looks just like the packaging. From there you are taken into the same UEFI that EVGA has been using on their boards for a while now. It is mouse friendly or can be navigated using just a keyboard. Up top, they show which of the memory DIMMs that are filled and you will notice that it is showing one of the four isn’t picking up. I didn’t catch this until as I write this but it does show just how useful that feature is! (I should also note that I did find a bent pin and am back up and running with all four DIMMs now)
Also up top, it does show three lit up PCI slots showing what the board has and that just one is being used and is running at x16. This is a simple feature but especially with the issues and questions around Kaby Lake X CPUs, it is cool to be able to see exactly what speed your devices are running. Also listed up top is the CPU and memory voltage and VRM and CPU temperatures as well. Hyperthreading is shown on and the clock speed, as well as multiplier, is shown in the middle. All of this is available no matter what page you are on.
The overclock page is where most people will spend their time in this BIOS and EVGA has done a good job including anything you might need. They have always been an overclocking first company, so it's not a big surprise. To change settings you have to drop down menus for some items and plus and minus symbols for the rest that let you adjust the numbers up and down. The memory tab is basically an extension to the overclock tab in my opinion. This is where you can overclock and tweak your memory settings.
From there just about every “standard” BIOS option is tucked away in the advanced tab. This is where you can turn board features off that aren’t being used. Get into CPU specific stuff like hyperthreading and virtualization or you can even change the TJMax setting!
The boot tab only has a few options but you can adjust the boot order if you have multiple drives installed, set up your boot options like if you want a disc drive or thumb drive to boot before windows, and you and turn on windows 10 specific boot functions.
Test Rig and Procedures
|
Intel Z270 Test System |
||
|
CPU |
Intel Core i9-7900X |
|
|
Cooling |
Noctua NH-U12S for cooling Noctua NT-H1 Thermal Paste |
|
|
Memory |
Kingston HyperX FURY DDR4 16GB Kit 2666MHz |
|
|
Storage |
Kingston HyperX 240GB SSD |
|
|
Video Card |
Nvidia GTX 1080 Ti |
|
|
Power Supply |
Thermaltake 850w |
|
|
Case |
Microcool Banchetto 101 Test bench |
|
|
OS |
Windows 10 Pro 64-bit |
|
|
Motherboard Testing |
|
|
Passmark Performance Test 9.0 |
Overall PCMark score |
|
PCMark 10 |
PCMark 10 standard test, not the quick or extended versions |
|
3DMark |
We run the 2013 Fire Strike test on the performance setting |
|
In Game Tests |
|
|
Deus Ex: Mankind Divided |
In game benchmark, ultra setting, 1080p |
|
Tom Clancy’s Ghost Recon: Wildlands |
1080p, built-in benchmark run at the high setting |
|
Subsystem Testing |
|
|
Passmark |
Passmark Advanced network test |
Performance
I’ve mentioned it in every review I’ve ever written but I will say it again in case this is your first time. Performance testing for motherboards is mostly about checking to make sure there aren’t any big variations. Boards these days have just about everything combined on the chipset so there isn’t much room for boards to perform better or worse beyond the normal variations in tests. But I did include the test results below to show that the X299 Micro did perform well and it does give you an idea of what kind of performance to expect if you are running a 7900X and a 1080Ti.
That said the network test is one of the rare tests that can differ depending on what NIC they went with. Antenna types also make a difference in the Wireless results as well. The Intel I219v3 that EVGA went with is standard for the X299 boards though so the performance there was as expected (really good). Now the wireless performance, on the other hand, ended up being on the low end. I actually even toyed around with the antenna locations a little because they were flopping around loose, not attached to a rear I/O but this was as good as I could get. In fact, most of my tests were lower. I don’t know if it is the antenna designs or the user installed configuration but you might want to look at other antennas if you pick up this board.
|
3DMark |
||||
|
Motherboard |
Overall Score |
Graphics Score |
Physics Score |
|
|
Asus Prime X299 Deluxe |
19867 |
23755 |
24113 |
|
|
Gigabyte X299 Aorus Gaming 3 |
20474 |
23567 |
26871 |
|
|
MSI X299 SLI Plus |
19153 |
23712 |
25345 |
|
|
EVGA X299 Micro |
19437 |
23604 |
23848 |
|
|
PCMark 10 Score |
||||
|
|
Overall Score |
Essentials |
Productivity |
Content Creation |
|
Asus Prime X299 Deluxe |
6475 |
9145 |
8486 |
9496 |
|
Gigabyte X299 Aorus Gaming 3 |
6402 |
9193 |
7932 |
9764 |
|
MSI X299 SLI Plus |
6304 |
9355 |
7834 |
9277 |
|
EVGA X299 Micro |
6527 |
9493 |
8775 |
9060 |
|
Passmark PerformanceTest 9.0 Overall Score |
||||
|
Asus Prime X299 Deluxe |
5924.0 |
|||
|
Gigabyte X299 Aorus Gaming 3 |
6042.2 |
|||
|
MSI X299 SLI Plus |
5816.2 |
|||
|
EVGA X299 Micro |
5948.9 |
|||
|
Tom Clancy’s Ghost Recon: Wildlands Average FPS |
||||
|
Asus Prime X299 Deluxe |
113.64 |
|||
|
Gigabyte X299 Aorus Gaming 3 |
115.88 |
|||
|
MSI X299 SLI Plus |
113.58 |
|||
|
EVGA X299 Micro |
112.29 |
|||
|
Deus Ex: Mankind Divided Average FPS |
||||
|
Asus Prime X299 Deluxe |
94.3 |
|||
|
Gigabyte X299 Aorus Gaming 3 |
96.9 |
|||
|
MSI X299 SLI Plus |
98.7 |
|||
|
EVGA X299 Micro |
96.8 |
|||
|
Average Network Speed |
||||
|
Asus Prime X299 Deluxe - Intel I219V NIC |
918.2 |
|||
|
Asus Prime X299 Deluxe - Intel I211-AT |
942.0 |
|||
|
Asus Prime X299 Deluxe - Wireless AC |
211.8 |
|||
|
Gigabyte X299 Aorus Gaming 3 |
936.6 |
|||
|
MSI X299 SLI Plus |
927.1 |
|||
|
EVGA X299 Micro – Intel I219v3 |
923.8 |
|||
|
EVGA X299 Micro – Intel Wireless AC 8260 |
176.7 |
|||
Overall and Final Verdict
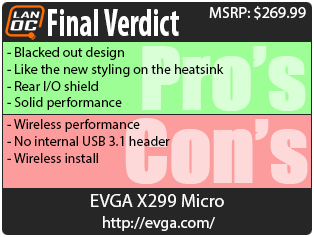
When you have a lot of the other motherboard manufacturers following and copying each other it is nice sometimes to have someone that does things their own way. EVGA has been doing their own thing for a while now and they seem to be happy to continue doing it. It's funny back in the day their boards seemed extra flashy because they blacked everything out but now everyone else is going crazy with RGB lighting and EVGA now looks like the subtle option. The X299 Micro is all blacked out and is going to look good in just about any build. The new styling they went with on the I/O shield and one of the heatsinks is sharp as well and it matches their new cooler design. Speaking of the rear I/O heatsink, talk about a small feature that makes a huge difference in how good the board looks, covering up the metal I/O components helps a lot with the blacked out look. Performance was solid in my testing, even when I found out I was only running on three sticks of ram lol.
Speaking of the ram, EVGA likes to keep things simple and only have the four DIMMs and it does help with overclocking. But it is nice to have a little room for expandability in the future without having to toss all of your current memory, having just four slots is fine on a dual channel board but with X299 (mostly) supporting quad channel it would have been nice to have the 8 DIMMs though even MSI’s mATX board only has four so I’m sure it is a space issue more than anything else. I would also love to see them include an internal USB 3.1 header as well, I think those are going to be very popular with cases here very soon. Beyond that my other issues were related to the wireless adapter. I’m not a big fan of having to install it myself, mostly because installing the two antenna cables is a pain and you later have to attach them to the I/O shield and remember to detached them if you pull your board out. But also the wireless performance was on the low side. I’m not sure if it is the antenna design or my wireless adapter installation.
The board itself is solid and the fact is there aren’t actually very many options for x299 in the mATX form factor. As of writing this, you can’t even find the X299 Micro yet and MSI is the only other company with an mATX board listed. As it sits the MSI board does have one more M.2 slot than the EVGA but the X299 Micro is also cheaper. I say cheaper because at $269.99 you can’t really call that cheap. But that is more related to x299 as a whole. Even the cheapest x299 boards are still up over $200. So if you are planning an mATX x299 build the X299 Micro is the cheapest option and you are getting a great looking blacked out motherboard with all of the features that you should need. In fact, x299 in a mATX build is sounding like a lot of fun assuming you can deal with the heat.

Live Pricing: HERE
