Noise Testing and Fitment
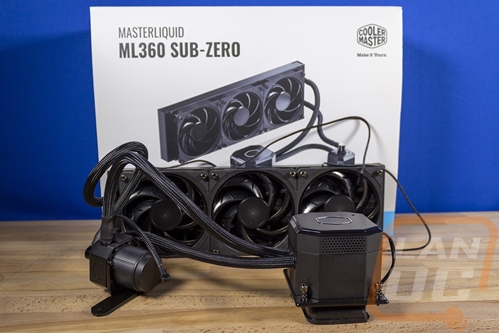
Before jumping into the performance testing the first thing I wanted to look at was overall fitment. When I test air coolers, part of this is making sure that you will have memory clearance. But for a kit like the ML360 Sub-Zero, it has a whole new list of potential issues. The water block height is one, at around 90mm it is as tall as shorter tower air coolers and taller than almost all AIOs. If you have a case that has a vertical mount for the GPU that puts it in front of your CPU you will want to make sure there isn’t an issue. Cooler Master lists out their cases that will work and they even have notes on the exact configurations like when you have to use a front mount or a top panel mount. But the Sub-Zero portion of this kit also brings other compatibility issues as well. For one, this is only designed to work with unlocked 10th gen core processors from Intel. I’m wondering if it could potentially still work with other older Intel CPUs as their mounting hasn’t changed at all or if they are doing anything on the software level. But that brings me to the other potential issue. The seal has to have clearance and some motherboards may not work so they have put together a list of boards tested and it isn’t a long list. They have touched on the higher end boards from everyone
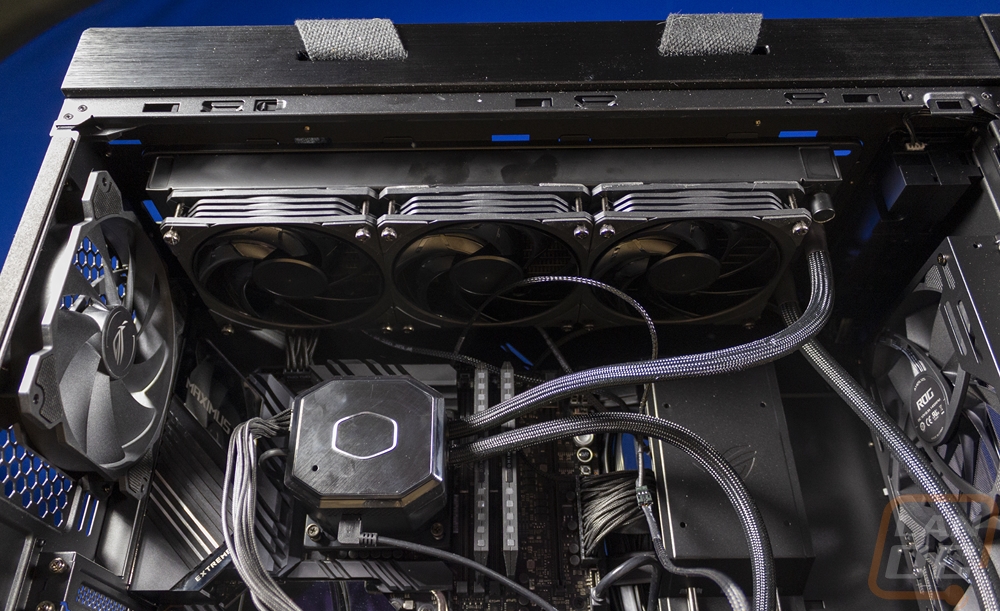
As for our actual installation for testing. I ran the Asus ROG Maximus XII Extreme with the 10900K for the CPU. Then I did the testing inside of the Asus ROG Helix case because I still had that build together and it gave me a good chance to test this out inside of a large case with support for the 360mm radiator and that build already had the ASUS ROG Ryujin AIO in it which is a great comparison point with this kit. It is also 360mm and because of its lighting, OLED screen, built-in VRM fans, and Noctua fans, it is also similar in price as well. The installation wasn’t hard, I started by installing the radiator to get the most cumbersome portion hung up. Thankfully I didn’t have to change the fan configuration so it was just hanging it with the included screws. Mounting the water block wasn’t too bad as well, you get the backplate at the back and start two of the standoffs. Then you can install the other two and tighten all four down. From there you screw the mount down. The pump did take a little thought but the Helix had a mounting spot right on top of the bottom cover that worked well. From there plugging in the three fans, the pump, power, and signal header were all simple. I think the results didn’t look too bad though I could have done a better job cleaning up dust from the system sitting around (we have been doing work on my office) and the fingerprints I put on the pump.
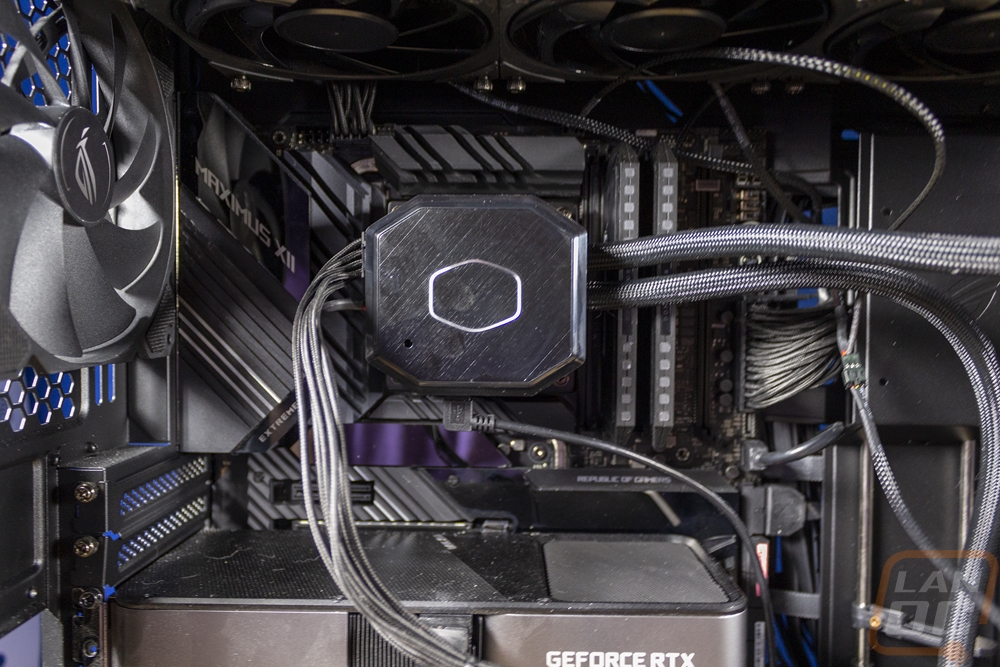
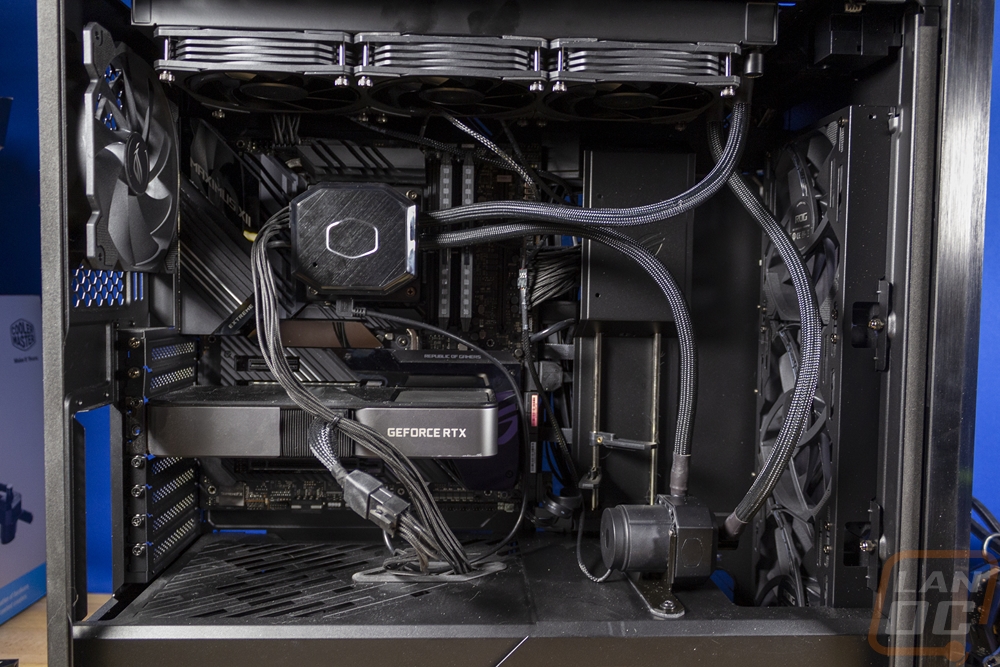
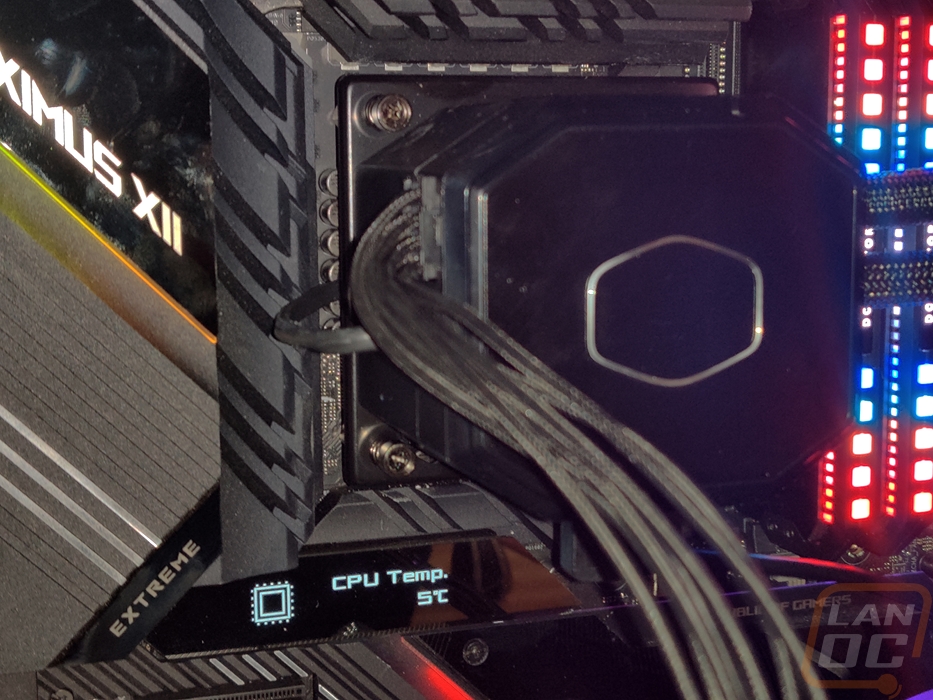
You also don’t want to forget to plug in the 8-pin power which is on the side of the water block. This one is such a tall case that did leave me stuck running it over top of the GPU but a cable extension could give the extra length to better hide this cable. This plug was a little hard to get, I found out later that you can pop the top cover off which gives a lot better access for plugging this in and unplugging it as well. There is a little clue at how well the cooler worked in this picture as well with the motherboard temperature readout. Not often you will see something like that.
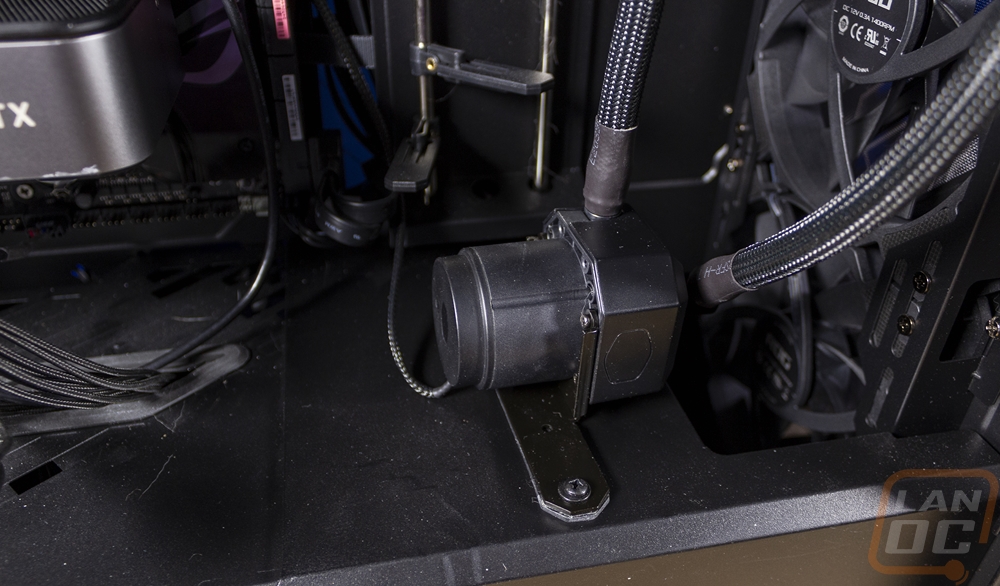
I then did some testing of noise levels. I did the same to the Ryujin before swapping coolers. I did two noise tests. One after running the cooler for over a half hour with an FPU load and the second with the fans/pump turned up to 100%. The fan speeds only changed things with the Ryujin. The Ryujin came in at 41.5 decibels when under the FPU load and then when I cranked up the fans it reached 54.2 decibels which isn’t too bad. The ML360 Sub-Zero had just the one result which was 45.8 decibels using our normal settings which is set to A mode. Our Sub-Zero kit had a surprisingly noisy sound that I initially thought was a loud pump which had a high pitch noise that when I tested using the C weighted mode came in higher at 55dB. This noise ended up coming from the top of the TEC cooler PCB which I guess was coil noise because from what I can see there isn’t a fan in there.
