With companies finding ways to pack more and more features into Mini-ITX motherboards the small form factor market has flourished over the past few years. We are finally seeing a lot of people running smaller builds at events as LAN rigs and the idea of a higher end build doesn’t require a case that hardly fits in your car and needs a backbelt to pickup anymore. In fact, even when looking past the smallest builds we have been seeing cases designed for Mini-ITX that are still more mid tower designs. This is because most builds only need a single video card these days and built in NICs have improved in quality, ITX boards now sometimes have wireless, and even onboard audio has improved (and some people have moved to USB audio). All of that means most people don’t really need huge builds. I already took a look at MSIs Z170 ITX gaming board and today I’m checking out the Gigabyte Z170N-Gaming 5, Gigabytes highest featured ITX board to see what they have packed into the ITX form factor.
Product Name: Gigabyte Z170N-Gaming 5
Review Sample Provided by: Gigabyte
Written by: Wes
Pictures by: Wes
Amazon Link: HERE
| Specifications | |
|
CPU |
-Support for Intel® Core™ i7 processors/Intel® Core™ i5 processors/ Intel® Core™ i3 processors/Intel® Pentium® processors/ Intel® Celeron® processors in the LGA1151 package -L3 cache varies with CPU |
| Chipset | Intel® Z170 Express Chipset |
| Memory |
2 x DDR4 DIMM sockets supporting up to 32 GB of system memory Dual channel memory architecture Support for DDR4 3333(O.C.) /3300(O.C.) /3200(O.C.) /3000(O.C.) /2800(O.C.) /2666(O.C.) /2400(O.C.) /2133 MHz memory modules Support for ECC UDIMM 1Rx8/2Rx8 memory modules (operate in non-ECC mode) Support for non-ECC UDIMM 1Rx8/2Rx8/1Rx16 memory modules Support for Extreme Memory Profile (XMP) memory modules |
| Onboard Graphics |
Integrated Graphics Processor-Intel® HD Graphics support: 1 x DVI-D port, supporting a maximum resolution of 1920x1200@60 Hz * The DVI-D port does not support D-Sub connection by adapter. 1 x HDMI port, supporting a maximum resolution of 4096x2160@24 Hz * Support for HDMI 1.4 version. Maximum shared memory of 512 MB |
| Audio |
Realtek® ALC1150 codec Support for Sound Blaster X-Fi MB3 High Definition Audio 2/4/5.1/7.1-channel Support for S/PDIF Out |
| LAN | Killer E2201 chip (10/100/1000 Mbit) |
| Wireless Communication module |
Wi-Fi 802.11 a/b/g/n/ac, supporting 2.4/5 GHz Dual-Band Bluetooth 4.2, 4.1, BLE, 4.0, 3.0, 2.1+EDR Support for 11ac wireless standard and up to 867 Mbps data rate |
| Expansion Slots |
1 x PCI Express x16 slot, running at x16 (The PCIEX16 slot conforms to PCI Express 3.0 standard.) 1 x M.2 Socket 1 connector for the wireless communication module (M2_WIFI) |
| Storage Interface |
Chipset: 1 x M.2 Socket 3 connector on the back of the motherboard (Socket 3, M key, type 2260/2280 SATA & PCIe x4/x2/x1 SSD support) 2 x SATA Express connectors 6 x SATA 6Gb/s connectors Support for RAID 0, RAID 1, RAID 5, and RAID 10 |
| USB |
Chipset: 2 x USB 2.0/1.1 ports available through the internal USB headers 5 x USB 3.0/2.0 ports (3 ports on the back panel, 2 ports available through the internal USB header) Chipset+Intel® USB 3.1 Controller: 1 x USB Type-C™ port on the back panel, with USB 3.1 support 1 x USB 3.1 Type-A port (red) on the back panel |
| Internal I/O Connectors |
1 x 24-pin ATX main power connector 1 x 8-pin ATX 12V power connector 6 x SATA 6Gb/s connectors 2 x SATA Express connectors 1 x M.2 Socket 3 connector 1 x CPU fan header 1 x system fan header 1 x front panel header 1 x front panel audio header 1 x USB 3.0/2.0 header 1 x USB 2.0/1.1 header 1 x S/PDIF Out header 1 x speaker header 1 x Clear CMOS jumper 1 x chassis intrusion header |
| Back Panel Connectors |
1 x PS/2 keyboard/mouse port 1 x HDMI port 2 SMA antenna connectors 1 x DVI-D port 1 x USB Type-C™ port, with USB 3.1 support 1 x USB 3.1 Type-A port (red) 3 x USB 3.0/2.0 ports 1 x RJ-45 port 1 x optical S/PDIF Out connector 5 x audio jacks (Center/Subwoofer Speaker Out, Rear Speaker Out, Line In, Line Out, Mic In) |
| I/O Controller | iTE® I/O Controller Chip |
| H/W Monitoring |
System voltage detection CPU/System temperature detection CPU/System fan speed detection CPU/System overheating warning CPU/System fan fail warning CPU/System fan speed control |
| BIOS |
2 x 64 Mbit flash Use of licensed AMI UEFI BIOS Support for DualBIOS™ PnP 1.0a, DMI 2.7, WfM 2.0, SM BIOS 2.7, ACPI 5.0 |
| Unique Features |
-Support for APP Center 3D OSD @BIOS AutoGreen Cloud Station EasyTune Easy RAID Fast Boot Smart TimeLock Smart Keyboard Smart Backup System Information Viewer USB Blocker -Support for Q-Flash -Support for Smart Switch -Support for Xpress Install |
| Bundle Software |
Norton Internet Security (OEM version) Intel® Smart Response Technology Intel® Wireless Display |
| Operating System |
Support for Windows 10/8.1 64-bit Support for Windows 7 32-bit/64-bit |
| Form Factor | Mini-ITX Form Factor; 17.0cm x 17.0cm |
| Box Contents |
GA-Z170N-Gaming 5 motherboard Motherboard driver disk Two SATA cables User's Manual Quick Installation Guide One antenna I/O Shield Wireless module driver disk |
Packaging and Accessories
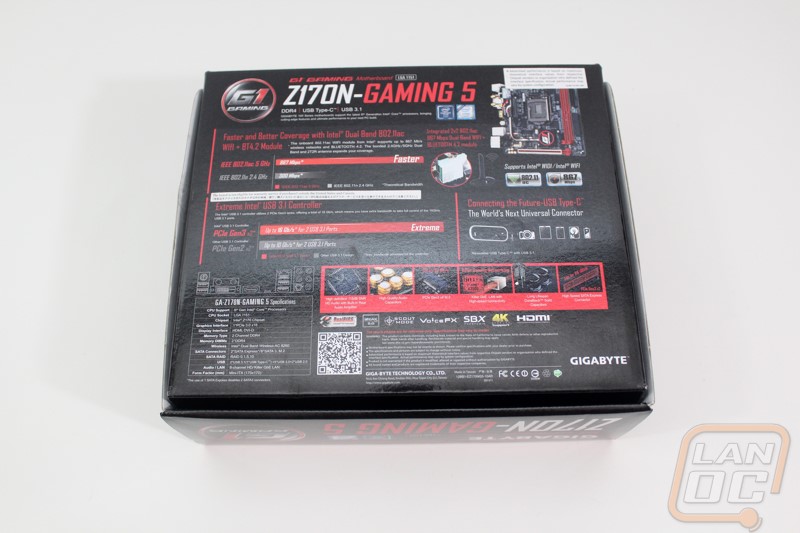
The box for the Z170N-Gaming 5 is small just like the motherboard inside. On the top Gigabyte has the same theme that I saw on our last Gigabyte Z170 board. The box has a black background and they have a white photo in the back with the GT Gaming logo on it. What did stand out to me though was that even though the box makes this being an ITX board obvious the name and nothing on the top actually tell us that. In fact, if I told you I had a Z170N-Gaming 5 you wouldn’t have a clue this was an ITX board. The back of the box has a lot more going on. Here we can see an actual photo of the motherboard along with photos of different details. They highlight performance from the USB 3.1 controller and the 5GHz wireless.
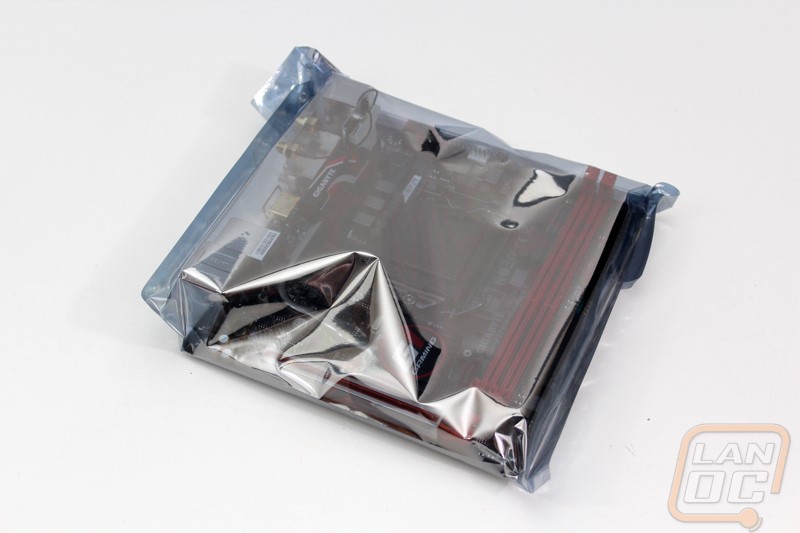
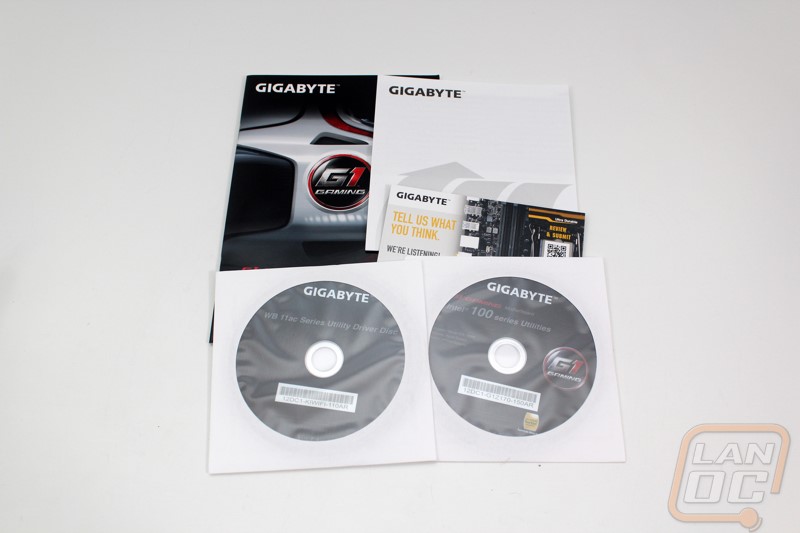
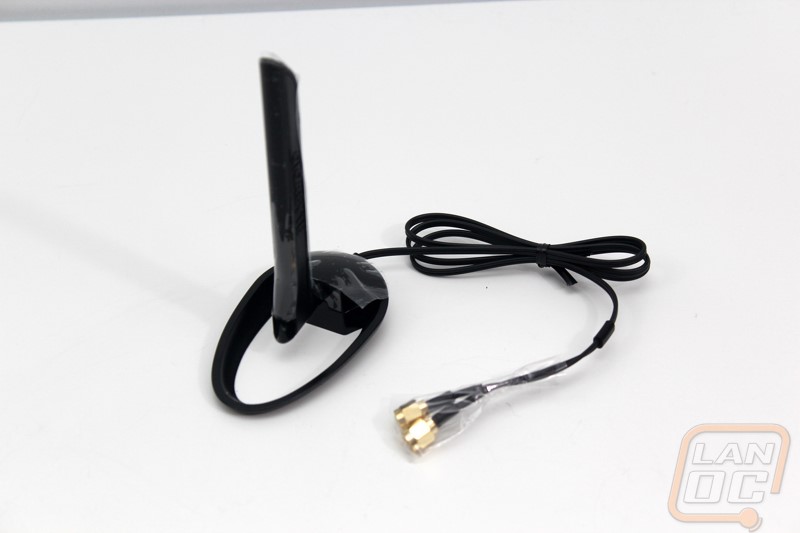
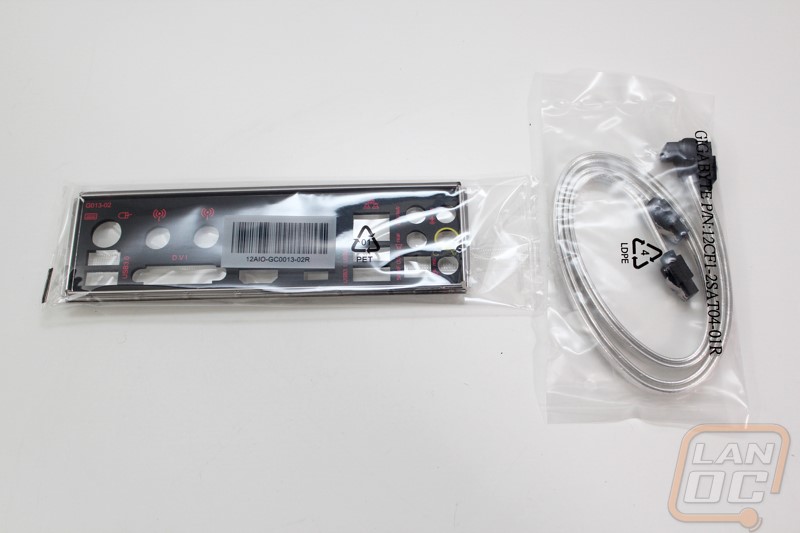
Inside the motherboard is right up on top wrapped up in a static protective bag. It sits up on a cardboard tray that makes room for the accessories underneath. Gigabyte includes A cool magnetic wireless antenna, the rear I/O panel, and SATA cables. The rear I/O panel is blacked out with all of the legends in red similar to what a lot of the other gaming boards are doing these days. For SATA cables you get two but I was surprised to find that they are wrapped in a reflective foil coating, I personally prefer black but these are at least different and much better than the red that everything used to come with. For documentation they include a user manual, a feedback card, quick setup guide, and two discs with the drivers and software for the board on one and for the wireless card on the other.
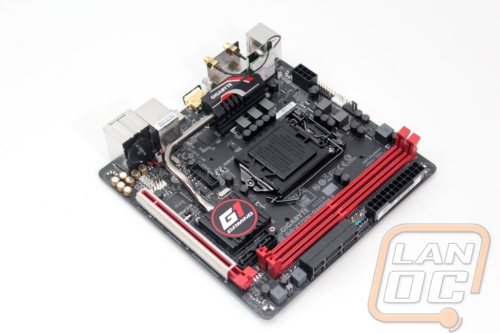
Board Layout and Pictures
Like basically every other motherboard manufacture, Gigabyte has gone with the black and red theme for the G1 Gaming boards. So the Z170N Gaming 5, while small still has a black PCB as well as red DIMM slots. Being an ITX board there isn’t really much room for styling though, the main focus of the board is to fit as much into it as possible. There aren’t any riser boards though like asus has been doing with their Impact boards for power circuitry and even fan header expanders.
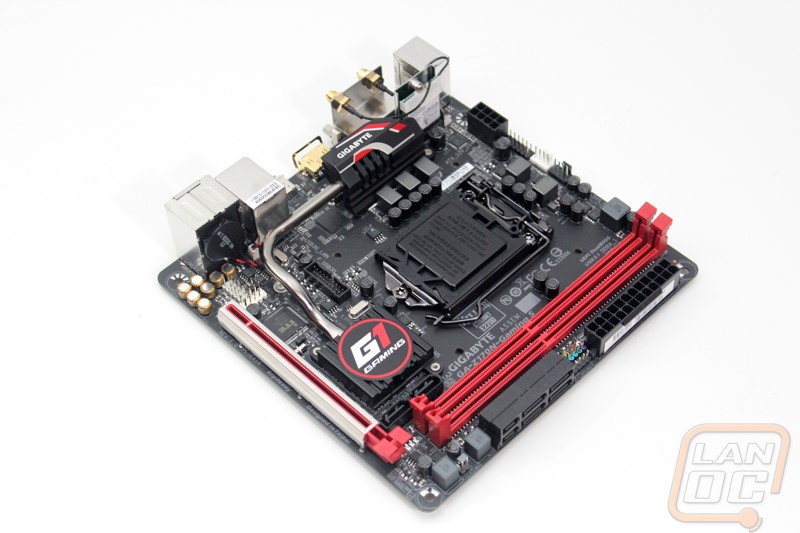
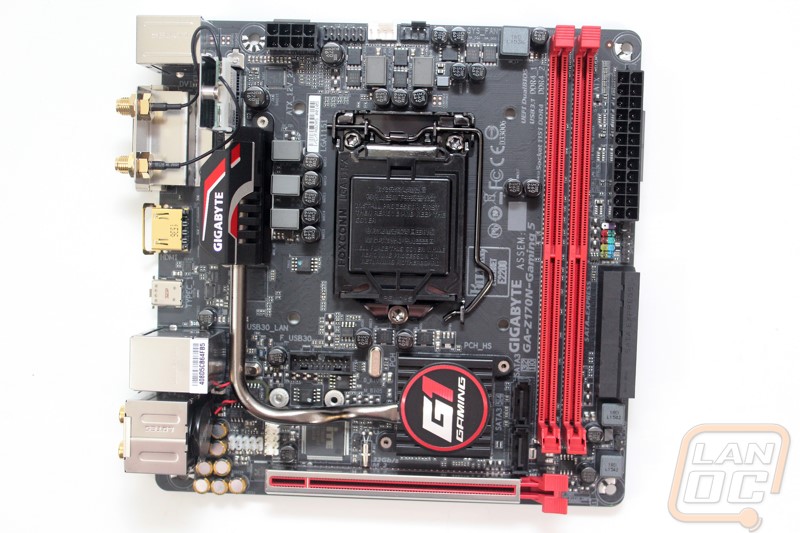
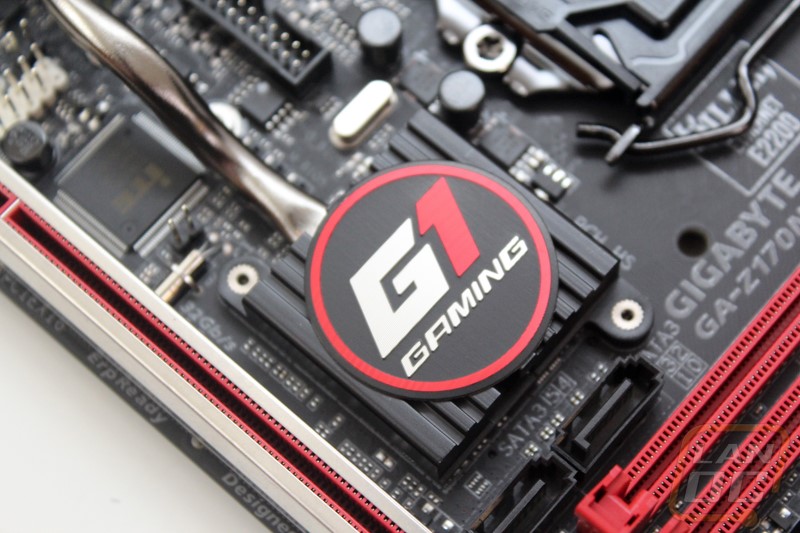
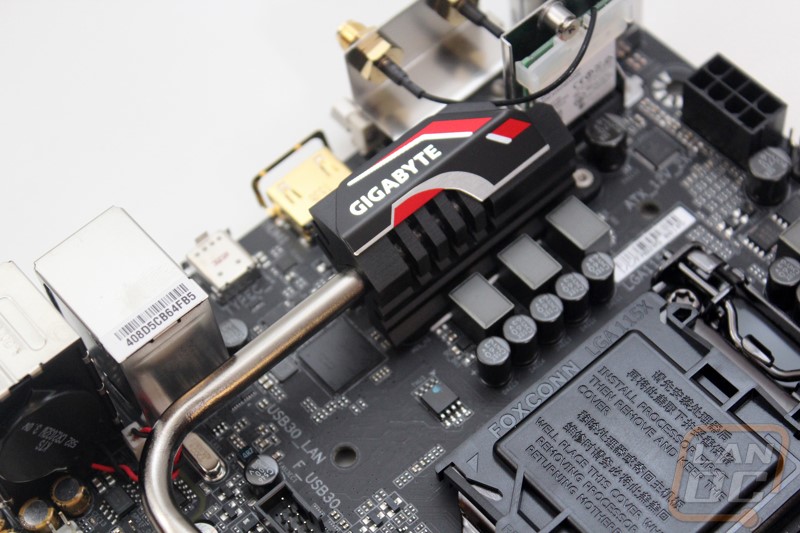
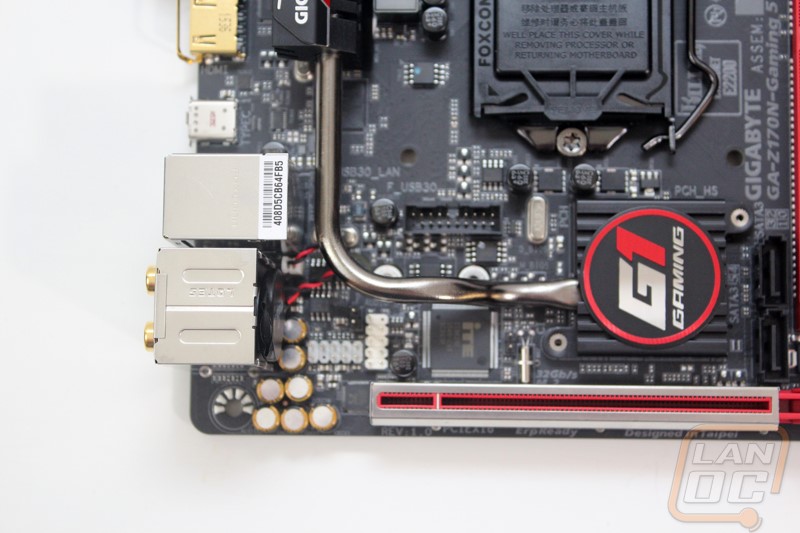
For cooling the tiny ITX board does still have the same two heatsink design like a full sized board but both are much smaller. The chipset cooler sits just above the PCIe slot and is about an inch square in size. It has a G! Gaming logo covering the entire top and is connected to the second heatsink via a heatpipe that runs over to the left then up. The second heatsink sits to the left of the CPU socket right next to the power chokes. It is made of black anodized aluminum with a silver, black, and red plate on top with the Gigabyte logo.
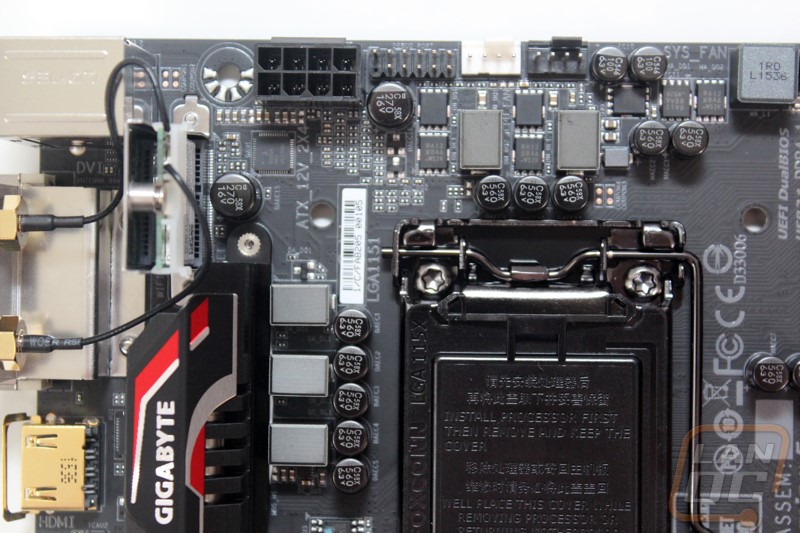
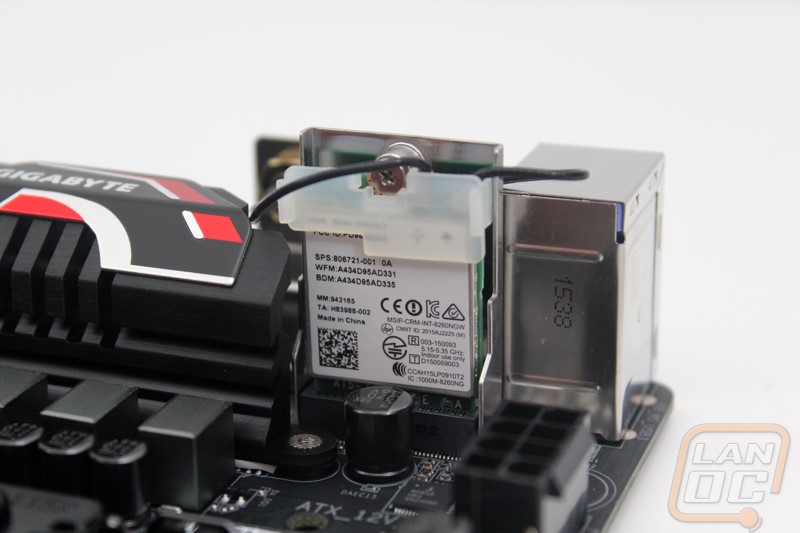
While the board is small let’s break things down into sections and check out what the Z170N Gaming 5 is all about. Starting up in the top left corner behind the rear I/O panel we have a few things going on. The most obvious is the CPU socket sitting in the center. Between the CPU socket and the I/O though Gigabyte slipped in an M.2 slot riser. This one comes with the wireless card attached. The wireless card runs up to Wireless AC in both 2.8 and 5 GHz. It also covers Bluetooth as well. Up above the CPU socket the board has a few connections starting with the 8-pin power connection. Next is the debug port that looks like a USB 2 header with one extra set of pins. Then of course there are two 4-pin fan headers to power the CPU cooler fan or fans. Of the two headers the main CPU fan header is distinguished with a bright white color.
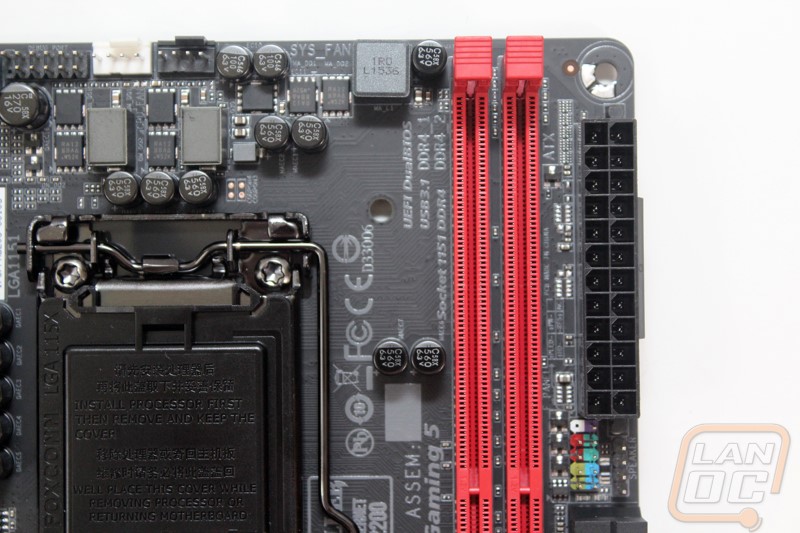
Moving around to the top right corner we have three things going on. First there are the two bright red DDR4 DIMM slots. Then there is the 24 pin motherboard power. Lastly just under the 24-pin power are the front panel connections. Gigabyte kept things simple and easy to hook up by color coding each connection and including polarity as well.
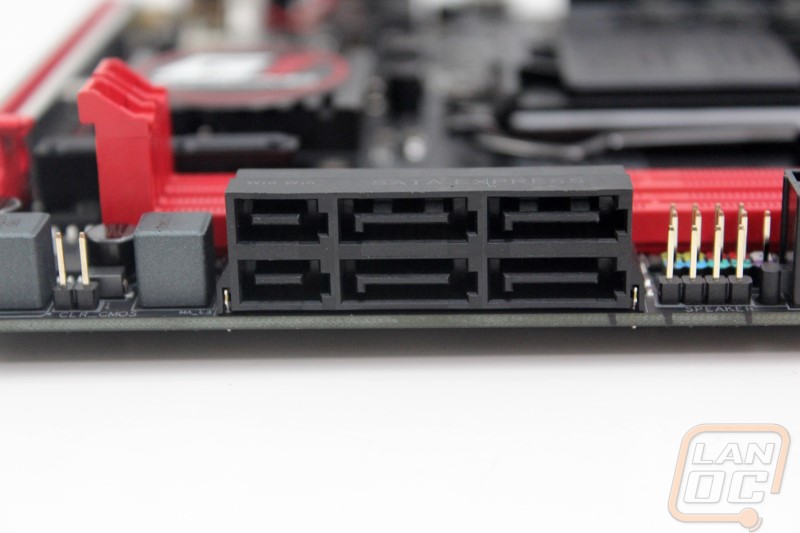
Down in the bottom right corner we start off with the SATA connections. We have to inward on the board that face up. Then there are also the two SATA Express connections that are right angled. The SATA Express connections can also double as four regular SATA connections if you aren’t using the Express functionality as well. If we look really close here we can also see a two pin header below the SATA express header. That small two pin header is the clear CMOS header, with this setup you can hook it up to a button if you plan on doing it often or use a screwdriver to touch it. Gigabyte included a jumper as well but they saved space by eliminating the third pin on the header where you would normally keep the jumper.
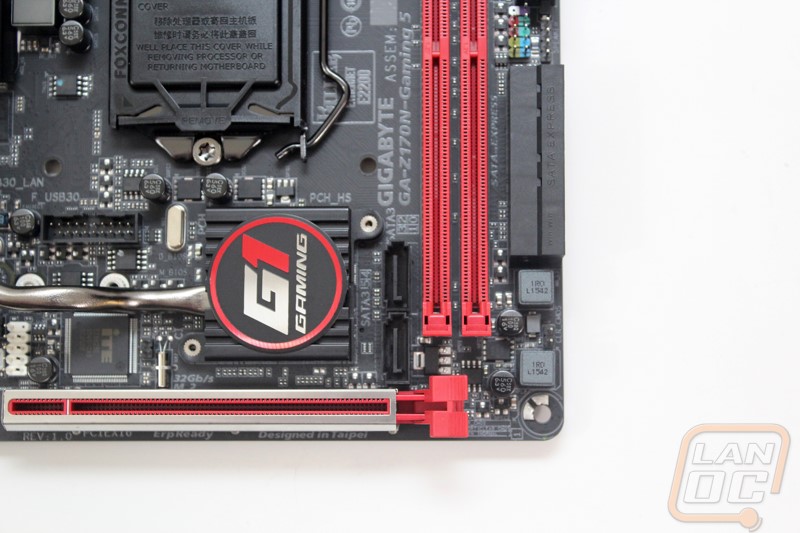
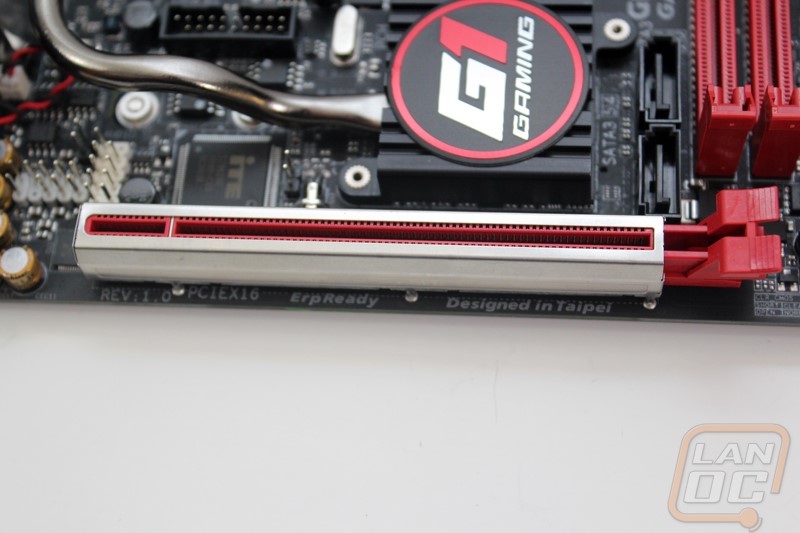
Last but not least we have the bottom left corner of the Z170N Gaming 5. Here we have a few things going on. The biggest is the PCIe x16 slot that runs across the entire bottom. They did use a red plastic to match the ram but Gigabyte reinforced the connection with a metal liner over the outside. We saw this on the full sized Gigabyte Z170 board and the MSI as well. This does a small amount of interference shielding and it also helps keep the slot strong should a heavy video card be putting strain on it. Also in the bottom left corner we have the boards only USB 3.0 connection sitting just above the heatpipe running between the heatsinks. Then tucked up behind the I/O panel is all of the audio circuitry. With that we have the front panel audio connection right up next to the audio caps and then the second white header that sits vertical is the boards only internal USB 2.0 header should you need one.
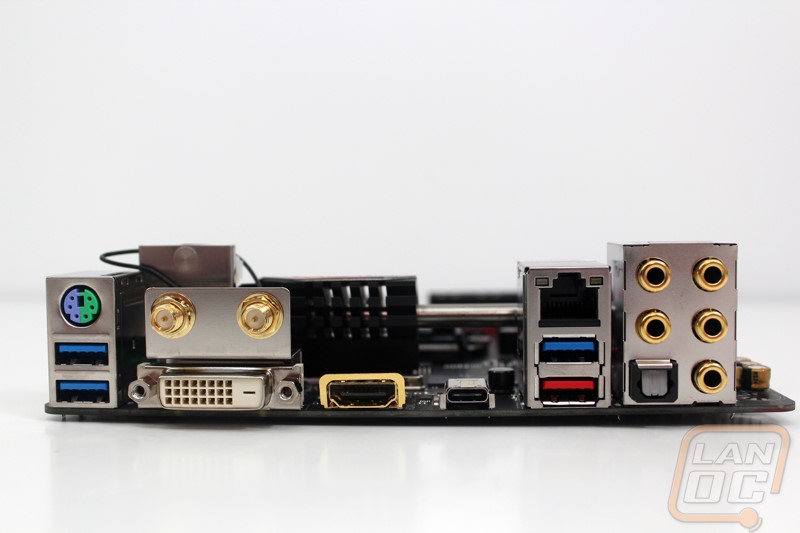
The funny thing about the rear I/O panel on a mini-ITX form factor is the I/O actually takes up the entire length of the board with the exception of the room for the single PCIe slot. This board comes with DVI and HDMI for video connections. Im a little surprised they didn’t also include a DisplayPort given there is room above the HDMI though. There is a single Ethernet port run off of a Killer E2201 controller. If wireless if your preference you have two antenna connections that hook to the wireless AC wireless network card. That same card also handles the bluetooth on the board as well. In wireless AC it can handle 2.8 and 5 GHz so there shouldn’t be a network it won’t work on. There are gold plated 7.1 audio ports running off the Realtek ALC1150 codec with support for Sound Blaster X-Fi MB3. Over on the left there is a PS2 port for hooking up your older keyboards and keyboard that support full NKRO over PS2. Then of course we are left with the USB connections. There are four normal USB ports, the three blue ports are USB 3.0 and the red supports USB 3.1. There is also the tiny USB 3.1 Type C port that should start to see a lot more use in the next year as everything slowly starts to move to it.
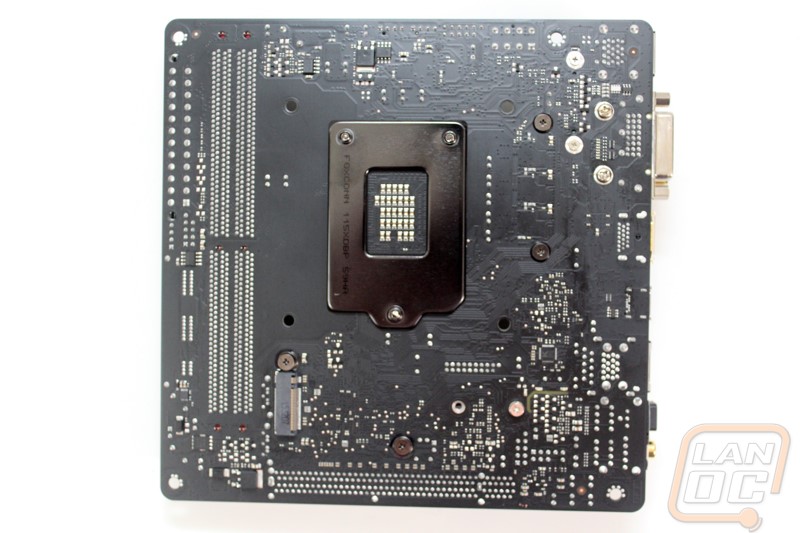
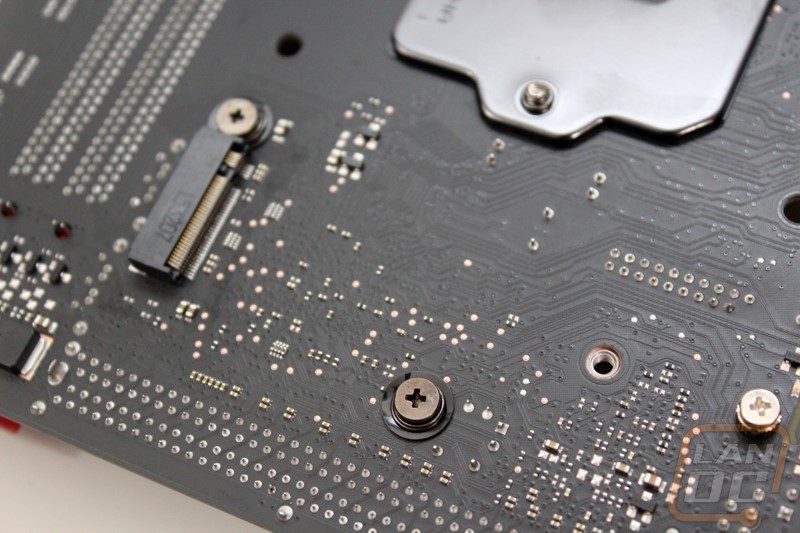
Normally on the back of a motherboard we are just checking out any mounting for cooling and getting a better look at the PCB. But with the Z170N Gaming 5, on top of the back finish on the PCB we also have an M.2 mount. This is because of the small size Gigabyte couldn’t actually fit a full sized M.2 up top. The slot supports an M key type 2260/2280. That means it supports SATA and PCIe with the PCIe being up to 4x. All of that means that if you want to go M.2 (and you should) you can go crazy with the fastest models.
Software
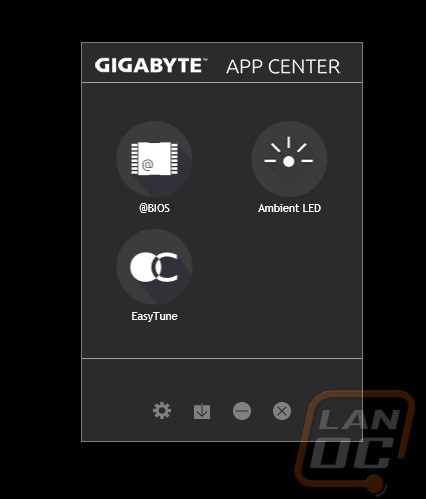
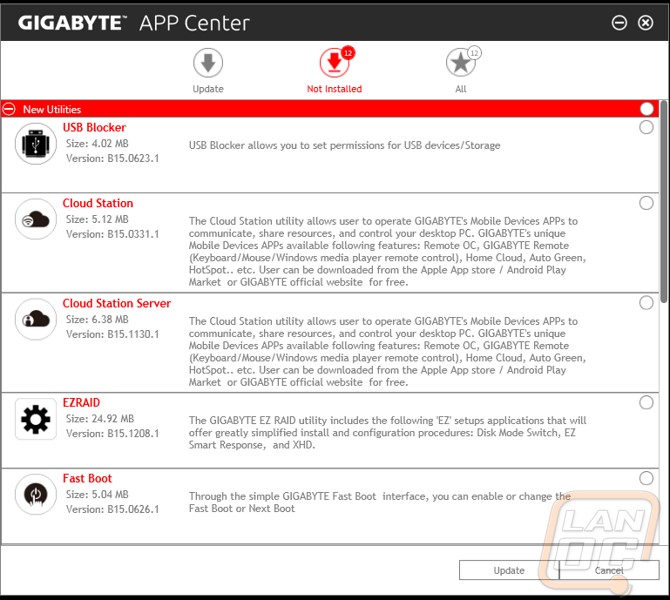
I’ve gone o and on about how much software can affect your user experience in a wide variety of reviews for things like peripherals, video cards, and motherboards. Part of that experience is how simple the installation goes. That is why peripheral manufactures have been combining software for all of their products, and the same has happened with motherboard manufactures as well. We used to have to download and install 10 or 15 different programs but now we get a single program to control everything like with Gigabytes App Center. In the case of the App Center we don’t install everything, in fact the program installs and then from there we can pick what portions of the program we want to download and install. It keeps everything together in one place and also helps keep everything up to date as well. The App Center runs in the background and if you click on it in your task manager it opens up a small window down in the corner that lets you pick from your installed apps quickly or if you want you can open it up all of the way to get to the updates, settings, and install sections.
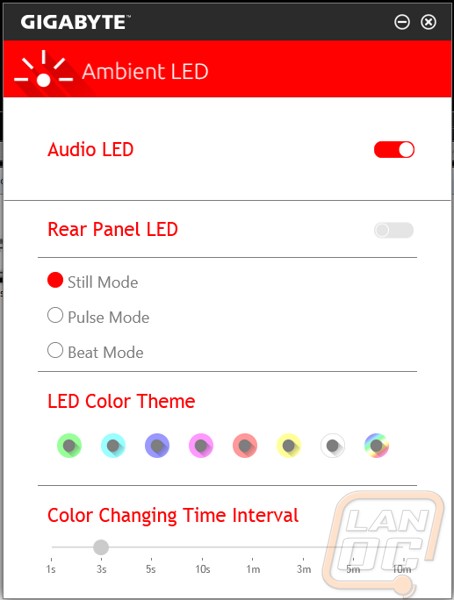
One of the apps that I had installed from our previous Gigabyte Z170 review is the ambient LED app. Most of the controls don’t work with this board but we can still turn off the audio lighting should you want too.
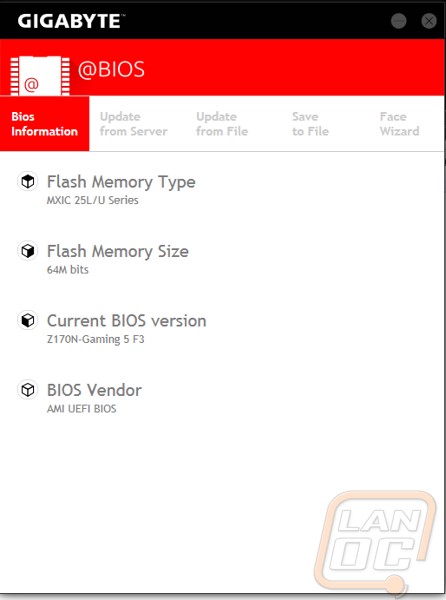
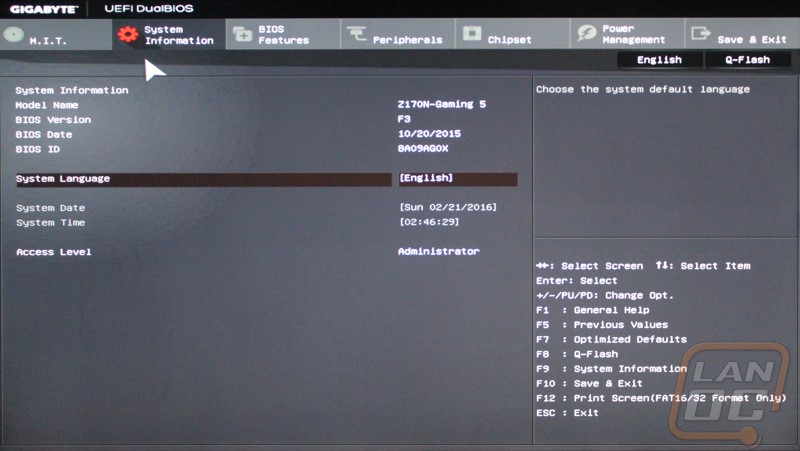
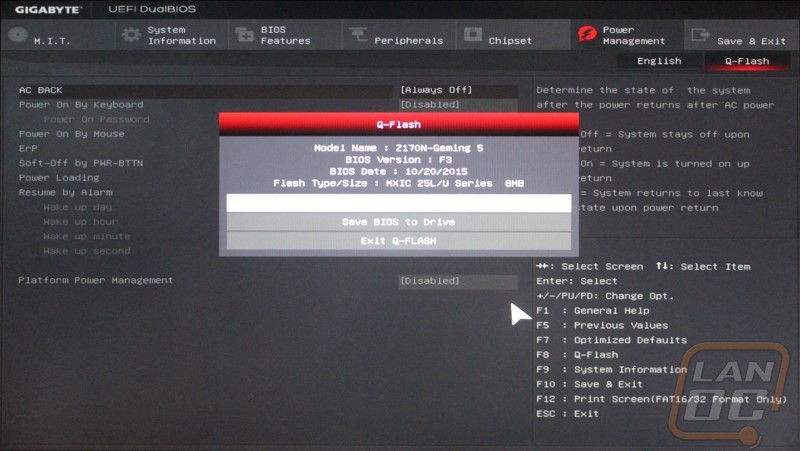
The @BIOS app lets us see what BIOS version we are running and gives us a few options for updating. We can download and update from the server or if you want you can download the file manually and update. This is also where we can get at the Face wizard to upload a new photo for the BIOS boot to customize your PC a little more.
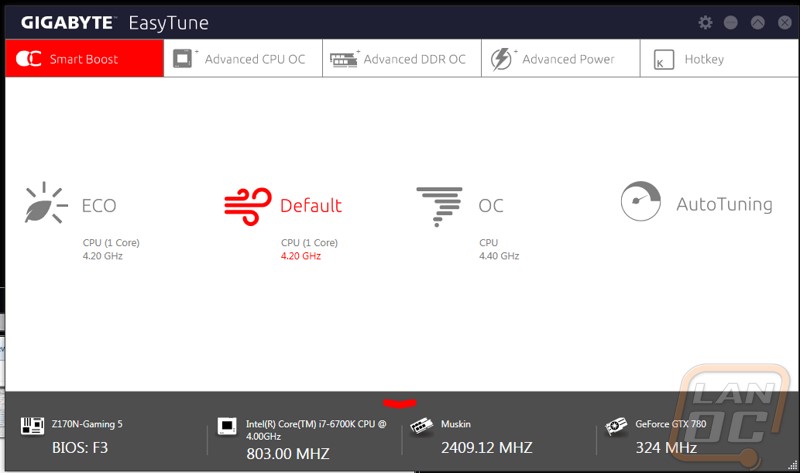
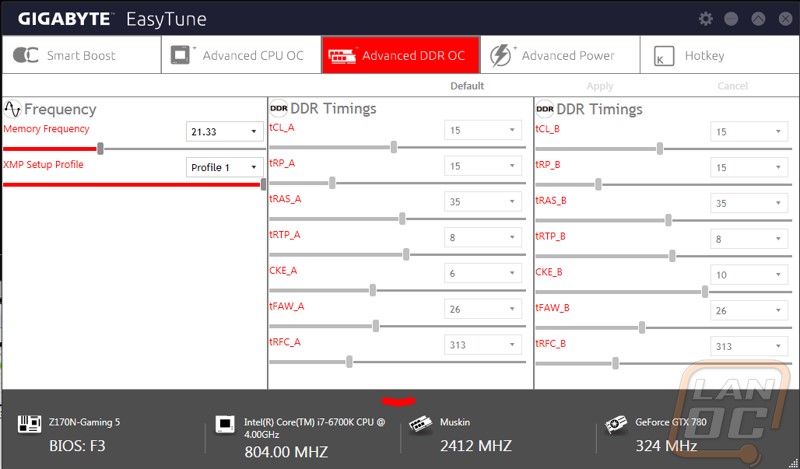
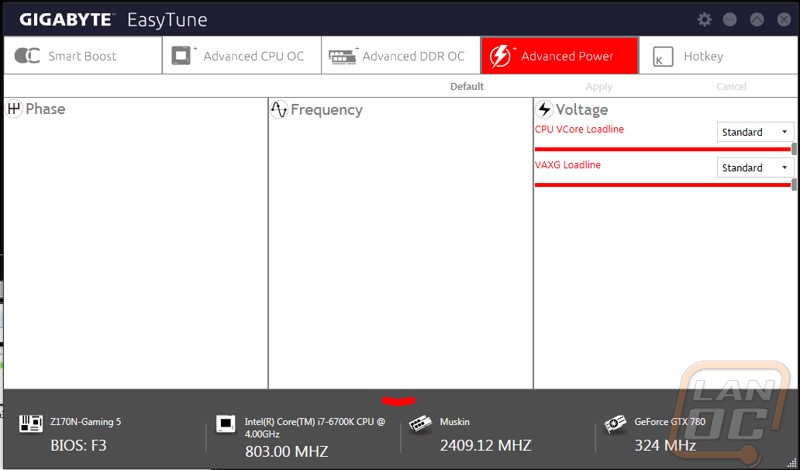
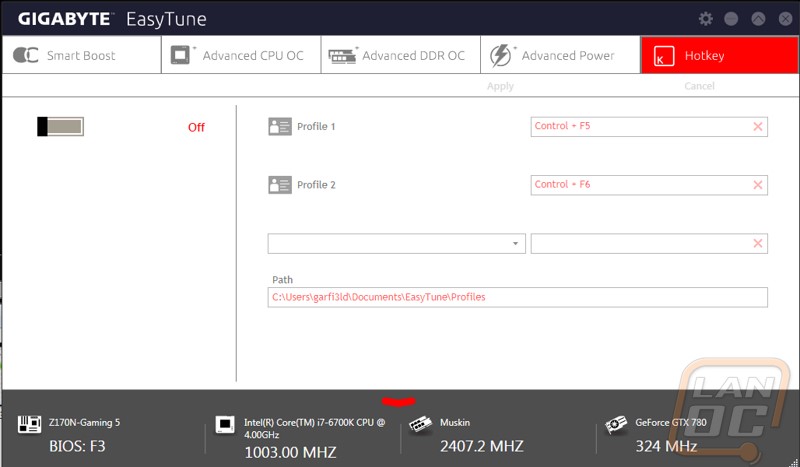
The only program that I really want to use on a regular basis is the EasyTune App. Basically here we can get into almost all of the BIOS options to overclock and tune. In addition to CPU and Memory options you actually have access to voltage adjustments on a few of the pages. Down on the bottom the software shows the clock speeds of the CPU, Memory and your video card. EasyTune is missing one big aspect though that I hope they add in the future. I would love to be able to see some temperature and other readings in a graph form here to both help with tuning and to also give a quick way to check for issues when your PC is acting up.

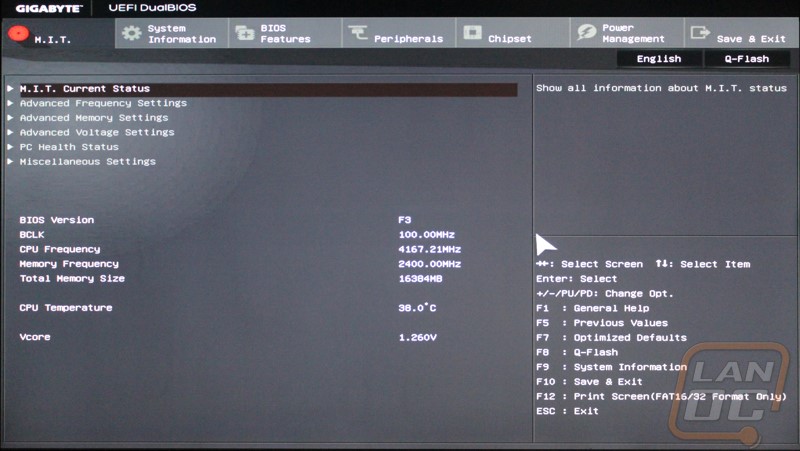
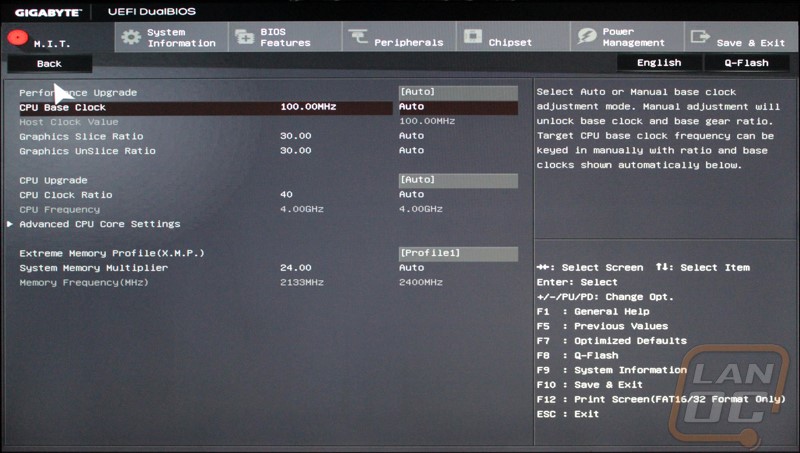
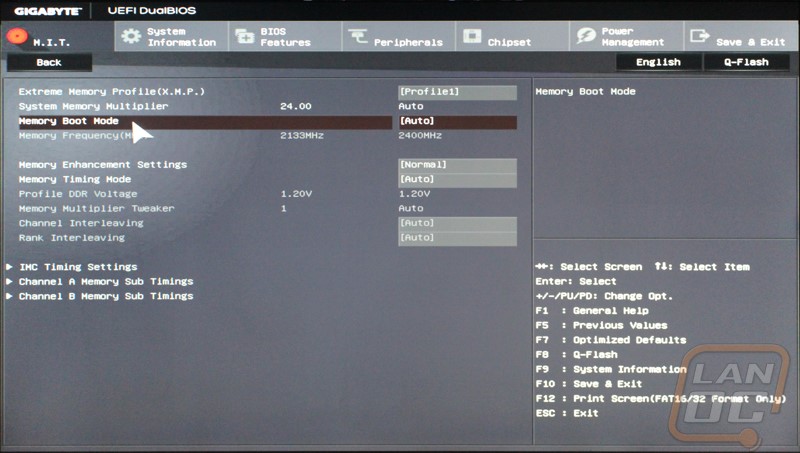
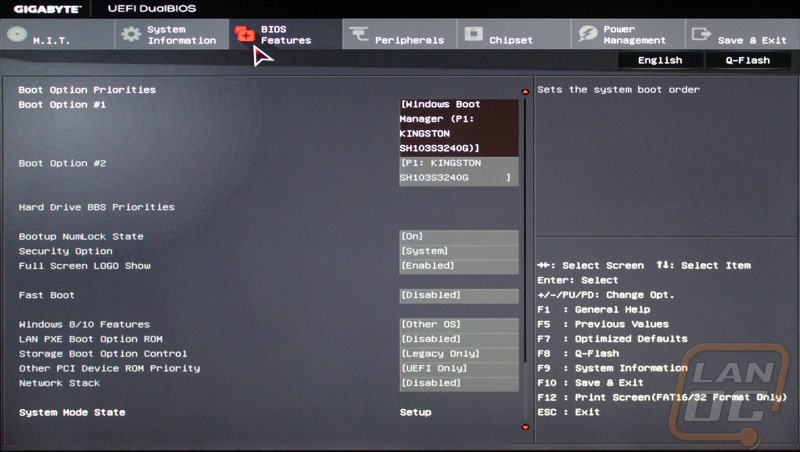
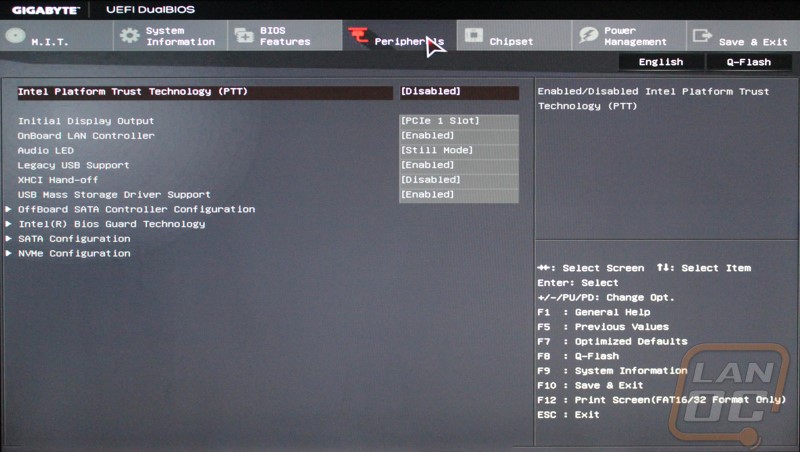
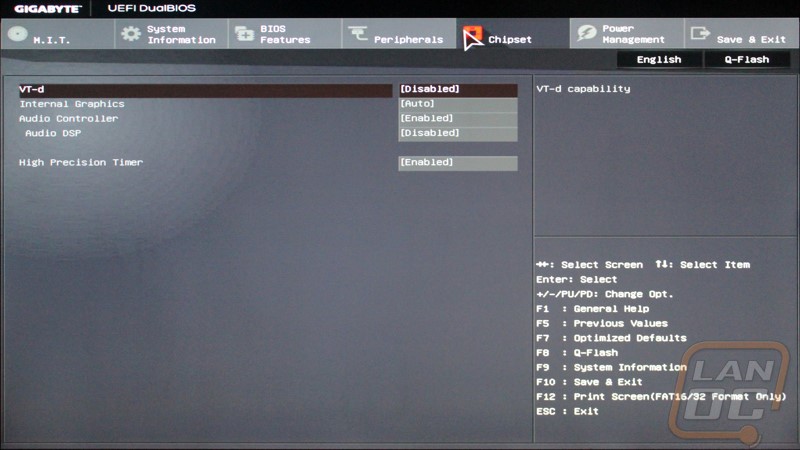
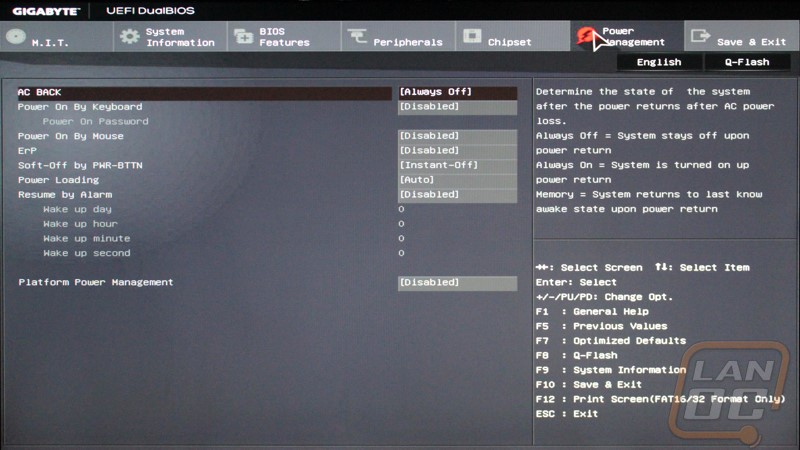
The other half of the software of a motherboard is the BIOS. We might not get into it very often but it is nice when it is easy to navigate and filled with all of the features you need. The Z170N Gaming 5 uses a fairly basic UEFI. You can navigate it with a keyboard or a mouse depending on your preference. The mouse movement was still a little weird feeling like most UEFIs are but I was still able to get around. Gigabyte has all of the overclocking options right on the first page called the MIT page. For the most part everything I needed was in here but I was a little frustrated when I couldn’t find ways to manually set a few settings on my memory to make sure our test setup matched all of our other Z170 benchmarks. Beyond that you will find all of the lesser needed options in the other tabs. Unlike a lot of other BIOS Gigabyte didn’t theme out this UEFI to match the motherboard but the simple grey look works well. Plus, I don’t know if I could handle any more red and black “Gaming” UEFIs.
Test Rig and Procedures
| AMD FM2+ Test System | ||
| CPU | Intel i7-6700K | Live Pricing |
| Cooling |
Noctua NH-U14S for cooling Noctua NT-H1 Thermal Paste |
|
| Memory | Kingston HyperX FURY DDR4 16GB kit 2666MHz | Live Pricing |
| Storage | Kingston HyperX 240GB SSD | Live Pricing |
| Video Card | Nvidia GTX 780 | Live Pricing |
| Power Supply | Cooler Master V1000 Power Supply | Live Pricing |
| Case | Microcool Banchetto 101 Test bench | Live Pricing |
| OS | Windows 7 Pro 64-bit | Live Pricing |
| Motherboard Testing | |
| Passmark Performance Test 8.0 | Overall PCMark score |
| PCMark 8 | We use the Home Accelerated benchmark and track the overall score |
| 3DMark | We run the 2013 Fire Strike test on the performance setting |
| In Game Tests | |
| Bioshock Infinite | Using the Adrenaline Action Benchmark Tool, we run Bioshock Infinite on the “Xtreme” quality setting. |
| Tomb Raider | Using the Adrenaline Action Benchmark Tool, we run Tomb Raider on the “Xtreme” quality setting. |
| Hitman: Absolution | Using the Adrenaline Action Benchmark Tool, we run Hitman: Absolution on the “Xtreme” quality setting. |
| Sleeping Dogs | Using the Adrenaline Action Benchmark Tool, we run Sleeping Dogs on the “Xtreme” quality setting. |
| Subsystem Testing | |
| Passmark | Passmark Advanced network test |
| CrystalDiskMark | Read speed testing on both SATA and USB 3.0 using a 60GB Corsair Force GT SSD |
Performance
Unlike with most other reviews when I’m doing performance testing on a motherboard it is less about what board performs faster and more about spotting any glaring issues. The reason for that is because all of these boards are using the same chipset, CPU, RAM, and video card. So the gap between each board isn’t very much typically. We typically see more of a gap due to things like some boards automatically overclocking your CPU a little and driver changes than anything. In the Physics test on 3DMark for example the Gaming 5 came in a little lower than the rest but this was due to me having trouble getting our memory set to the exact same setting causing a little drop there. Surprisingly though that same issue didn’t seem to show on any of the other benchmarks. All in all the benchmarks prove that if you pair the Z170 Gaming 5 with a good CPU and even a decent GPU you are going to see great benchmark numbers, numbers no different than the full ATX boards.
| 3DMark | |||
| Motherboard | Overall Score | Graphics Score | Physics Score |
| MSI Z170A Gaming M5 | 8653 | 9635 | 12451 |
| Gigabyte Z170X Gaming 7 | 8849 | 9783 | 13622 |
| MSI Z170I Gaming Pro AC | 8693 | 9524 | 13694 |
| Gigabyte Z170N-Gaming 5 | 8730 | 9803 | 11785 |
| PCMark 8 Home Accelerated Score | |||
| MSI Z170A Gaming M5 | 4712 | ||
| Gigabyte Z170X Gaming 7 | 4798 | ||
| MSI Z170I Gaming Pro AC | 4906 | ||
| Gigabyte Z170N-Gaming 5 | 4782 | ||
| Passmark Overall Score | |||
| MSI Z170A Gaming M5 | 5507.6 | ||
| Gigabyte Z170X Gaming 7 | 5669.8 | ||
| MSI Z170I Gaming Pro AC | 5831.3 | ||
| Gigabyte Z170N-Gaming 5 | 5442.5 | ||
| Bioshock Infinite Average FPS | |||
| MSI Z170A Gaming M5 | 108.28 | ||
| Gigabyte Z170X Gaming 7 | 108.96 | ||
| MSI Z170I Gaming Pro AC | 108.05 | ||
| Gigabyte Z170N-Gaming 5 | 105.68 | ||
| Tomb Raider Average FPS | |||
| MSI Z170A Gaming M5 | 57.8 | ||
| Gigabyte Z170X Gaming 7 | 57.9 | ||
| MSI Z170I Gaming Pro AC | 55.5 | ||
| Gigabyte Z170N-Gaming 5 | 55.0 | ||
| Hitman: Absolution Average FPS | |||
| MSI Z170A Gaming M5 | 46.8 | ||
| Gigabyte Z170X Gaming 7 | 46.3 | ||
| MSI Z170I Gaming Pro AC | 46.5 | ||
| Gigabyte Z170N-Gaming 5 | 44.7 | ||
| Sleeping Dogs Average FPS | |||
| MSI Z170A Gaming M5 | 60.3 | ||
| Gigabyte Z170X Gaming 7 | 61.1 | ||
| MSI Z170I Gaming Pro AC | 59.6 | ||
| Gigabyte Z170N-Gaming 5 | 59.5 | ||
USB and SATA
In the past testing USB and SATA was a lot more important because a lot of the boards used different controllers but with Z170 the built in Intel controllers for both are top notch so the differences between the boards are minimal at best. The Gaming 5 was within a few MB/s compared to all of the Z170 boards I tested. In USB 3.0 testing the results were similar with the Gaming 5 actually being the fastest out of the bunch with the exception of when using USB 3.1 Boost on the MSI board.
| SATA3 | Read Speed |
| MSI Z170A Gaming M5 | 435.6 |
| Gigabyte Z170X Gaming 7 | 442.8 |
| MSI Z170I Gaming Pro AC | 444.4 |
| Gigabyte Z170N-Gaming 5 | 438.2 |
| USB 3.1 | Read Speed |
| MSI Z170A Gaming M5 | 220.3 |
| Gigabyte Z170X Gaming 7 | 251.5 |
| MSI Z170I Gaming Pro AC |
251.3 280.9 w/USB 3.1 Boost |
| Gigabyte Z170N-Gaming 5 | 254.6 |
Network
Last but not least I wanted to see how the Killer NIC would perform. To do this I ran the Passmark Advanced Network Benchmark using a server in another room (across two switches). I use the average result for comparison. As we can see the two other boards using the same NIC perform a little better but even being the slowest Killer NIC out of the bunch is still faster than the two boards with Intel NICs. In the past I would have been worried about the Killer NIC holding up over time but it seems the failures I experienced early on with the first few Killer NICs have been fixed and I haven’t had any issues in years now.
| Motherboard | Average Network Speed |
| MSI Z170A Gaming M5 | 873.0 |
| Gigabyte Z170X Gaming 7 |
Intel 760.0 Killer 922.4 |
| MSI Z170I Gaming Pro AC | 578.5 |
| Gigabyte Z170N-Gaming 5 | 816.9 |
Overall and Final Verdict
So the Gigabyte Z170N Gaming 5 isn’t the first Mini-ITX Z170 board to come through the office. The first was the MSI Wireless AC Pro that I covered. So going into this review I had a good idea of what a Z170 ITX board should have for features, so most of the time I spent comparing them. Really for the most part both boards have the same features. You have the same chipset, audio, and wireless. The Gigabyte board pulled ahead when really digging into the features though. For one it actually has a new USB 3.1 Type C connection. You also get a DVI-D port where the MSI just had HDMI. There are also a few more SATA ports, in fact this board has more SATA ports than I’ve ever seen on any other ITX motherboard, perfect for a small server or NAS. But what really set things apart for me was the difference in network cards. It might be a small difference but the performance difference between the Intel I219-V and the Killer E2201 on our network was night and day and its really the only feature that will effect performance.
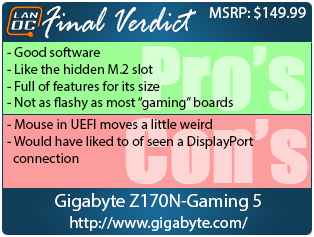
Gigabyte did a great job with the Gaming 5. I love the M.2 slot on the back panel, it is going to save me a lot of room if I use the board in a small form factor build. Like I mentioned above they really packed the board full of features given the ITX form factor. I’m also really happy with the software, specifically the App Center and the apps I was able to download using it. While I would actually prefer that Gigabyte not go with the black and red theme like every other “gaming” motherboard, I was happy that they didn’t make the Gaming 5 as flashy as the MSI. It wasn’t all perfect though, I did find the mouse movement in the UEFI to be a little weird and hard to control. I would also love to see them include a DisplayPort connection on the rear I/O as well given they had the room. Even so those are small complaints in comparison to the Gaming 5’s positives.
My other concern was just how much the Gaming 5 would cost. With the MSI I found that it wasn’t a bad deal given its features but it was still close to the top of the price range for an ITX motherboard. A quick look on Newegg shows that the Gigabyte Z170N Gaming 5 is $25 less than the MSI and is also cheaper than almost every other Z170 ITX board with the exception of two. Typically gaming focused boards end up having a bit of a price premium for added features that you might not need and for the “gaming” look but Gigabyte did a good job keeping this board in still in range of a decent value. You can pick up a budget CPU for as low as $65 to get you rolling or you can pair it with a nice i5 for about $350 for the pair.


Live Pricing: HERE
