
Lian Li hit the nail on the head when they brought out their Uni Fan line of fans and they have also done a good job of expanding the lineup with a few variations. They have even started to improve on their original designs with fans like the Uni Fan SL V2 and today they are announcing the Uni Fan AL V2 which brings a lot of those same features to the AL series and today I’m going to take a closer look. I have a chance to check out the new SL V2 design when they were launched this holiday season so I’m excited to get a first look at the V2 changes and see how Lian Li has improved on the already popular design.
Product Name: Lian Li Uni Fan AL120 V2
Review Sample Provided by: Lian Li
Written by: Wes Compton
Amazon Affiliate Link: HERE
|
UNI FAN AL120 V2 |
||||
|
Model |
AL120V2-1B |
AL120V2-3B |
AL120V2-1W |
AL120V2-3W |
|
Color |
Black |
White |
||
|
Number of fans |
1 |
3 |
1 |
3 |
|
Dimensions |
120x120x28mm |
|||
|
Material |
PBT / PC / Aluminum |
|||
|
Rated Voltage |
12V (FAN) / 5V (LED) |
|||
|
Fan Speed |
0, 250 - 2000 RPM |
|||
|
Static Pressure |
2.97 mmH2O (Maximum) |
|||
|
Airflow |
77.3 CFM (Maximum) |
|||
|
Acoustic Noise |
28.7 dBA (Maximum) |
|||
|
Bearing Type |
Fluid Dynamic Bearing (FDB) |
|||
|
Operational Voltage |
DC 12C & 5V |
|||
|
Input Power |
7.2 Watt |
|||
|
Warranty |
2 Years |
|||
|
UNI FAN AL140 V2 |
||
|
Model |
AL140V2-1B |
AL140V2-1W |
|
Color |
Black |
White |
|
Number of fans |
1 |
1 |
|
Dimensions |
140x140x25mm |
|
|
Material |
PBT / PC / Aluminum |
|
|
Rated Voltage |
12V (FAN) / 5V (LED) |
|
|
Fan Speed |
0, 250 - 1600 RPM |
|
|
Static Pressure |
2.80 mmH2O (Maximum) |
|
|
Airflow |
81.6 CFM (Maximum) |
|
|
Acoustic Noise |
26.8 dBA (Maximum) |
|
|
Bearing Type |
Fluid Dynamic Bearing (FDB) |
|
|
Operational Voltage |
DC 12C & 5V |
|
|
Input Power |
6.32 Watt |
|
|
Warranty |
2 Years |
|
Photos and Features
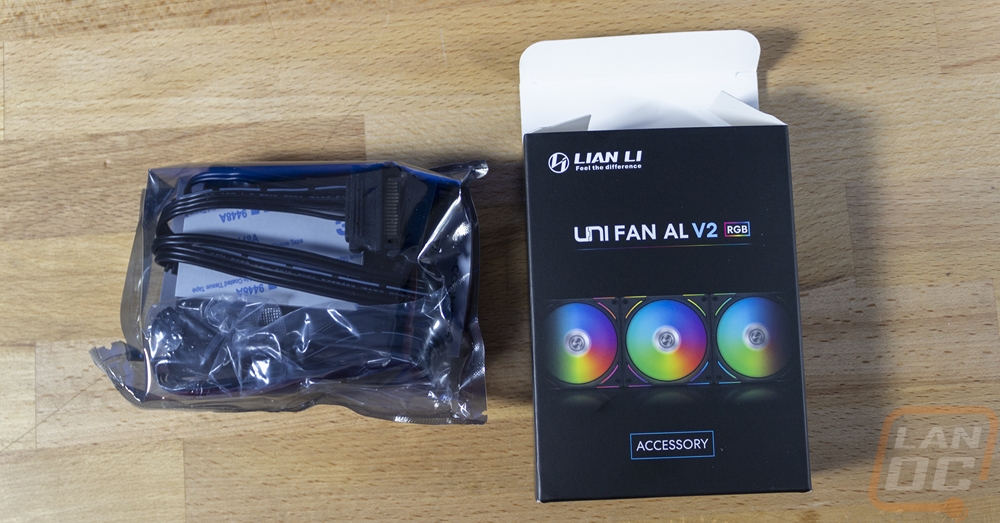
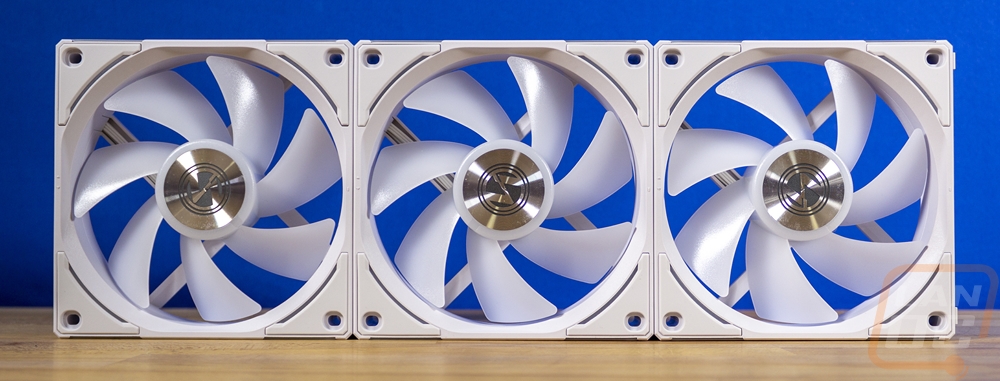
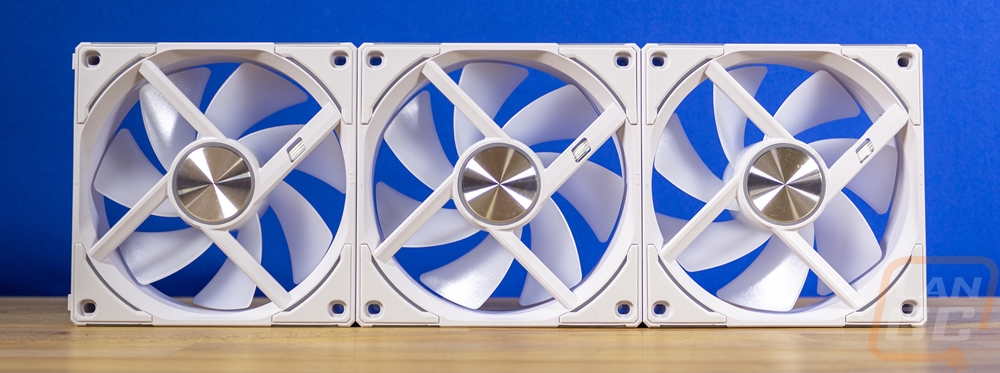
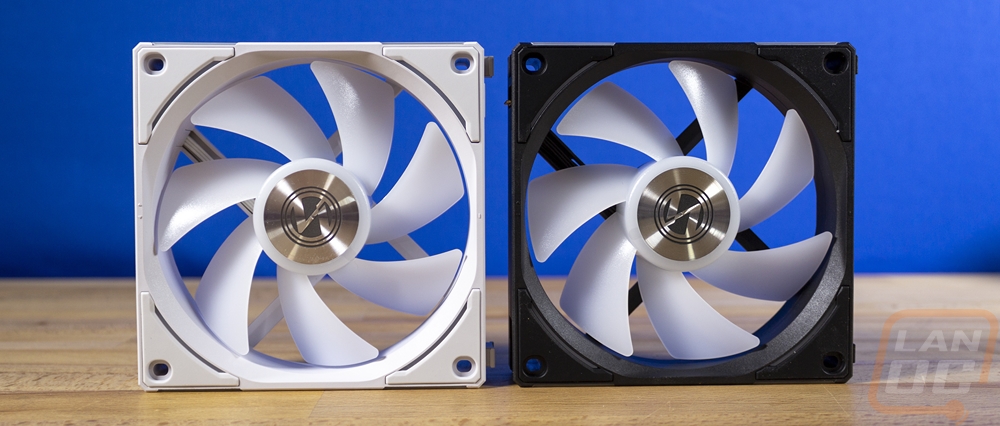
The new Uni Fan AL V2, like other Uni Fan models, is available in both black and white models and Lian Li has a pack of three and individual fans as well for the 120 mm fan size. They also have the AL V2 140 mm which is also available in black or white but it is only sold as an individual fan. For today though I have one triple pack of the white AL120 V2 in white and also three single black AL120 V2s so we can get a good look at both versions. I’m always surprised that even with the same design the color can affect the overall look.
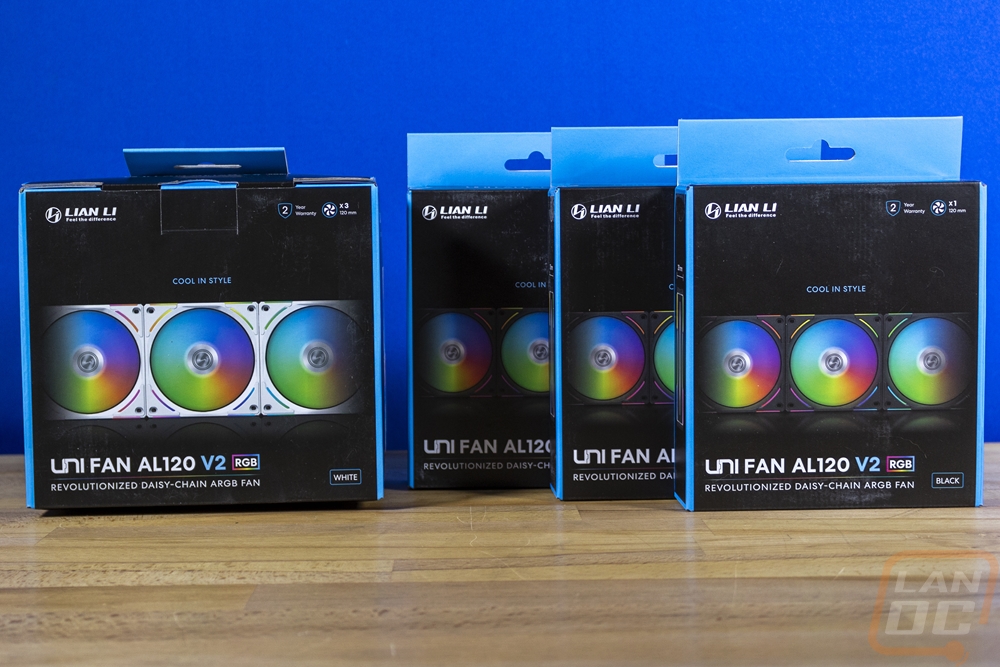
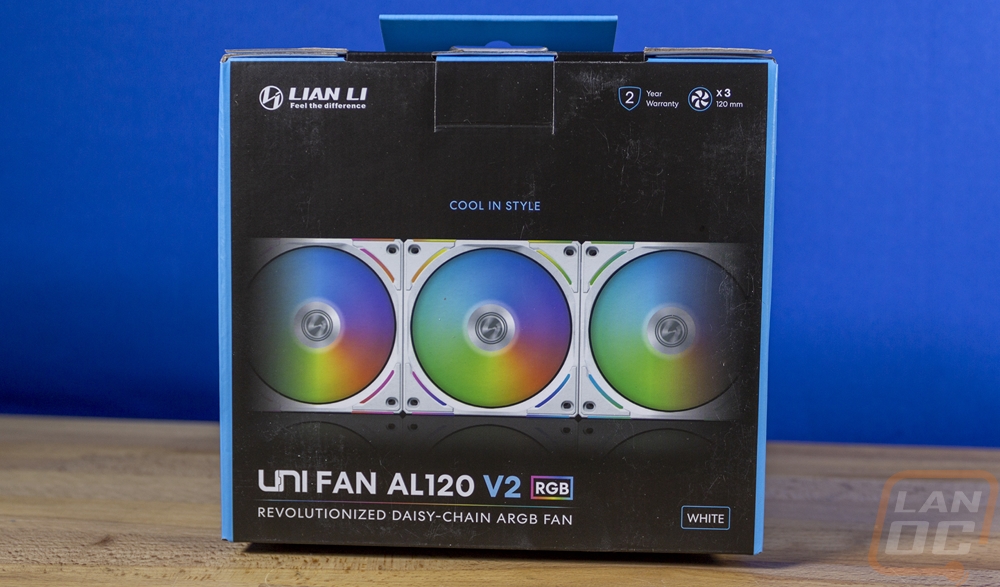
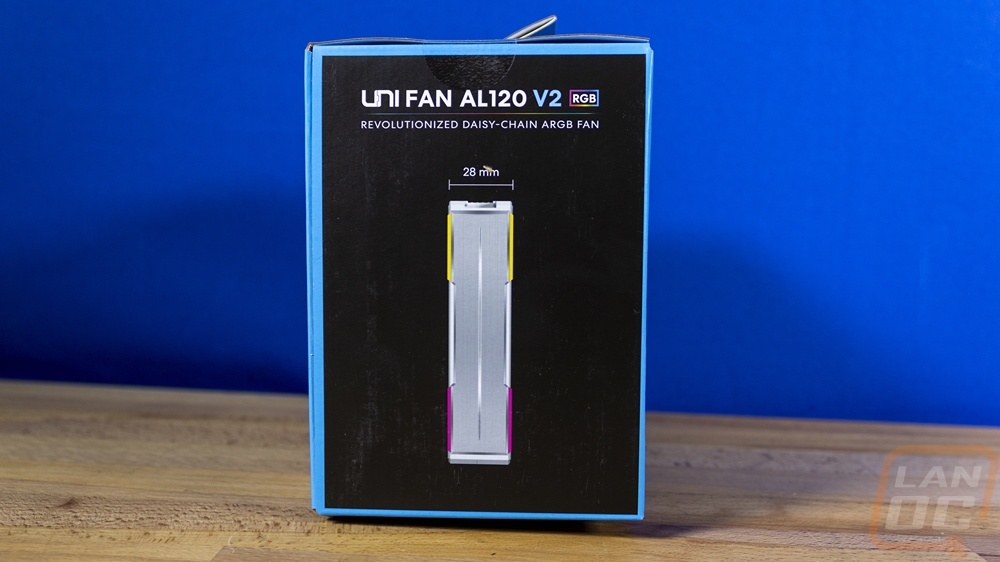
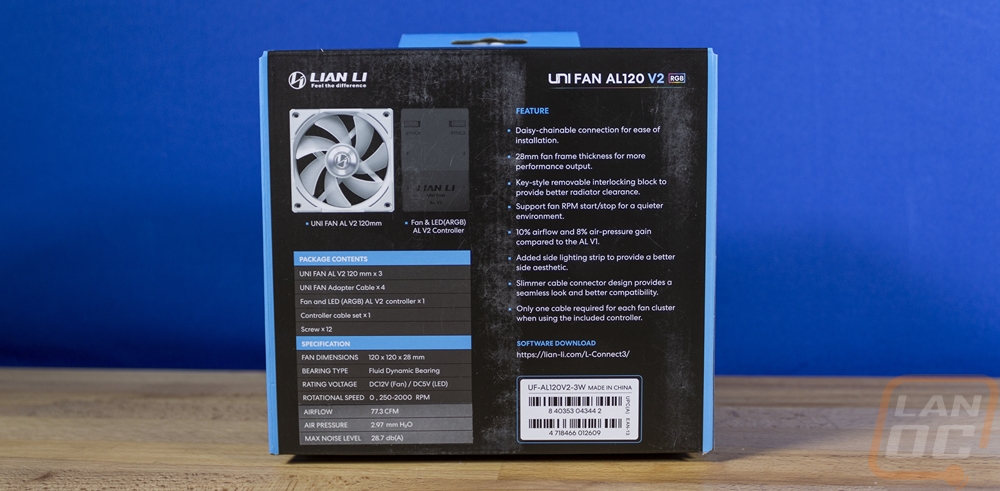
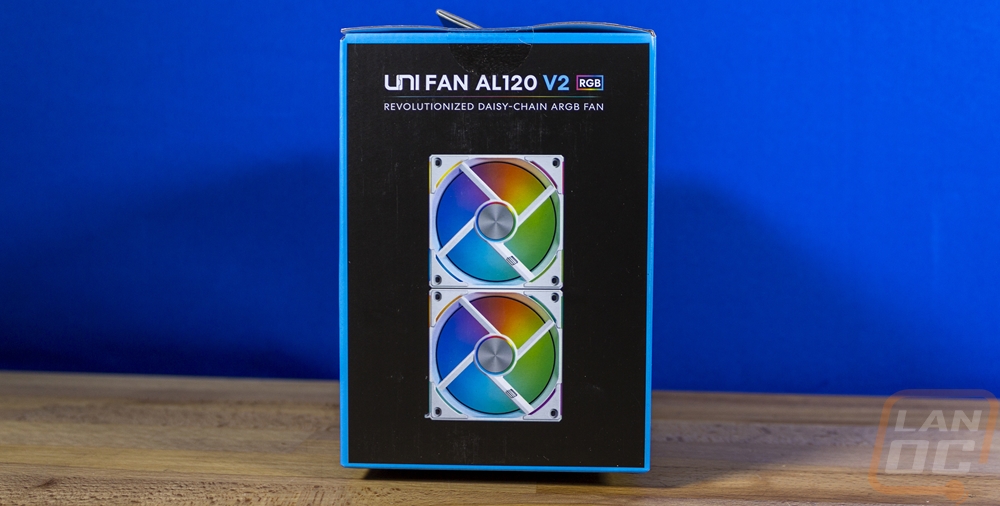
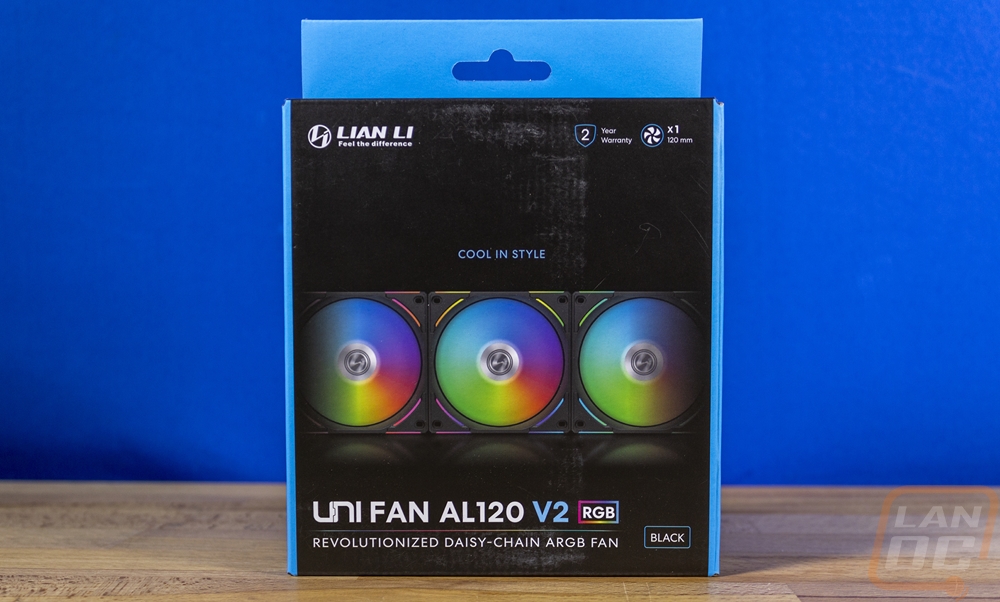
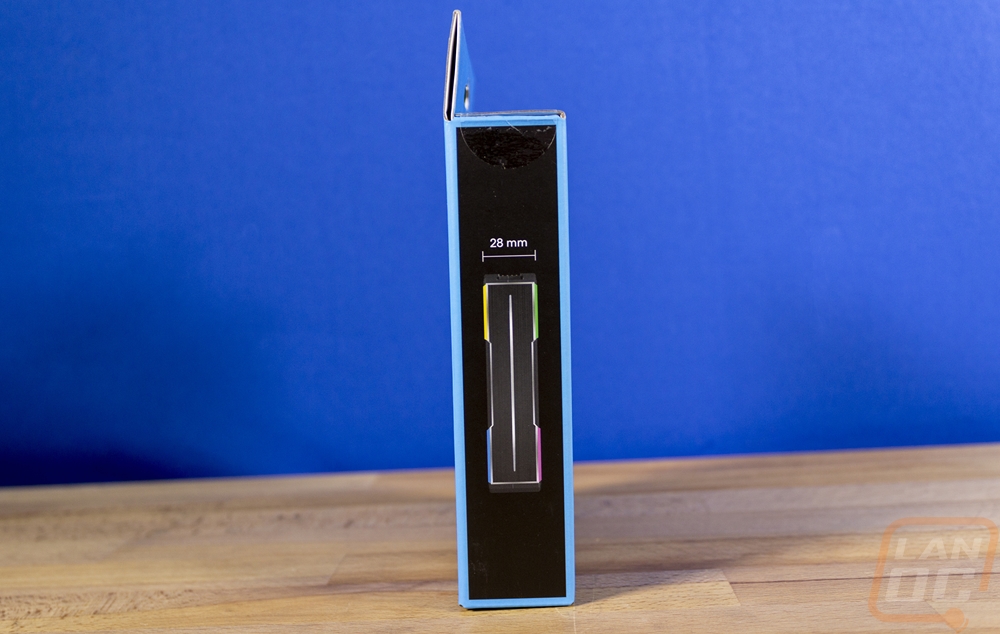
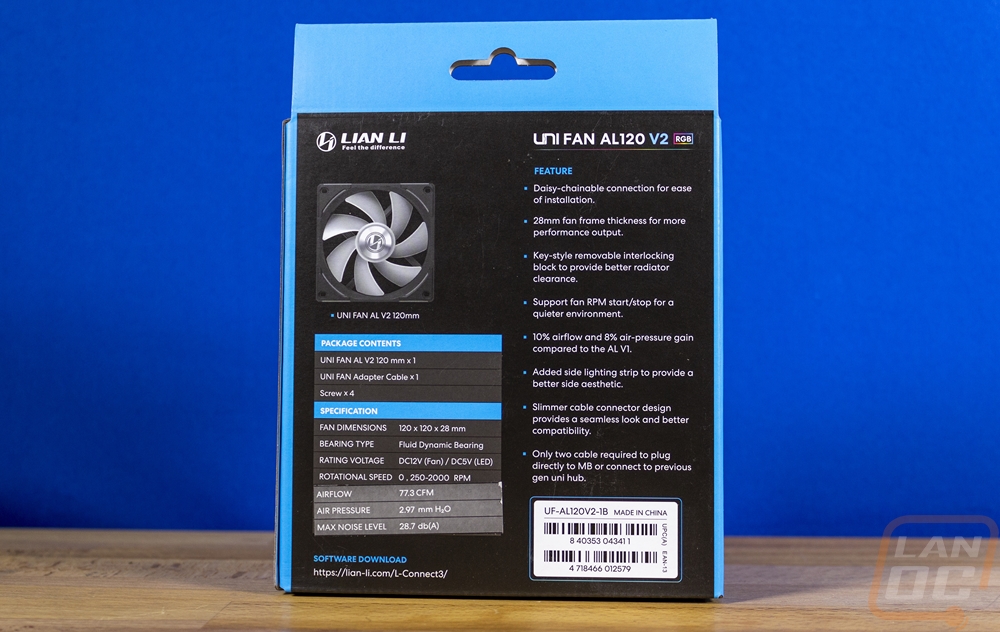
First up let’s dig into the AL120 V2 White triple pack and even with the new fan design Lian Li has stuck with the same packaging styling for the entire product lineup. This consists of a black background with a light blue on the edges and as accents on a few things on the front of the box like around the white color designation in the bottom right corner, around the 2-year warranty badge, and the fan icon in the top right corner that lets us know this is a three pack of 120 mm fans, and even in the V2 in the model name which is down at the bottom left corner. Lian Li reiterates that the Uni Fans daisy-chain together and have addressable RGB lighting with the text below the model name as well as with the large picture in the center that shows the fans off all linked together and the lighting lit up. The sides of the box have a side profile picture of the fan and show the 28 mm thickness as well as a picture of the back of the fan which shows the lighting around the center there as well. Then on the back of the box there is a picture of the fan and the controller included with a complete specification listing. Then on the right, they break down the features with longer descriptions of each.
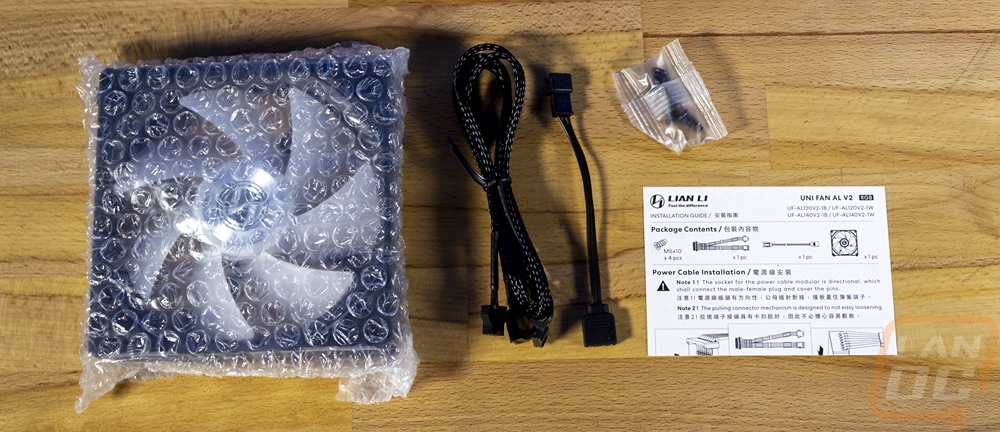
When you dig into the box most of the wiring is sitting right up on top. Then below that, each fan is wrapped in bubble wrap bags and there is a box with the controller and controller-specific accessories.
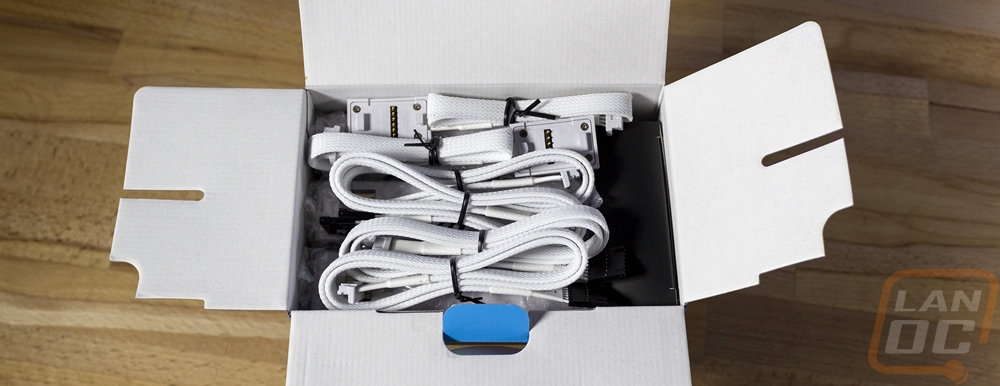
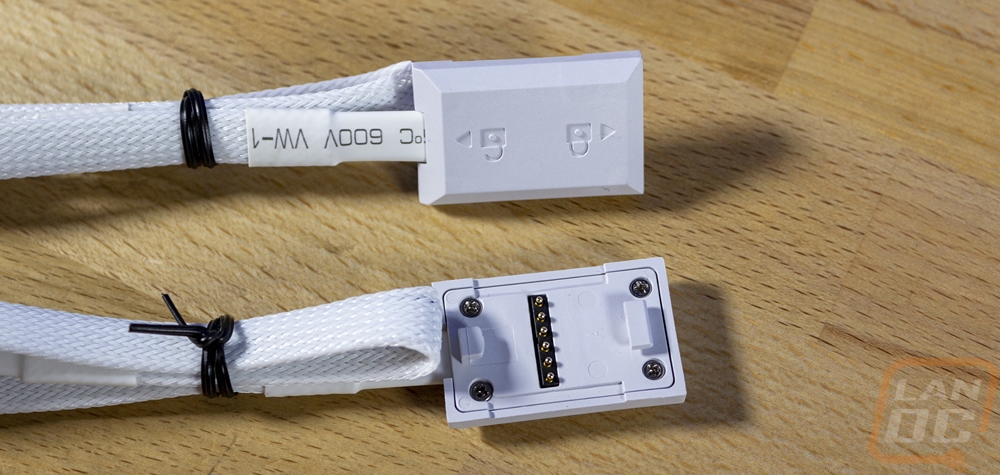
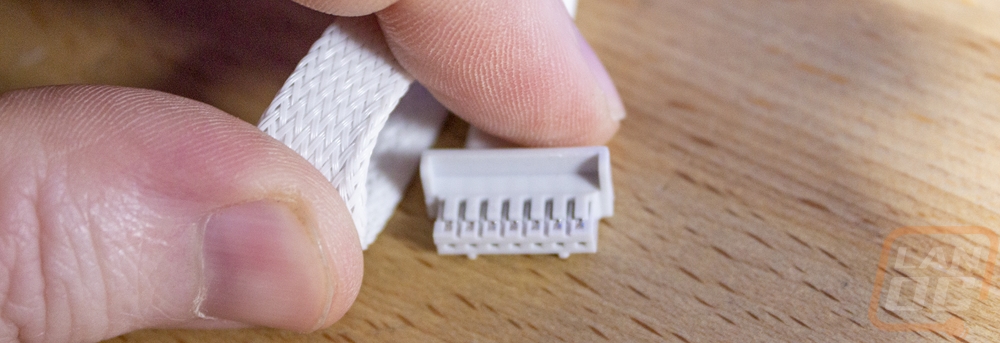
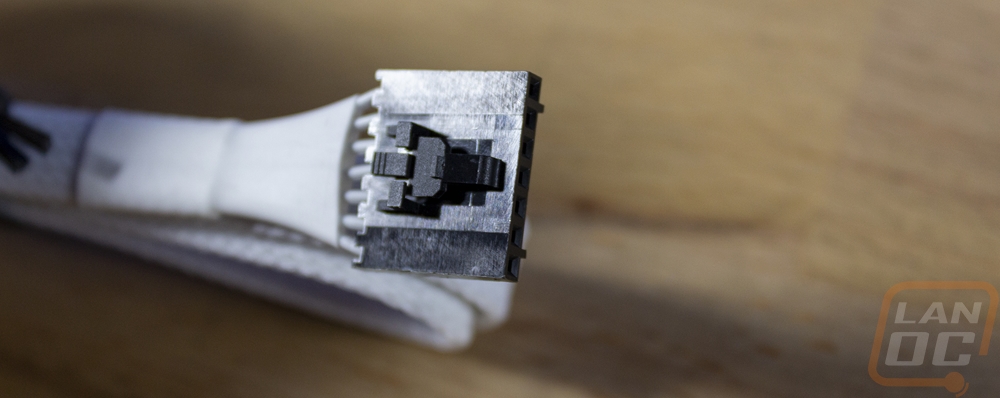
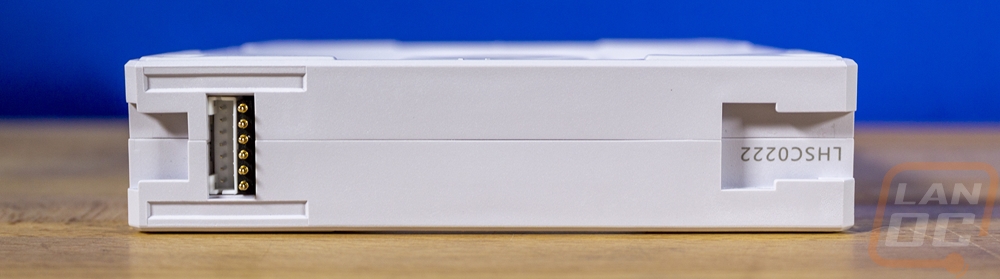
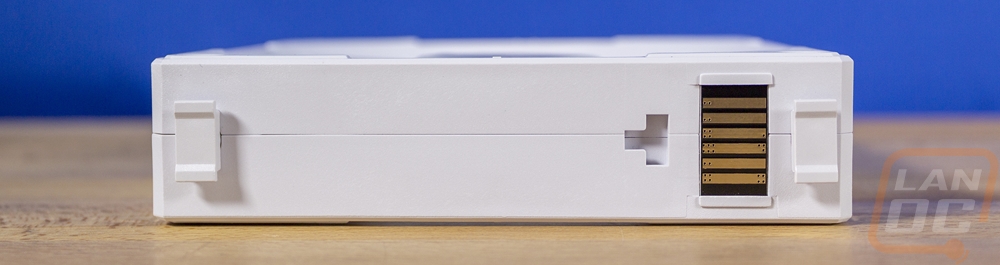
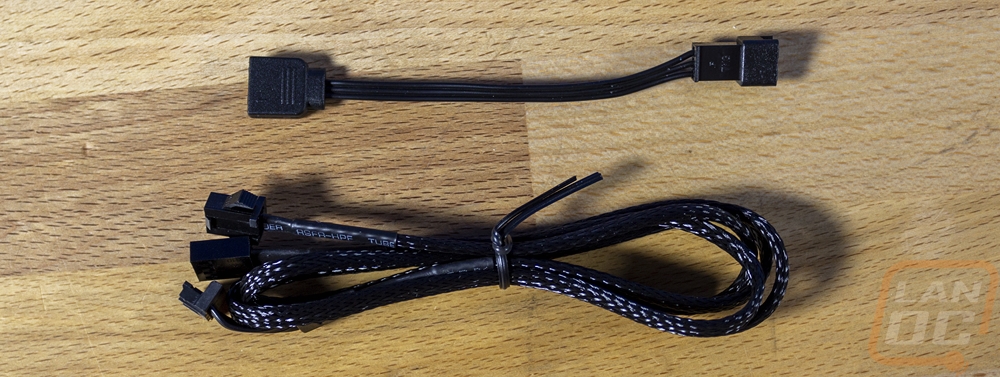
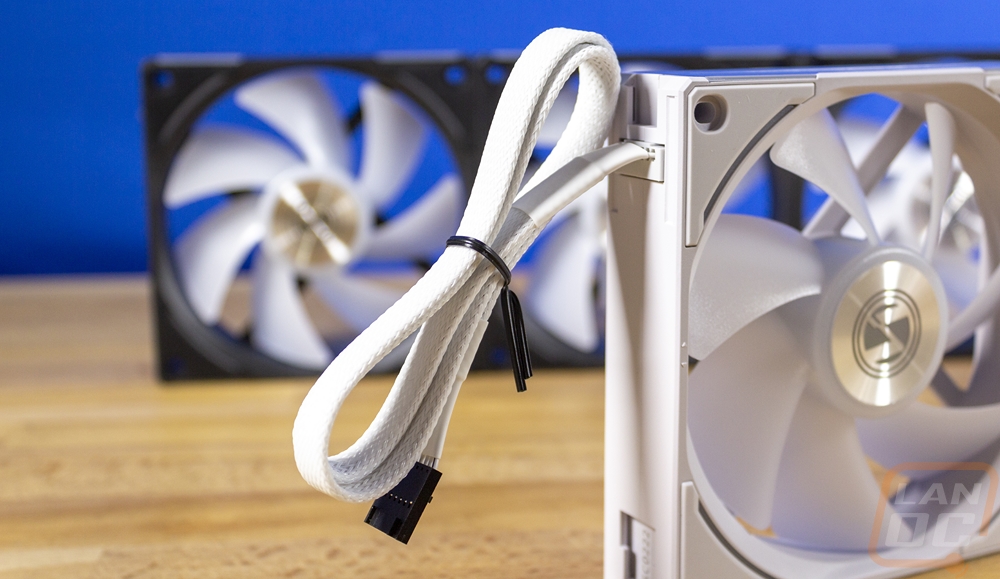
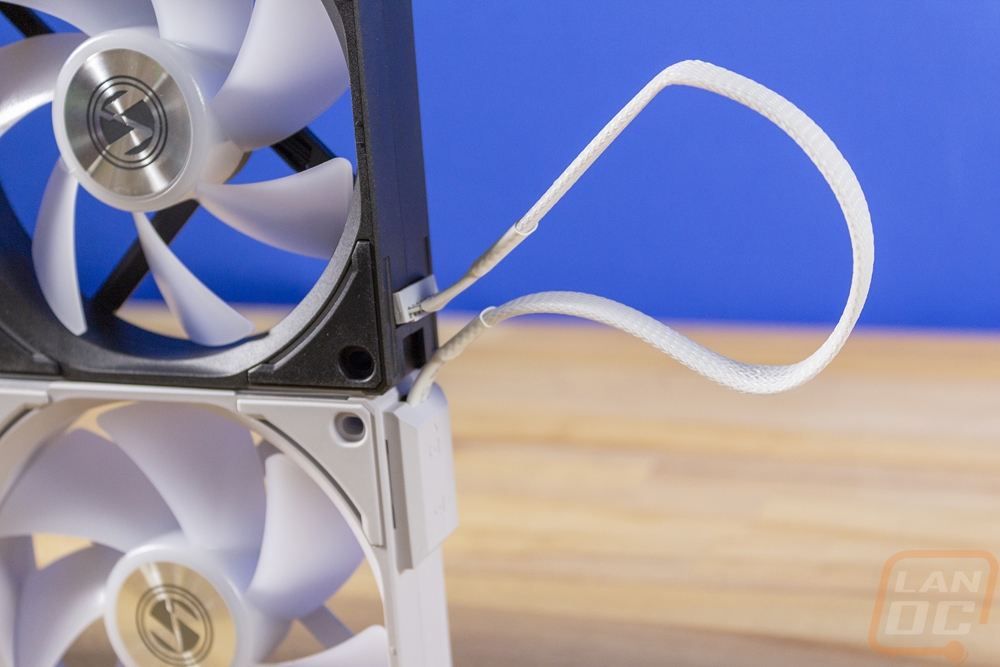
Because of the unique linking design, you do get a lot of accessories considering it is just three fans. You get four adapter cables and then two link cables that go from fan to fan. These are color matched to the color of the fan so ours are white but the adapter cables do still have black ends on the controller end but black on the fan end. This is one of the big changes for the V2 fans, the old cable designs had the larger slide-on connection that you see for the fan to fan cables, but for ALL of the cables. The controller end of the cable is the same but they now have a smaller plug that can plug into the daisy chain connection which replaces that slide-on connection. This new design is more compact and sits flush with the fan.

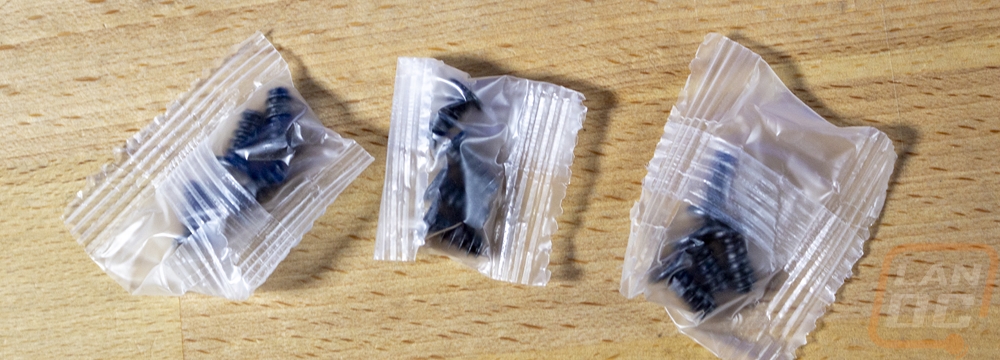
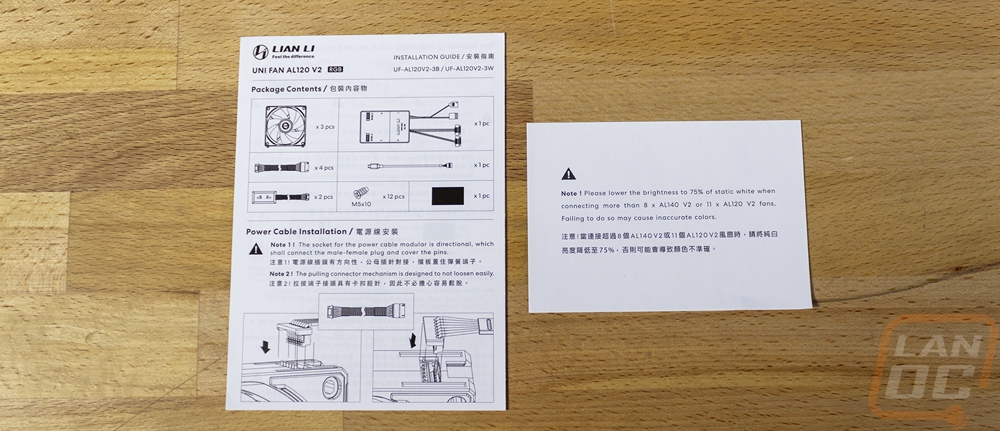
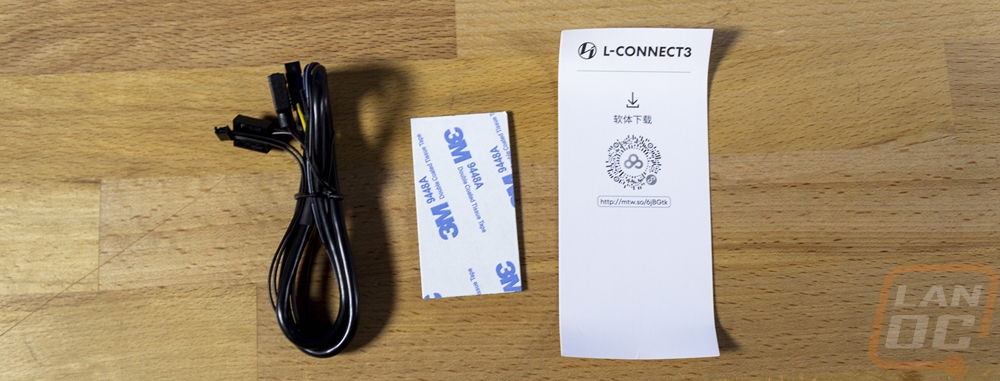
In addition to the cables, you get three sets of fan screws for mounting everything. You also have documentation that runs through all of the contents and then has instructions to get everything set up. There is also a small paper with a warning that if you are running more than 8 AL140 V2 fans or 11 AL 120 V2 that you should run at 75% brightness when running white to prevent damage.
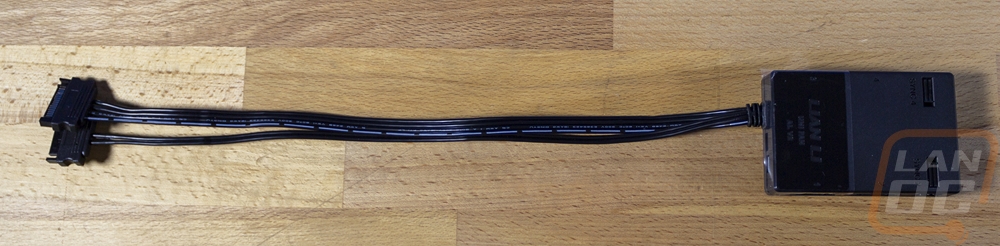
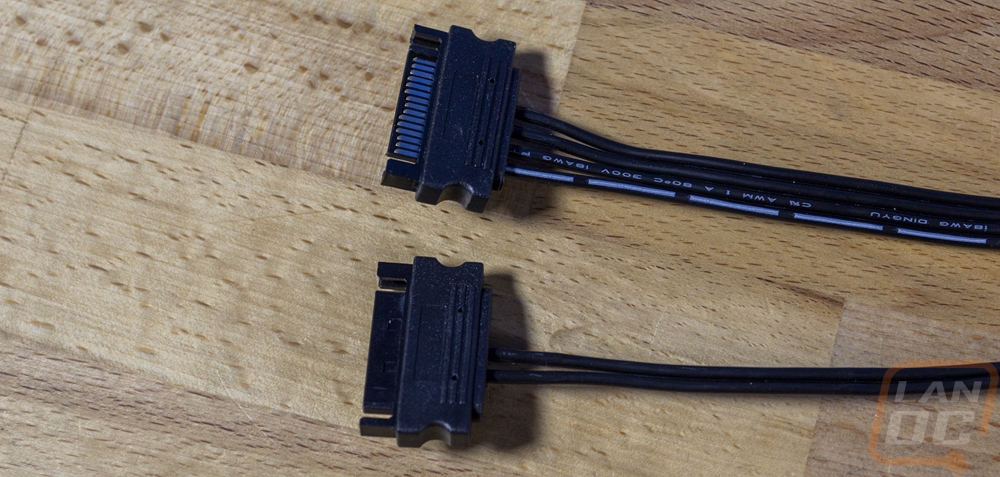
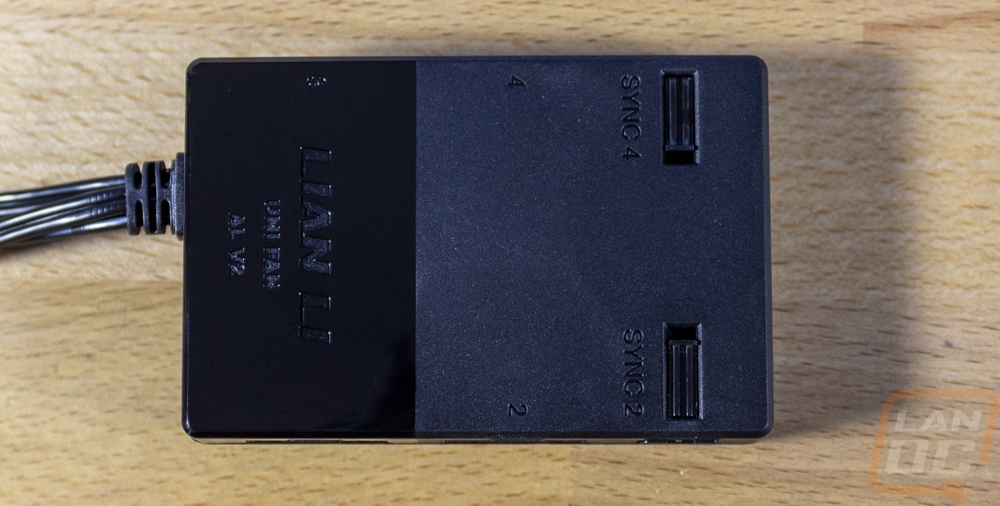
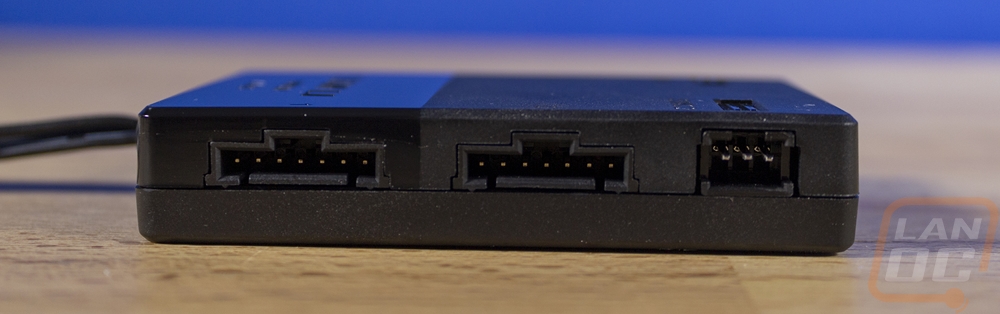
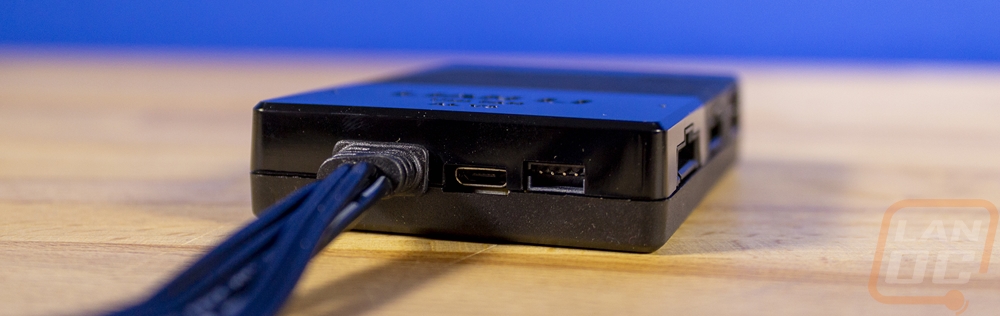
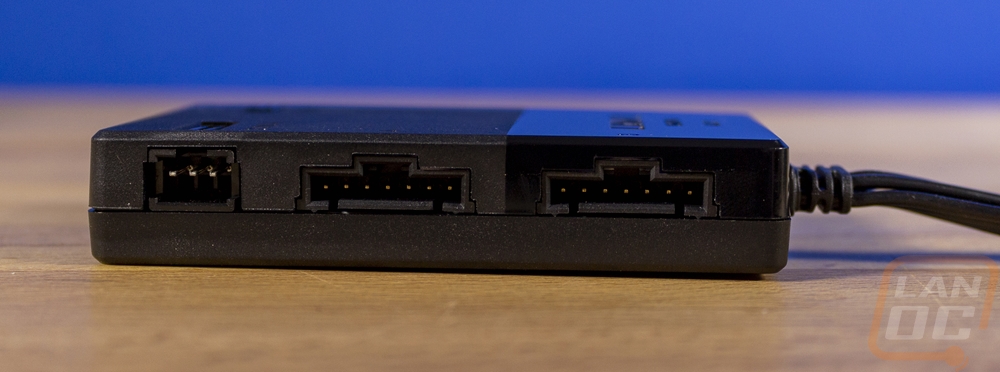
Then of course we have the L-Connect 3 controller and its accessories. The controller itself comes bundled in a static protective bag which I should note that because of the changes in the fan cable connections they no longer have to ship those in static protective bags as well. The controller comes with its own small instructions, a 3M double-sided sticky sheet, and a small bundle of cables which has a motherboard aRGB connection that also has a fan connection to let your motherboard know the fan speeds or to let it run the fan speeds and the USB cable which has the USB 2 header on one end and a micro USB plug on the other end. The controller itself comes with its power cables permanently attached which consists of two SATA power plugs. The controller has a black plastic housing with gloss on one half. That is where they have the Lian Li branding and it is also branded with the Uni Fan AL V2 branding as well. It has a magnet bottom with a grip tape finish that comes covered to keep it clean. On the power cable end of the L-Connect 3, it has the micro USB connection for the USB cable and the small four-pin plug for the RGB/Fan cable. The side edges have four of the 7-pin plugs for the fan cables and two SM Type Ports which have three pins and can connect other devices like the Lian Li Galahad AIO cooler pump lighting. The SM connections are labeled to show which lighting plug it syncs with as well.

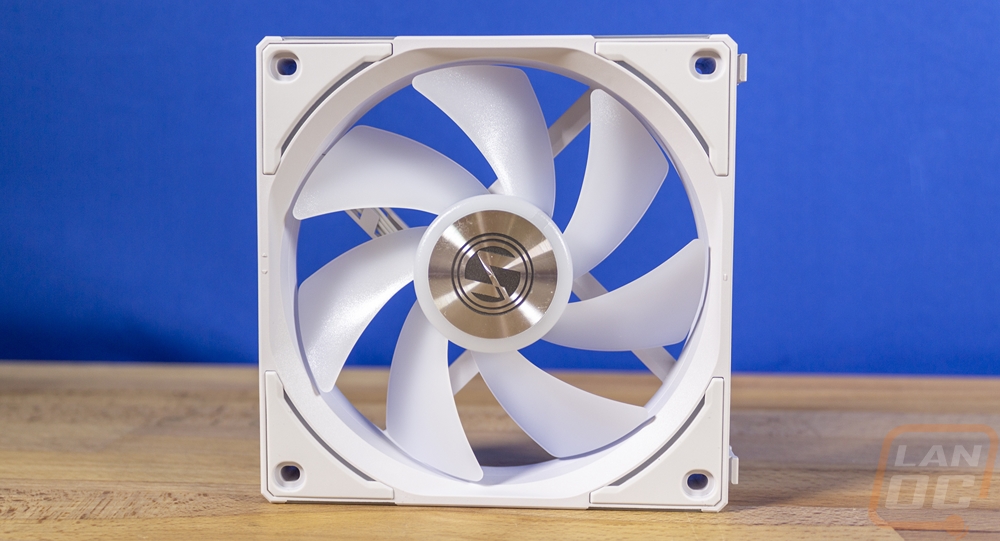
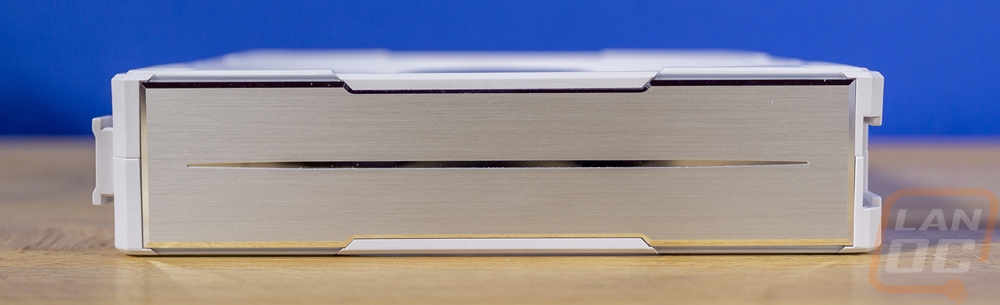
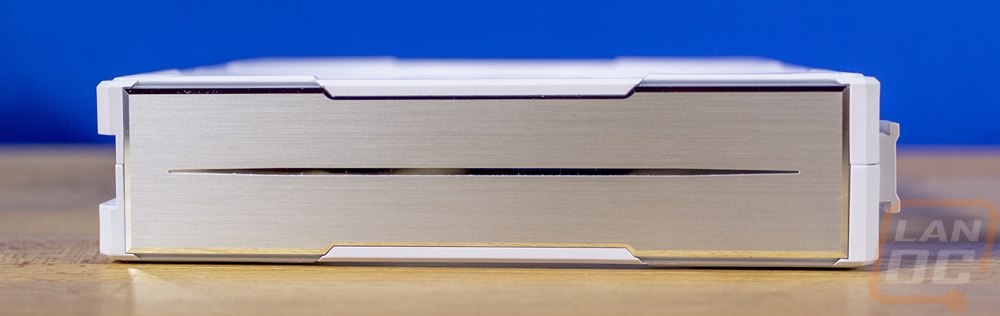
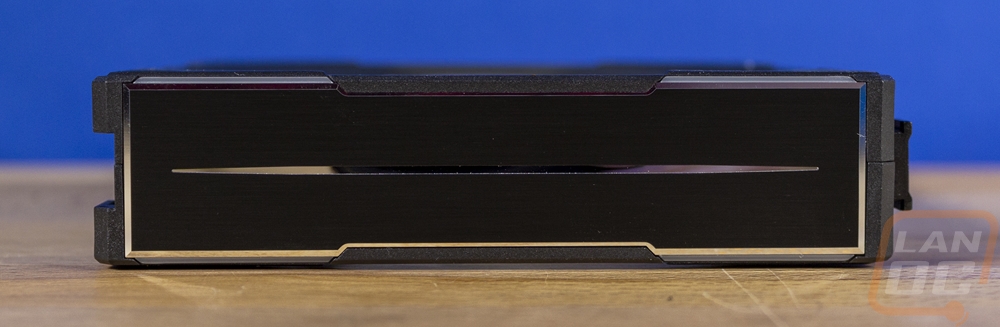
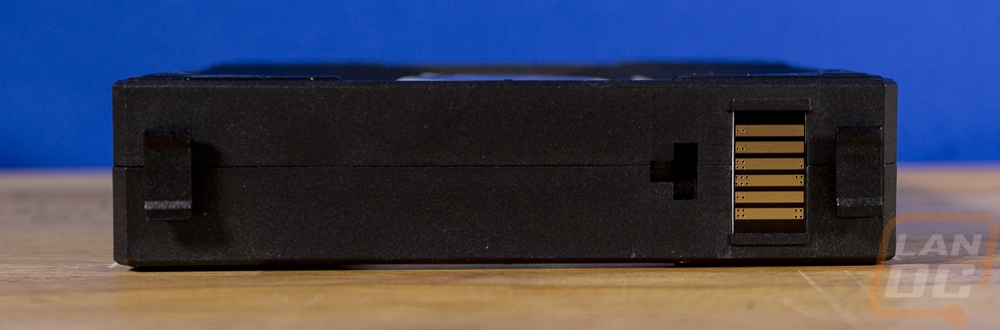
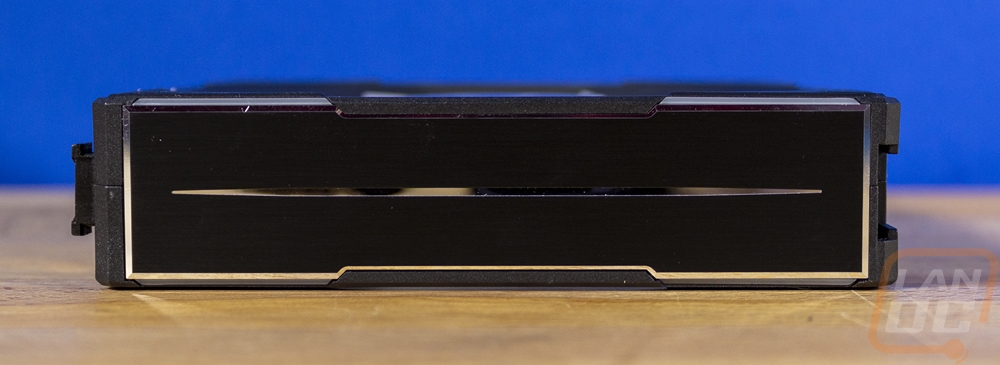
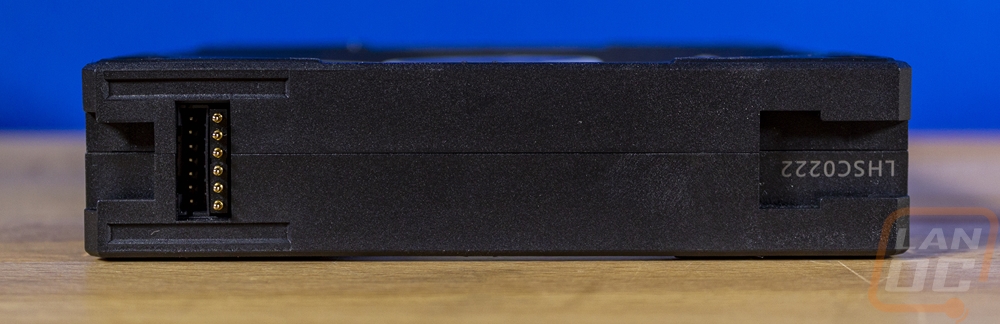
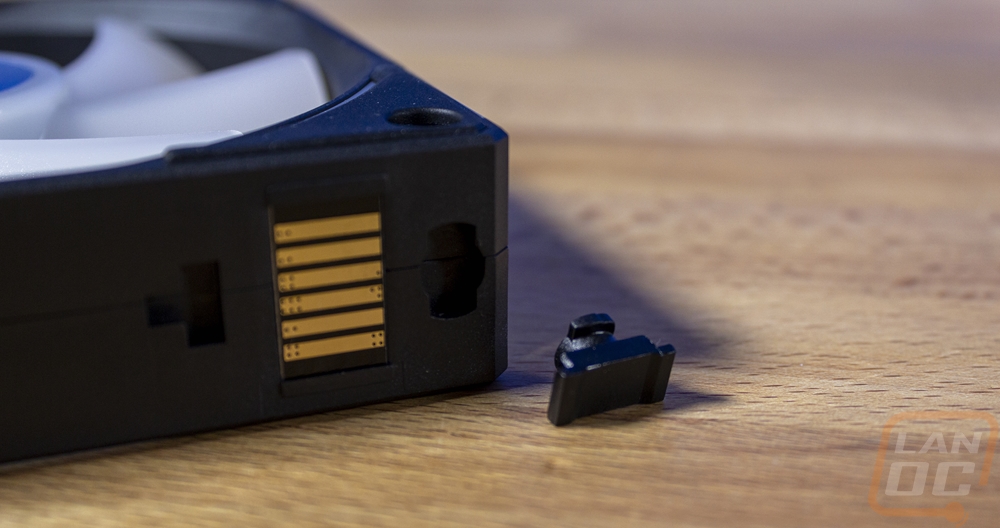
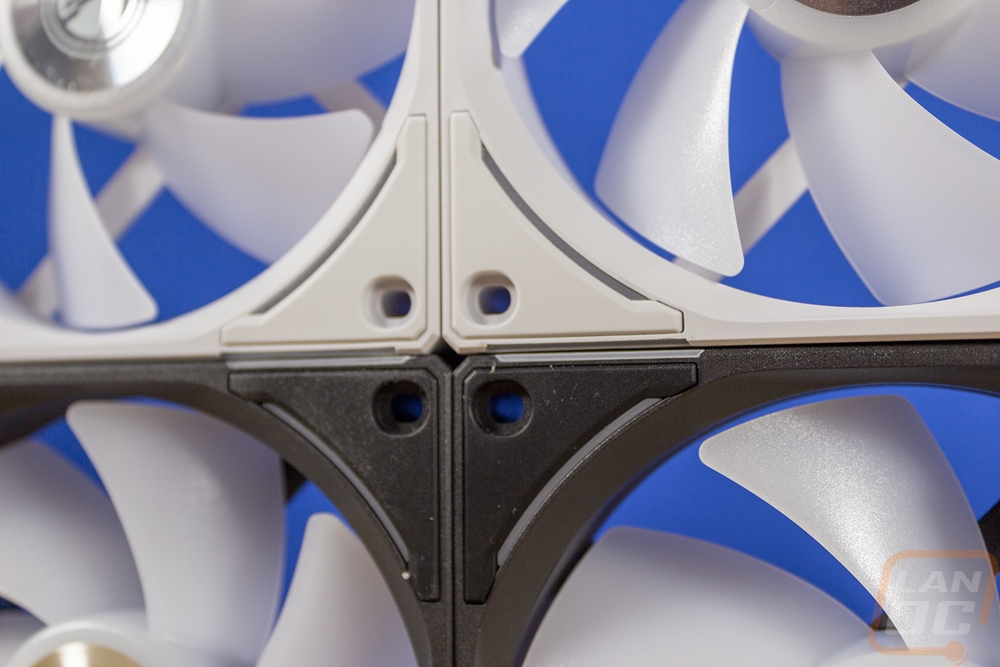
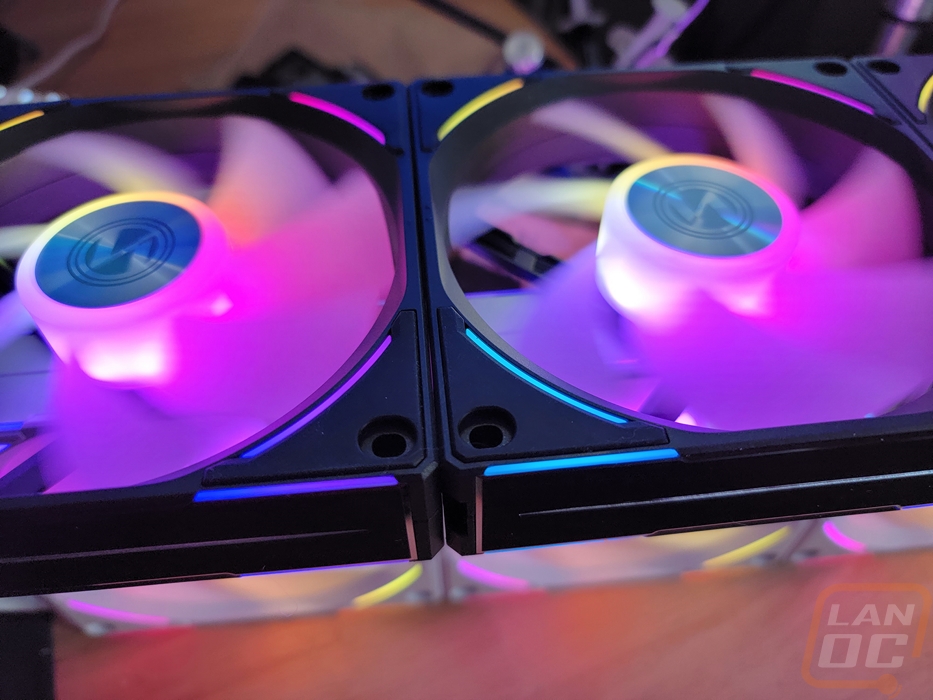
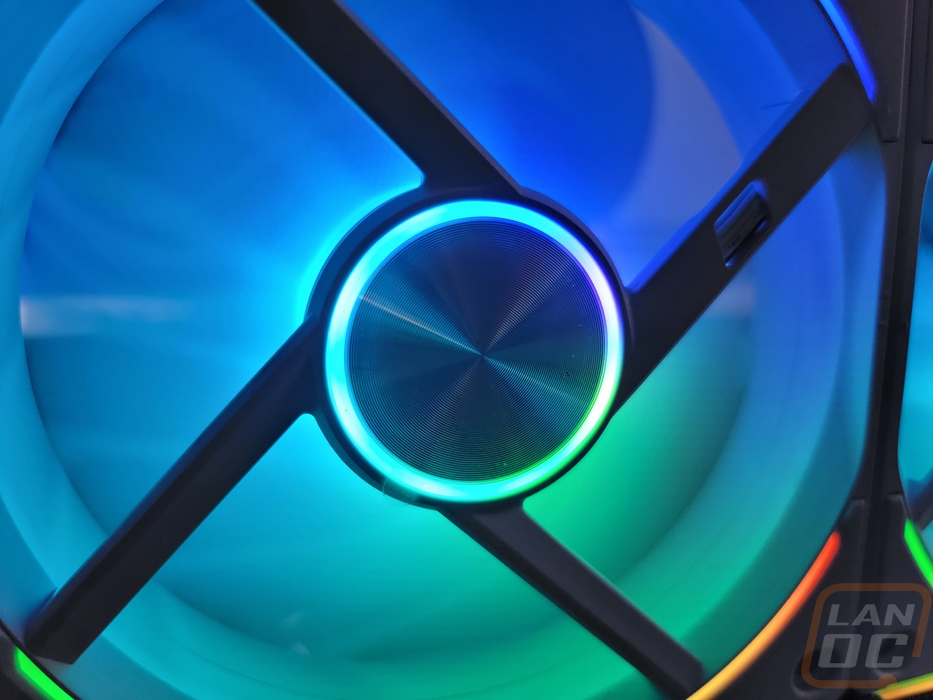
The new AL120 V2 fan design has gotten a touch thicker with it now at 28 mm thick, this was to add to its airflow taking its airflow up to 77.3 CFM from 64.5 CFM of the original AL120. Static pressure has improved as well from 2.62 mm H2O to 2.97 mm H2O. Of course, in addition to the thicker size they have also increased the max fan speed slightly from 1900 RPM to 2000 now but the new design is also capable of running at 250 RPM where the original AL120 bottomed out at 800 RPM. The V2 has the same fluid dynamic bearing and the same 2-year warranty. But it's going to be the physical changes that most people will be keeping an eye on. The design does still have the same aRGB lighting in the translucent fan blade and small lightbars in the corners of the housing. But the V2 design has added more housing lighting with small strips now on the outside edges of the fan which help add some lighting to the sides which in a lot of cases is still the most visible side of your fans. The design still integrates aluminum with the plastic fan housing as well with a brushed aluminum panel on the top and bottom edges with the edge and a center stripe machined for the mirrored accents. The daisy chain design is still there with 6 pins on one side of each fan and 6 contact pads on the other side. Then to lock things down the contact pad side has T-shaped brackets sticking out that slide into the T-shaped groves on the other side of the fan. There are two big changes for the V2 however. The T brackets can now be twisted and removed which helps fix an issue that all Uni Fans have had, they wouldn’t fit in tight spaces. The other change is the small recessed plug right next to the contact pins, this is how they were able to drop some of the slide-on pads used for the wiring and more importantly, this design remains flush with the fan to help with those tight situations.
The three black AL120 V2s that Lian Li sent over came individually packaged and it gives us a good look at what you get when not buying the triple pack. The packaging while smaller and the standard fan box size, does still have all of the same artwork and information on it. Only this one has the black fans on the front, back, and side pictures. Then inside the fan comes wrapped in its bubble wrap bag and you get a set of fan screws. The instruction manual stills show what you should have in the box as well as the installation instructions. Then you get two cables one is a split cable with a fan header and then the SM plug that we saw on the L-Connect 3 and the second cable adapts that to the standard 3-pin addressable RGB plug that most motherboards have. What is missing other than other fans is the L-Connect controller and I was surprised to not see at least one of the link cables or the cable to hook the fan up to the controller. So keep in mind that the 4+2 cables that you get with a 3-pack will have to cover any additional fans.
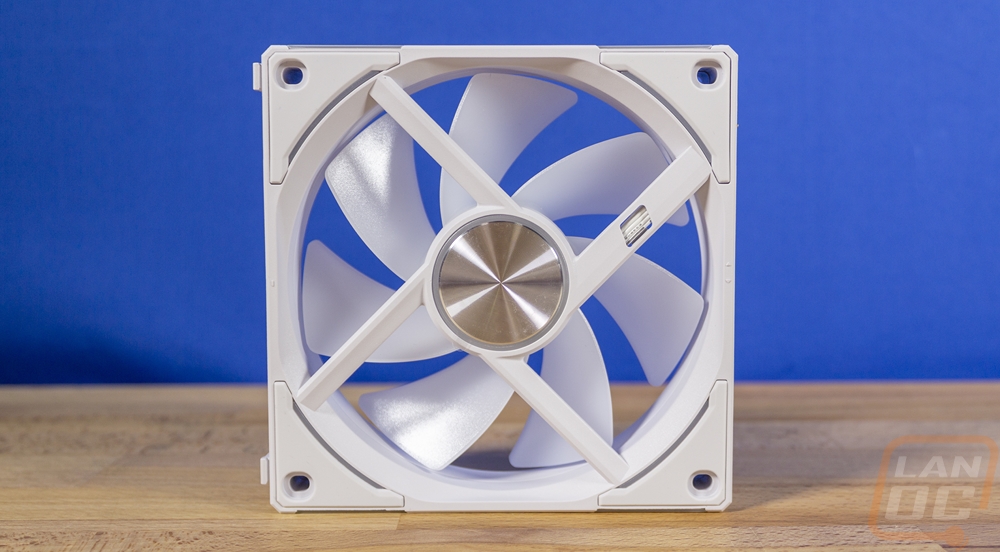
The black AL120 V2 design, of course, changes the all-white housing and the rubber anti-vibration pads to black but because of the lighting in the fan, it does still have a white translucent fan blade. The black gives a nice contrast however but still goes great with the aluminum center sticker on the front and back. For the black model, they have also given the brushed aluminum top and bottom panels a black finish but still has the mirrored finish edges and center stripe.
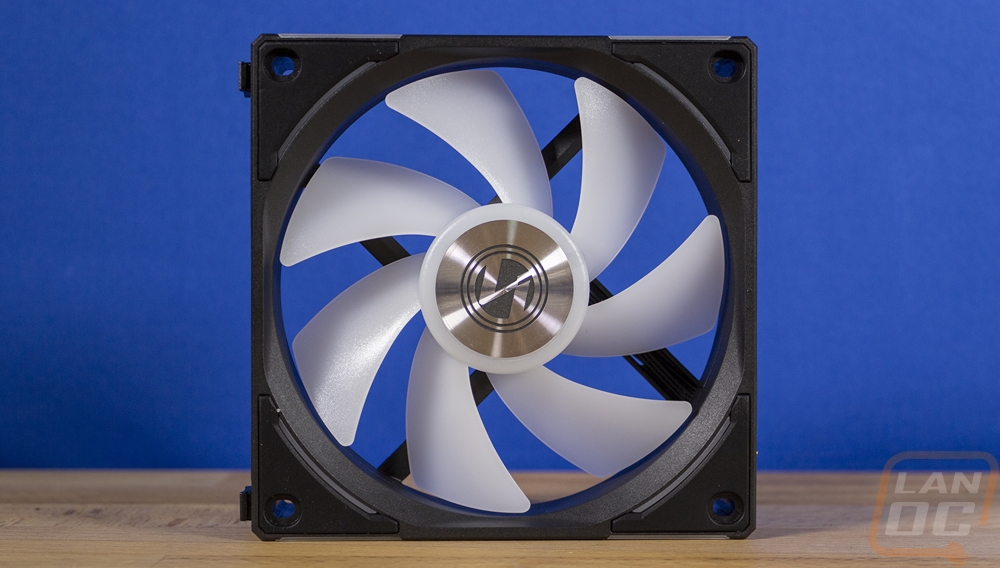
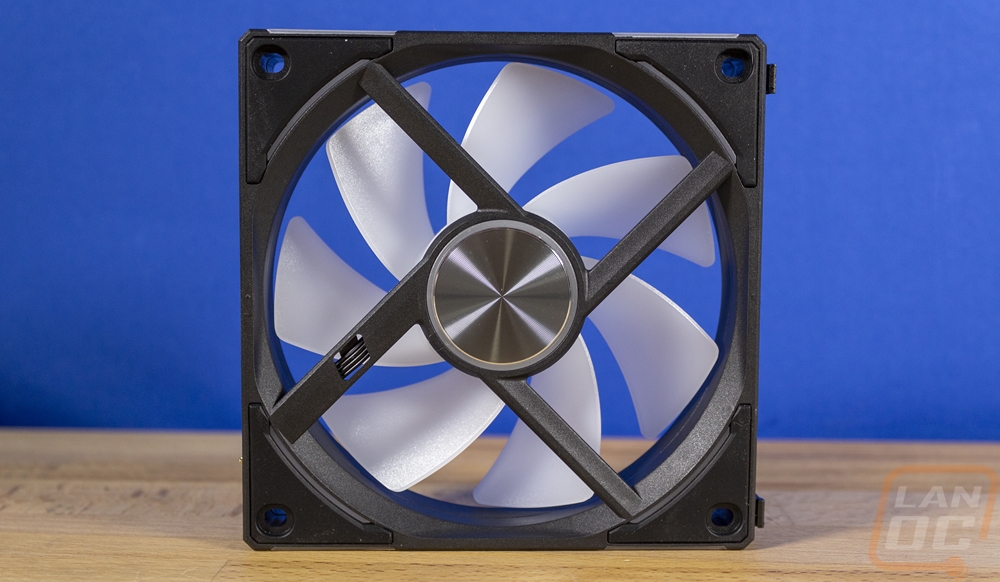
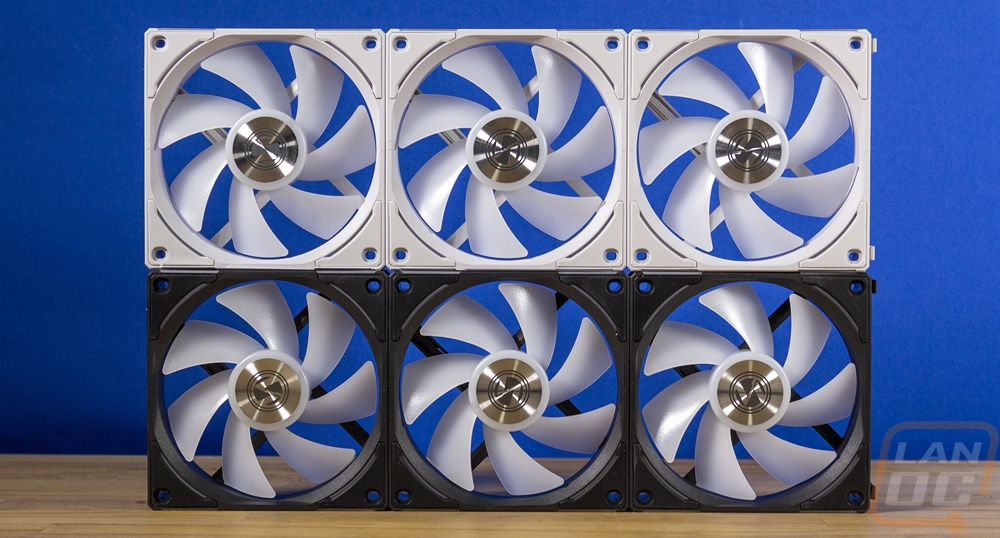
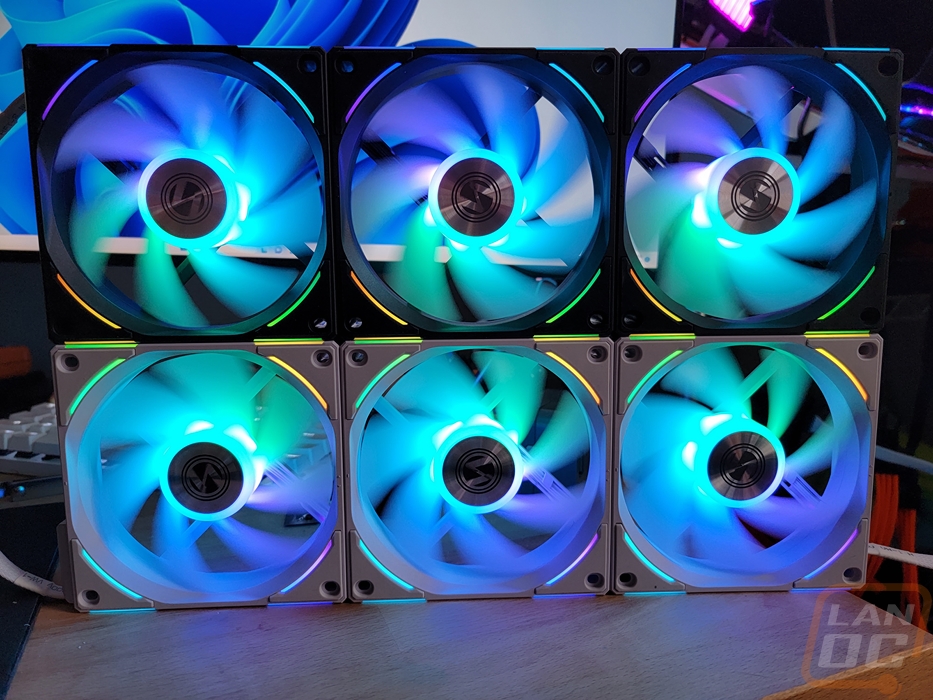
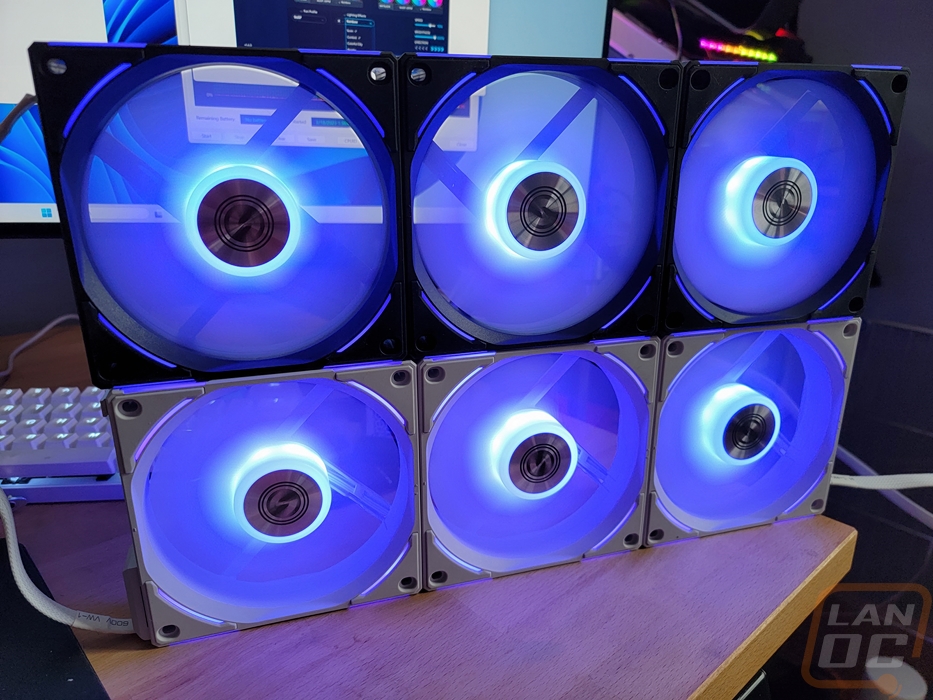
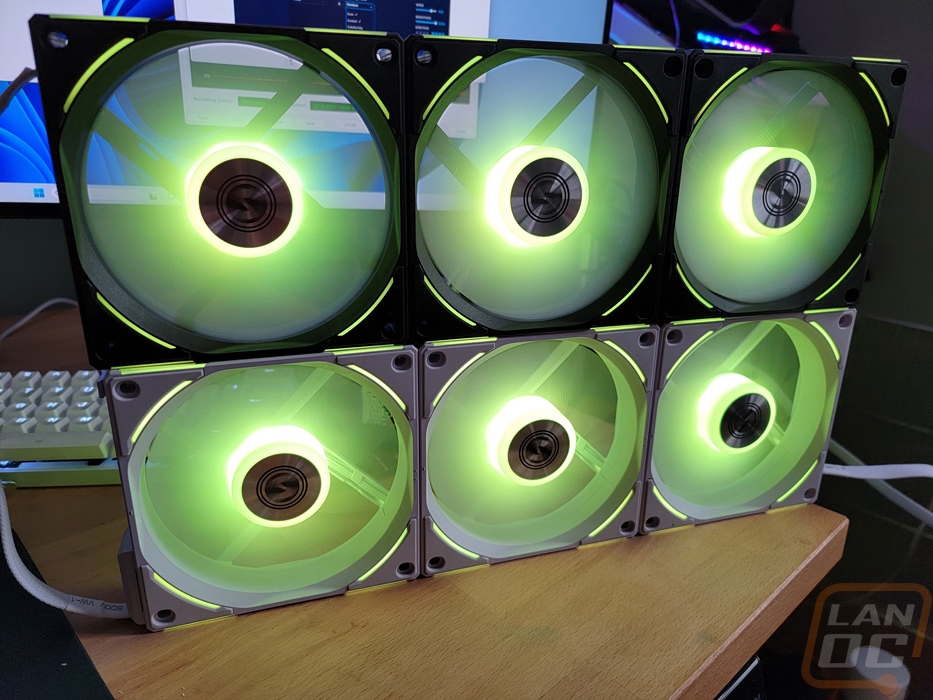
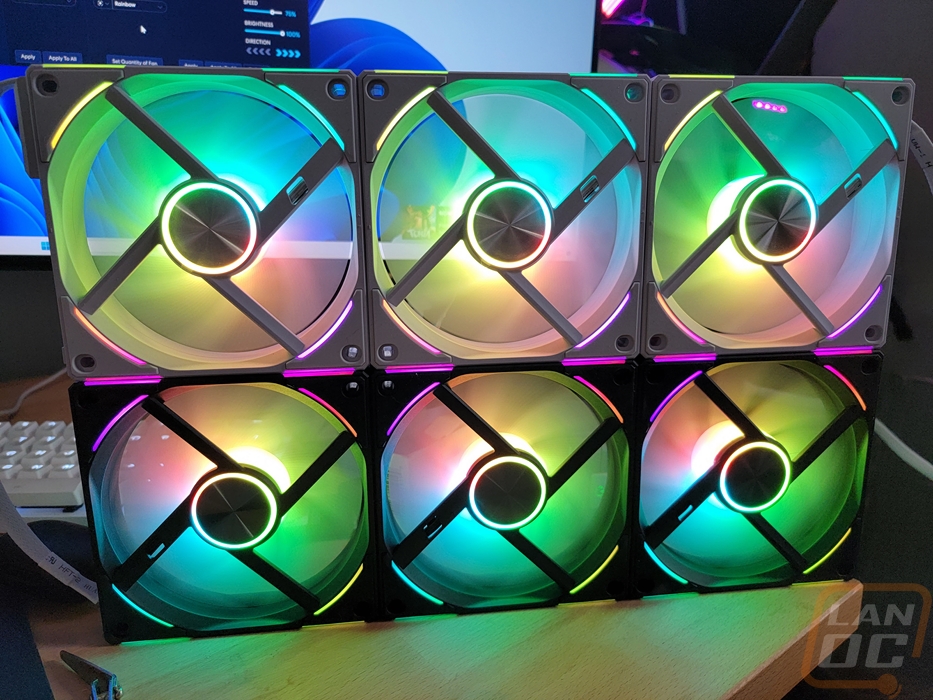
Getting the white and black fans next to each other, I’m still torn in which design I like better. White typically always looks better with lighting because it brightens it up even more. But the black AL120 V2s look great. More importantly, this is a look at the fans daisy chained together. Notice that in each of the sets of three, there isn’t any wiring needed to go from fan to fan, we will just need one wire to go back to the L Connect 3 controller to handle the fans and the lighting together. A closer look near the anti-vibration pad area helps show the housing lighting for the AL120 V2 including the top and bottom edge light bars in addition to the curved bar closer to the fan opening. The AL series doesn’t have the crazy housing lighting like the SL series but it's not bare, especially now with the additional lighting.
This is a look at all of the cables needed to hook up our six fans. Plugged into the recessed plug in the flat cable that goes to the L Connect 3. Then on the other end of the daisy chain is one clip-on cable that passes the signal from the first set of fans down to the next set. Do be careful with the new plug though, you can see in this picture I thought it was plugged all the way in but can see now that it is coming out slightly. You get two of these cables so you could tie in the single rear fan, two or three top fans, and two or three front fans on the case with almost no lighting. You also have the option to run a separate cable from the controller to each set as well and you get four of those in the three-pack of fans.
Lighting, Software, and Performance
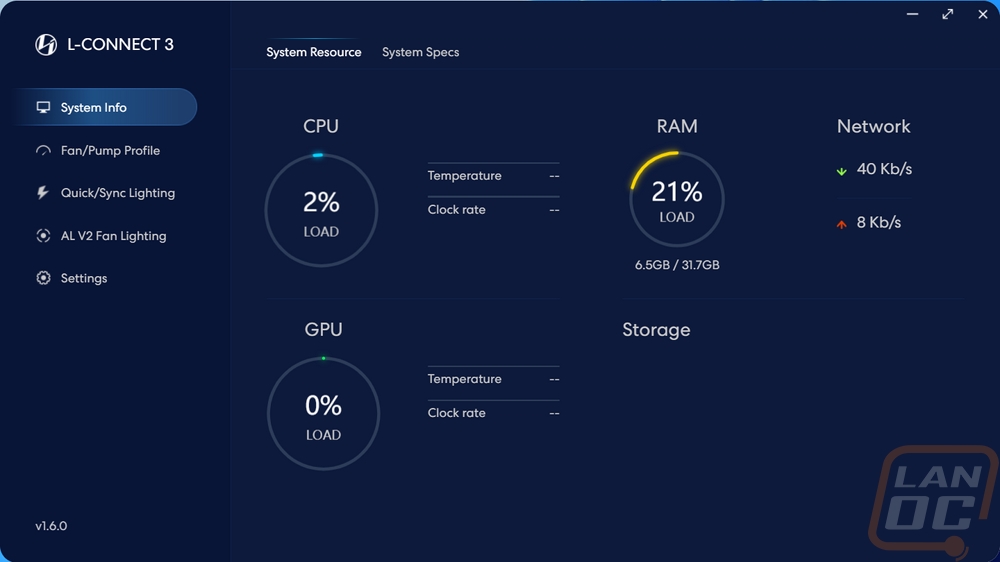
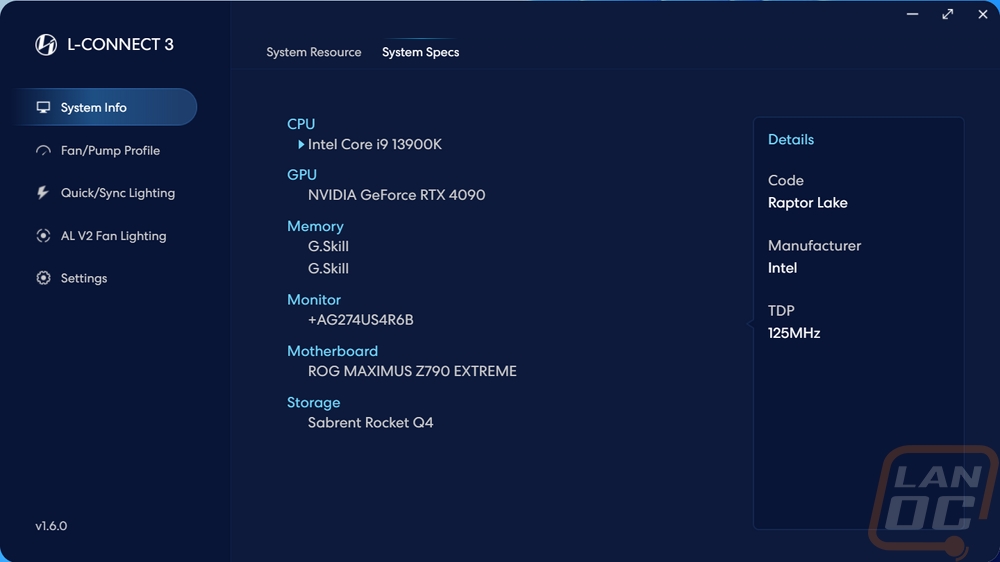
If you have seen the L-Connect software in the past there aren’t going to be many surprises this time around. I loved Lian Li’s software the last few times I reviewed the Uni Fans and I still do now. You start with a system info page that shows your current CPU, GPU, RAM, and network load. They also have a second page that lists all of your components.
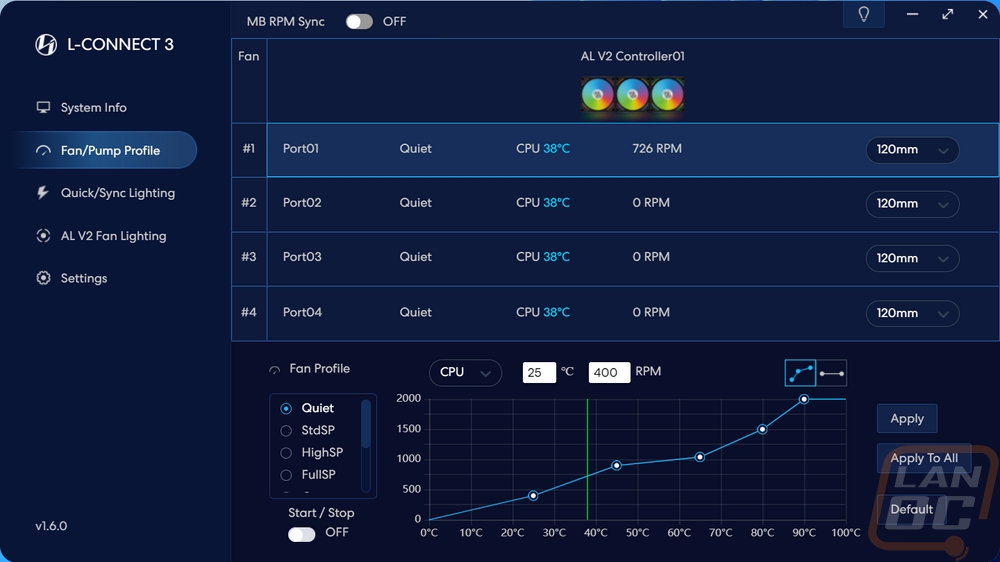
All of the fan speed settings can be found on the second page, the Fan/Pump profile. They have all four of the fan connections listed out 1 through 4 and you can set the fan size and see the current fan profile and RPM in the top half. Then down at the bottom, you have a graph showing the current fan profile where you can make changes and make your own custom profile. There are also default settings on the left and a switch that will turn on the option to start and stop the fans at lower CPU temperatures. You can also turn the profile off and switch to fixed fan speeds as well. Then you can set your new fan profile to a specific port or apply it to all of the system fans.
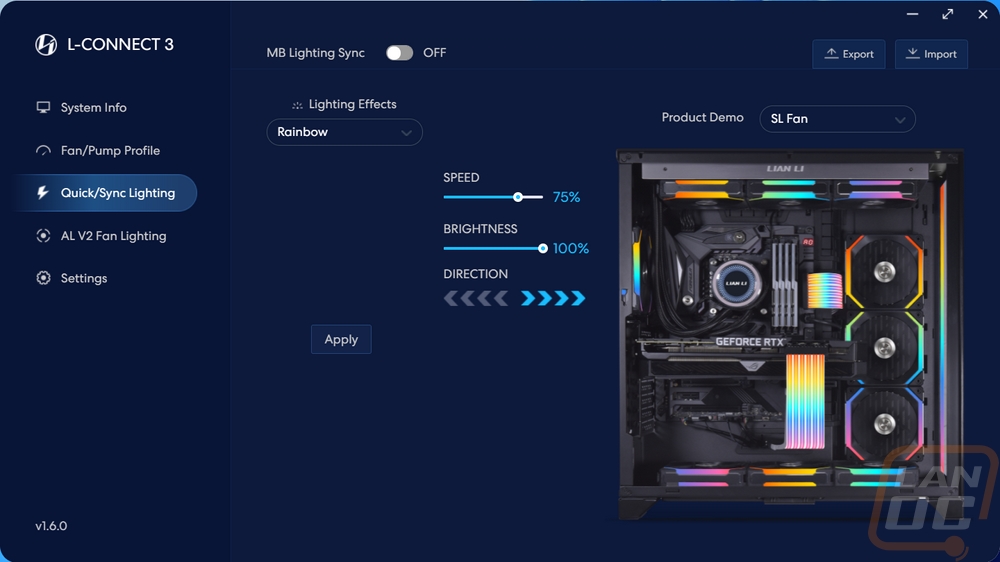
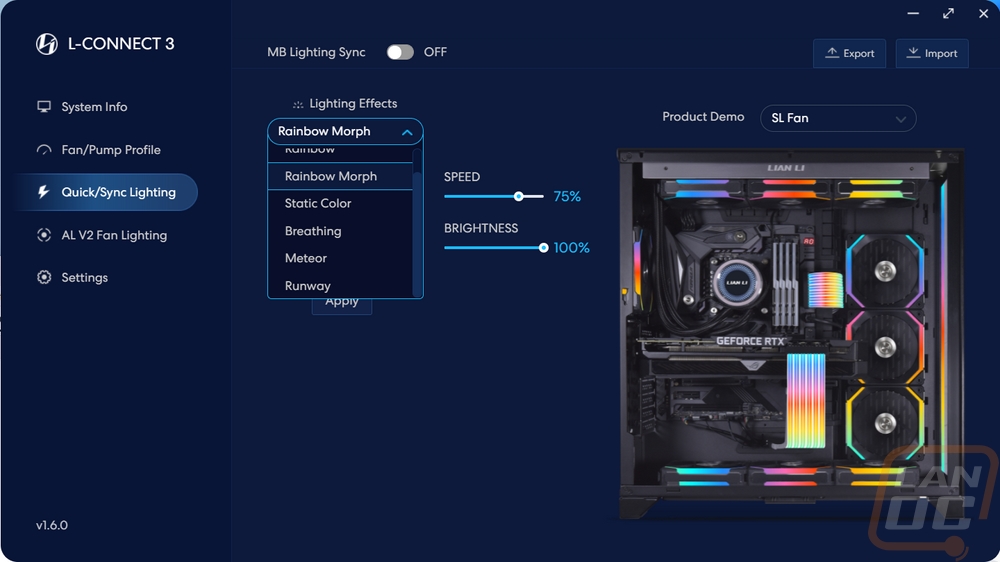
The quick sync lighting page is where you can turn on the motherboard lighting sync if you have that wired up. This is also where you can quickly swap lighting profiles for the entire system however this has a shorter lighting effect list than on the page I will show next. You have the option to change the effect speeds, brightness, and direction here as well.
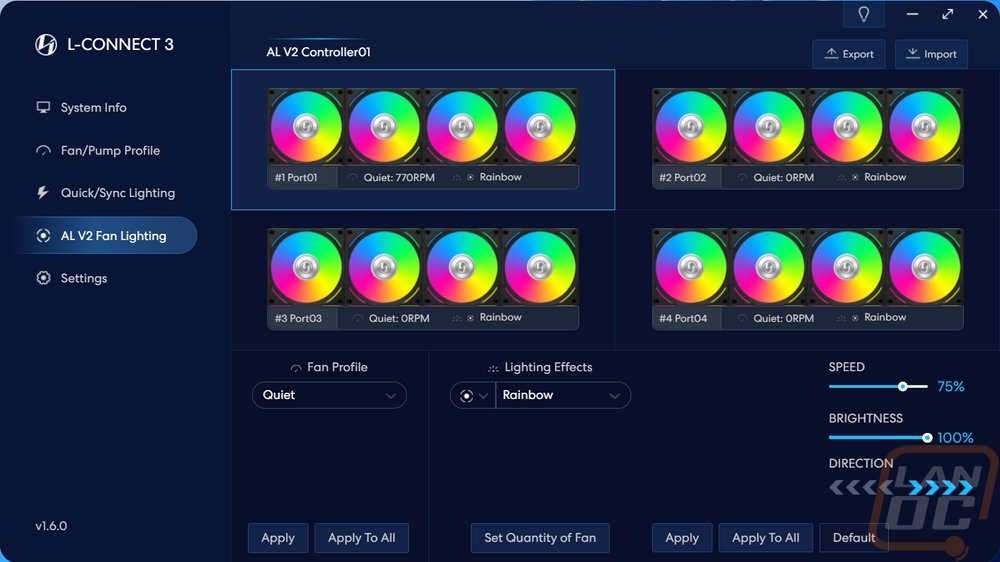
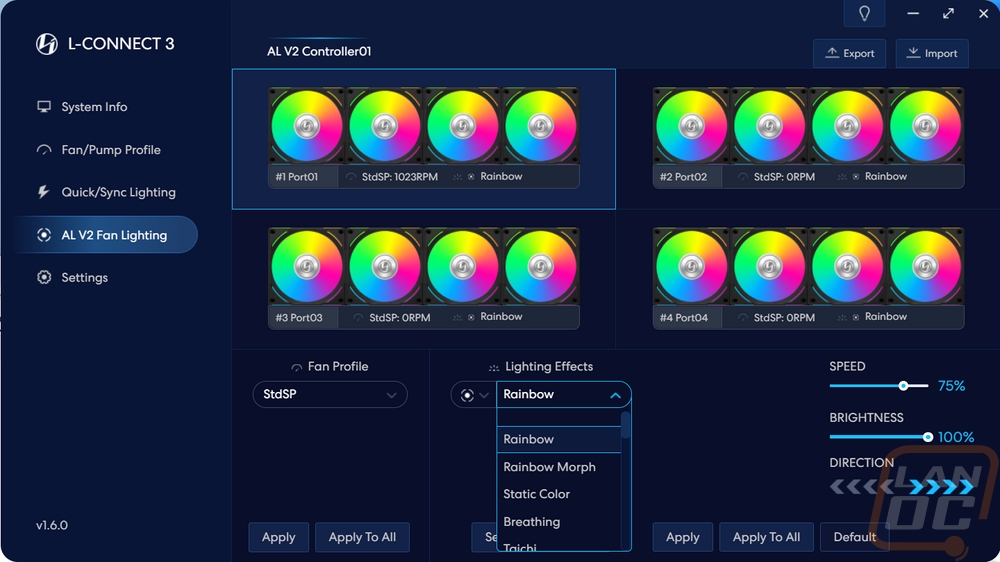
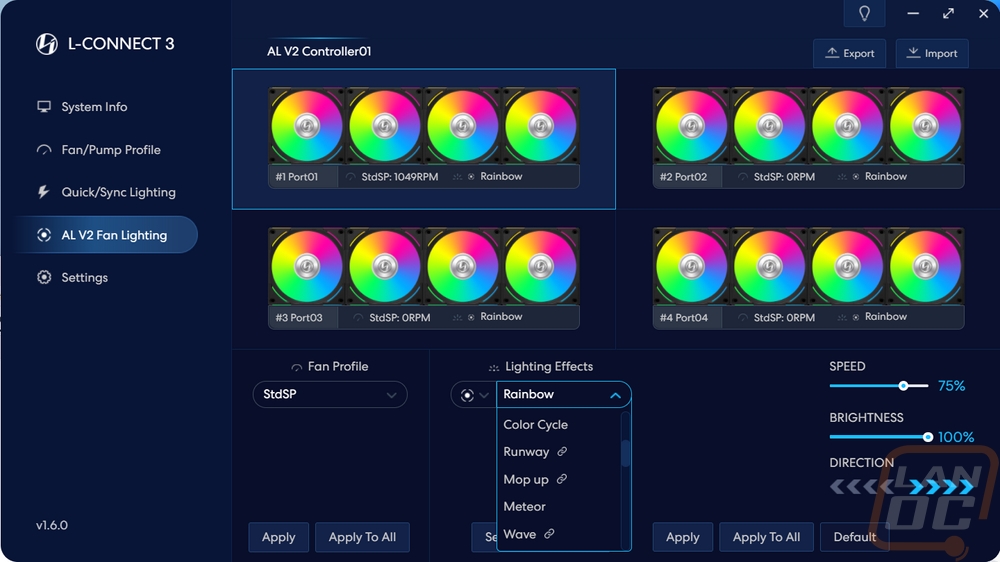
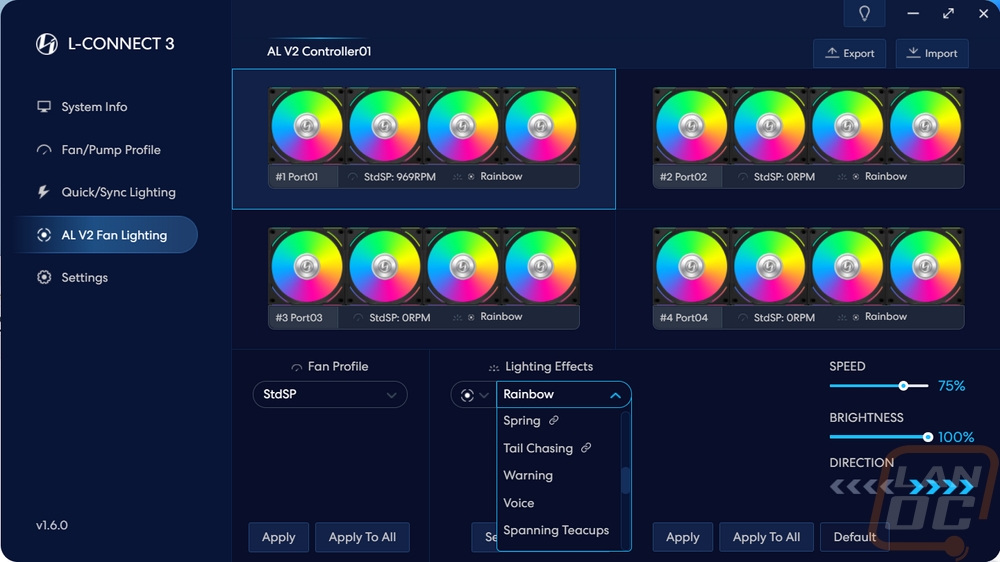
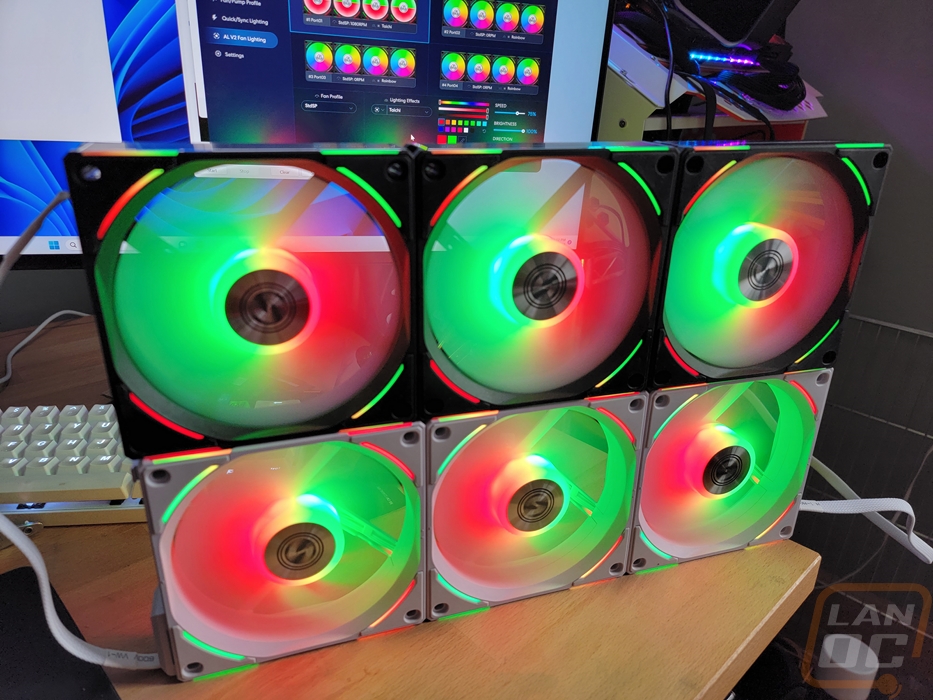
The next page is specific to the AL V2s and this has four sets of fans pictured, each has four fans and shows the current lighting effects for each of the L-Connect ports. This also shows the fan speed profile as well. Like the page before in the bottom right corner you can change speed, brightness, and direction. But you can get into more detailed lighting effects here. Under lighting effect on the left, there is a dot with four dashes around it, these represent the blade and then the outer lighting. You have a long dropdown of effects here where you can set different effects for the blade lighting and the outer lighting including effects specific only to each.
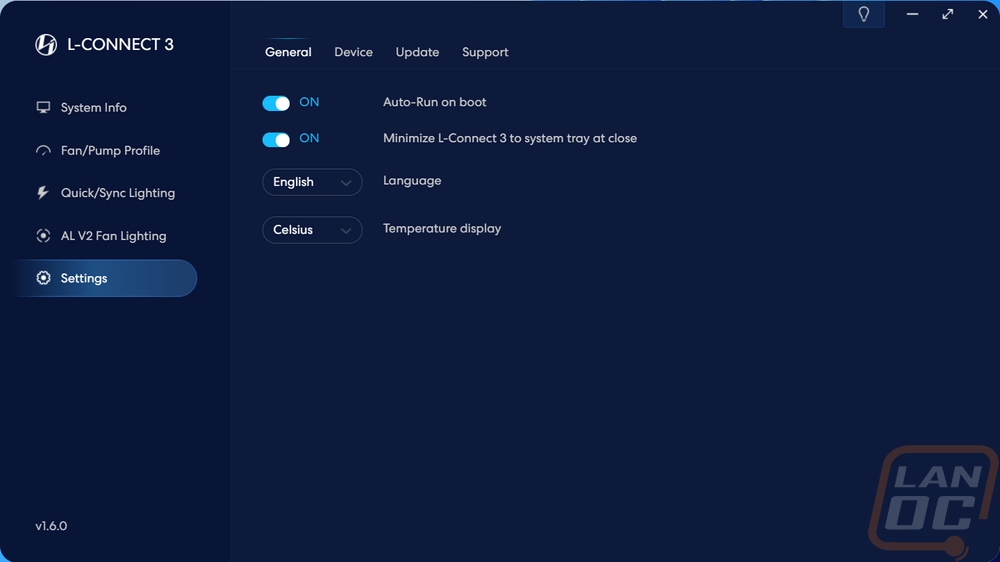
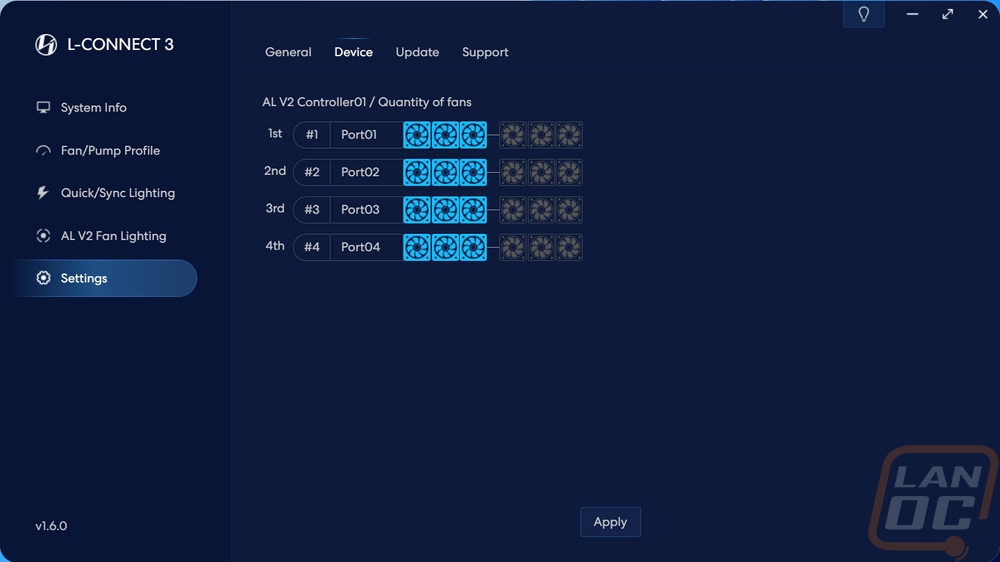
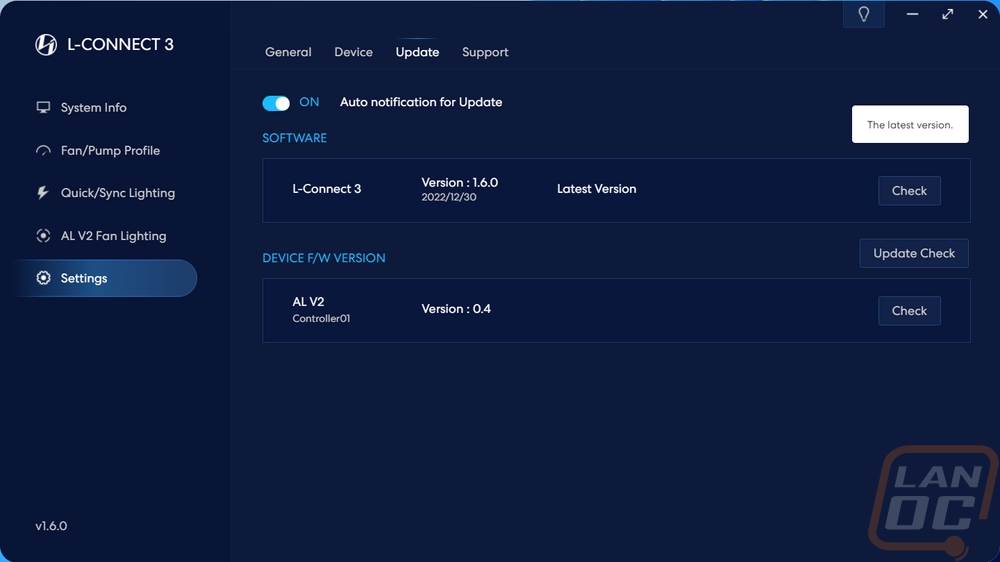
Last up is the settings page. There are a few pages under settings and the first is simple with software options like should the software open when windows starts and if it should minimize to the system tray. You can pick the language and also pick between Celsius and Fahrenheit as well. The device settings are where you can let the software know how many fans you have daisy chained together. By default, it is three, but your effects won’t track correctly if you have fewer or more fans until you let it know. You can also check for software updates and firmware updates as well on the update page.
For the most part, we can let the pictures do the talking here. The AL120 V2s look great and the lighting was bright even in the middle of the day when I took the pictures. The blade lighting is brighter in the middle where the LEDs are but the lighting does reach out all the way to the tips. The white AL120 V2s look a little brighter in my opinion because of the white lighting. But I personally like the black model for how well the housing lighting stands out. This includes the new lighting up on the top and bottom edge which adds lighting that will still be visible when looking in a side panel for top and front-mounted fans.


Here is a look from the back which shows off the ring around the back of the fan motor where the blade lighting can slip through. Even with the mount bars on this side of the fan, you aren’t missing out on much lighting at all and with the aluminum center cover on both sides the back doesn’t look like the red-headed stepchild and you can run the back out without worrying that it will look bad.
I also put together a simple video that shows off each of the lighting effects that you can flip through, everything is labeled.
For performance testing, I took a look at the noise performance. I went at this in two different directions. With the CPU running at 40c I tested the noise level and RPM of the fans under all of the different fan speed settings in Lian Li’s software. This gave me an idea of what to expect for noise levels with mid-range CPU temps. The standard profile did a great job of keeping things quiet where going up to the high-speed setting started to get louder and of course with the fans cranked to 2000 RPM they are noisy. Breaking things down with the fixed fan speeds do a better job of showing things. As long as you stay at 1200 RPM and lower they are quiet but once you get up into the high fan speeds they are noisy. The main focus is still aesthetics and clean wiring but Lian Li did improve the airflow while still keeping the noise levels near where they were before so I can’t complain too much.
|
Fan Profile |
RPM |
Decibels |
|
Quiet Fan Profile |
710 RPM |
34.8 dB |
|
StdSP Fan Profile |
919 RPM |
36.1 dB |
|
HighSP Fan Profile |
1162 RPM |
39.4 dB |
|
FullSP Fan Profile |
2002 RPM |
56.1 dB |
|
Fixed Fan Speed Testing |
||
|
Fixed Fan Speed |
1000 RPM |
38.4 dB |
|
1200 RPM |
39.4 dB |
|
|
1500 RPM |
46.7 dB |
|
|
1700 RPM |
49.6 dB |
|
|
2000 RPM |
56.1 dB |
|
Overall and Final Verdict
With the first few Uni Fan designs Lian Li was on point and surprised me with a creative design that was not great looking, but read the market and brought features like the daisy chaining and simplified wiring at exactly the right time. But with the new Uni Fan AL120 V2s that I’m checking out today being the first Uni Fan V2s that I’ve had to check out I’m even more impressed that Lian Li was able to build on their original design and improve an already good design. They eliminated some of the thick wire connections with the new recessed plug. That combined with the removable hooks on the side the daisy chain design doesn’t have to prevent their use in any tight spaces like they used to. They recognized that with the fans being used often on water cooling that they needed a little more airflow and static pressure and improved on that with the thicker design and a little more fan speed. They also added to the AL series lighting with the addition of lighting on the top and bottom edges on top of all of the lighting on the front and back of the fan which looks great alongside the aluminum accents on the top and bottom edges.
All of the new changes add to what they already had going like the long list of lighting effects supported. If you haven’t seen the daisy changing before you are going to be impressed with how you can eliminate a majority of the wiring to and from the fans, especially in situations where you can link a bunch together like in the front or top of a case. When compared to options from the competition where each fan has a fan wire and then a lighting wire it adds up. Really the only downside that I’ve run into is the fans do get noisy when you have them cranked up to their highest speeds. They aren’t noticeably louder than the last generation even with the 100 RPM higher fan speed which is good. But it is worth noting that a good fan profile is worth its weight in gold with the Uni Fan AL120s which Lian Li has great software that will make that easy.
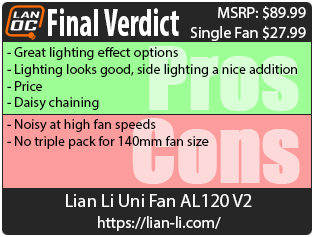
More than anything though it's always the pricing that surprises me. So a three-pack of fans which also includes the L-Connect 3 controller is $89.99 which is a great deal. The 120 mm single fan is $27.99 in black or white and then the 140mm fans are $30.99 each, sadly you can’t get those in the triple pack with the controller. The Uni Fan pricing from the looks of it has pushed Corsairs pricing down as well but even then a lot of those kits still cost more and don’t have the daisy chaining ability that makes the Uni Fans stand out.

Live Pricing: HERE
