Installation and Performance
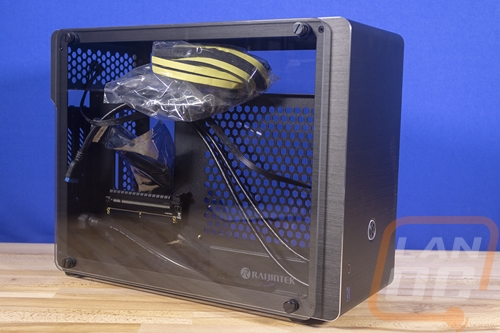
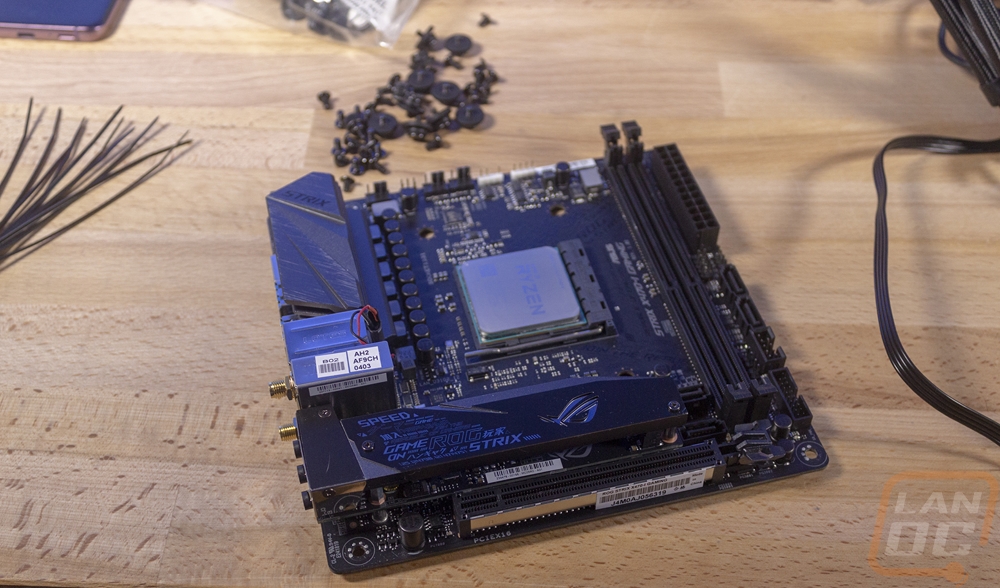
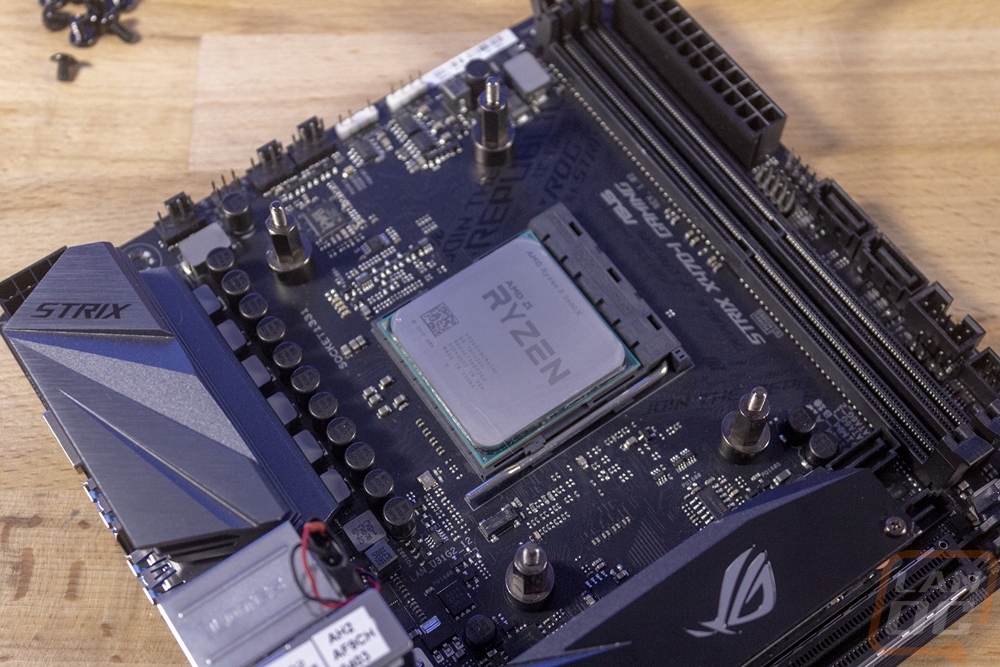
Now that we have an idea of what the Ophion Evo is all about, I just needed to get a system built in it. Obviously getting started I needed to pull the two glass side panels off giving us access to the entire case. From there I prepped our components. I went with an Asus Strix X470 Gaming motherboard and the Ryzen 2600X which were both about what I would be looking at with a mid to high-end build in a case like this. The 2700X would be nice, but at $185 the 2600X is a great deal. You get two cores at nearly the same clock speed for $110 less than the 2700X.
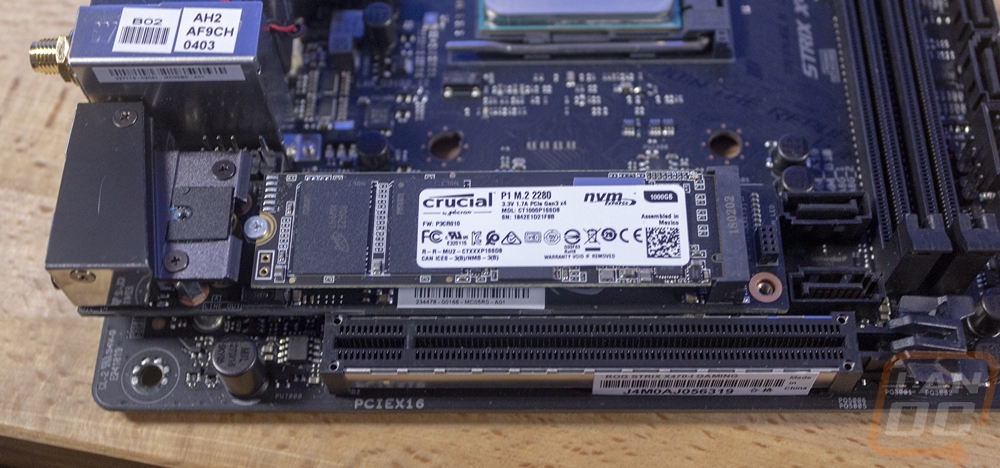
Next, I went with the Crucial P1 SSD which gives us NVMe performance but with the exception of the Intel 660p which are being cleared out right now, it is one of the cheaper NVMe drives you can get. The 1TB model was just enough to not worry about space in a LAN rig for the OS and any games I might want later.
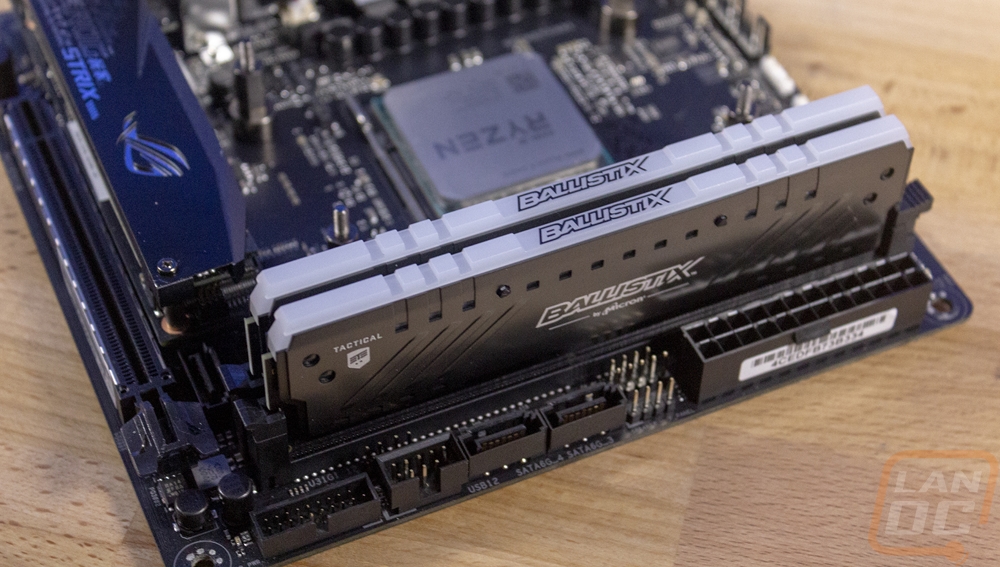
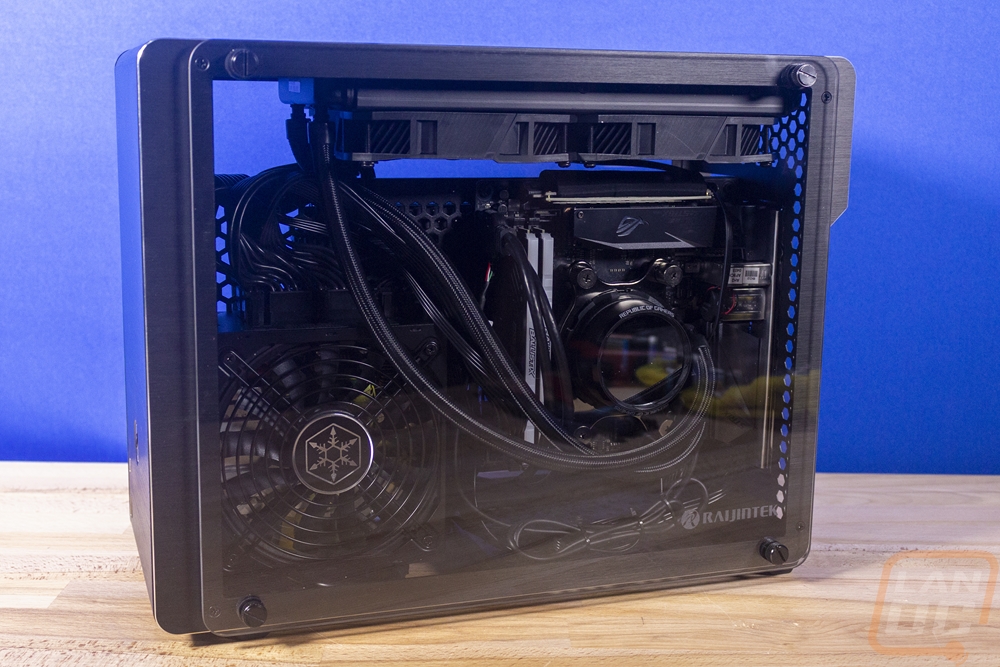
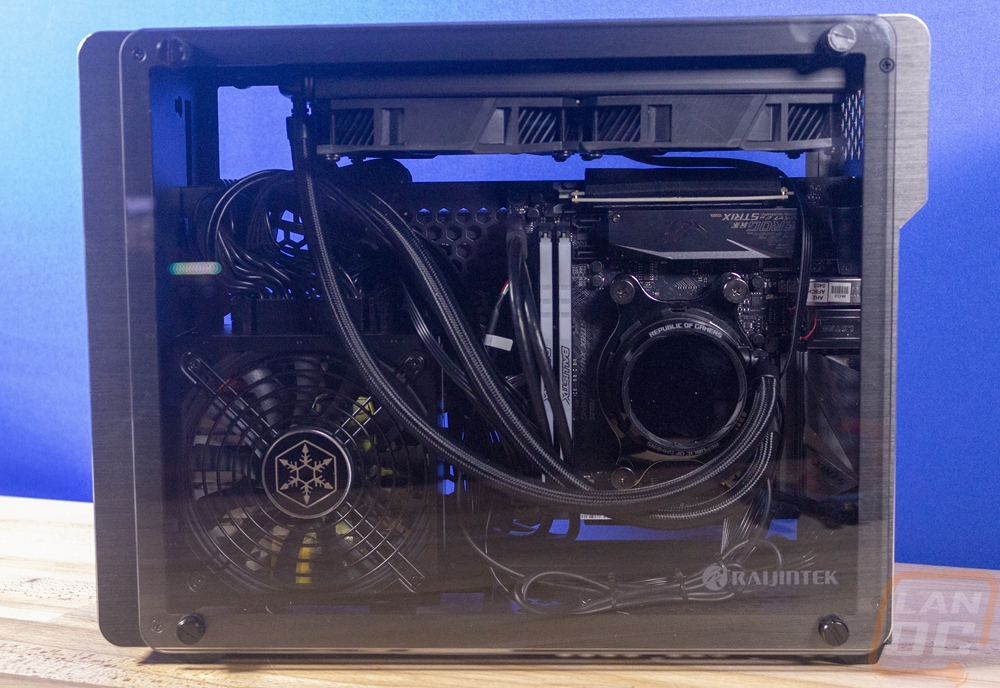
Then for memory I went with the RGB Ballistix Tactical kit, with the glass side panels I thought this kit would match the Strix motherboard really well and it did. I then prepped the motherboard for our water cooling kit which was the Asus Ryou that I reviewed a while back. I thought this would be a good way to check out the built-in screen and it also happened to be the only 240mm AIO kit I had.
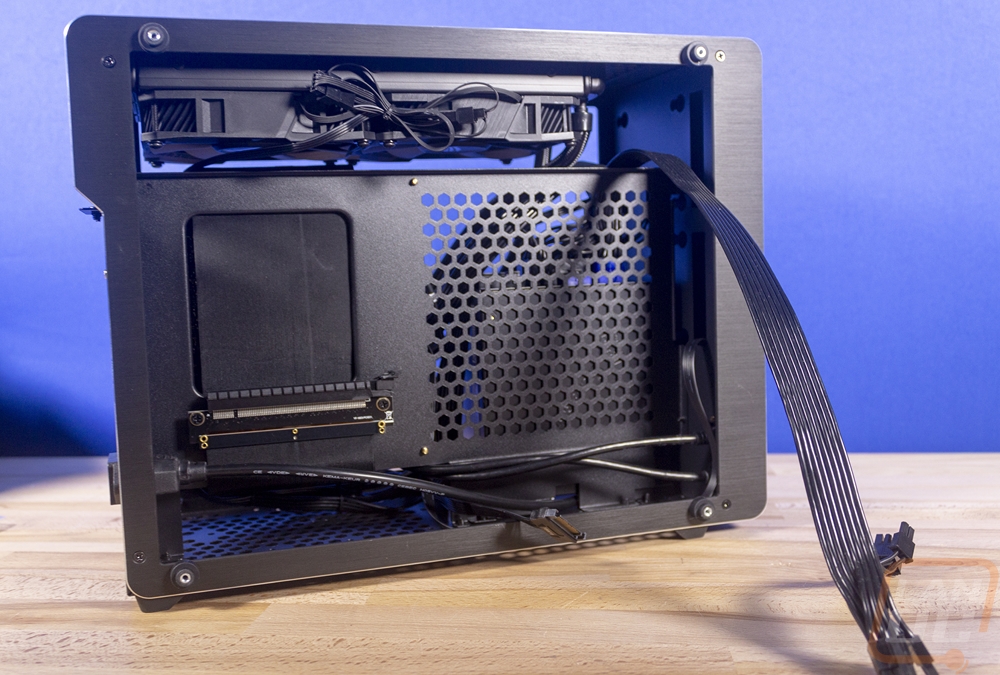
Installing the motherboard once I had everything mounted on it was just the four screws and making sure I had the rear I/O panel on. The only trouble was understanding that the PCIe riser cable needed to run behind the motherboard and you have to plug it in before you install the board. There isn’t any extra length in it.
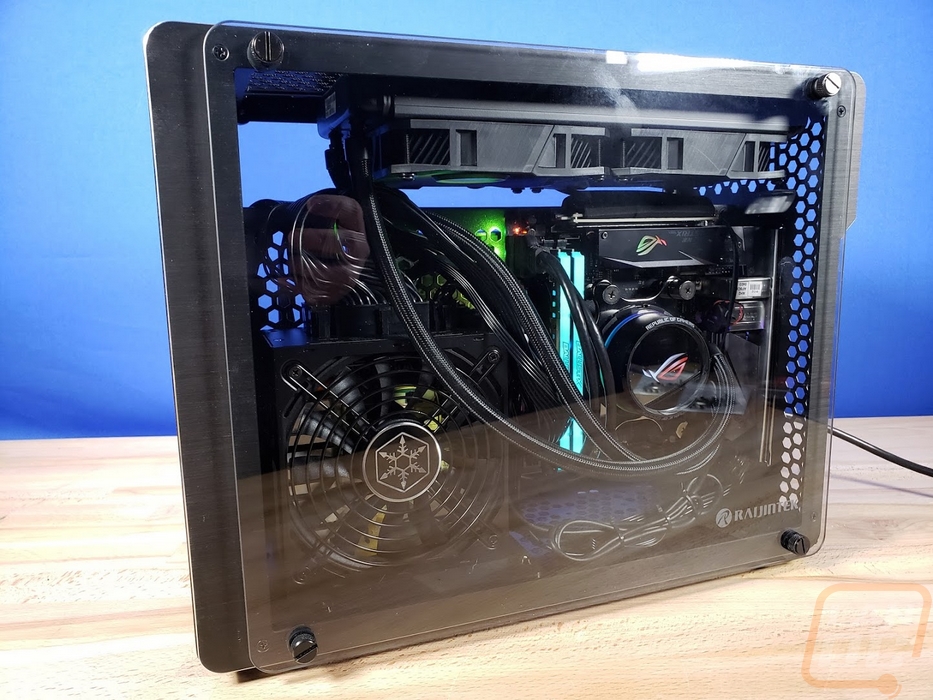
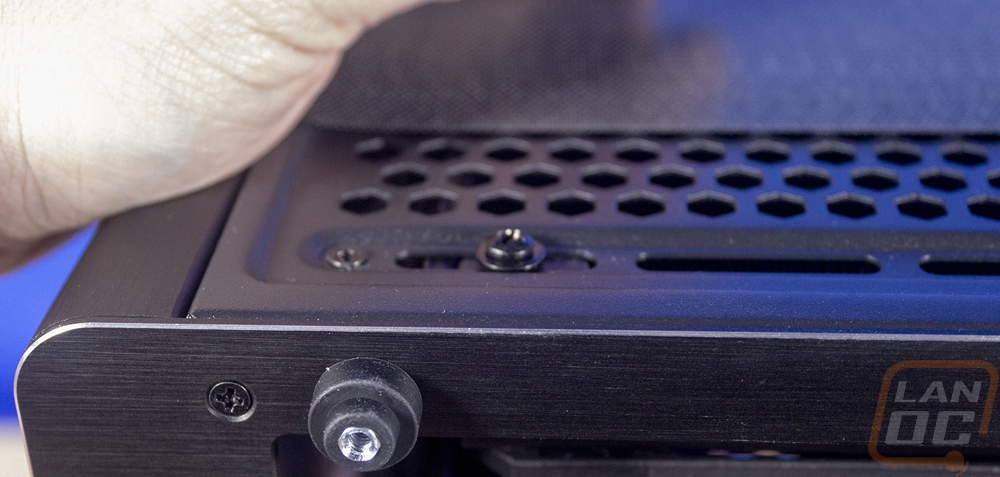
My main focus was getting in the AIO water cooling kit into the case. Preinstalling the mounts to the motherboard helped but this is still a small case, don’t let all of that GPU space fool you. So I was concerned with getting the radiator installed. Initially, I installed it using the screws that our AIO kit came with. I did this because I was worried about having too long of a screw puncturing a hole in the radiator. This worked well initially but then I ran into a big problem. Those nice flush mounted fan filters up top didn’t want to flush mount as you can see below. Using the button head screws and washers pushed up on it. After digging through the case screws I did find countersunk screws with the radiators thread pattern, they were a little longer than I would have liked but I just went with it and it worked.

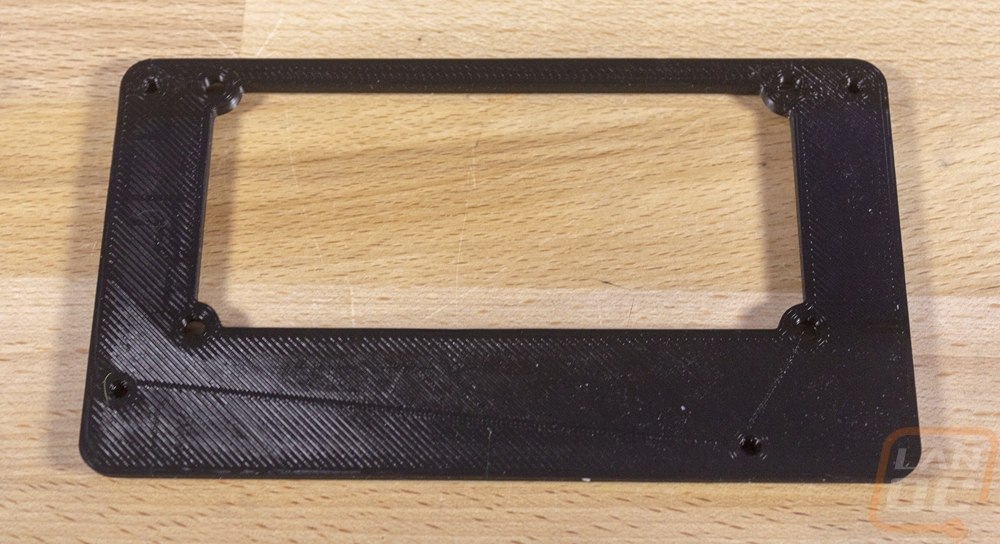
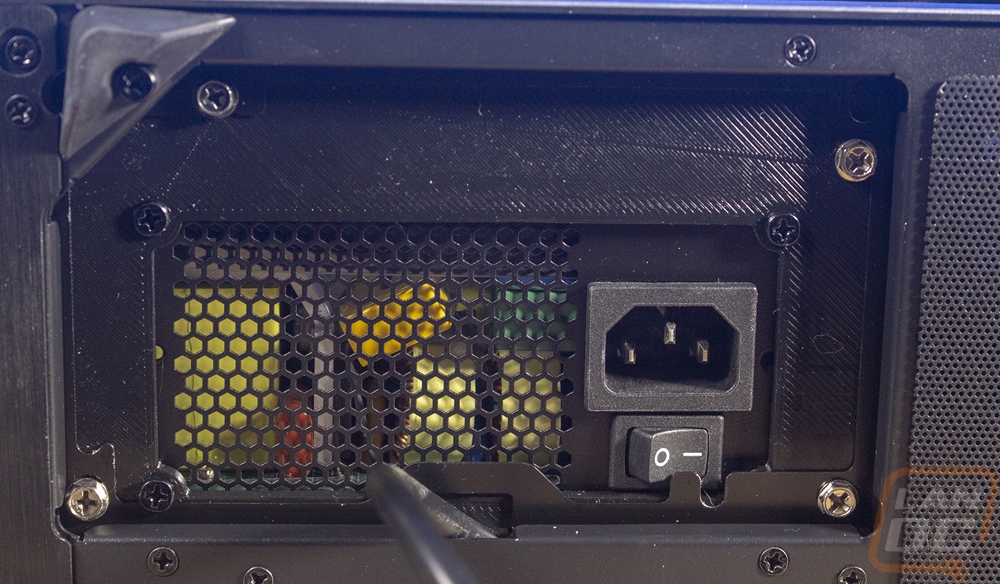
Now for the power supply, I know the Ophion Evo supports a full ATX PSU but I really prefer to have a little room in my builds and I had an 800 watt Silverstone SX800-LTI that I had taken a look at. Not only would it allow a little more space, but being Titanium rated I couldn’t ask for a better PSU. But there was a problem, the power supply doesn’t come with an adapter plate and I couldn’t find one of my extras so I 3D printed an adapter.
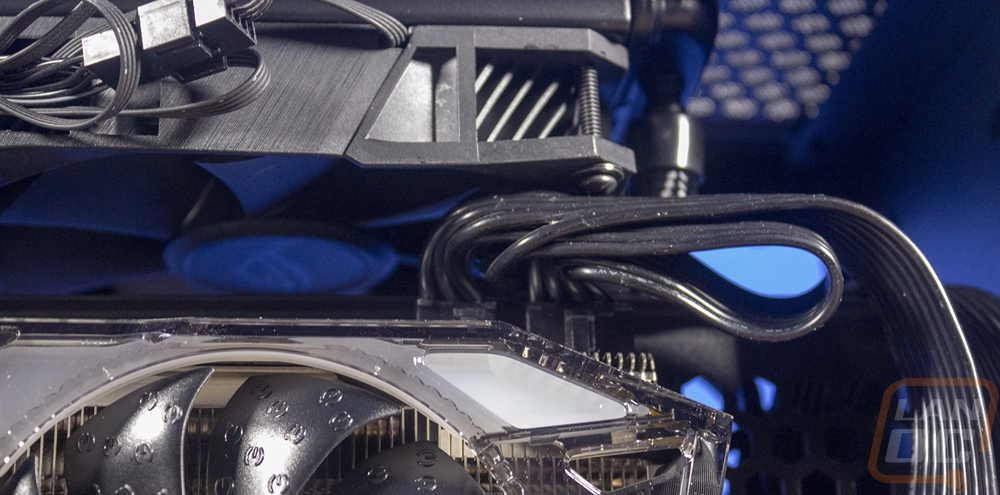
With the SFX PSU installed I had to finish the AIO installed. I had to play around a little moving it back and forth to find where I wanted it and which side I wanted the tubes running. If I had gone with an ATX PSU I think I would have ran the tubes from the right side but the SFX opened up a little room for the Ryou kits long tubes to keep them from being all bunched up on the right. You can see how tight things would have been if the PSU was taller, wider, and thicker. Also to note, the far side trube on the water cooling is going to push up against the motherboard backplate unless your kit has a swivel fitting at the radiator or thin lines. I even toyed around with the idea of running the tubes around the back and up under the motherboard. It would have looked amazing, but would have gotten in the way of the video card.
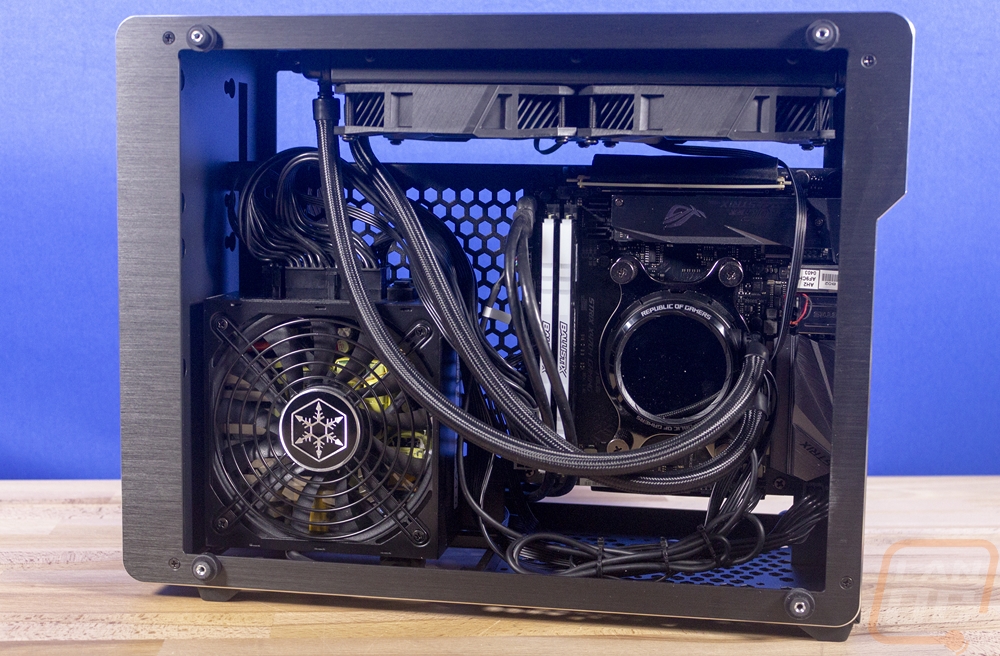
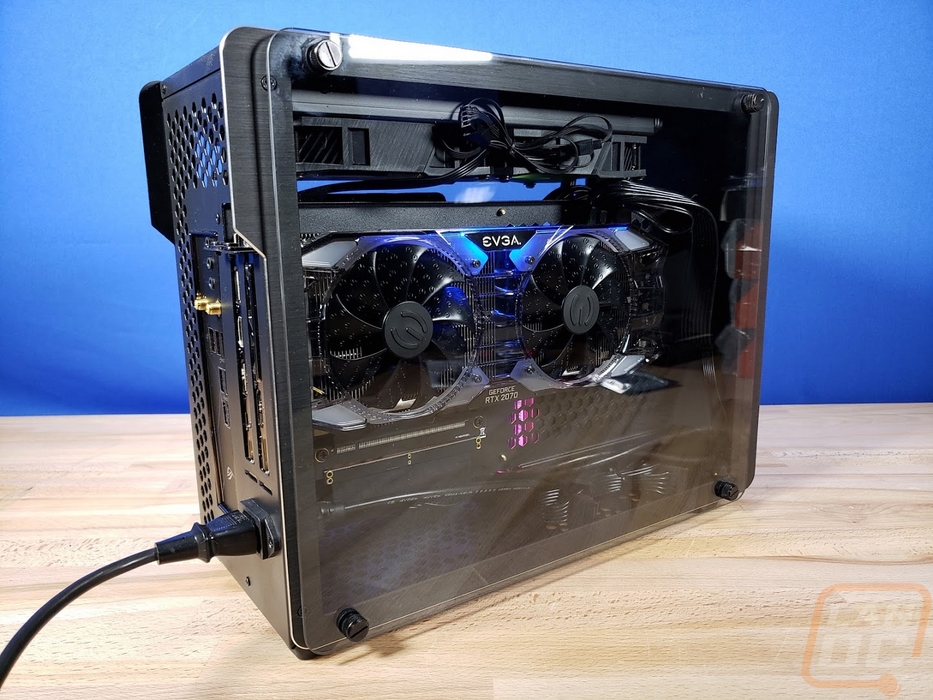
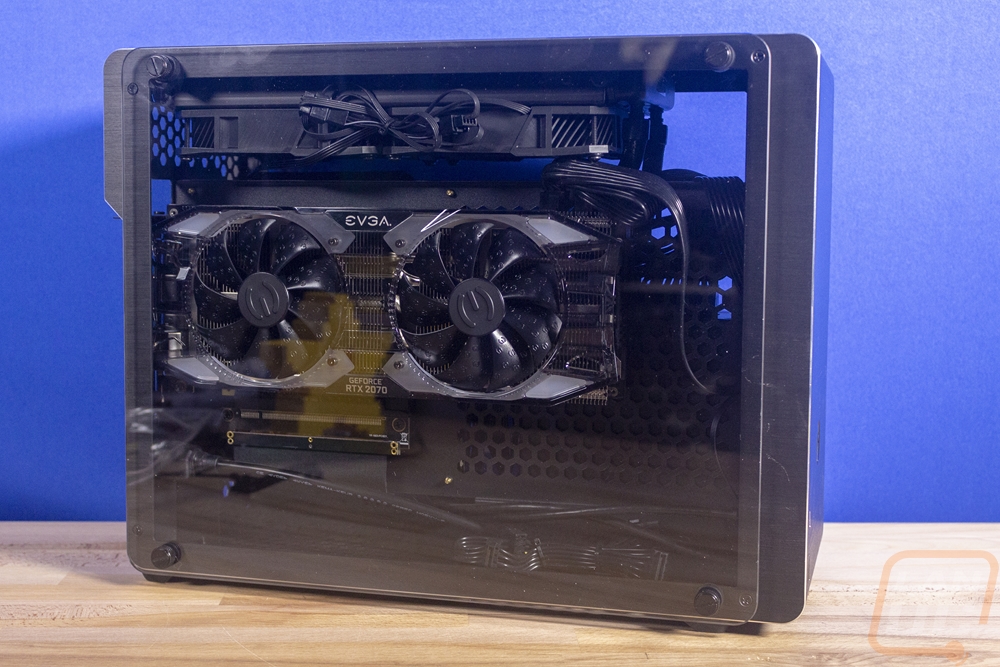
Speaking of the video card, most of our wiring ended up staying over on the front side but I did run the PCI power cable up over the top. From there I installed the EVGA RTX 2070 which fit perfectly and matches the Ryzen 2600X when it comes to good performance but not 2080 Ti levels of cost. I did run into one big concern. With the radiator and fans installed the power connection coming out of the top of our video card was extremely tight. This also means that if you have a tall video card you might need to consider two things. First, if the card is tall, make sure the connection is on the end or recessed lower than the rest of the card. You might also have to consider thinner fans like the Noctua NF-A12x15 which is 15mm thick not 25mm thick like most fans.
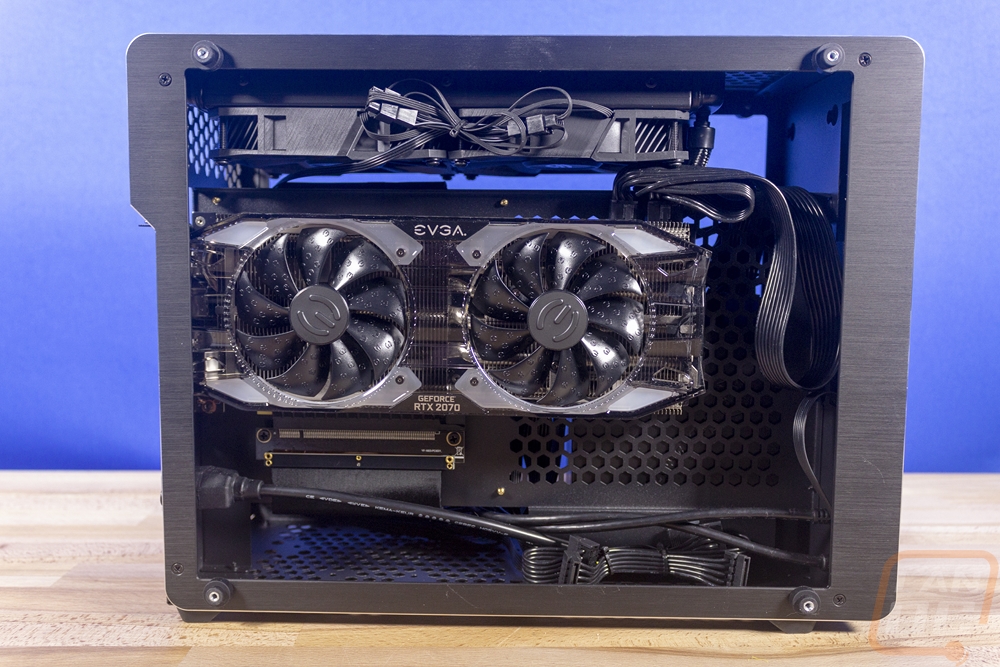
With everything installed I could finally button everything up and I must say other than some of the wiring which a set of custom cables would help with significantly, the build looks amazing in my opinion. The full glass panels really complement the vertical GPU mount. Especially with that blacked out but transparent EVGA card. On the motherboard side, I think the AIO screen and RGB memory will set things off and seriously as I write this I could have done better with the wiring. The thick USB 3.0 cable though was a pain given where it ended up plugging in on the Asus board.
As for performance, well even though this is an SFF build. The extra height that allows you to fit a full 240mm AIO into the case makes a significant difference. Typically in a build like this, you would be struggling with CPU cooling and that doesn’t even include keeping the GPU, RAM, and motherboard cool as well. Tossing a 240mm cooler on the CPU handles that completely. I ended up running this in a push configuration, using the top as an exhaust which ran counter to the dust filters. But I liked being able to pull in cool air all over and to also take advantage of heat rising. The end result was a build that temperatures were never a concern. The CPU ran cool as did everything else. Now with those fans right up on top noise was a concern, especially given how noisy the Asus fans ended up being. Long term this build would really benefit from a better set of fans to quiet things down. If you aren’t installing an AIO you really need to install the top fans if nothing else. The case doesn’t come with any of its own fans, but it is designed with that airflow in mind. Now the optional one 120mm fan mount under the motherboard is also interesting and could really add to cooling if you go with air cooling as well, but keep in mind it will make wiring around the motherboard even tighter as well.