 Cooler Master has added a new case to their CM Storm lineup. The “Trooper” will be the fourth variant in this lineup, the first to support XL-ATX mainboards. The features are quiet interesting, but the most noticeable one is the ultra-strong carrying handle – which supports up to 95lbs. I had a positive experience when reviewing the CM Storm Enforcer, hopefully the Trooper can bring us similar results. Whatever you do make sure you don't call it the Storm Trooper, we wouldn't want George Lucas hunting us down. Oh crap.. better make this quick, I think I hear them coming!
Product Name: Cooler Master CM Storm Trooper
Review Sample Provided by: Cooler Master
Review by: Jakob Barnard
Pictures by: Jakob Barnard
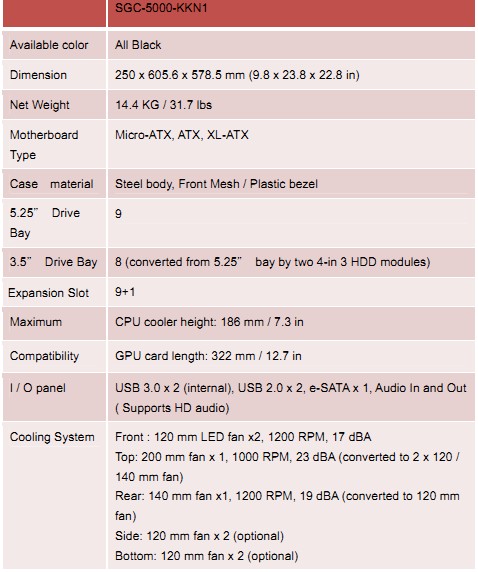
Specifications:
Packaging
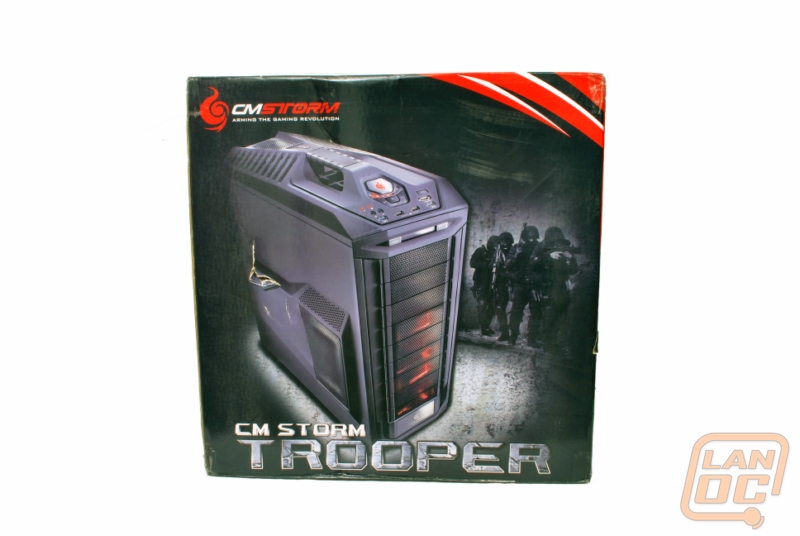
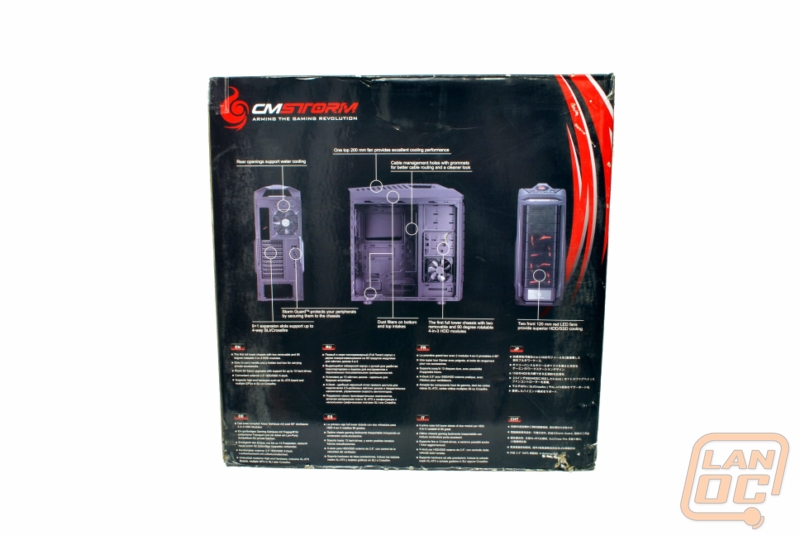
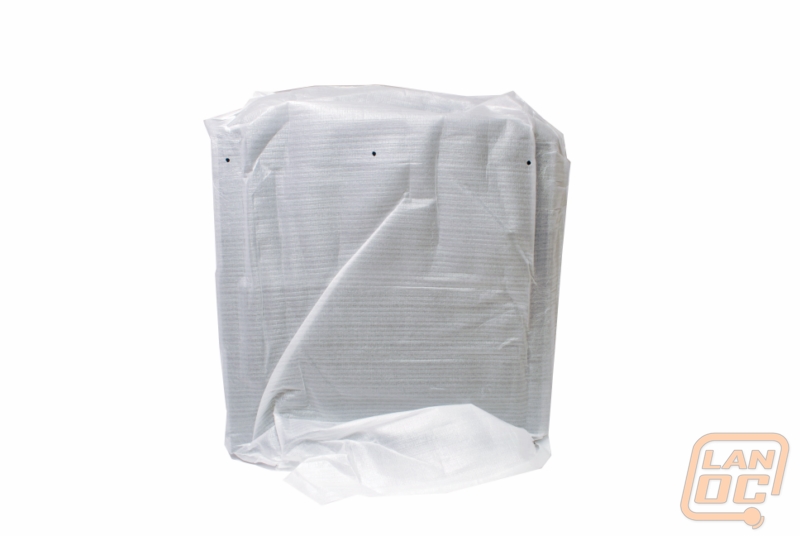
The CM Storm Trooper comes in the typical black and red of the CM Storm line. A picture of the case can be seen on the front and the features laid out on the back. Opening the box we find the usual foam end caps and the case itself wrapped in a plastic sheet.
Exterior Design
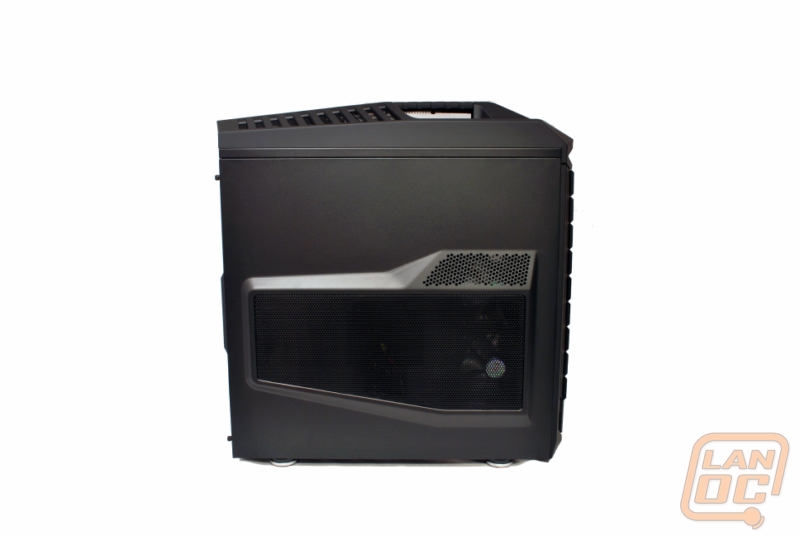
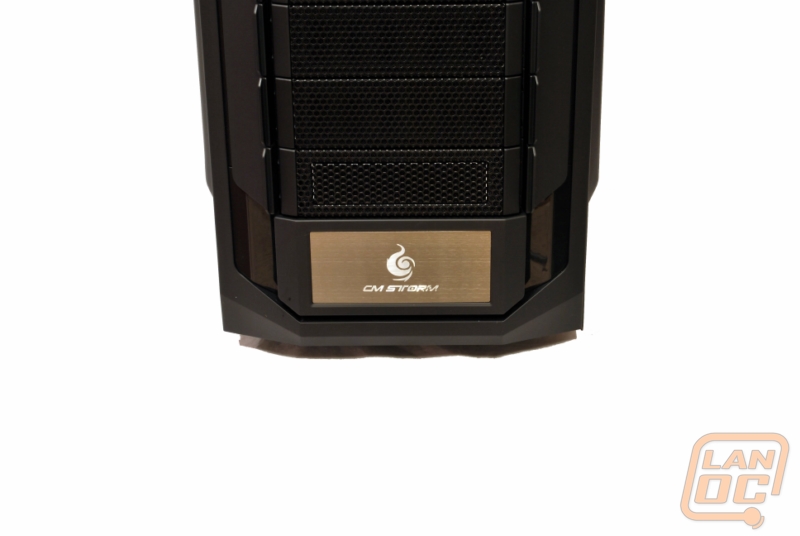
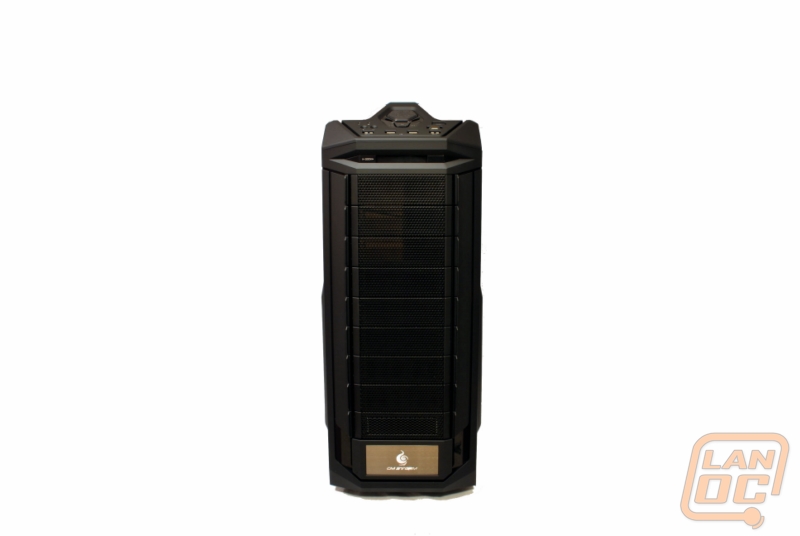
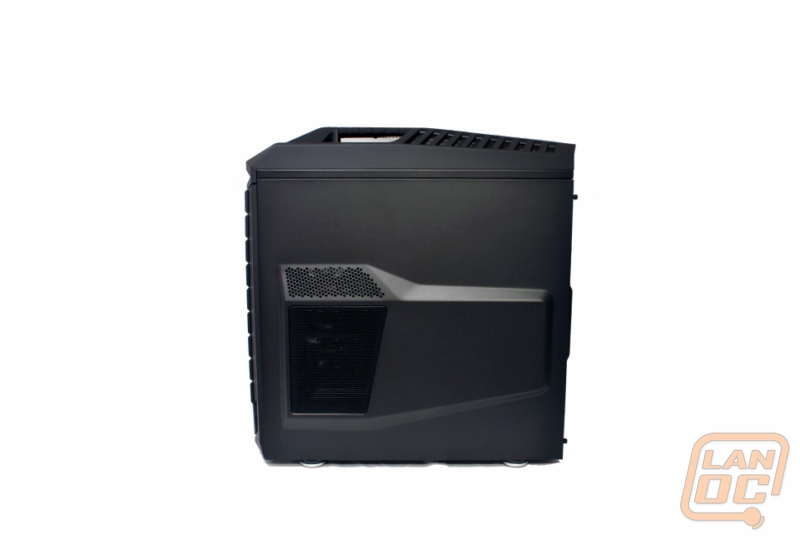
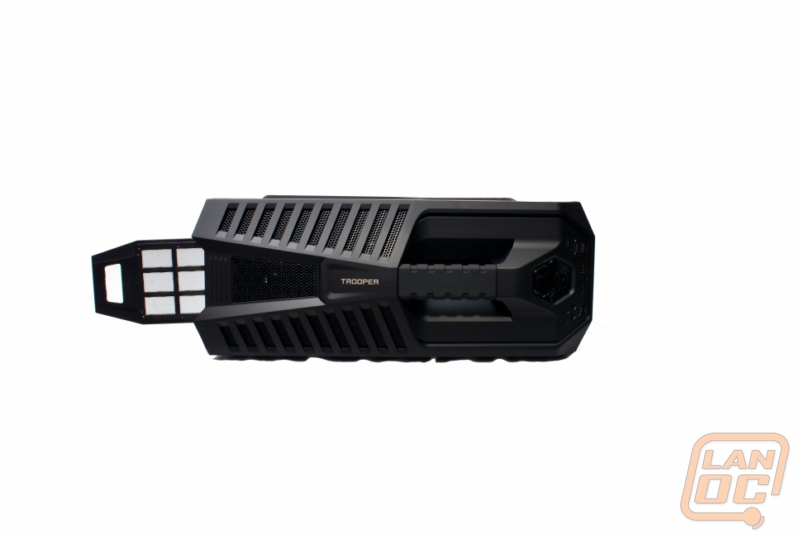
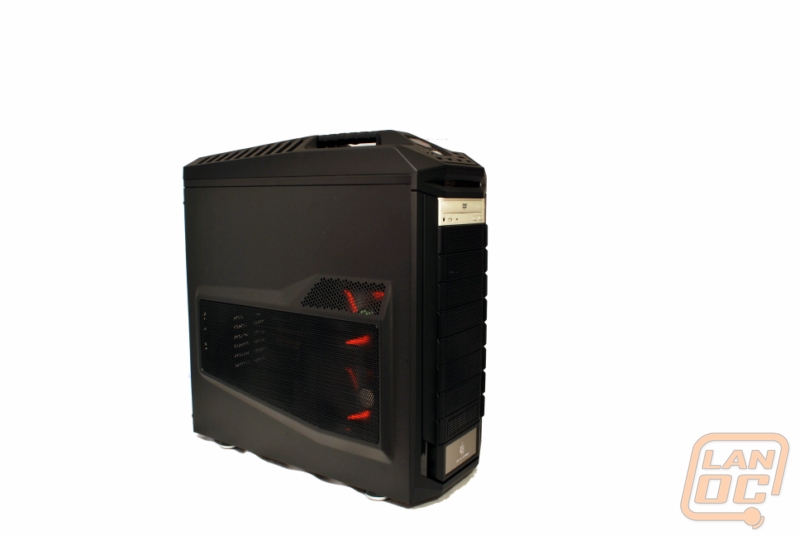
The very first thing I noticed when unpacking this case is the handle. It isn’t the first case I have seen with a handle on it, but it is the first case that I haven’t felt the handle flex. The thing is just plain sturdy, comfortable to lift with, and something I wouldn’t be afraid to use. The style is fairly subdued when comparing to the Enforcer. The size becomes part of the styling when we take a look at the front. The black mesh bay covers run down the whole front of the case with up to nine drives. The CM Storm logo is featured on the bottom front of the case, which also serves as a door to the toolbox. (We will have more on that during the installation portion of this review.) The black mesh style is prominent on the side as well.
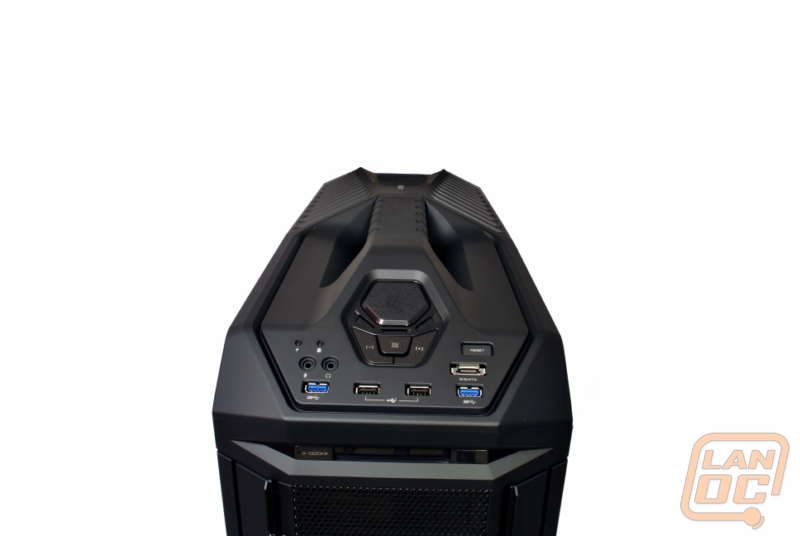
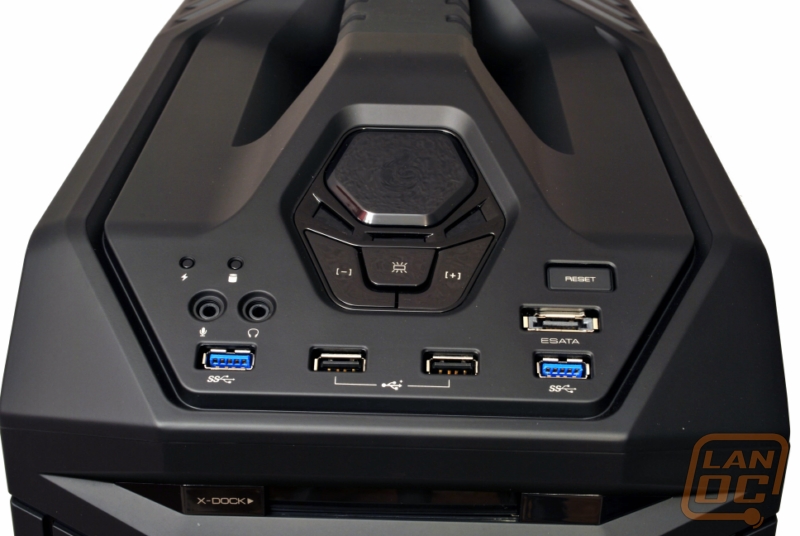
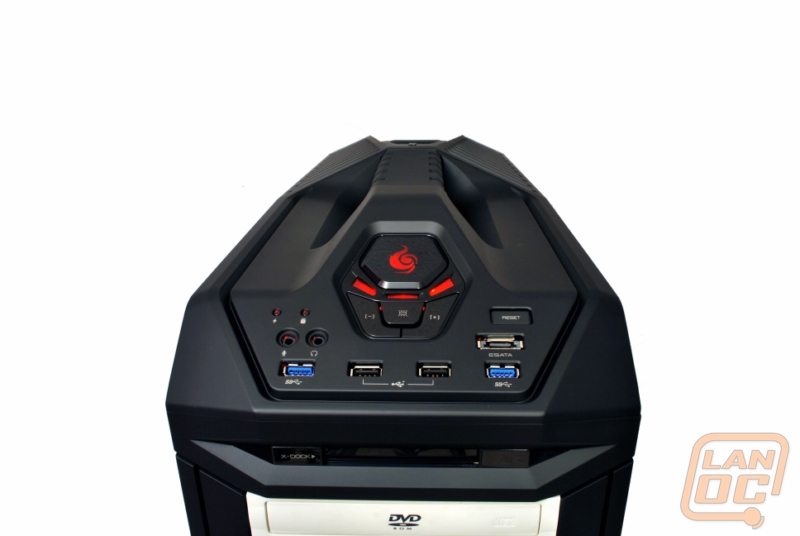
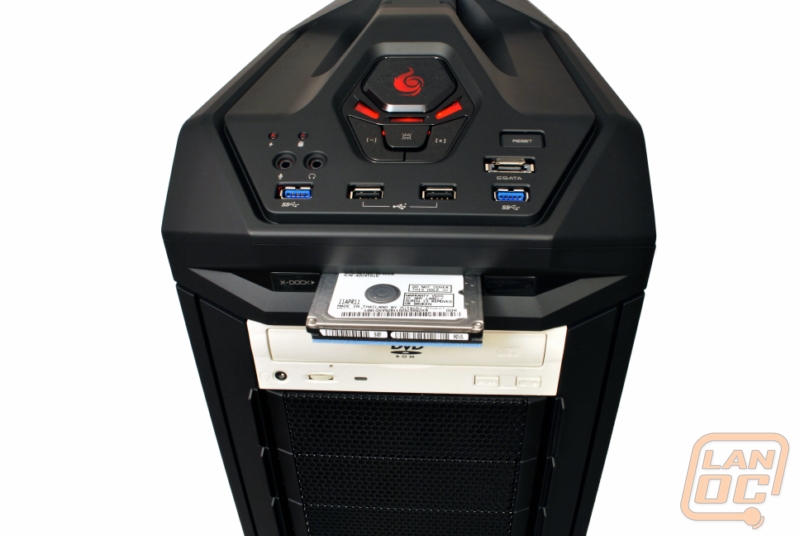
The front control panel is sloped slightly, which makes it easier to see what ports are what when trying to plug something in while sitting on top of a desk. There are some interesting features to be found here, a 2.5” SSD dock just below the ports, two USB3.0 ports, two USB 2.0 ports, eSATA, audio jacks, power/reset buttons, and a fully integrated fan controller.
The far side of the case is identical to the other with the black mesh opening to promote airflow through the drive bays. The rear of the case is where you really get the idea of how much hardware one could cram into this thing.
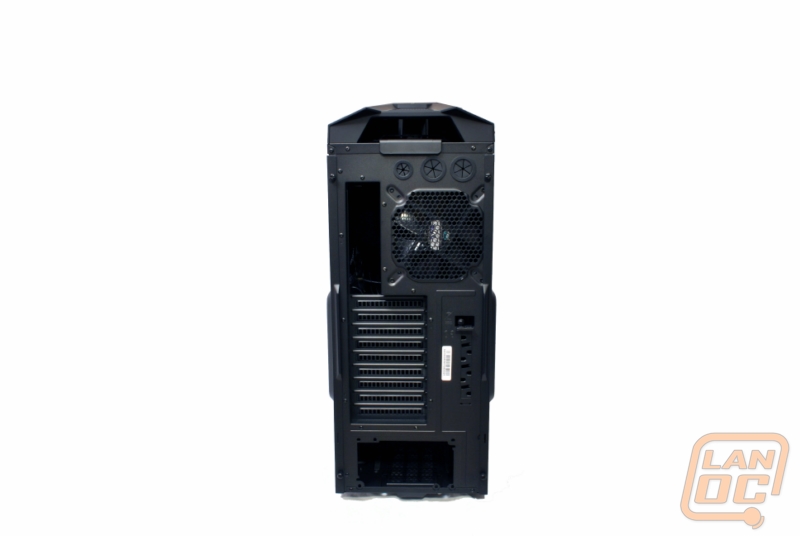
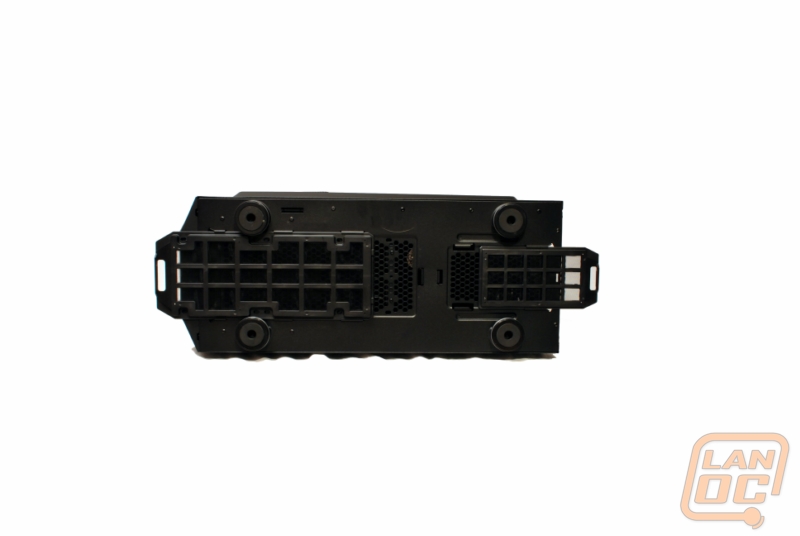
Let’s open this case up and see how the interior is designed. Nine expansion slots with a wire lockdown are the most noticeable features here. You can also see the bottom mount PSU position, which I am a fan of. On the top you can see three openings for water-cooling support. Both the top and bottom of the case feature fan filters that you can easily remove them, clean, and replace all without opening the case.
Interior Design
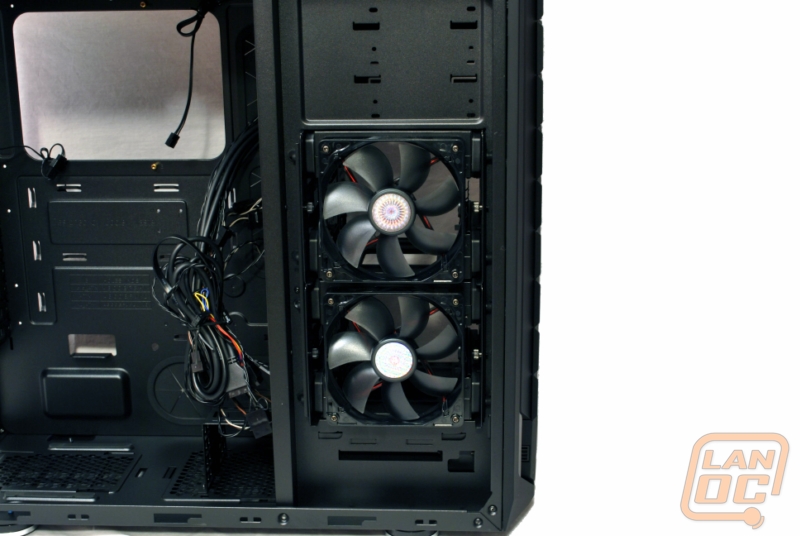
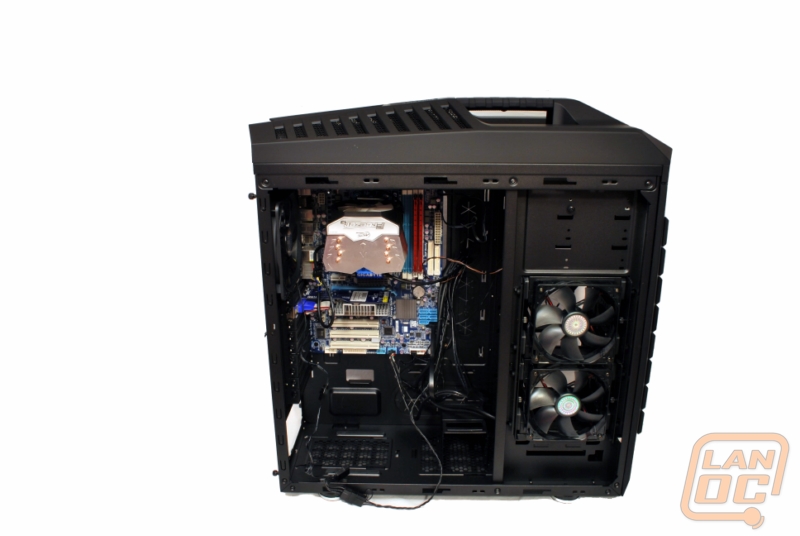
The internal design is also elegant in the fact that it manages to look simplistic, but is highly configurable. The two fans we see on the drive bays are configurable. We can remove those bays and change the orientation of the drives if we so desire, moving where the fans are pointing as well. This gives you flexibility in how you want the airflow passing through the case.
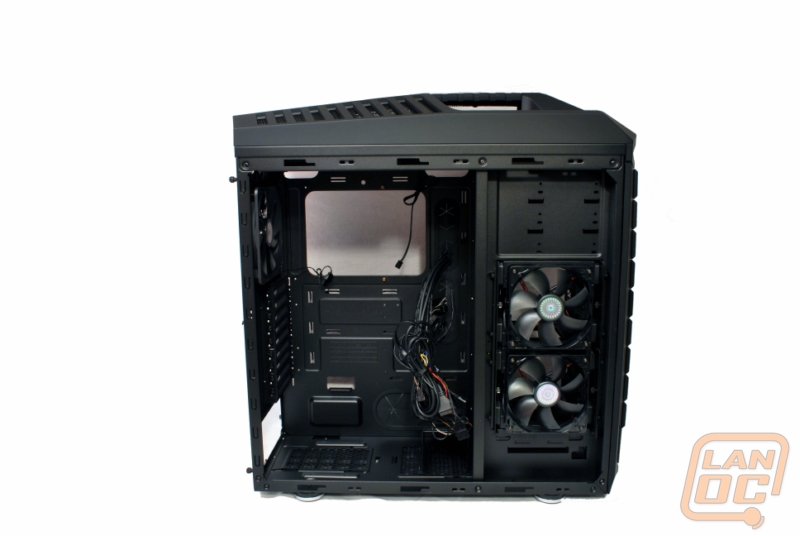
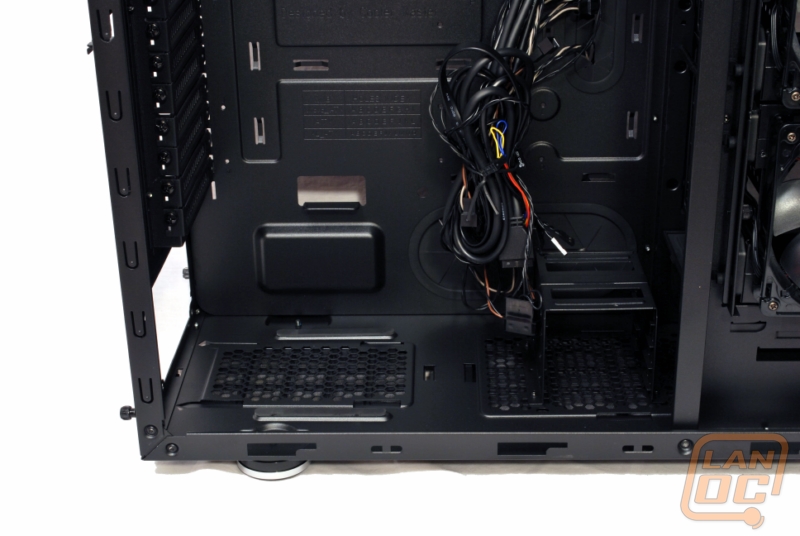
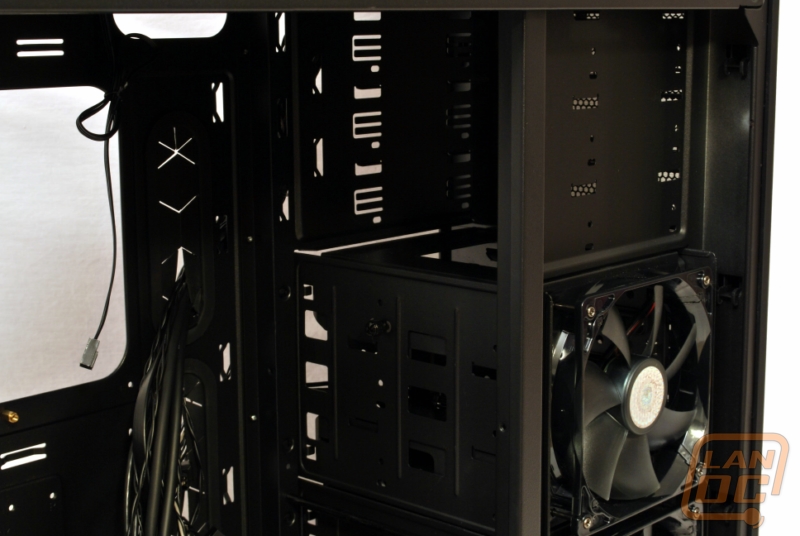
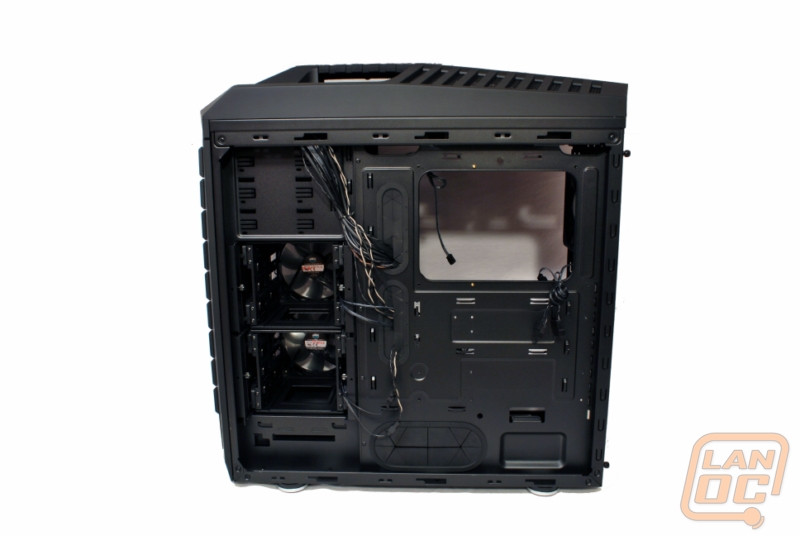
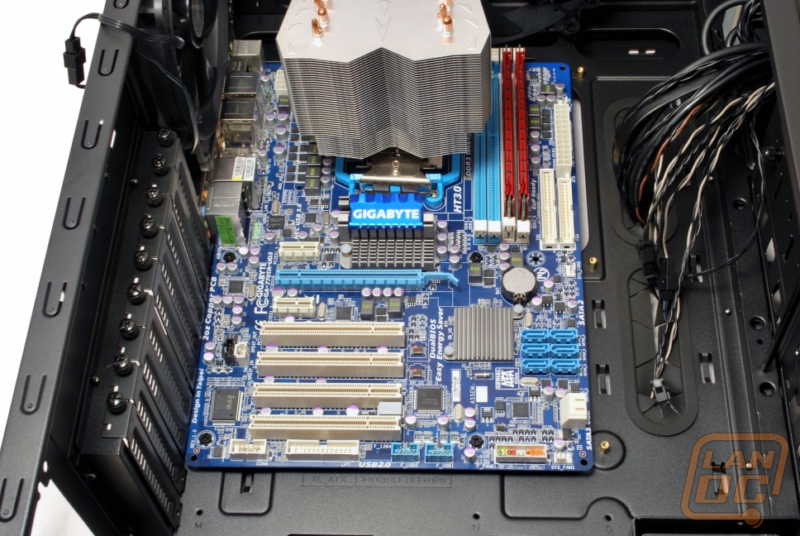
There is a whole lot of room below the mainboard, which is in support of those extended ATX boards. The inside is packed with pass-through’s to help keep the wiring clean. There is a large cutout on the mainboard tray that should give you plenty of flexibility in choosing aftermarket CPU coolers. I will be leaving the 3.5” drive bays in this configuration as it is my preference. I can stash wires here out of sight and out of the way, so it works for me.
Installation
Hardware Installed:
AMD Phenom II X4 955BE 3.2 GHz
Arctic Freezer 13 CPU Cooler
Gigabyte GA-770TA-UD3 770 R
G.Skill 2gb DDR3 1600
Raidmax Hybrid 450w PSU
EVGA Geforce 9400 GT
HHD0: Samsung 1.0tb (3.5”)
The first thing you find when opening the case is what you would assume is the usual box of accessories along with the instructions. The brown cardboard box actually only contained drive trays. Where were the usual assortment of screws, standoffs, and other associated hardware? Cooler Master decided to get creative on us and include a built-in toolbox.
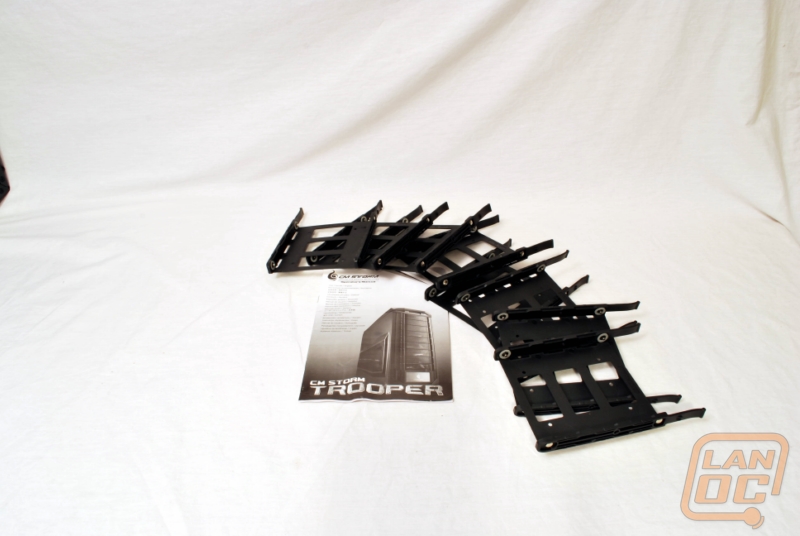

The drive trays themselves are simple to use. You clip in the drive, slide the drive into the bay, and that is it. While there is a 2.5” drive bay available inside of the case, you can also mount 2.5” drives to this trays and place them in the 3.5” bays.
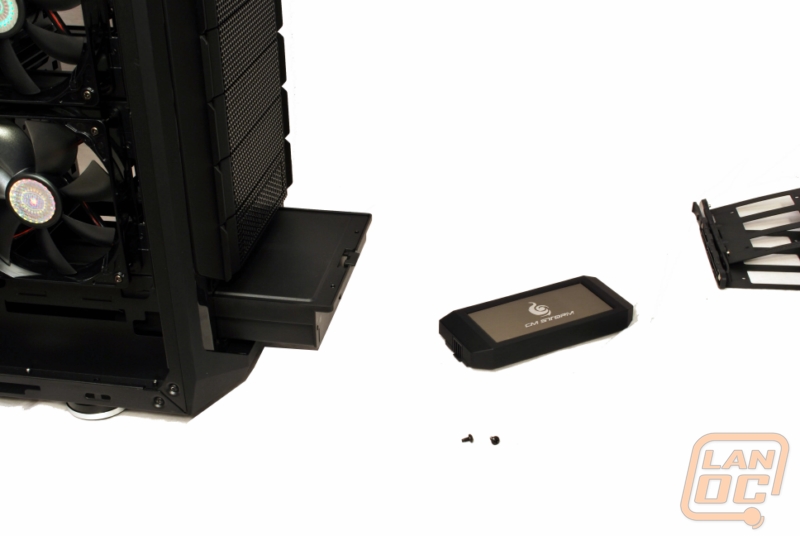
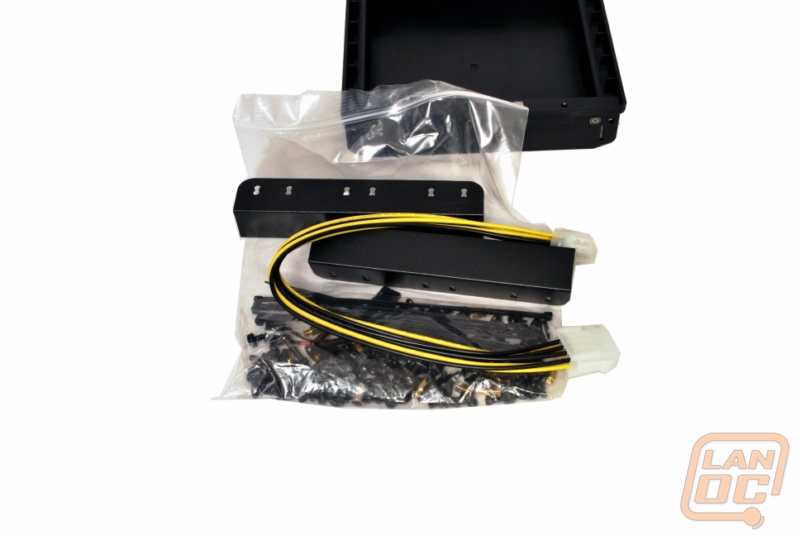
Two small screws need to be removed and the toolbox slides out of its hidden compartment. Now we finally locate the missing screws, standoffs, etc. I would have preferred some other system than having to screw/unscrew the toolbox, but it does mean it is secure inside of the case and won’t be moving around.
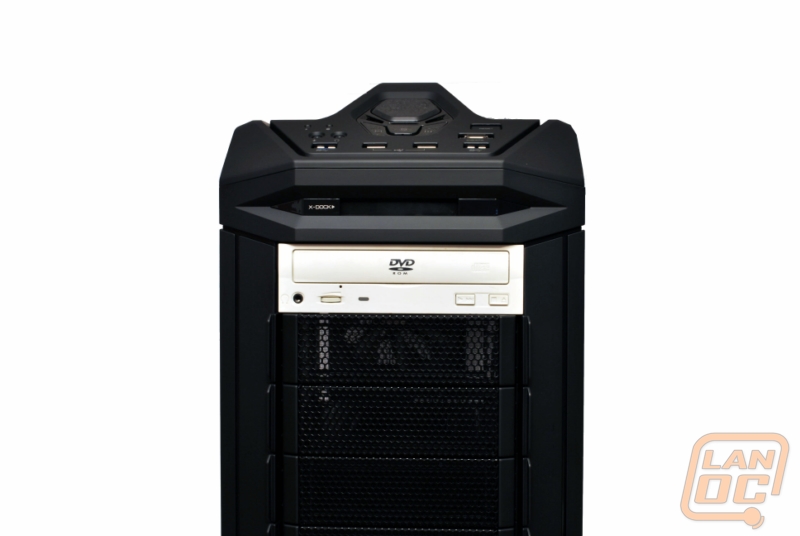
The drive bay covers are easy to remove. Simply pinch in and remove the cover. The DVD drive slid right in and is secured by thumbscrews. This is a bit more manual than I had anticipated and is a bit a-typical. The move has been to include tool-free retention system. The thumbscrews are a good compromise to make sure it is secure, yet easy to remove.
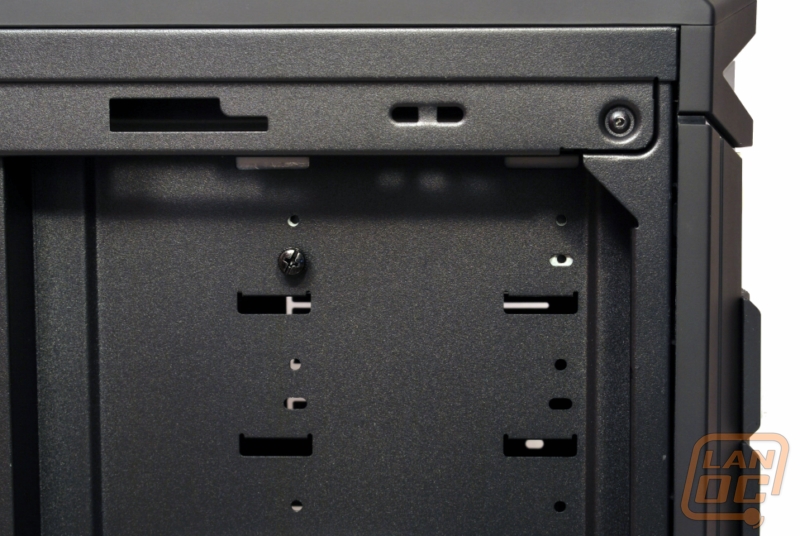
Getting the mainboard installed was easy. There is so much room in this case that getting the board placed and screwed down was a quick process. You will notice the board I am using here doesn’t line up completely with the standard ATX standoffs, but I have found that is actually pretty typical. Once the board is installed and the case stood back up, you can also see how long of graphics cards this case can support. Furthermore, you can see how the expansion slots actually push down past the bottom of the mainboard. You can fit a lot of expansion cards into this case.
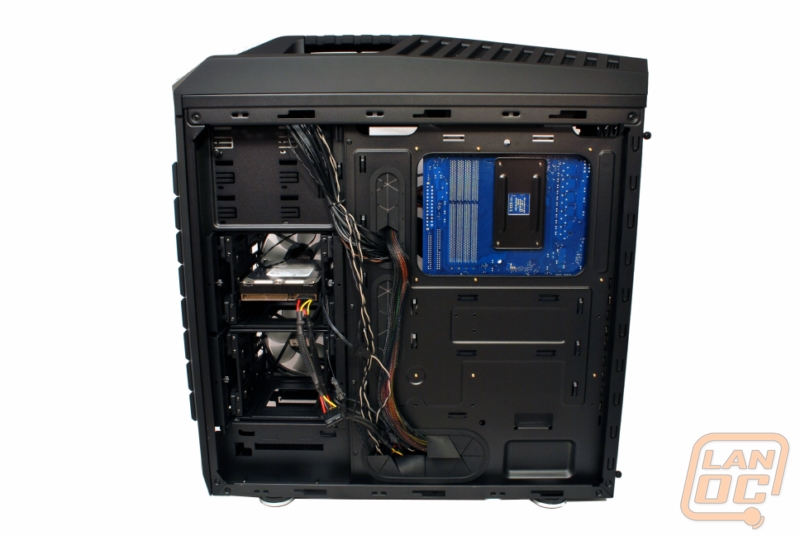
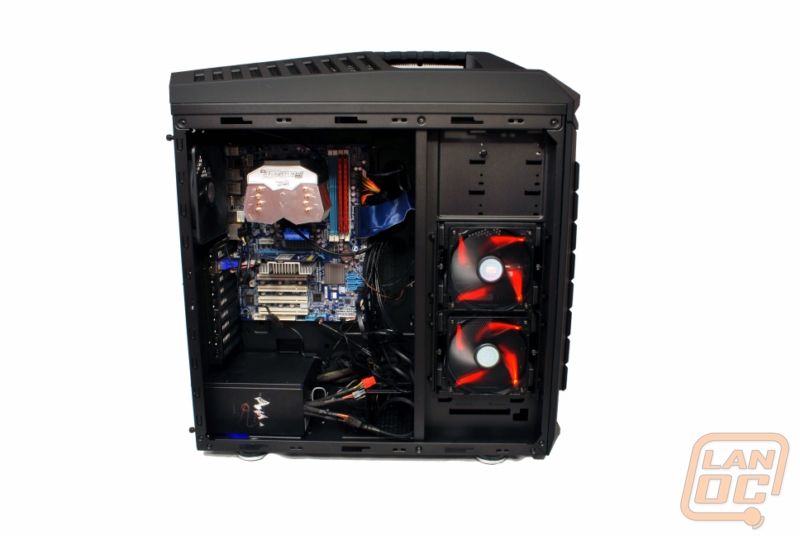
Turning the case back around, now with the mainboard installed we can see how large that cutout really is. There shouldn’t be any issue working with backplates on either AMD or Intel style boards. Installing the PSU and powering the case on, we can see the side 120mm fans are red LED fans. Depending on how you put the bay configuration, these will be either glowing out of the side or front. The front control panel has a red glow to it and the power button features the CM Storm logo. You can see the 2.5” hotswap bay in use in the last picture. I should note here that using a white drive in a black case drives me nuts, so during an actual built I would be placing a black drive here.
Overall
I certainly have been a fan of the CM Storm series. Simple yet flexible has been their hallmark. What started with the Enforcer has grown up a little bit into the Trooper.
The one area that bothered me about the case was the reduction in the tool free design elements. I do however suspect this had more to do with keeping the configuration flexible, so it isn’t a serious ding in my book. The retention system for the toolbox was a bit odd with having to open the hidden door, unscrew two screws, though it was effective. This case really shines though when it comes to portability and flexibility. It is nice being able to choose the orientation of the drive bays to allow for personal preference. The handle is comfortable to hold and neither the case, nor the handle, flex when picking it up fully loaded with hardware. The Trooper is a case offering that should be near the top of the list for anyone who is in the market for a full tower case. The MSRP of $189.99 makes it about middle of the range for this sort of case. The CM Storm Trooper is quite possibly the best case I have reviewed this year, so I am happy to award it 9/10 – LanOC Recommended.


Cooler Master has added a new case to their CM Storm lineup. The “Trooper” will be the fourth variant in this lineup, the first to support XL-ATX mainboards. The features are quiet interesting, but the most noticeable one is the ultra-strong carrying handle – which supports up to 95lbs. I had a positive experience when reviewing the CM Storm Enforcer, hopefully the Trooper can bring us similar results.Product Name: Cooler Master CM Storm TrooperReview Sample Provided by: Cooler MasterReview by: Jakob BarnardPictures by: Jakob Barnard Specifications:[trooper specs jpg]Packaging [Images 4016, 4017, 4018]The CM Storm Trooper comes in the typical black and red of the CM Storm line. A picture of the case can be seen on the front and the features laid out on the back. Opening the box we find the usual foam end caps and the case itself wrapped in a plastic sheet.Exterior Design [Images, 4019,4020,4021]The very first thing I noticed when unpacking this case is the handle. It isn’t the first case I have seen with a handle on it, but it is the first case that I haven’t felt the handle flex. The thing is just plain sturdy, comfortable to lift with, and something I wouldn’t be afraid to use. The style is fairly subdued when comparing to the Enforcer. The size becomes part of the styling when we take a look at the front. The black mesh bay covers run down the whole front of the case with up to nine drives. The CM Storm logo is featured on the bottom front of the case, which also serves as a door to the toolbox. (We will have more on that during the installation portion of this review.) The black mesh style is prominent on the side as well. [Images 4022, 4023]The front control panel is sloped slightly, which makes it easier to see what ports are what when trying to plug something in while sitting on top of a desk. There are some interesting features to be found here, a 2.5” SSD dock just below the ports, two USB3.0 ports, two USB 2.0 ports, eSATA, audio jacks, power/reset buttons, and a fully integrated fan controller. [Images 4024, 4025, 4026, 4027]The far side of the case is identical to the other with the black mesh opening to promote airflow through the drive bays. The rear of the case is where you really get the idea of how much hardware one could cram into this thing.Let’s open this case up and see how the interior is designed. Nine expansion slots with a wire lockdown are the most noticeable features here. You can also see the bottom mount PSU position, which I am a fan of. On the top you can see three openings for water-cooling support. Both the top and bottom of the case feature fan filters that you can easily remove them, clean, and replace all without opening the case.Inside Design [Images 4028,4029,4030,4031,4032]The internal design is also elegant in the fact that it manages to look simplistic, but is highly configurable. The two fans we see on the drive bays are configurable. We can remove those bays and change the orientation of the drives if we so desire, moving where the fans are pointing as well. This gives you flexibility in how you want the airflow passing through the case.There is a whole lot of room below the mainboard, which is in support of those extended ATX boards. The inside is packed with pass-through’s to help keep the wiring clean. There is a large cutout on the mainboard tray that should give you plenty of flexibility in choosing aftermarket CPU coolers. I will be leaving the 3.5” drive bays in this configuration as it is my preference. I can stash wires here out of sight and out of the way, so it works for me.InstallationHardware Installed:
AMD Phenom II X4 955BE 3.2 GHz
Arctic Freezer 13 CPU Cooler
Gigabyte GA-770TA-UD3 770 R
G.Skill 2gb DDR3 1600
Raidmax Hybrid 450w PSU
EVGA Geforce 9400 GT
HHD0: Samsung 1.0tb (3.5”) [Images 4033, 4034]The first thing you find when opening the case is what you would assume is the usual box of accessories along with the instructions. The brown cardboard box actually only contained drive trays. Where were the usual assortment of screws, standoffs, and other associated hardware? Cooler Master decided to get creative on us and include a built-in toolbox.The drive trays themselves are simple to use. You clip in the drive, slide the drive into the bay, and that is it. While there is a 2.5” drive bay available inside of the case, you can also mount 2.5” drives to this trays and place them in the 3.5” bays. [Images 4035, 4036]Two small screws need to be removed and the toolbox slides out of its hidden compartment. Now we finally locate the missing screws, standoffs, etc. I would have preferred some other system than having to screw/unscrew the toolbox, but it does mean it is secure inside of the case and won’t be moving around. [Images 4037,4038]The drive bay covers are easy to remove. Simply pinch in and remove the cover. The DVD drive slid right in and is secured by thumbscrews. This is a bit more manual than I had anticipated and is a bit a-typical. The move has been to include tool-free retention system. The thumbscrews are a good compromise to make sure it is secure, yet easy to remove. [Images 4040,4041]Getting the mainboard installed was easy. There is so much room in this case that getting the board placed and screwed down was a quick process. You will notice the board I am using here doesn’t line up completely with the standard ATX standoffs, but I have found that is actually pretty typical. Once the board is installed and the case stood back up, you can also see how long of graphics cards this case can support. Furthermore, you can see how the expansion slots actually push down past the bottom of the mainboard. You can fit a lot of expansion cards into this case. [Images 4042,4043,4045,4046]Turning the case back around, now with the mainboard installed we can see how large that cutout really is. There shouldn’t be any issue working with backplates on either AMD or Intel style boards. Installing the PSU and powering the case on, we can see the side 120mm fans are red LED fans. Depending on how you put the bay configuration, these will be either glowing out of the side or front. The front control panel has a red glow to it and the power button features the CM Storm logo. You can see the 2.5” hotswap bay in use in the last picture. I should note here that using a white drive in a black case drives me nuts, so during an actual built I would be placing a black drive here. ConclusionsI certainly have been a fan of the CM Storm series. Simple yet flexible has been their hallmark. What started with the Enforcer has grown up a little bit into the Trooper. [Image 4044]The one area that bothered me about the case was the reduction in the tool free design elements. I do however suspect this had more to do with keeping the configuration flexible, so it isn’t a serious ding in my book. The retention system for the toolbox was a bit odd with having to open the hidden door, unscrew two screws, though it was effective.This case really shines though when it comes to portability and flexibility. It is nice being able to choose the orientation of the drive bays to allow for personal preference. The handle is comfortable to hold and neither the case, nor the handle, flex when picking it up fully loaded with hardware. The Trooper is a case offering that should be near the top of the list for anyone who is in the market for a full tower case. The MSRP of $189.99 makes it about middle of the range for this sort of case. The CM Storm Trooper is quite possibly the best case I have reviewed this year, so I am happy to award it 9/10 – LanOC Recommended.
