In the past year I have been having a blast with 3d printing in my free time. This past week I ran into a situation that printing helped me out and I thought I would take a few minutes to tell everyone about it. I was outside installing a new flag mount to our porch and moving our flag and when I went to move the cheap solar light that keeps the flag lit up at night I had trouble reinstalling it into the ground. The peg started making cracking noises and then broke. I didn’t want to have to buy a new light and If I didn’t keep our flag lit at night (I’m far too lazy to bring it in each day) it would be against the US flag code. So I brought a small piece of the broken peg inside to look at my options.
Article Name: Functional Prints: Solar Light Peg
Material provided by: MatterHackers
Written by: Wes
Pictures by: Wes
Amazon Affiliate Link: HERE
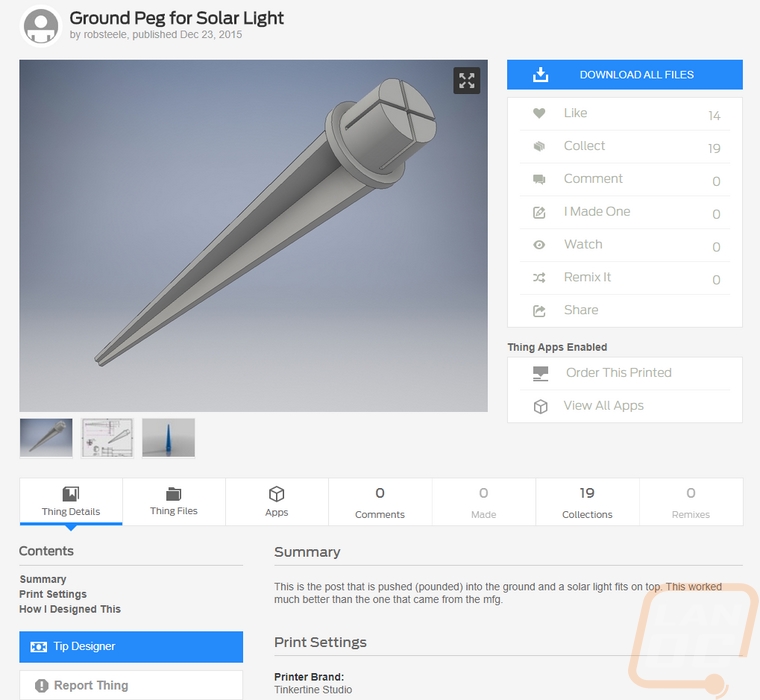
I was originally going to sit down and design my own replacement peg but I ended up finding two on Thingiverse that looked like they would do the job. One was more of a direct replacement and the other had been beefed up with a stronger connection where it goes into the light. The stronger model also had an image with all of its dimensions. This helped me a lot because I didn’t think every peg would be the same. Here is a link to the actual file, big thanks to robsteele for making it.
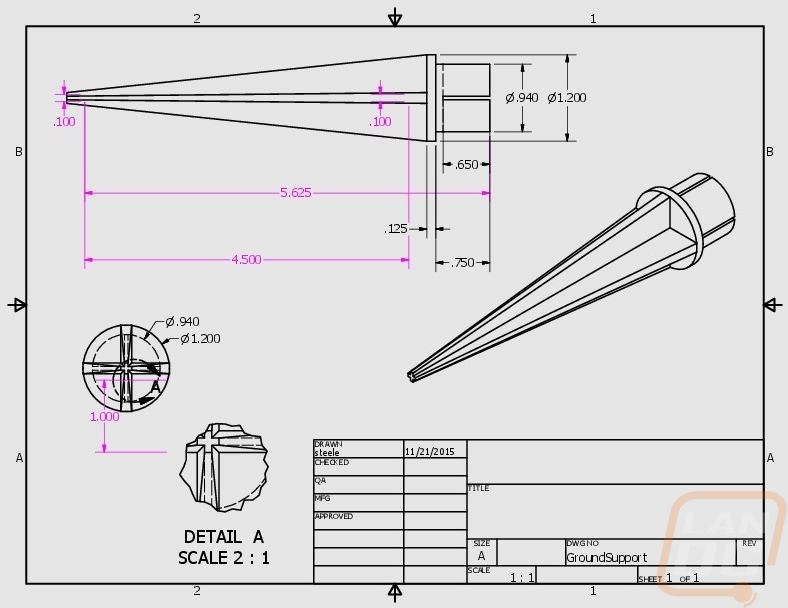
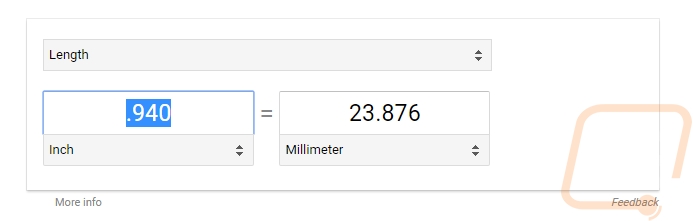
With the dimensions in mind, I measured how wide the connection area on my broken part was. The broken part was 21mm and the diagram showed the model to be .940. Putting to use the built in conversion on google I found that .94 of an inch is 23.876mm. In other words, I was stuck again.
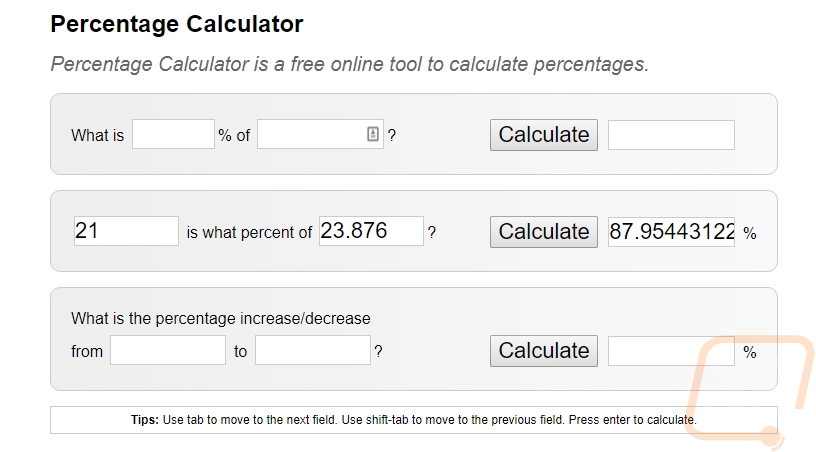
After thinking about it I realized that the only dimension that matters is where it plugs into the light so scaling the peg down wouldn’t hurt us at all. Plus the entire thing is going to be stuck into the ground anyhow. So I used what I already knew and went on a percentage calculator to figure out what percentage of 23.876 21 would be. This result was 87.95 and a few more digits.
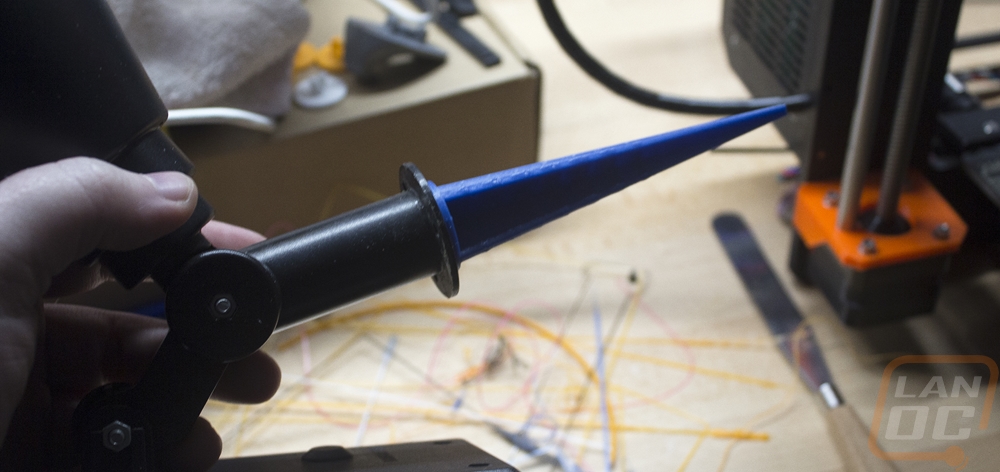
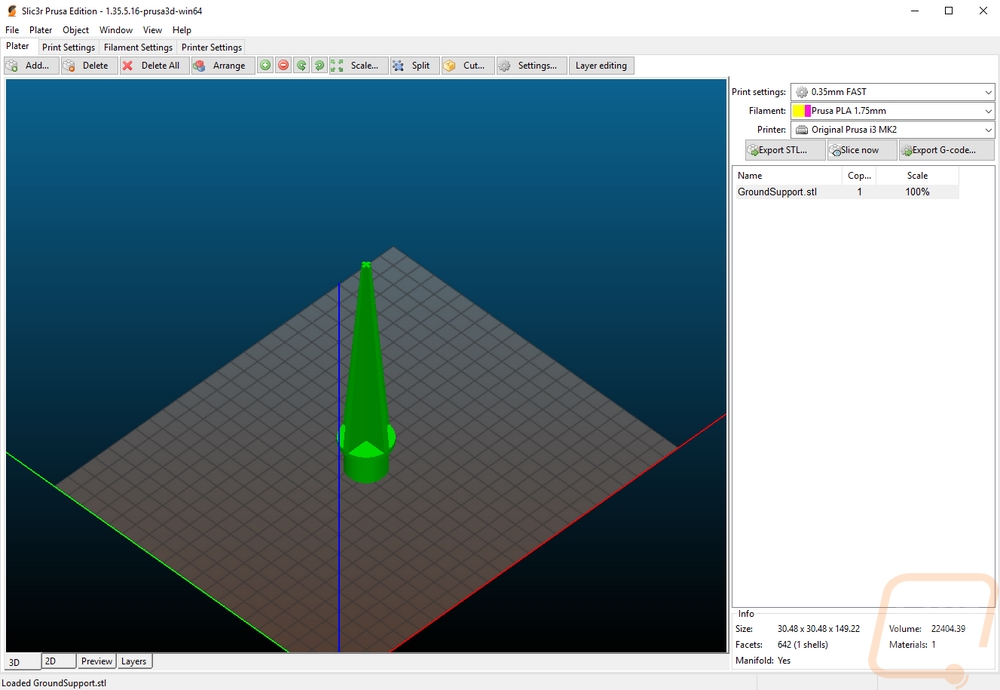
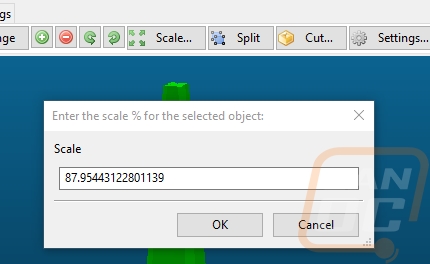
From there I opened up my slicer, for this print I’m using the Prusa MK2 that I’m testing so I was using Slic3r. I dropped the STL in and I had my peg sticking up from the print bed. From there I took number I got from the percentage calculator and opened up the scale button and put that number in. This scaled the peg down to match that 21mm wide connection.
I sliced the file and put it on our SD card and started up the print. For material, I had MatterHackers PLA Pro (affiliate link should anyone want it) in a really cool looking pearl blue that they sent me to use already on the printer so I stuck with that. PLA isn’t really the best option for something that will be outside, especially in the ground where it will be exposed to water but I’m hoping it will still do the job for as long as we might need it. Like I said the solar light itself was a cheap light. I printed it on the fast print option with .35mm thick layers and I didn’t use supports even though the design could use them to help with the ring about an inch up. Because it is a tall print it did take an hour and 40 minutes to print, but I didn’t have to stand over it.
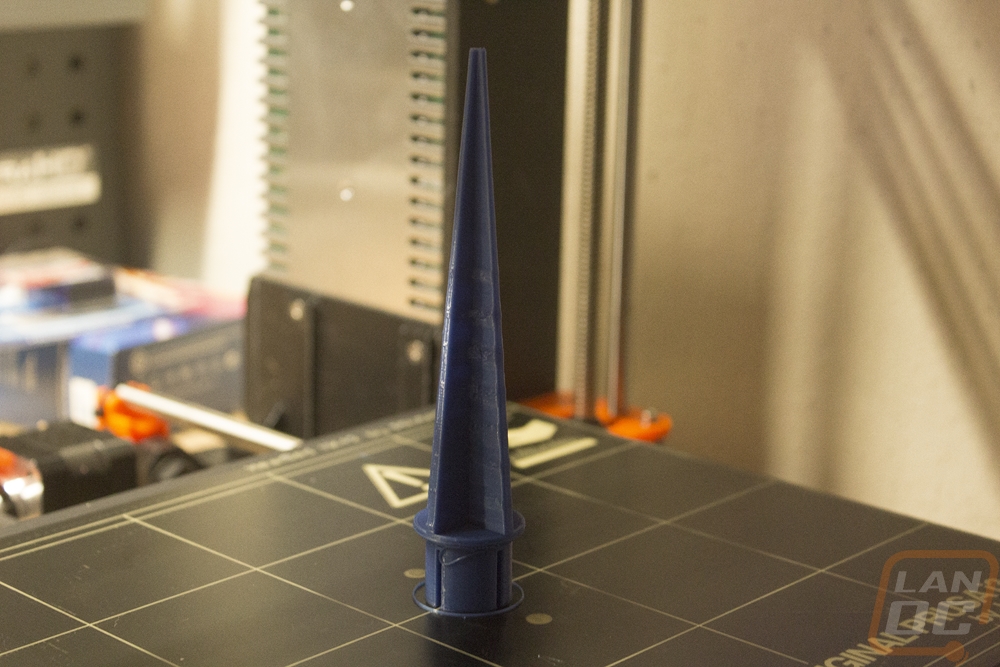
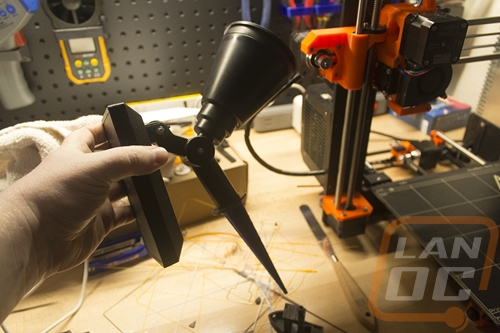
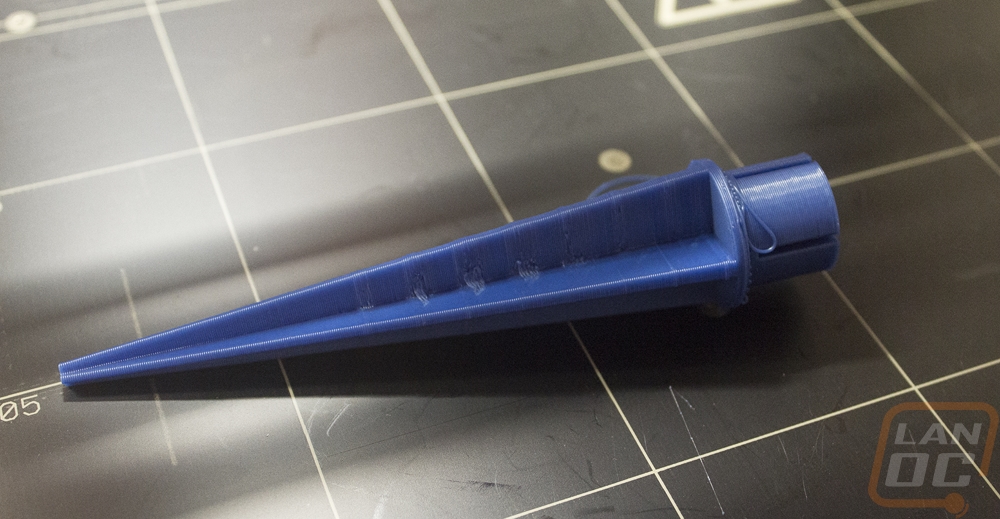
The lip around the edge about an inch up did have a few strands where it tried to print without the supports it needed but it turned out decent. There was an interesting effect on the rest of the print every centimeter or so. You can see it in the photo below. This is a weird artifact from me scaling the item down. This doesn’t always happen but the angle didn’t scale down correctly and caused small bumps. Again, no skin off my back I’m putting this thing in the dirt right?
So did it even fit? Well, I went out and grabbed our solar light and brought it in to try it out. It actually ended up fitting better than the original. The original design had a plus shape for the connection so there wasn’t much surface where it would touch. This has surface area all around the circle and fits perfectly. Being proud of my functional print I went looking for my wife to show her then I went outside to see if this one would break when I tried to put it in the ground. While FDM printing as a whole isn’t as strong as an injected part, the design worked really well and was more solid in construction. It slid right into the ground and I don’t have to worry about anyone knocking on my door upset that I have my flag outside in the dark without a light on it. Being on a busy street in a town filled with people who loved to complain, that was a real concern.