Software and Performance
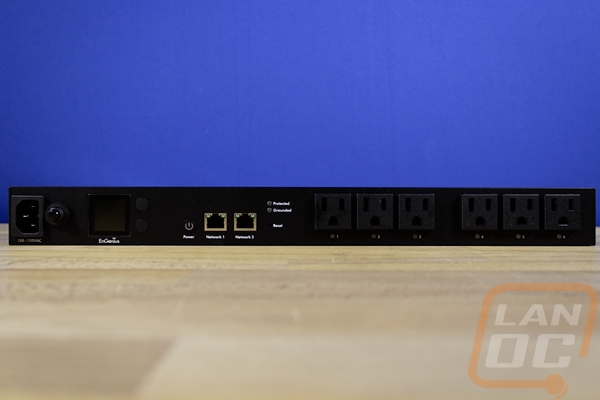
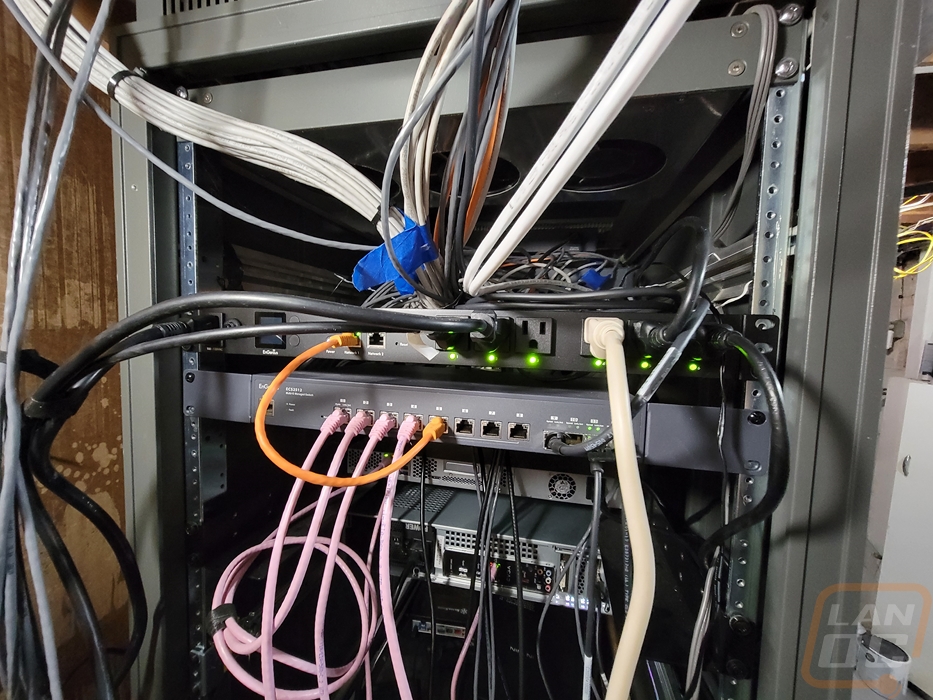
To put the EnGenius ECP106 Switchable Smart PDU to use I did have to get it installed in our rack. EnGenius gives you the option to flush mount or the recessed brackets. The ECP106 also has mounting holes to mount those facing the back for wall mounting and there is the option to mount at an angle as well. I kept things simple with the basic flush rack brackets mounted for a traditional rack installation. I did however mount the ECP106 in the back of our rack, not the front. Being in the front would be a LOT easier to control but for that, I would need rear-facing outlets, which would be a great option to have in future models. With 6 plugs, plugging everything in our rack individually wouldn’t be an option but it does give me dedicated plugs for our one server and two NAS. Then from there, I wanted to get our network switches, gateway, and model all plugged in. For that, I did use a power strip which isn’t ideal but with those devices being lower power I wasn’t worried about the total power being an issue. On top of that, our modem does use a power wart and wouldn’t fit without covering up at least a second port. That said, getting everything hooked up was easy. The main things to remember are to scan the PDU in using your EnGenius Cloud app before mounting it because that QR code is on the bottom, you also want to take note of what is plugged into each port so you can input that in on the cloud as well.

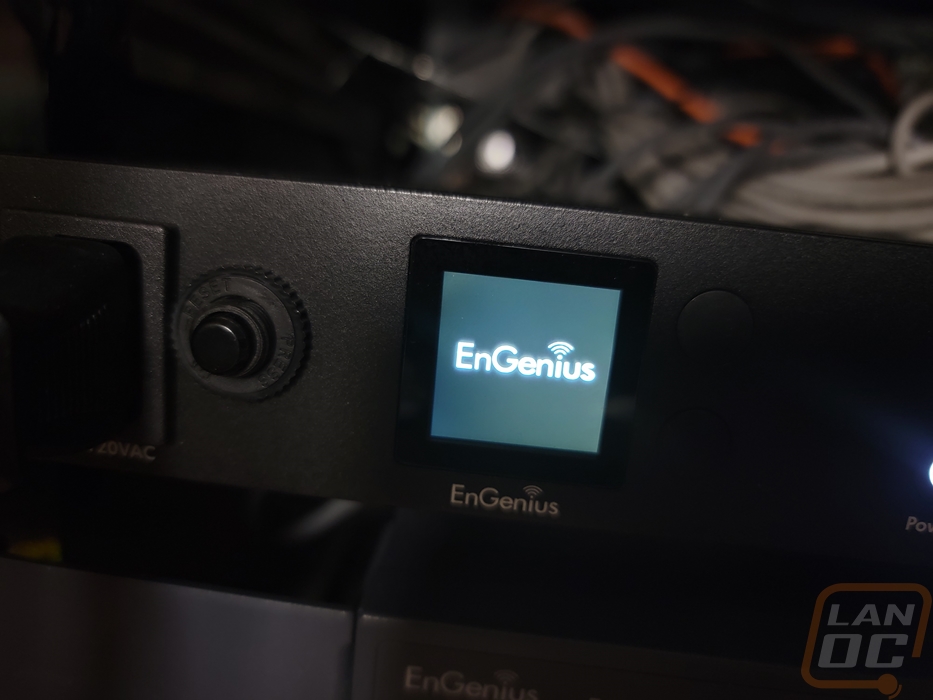
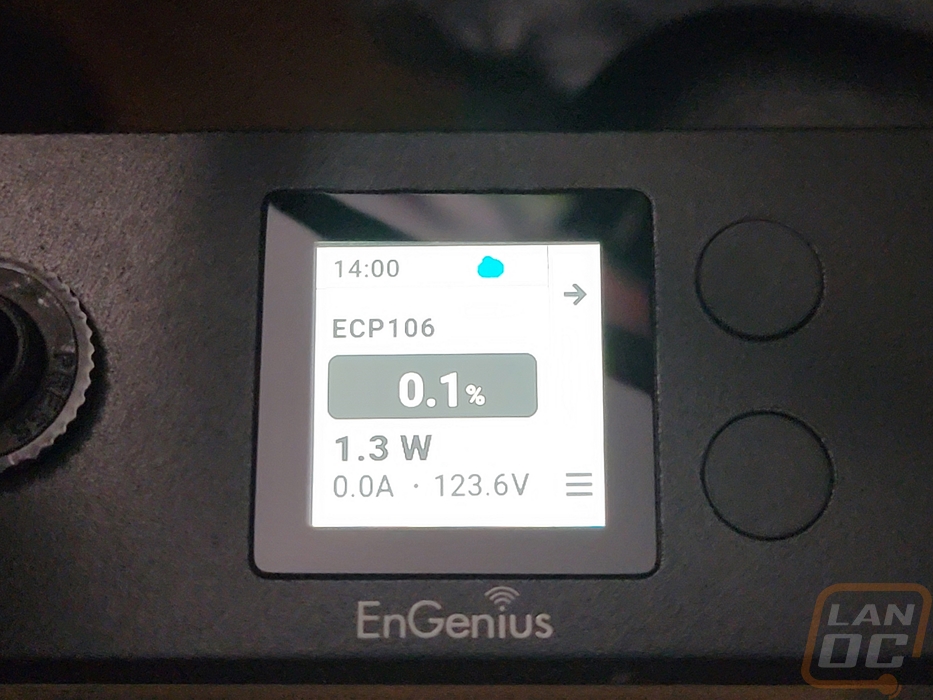
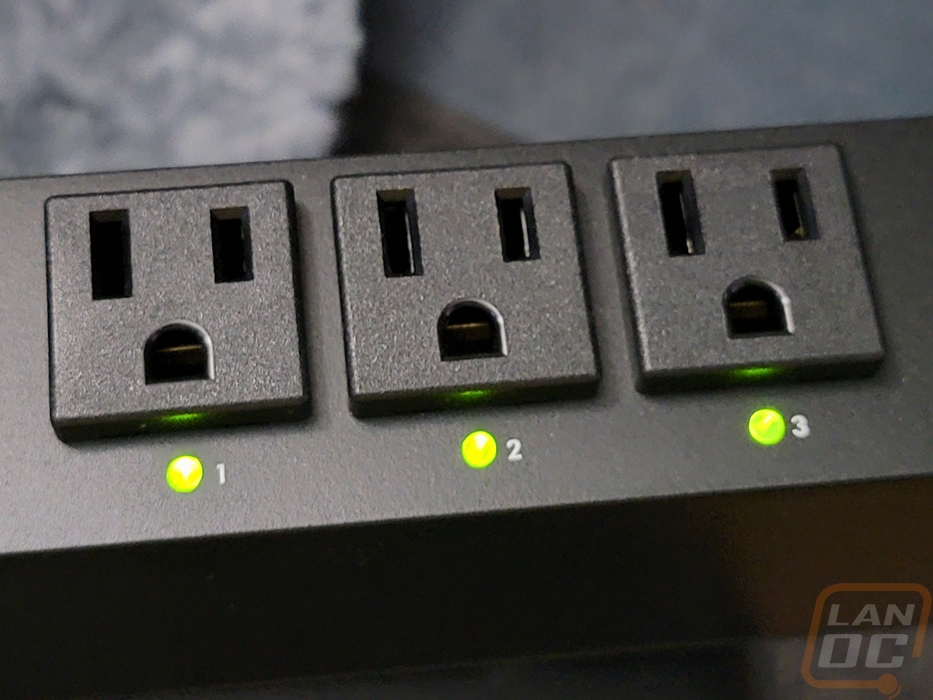
With the ECP106 up and running, each of the powered outlets does have a green LED under the plug to let you know it is powered up. This is great to help with diagnosing an issue to only find out that the PDU has the power to a server turned off. The display screen by default just shows the EnGeius branding. It isn’t until you start navigating the controls that you can see any other information. When I took the pictures below, I didn’t have any devices powered up but you can see that it does show you the voltage, amperage, wattage, and also how close you are to the total power the PDU can provide. This can be flipped to show small graphs as well but keep in mind it is a small screen and it is already packing a lot in that space. In the end, this is a nice tool for quick in-person diagnosing but you are still going to want to use the cloud interface or the local web interface to dive into things more or for setting things up.
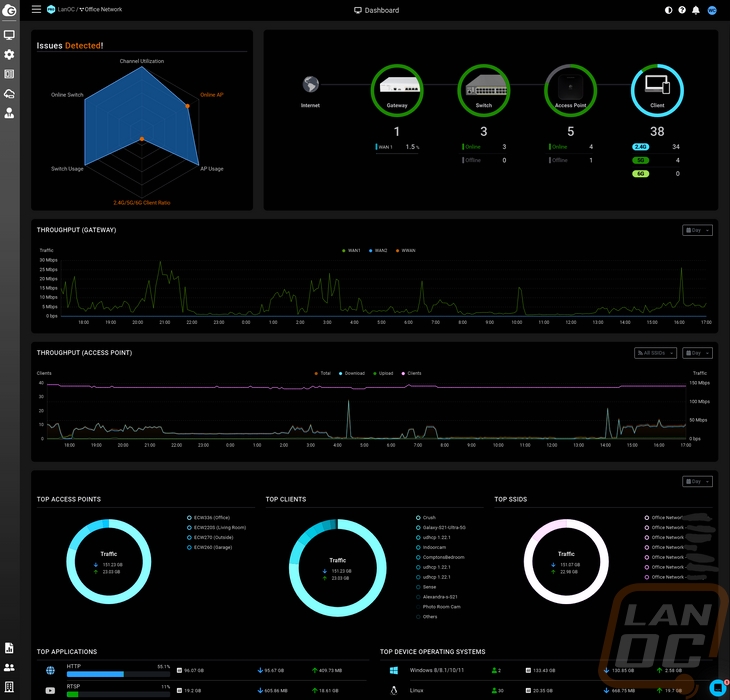
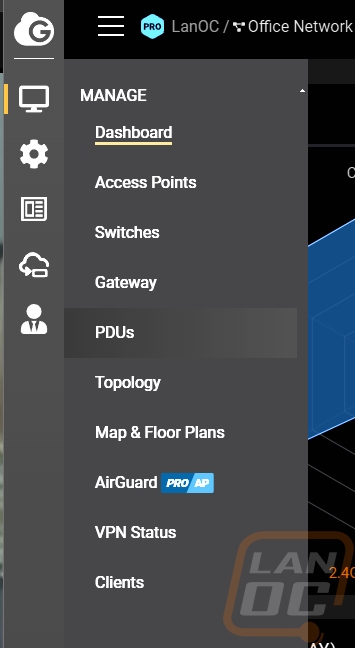
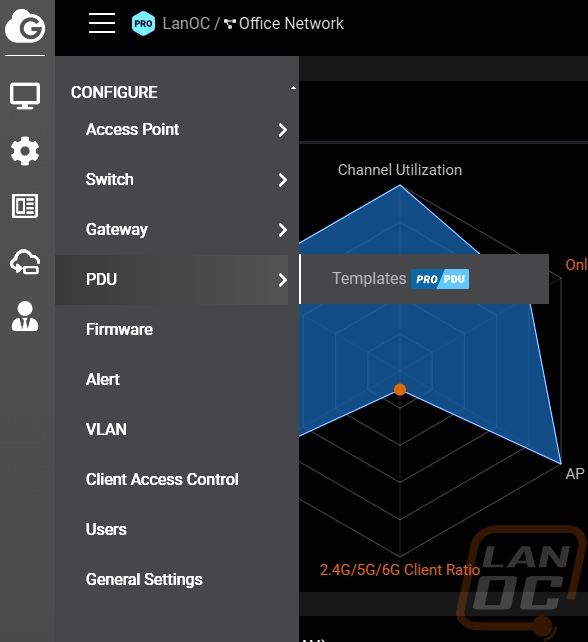
As I mentioned a lot of the functionality of the ECP106 is all in how everything is handled on the software level. Without that you have what you can see and control on the small screen on the front, the power button to turn everything on or off, and the built-in surge protection. EnGenius has their Cloud app, the web interface, and the ECP106 also has its own web interface if you want to use it without being attached to the cloud. I used the cloud app to attach the ECP106 because it is the easiest way to add new devices. It uses your phone's camera and the QR code on the main sticker to link it to your account. But for the look at the software, today I am focusing on the EnGenius Cloud web interface. The main landing page starts off showing if you have any current issues detected, ours shows one because I do have one access point that is attached but isn’t connected currently. Next to that, you get a status on all of your cloud devices which shows if any are offline, for your gateway it shows the percentage of traffic per WAN, and it gives you a count on total wireless clients. Below that you have graphs that map out the throughput from the gateway and for the access point, this is across a day by default but pro subscribers can change this to week, month, or any other window. Then down at the bottom, it has top access points, top clients, top SSIDs, top applications, and top device operating systems all listed out or in a graph. None of that applies to the ECP106 however. Then on the left, there are five icons when you mouse over these it opens up menu listings. The ECP106 or any of the EnGenous Cloud supported PDUs only will show up with settings in the PDU settings page under manage and configure with the configure option just being where you can save a setting templet to clone to other PDUs and that is a pro subscriber only option.
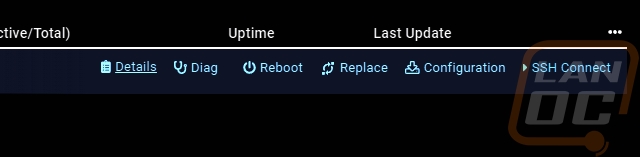
So on the one menu page we have for the PDUs, clicking that will open up a list of attached PDUs, in this case, we just have the ECP106. Here you can name each device to help make it easy to know where it is located. This will show the serial number and MAC address as well as the IP, model name, and firmware version. It also shows the number of outlets you have active and the device uptime. Hovering your mouse over the device shows a few options that you can open up or do. You can reboot, replace the device, download the configuration, connect to SSH, open the diag menu, and open the details page. All of the settings are on the details page so that is where my focus is going to be.

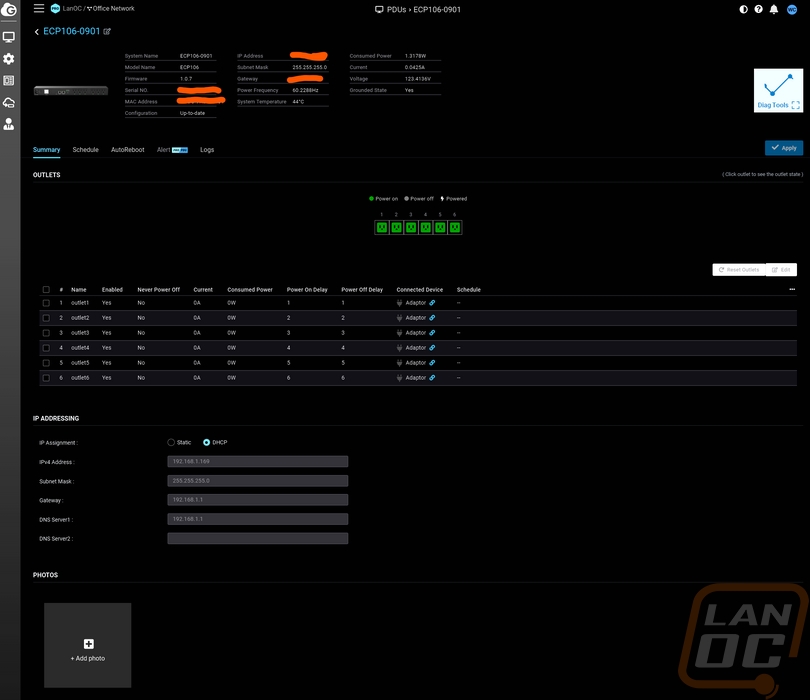
This is the details page and if you have seen any of the other EnGenous Cloud devices, this is similar to their detail pages as well. Up top they list out the same information we saw on the listing page as well as a few other things like the current voltage, current, temperature, power frequency, current, wattage, and if it is grounded. You can open up the diag page here on the right side. Then below all of that, the detail page has 5 different tabs. The first is the summary tab. This has a status picture showing if each of the six plugs is powered on or off. Then below that you have your IP configuration for the device and a list of the outlets where you can name them, turn them off, see the current and consumed power, the power on delay, power off delay, see if it has a schedule setup, and see if a default connected device type has been selected.

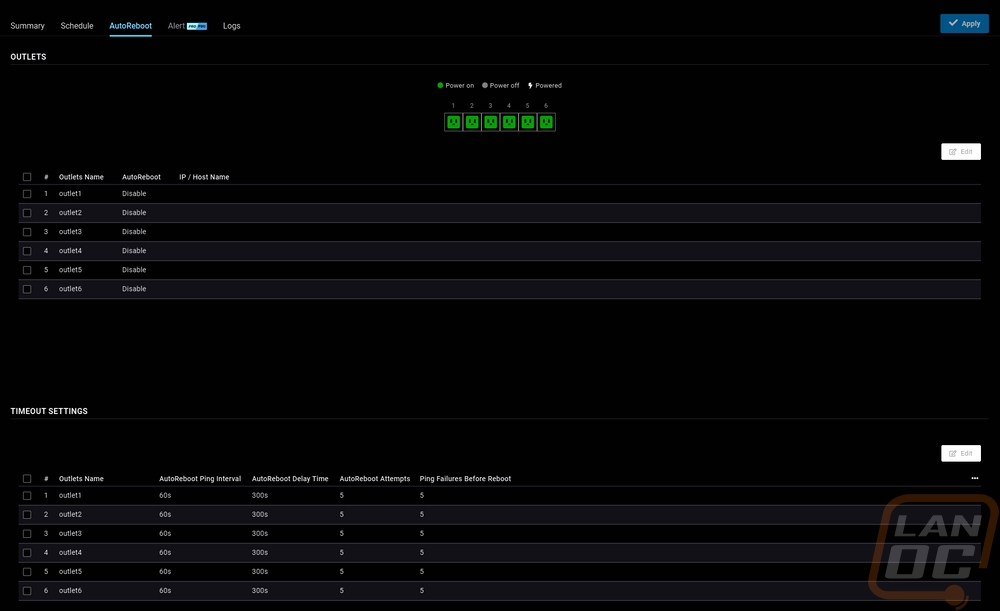
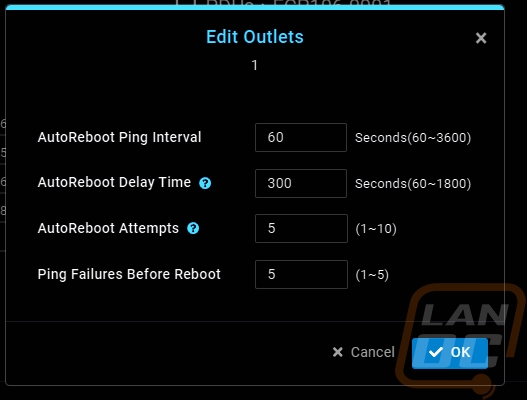
The AutoReboot page is where the ECP106 stands out against the competition. Most PDUs are at most designed to let you reboot and turn outlets on or off, they also sometimes have the ability to see power usage as well. But EnGenius has added in the ability to set up an IP for the PDU to check and if that ping stops you can setup rules on how long before it will reboot that outlet or continue to reboot to try to fix the issue. Not every device will need or could use this, but this is a way to automatically correct an issue without your intervention. Some of the settings are a little different than you might expect, however. Specifically, I would think that you would be able to just set the number of failed pings to whatever number you want but they only give you a range between 1 and 5 pings. To adjust the amount of time you will allow for there to be an issue you have to adjust the ping interval time which starts at 60 seconds and can go up to 3600 seconds between pings. The delay time setting is then how long of a delay before that outlet is turned back on. You would use that for when you have multiple devices that you want to boot in a specific order, like a modem booting up first for example.
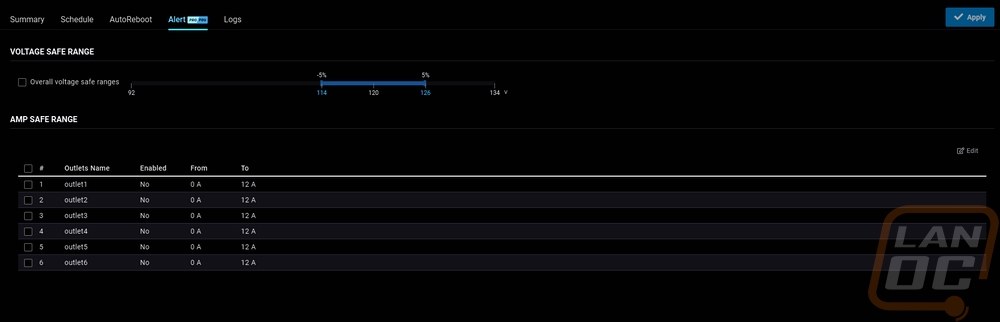
For the alert page, you can setup alerts if you are a pro subscriber. There are two different settings here. Up top you can set a voltage safe range and by default that is set to 5% above and below the 120 volt range. You can adjust those as far as down to 92 volts on the low and 134 volts on the high but the default range isn’t too bad. Then in the bottom half you can setup amperage safe ranges for each of the outlets. The range for these can be anywhere from 0 to 12 amps. The idea there would be to catch something pulling too much power before there is an issue.
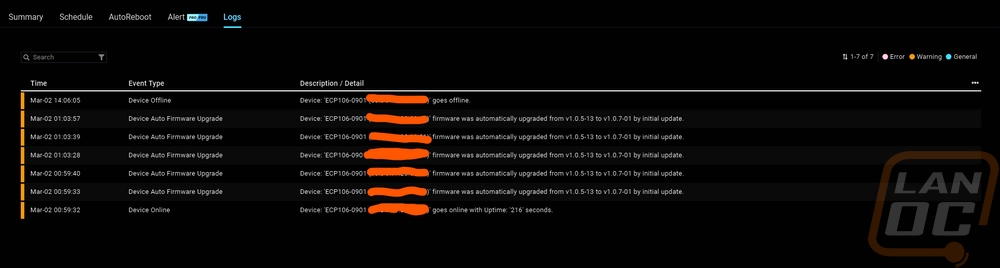
The last tab is the logs listing. This lists out when the ECP106 goes on and offline and when the firmware has been upgraded. I would love for this to show more information though, specifically anytime an outlet is turned off or on. I had a situation in testing where my reboot settings kicked in and rebooted things but I had no way to know for sure that was what happened.
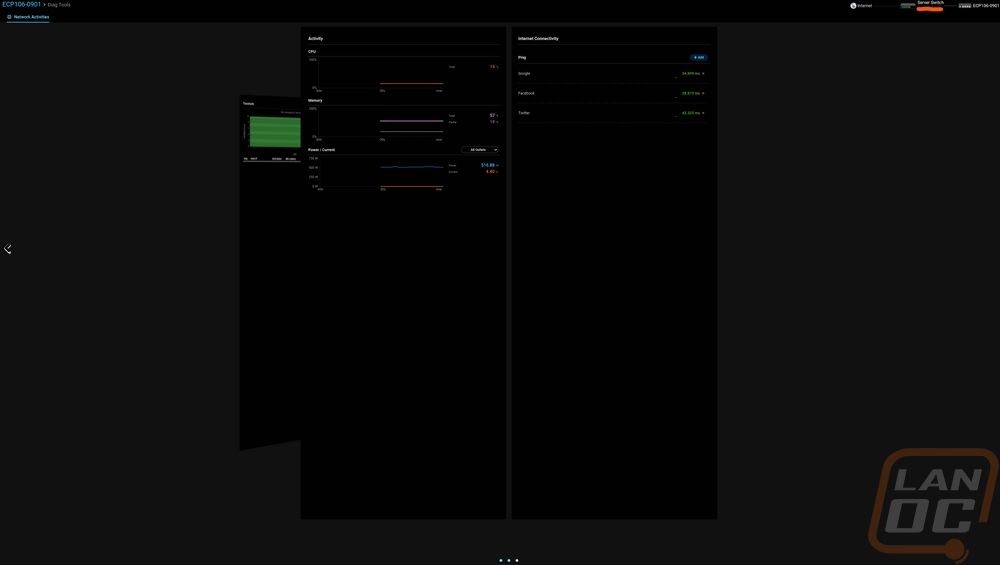
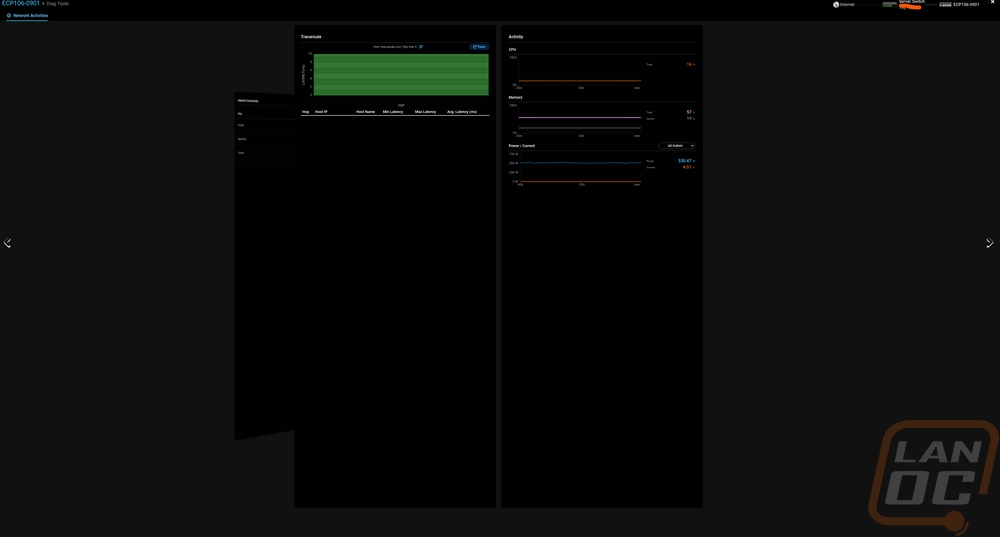
I was a little surprised that the ECP106 had a diagnostic page at all, while it is network-connected it doesn’t need some of the tools that EnGenius uses for their switches and other devices. There were three pages in total and most of the tools were the same as what other devices have. This includes a full page for ping testing with a few default websites already listed and the ability to add more as needed. The traceroute page graphs out the traceroute while also listing it. Then the last page of tools shows the ECP106’s CPU usage, memory usage, and power consumption. All three have a rolling graph as well as the current number on the right. For the power consumption, it shows both wattage and amperage. It shows the total consumption by default but there is a drop-down menu that lets you pick a single outlet if needed. The diagnostic page, like with other EnGenius Cloud devices does open up full screen and closes if you tab out and I still don’t know why that is needed. It makes it impossible to look at two pages back and forth making the tool not very useful which is a shame because it does offer a lot of nice tools to use for most supported devices.
There aren’t any specific benchmarks to run when testing the ECP106, but I did want to touch on a few different things I noticed. For starters, the way everything powers on or off when you use the power button on the front or if your power comes on. The ECP106 turns on each plug on or off one at a time. This is one of the main settings in the software and it is adjustable. But even out of the box, each outlet has one additional second for power on or power off delay. This helps prevent a big spike in power all at once. But you can dive into this a lot more depending on what you are powering up. A great example would be powering up your modem but having a longer delay for your gateway, than your switch or switches. This can give things a chance to boot up before the next device powers on and should help prevent weird issues at startup. I’ve done this on servers, having our TrueNAS server not boot up until the network card picks up that the switch is up and running because if it boots up before the network is up it bugs out. The ECP106 however lets you do all of this at the power level. While on the subject of the timing of the outlets, I should point out that I did test out how long the reboot or power on or off commands took when you apply them and it was immediate. With some of the EnGenious Cloud products, updates require it to send out an updates config file and that can take a minute but that wasn’t the case here. A full reset took less than a second, powering on or off took that along with whatever the delay was set to for that plug.
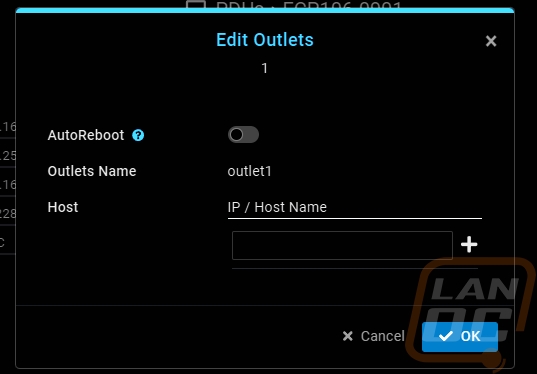
You have the option to schedule each outlet to be on or off in specific windows or you can add in a scheduled hard reset at a specific time. Obviously, this will depend a lot on what you have plugged in on if this is needed at all. But it is cool that the option is there. For me though the most important functionality are the AutoReboot settings. For each outlet, you can set up one or more IP addresses that you want to ping. Then from there, you have a few timeout settings that will go into effect once the ECP106 can’t reach that IP address. You have a ping interval, a delay time setting, the number of AutoReboot attempts, and the number of ping failures before it will reboot. What isn’t clear to me and what would be nice to see is if you are running more than one IP address, does the AutoReboot go into effect if one of those IPs goes offline or does it need all of them to go offline for it to kick in. Because it is always possible that an outside IP address might have an issue, being able to run two and have it require both could give a safety net to keep your entire network from being rebooted just because Google hiccupped for example.
Anyhow, the reason this was big for me is because I never seem to have a network issue when I am home. It happens when I am a thousand miles away and accessing files remotely. I wanted to use this feature to automatically reboot my modem if an outside ping went down for a long time, reboot our gateway similarity, and even do our switches for the same reason. For internal servers, I have it set up to ping their IP and to reboot each server if they completely lock up. In theory, this should at least keep things accessible. Of course, you do want to play with the settings. I started with the default times and we had a short internet outage which after five minutes rebooted our modem, gateway, and switches. Because the switches were also powered down, the delay wasn’t long enough and it caused all of the servers to also be hard rebooted. There is also a valid concern that the five default reboot attempts could damage some equipment. In the end, I have increased the ping interval to be twice as high, but I will most likely change the reboot attempts down on servers. I do wish that you could increase the number of ping fails before reboot rather than just changing the ping timing.
The ECP106 does let you see the power usage of each of your plugged in devices both live and in five minute increments over the day. A pro subscription expands that out to week and month as well. With that functionality, there is one feature that I think would be a huge addition. Being able to set up checks for wattage dropping and rebooting in those situations. It wouldn’t work in every situation, but in a few situations, it could be a nice feature.
