Over the last few years, I have been slowly upgrading our network. Some of it was just to clean things up but I have also been addressing issues that I have run into here and there as well. Most of that has been running smoothly but it seems like on the rare situations where I go on vacation or on a trip, that is when an issue will pop up and it always seems to require something to be restarted in person. That can be a little hard when you are 2000+ miles away. How do we address that? Well a Smart PDU can help, and EnGenius now has them. They sent over the ECP106, their 6-plug Switchable Smart PDU, and today I’m going to see what it is all about so let’s dig in!
Product Name: EnGenius ECP106 Switchable Smart PDU
Review Sample Provided by: EnGenius
Written by: Wes Compton
Amazon Affiliate Link: HERE
|
Specifications |
|
|
Technical Specifications |
|
|
Input |
Voltage: 100-120V Frequency: 50/60Hz Derated Input Current: 12A Power Input Plug: SJT 14AWG Power Cord Type: NEMA-5-15P Power Cord Length: 6 foot |
|
LED Indicators |
1 x Outlet Power Switch 2 x LAN 1 x Outlet Power Indicator 1 x Grounded Indicator 1 x SPD Indicator |
|
Output |
Voltage: 100-120V Frequency: 50/60Hz Derated Input Current: 12A Outlet Type: NEMA-5-15R Number of Outlets: 6 Overload Protection: 15A Max Power Consumption: 1800 for 120V |
|
Physical Interface |
2 x 10/100/1000/ BASE-T, RJ-45 Ethernet Port IEC-C13 Inlet Reset Button 15A Circuit Breaker |
|
Environment & Physical |
|
|
Temperature Range |
Operating: 32º~+122ºF/0ºC~+50ºC Storage: -22Fº~+158ºF/-30ºC~+70ºC |
|
Humidity (non-condensing) |
Storage: 95% or less |
|
Surge Protection |
Yes |
|
ESD Protection |
Yes |
|
Dimensions & Weights |
|
|
ECP106 Device |
Weight: 2.28 lbs. (1.035 kg) Width: 1.73” (44 mm) Length: 17.32” (440 mm) Height” 2.75” (70 mm) |
|
Enclosure material |
AL6063 |
|
Package Contents |
1 x ECP106 PDU 1 x Power Cord 1 x Rack Ear 1 x Rack Screw Set 1 x Quick Installation Guide |
|
Certifications |
FCC IC WEEE RoHS UL1449 type 5 UL62368-1 CSA22.2 |
|
Warranty |
2 Year |
Photos and Features
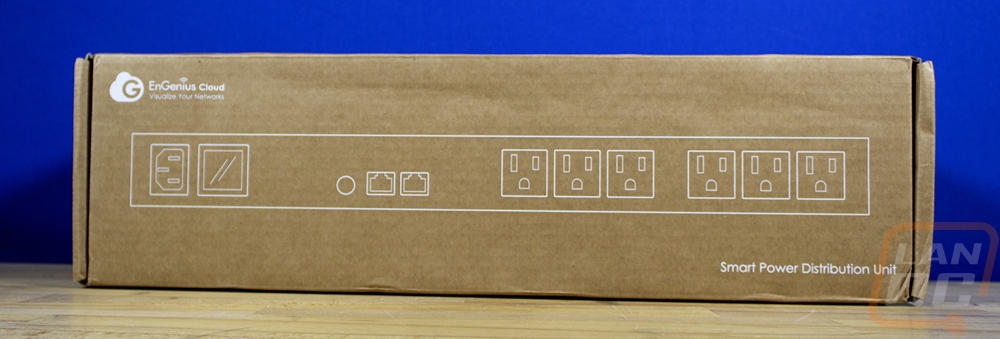
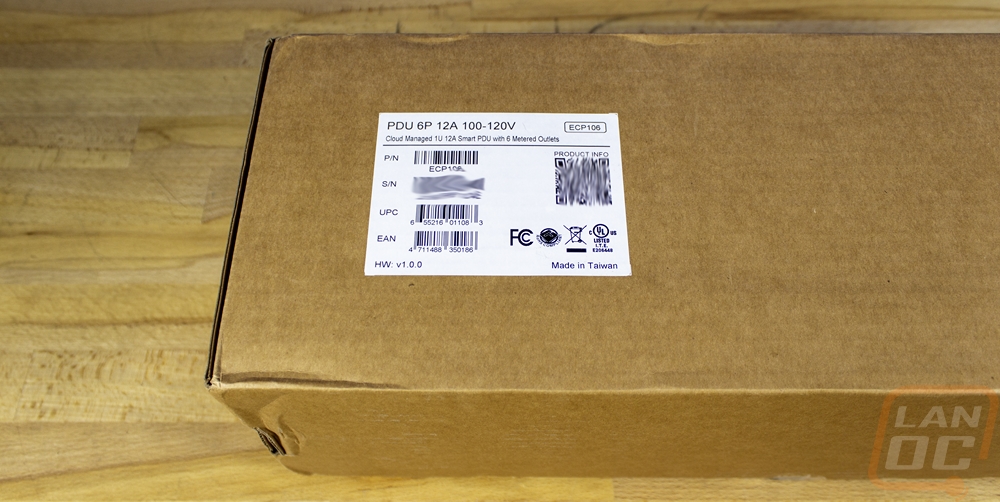
With an enterprise focus most of EnGenius’s lineup doesn’t go overboard on the packaging. If anything the ECP106 has more going on than most of their network hardware for packaging. This has a normal brown box but on the top, they do have a line drawing of the PDU across it that shows all of the power plugs, network connections, and the display screen. The back of the box has the EnGenius Cloud branding and shows the plug type as well as voltage and amperage supported. Then there is a sticker on the front edge. That just has the model name and full description as well as the UPC, Serial Number, Part Number, and a QR code with the product information on it.

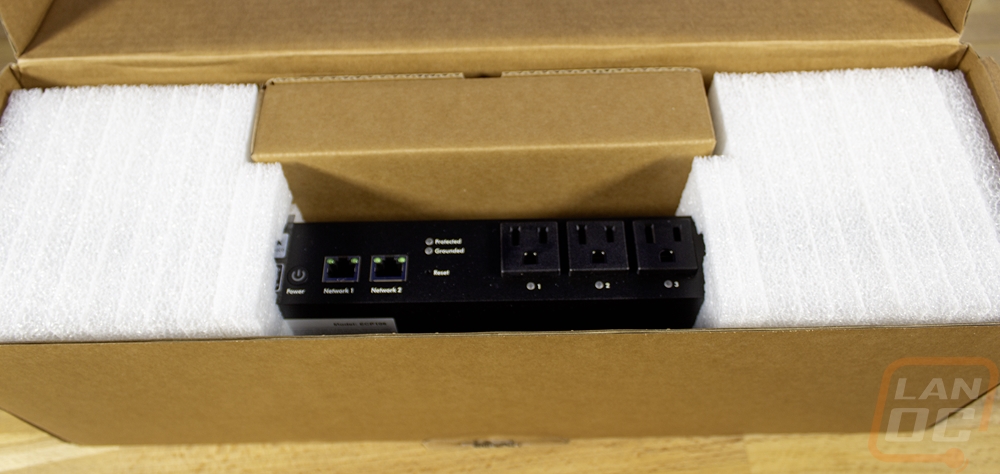
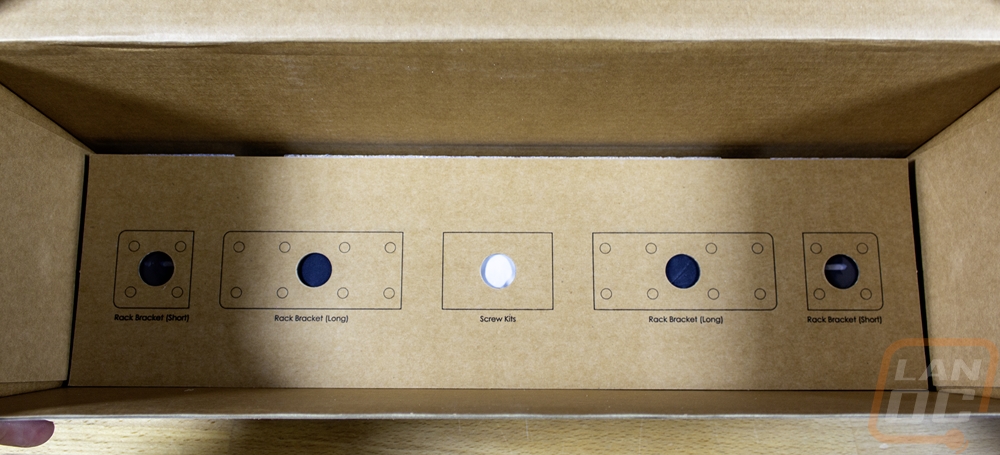
When you open the box up they have a cardboard panel over top of everything. This has a QR code for the product information and a second one that links to the quick start guide saving paper used for manuals. That also has the model number and full description listed again as well as the EnGenius Cloud branding. Under that the ECP106 can be seen with thick foam inserts at both ends that hold the PDU directly in the middle, keeping it safe. Alongside of the ECP106, EnGenius has some of the accessories in a box that is also slid into the foam. When you pull all of that out there is along layer of cardboard down in the bottom which shows everything you will find under it with more line drawings. Here they have two sets of rack brackets, one standard bracket and a longer bracket. There is also a screw kit as well which has both the screws used to mount the brackets as well as a set of wall mounting screws should you go in that direction.

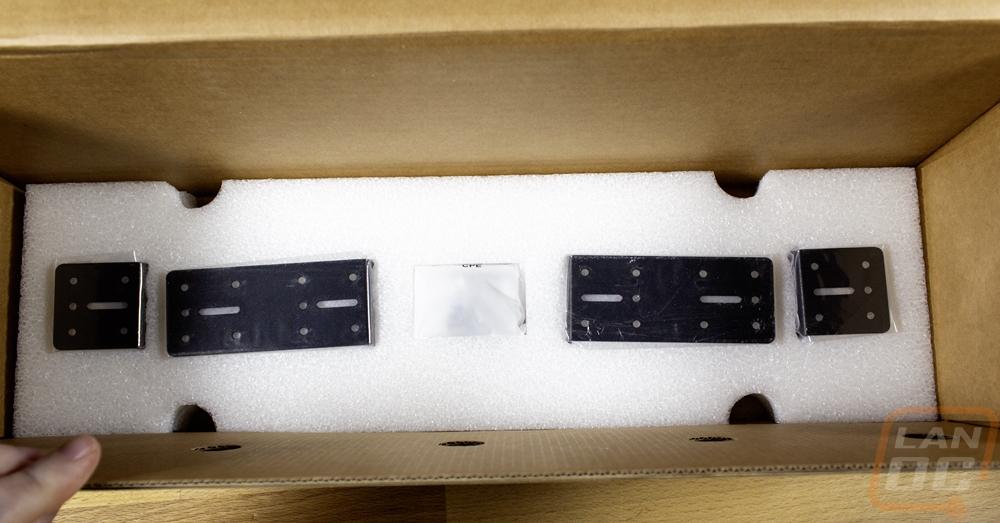
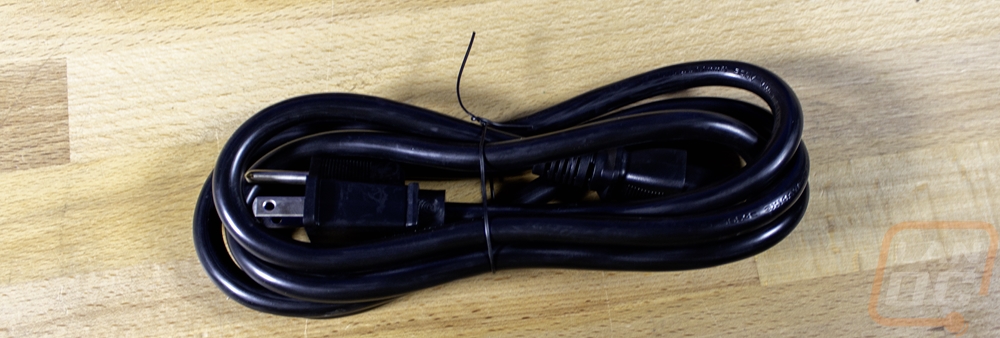
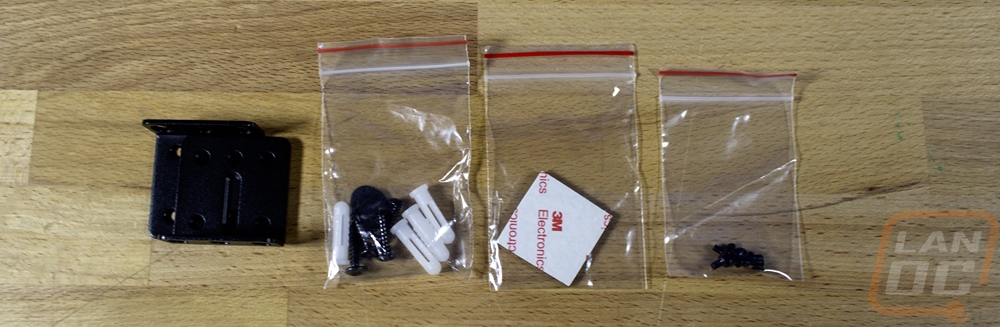
The accessory box for the ECP106 has one power cable inside which has the standard NEMA5-15R plug on one end and a C13 plug on the other end. I pulled the shorter brackets out as those are what I am going to use on our setup as well as the screw kit. The screw kit has four screws with drywall or concrete anchors, then a baggie of small machine screws to mount the bracket to the ECP106.
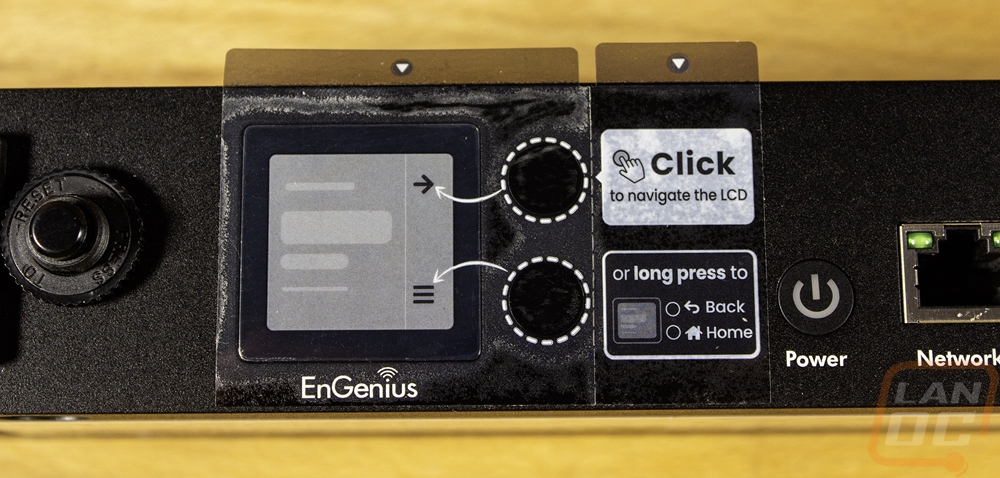
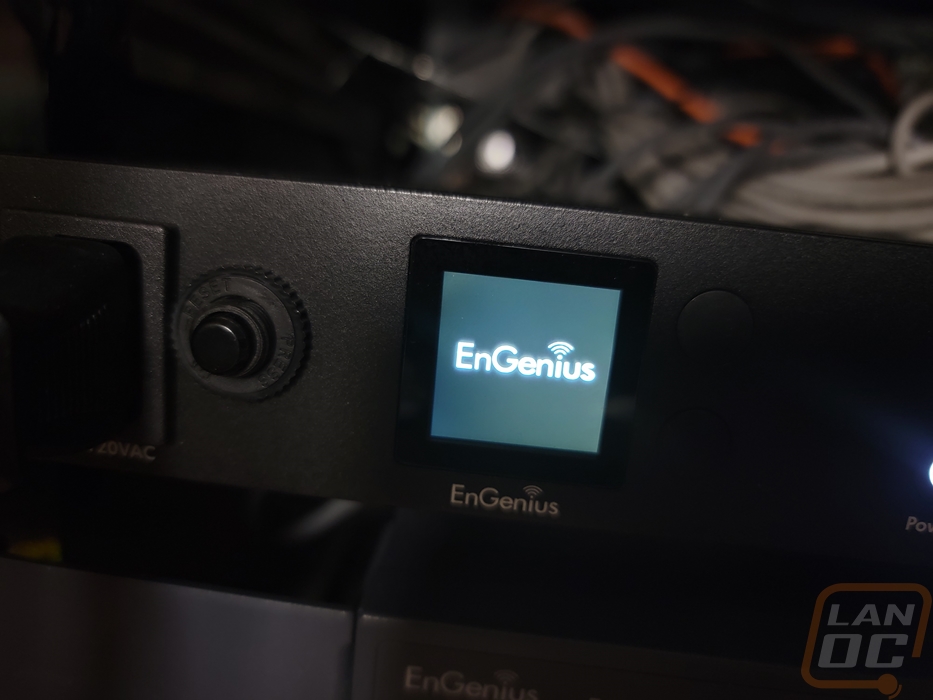
The ECP106 didn’t come in a bag at all but the screen does come with a sticker covering it along with basic instructions on how to navigate the display using the two buttons next to it.
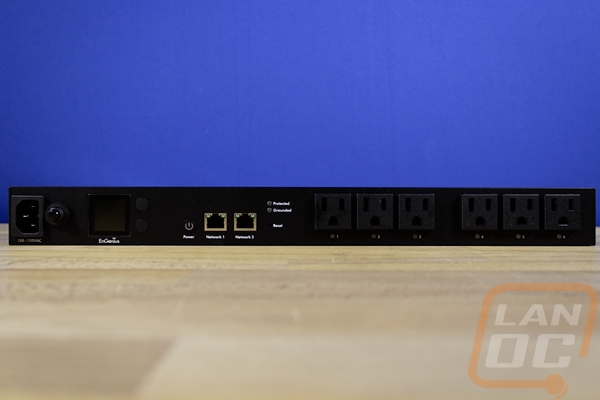
The front of the ECP106 is where the magic happens but before I touch on what we see here I did want to run through what the ECP106 is to help give some context to what we are seeing. This is a cloud managed switchable smart PDU or power distribution unit. The ECP106 is one of two models that EnGenius has and this is their 6 outlet 1U design. They have the ECP214 which has a similar design but is 2U in thickness and handled 14 outlets, scaling things up significantly. When it comes to PDUs there is a full range of functionality, ranging from a basic rack mounted power strip, going up from there you can get models that have switches for each outlet. From there, you have monitored PDUs that will display the power usage. Then from there, things step up to intelligent or smart PDUs which can output those power numbers and sometimes have control over the network. There is also some variation between with models that will just give you the total power numbers versus getting information for each independent outlet. That is where the ECP106 comes in, but on top of networked support, it ties in with EnGenius’s established cloud control.
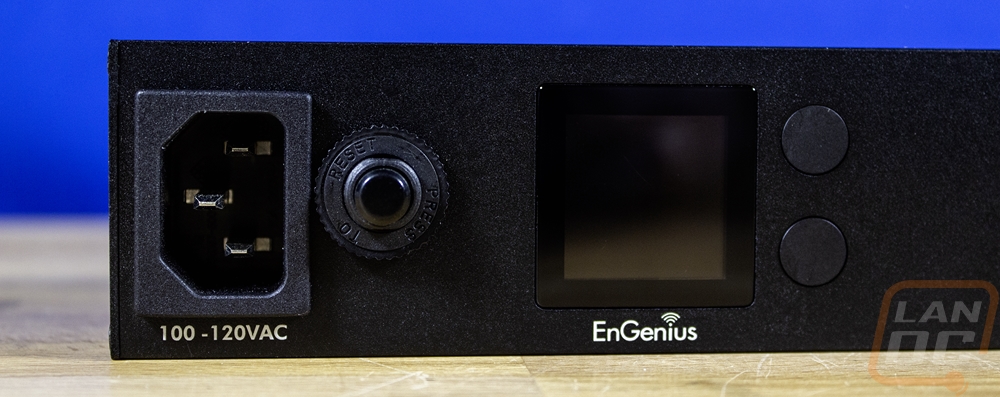
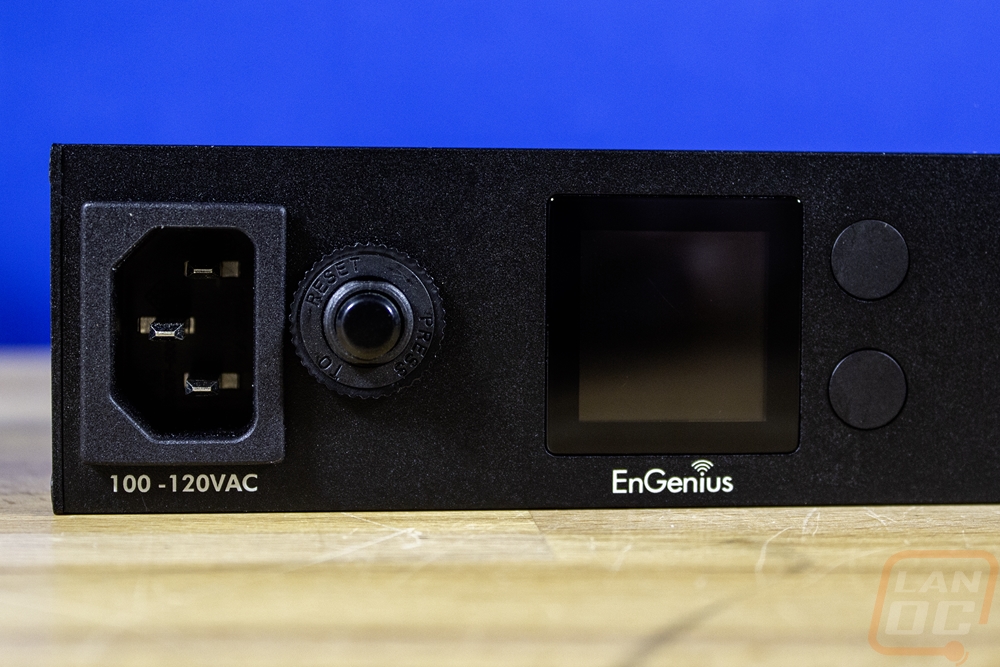
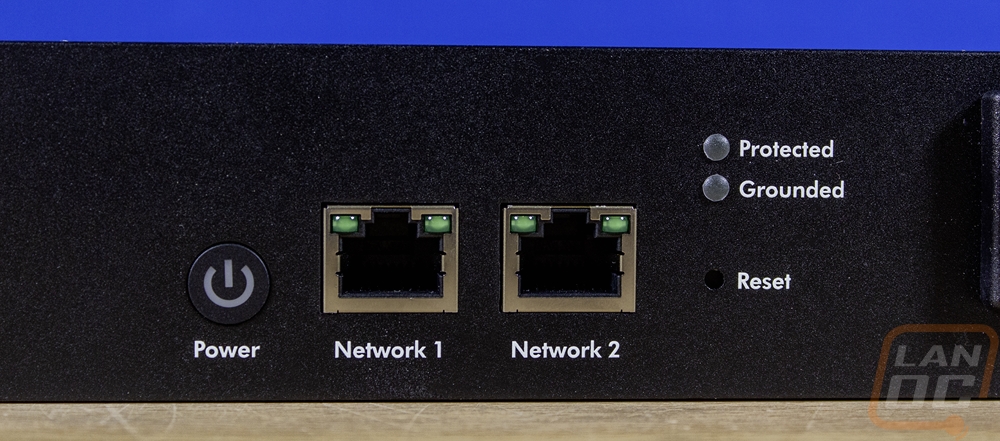
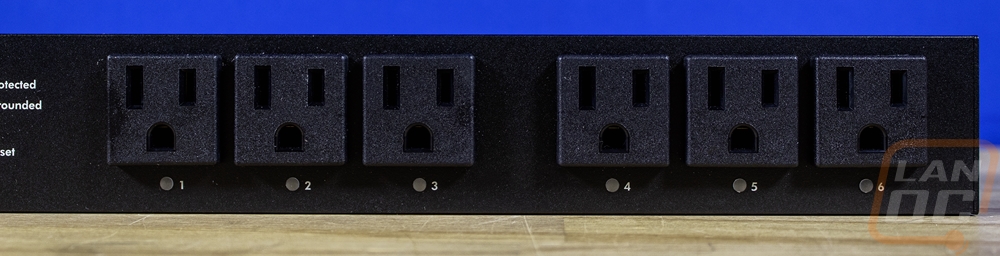
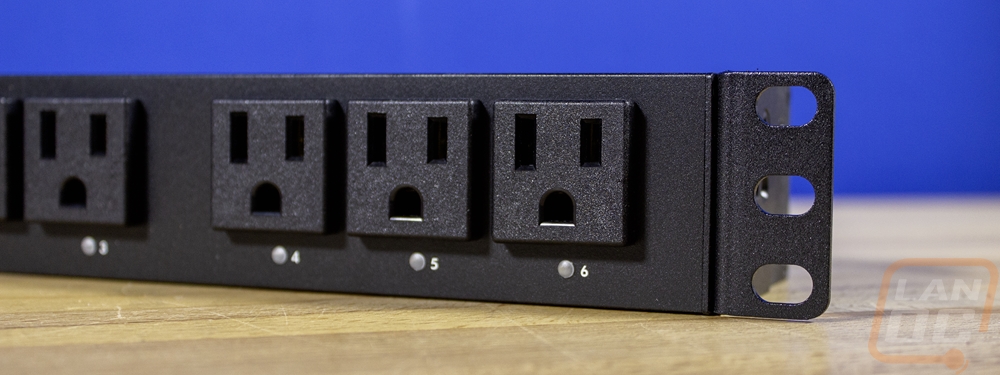
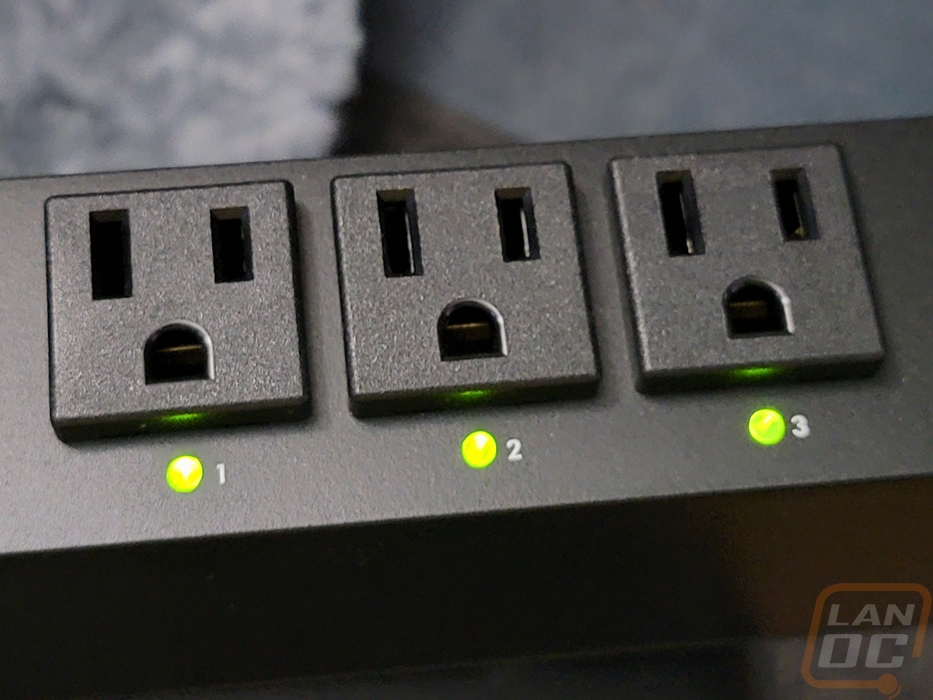
With all of that, the front of the ECP106 has its six NEMA5-15R power plugs on the right half of the PDU. They are split up into groups of three and each plug has a status LED under it as well as a number label. Then on the far left, it has the input power plug which has a C14 plug that works with your standard C13 power cable. With that, they also have a circuit breaker to help avoid damaging anything with too much power draw. For the smart side of things, the ECP106 has two 1 Gig ethernet ports which lets you have redundancy with two networks. There is a power button to the left of those powers and to the right there is a pinhole reset button as well as status LEDs that show the power connection is grounded and surge protected (which is handled by fireproof Metal Oxide Varistors). On the left, there is also an inch square display and two control buttons. The top button selects and the bottom button is the menu navigation button. Long pressing the top goes back and long pressing the bottom button takes you back to home. Like with the basic non-networked PDUs, the RCP106 does give you access to the power information and the ability to power things up or down as well locally but most of the control is still designed to be through EnGenius Cloud.

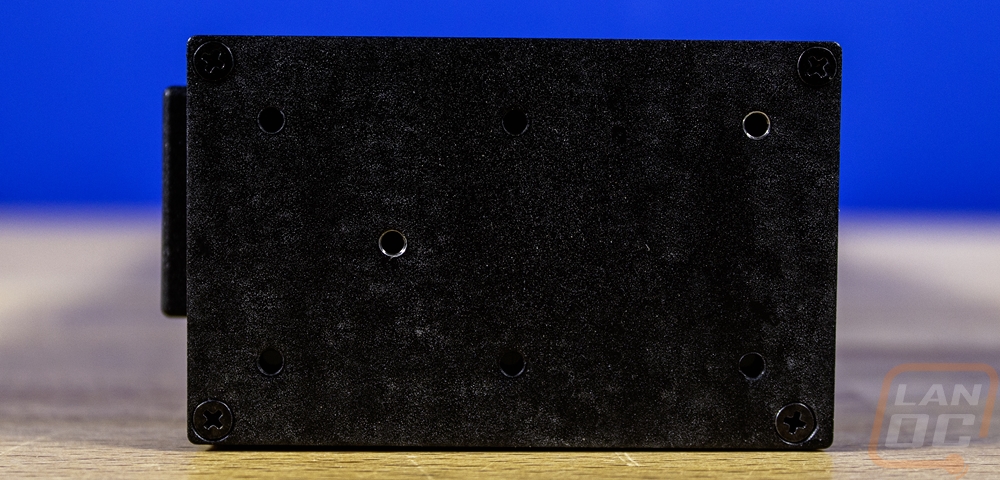
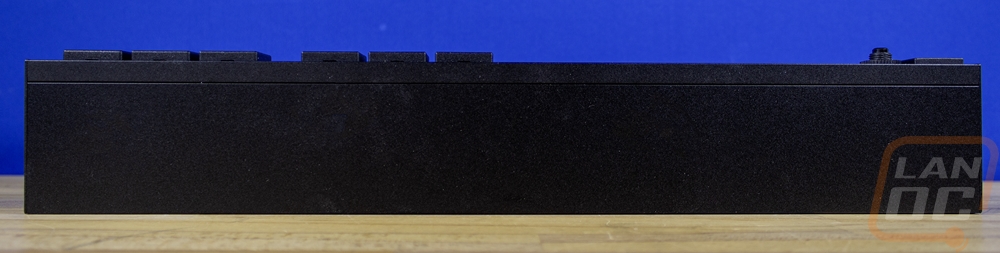
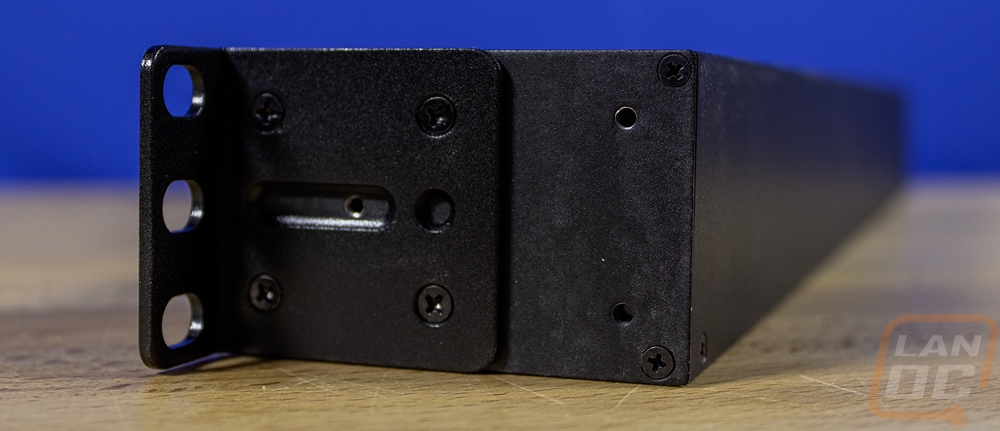
Both sides of the ECP106 have threaded screw holes to install the included rack brackets but there are more than just the four you would normally see. They have six main holes that let you mount the bracket to the front or back of the ECP106 and there is a seventh hole in the middle which can be used if you are trying to mount the PDU at an angle for better wire management. Because the front of the ECP106 has all of the connections including the incoming power plug, the back has nothing at all going on, just the metal housing and textured black finish.


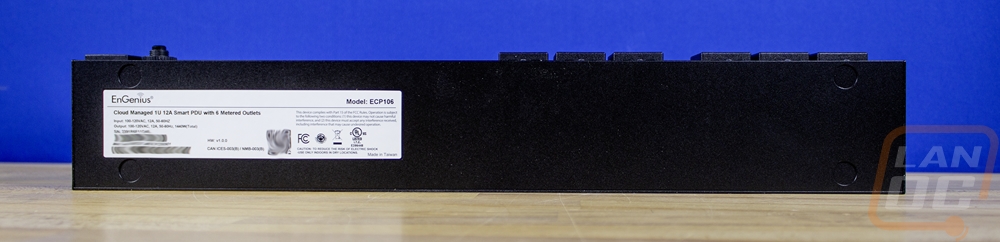
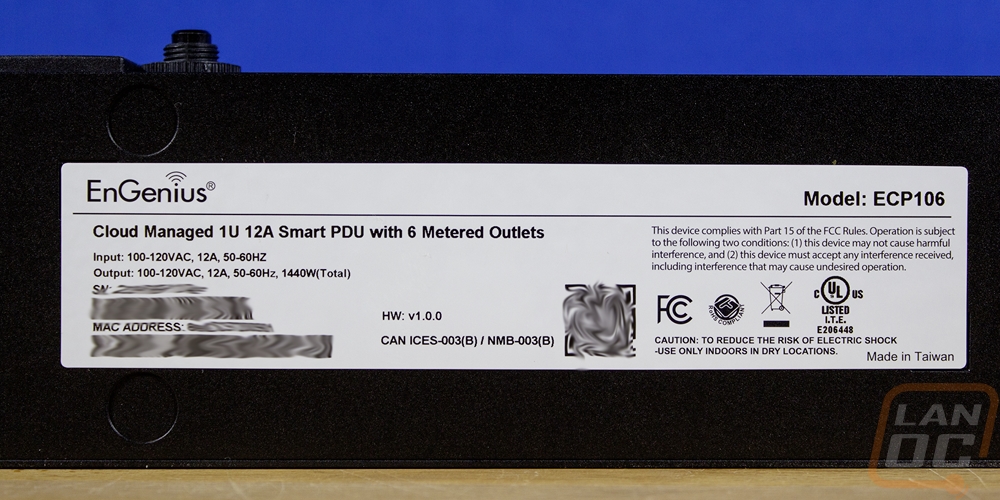
The top and bottom of the ECP106 don’t have much going on, no surprises there given that it is designed to be rack mounted. The top just has the textured black finish but the bottom does at least have the information sticker on it. That sticker has the model number and full description. It also has all of the certification logos and the power input and output information. You can also find the serial number and its mac address as well as a QR code used to add the ECP106 to the EnGenius Cloud network.
I did also get pictures with the shorter rack brackets installed on the ECP106. This was what was needed for mounting in our rack. You get four screws per side. But I did want to point out that the extra screw holes on the side of the ECP106 does give you the option to flip these to the back and mount the ECP106 to a board or wall if that better fits your setup. The other included brackets can do the same but would put a space between the ECP106 and the wall or if you flip them this direction it would recess the PDU back into the rack so that the plugs don’t get in the way of a door. The triple screw holes on the bracket give you flexibility on where you mount it as well.
Software and Performance
To put the EnGenius ECP106 Switchable Smart PDU to use I did have to get it installed in our rack. EnGenius gives you the option to flush mount or the recessed brackets. The ECP106 also has mounting holes to mount those facing the back for wall mounting and there is the option to mount at an angle as well. I kept things simple with the basic flush rack brackets mounted for a traditional rack installation. I did however mount the ECP106 in the back of our rack, not the front. Being in the front would be a LOT easier to control but for that, I would need rear-facing outlets, which would be a great option to have in future models. With 6 plugs, plugging everything in our rack individually wouldn’t be an option but it does give me dedicated plugs for our one server and two NAS. Then from there, I wanted to get our network switches, gateway, and model all plugged in. For that, I did use a power strip which isn’t ideal but with those devices being lower power I wasn’t worried about the total power being an issue. On top of that, our modem does use a power wart and wouldn’t fit without covering up at least a second port. That said, getting everything hooked up was easy. The main things to remember are to scan the PDU in using your EnGenius Cloud app before mounting it because that QR code is on the bottom, you also want to take note of what is plugged into each port so you can input that in on the cloud as well.
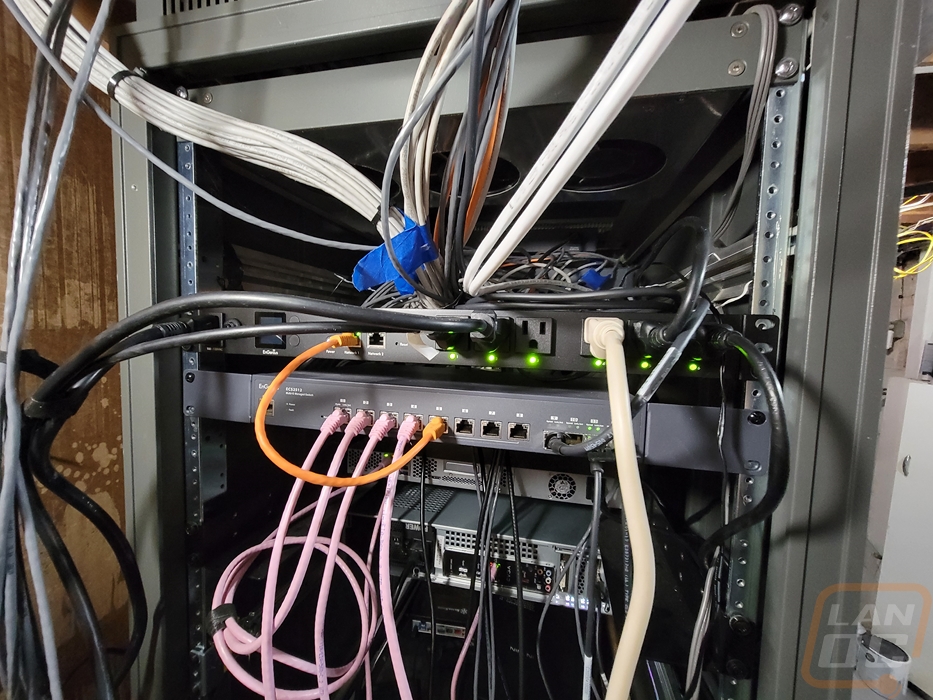

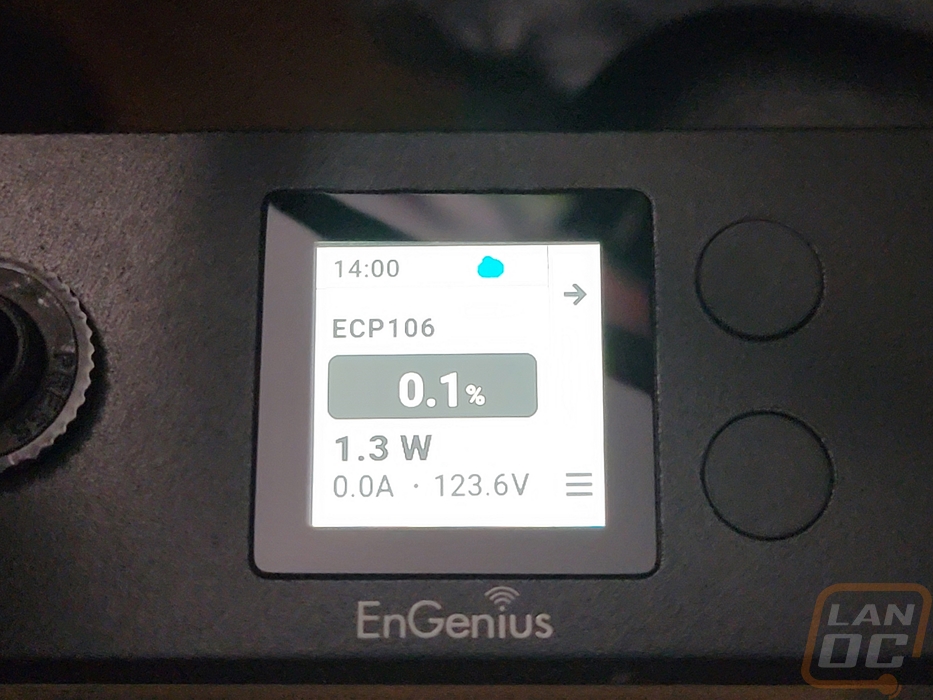
With the ECP106 up and running, each of the powered outlets does have a green LED under the plug to let you know it is powered up. This is great to help with diagnosing an issue to only find out that the PDU has the power to a server turned off. The display screen by default just shows the EnGeius branding. It isn’t until you start navigating the controls that you can see any other information. When I took the pictures below, I didn’t have any devices powered up but you can see that it does show you the voltage, amperage, wattage, and also how close you are to the total power the PDU can provide. This can be flipped to show small graphs as well but keep in mind it is a small screen and it is already packing a lot in that space. In the end, this is a nice tool for quick in-person diagnosing but you are still going to want to use the cloud interface or the local web interface to dive into things more or for setting things up.
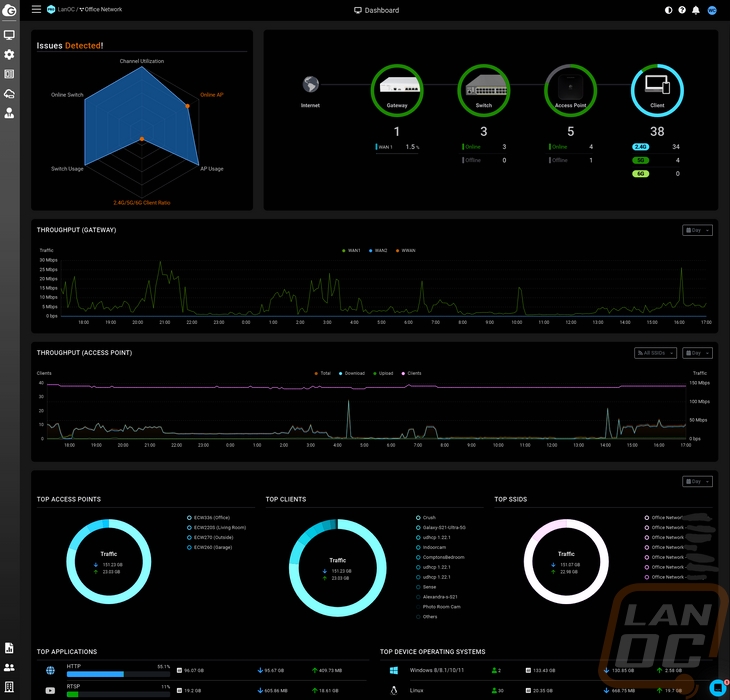
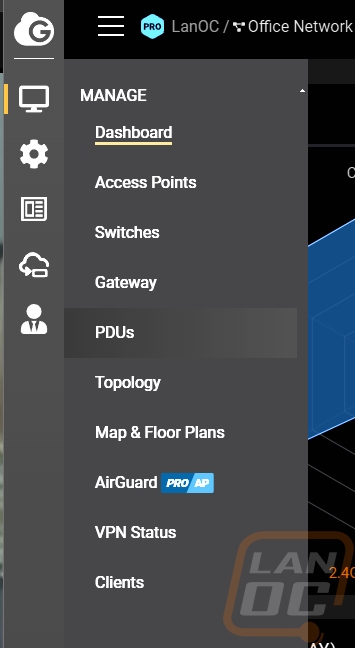
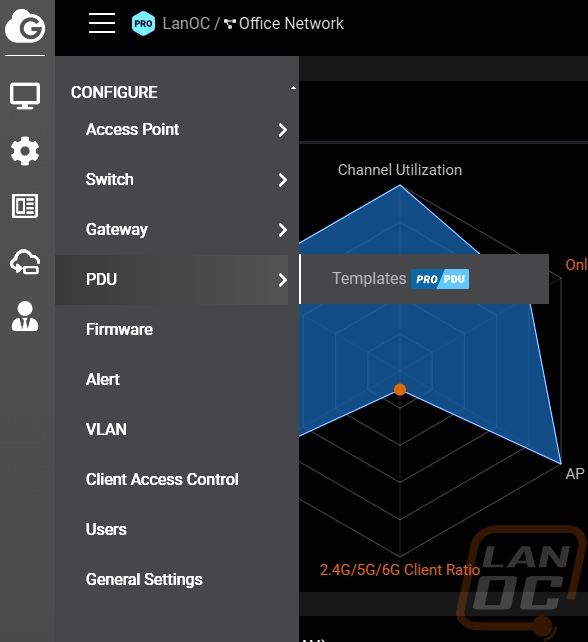
As I mentioned a lot of the functionality of the ECP106 is all in how everything is handled on the software level. Without that you have what you can see and control on the small screen on the front, the power button to turn everything on or off, and the built-in surge protection. EnGenius has their Cloud app, the web interface, and the ECP106 also has its own web interface if you want to use it without being attached to the cloud. I used the cloud app to attach the ECP106 because it is the easiest way to add new devices. It uses your phone's camera and the QR code on the main sticker to link it to your account. But for the look at the software, today I am focusing on the EnGenius Cloud web interface. The main landing page starts off showing if you have any current issues detected, ours shows one because I do have one access point that is attached but isn’t connected currently. Next to that, you get a status on all of your cloud devices which shows if any are offline, for your gateway it shows the percentage of traffic per WAN, and it gives you a count on total wireless clients. Below that you have graphs that map out the throughput from the gateway and for the access point, this is across a day by default but pro subscribers can change this to week, month, or any other window. Then down at the bottom, it has top access points, top clients, top SSIDs, top applications, and top device operating systems all listed out or in a graph. None of that applies to the ECP106 however. Then on the left, there are five icons when you mouse over these it opens up menu listings. The ECP106 or any of the EnGenous Cloud supported PDUs only will show up with settings in the PDU settings page under manage and configure with the configure option just being where you can save a setting templet to clone to other PDUs and that is a pro subscriber only option.
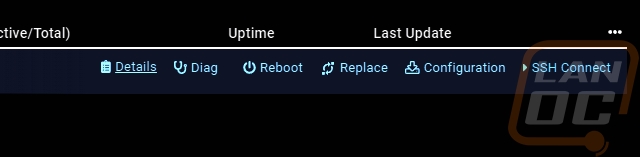
So on the one menu page we have for the PDUs, clicking that will open up a list of attached PDUs, in this case, we just have the ECP106. Here you can name each device to help make it easy to know where it is located. This will show the serial number and MAC address as well as the IP, model name, and firmware version. It also shows the number of outlets you have active and the device uptime. Hovering your mouse over the device shows a few options that you can open up or do. You can reboot, replace the device, download the configuration, connect to SSH, open the diag menu, and open the details page. All of the settings are on the details page so that is where my focus is going to be.

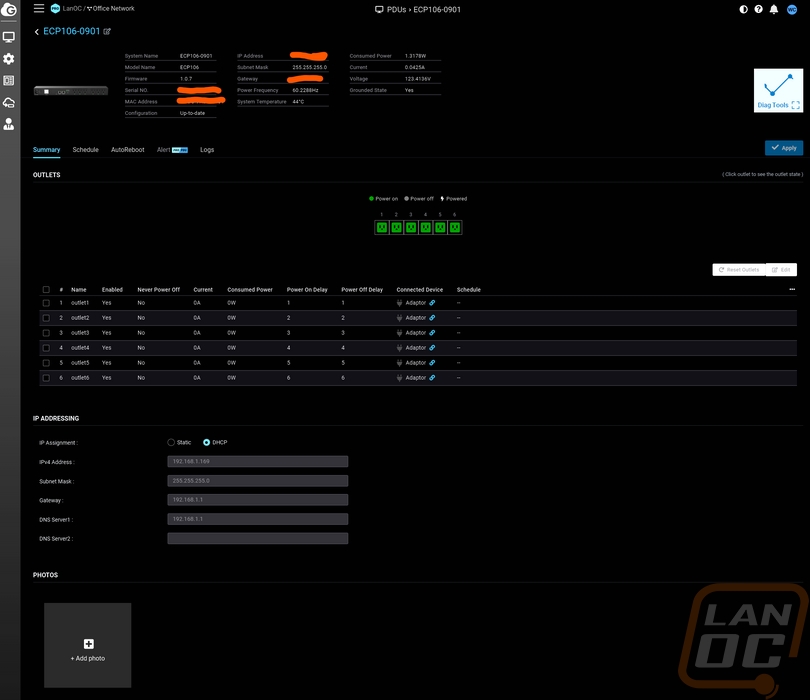
This is the details page and if you have seen any of the other EnGenous Cloud devices, this is similar to their detail pages as well. Up top they list out the same information we saw on the listing page as well as a few other things like the current voltage, current, temperature, power frequency, current, wattage, and if it is grounded. You can open up the diag page here on the right side. Then below all of that, the detail page has 5 different tabs. The first is the summary tab. This has a status picture showing if each of the six plugs is powered on or off. Then below that you have your IP configuration for the device and a list of the outlets where you can name them, turn them off, see the current and consumed power, the power on delay, power off delay, see if it has a schedule setup, and see if a default connected device type has been selected.

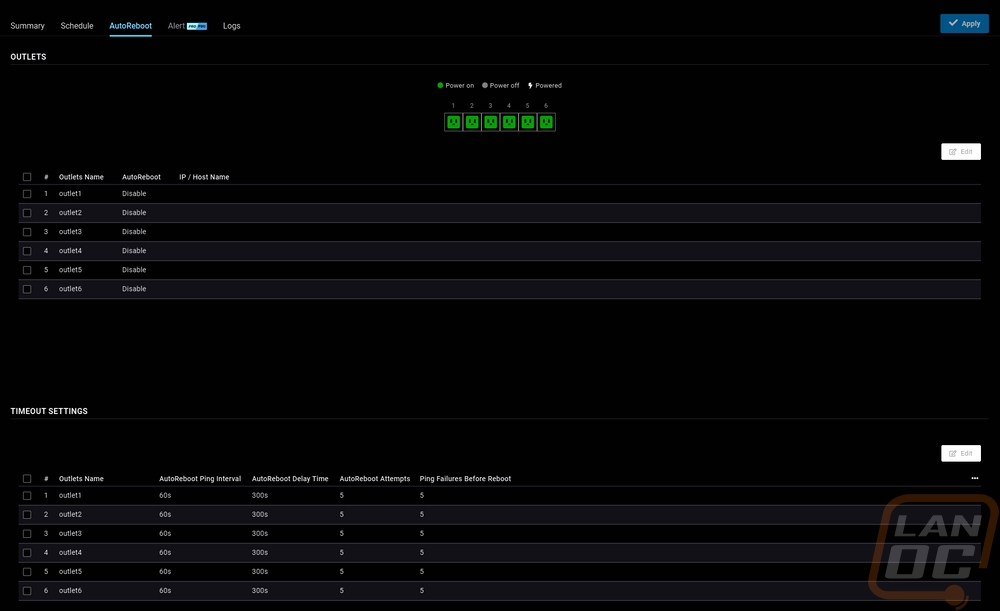
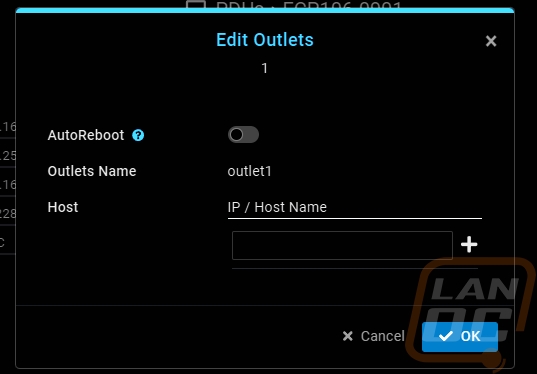
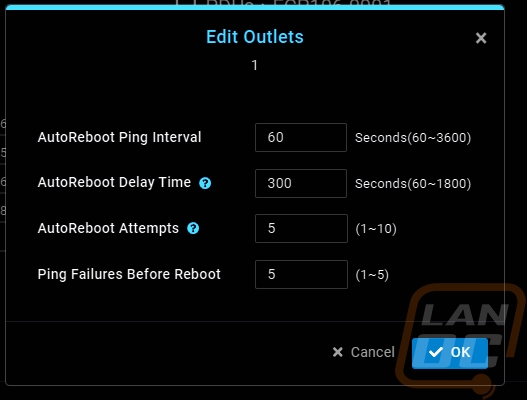
The AutoReboot page is where the ECP106 stands out against the competition. Most PDUs are at most designed to let you reboot and turn outlets on or off, they also sometimes have the ability to see power usage as well. But EnGenius has added in the ability to set up an IP for the PDU to check and if that ping stops you can setup rules on how long before it will reboot that outlet or continue to reboot to try to fix the issue. Not every device will need or could use this, but this is a way to automatically correct an issue without your intervention. Some of the settings are a little different than you might expect, however. Specifically, I would think that you would be able to just set the number of failed pings to whatever number you want but they only give you a range between 1 and 5 pings. To adjust the amount of time you will allow for there to be an issue you have to adjust the ping interval time which starts at 60 seconds and can go up to 3600 seconds between pings. The delay time setting is then how long of a delay before that outlet is turned back on. You would use that for when you have multiple devices that you want to boot in a specific order, like a modem booting up first for example.
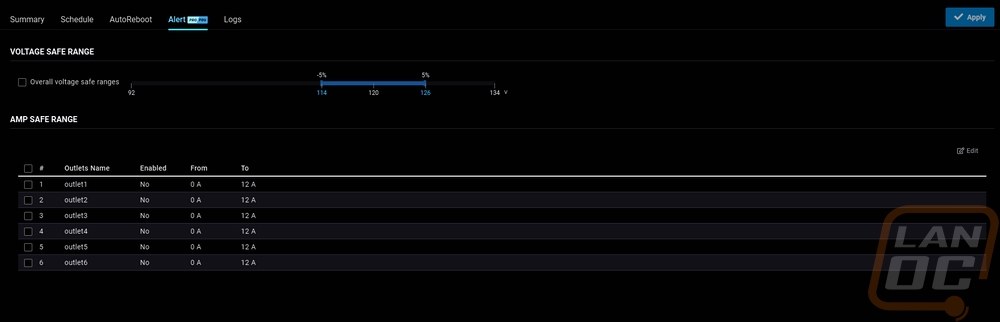
For the alert page, you can setup alerts if you are a pro subscriber. There are two different settings here. Up top you can set a voltage safe range and by default that is set to 5% above and below the 120 volt range. You can adjust those as far as down to 92 volts on the low and 134 volts on the high but the default range isn’t too bad. Then in the bottom half you can setup amperage safe ranges for each of the outlets. The range for these can be anywhere from 0 to 12 amps. The idea there would be to catch something pulling too much power before there is an issue.
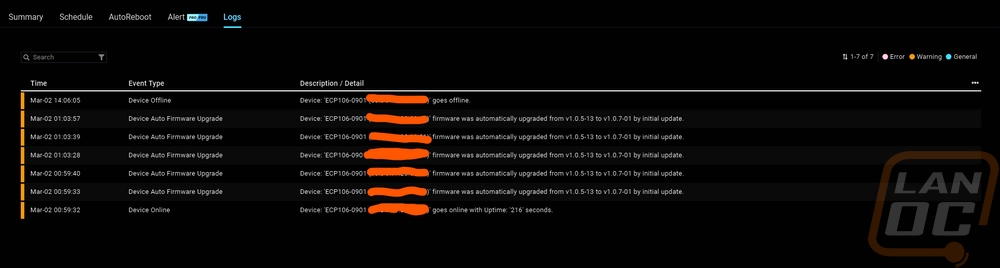
The last tab is the logs listing. This lists out when the ECP106 goes on and offline and when the firmware has been upgraded. I would love for this to show more information though, specifically anytime an outlet is turned off or on. I had a situation in testing where my reboot settings kicked in and rebooted things but I had no way to know for sure that was what happened.
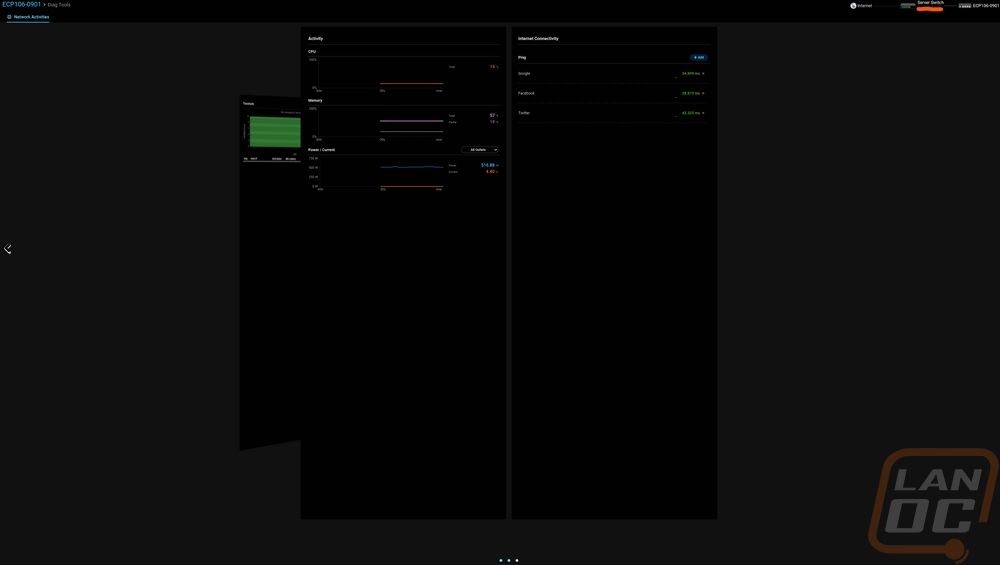
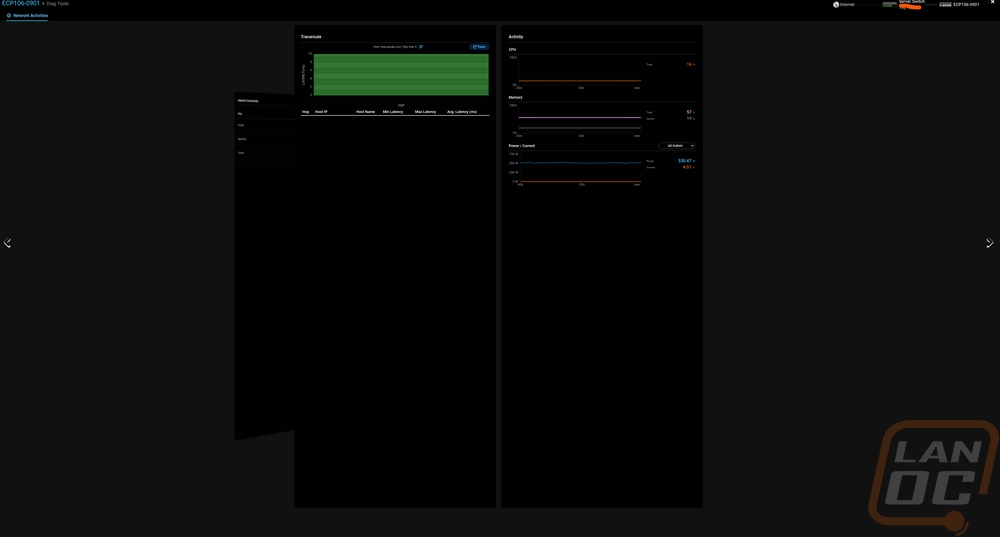
I was a little surprised that the ECP106 had a diagnostic page at all, while it is network-connected it doesn’t need some of the tools that EnGenius uses for their switches and other devices. There were three pages in total and most of the tools were the same as what other devices have. This includes a full page for ping testing with a few default websites already listed and the ability to add more as needed. The traceroute page graphs out the traceroute while also listing it. Then the last page of tools shows the ECP106’s CPU usage, memory usage, and power consumption. All three have a rolling graph as well as the current number on the right. For the power consumption, it shows both wattage and amperage. It shows the total consumption by default but there is a drop-down menu that lets you pick a single outlet if needed. The diagnostic page, like with other EnGenius Cloud devices does open up full screen and closes if you tab out and I still don’t know why that is needed. It makes it impossible to look at two pages back and forth making the tool not very useful which is a shame because it does offer a lot of nice tools to use for most supported devices.
There aren’t any specific benchmarks to run when testing the ECP106, but I did want to touch on a few different things I noticed. For starters, the way everything powers on or off when you use the power button on the front or if your power comes on. The ECP106 turns on each plug on or off one at a time. This is one of the main settings in the software and it is adjustable. But even out of the box, each outlet has one additional second for power on or power off delay. This helps prevent a big spike in power all at once. But you can dive into this a lot more depending on what you are powering up. A great example would be powering up your modem but having a longer delay for your gateway, than your switch or switches. This can give things a chance to boot up before the next device powers on and should help prevent weird issues at startup. I’ve done this on servers, having our TrueNAS server not boot up until the network card picks up that the switch is up and running because if it boots up before the network is up it bugs out. The ECP106 however lets you do all of this at the power level. While on the subject of the timing of the outlets, I should point out that I did test out how long the reboot or power on or off commands took when you apply them and it was immediate. With some of the EnGenious Cloud products, updates require it to send out an updates config file and that can take a minute but that wasn’t the case here. A full reset took less than a second, powering on or off took that along with whatever the delay was set to for that plug.
You have the option to schedule each outlet to be on or off in specific windows or you can add in a scheduled hard reset at a specific time. Obviously, this will depend a lot on what you have plugged in on if this is needed at all. But it is cool that the option is there. For me though the most important functionality are the AutoReboot settings. For each outlet, you can set up one or more IP addresses that you want to ping. Then from there, you have a few timeout settings that will go into effect once the ECP106 can’t reach that IP address. You have a ping interval, a delay time setting, the number of AutoReboot attempts, and the number of ping failures before it will reboot. What isn’t clear to me and what would be nice to see is if you are running more than one IP address, does the AutoReboot go into effect if one of those IPs goes offline or does it need all of them to go offline for it to kick in. Because it is always possible that an outside IP address might have an issue, being able to run two and have it require both could give a safety net to keep your entire network from being rebooted just because Google hiccupped for example.
Anyhow, the reason this was big for me is because I never seem to have a network issue when I am home. It happens when I am a thousand miles away and accessing files remotely. I wanted to use this feature to automatically reboot my modem if an outside ping went down for a long time, reboot our gateway similarity, and even do our switches for the same reason. For internal servers, I have it set up to ping their IP and to reboot each server if they completely lock up. In theory, this should at least keep things accessible. Of course, you do want to play with the settings. I started with the default times and we had a short internet outage which after five minutes rebooted our modem, gateway, and switches. Because the switches were also powered down, the delay wasn’t long enough and it caused all of the servers to also be hard rebooted. There is also a valid concern that the five default reboot attempts could damage some equipment. In the end, I have increased the ping interval to be twice as high, but I will most likely change the reboot attempts down on servers. I do wish that you could increase the number of ping fails before reboot rather than just changing the ping timing.
The ECP106 does let you see the power usage of each of your plugged in devices both live and in five minute increments over the day. A pro subscription expands that out to week and month as well. With that functionality, there is one feature that I think would be a huge addition. Being able to set up checks for wattage dropping and rebooting in those situations. It wouldn’t work in every situation, but in a few situations, it could be a nice feature.
Overall and Final Verdict
Where your average home user might just be looking at a basic power strip, a PDU is a product that not only offers a way to keep your power wiring on a server rack clean it also has other functionality depending on what type of PDU you go with. EnGenius’s ECP106 Switchable Smart PDU would be on the higher end of that functionality with it having surge protection, per outlet and total PDU power tracking, and individually switchable outlets that tie in with their EnGenius Cloud service allowing a few unique abilities beyond remotely being able to control each outlet. While being able to clean up some of the mess that is our server rack is nice, the main reason I have been looking at a PDU was to work out an issue that seems to pop up only when I travel where some part of our network has an issue and requires a reboot. I tried a smart plug early on but learned that because you issue the off and on independently turning the outlet off would kill any internet connection and I wouldn’t be able to turn it back on. Similarly, when the internet connection itself had a problem the smart control wasn’t accessible. The EnGenius’s ECP106 does have proper reset commands which means that even if rebooting the outlet kills the connection it will still complete the reboot. But the big feature for me is its auto reboot functionality. You can set up a check that will ping a specific IP and when that goes down, after a specific number of failed pings EnGenius’s ECP106 will reboot that outlet. This is a better hands-off solution for my issues that can potentially fix the issue even before I notice things are down.
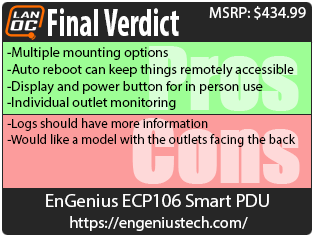
The EnGenius’s ECP106 was easy to get set up and with two different sets of brackets, you have a variety of mounting options. For in rack you can mount the PDU flush or have it recessed back so the cables don’t get in the way of a door. Beyond that though you can use those same brackets to mount to the wall or vertically on the edge of your rack as well. The only downside I ran into for my specific setup was that I would love to have a model with the outlets facing out the back of the PDU. That is mostly just to be able to have the power display visible on the front of our rack while still having the cleaner wiring. That front display doesn’t replace what you can see when looking through the software but it is nice to be able to check on when in person, same with the power button as well but individual power buttons per outlet would be a lot more useful to avoid turning off multiple devices. The timed delays build in and that you can adjust is a nice addition when powering up the entire rack as well.
The EnGenius’s ECP106 is relatively simple and hits its mark in all of the things I needed for our specific setup. The only other area that I would like to see improved on is expanding what you get in the logs. The current logs available on EnGenius Cloud just cover firmware updates and the bootup of the ECP106 itself. I would love to see any powering up or down of individual outlets added in and other areas like ping’s failing or when the auto-reboot feature is used. Those logs are on the software side and could potentially be added in the future and I hope that EnGenius considers doing just that.
The EnGenius ECP106 is listed on their own store for $699, which by the way when did EnGenius get a store I’ve never seen that before! But the ECP106 can be found in other online stores like CDW for $434.99. For a lot of people, that is going to sound a little crazy for a high tech smart power strip. But it is in line with what you would see for other commercial PDUs. A basic single switch manual PDU with 6 outlets for example runs around $80 at CDW and that quickly goes up in price once you add in wattage/voltage/amperage tracking and the ability to control the outlets remotely like the ECP106 does. A good example of the competition would be the PDU41001 from CyberPower which isn’t cloud-controlled but does have similar features and is $499. So while not cheap from the outside, EnGenius is cheaper than the competition.
Live Pricing: HERE


