Photos and Features
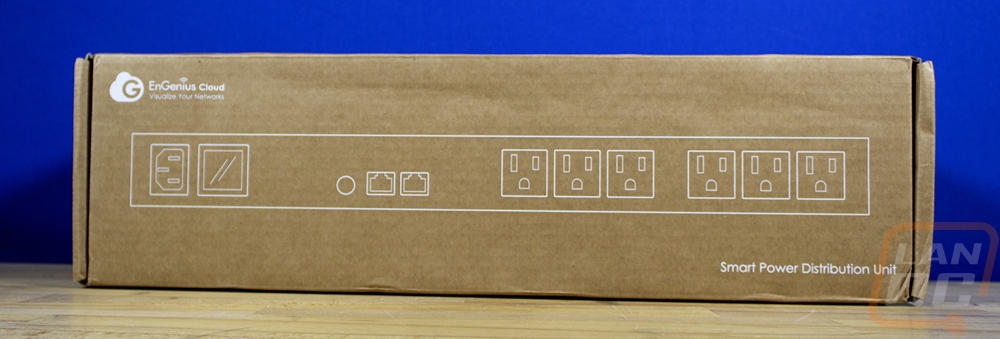
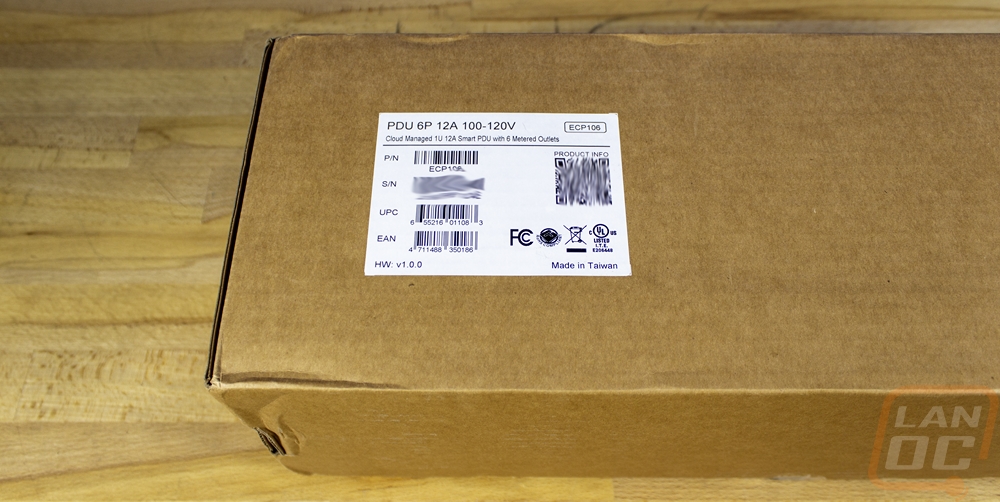
With an enterprise focus most of EnGenius’s lineup doesn’t go overboard on the packaging. If anything the ECP106 has more going on than most of their network hardware for packaging. This has a normal brown box but on the top, they do have a line drawing of the PDU across it that shows all of the power plugs, network connections, and the display screen. The back of the box has the EnGenius Cloud branding and shows the plug type as well as voltage and amperage supported. Then there is a sticker on the front edge. That just has the model name and full description as well as the UPC, Serial Number, Part Number, and a QR code with the product information on it.

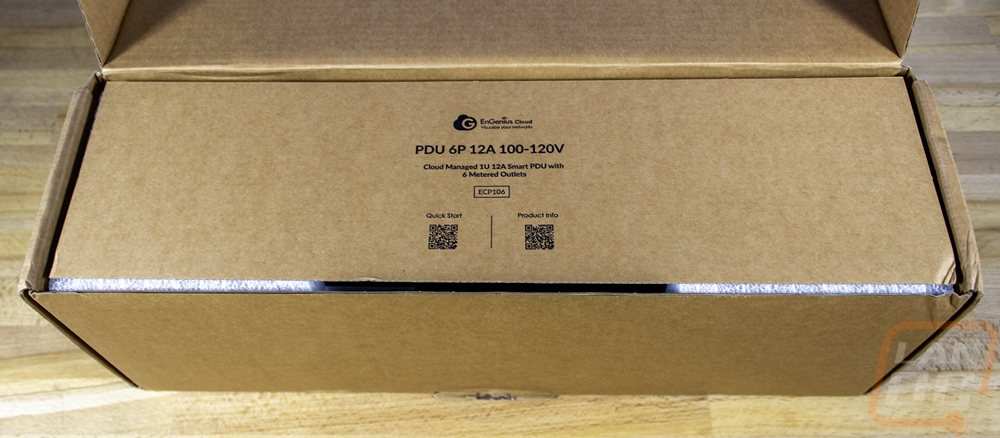
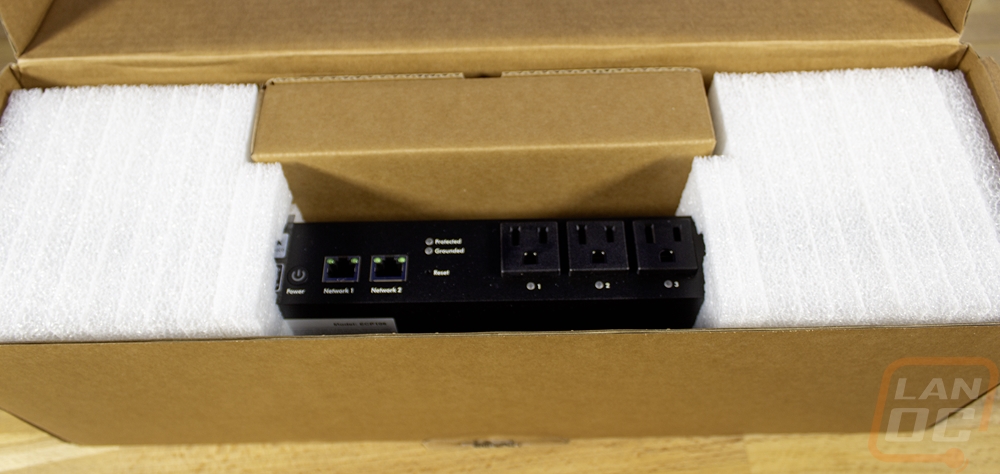
When you open the box up they have a cardboard panel over top of everything. This has a QR code for the product information and a second one that links to the quick start guide saving paper used for manuals. That also has the model number and full description listed again as well as the EnGenius Cloud branding. Under that the ECP106 can be seen with thick foam inserts at both ends that hold the PDU directly in the middle, keeping it safe. Alongside of the ECP106, EnGenius has some of the accessories in a box that is also slid into the foam. When you pull all of that out there is along layer of cardboard down in the bottom which shows everything you will find under it with more line drawings. Here they have two sets of rack brackets, one standard bracket and a longer bracket. There is also a screw kit as well which has both the screws used to mount the brackets as well as a set of wall mounting screws should you go in that direction.
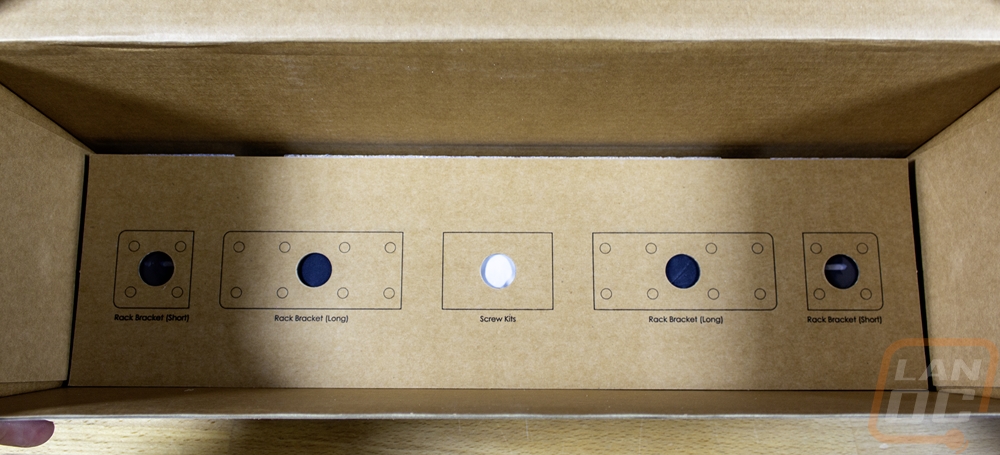
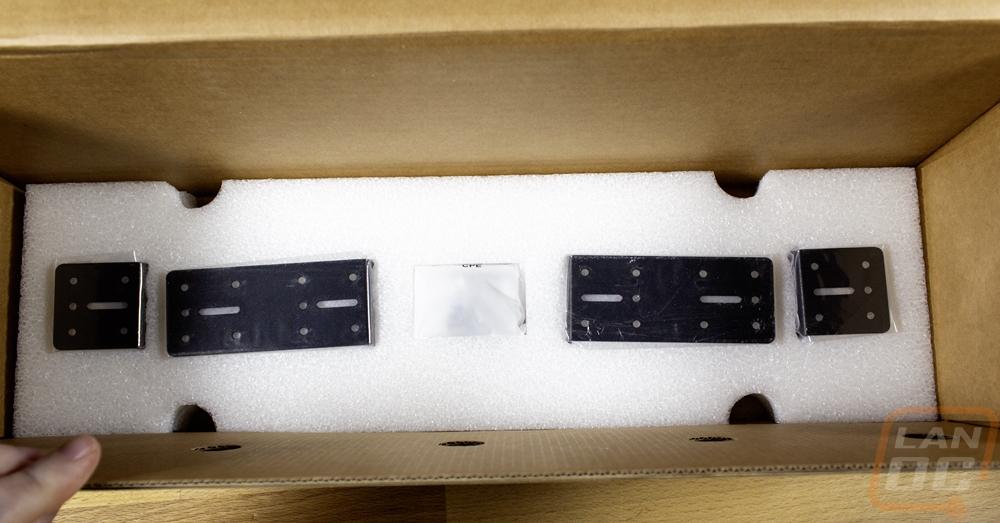
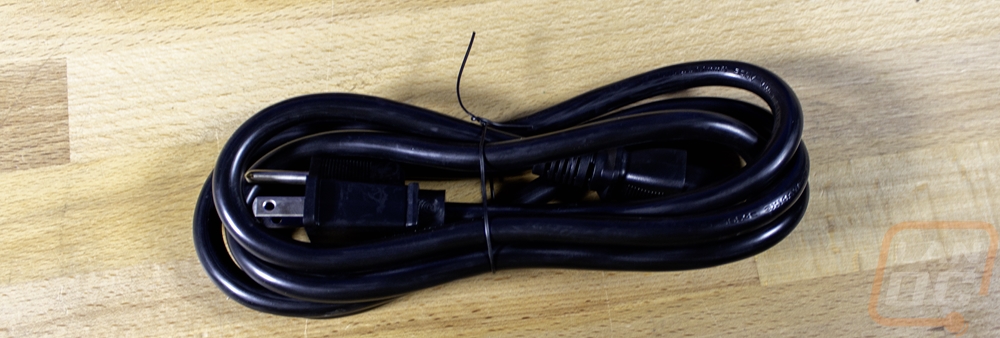
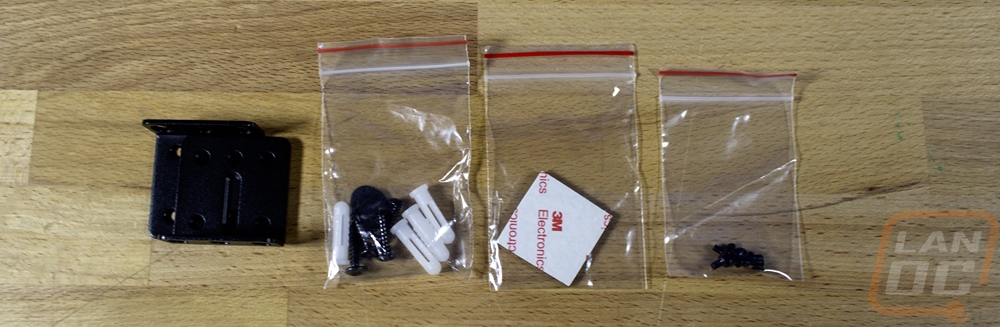
The accessory box for the ECP106 has one power cable inside which has the standard NEMA5-15R plug on one end and a C13 plug on the other end. I pulled the shorter brackets out as those are what I am going to use on our setup as well as the screw kit. The screw kit has four screws with drywall or concrete anchors, then a baggie of small machine screws to mount the bracket to the ECP106.
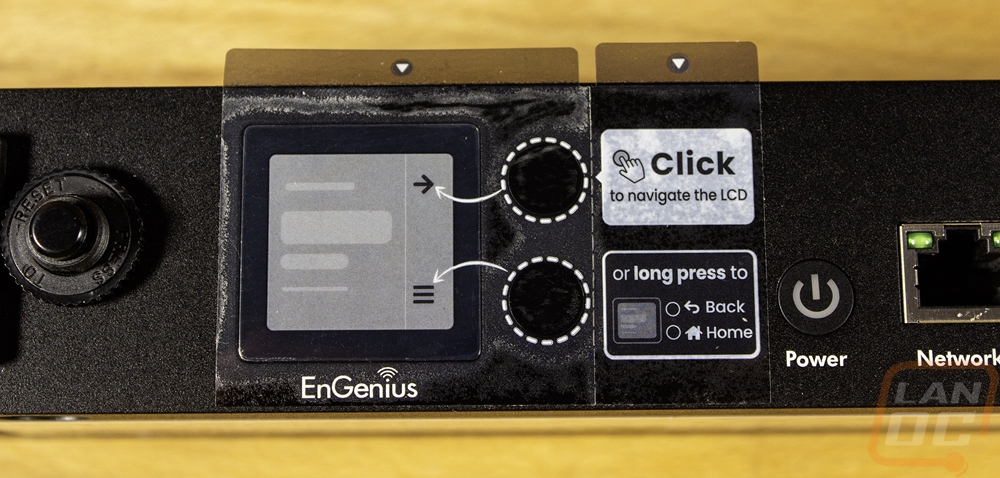
The ECP106 didn’t come in a bag at all but the screen does come with a sticker covering it along with basic instructions on how to navigate the display using the two buttons next to it.
The front of the ECP106 is where the magic happens but before I touch on what we see here I did want to run through what the ECP106 is to help give some context to what we are seeing. This is a cloud managed switchable smart PDU or power distribution unit. The ECP106 is one of two models that EnGenius has and this is their 6 outlet 1U design. They have the ECP214 which has a similar design but is 2U in thickness and handled 14 outlets, scaling things up significantly. When it comes to PDUs there is a full range of functionality, ranging from a basic rack mounted power strip, going up from there you can get models that have switches for each outlet. From there, you have monitored PDUs that will display the power usage. Then from there, things step up to intelligent or smart PDUs which can output those power numbers and sometimes have control over the network. There is also some variation between with models that will just give you the total power numbers versus getting information for each independent outlet. That is where the ECP106 comes in, but on top of networked support, it ties in with EnGenius’s established cloud control.
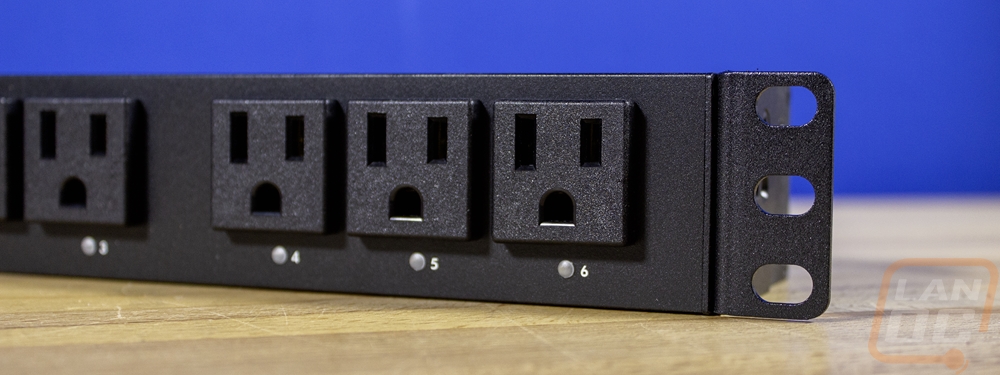
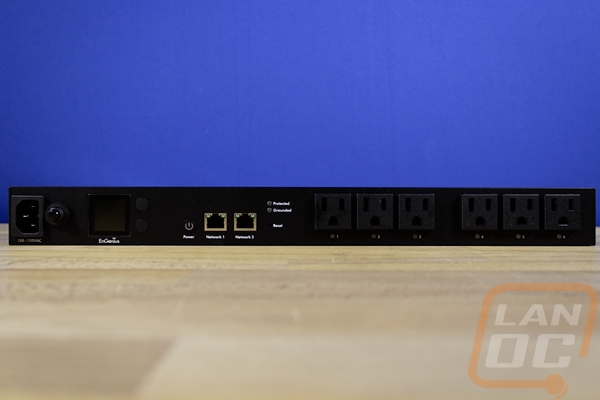
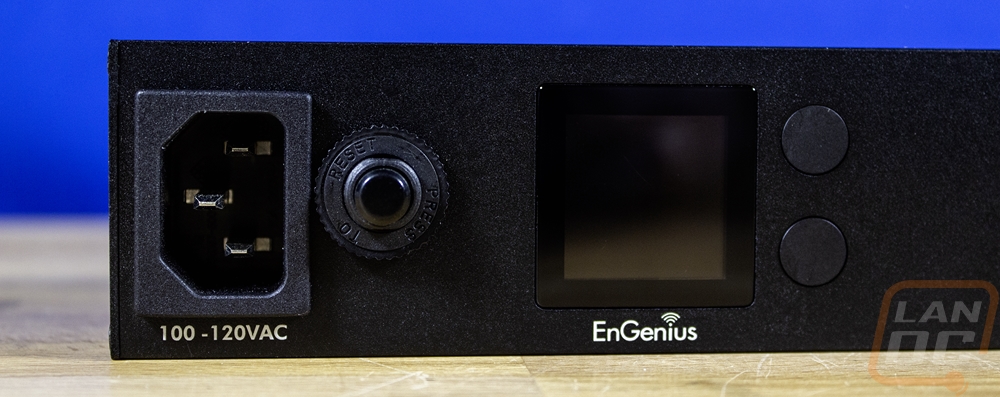
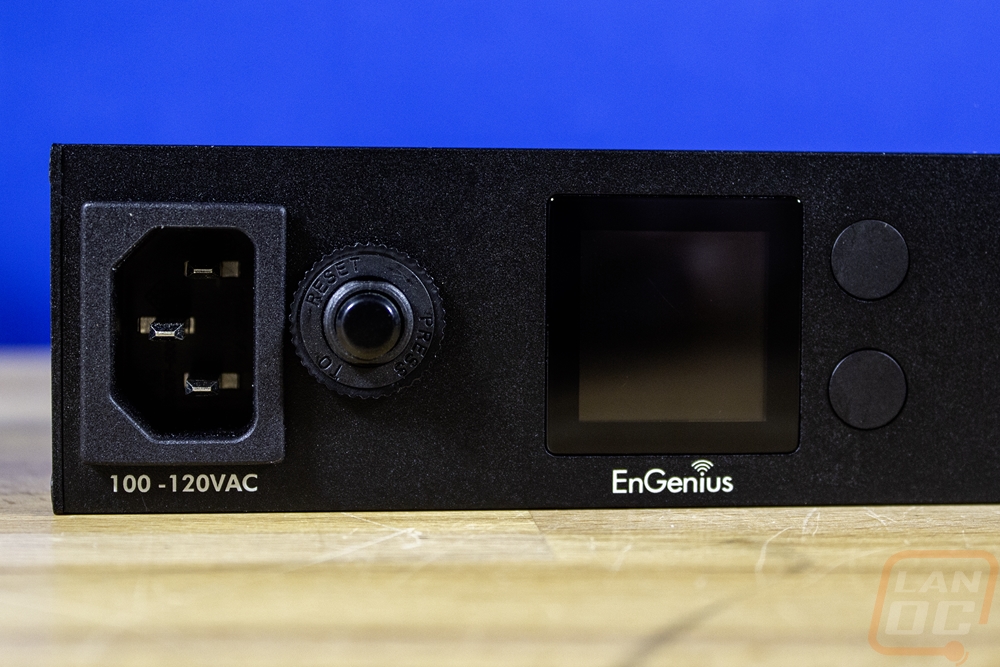
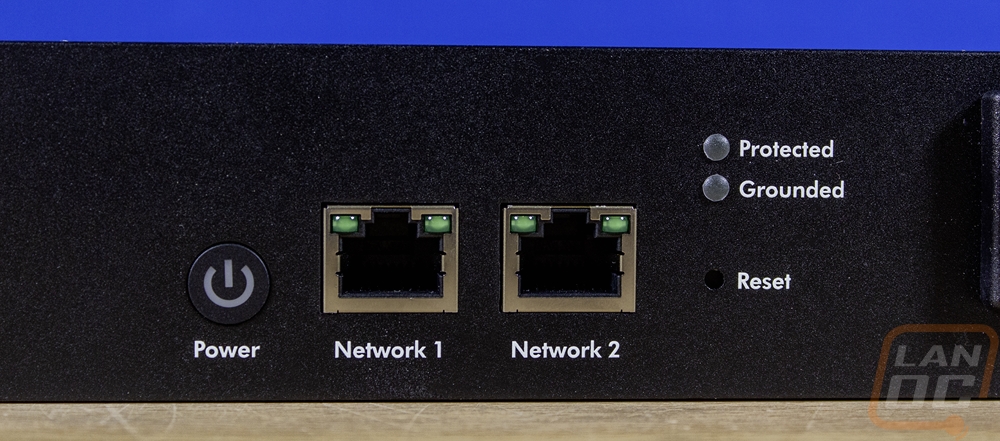
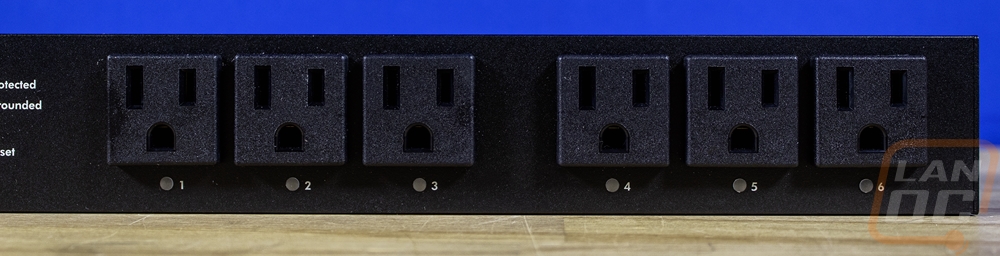
With all of that, the front of the ECP106 has its six NEMA5-15R power plugs on the right half of the PDU. They are split up into groups of three and each plug has a status LED under it as well as a number label. Then on the far left, it has the input power plug which has a C14 plug that works with your standard C13 power cable. With that, they also have a circuit breaker to help avoid damaging anything with too much power draw. For the smart side of things, the ECP106 has two 1 Gig ethernet ports which lets you have redundancy with two networks. There is a power button to the left of those powers and to the right there is a pinhole reset button as well as status LEDs that show the power connection is grounded and surge protected (which is handled by fireproof Metal Oxide Varistors). On the left, there is also an inch square display and two control buttons. The top button selects and the bottom button is the menu navigation button. Long pressing the top goes back and long pressing the bottom button takes you back to home. Like with the basic non-networked PDUs, the RCP106 does give you access to the power information and the ability to power things up or down as well locally but most of the control is still designed to be through EnGenius Cloud.

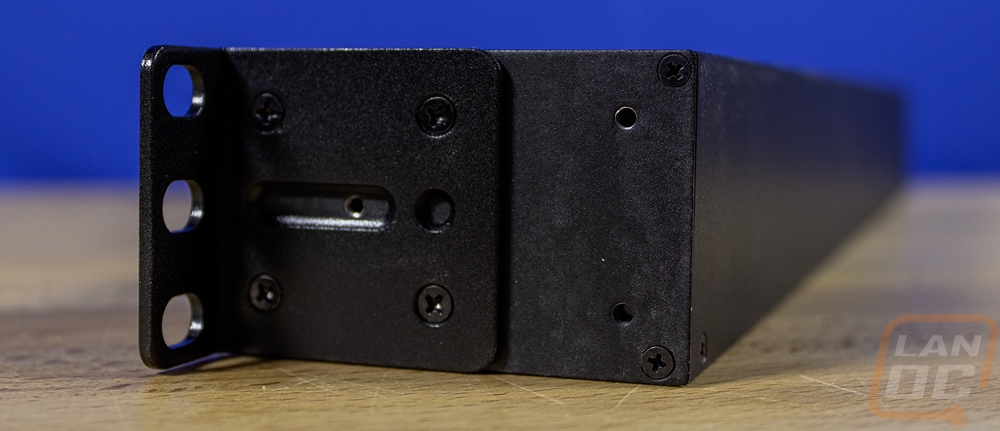
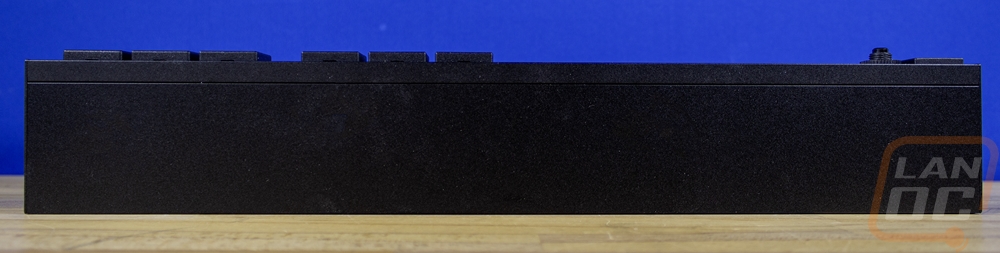
Both sides of the ECP106 have threaded screw holes to install the included rack brackets but there are more than just the four you would normally see. They have six main holes that let you mount the bracket to the front or back of the ECP106 and there is a seventh hole in the middle which can be used if you are trying to mount the PDU at an angle for better wire management. Because the front of the ECP106 has all of the connections including the incoming power plug, the back has nothing at all going on, just the metal housing and textured black finish.
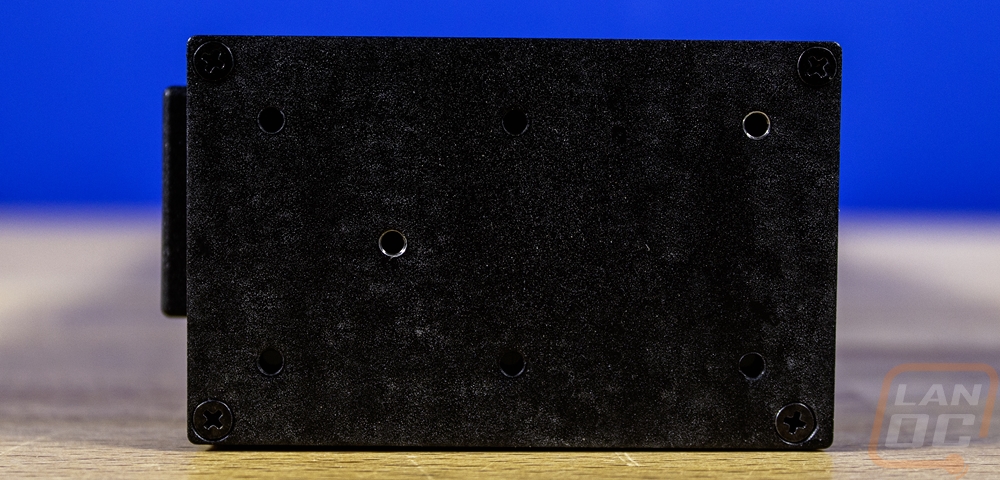


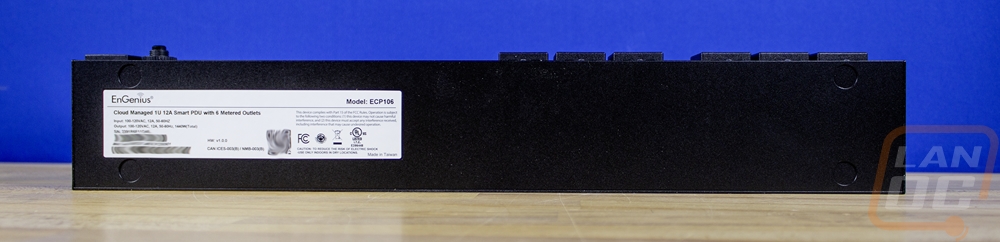
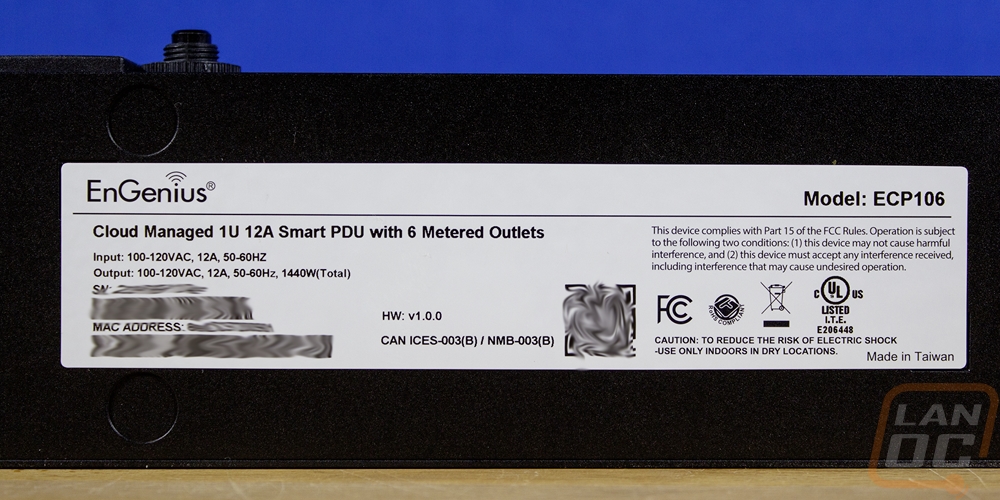
The top and bottom of the ECP106 don’t have much going on, no surprises there given that it is designed to be rack mounted. The top just has the textured black finish but the bottom does at least have the information sticker on it. That sticker has the model number and full description. It also has all of the certification logos and the power input and output information. You can also find the serial number and its mac address as well as a QR code used to add the ECP106 to the EnGenius Cloud network.
I did also get pictures with the shorter rack brackets installed on the ECP106. This was what was needed for mounting in our rack. You get four screws per side. But I did want to point out that the extra screw holes on the side of the ECP106 does give you the option to flip these to the back and mount the ECP106 to a board or wall if that better fits your setup. The other included brackets can do the same but would put a space between the ECP106 and the wall or if you flip them this direction it would recess the PDU back into the rack so that the plugs don’t get in the way of a door. The triple screw holes on the bracket give you flexibility on where you mount it as well.