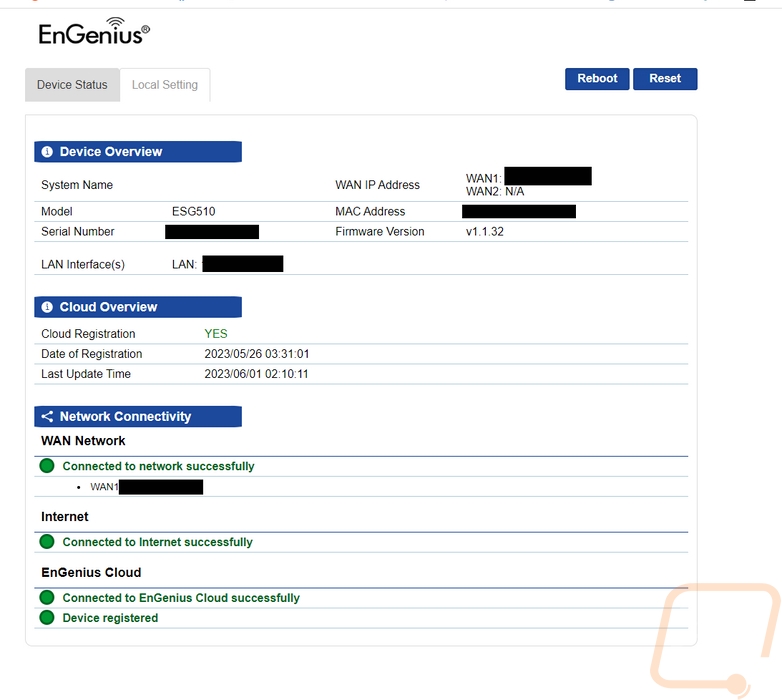
Software and Performance
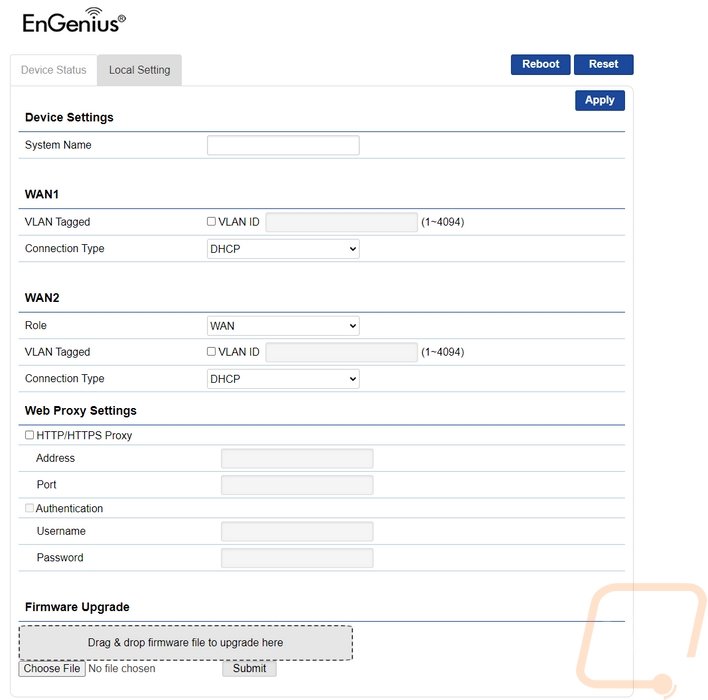
The ESG510 is another great example of a product where the physical hardware, while important, is only as good as the software side of things. That is because the ESG510 physically is a basic computer with a four-port 2.5G switch attached without its software. Like with a lot of the EnGenius Cloud-supported devices, the ESG510 does have its own web interface on top of the EnGenius Cloud web interface so before diving into the Cloud let's check that out first. Some of the web interfaces can function on their own but I was surprised to find that the interface for the ESG510 is about as simple as they come. It has just two pages. The main landing page shows the device information up top including the model number, serial number, firmware version, MAC address, and WAN1/WAN2/LAN IP addresses. It checks the cloud connection and shows that as well as tests connections to the internet and your WAN connection. The only thing you can do on this page is reboot or reset the ESG510 with the buttons up top. The second page on the other hand has a few options. Up to you can rename the ESG510 and below that you have WAN and then WAN2 connection settings where you can tie them to a specific VLAN and set up your static connection or in our case have it set to DHCP. The WAN2 option has an additional option where you can pick what you have the connection set as, this lets you switch it between a second WAN connection or an additional LAN connection. Then below that you can set up web proxy settings. Down at the bottom, you can also do a manual firmware update which is nice to see on the chance that the cloud auto firmware updates break something.
While I don’t have any pictures here, the EnGenius Cloud software is accessible through their app or the web interface. My pictures below are all through the web interface, but it is similar to the app. I personally prefer using the web interface in most situations, the exception to that is when adding a new device like the ESG510 to your network. In addition to hooking it up, you use the apps to add a device feature which uses your phone's camera and will scan the QR code on the ESG510. You then just have to tell it what network you want the device to be on and give it a name if needed and you are up and running. It will call out and download the latest settings which you can set up ahead of time and download its firmware update and that’s it.
The landing page is the dashboard and up top you have a graph showing you if you have any issues like devices not being online or in our case also too many devices using 2.4GHz vs 5GHz on our wireless network because of the number of IoT devices that only use 2.4 GHz. Next to that, you have a quick go-to section that shows how many devices you have linked as well as the total client count. This shows the WAN traffic for the ESG510 and breaks down how many wireless devices are connected at each frequency. Once you add the ESG510 the dashboard does change compared to how it looked with having switches and access points attached. You still have the throughput graph for your access points that show the number of clients, upload, and download speeds over the day. But now there is a second graph, this time for gateway traffic that will show the traffic on your WAN1 and WAN2 if you are using a second.
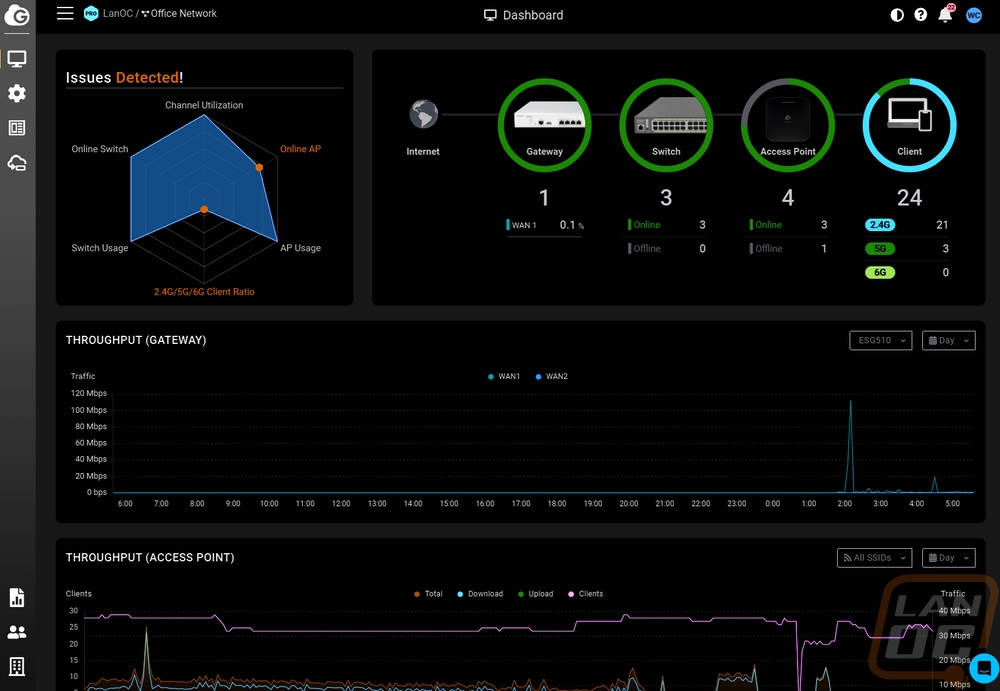
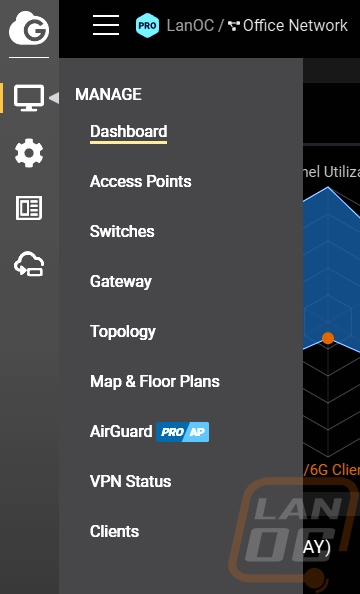
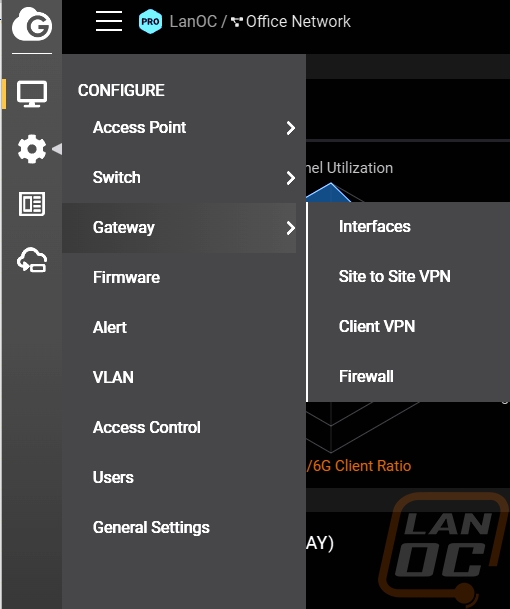
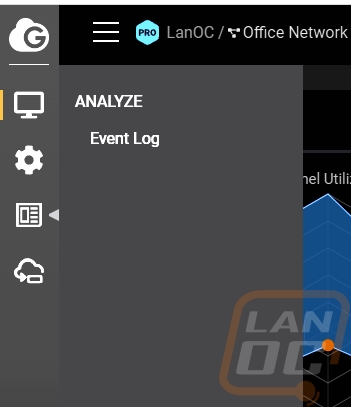
On the left, there are multiple menu options and when you mouse over them a longer full menu opens up. You have the manage menu up top and configure below that. These are the two main menus. Then there is analyze which just has the event log access on it. The manage menu has just one option for your Gateways, the configure page on the other hand opens up and gives you access to four different pages. We will check out each page, but you have Interfaces, Site-to-Site VPN, Client VPN, and Firewall.
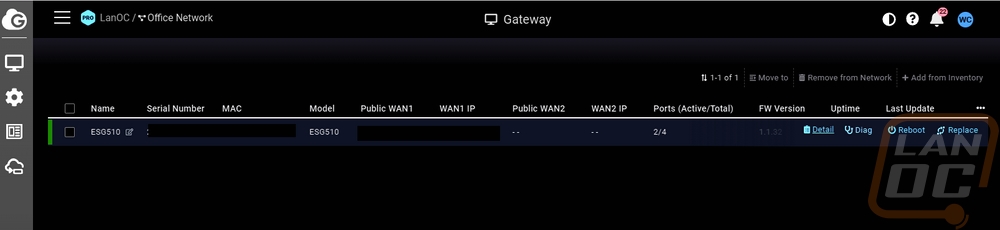
The manage menu page for Gateways opens up a page similar to what we have seen for switches and access points as well. It will list off all of the Gateways you have attached to this network and in this case, we have just the one ESG510. The list shows the serial number, your MAC address, model number, Public and private WAN IPs for both WAN1 and WAN2, ports active, firmware version, uptime, and last update. Mousing over it opens up a few links. You can reboot, or replace. You have access to the detail page and also the diag page.
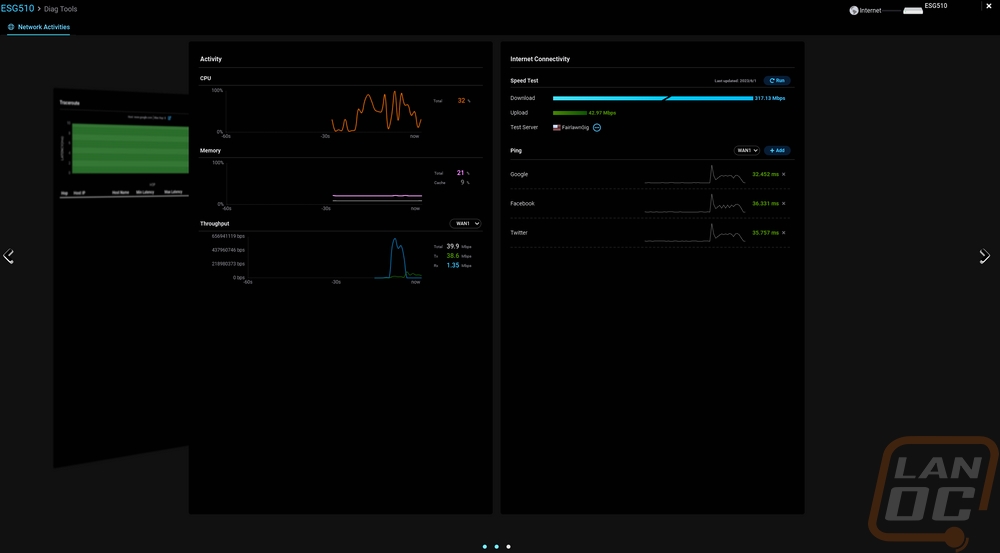
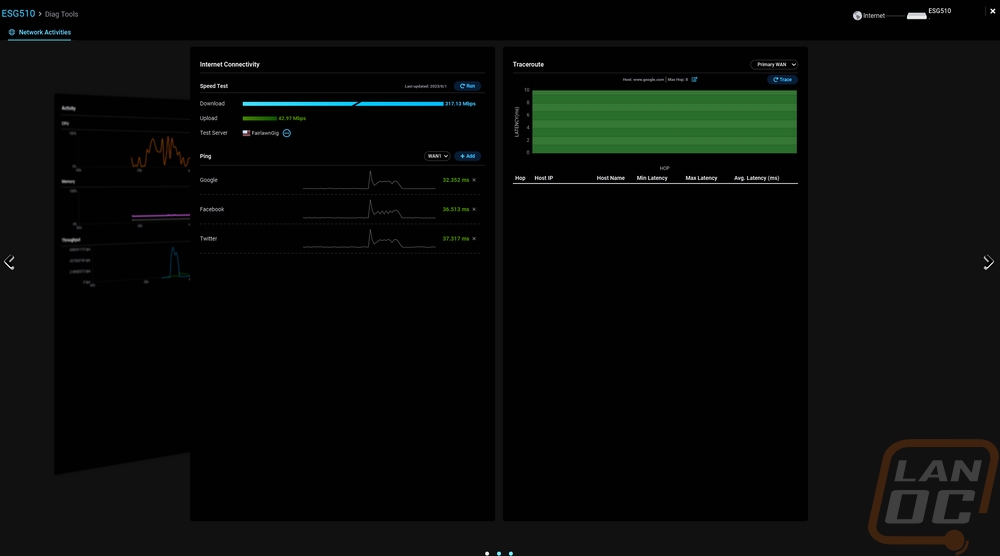
This is the diag tools page and this opens up to a full screen which can be annoying sometimes. You have three tools that you can flip through. One is a traceroute tool that will list everything out and also graph the pings to help show where issues are. You have the internet connectivity tool that has a speed test and a list of pings to popular websites. Those pings also graph out as you keep the window open and you can add more of your own ping destinations if needed. There is also the option to switch the WAN to other WANs if you have them set up. Then there is also the activity page. This just graphs out the CPU usage, memory, and throughput while you have this page open.
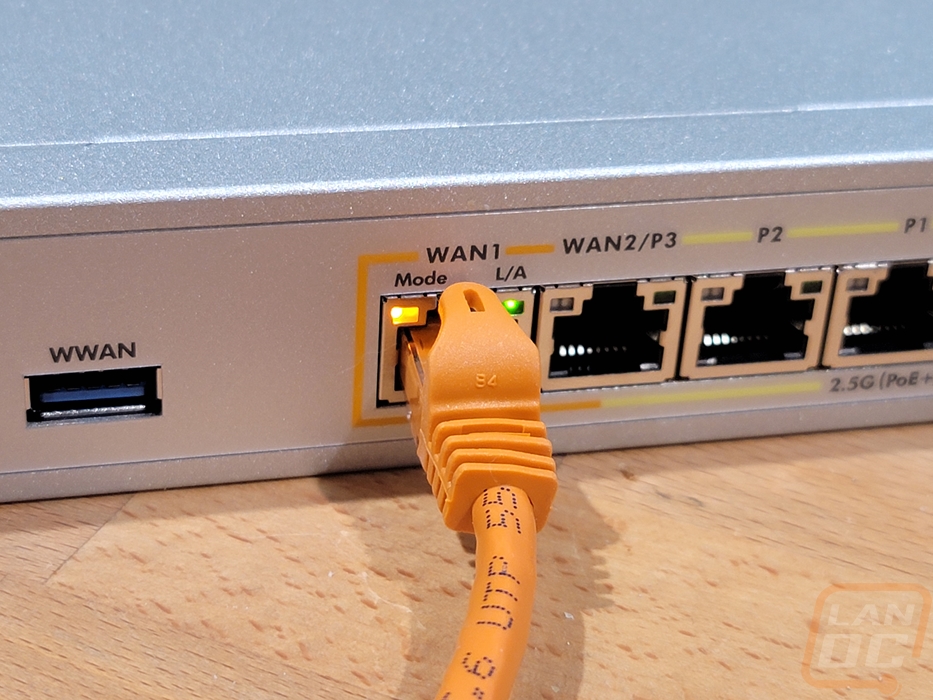
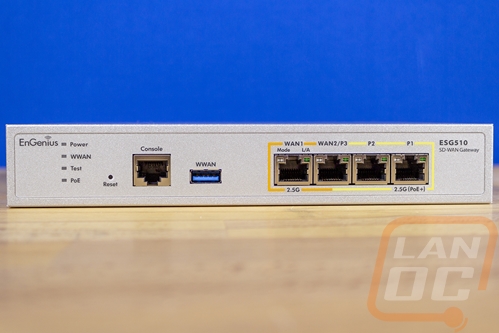
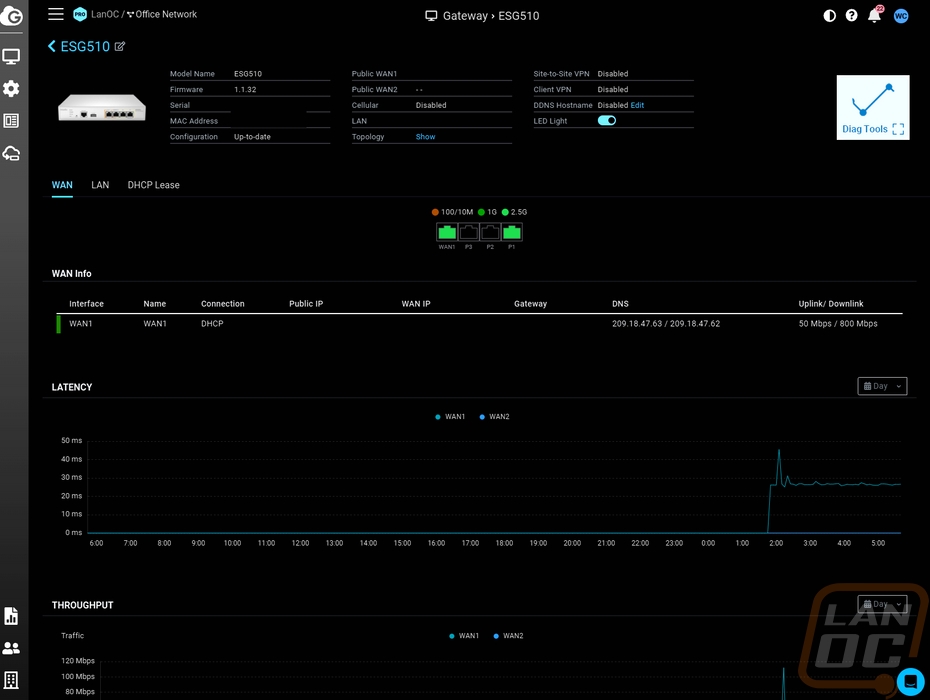
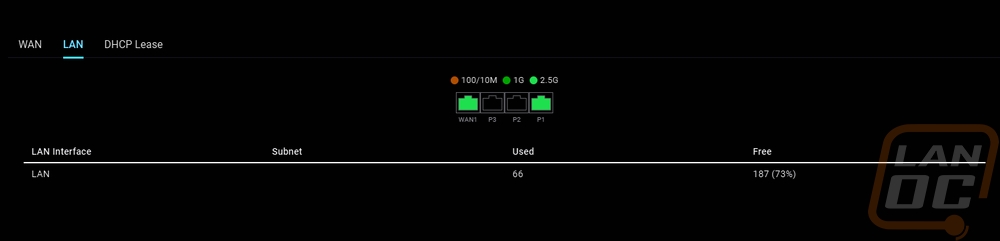
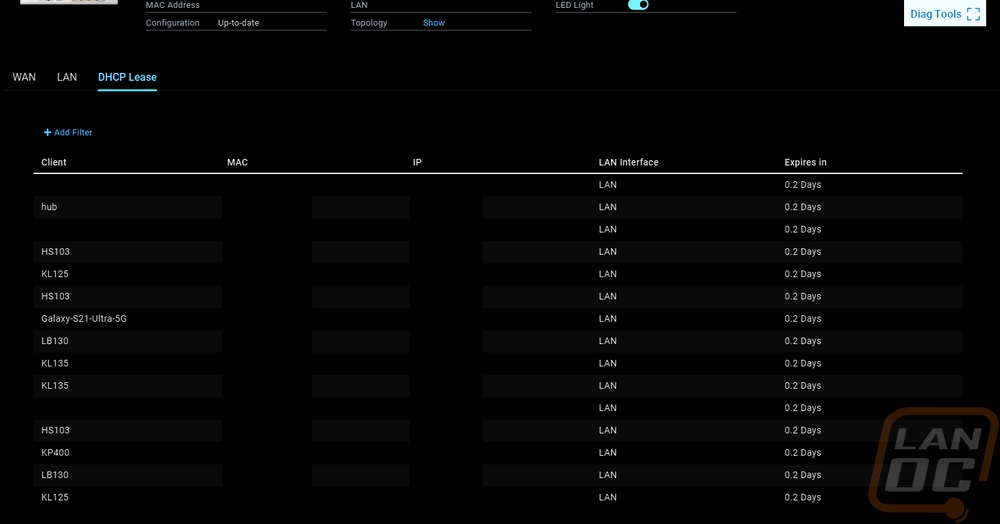
The details page opens up and up top starts with a lot of the same information that was on the Gateway listing page up top. You also have a few important settings shown up like the VPN and DDNS settings that it will show if you have turned on. Then there is a picture of the four 2.5G RJ45 jacks on the ESG510, this shows the status of each port. We can see that the WAN is hooked up and the P1 LAN jack is being used which are both connected at 2.5G. The WAN page shows the WAN info listed for all of your WAN connections then below that you have graphs for latency and throughput throughout the day. The latency is especially helpful when you think you have internet issues from time to time, you can look back here and spot them. The LAN sub-page has the same status as all of the ports then below that it lists out your LAN connections and each shows how many IPs are used on DHCP for that LAN. The third page is the DHCP Lease list which I have a lot blocked out here for privacy reasons. But this lists out the client name, MAC address, IP, interface, and how long until the lease expires.
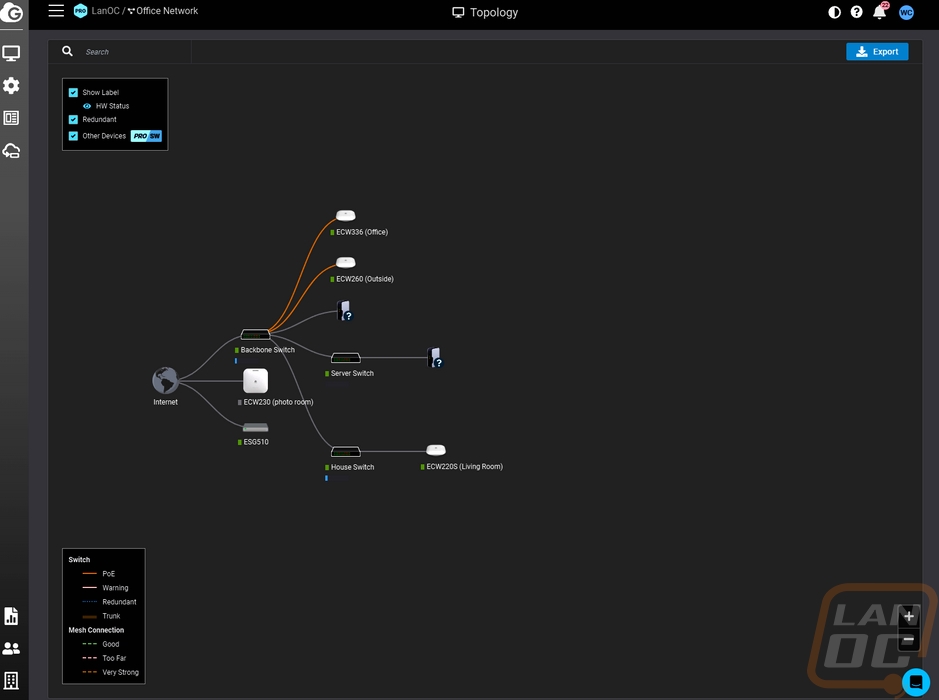
The detail page also has a link to your network Topology which is also in the main menu on the far left. I’m a big fan of this feature but as I mentioned in my coverage of the ECS1552P switch I would love if this did a better job of mapping out some of the other devices. Even with the Pro subscription where it has the option to show other devices most of the devices showing on our network are the EnGenius devices. Even just using some of the available information from the switches and access points which can list out the devices connected it could expand out and show more of what is on your network. Or have the option to manually add them.
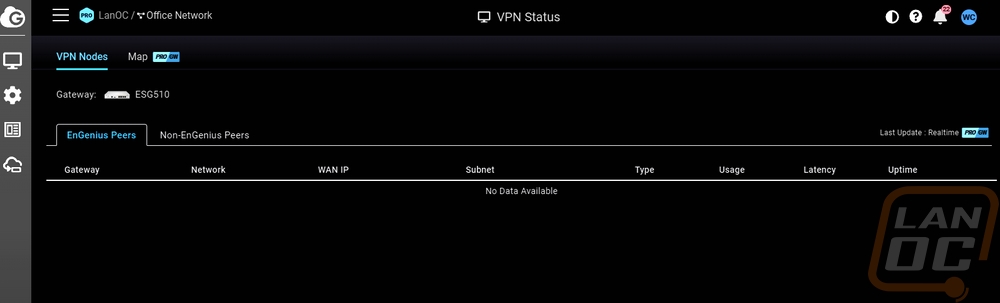
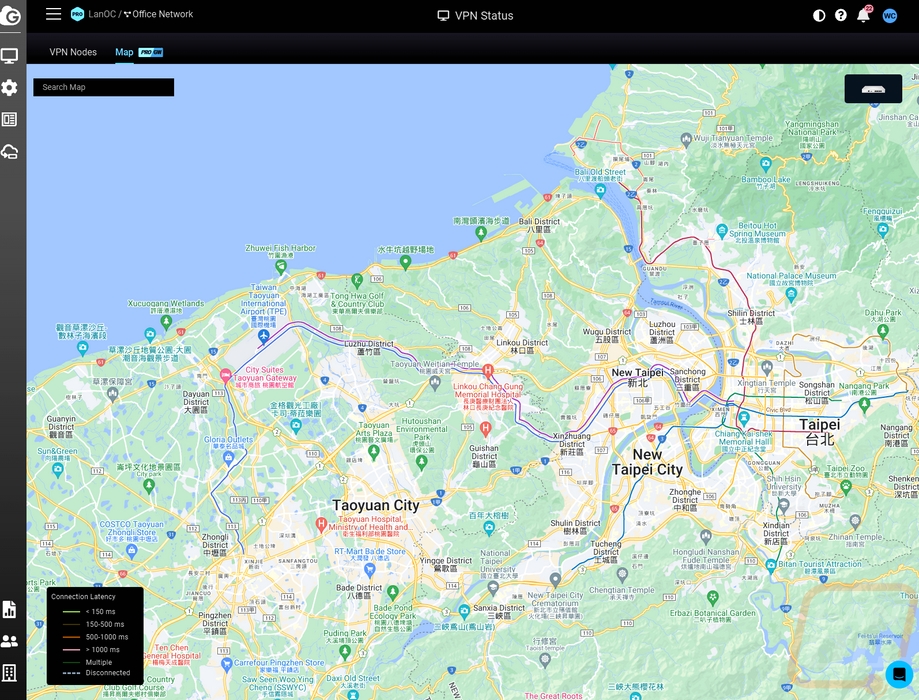
Still in the Manage menu, there is a page to check on your VPN Status. With the ESG510 this opens up and they break down the listed VPN connections between EnGenius Peers and Non-EnGenius Peers. Each will show the gateway, network, WAN IP and subnet, the type of VPN connection, usage, latency, and uptime. Pro subscription users also have a second page here that opens up a map. This will put lines between you and all of the connected devices to get a rough idea of where all of your connections are coming from. The lines are different colors depending on their latency as well.
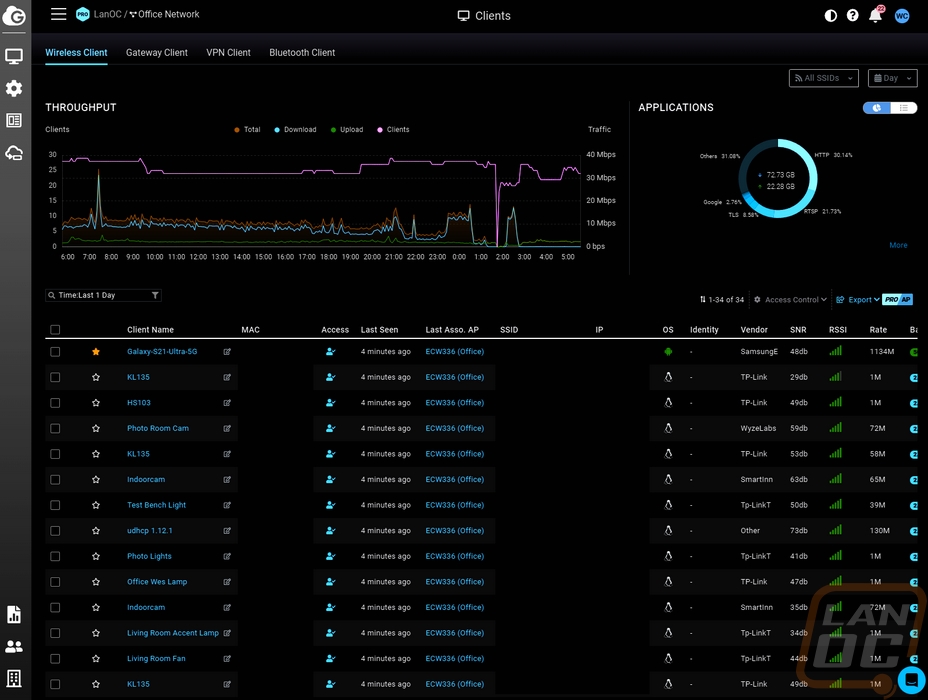
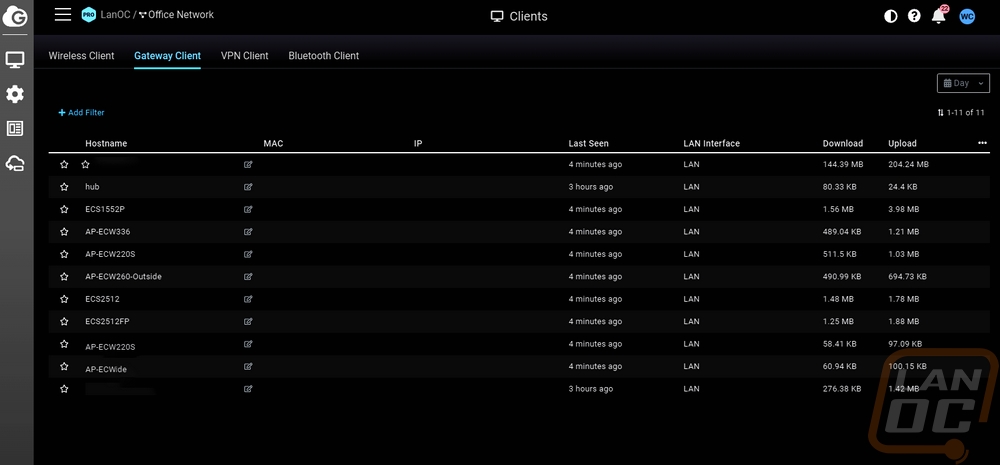
Previously the clients listing page on EnGenius Cloud just had the devices connected to our access points but with the addition of the ESG510 on the network Gateway and VPN Client pages were also added. The wireless page has a throughput graph and a breakdown of the applications being used and the gateway page doesn’t show anything like that. But you do at least get a list of hostnames, MAC addresses, IPs, when they were last seen, what LAN interface they are on, and upload and download usage. This still doesn’t list a majority of the devices on the network, in fact when I check this now it shows no clients at all for today and most that are picked up are the other EnGenius devices.
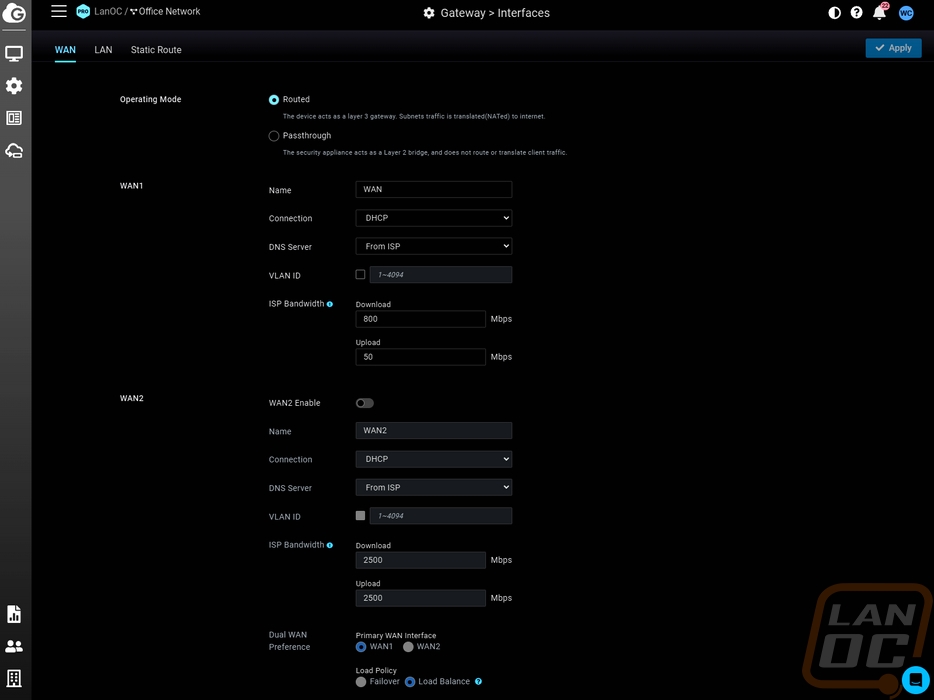
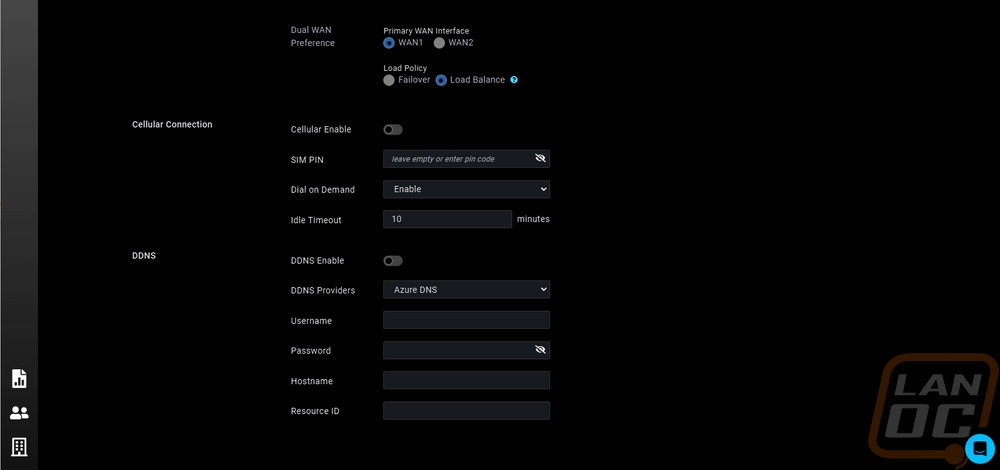
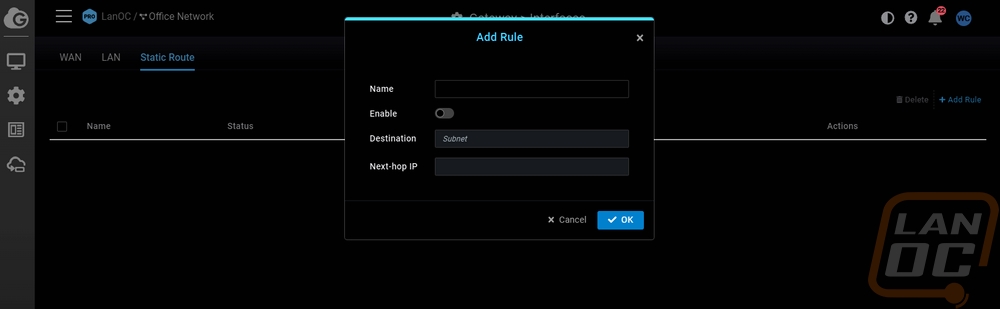
Moving over to the Configure menu which has four different pages starting with the Interfaces page. This has pages for the WAN interfaces as well as the LAN interfaces and a third for Static Routes. The WAN page up top lets you decide if the ESG510 will be running as a Layer 3 gateway or a Layer 2 bridge. In other words, will be a router or passing that through to another router. Then from there you can rename the WAN, set up the connection type to your ISP, and also pick your DNS servers. For the DNS settings, you can use the ISP, Google DNS, or you have the option to input your own. Then you can input your IPS bandwidth which helps in some of the other interfaces that show what percentage of bandwidth you are currently using as well as with load balancing. You can also specify a WAN to a specific VLAN as well. These settings are available for both the WAN and WAN2, the WAN2 also has the option to turn that off and to switch between load balancing and failover on how the ESG510 handles the second WAN. Then down at the bottom, you have settings for the cellular modem which the ESG510 supports, and dynamic DNS settings as well as a dropdown of the popular DDNS providers and room to input your username, password, hostname, and resource ID.
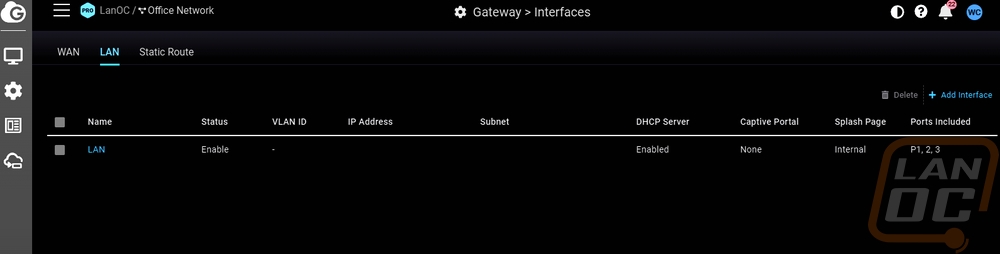
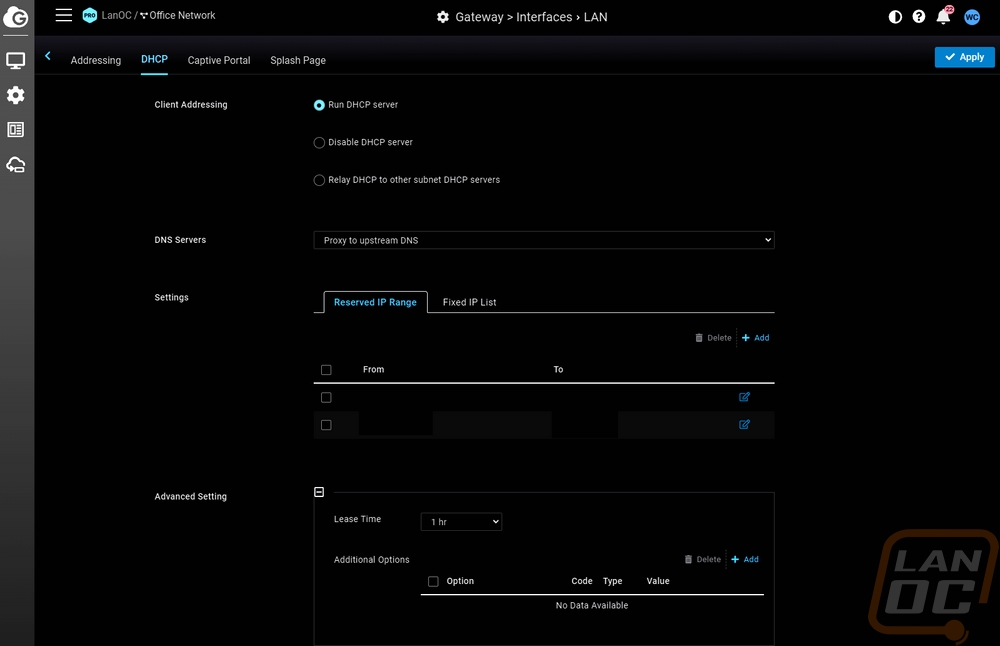
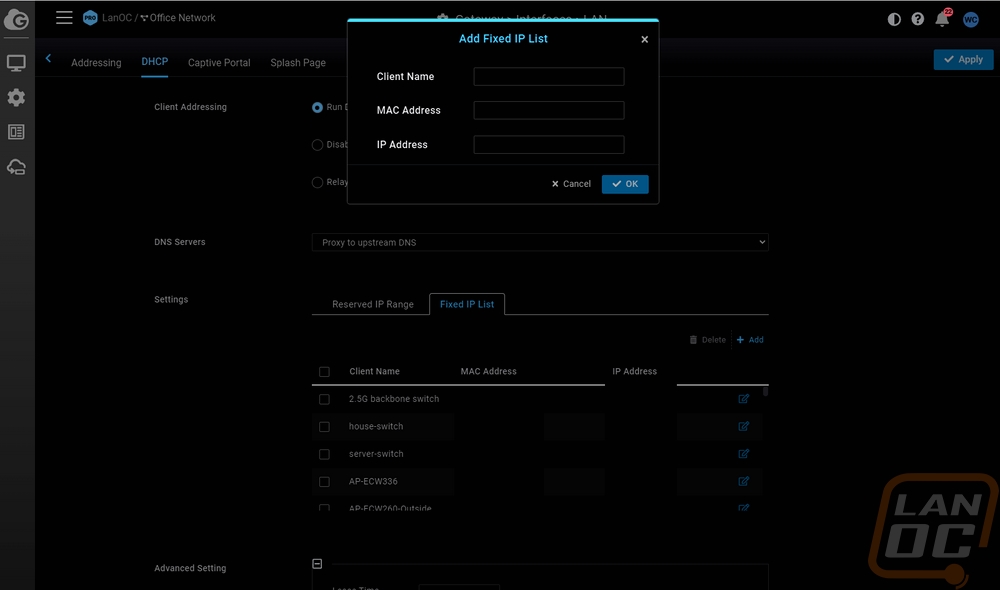
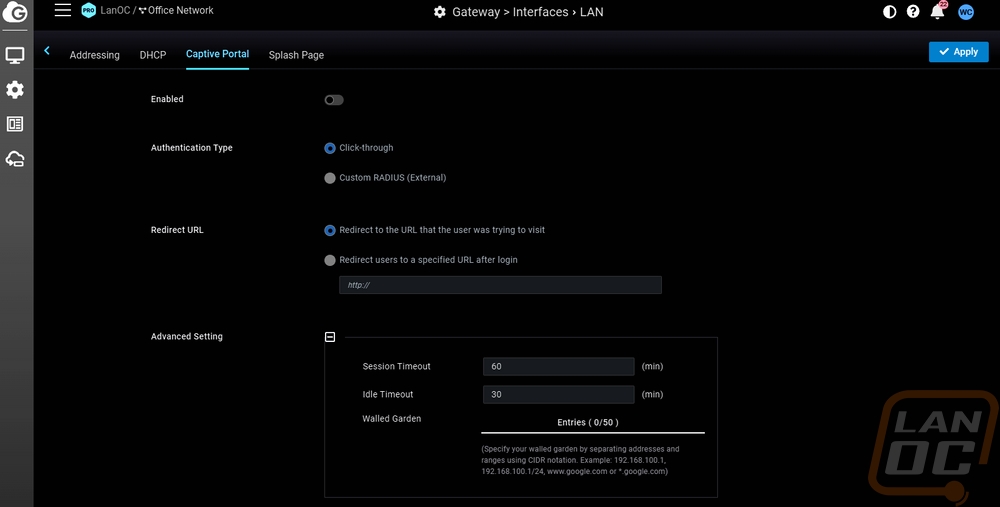
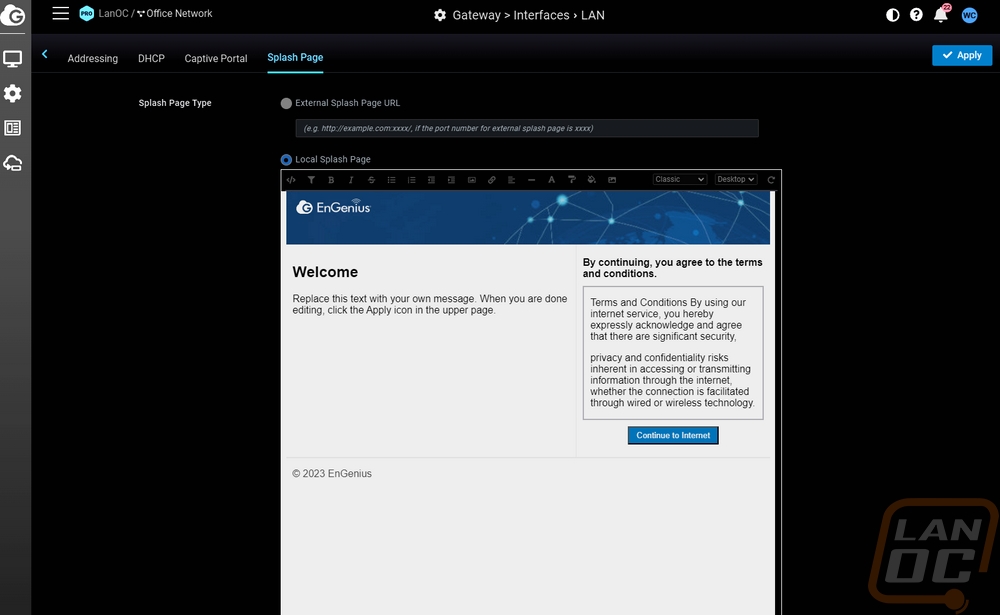
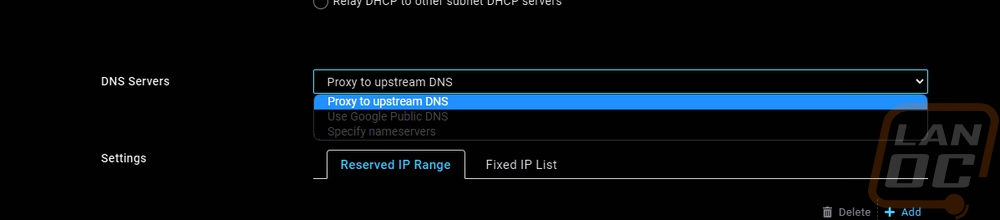
The interfaces page for your LAN will list out all of the ports you have connected to LAN which could be between 1 and 3, for our setup I have just the one. This page shows the status, VLAN id of the LAN, IP address, subnet DHCP server setting, captive portal setting, splash page setting, and what ports you have dedicated to that interface. Clicking on the LAN name then opens up a second page. This has Addressing, DHCP, Captive Portal, and the Splash Page settings pages. The addressing page is where you can rename the LAN, set up your IP address, allow VPN, and which ports you want these LAN settings to work on. The DHCP page has all of your DHCP settings all together. Up top, you can select if the ESG510 is running DHCP, completely off, or relaying DHCP to a different server. You can pick from the DNS server dropdowns with the same options we saw on the WAN page this includes using the ISP DNS, Google DNS, and inputting your own. Below that you set your reserved IP range which is where you can section off IPs that you don’t want the DCHP server to use. That area also has the Fixed IP List which is where you can input a client name, MAC address, and IP Address to always give a specific device the same IP. Then down at the bottom under advanced settings, you can change the DHCP lease times. The captive portal page lets you set up a click-through authentication or use a custom RADIUS server to authenticate before giving out IPs, which also lets you set up a redirect after login as well. The splash page works with that as well with a default welcome page and terms and conditions which you can edit for a basic splash page or you can input an external URL.

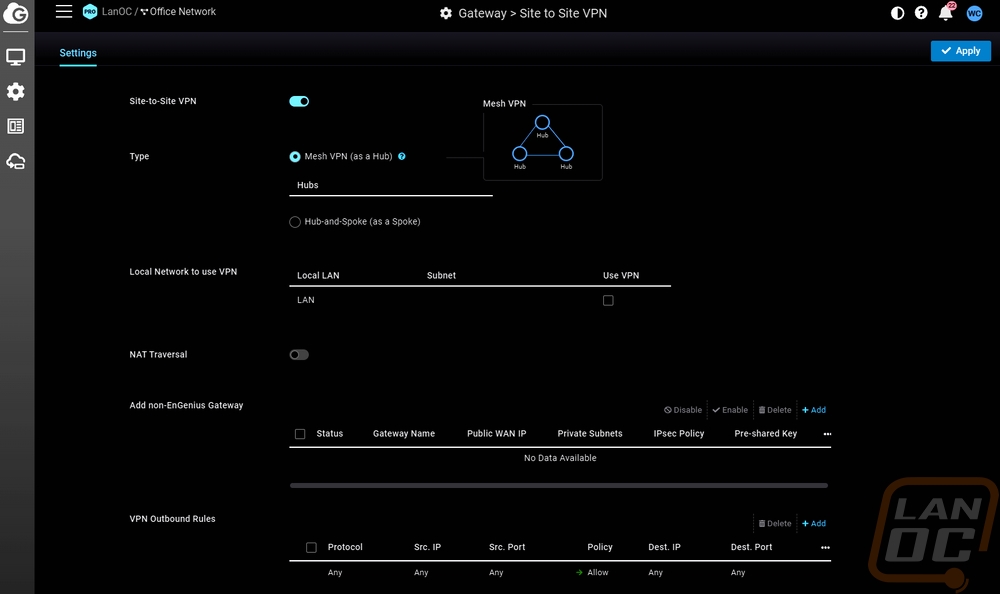
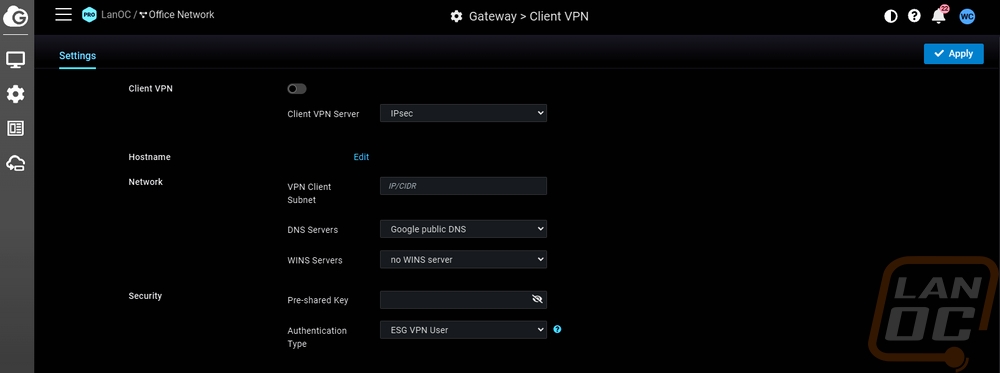
The Configure menu has two different VPN settings pages. The first is site-to-site VPN settings. This is where you can link together different offices and they have options to switch between a mesh VPN or a hub and spoke. With a mesh, EnGenius will link together the hubs where a hub and spoke configuration you specify the hub that the other offices are linking back to. You can add in a non-EnGenius gateway down at the bottom and you also have options to specify outbound rules, just like the firewall rules. The NAT Traversal setting lets you pick between automatic or manual with port forwarding but it should be noted that Automatic is a pro subscription-only feature. The second VPN page is the client VPN settings page. This is where you can set up the basis of your VPN settings to allow individual computers to VPN into the network and while there is a dropdown under client VPN Server the only option is IPsec. You can set the subnet for the VPN clients as well as the DNS servers.
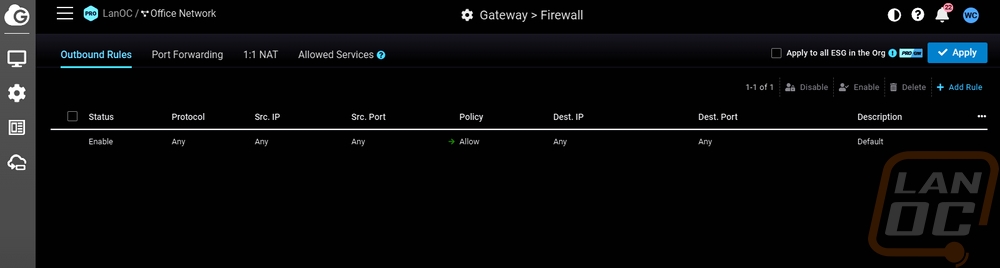
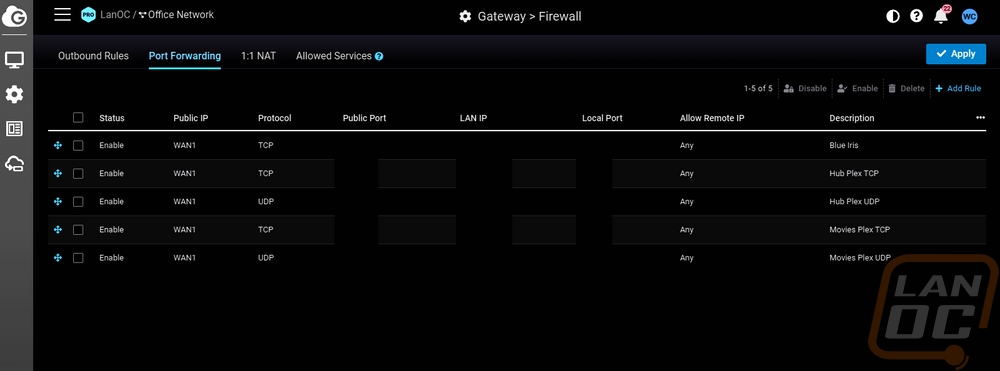
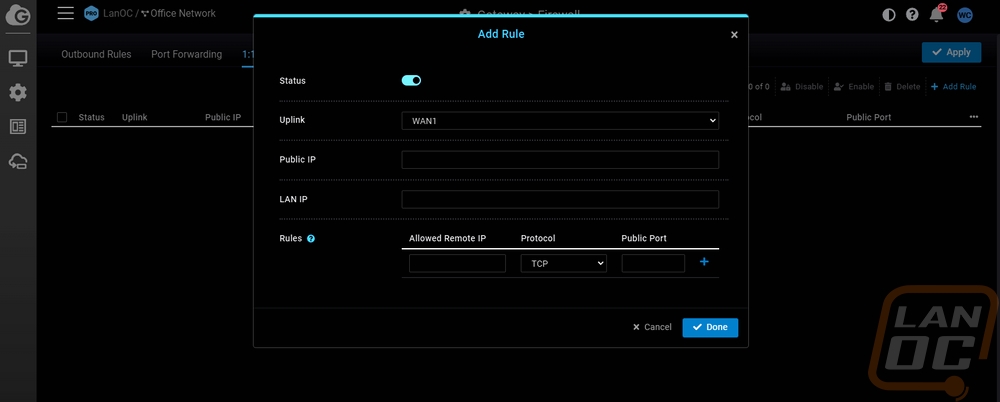
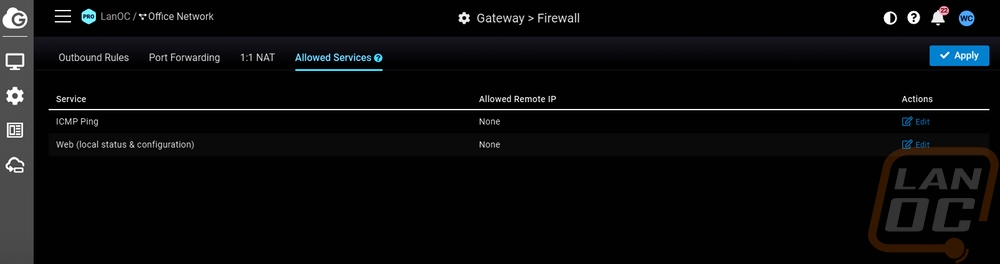
The last option in the configuration menu is a big one, it is the Firewall settings. This is broken down into four different pages with the tabs up top. You start out on the Outbound Rules page. This is where you can set up allow or deny policies to block specific IPs or Ports, by default there is an overall rule that allows anything but if you wanted you could flip that around and block everything and open things up individually if necessary. The second page most people are going to be familiar with, port forwarding. Here you can set up rules to help guide traffic in and out of your network for the software that needs it. For ours, there is port forwarding setup for a few Plex servers for example and our security camera server as well. I was surprised here that you have to make a rule for TCP and a second for UDP, there isn’t an option that covers both. The 1:1 Nat page is your demilitarized zone, this is where you can set specific IPs up to be outer facing. Then the last page is the Allowed Services page which is where you can allow specific IPs to ICMP ping and access the web service.
For performance testing, I’ve been using the ESG510 as our main gateway, and coming from PFSense there have been a few things to note. While it does offer great functionality when it comes to VPN, multiple internet connections including having a backup cellular connection, and solid firewall functionality. I do miss some functionality from PFSense, specifically the packaging/plugins which can expand functionality. I will especially miss pfBlockerNG. The ESG510 didn’t have any trouble with any of the web traffic I through at it but I did notice that when using the diag tools to track CPU usage and doing a speed test I was able to push the CPU usage up into the mid 90% range. Ram stayed down around 20% however. I didn’t experience any slowdowns when doing the speed test and I’m not really sure why it caused the CPU usage to ramp up like with web traffic. Our internet connection is 700 down and 35 up which shouldn’t really scratch the surface of what the ESG510 is capable of. DHCP was quick and had no issues beyond me inputting the wrong setting for one of the fixed IPs of our servers which didn’t show itself until later when a switch updated and cleared its ARP tables.