So over the past few years I have been lucky enough to cover nearly every new and interesting mechanical keyboard I could find. This includes various models with RGB backlighting, unique switches, and even an ergonomic model. That said there have still been a few mechanical keyboards that I haven’t been able to get my hands on, mostly because they are a little less mainstream. Well last last year I had the chance to talk with a fairly new group buy website called Massdrop, some of you may have heard of it. Massdrop really caught my eye because they do group buys on enthusiasts focused products. It just so happened there mechanical keyboard buyer has seen our coverage in the past and was excited to work with us. I don’t think there is a more fitting product to cover than the ErgoDox Ergonomic Mechanical Keyboard Kit. This is what helped establish Massdrop and it is also one of the most unique keyboards you can get.
Product Name: ErgoDox Ergonomic Mechanical Keyboard Kit
Review Sample Provided by: Massdrop
Written by: Wes
Pictures by: Wes
What is Massdrop all about?
Before I get into the review, I did want to step back a little and just tell you all what Massdrop is. This isn’t your traditional retailer. What they do is let users suggest products that they would like to get at a better price and then the community votes to see what would be the best out of those suggestions. Assuming there is enough of a response Massdrop then contacts the company and tries to work out a deal. The deals typically start off at a reasonable price and as more people buy into the deal the price can drop. Massdrop has grown from mostly being audio and mechanical keyboards and now they cover a wide variety of products. In some cases they have even used the communities feedback to design and sell completely new products!
I’m excited to work with them because frankly I have been on their website drooling over different drops for a long time as well. The idea of getting a chance to influence what will be sold at a discount is exciting and a little addicting. You will need to sign up for an account to be able to see what they have to offer, I know to some people this is frustrating, but it is worth it. When/If you do be sure to use our link as well to let them know where you came from. We don’t get any commission or anything like that, it is just to show who enjoyed our review.
|
Ergodox Specifications |
|
|
Key count |
76 |
|
Interface |
USB |
|
Compatibility |
Windows, Mac, Linux |
|
Case Material |
Acrylic |
|
Keyswitches available |
Cherry MX Clear Cherry MX Red |
|
Case color options |
Clear Silver Aluminum Red Aluminum |
|
Keycap options |
Black PBT DSA Black PBT DCS Clear plastic DCS |
|
Components included |
2 x PCB 10 x Acrylic case Plates 1 x Teensy USB Board, Version 2 1 x MCP23018 I/O expander 2 x 3.5mm TRRS connector 1 x USB mini B plug 1 x 0.1uF ceramic capacitor 76 x 1N4148W-7-F diode (surface-mount) 1 x 2.2k ohm resistor 3 x 3mm T1 LED 2 x 220 ohm resistor 76 x Cherry MX switch 2 x USB cable Male A to male mini B 1 x TRRS cable 14 x Case screws/nuts (16 for Full cases) |
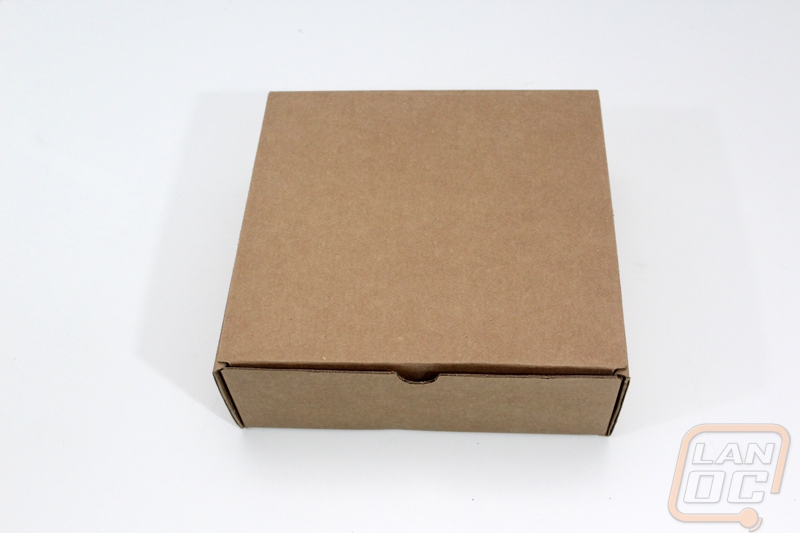
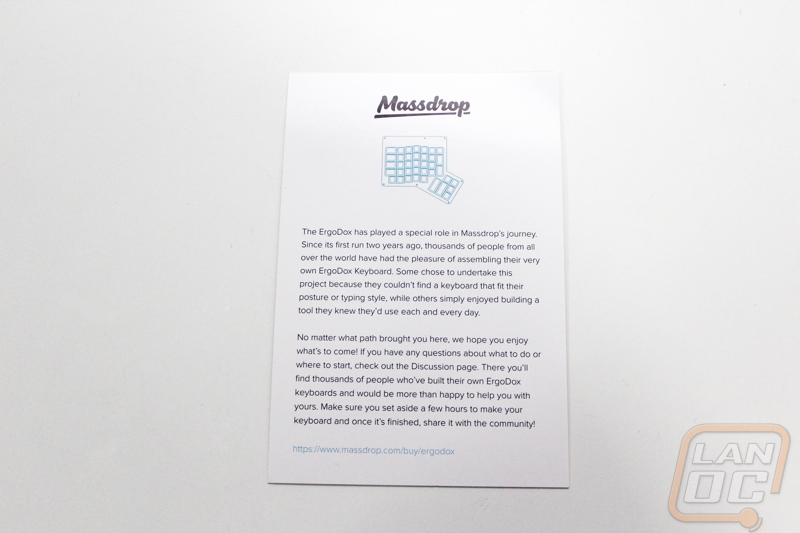
Packaging
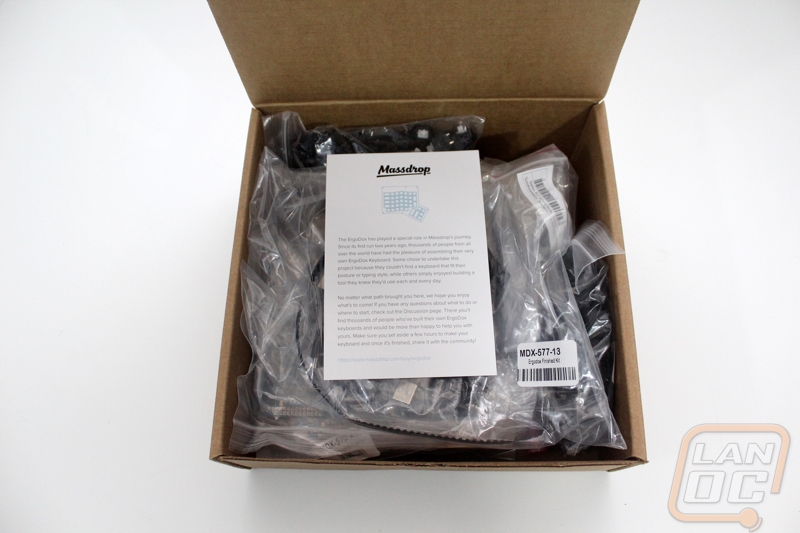
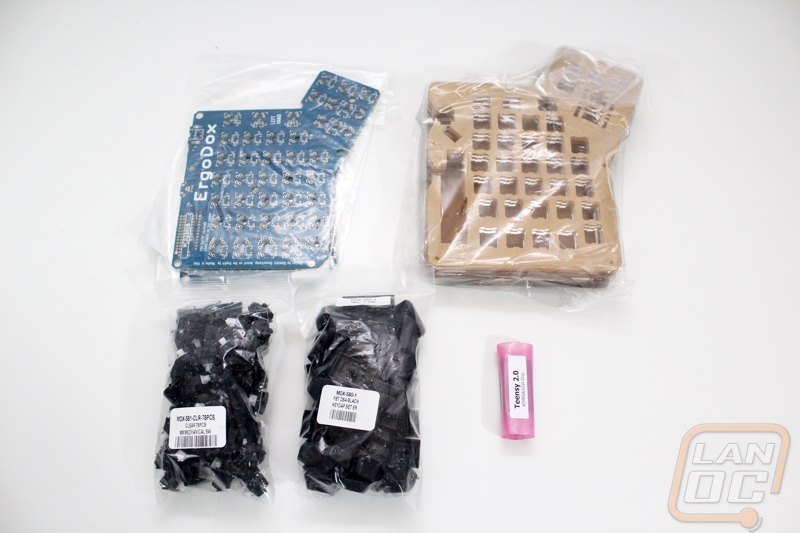
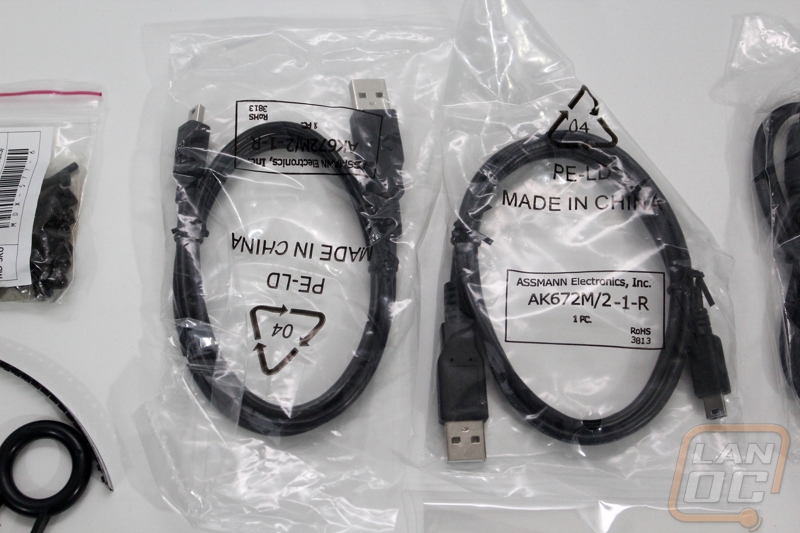
With this being a kit the box for the ErgoDox isn’t exactly huge but inside Massdrop has packed it full. Right on top is a nice card explaining that the ErgoDox played a special role in Massdrop’s journey. Under that card, almost everything else is wrapped up in various bags. All of the acrylic parts to the casing are covered in a protective film then stacked up together in a bag. The two PCBs are in their own bag just like the clear Cherry MX switches and the black PBT keycaps. What really stood out to me is that when you order an ErgoDox you have to select your preferred keyswitch, keycap, and even select if you want an aluminum cover on the casing. Each of those things has to be hand packed into this box for each order, they can’t really just have a UPS for each variation.
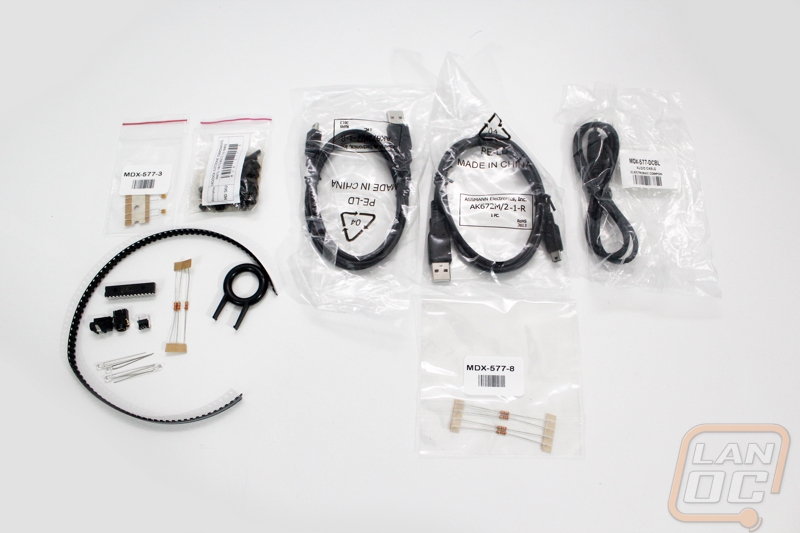
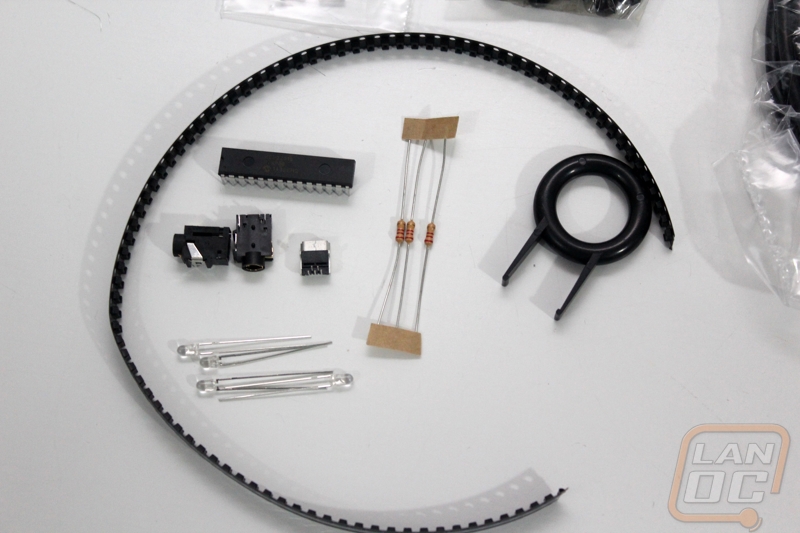
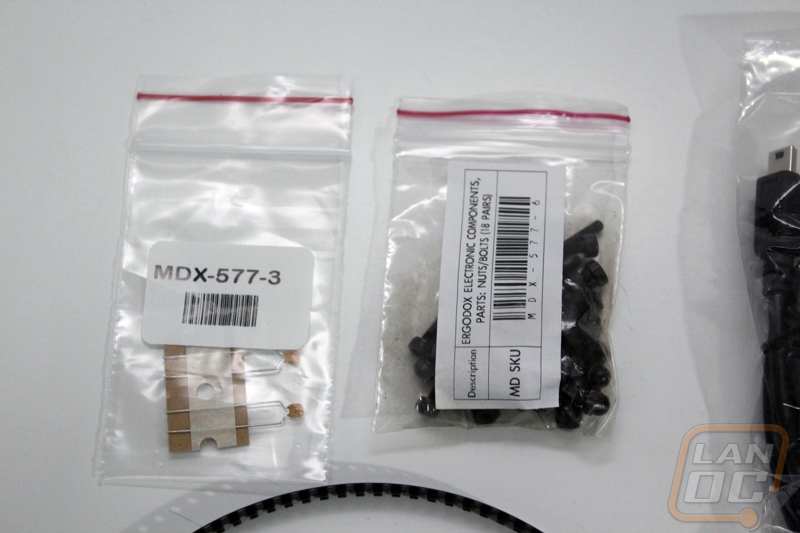
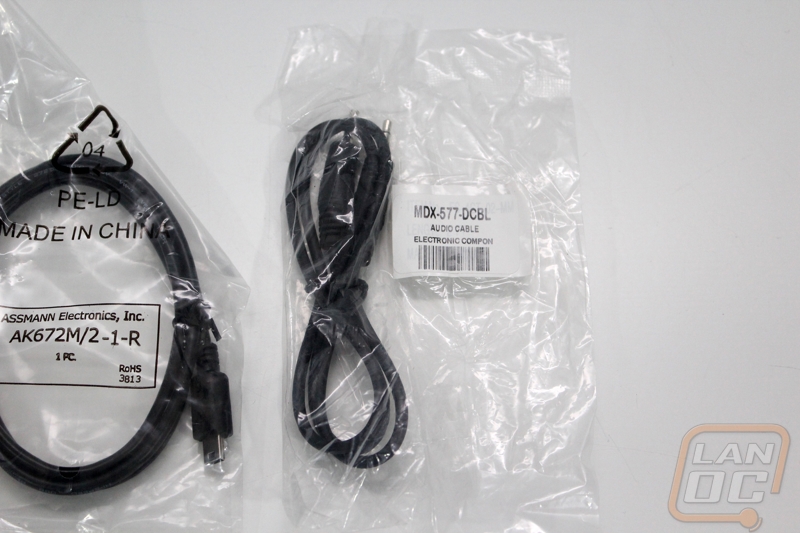
The rest of the components come bundled up together in one last bag. This bag includes your USB cords and TRRS cable. You also get a keycap puller, the case bolts, and all of the resistors, diodes, LEDs, and connectors needed to build out your PCBs. Pulling everything out can be a little intimidating unless you are very comfortable with electrical work but take a deep breath I will dig into all of that in the next section.
Building your Ergodox
As you might have figured out from the packaging photos or even “Kit” in the product name the ErgoDox comes in pieces and you have to put it together. You are going to need a short list of things in addition to the kit itself to be able to get it all together. Here is a short breakdown:
Soldering Iron with a flat tip
.032 Solder
An area or surface to work in
Wire cutters
Diagonal cutters
Tweezers
Time
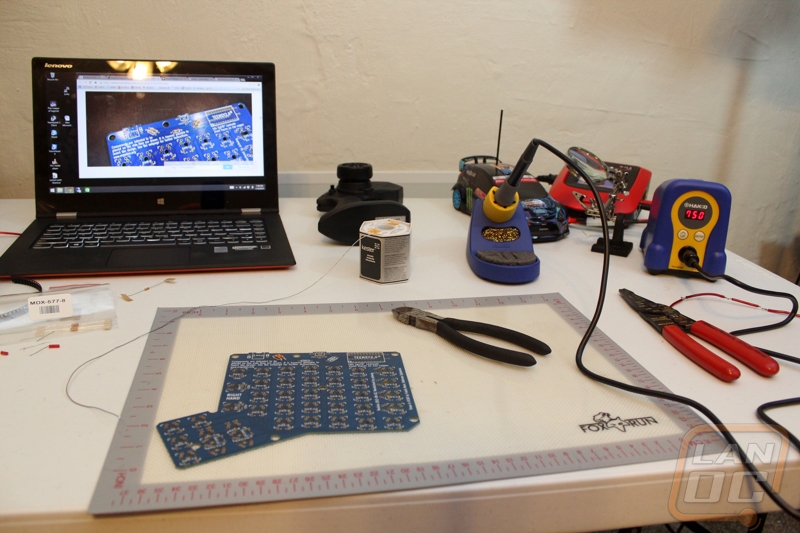
Before I got started on this build I had to go out and replace my old soldering iron because it was dead. I went with a temperature controlled Hakko Digital FX888D but you could go with something cheaper as well. For solder I went with Kester 44 Rosin Core Solder 60/40 .031, I picked up a full spool because I couldn’t find anything on how much I should expect to use but looking back you could go with one of their small kits and save money. To prevent any damage to my table when soldering I picked up a silicone baking mat for cheap on Amazon to work on. Once I had everything I needed to get started I spent a little time practicing my soldering and also reading both Massdrops instructions and also an additional set of notes over at studioidefix. To give you an idea of my soldering experience, I used to solder a lot when I was younger and raced RC cars and again later when I spent a lot of time working on cars as well but I haven’t soldered anything at all in at least 8 years. Because of that I was careful to watch a few videos on YouTube and also practiced soldering before getting started on the ErgoDox.
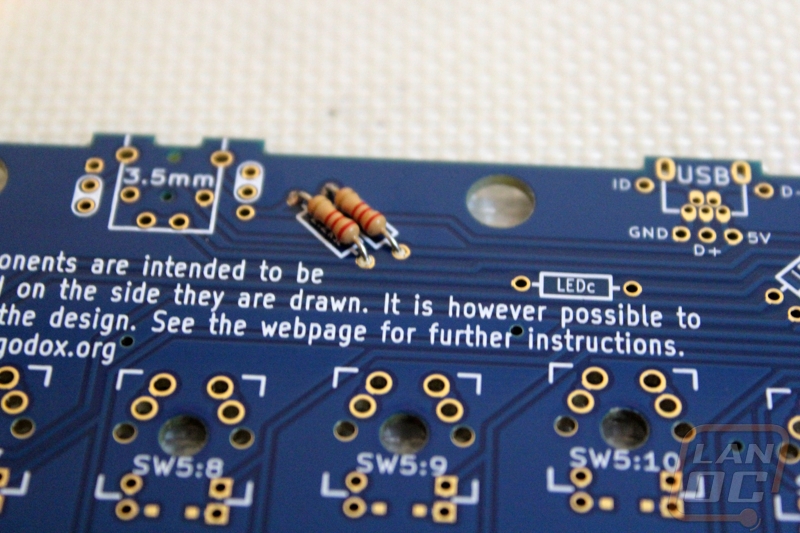
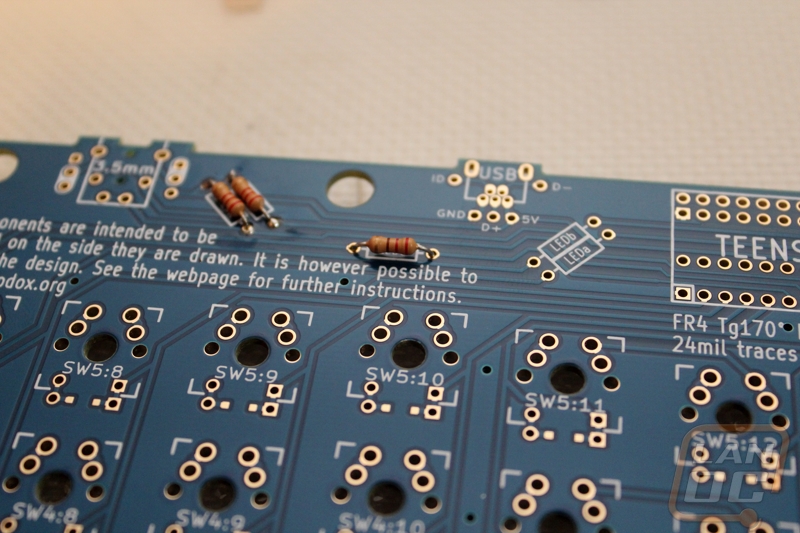
While officially Massdrops instructions start you off with the diode installation. I started by installing the resistors first to get a little more comfortable with things knowing that the diode installation was by far the hardest art of the build. They make things easy to figure out though. Both PCBs are the same but when you flip one over to be the second hand you will see they did a great job with highlighting what you need to do for each hand right on the PCB. For example on the resisters they put boxes around the mounting locations with labels inside on the right hand side and the left hand side has nothing.
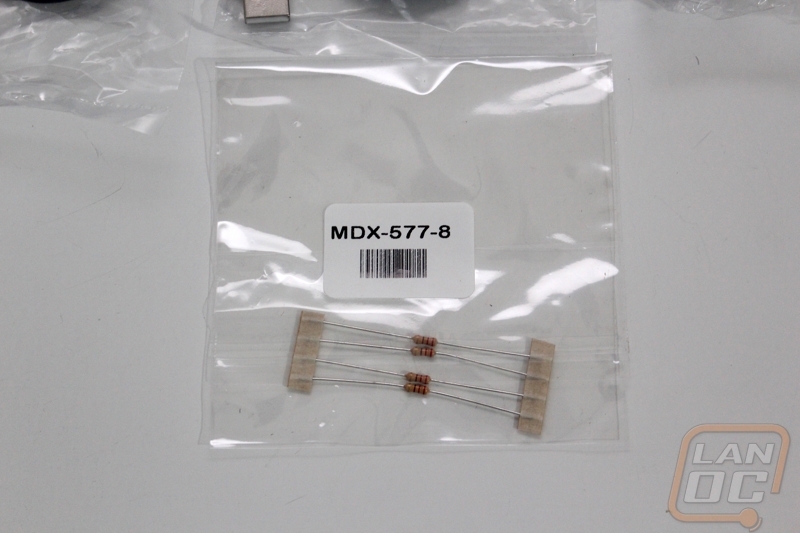
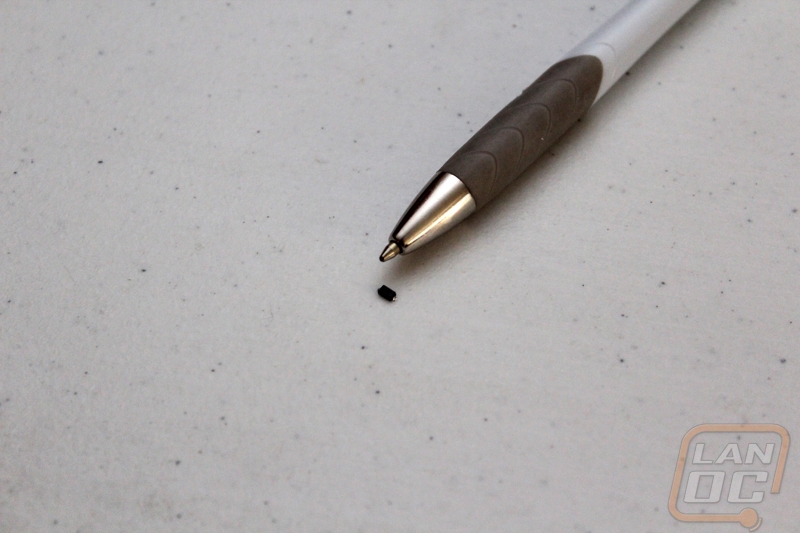
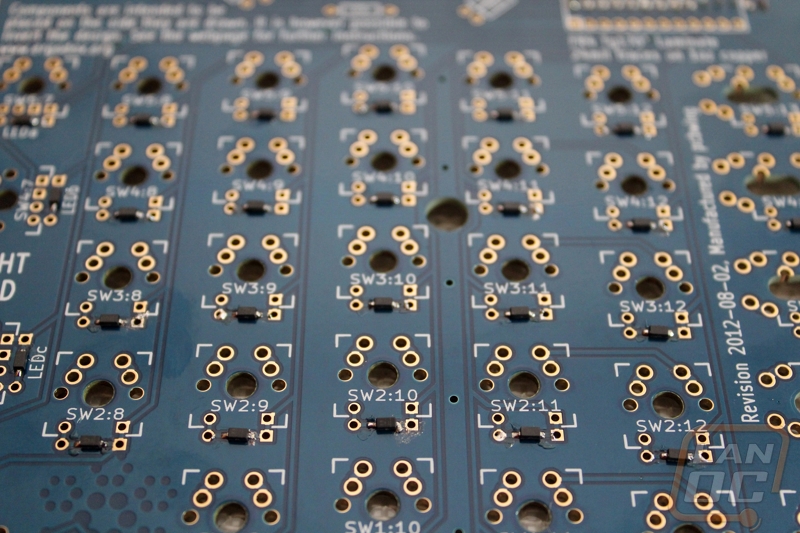
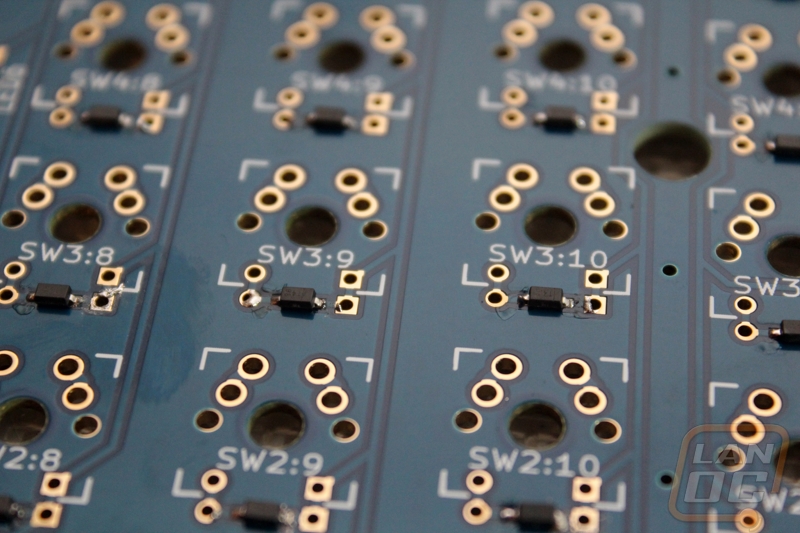
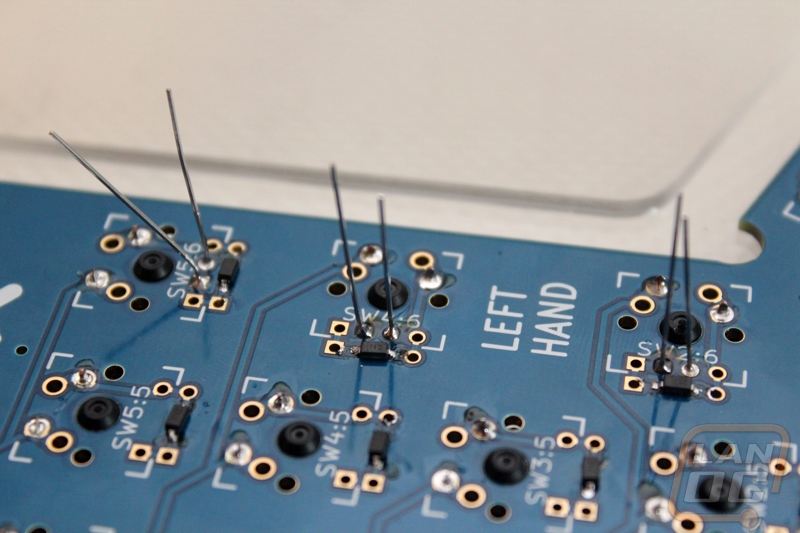
Once I was comfortable I started in on the diodes. As I mentioned before this is BY FAR the hardest part of building the ErgoDox. This is because the diodes are ungodly tiny and they are surface mount. Even going into the build having seen the build photos on the Massdrop website and YouTube video of a build I was shocked at how small the diodes are, I took a picture that really shows their size. They are the size of the tip of my pen. To make things even harder there is a polarity so you have to look for a line etched on the top and put that side on the side of the switch PCB with a square. The best way to do this is to tin that side first, find the polarity, put the diode down lined up, then solder that side first. Once you have that side down you can come back and solder the other side.
Due to their size, the first whole PCB that you do will take a while but the second one will go very quickly once you have the hang of it. Sadly for me I messed up bad on my first PCB. When I originally read the instructions, I thought they wanted the line side to be on the square pad and in this case one of the pads looked square and the other had one side slightly rounded. When I moved on to my second hand I figured out that they wanted it to be on the side with the square with a hole in it. So I ended up having to go back and remove every diode and flip them all over. If you think putting the diodes on is hard, putting them BACK on it even harder because you have solder on both sides. I did manage to get it all put back together but my resoldered joints didn’t look half as good as my second PCB.
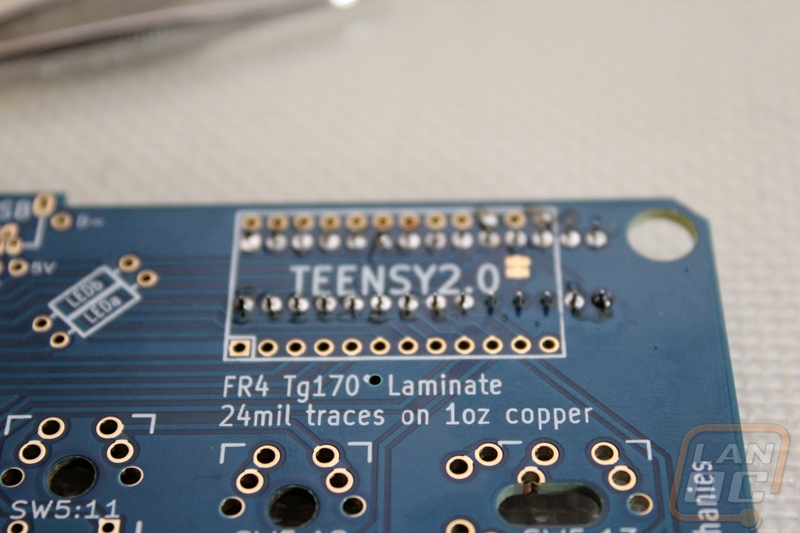
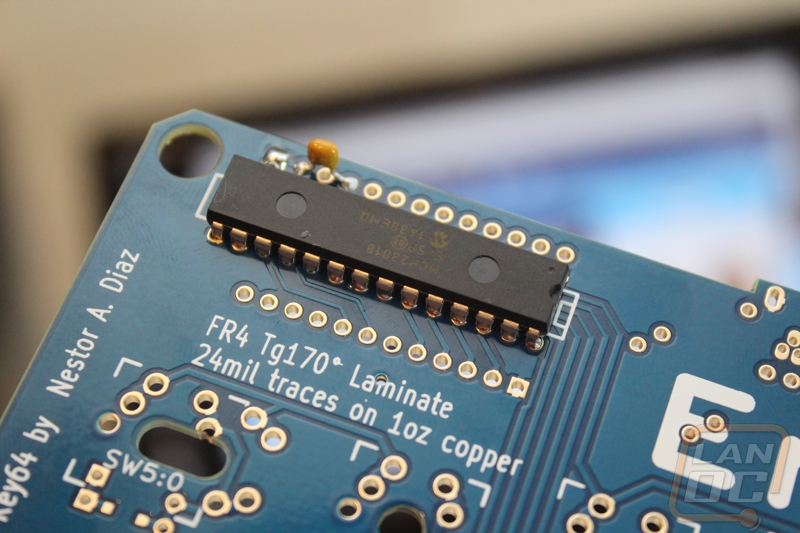
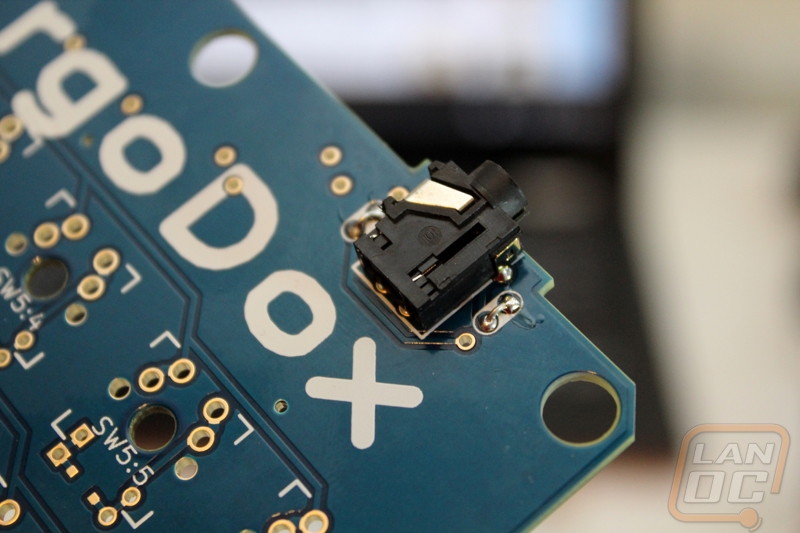
Once the diodes were finished everything else started to come together a lot quicker. You have to solder down the I/O expander as well as the capacitor to clean up the signal. Both boards need their TRRS connectors installed as well. This is just a small headphone jack that communicates between the two halves. Then on the right hand you solder on the Teensy V2 USB board that will run our firmware. Before doing that I did save myself a little trouble and I plugged it into my PC and used Massdrop’s instructions to flash the firmware.
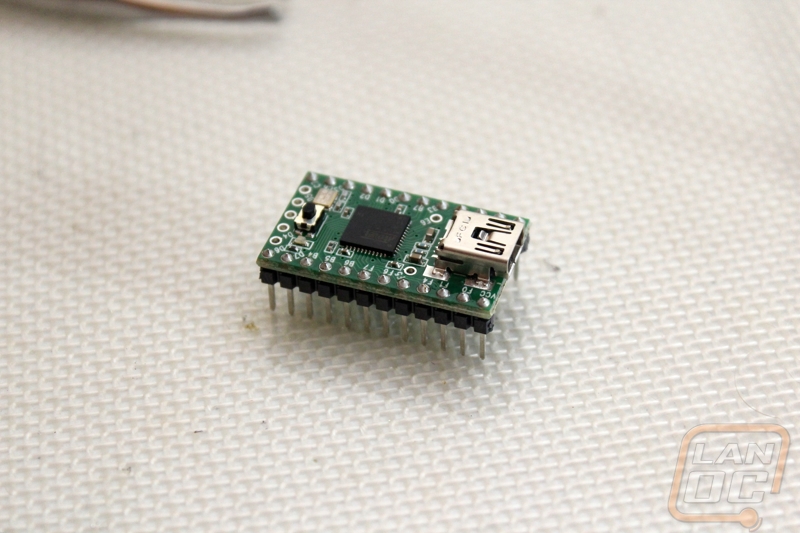
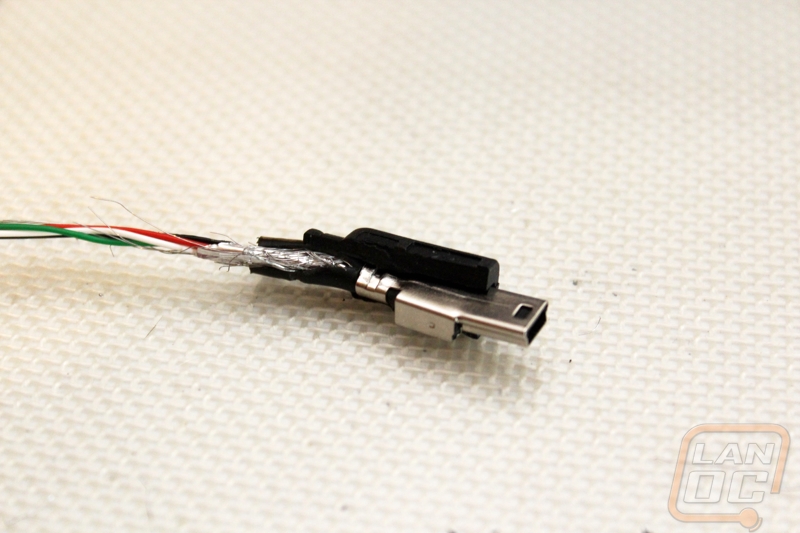
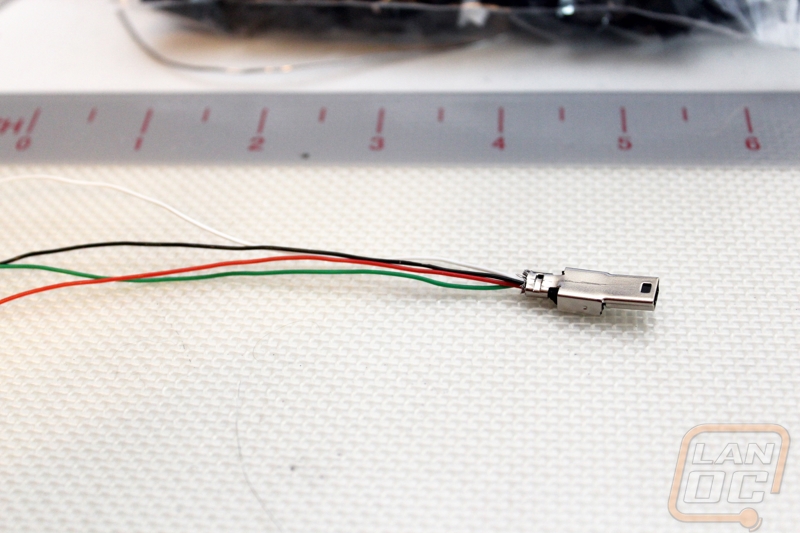
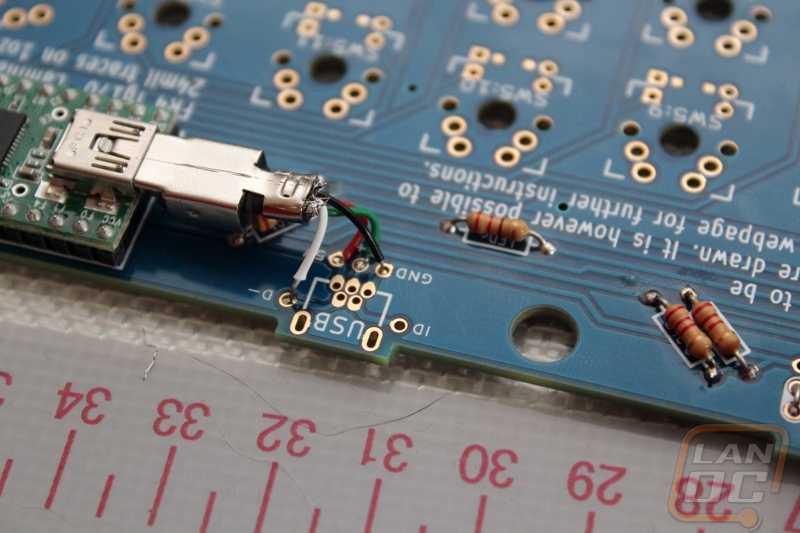
Once you have the Teensy installed you have to cut and rip apart one of the two USB cables that is included with the ErgoDox. This seems a little weird but the USB connection on the Teensy doesn’t face out so we need to run the USB onto the PCB and then install our actual USB plug. Massdrop suggests that you use a Dremel to get the thick casing off of the USB connection but I managed it with a box cutter. Once you get it apart, you have to cut the leads down a little more and strip them. Then you solder them in the four labeled holes around the USB connection on the PCB. Be sure to give yourself a little extra room just in case you mess things up, if not you will have to get a second cord to cut up and start over again. From there you install the USB mini B plug. Be sure to give extra solder on the side mounting points to give it a little extra security.
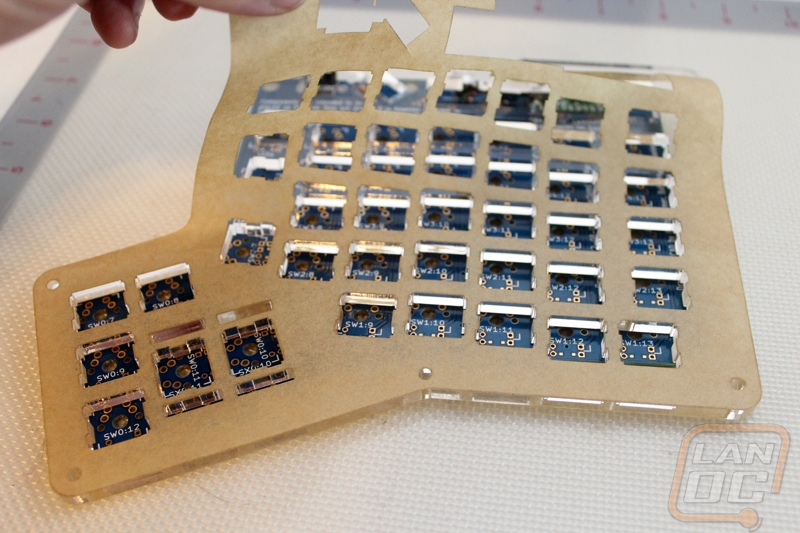
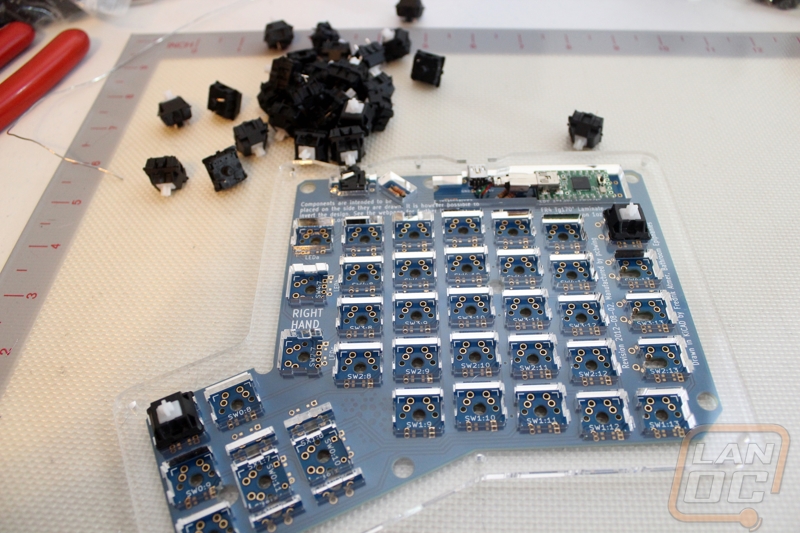
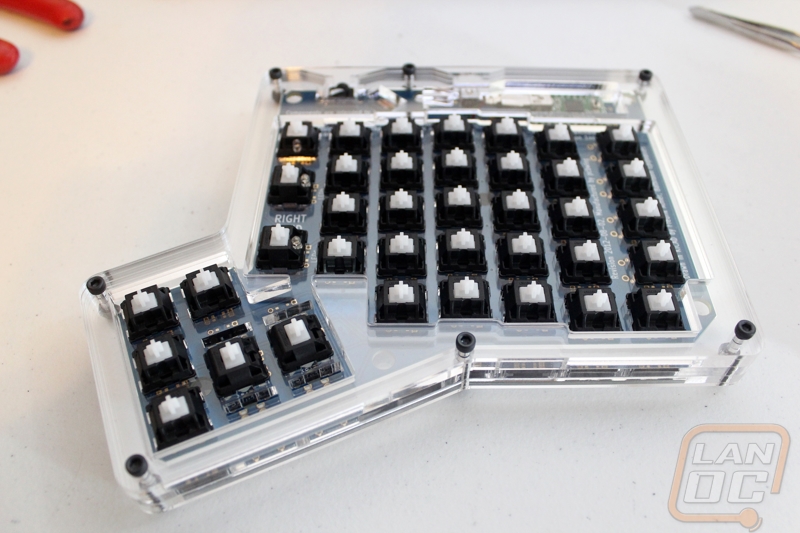
Next you need to dig out the 3rd layer of acrylic for each side, the switches mount to the plate and the PCB at the same time. You will have to pull the protective coating off as well. Here you want to start by doing two switches with one on each end. Getting two in properly will keep everything together tight for you to do the rest. Basically the switches just push in but make sure the pins on the back aren’t bent, I had a few. I installed all of the switches on the left hand and all but the three LED switches on the right hand then flipped things over and soldered the two pins of each switch. This has to be the best part about the build because for the first time everything is starting to come together.
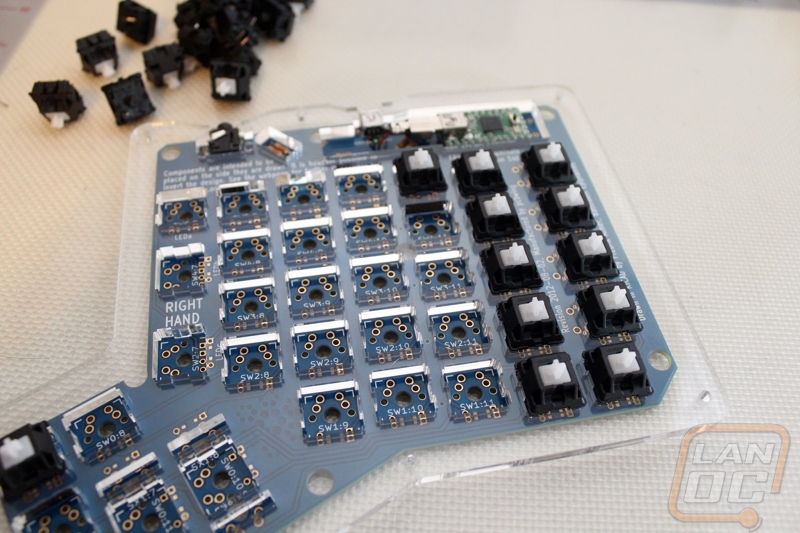
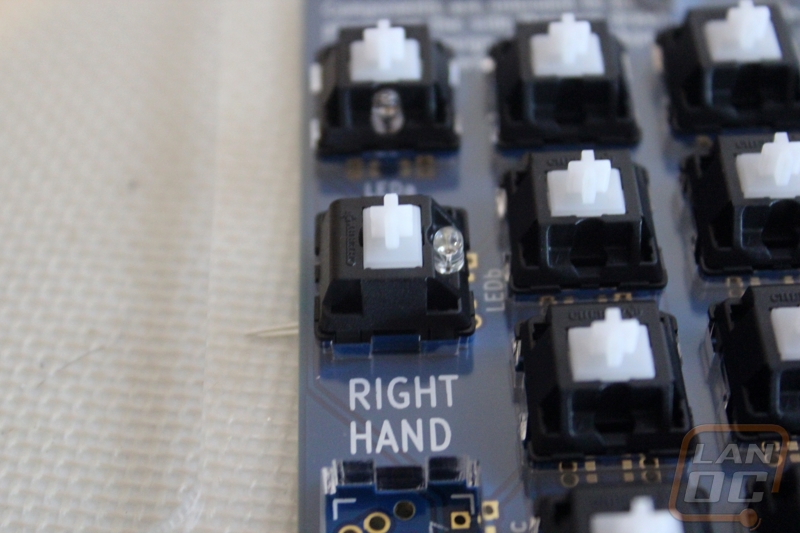
The three LED switches install the same as the others but you have to also slide the LEDs into the LED slot on the switch making sure to take into account the polarity of the LED as well (the longer lead is the positive side). When installing these you have to pull on the LED as you are soldering it to get it pulled tight.
With everything together, before I put the casing together I hooked both PCBs up and went through and confirmed that every switch worked. I found 3 that had problems when testing, noted their locations and went back over and took a closer look at them. Not surprisingly on the side that I had to redo all of the diodes a few of the diodes didn’t have a good connection. I went back through them and then confirmed it was all fixed. From here I just had to pull all of the protective paper off of the acrylic and stack everything together. Massdrop includes the 6 nuts and bolts needed for each PCB. I should also note that they do provide a few extras of everything including a couple extra switches just in case you run into problems. So once I had the ErgoDox together I put together a small bag of extra backup parts. All in all I spent about 2 and a half or three hours building everything but far too much of that was spent redoing my work over. If I build a second one I think it would take an hour to an hour and a half.
Photos and Features
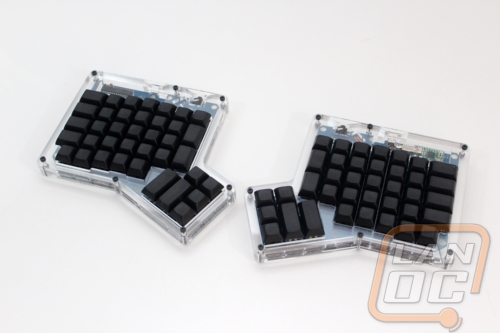
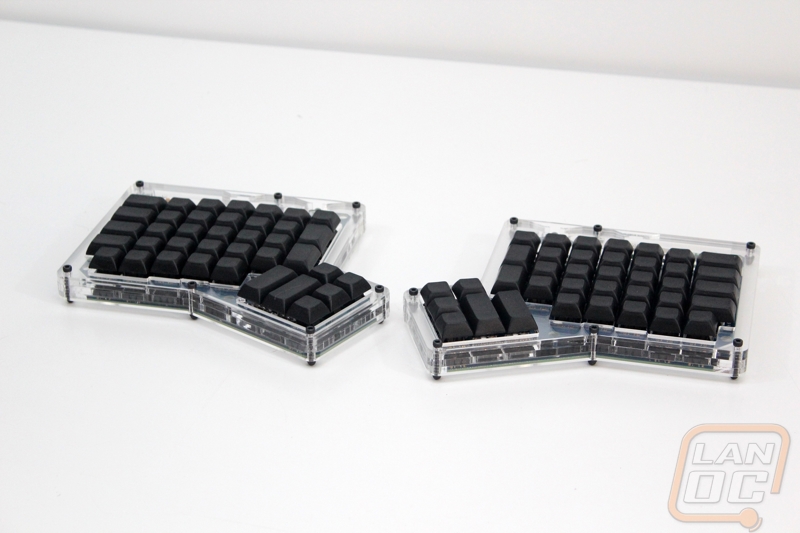
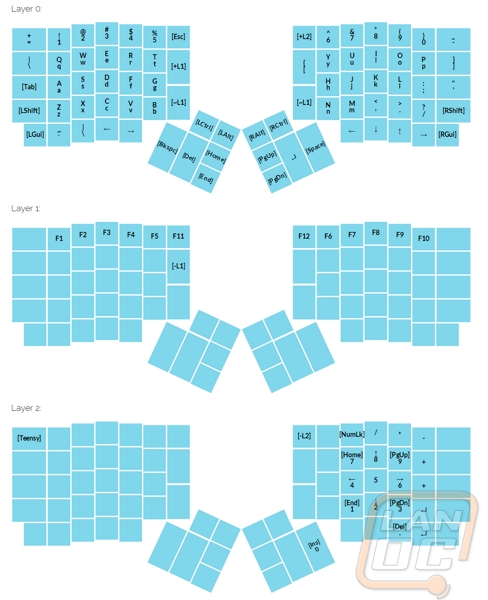
Now that we have the ErgoDox together we can check out the keyboard and see what makes it so special. The most obvious thing you are going to notice is that everything is split up into two pieces and there is basically no resemblance of a standard keyboard. The whole idea behind this madness is to follow the same idea that the old ergonomic keyboards from Microsoft and Logitech but to go a little farther. Where on a standard keyboard the keys are aligned in a row from left to right and then each row is offset slightly so they aren’t over top of each other. The ErgoDox has its rows vertically and then the horizontal rows are arranged in the same what that your fingers sit when you rest your hand. It is an arch shape and when you are using your standard keyboard you actually compensate for this.
They also put all of the keys that you typically move your hands to reach down under your thumb to make your hand movements more efficient. With this in mind, assuming you learn to type on the new layout as effectively as you do on a standard keyboard you should type faster. Then on top of that they split it all up so you can position your arms at whatever width and angle that makes you most comfortable. My wife for example is much smaller than me and she would most likely find it more comfortable to keep the two keyboards close together where due to my additional width it might help me to pull them apart slightly.
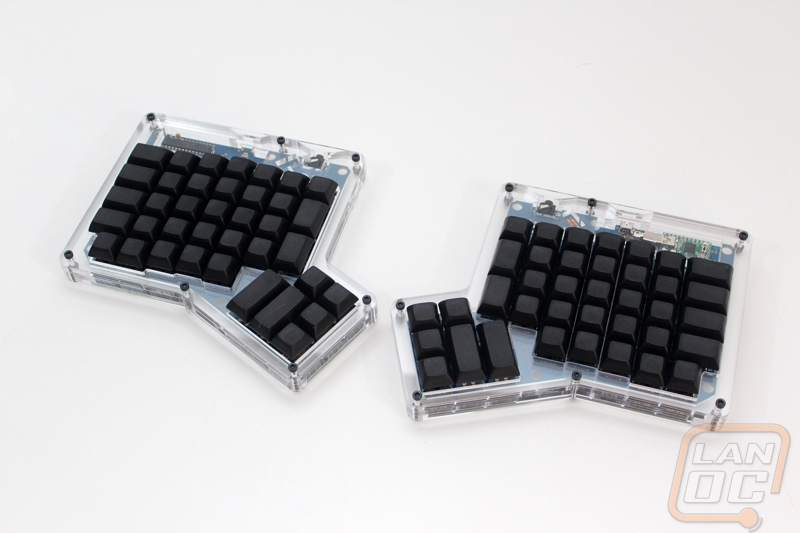
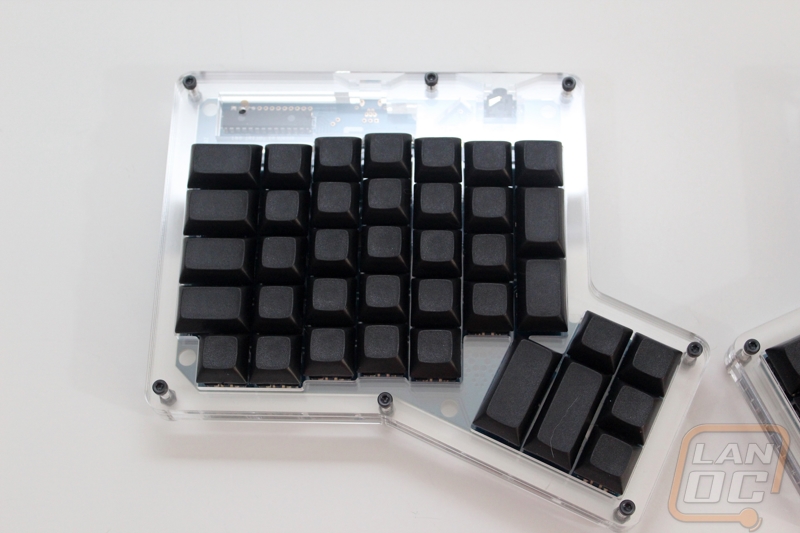
So the key layout is obviously not going to be familiar to anyone used to a traditional keyboard. For starters all of the keycaps are blank because you can upload any key layout you would like. Printing letters or having double shots made would make that customization impossible. I already spoke about the actual key layout but the one thing I didn’t talk about was the use of three different keycap widths. Of the 38 keys on one ErgoDox hand, thirty of them are the standard keycap width (1u). The design does however have a few special longer keys. On the left, you have four 1.5u keys as well as two vertical 1.5u keys over on the right. What is really unique about the ErgoDox is the thumb area. Here you have two 2u keycaps. Sadly, the design for these doesn’t include a stabilizer, on a standard keyboard a 2u would have a stabilizer to keep the key from binding up, hopefully we don’t have that issue.
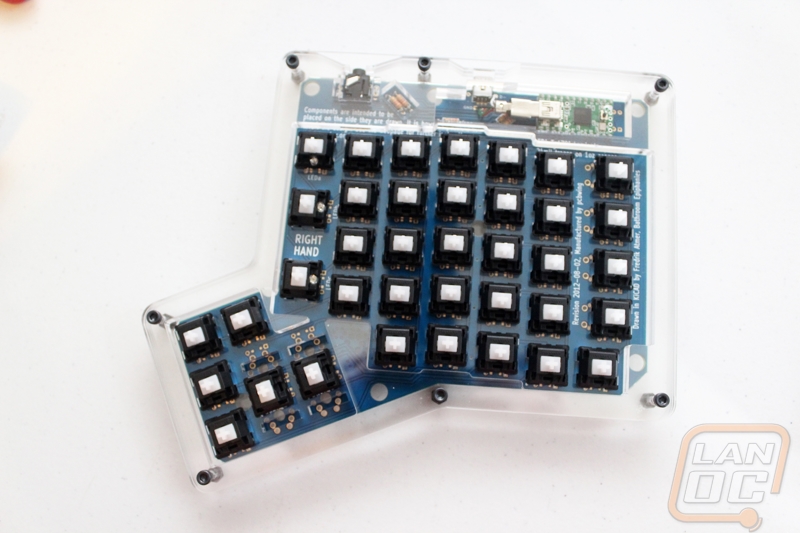
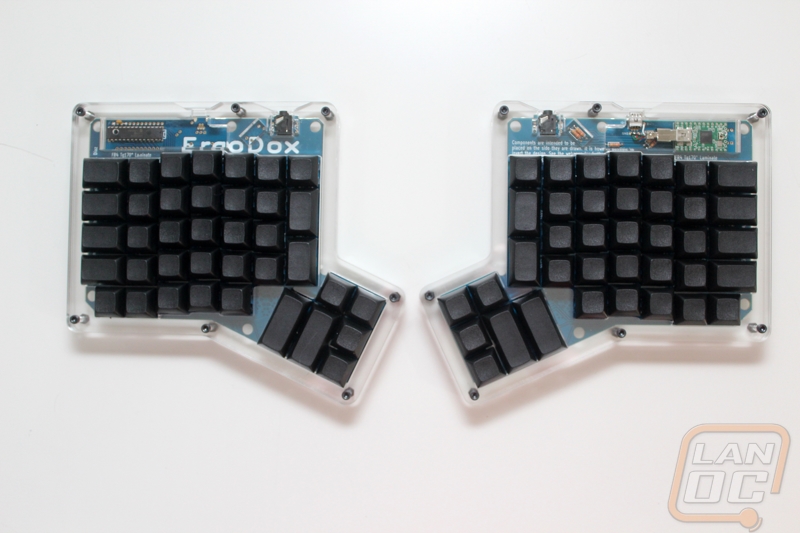
Here we have a nice view through the acrylic casing to see what is going on underneath. I love that from the top we can see the ErgoDox logo printed onto the PCB on the left hand. On the right hand we also have a good look at the Teensy v2 controller. You can’t see it in this photo but Massdrop also designed a small hole in the top panel. This small hole lines up with the Teensy and lets you poke through and hit the rest button. This is important if you are flashing a new firmware or key layout file. Not having to pull everything apart might not seem like much but is a huge time saving feature that was added to the design after feedback.
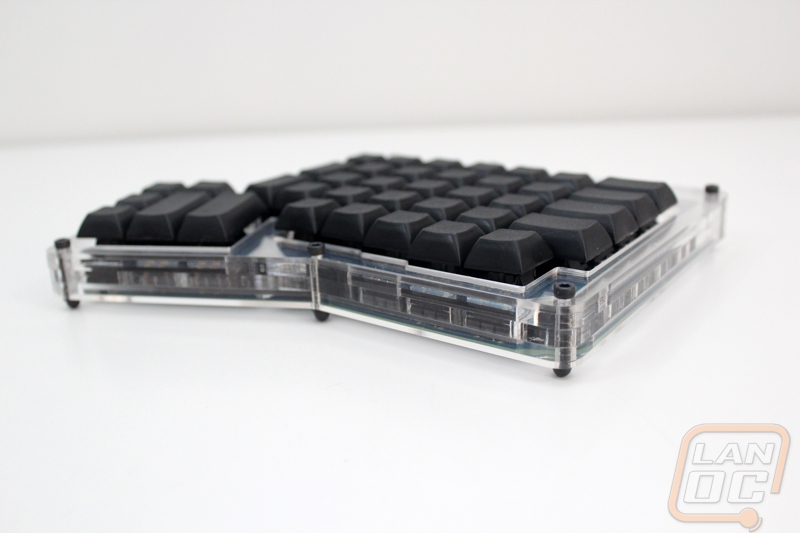
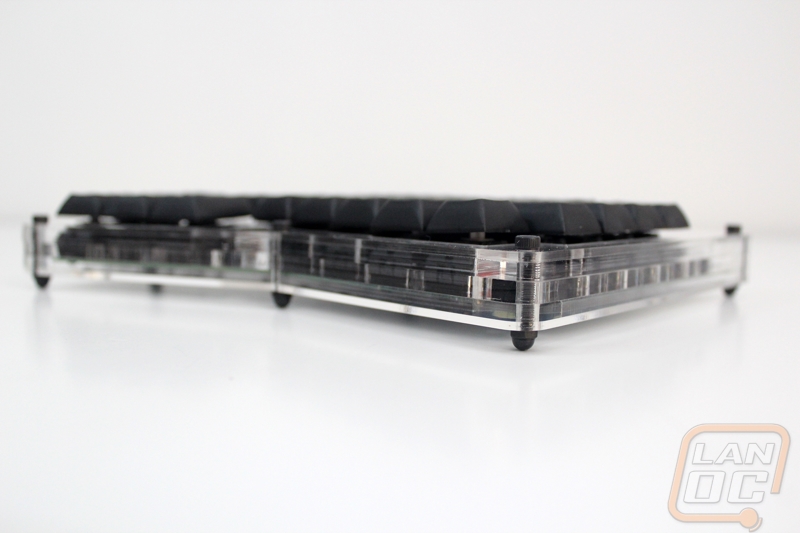
Here is a look at the side profile of the ErgoDox. With our DSA PBT keycaps, the key profile is perfectly flat. The total height of the keyboard from the base layer to the top of the keycaps is exactly one inch, but there is a little under a ¼ inch of space under the ErgoDox as well making it a little taller. In these photos, the keycaps are actually a little gapped from the casing, but I later found out that I had to push down on them a little hard to get them to slide into place. I should point out that that I didn’t have this issue in the past with standard keyboards, but that is most likely related to the variances in key switches than anything else. With the caps pushed down properly, there isn’t a gap between the casing and the keycap.
I mentioned it when we took a look at the top of the ErgoDox, but when you flip them over you can really get a good view of just how good or bad of a job you did putting everything together. This is one of the great things about a full acrylic casing, getting to check out the electronics inside. Sadly, all you really get to see is your soldering job as well as all of the surface mounted diodes. For me this is a reminder that I messed up and had to flip the polarity on the one set, the resoldered diodes don’t look as clean as the others. On the bottom, we can also finally see what actually touches your desk as well. Originally I was a little worried about the acrylic being scratched up but Massdrop includes nice acorn nuts for each of the bolts that hold the casing together. So the nuts double as your feet. This does mean that you don’t have any rubber feet though.

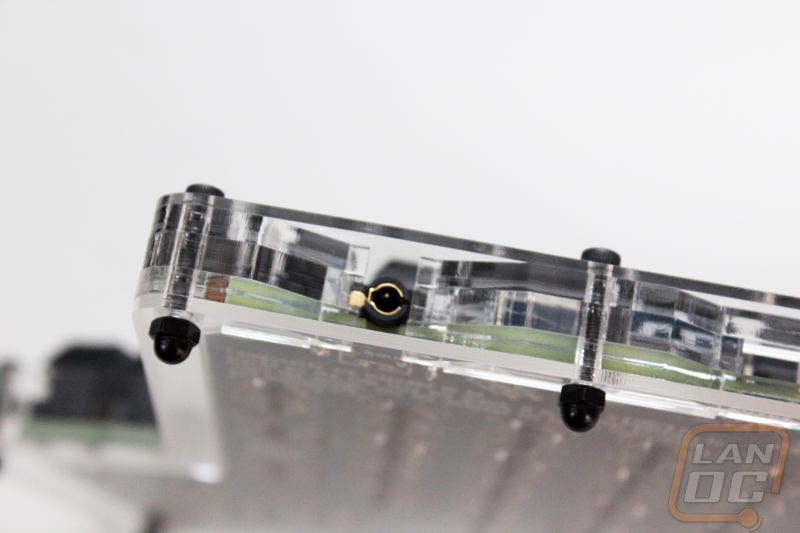
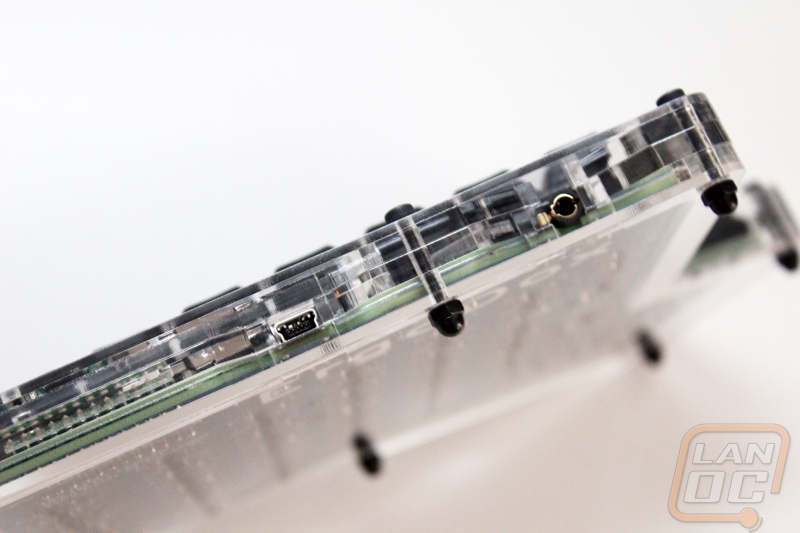
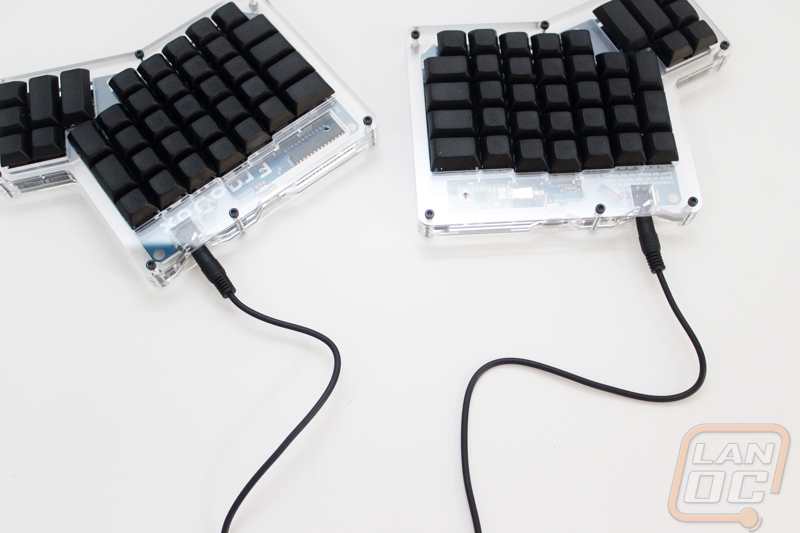
All together, the ErgoDox has three connections you have to worry about. Both halves have a TRRS connection. This is your standard audio jack, but with four poles. The ErgoDox uses this to talk between the keyboards. Not only do you pick up key presses from the left hand over the wire, but it also allows you to do things like using a shift key with your right hand to capitalize letters on your left hand. You do get a cable with the ErgoDox for this, it is just over two feet long. If for some reason you plan on having the two halves farther apart you will need another cable. The third cable connection is the Mini-USB connection on the right half. This is where you are hooking everything up to your PC. The cable that comes with the Massdrop kit is 3 feet and 3 inches long, this is half the length of a standard keyboard cable, unless you have a USB hub or your PC on your desk this could be a big issue. Thankfully it is a standard cable, if you have a PlayStation 3 you most likely have a cable.
Performance
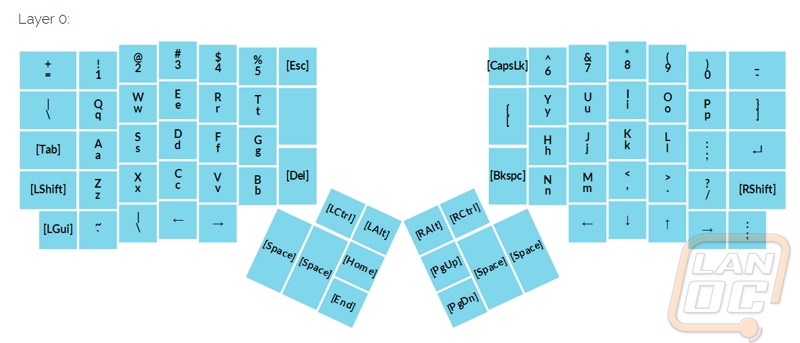
So now that you have an idea of what the ErgoDox is all about. I’m sure you are curious how it worked out. Well when I first hooked u the ErgoDox the best way I could describe using it would be like having a blindfold on in a room that you have never been in. Even with a standard keyboard I struggle a little with blank keycaps, so trying to adjust to a completely new design with blank keycaps was especially difficult. Well one of the reasons you have blank keycaps is because there isn’t any one specific key layout that everyone uses. I started off using the standard QWERTY layout using Massdrops tool. This is close enough to a standard keyboard layout that if you can get your hands in the right place you will at least know where all of the letters are. Adjusting to the thumb mounted keys took a little more trouble.
Here is a photo of Massdrop’s layout
To help me I pulled a good portion of the keycaps off the ErgoDox and I pulled the Skull Squadron keycaps off of my Novatouch and started putting them on the ErgoDox where I could. I used this specific set because it is also a DSA keycap just like the blank keycaps. Most of the 1.5u and 2u keys didn’t have matching keys so for those I kept the blanks. Adding a way to visually look at the ErgoDox and see that I have my hands in the right place made a HUGE difference. I went from hardly being able to type to instantly being able to carry on a conversation with people.
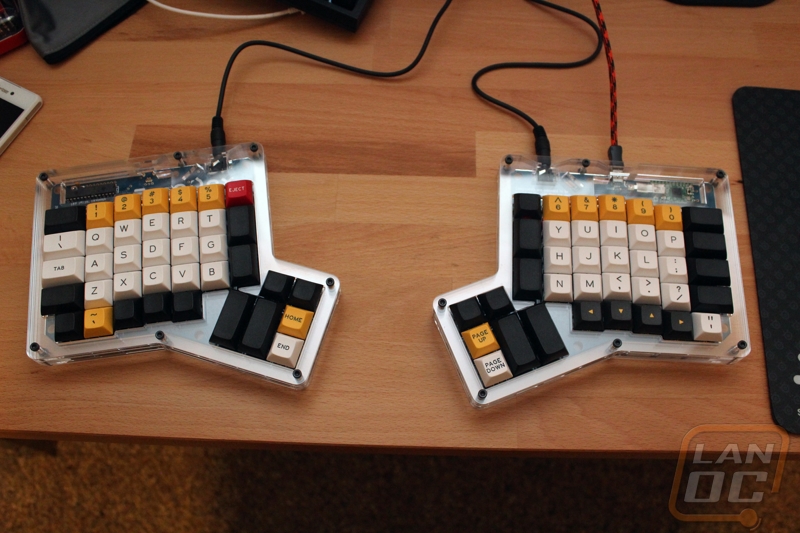
From here I just had a few issues where I would hit backspace or delete when I wanted to space or enter and I would hit enter a lot when I wanted to space. I decided to change things up slightly and tune the key layout to something that worked a little better for me. For starters the multiple layers was completely throwing me off so my goal was to drop the layers and then move a few of the other keys around to where they felt more comfortable. Ironically I know that by moving a few of these things around I ended up losing some of the efficiency of the ErgoDox’s layout because I moved them into locations closer to what they would be on a standard keyboard. That said this is the layout that worked best for me. I’ve included a photo below and HERE is a copy of the actual .hex file as well if you want to give it a try.
Once I finally got the key layout setup in a way that I could function like a normal person I could finally step back a little and see how everything was performing. I did run into a few issues. For starters the USB cord wasn’t even close to being long enough for standard use. When setting things up I hooked it up to my desktop USB hub but even then it wasn’t long enough. I swapped to a 6 foot long cord and didn’t have any other issues with the length. Secondly I mentioned earlier that the feet of the ErgoDox are actually the acorn nuts. This does a good job of keeping the ErgoDox up off of your desk but without a few rubber feat it does slide around a little. I’m going to look for a few small stick on feet to fix this issue in the future. It should be an easy fix just like the USB cord. The third issue I had is a little more difficult. When I use the 2u keys down near my thumbs they do sometimes bind up a little due to the lack of stabilizers. As long as you get a good centered push on the key this isn’t an issue. If you swap these to 1.5u keycaps you don’t really run into the issue as well.
On the good side of things, once I adjusted to the layout the ErgoDox is great to type on. The clear switches that I went with are nice a tactile without being obnoxiously loud like a blue switch. Being able to move each half of the keyboard individually I could really get them positioned perfectly for my body type. After typing for hours my shoulders felt a little better, with a standard layout I tend to hunch over slightly to get my arms together a little more to get my hands in the right places. Up to this review I didn’t have enough time to adjust to the ErgoDox enough to be able to fully get back up to my normal typing speed but once I had made my adjustments I was up close enough to be more than functional.
Comparing the ErgoDox to the Truly Ergonomic Mechanical Keyboard that I covered a few years ago I do prefer having the option to be able to pull the halves apart farther. Adjusting to the new layout took a similar amount of time with the exception that the Truly Ergonomic did have keycaps printed with all of the extra keys that I didn’t have on the ErgoDox making it a little easier to find rarely used keys when I needed them.
Overall and Final Verdict
When the ErgoDox came in, I was a little nervous. Not only did I have to put everything together without it blowing up but also I knew from previous experiences that adjusting to a key layout like this doesn’t happen overnight. Looking back over the whole experience, I have really enjoyed it all. I thought that building the ErgoDox would just be a means to using the keyboard but in the end putting it all together was a fun experience in itself. Not to mention there is a little pride when you get it all working and when you can show off your hard work. Looking forward I’m actually seriously considering looking at other custom keyboard options, I’ve always wanted to try out a 60% keyboard for example. Massdrop has an interesting build called the Infinity Keyboard that is especially interesting.
Using the ErgoDox did have a few issues. The lack of stabilizers on the 2u keys required that I be a little more careful to not bind them up. The lack of rubber feet and the short USB cable that Massdrop included were also disappointing. Both show that the kit could still use a little more refining, but both are easy fixes as well. Let’s not forget just how much of a pain those tiny diodes were to install as well. Massdrop could really make things easier with an optional PCB that includes pre-installed diodes, although I think I would personally still take on the challenge of installing them myself, especially now that I have a little more experience with them. The other issue that you will run into with the ErgoDox is just how long it takes to relearn. I was able to speed things up for myself by putting custom keycaps on and by tweaking the key layout to something to work better for me though.
With everything together, I think it is the customization that really sets the ErgoDox apart the most. Using Massdrop’s tool you can setup as many layers as you need to get the ideal setup for yourself. If you wanted, you could create a layer specific to any game or software that you might run frequently for example. The ergonomic design was also useful as well, especially being able to pull the two halves apart more. There is also a little bit of exclusivity with an ErgoDox, you aren’t going to go out to a LAN and see 15 people running the same keyboard as you, that is for sure!
One of the other things to consider for the ErgoDox is that while you are building it, this is still an expensive little build. Massdrop does a great job of keeping things cheap of course but with a price of $199.99, but it is still more expensive than your average higher end keyboard. However, keep in mind this is still considerably less than sourcing your own parts. I started to price out building your own ErgoDox kit and you are looking at close to $230 before you even add in keycaps, resisters, and diodes. The best part is with a kit like this everything works perfectly together and you have easy to follow instructions. Not only has Massdrop made getting an ErgoDox much cheaper, but they have also done a great job at making building it simpler as well. So While it is more expensive than a standard keyboard I think it still deserves the Good Value award for being so much cheaper than putting together your own kit.