Having had the opportunity to work and support home and small office environments, the necessity for things like redundancy, ease of access, and perhaps more importantly granularity of access are extremely obvious. Things that a NAS can provide, but rarely are invested in for one reason or another. The fear of cost or expertise often leads to that heart-breaking conversation where you relay the news that their presentation went up in flames with their failed hard drive, or early morning support calls due to permission issues. Thecus has several NAS offerings on the table, and we've had a look at a few of them. Today we'll sit down with the N4560, a NAS targeted for this very SOHO situation, in which Thecus hopes to address a few of the examples here and beyond.
Product Name: Thecus N4560 4 Bay NAS
Review Sample Provided by: Thecus
Written by: Adam
Photos by: Adam
|
Thecus N4560 Specifications |
|
|
Processor |
Intel Atom SoC CE5335 (1.6GHz Dual Core) |
|
System Memory |
2GB DDR3 |
|
LAN Interface (PCI-e) |
RJ-45x1: 10/100/1000 BASE-TX Auto MDI/MDI-X WOL supported |
|
USB Interface |
USB 2.0 host port x2 (back x1) USB 3.0 host port x1 (front x1) |
|
LCM Module |
LCM display 4 buttons (ENTER, ESC, UP, DOWN) |
|
HDMI Output |
HDMI port (back x1) |
|
Audio Output |
SPDIF (back x1) |
|
Disk Interface |
4x SATA for internal |
|
Power Supply |
150W internal power supply |
|
Power Management |
Auto power on after shutdown due to power loss |
|
Buttons |
Power button Reset button |
|
Environment |
Temperature: 5C to 40C Humidity: 0 ~ 80% R.H. (Non-condensing) |
|
Chassis |
4bays Tower |
|
Dimensions (HxWxD) |
226 x 165 x 192 (mm)/ 8.9 x 6.40 x 7.55 (in) |
|
Weight |
4.72(Kgs)/10.4(ln)(NAS only) |
|
Certificates |
CE/FCC/C-Tick/TCCI/BSMI RoHS WEEE |
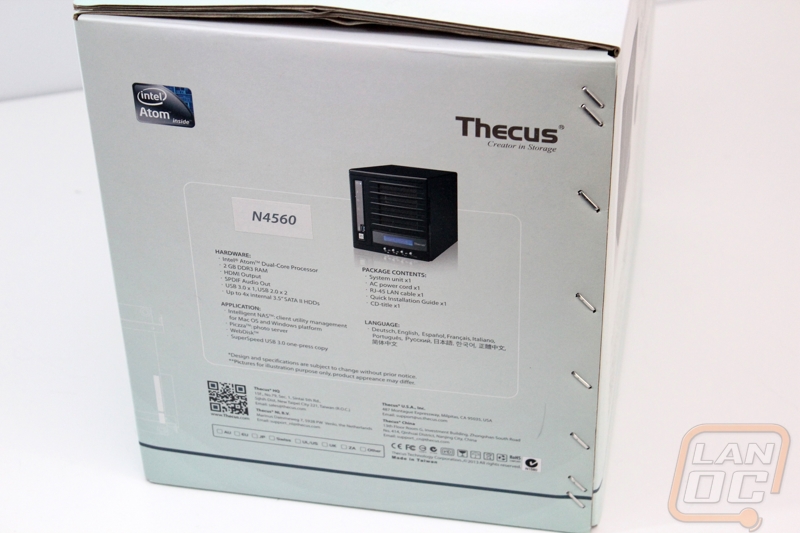
Packaging
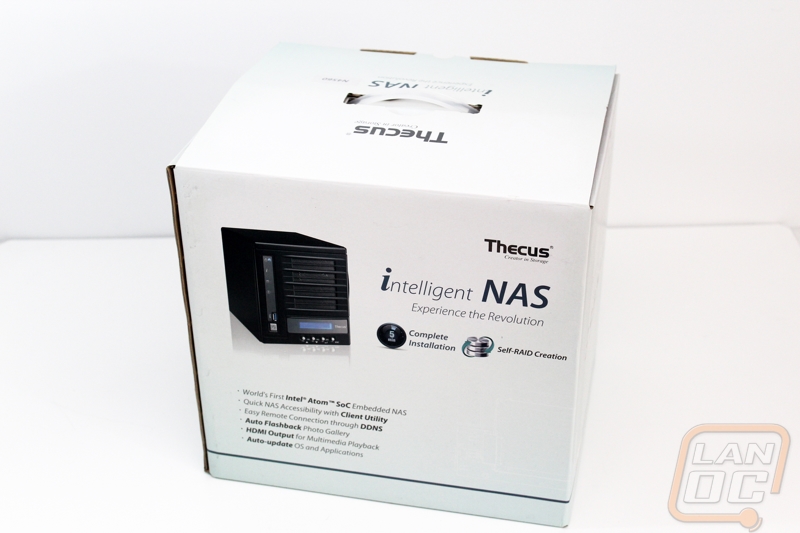
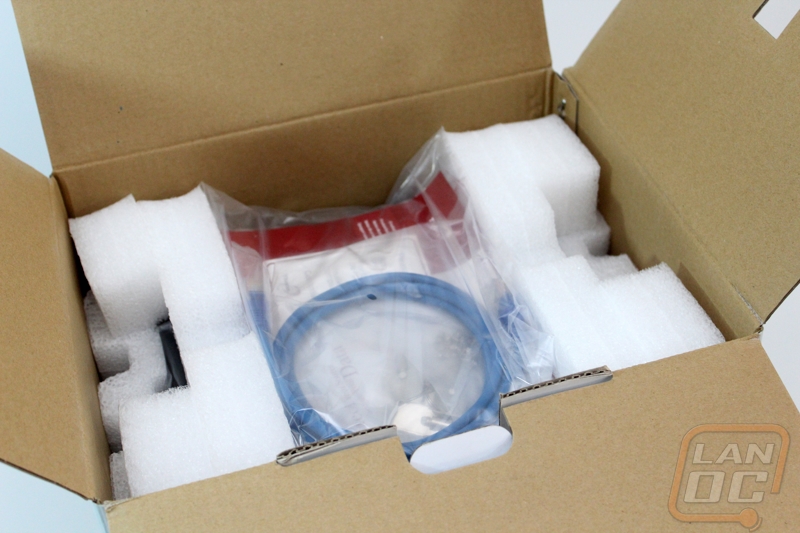
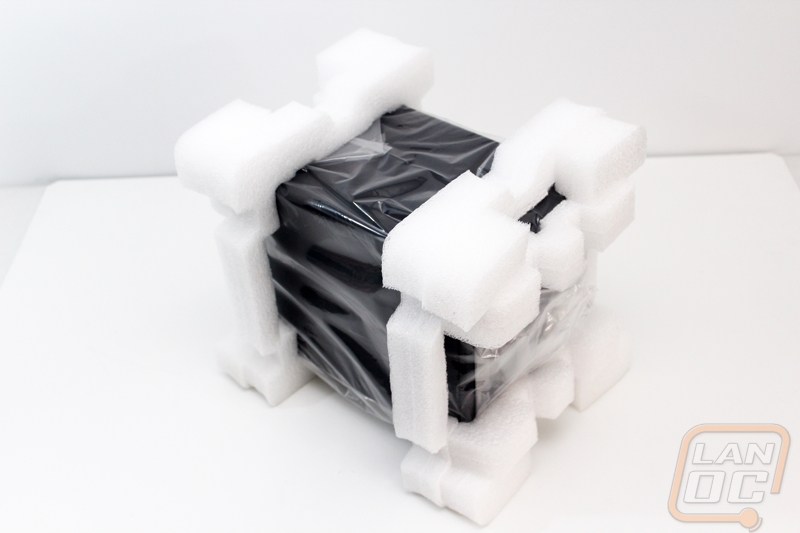
Although marketed towards small offices and home use, the retail package of the N4650 is all business. A few product images, a few buzzwords, and quick specifications can be read from a shelf, while inside the unit is secured between two form-fitting foam cushions with the accessories settled on top. You'll find a bit of paper work included here, as well as two sets of keys (totaling four, the amount of drive bays available in the NAS), a five foot cat 5e Ethernet cable, a two flavors of screws, which you'll ultimately use to mount 3.5" or 2.5" drives to the bay trays. The unit itself is further protected from dirt and debris with a plastic bagging.
Photos and Features
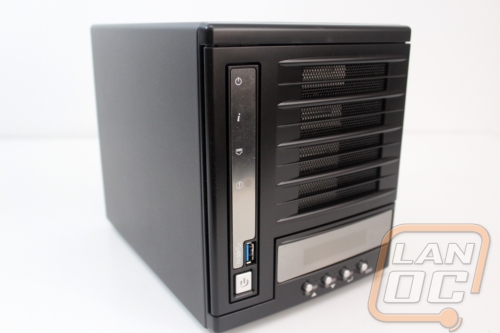
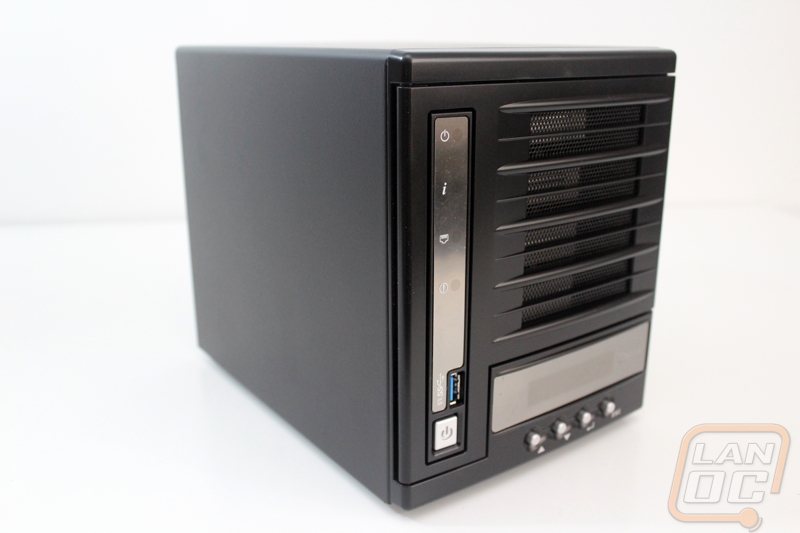
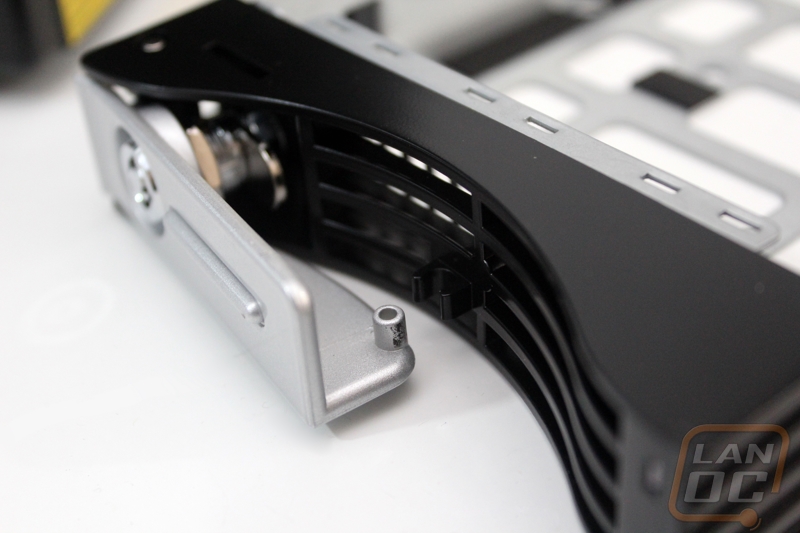
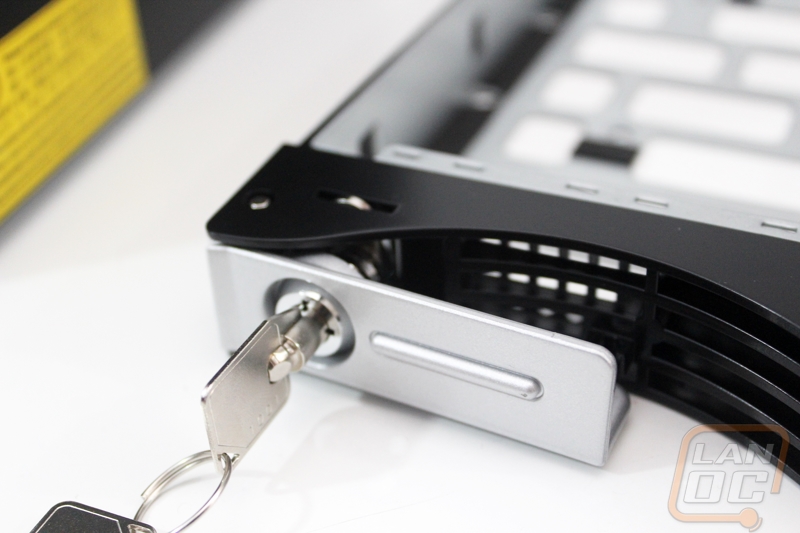
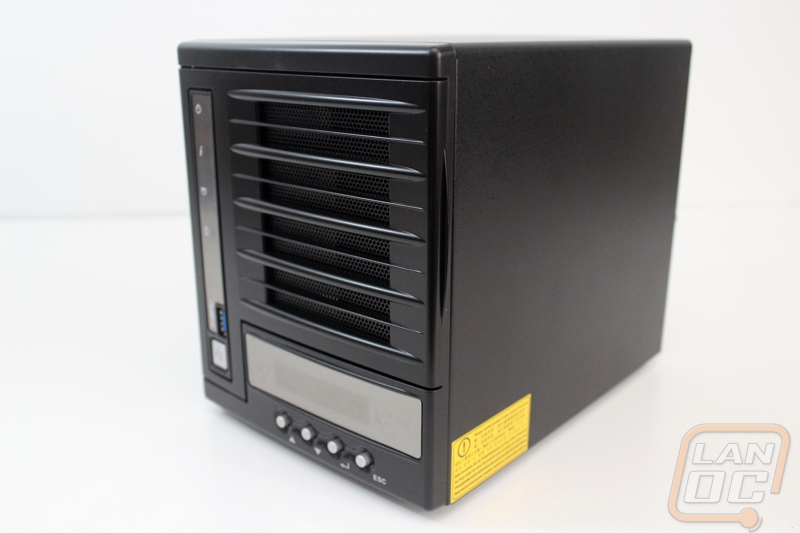
Unlike the N7510 we looked at earlier this year, the N4650 sports a full black chassis (save the LCM displays and buttons), and has brought back plastic as the material for the face of the unit. The N7510 is in a different class of NAS offerings as well as a different price point, and I think the lighter material will be fine for the intended purpose. I'm not a fan of the use of plastic for the tray handles, however. While locked in place, you can wiggle these handles a bit up and down, which doesn't promote a feeling of security. The handle participates in securing the tray in the unit with a tab that "locks" into the side of the chassis when you close it. The lock mechanism (which is metal) has a separate tab that extends into the top of the tray, preventing the handle from being pulled out and therefore released from the chassis. The plastic on the tray frame is much more solid than the handle, so it would be a tough to break that with brute force, but the tab that secures it to the chassis doesn't seem like it would take much abuse if someone really wanted to get the drive out while locked.
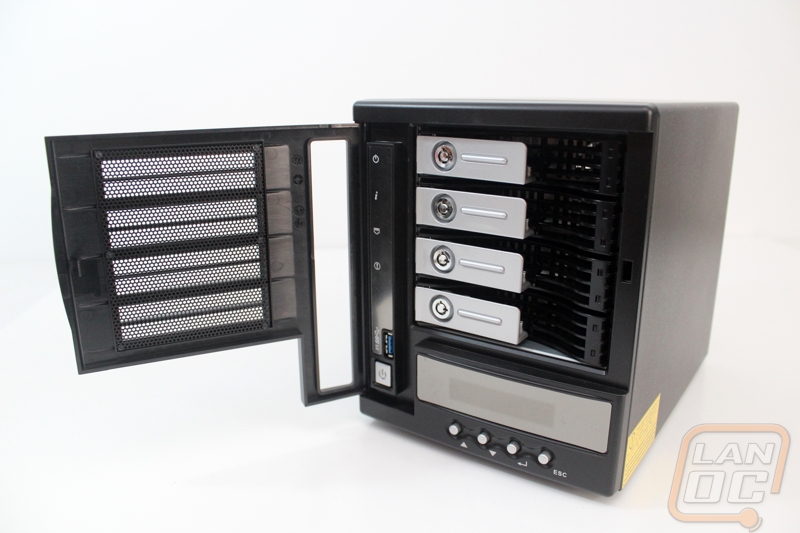
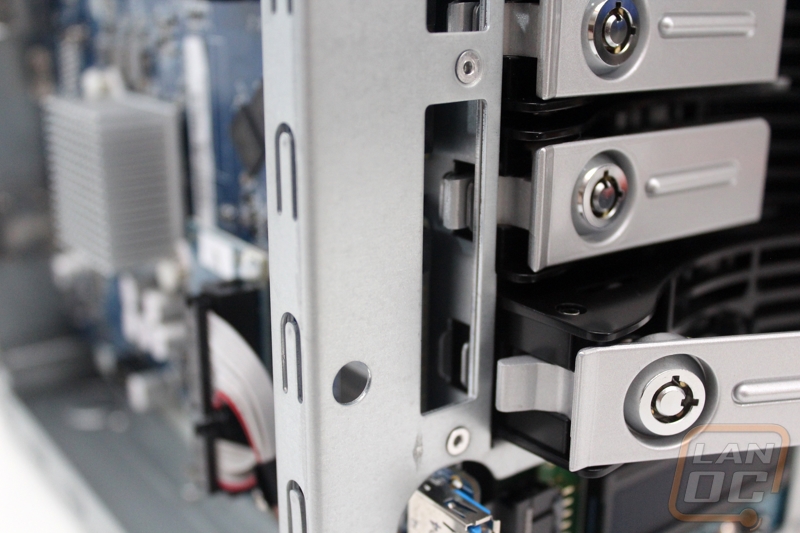
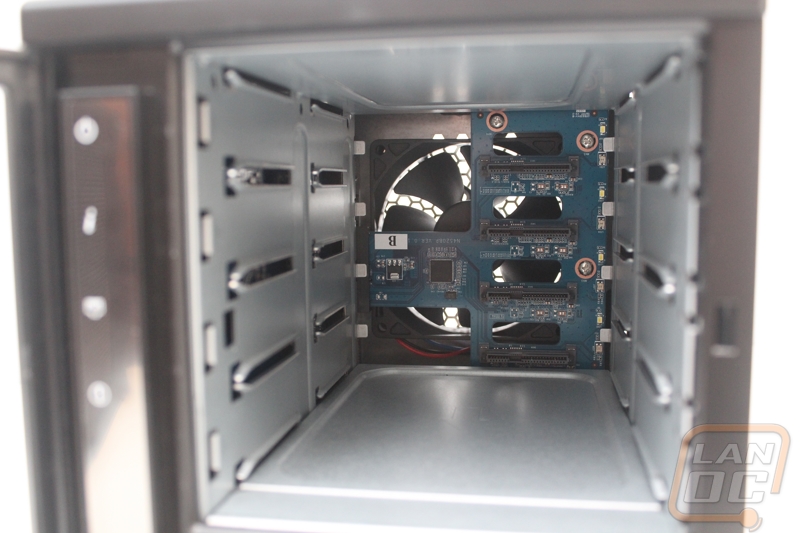
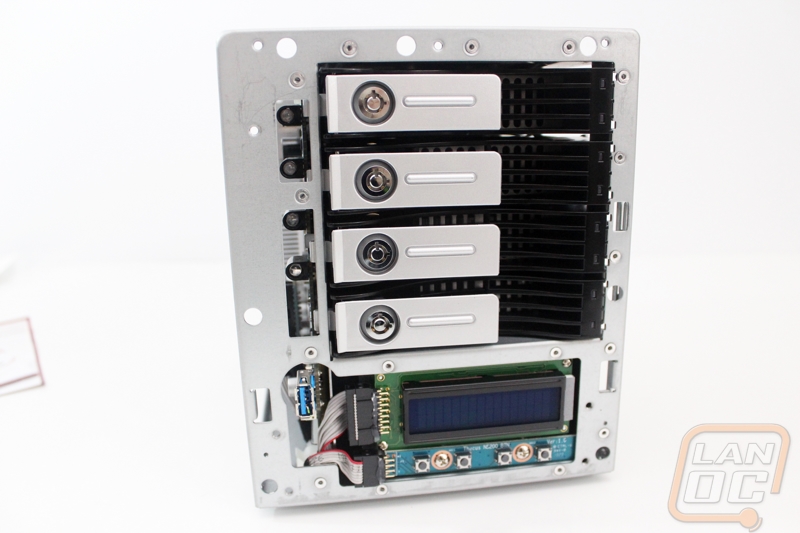
Removing all the trays will give a you good look at the PCB and SATA connections for the drives (though we'll get a much better angle later when we disassemble the unit). You can also see the rear exhaust fan behind, which will help to circulate air throughout the unit. Thecus hasn't published any specifics on this fan, but it does run fairly quiet. You'll probably hear the operation noise of mechanical drives before you notice it.
The front panel itself is meshed to help with ventilation. On the left a vertical status indication display runs serving information about (from the top) power, system status, LAN activity, and system failures. It also houses a USB 3.0 port for external drives or other devices such as digital cameras or printers (we'll touch more on that in a bit). A horizontal LCD display is featured near the bottom of the face displaying current status and any warning messages. The buttons underneath can be used to navigate options from this LCD panel.
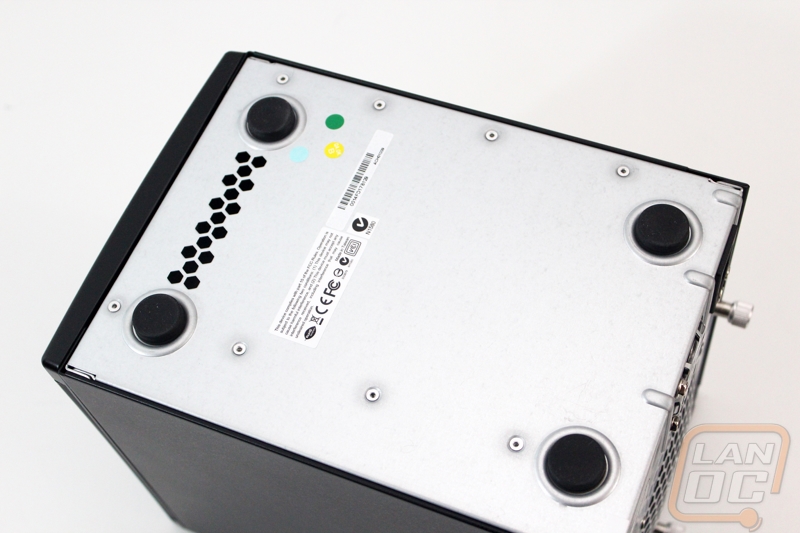
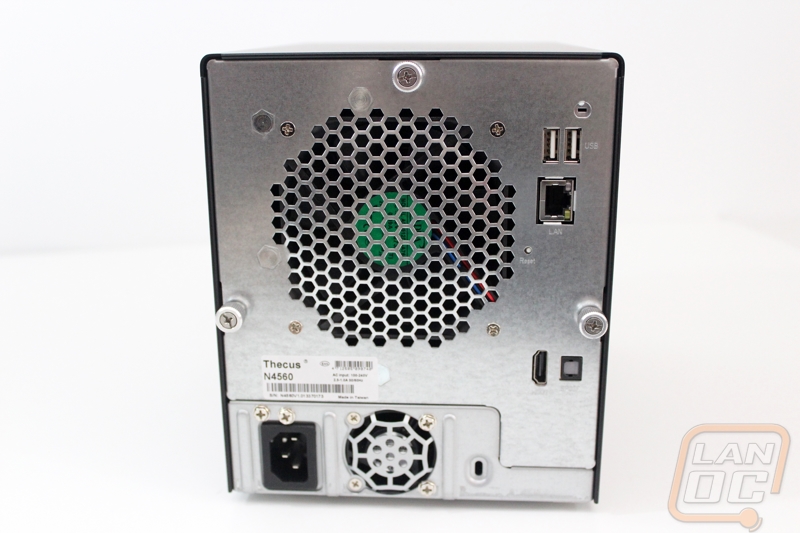
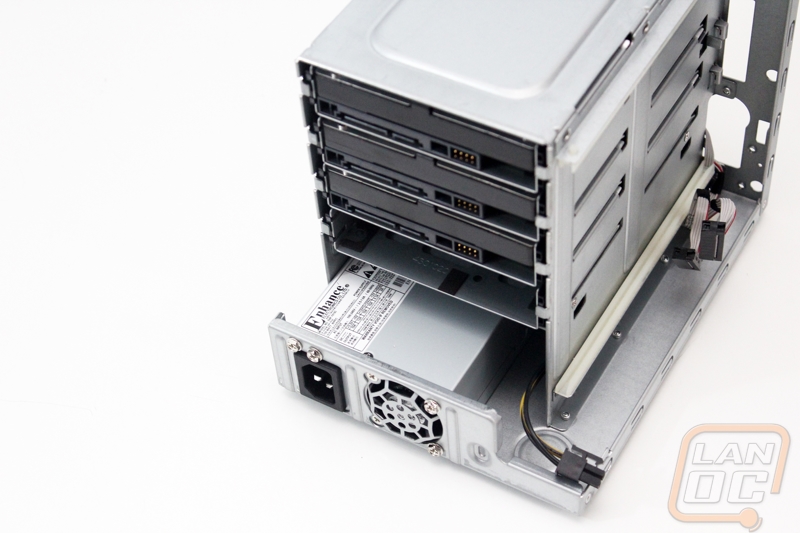
The bottom and the back of the unit are essentially exposed frames of the chassis, which will become apparent once we remove the black plating that covers the front, sides, and top. Aside from a small area of hexagonal vent punchouts and the rubber feeting located in each corner, there isn't a lot to visit on the underside. The rear of the unit is dominated by the aforementioned exhaust fan, but you will find a few extra I/O goodies here, such as the essential network port (RJ-45 10/100/1000 BASE-TX Auto), two additional USB 2.0 ports, an HDMI out port, and SPDIF audio out (again, we'll touch more on why these exist shortly). The power supply unit also makes its appearance here.
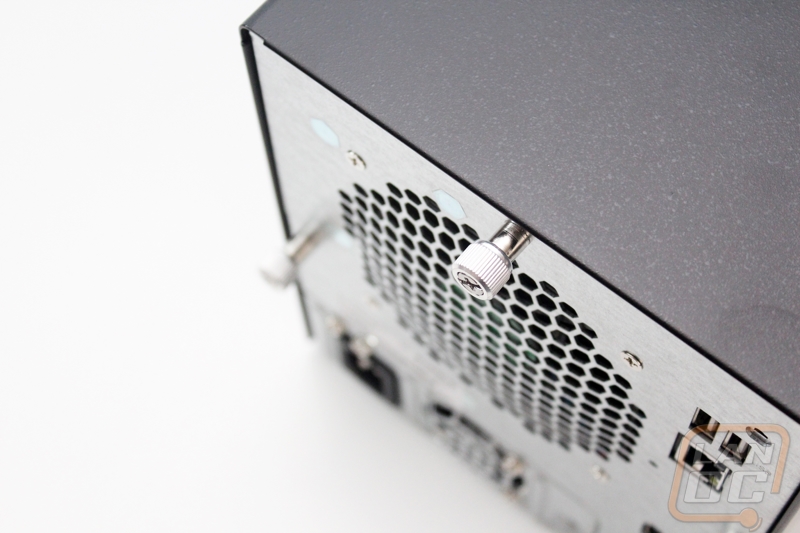
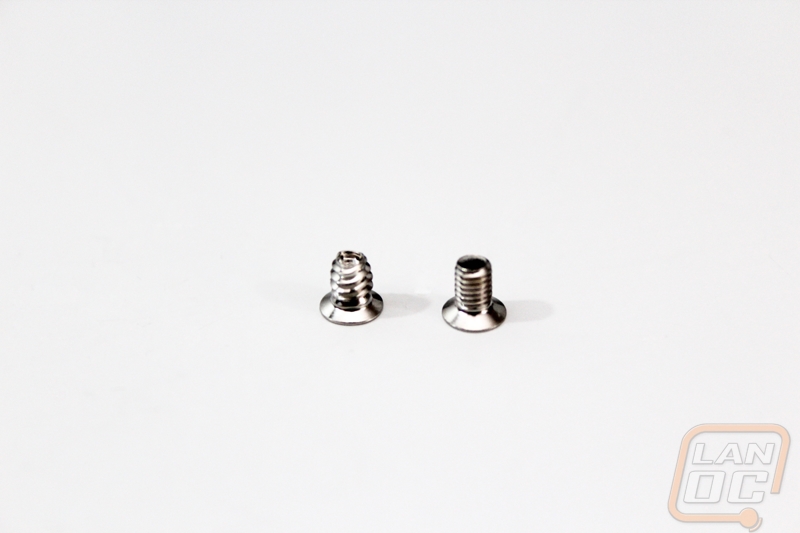
When you're ready to really tear into this NAS, Thecus has not only included thumbscrews to help get you there, but also the type that release from the threading but stay attached to the chassis. I can't express how much I appreciate this. If you've ever had the pleasure of working on something inside of a data center, whether a dedicated co-location or even in-office, you know how easy it is to lose screws. You often find yourself resting them on rack bars or other servers, and ultimately either losing track of them or knocking them under a heavy, expensive piece of equipment that may as well be an abyss. With the twist of three screws, you'll be able to remove the metal shroud from the unit.
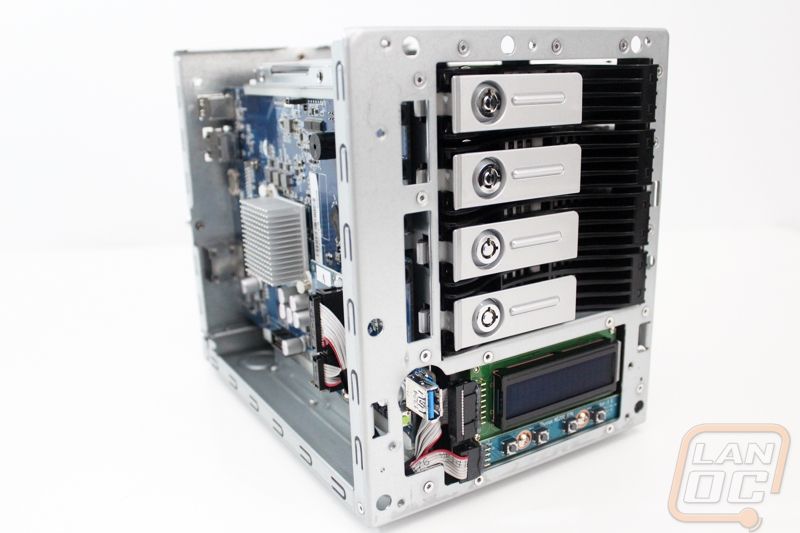
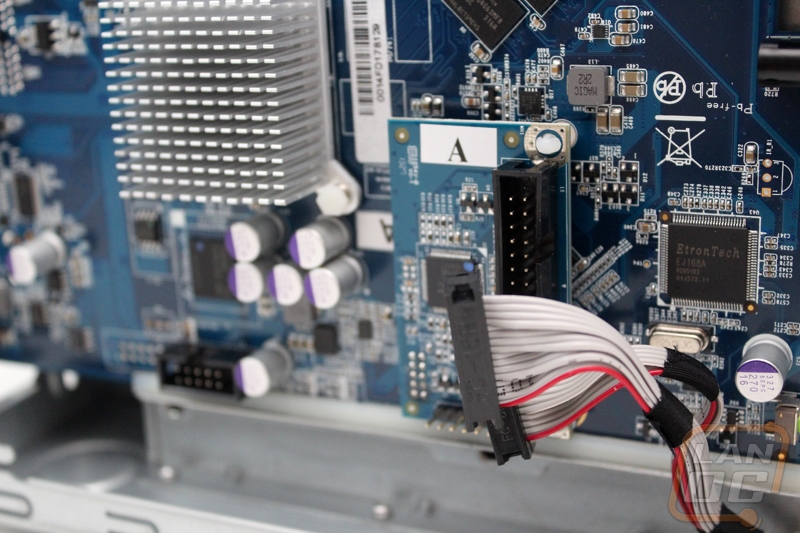
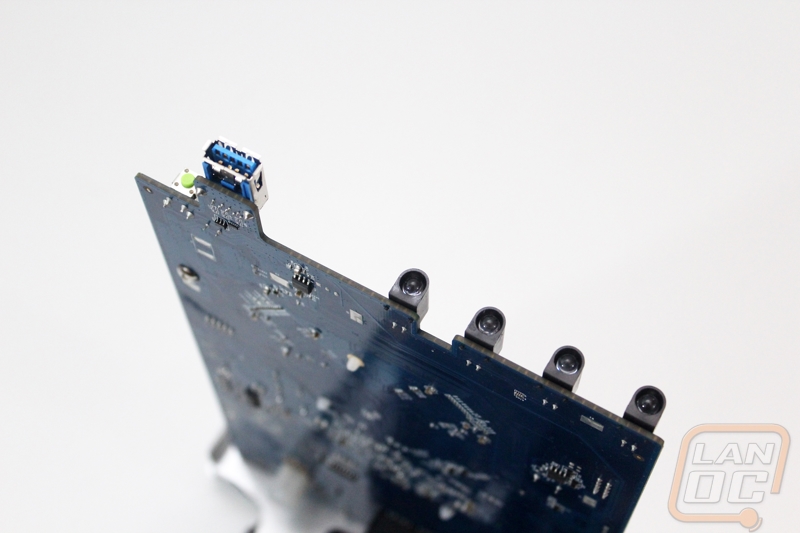
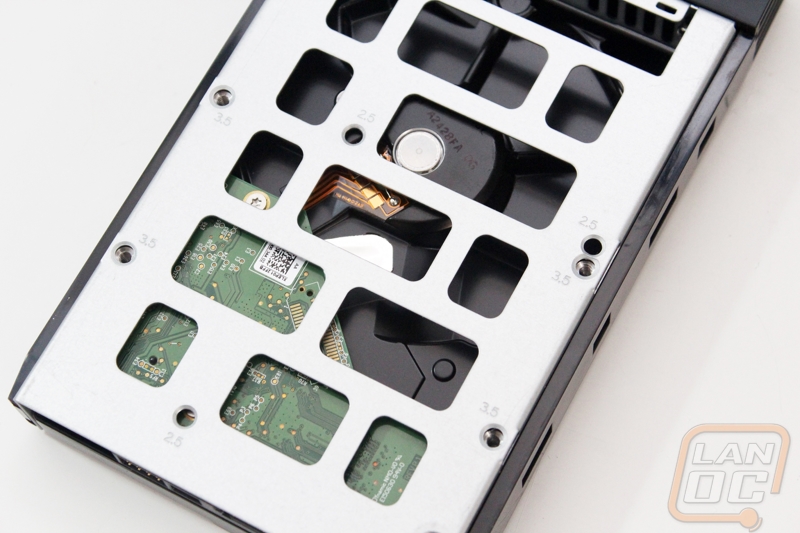
Here we get a nice look at the main PCB, you you'll notice an elevated PCB marked A. This is where the front panel terminates, since they went with a modular design here it helps service the unit if that part ever needs replaced. You can see the same thing around front with the button and LCD boards.
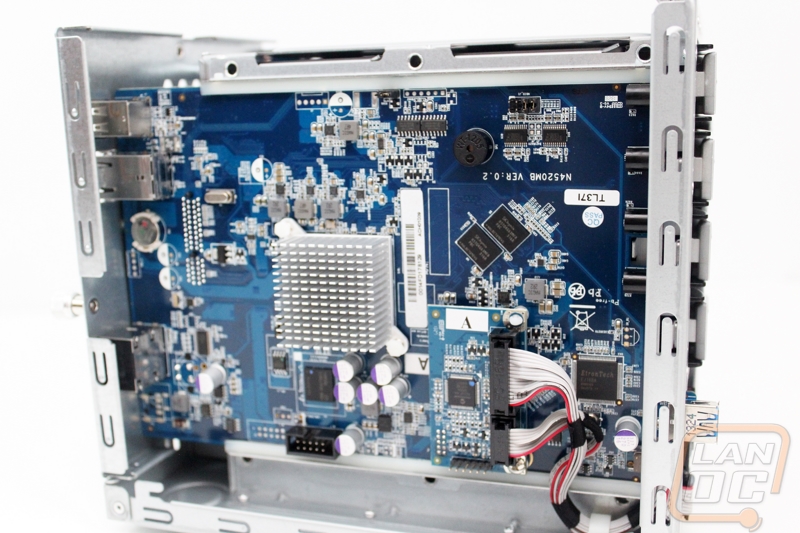
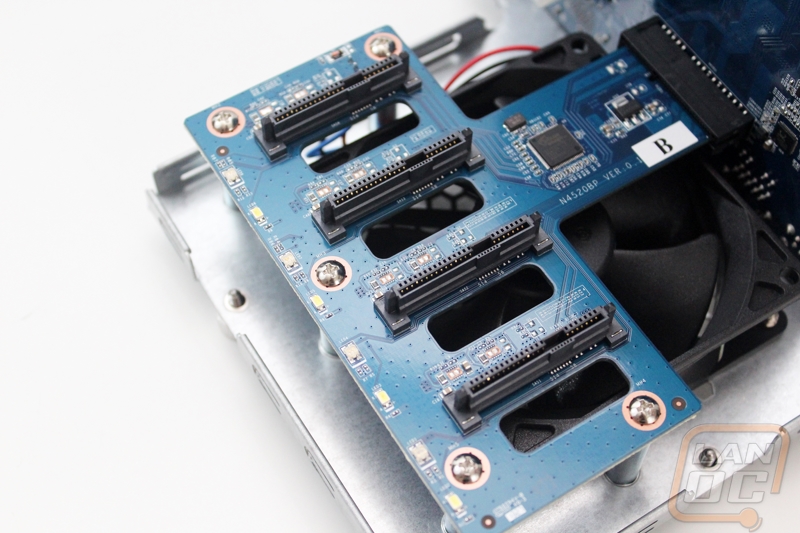
Labeling something 'A' implies that there should at least be a 'B', and the more observant readers may have already found it above in the photo looking at the SATA connections through the chassis. To get a better look at this, the entire chassis actually separates, a feature I discovered while trying to move the unit for pictures while the shroud was off. Make sure you disconnect the cables at the A point as well as the power before pulling too far.
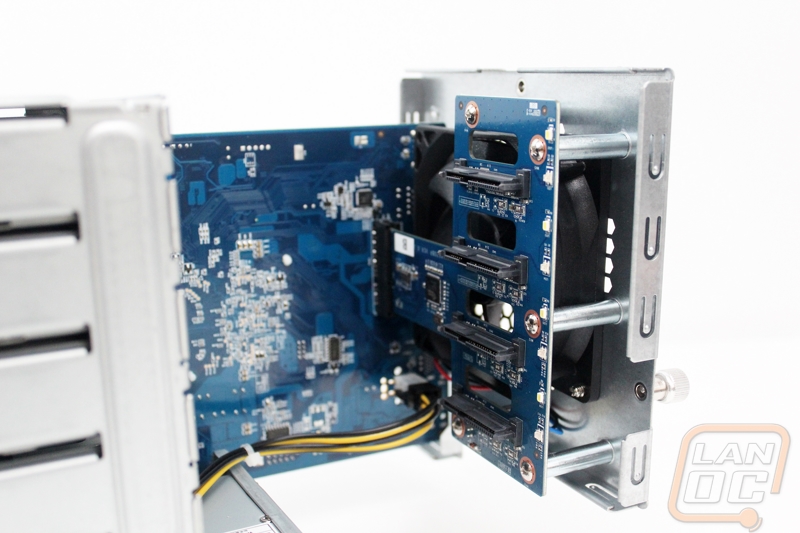
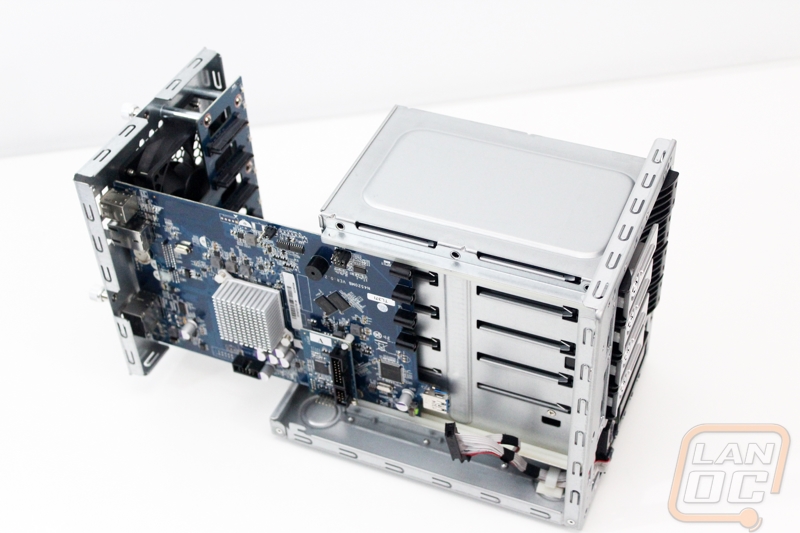
Now we can get a good look at the rear PCB as well. Again, this modularity makes it pretty easy to service if the need ever arises, or even to clean.
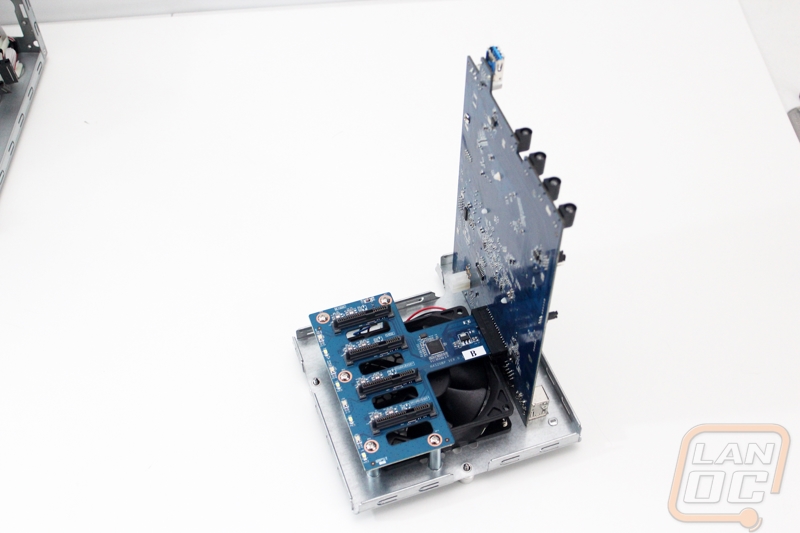
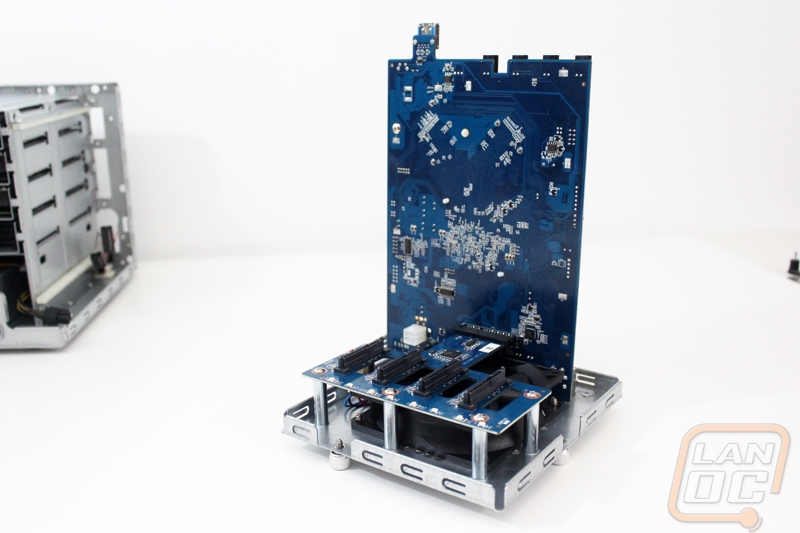
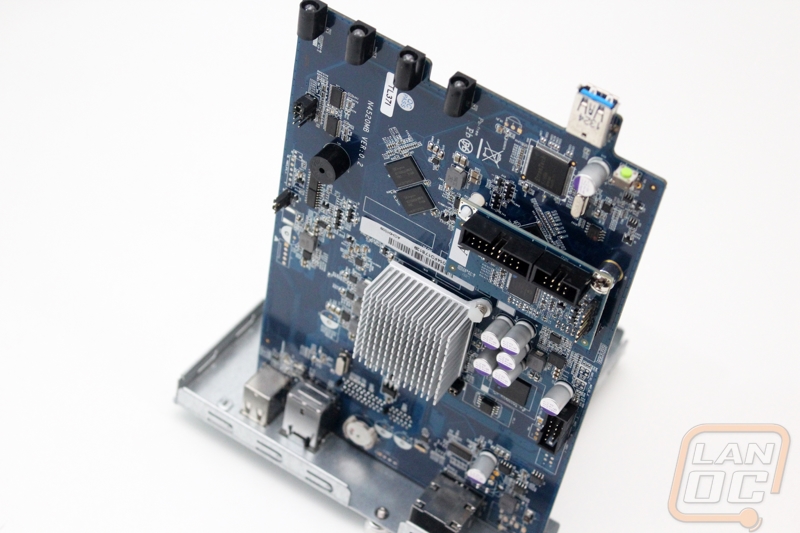
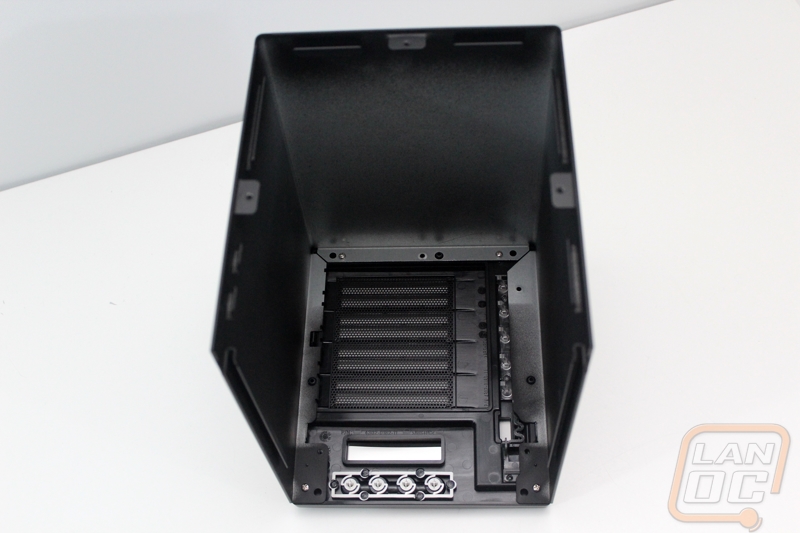
Also, the base chassis with much of the circuitry removed.

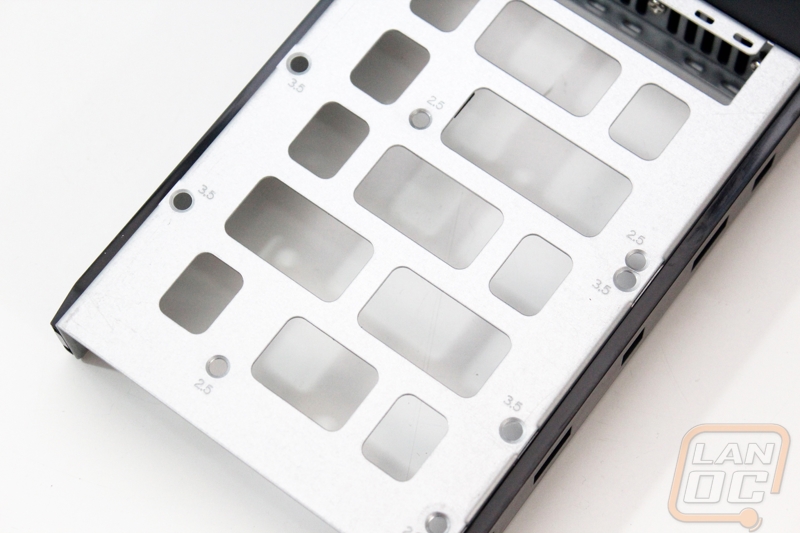
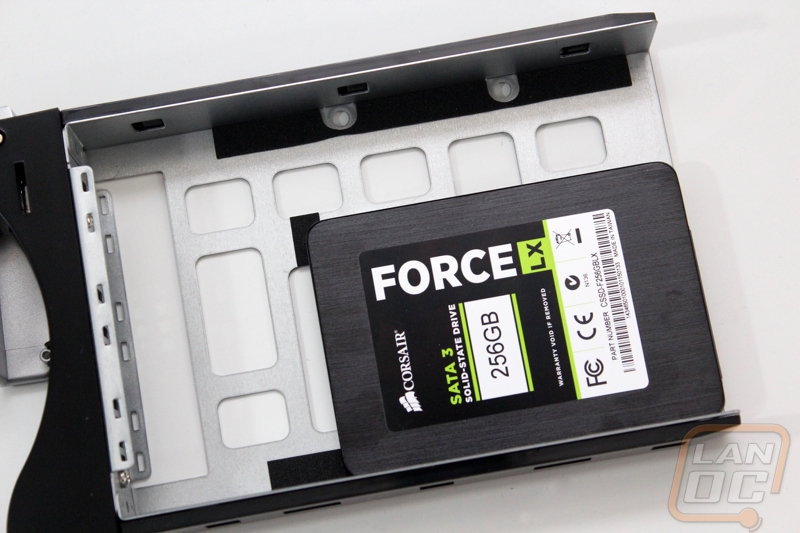
Let's put it all back together and install some drives. For our testing , we'll be using three Western Digital Red 1 TB drives to construct a RAID 5 design. I mentioned it earlier, but you'll find two types of screws included with the N4560, one with smaller threading for 2.5" drives. I installed an SSD to a tray for photo purposes, but it isn't used in our testing. If you've installed hard drives in a computer tower that features any sort of tray design, this process will be very familiar. Thecus has outfitted the tray with anti-vibration padding at strategic locations to help cut down on the operation noise of mechanical drives, both 2.5" and 3.5" alike. Mounting points for the two sizes are clearly marked on the tray.


Software
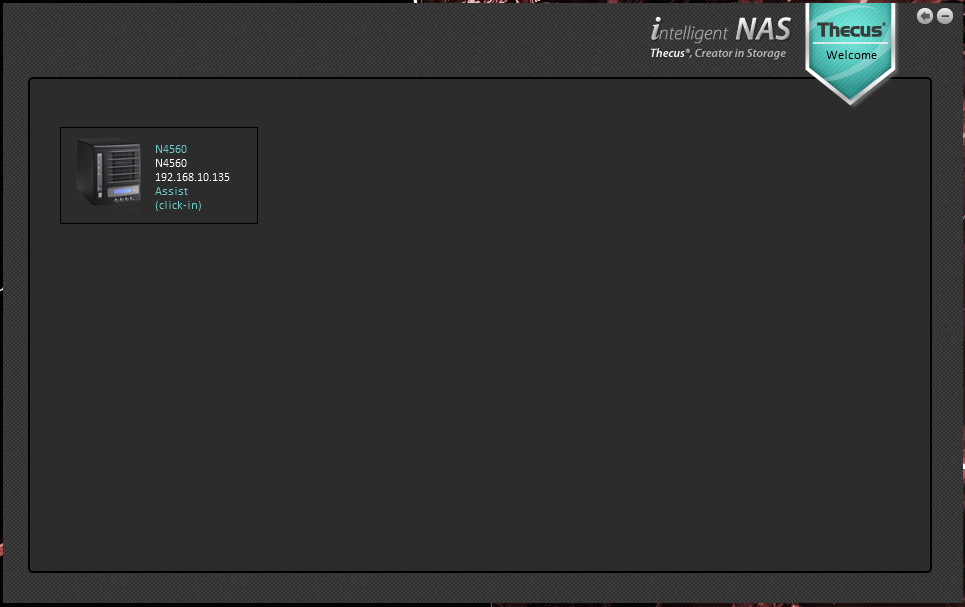
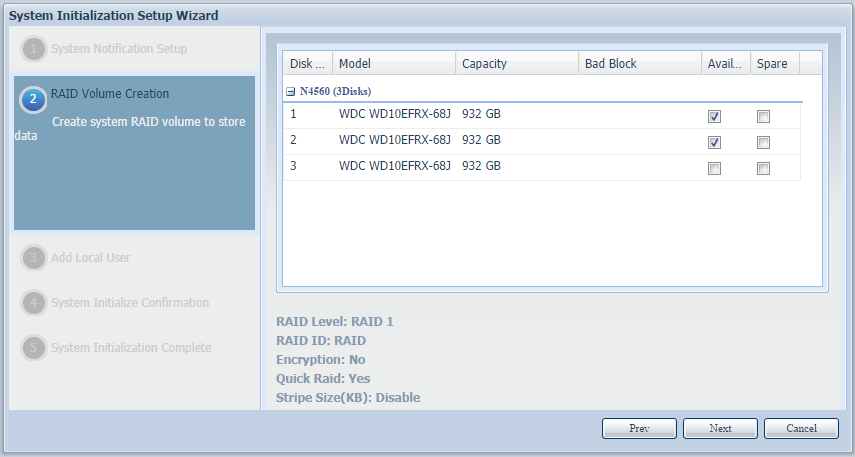
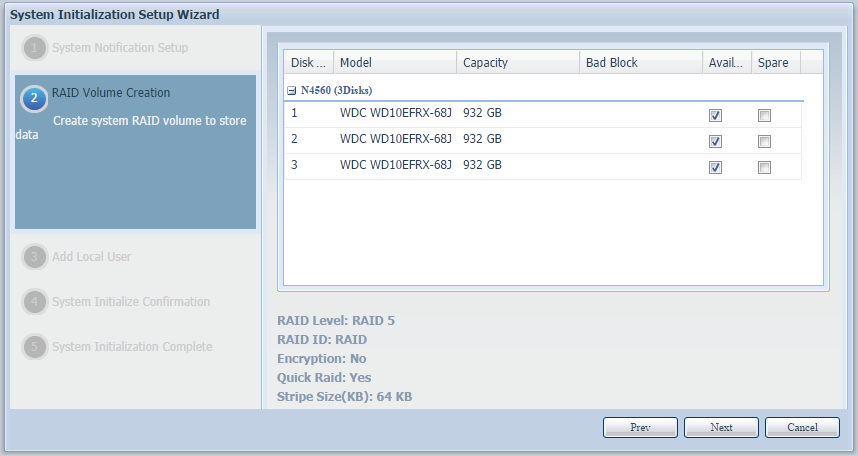
Before we can do testing, or use the NAS for that matter, we'll need to set it up. Get it on the network and initialize the disks, at the very least. There are a couple of ways to achieve this, I tried to hit each one of them, and had varying success with each. The first is through the Thecus IntelligentNAS software. This is a one point of management if you have multiple Thecus devices, and I think that is really where it stands out. It is much easier to manage multiple units from one central location. Starting this up will locate any Thecus NAS on the network, display the IP (which is defaulted to DHCP settings), and in our case ready to set up with a click.
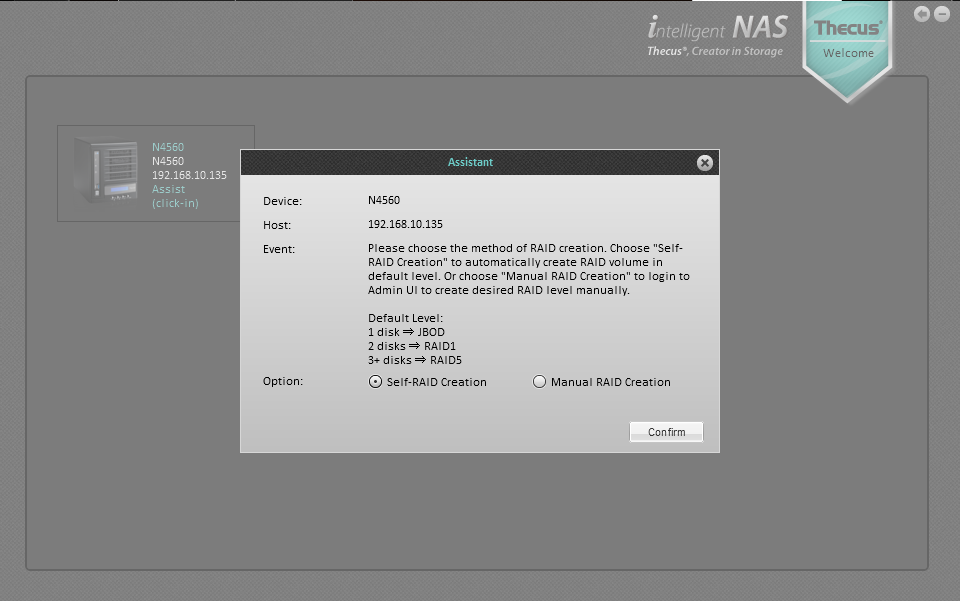

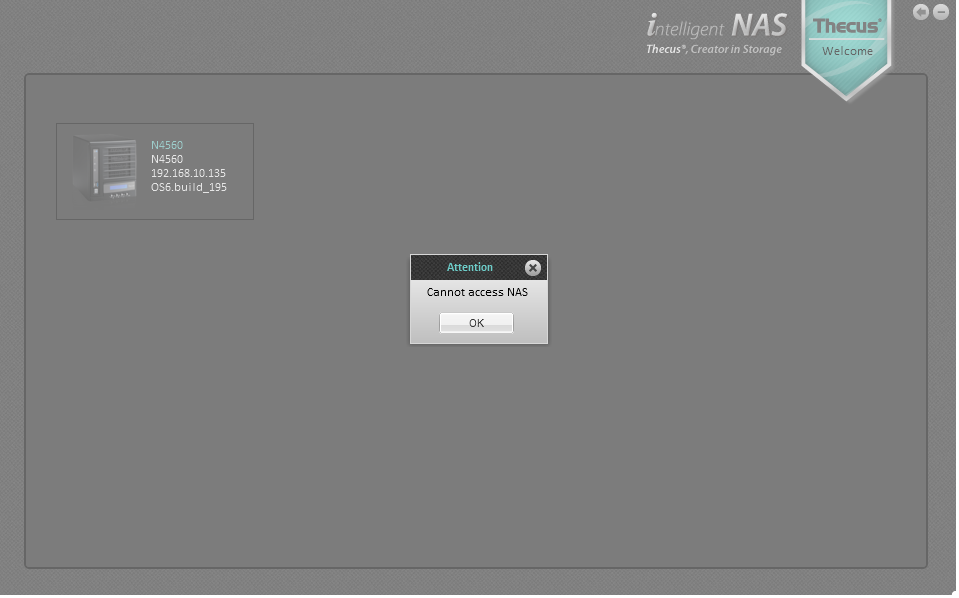
As you can see, it is somewhat wizard-y, stepping you through different options to initialize the disks. I stumbled on the opportunity to configure the NAS through a browser because even after going through this process, it didn't seem to actually do anything. I would be met with a "Cannot access NAS" message that even after configuration was complete via browser, I still get every now and then. But, I at least had an IP and browsing to it to set the device up had much more success.
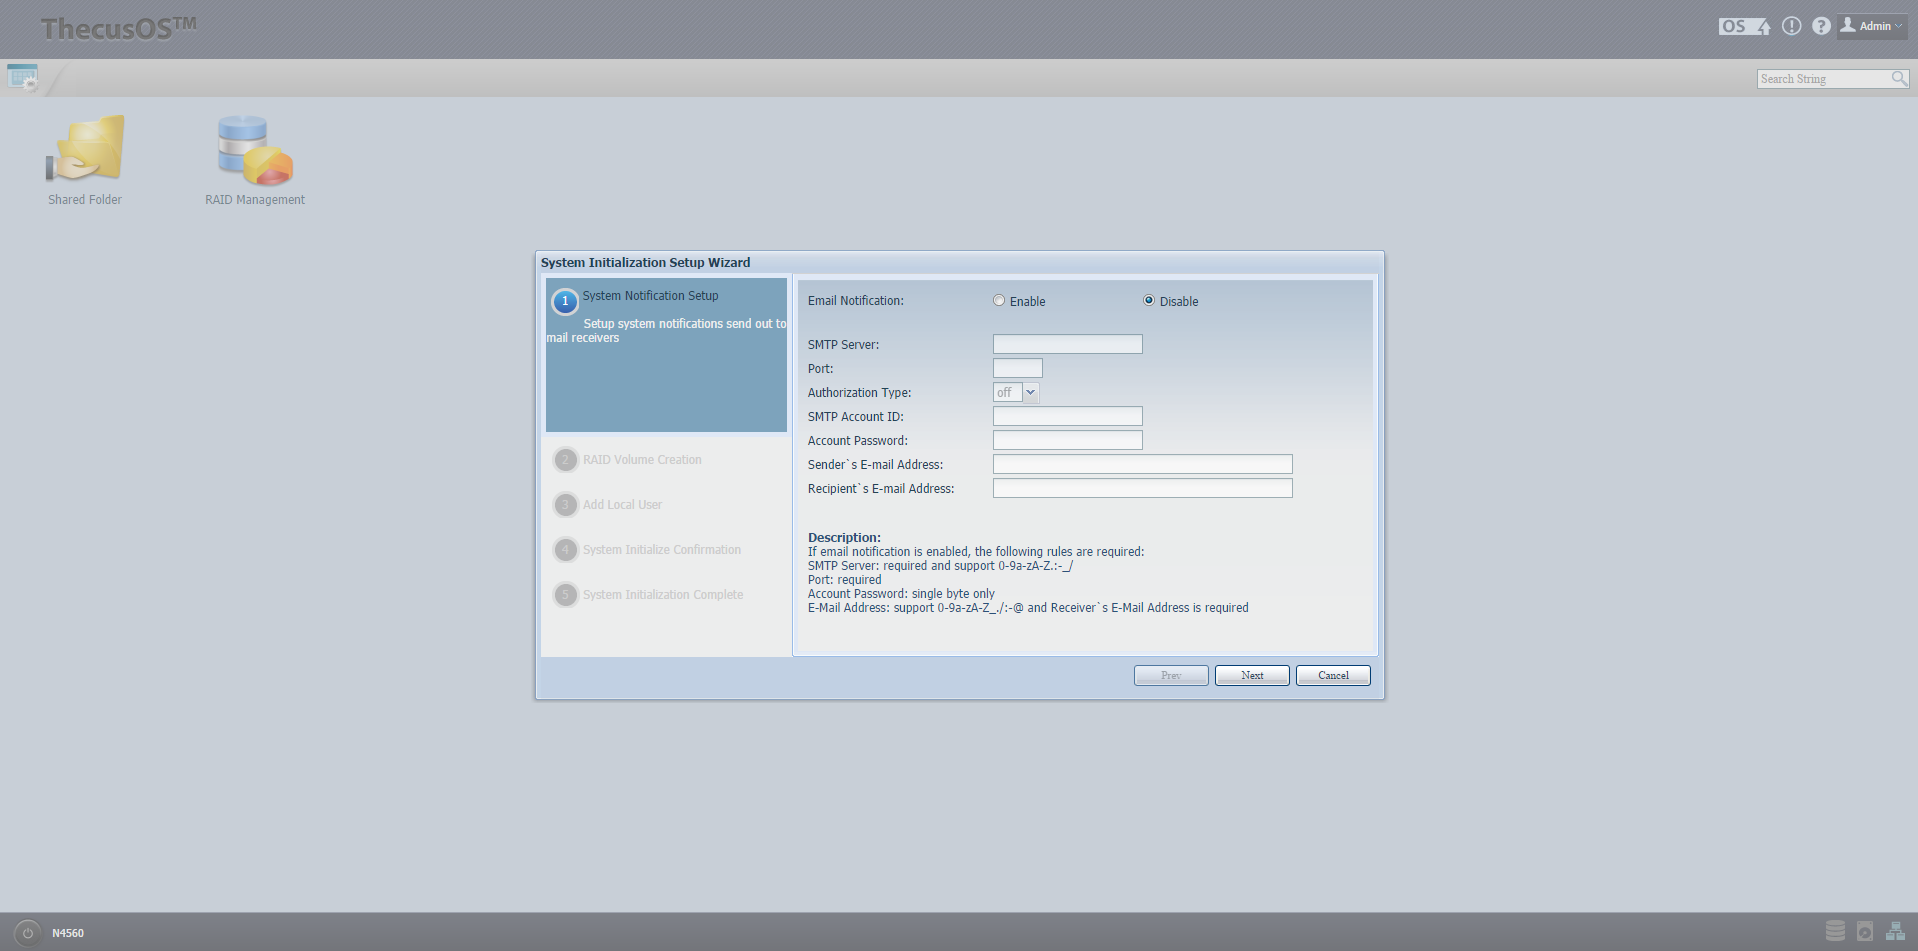
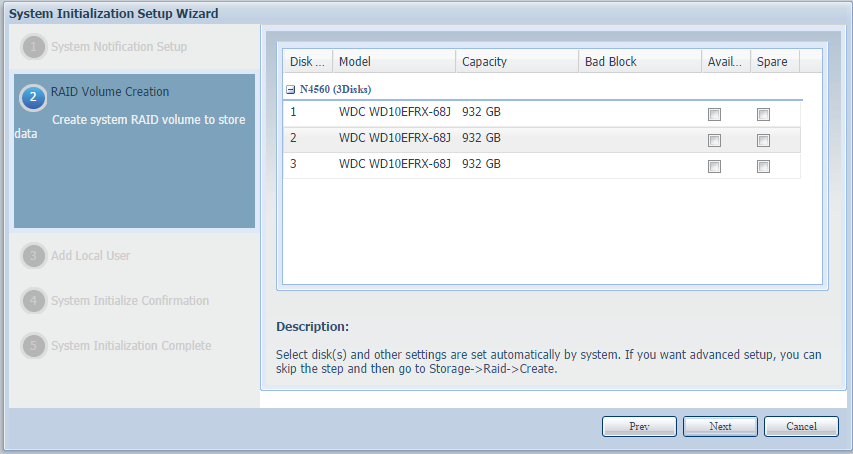
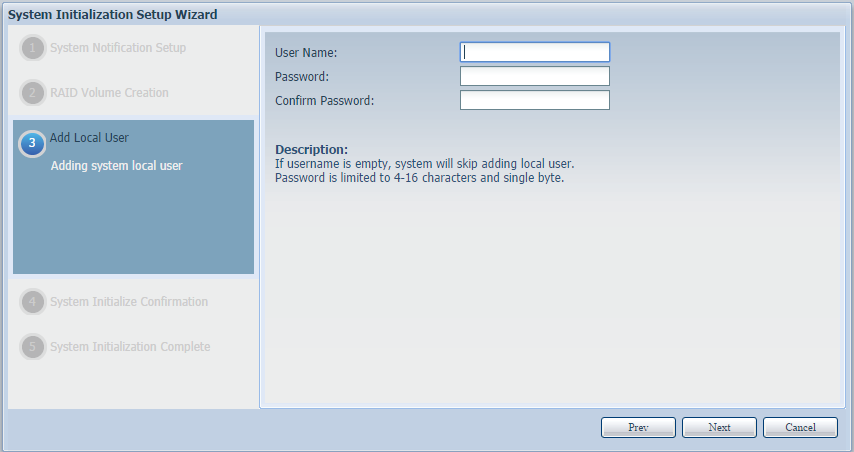
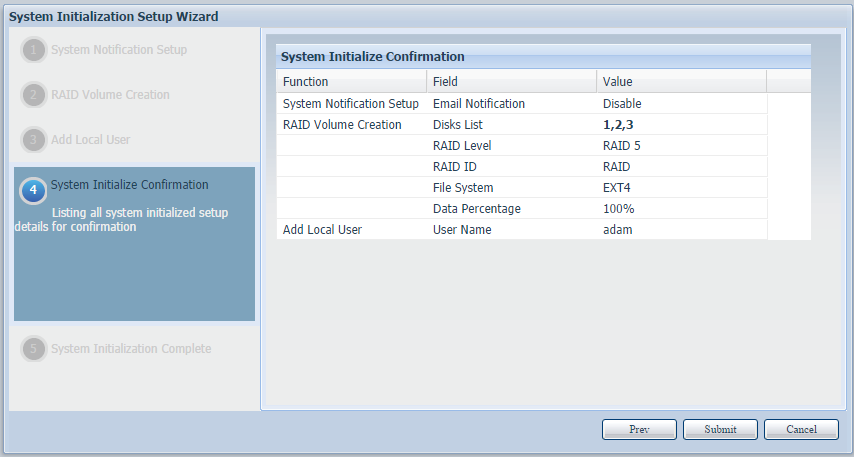
The web interface starts out very basic, but as you'll discover you have the opportunity to customize it and add a lot of features. On first access, you'll be walked through a similar wizard but a a few more options this time around.
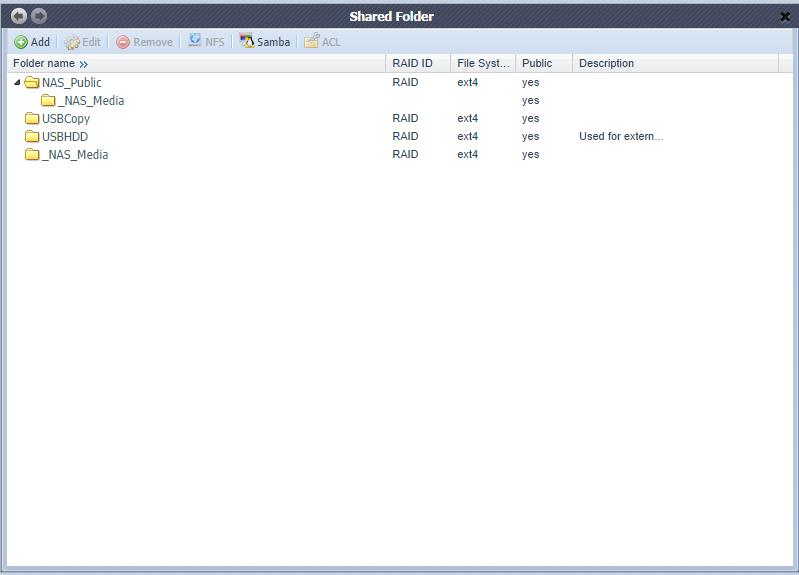
Once everything is setup, you'll be taken to the main page of the NAS, again very not much is here by default. The "Shared Folder" was a little misleading to me, but given a little more thought for the most part what you store on a NAS is meant to be accessible to the network, so perhaps the name does make sense. While this folder doesn't appear if you browse to the NAS over Windows Explorer, folders within it do. So you'll create directories and put files here. You'll find that a few directories already exist, which are created by the system and are needed for certain operations. You can't delete them from the web interface, but you can turn them off so they do not show up as available folders over the network if you aren't using them. If you are familiar with Linux, you can enable SSH and gain a shell to delete them, but this is how I learned that the system needs them for certain operations. I wouldn't suggest doing so unless you really know what you're doing. But something positive to take from that story is that you can get a functional Linux shell, which allows much more in-depth customization, monitoring, management, etc if you have the knowledge to do so.
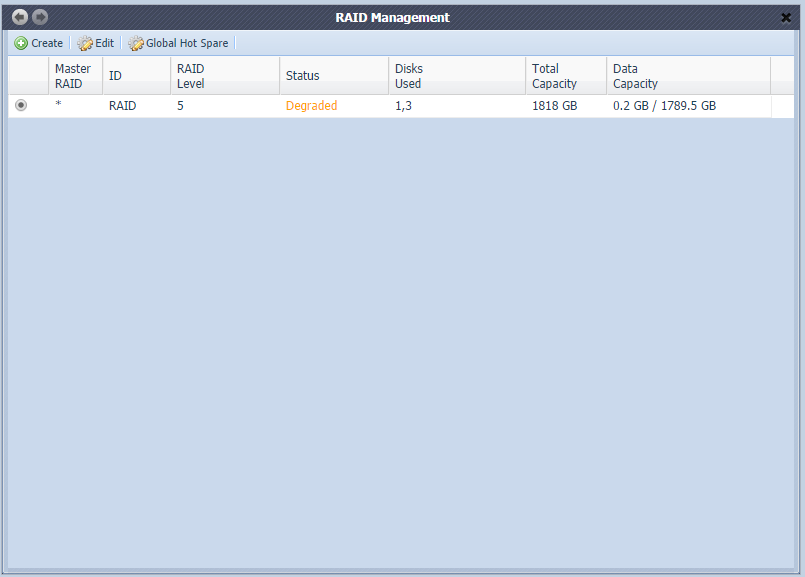
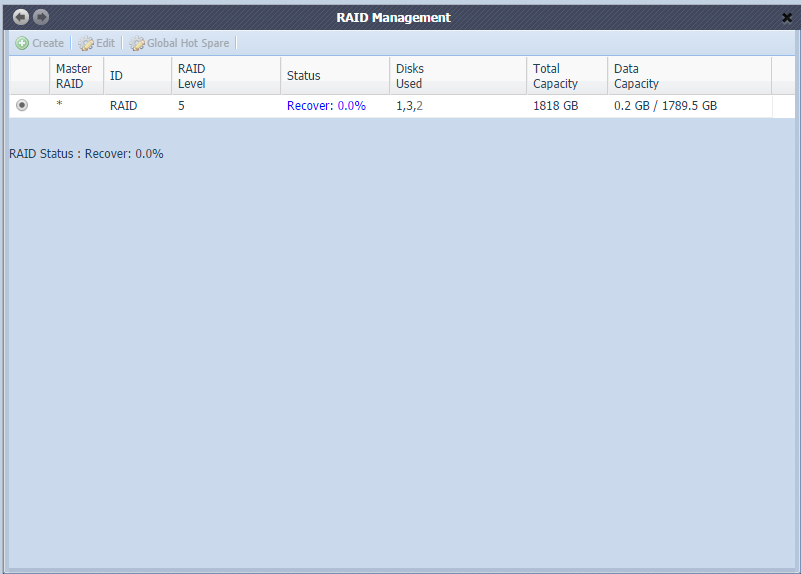
RAID management is pretty self-explanatory, this will provide a quick look at the status of your RAID and allow you to add or modify. There is also an option to add a global hot spare, so if a disk fails in any RAID it will take over. The four drive bays is perfect for a RAID 5 with global hot spare design. Note that we are talking a lot about RAID here, you can just use drives as a collection with no redundancy. We are using RAID as part of our testing so we'll be covering some features with it.
So what happens when the RAID degrades? It is very loud. You may have noticed the speaker built into the PCB in the previous section. I removed one of the drives manually from the chassis during operation, and this thing wailed. Likewise, the RAID Management application in the web interface reflected the status. Popping it back in, the RAID immediately began to rebuild itself.
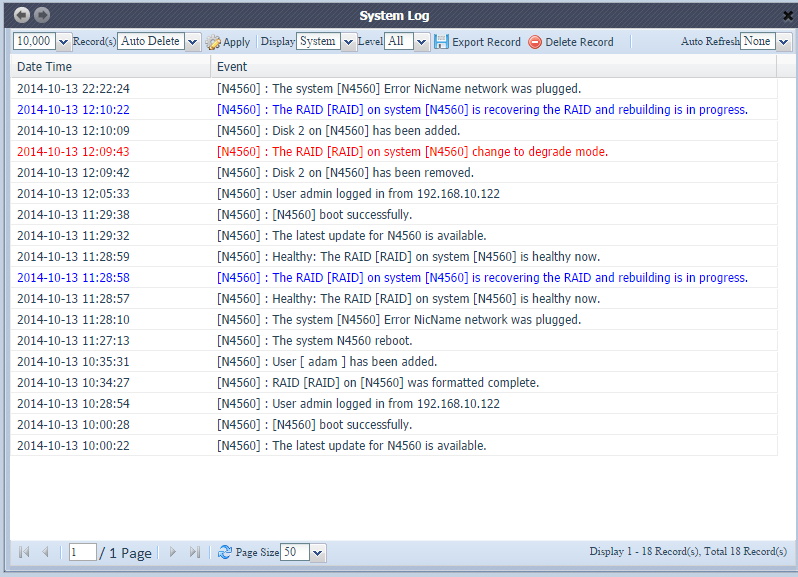
All this was captured in the logs, too. Working in the IT security, logs are a huge part of my job, so I appreciated how accessible and verbose logging is with ThecusOS. You can view the log file at any time by clicking the '!' icon in the upper right hand corner, and you can even export them to an aggregate program or just for archiving.
Next to that log button in the web interface is a blink "OS" indicator, which is meant to get your attention about available updates. This is more than firmware updates, however. It will ist updates for any installed application, as well as the option to add on official applications that may not yet be installed. While this is a fine feature, it doesn't just blink until you visit it and then once a new update is available. I can only suspect that it blinks until you have added and upgraded everything available (a part of me wonders if it would even then continue to blink). It sounds like a petty thing, but again in my field I've trained myself to pay attention to available updates, and its hard to put this in the back of my mind. I did run through updating the OS to make sure nothing bricked afterward, and I can safely say that I managed to not break anything during that process.
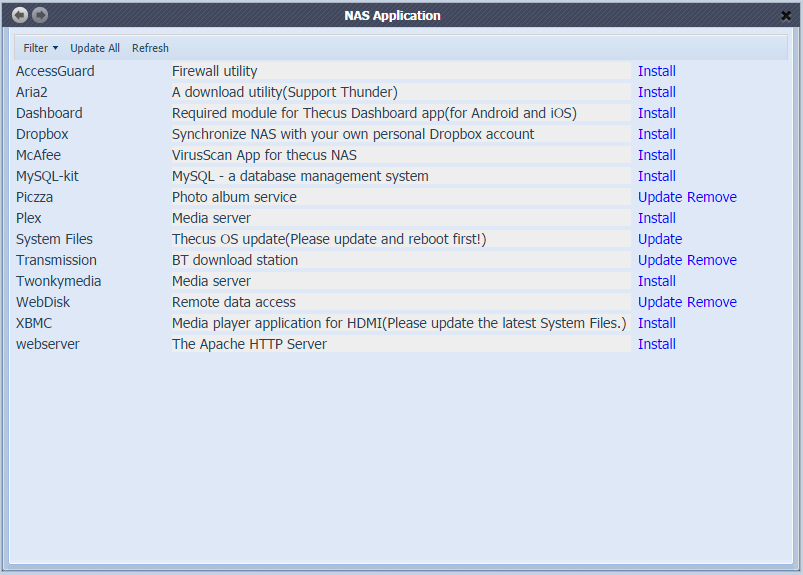
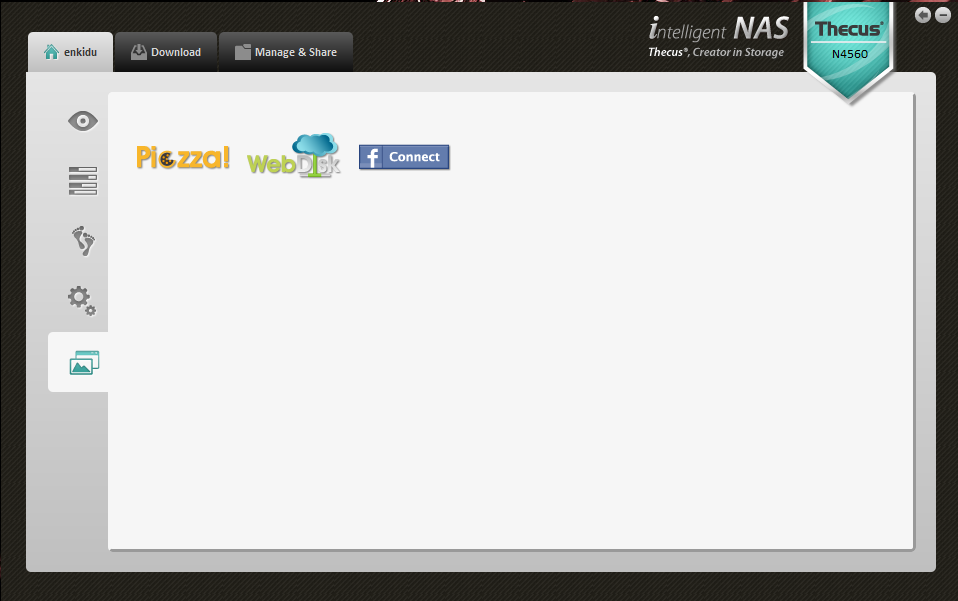
Somewhat hinted at above, the N4560 can serve to be much more than a NAS. Remember those outputs, particularly the video and audio? You can hook peripherals up to this unit and use it for a pretty wide array of different functions. There are a few "official" applications, such as Plex media server or Dropbox, then there are third-party applications hosted from the Thecus website. You'll have to pay attention to the model, as certain applications are only designed for firmware running on certain models, and admittedly the N4560 is one of the models with a lesser selection, but there are still some cool options out there.
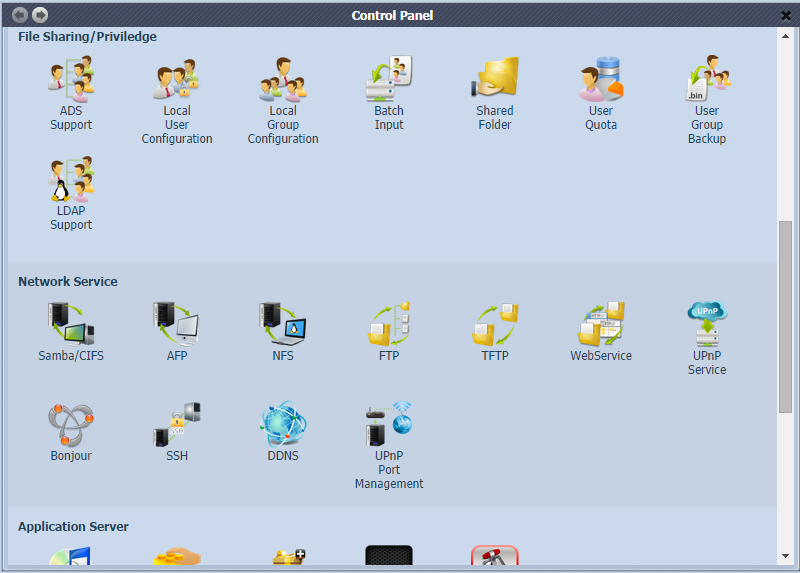
To add additional applications to the main screen, so your Shared Folder and RAID management aren't so lonely, you'll click on the Control Panel icon in the upper left hand corner of the web interface. Here you'll see a variety of management tools and applications, which you can launch from here or simply right click and add a shortcut to the main page. It would be hard to cover all of these features without appearing as a user manual, so suffice it to say there is a lot of depth to setting up profiles, permissions, shares, and other applications.
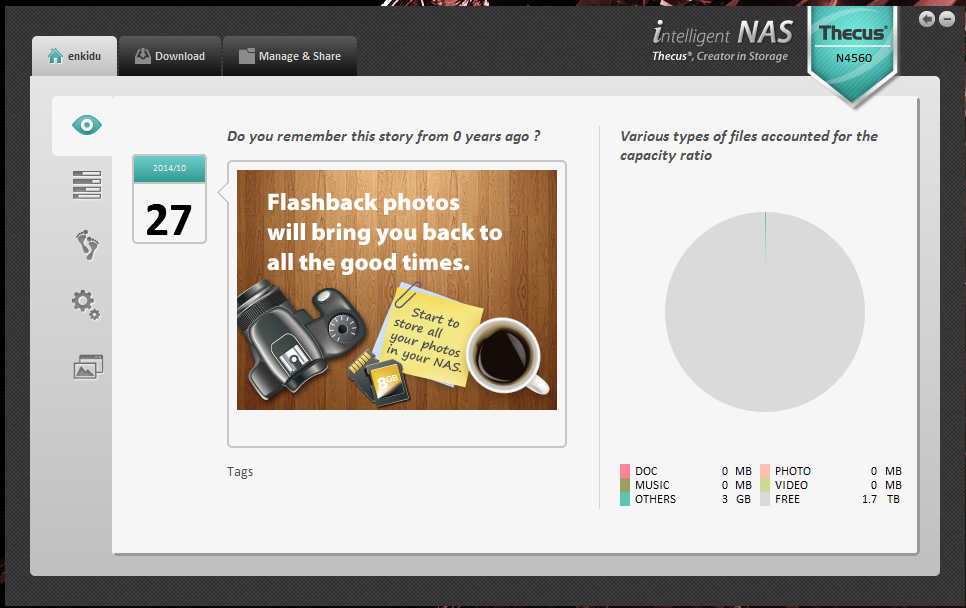
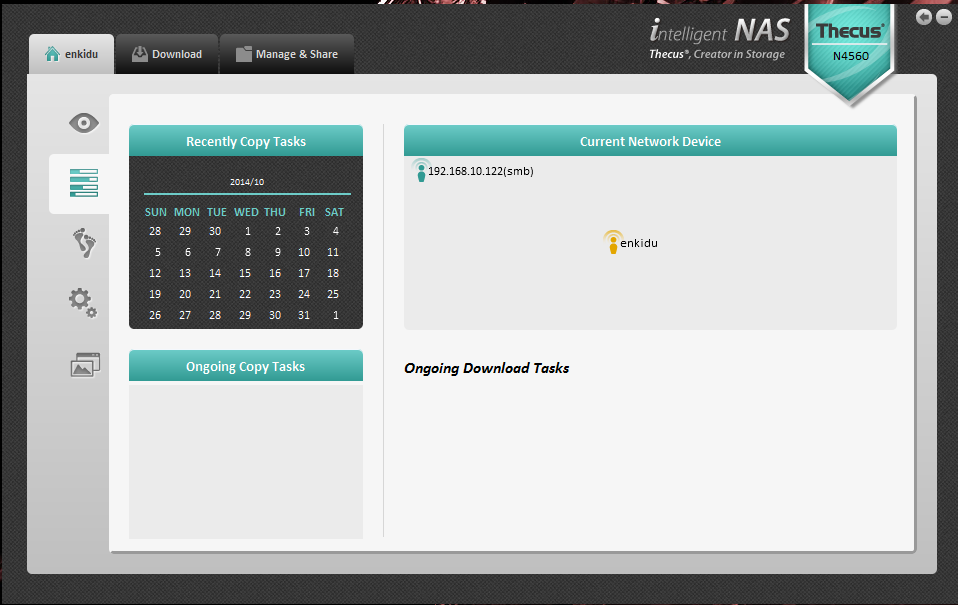
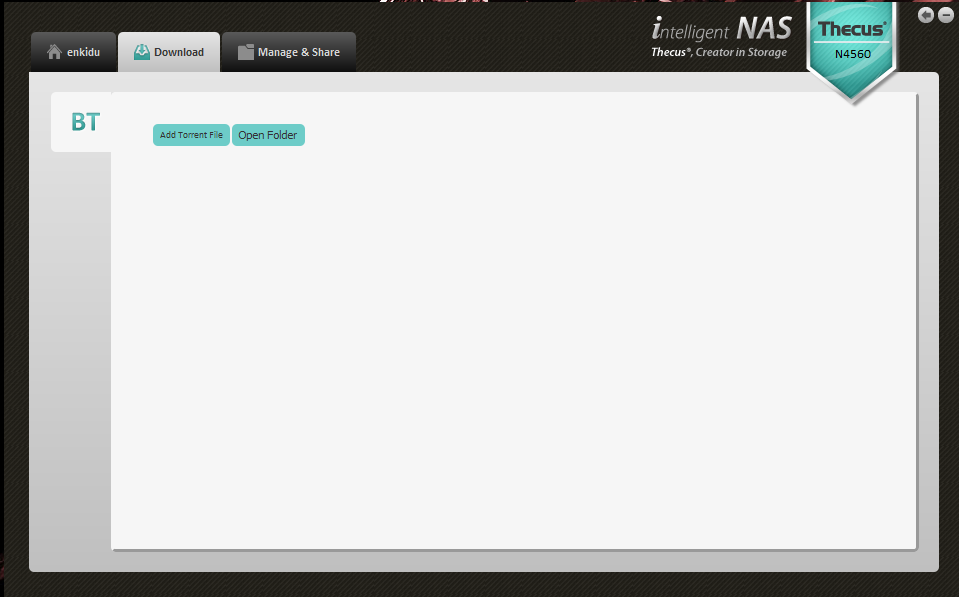
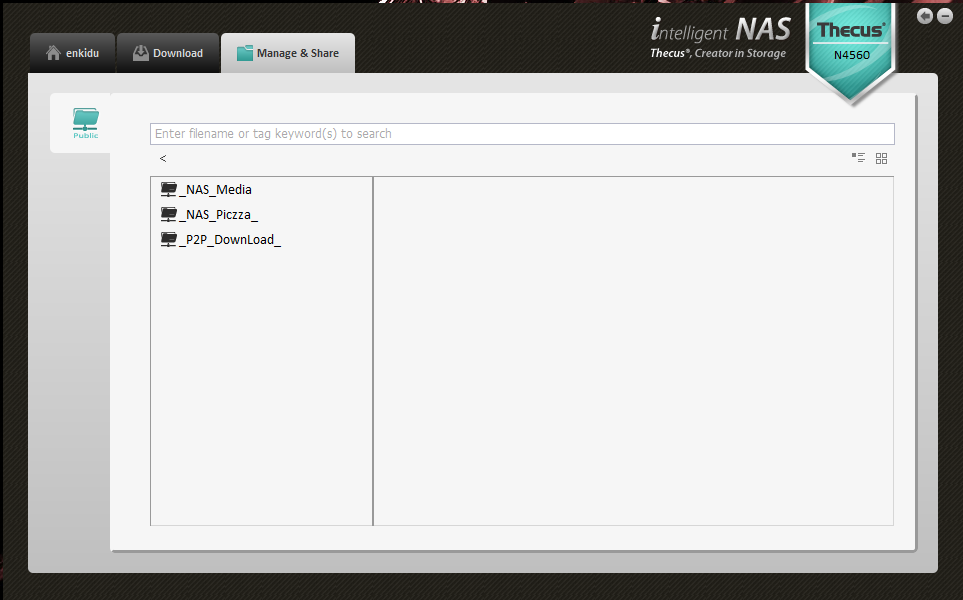
Let's cycle back to the IntelligentNAS software. Now that I had the device configured, it seemed much happier and allowed me in. You can easily see that this software uses the back-end as the web interface, as many features overlap. The main screen provides a quick look at the data on your NAS (as well as a flashback feature that pulls media from the device). This "home" tab provides additional pages to view some further statistics, recent files, and even some UI customizations to the software. The "download" tab provides the ability to uses torrents or pull a manual file, and the "manage & share" tab will provide you with a Windows Explorer-esque view of the file tree.
Finally, let's take a quick look at browsing to the device through Windows Explorer. The NAS should appear as a network device, and if we take a look at it we'll see the mentioned built in folder, plus any that you add manually. Again, the built in folders can be turned off if desired, but a neat one to keep around is the 'usbhdd', which is where a USB external drive will mount, allowing you to access it over the network. A perfect use for the USB 3.0 port.
Performance
How a NAS performs can be somewhat ambiguous; in reality I've been discussing how the N4560 performs in many subjective aspects so far. To test the technical, objective performance we benchmark against other storage solutions we've reviewed. This is a combination of Intel's NAS Performance Toolkit suite which simulates many uses such as HD video playback, file transfer, and office productivity. In our test environment, we built three RAID configurations (JBOD, 0, and 5) between three physical disks and tested each with the following results:
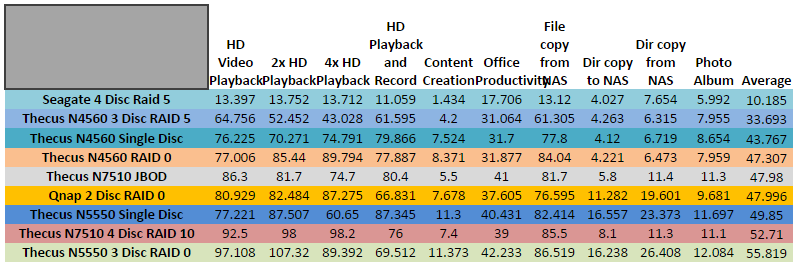
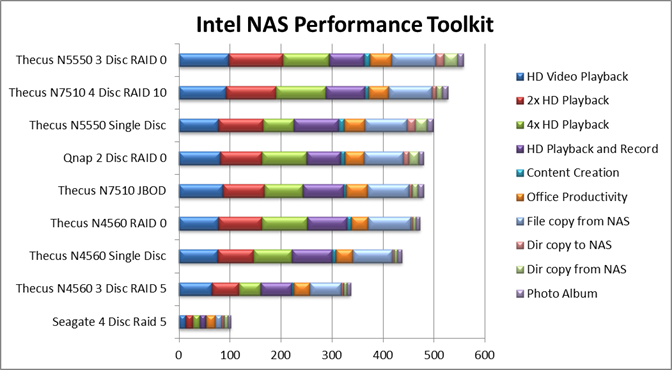
The best comparison in this situation would be with the N5550, which was tested with the exact same discs as the N4560. The results ebb and flow in favor of one or the other in different categories, but taken on the whole they hit pretty close to the same mark as what we would expect.
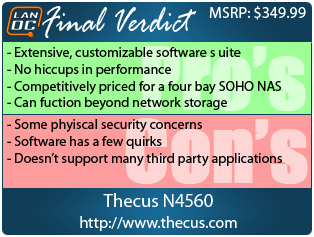
Overall and Final Verdict
The N4560 has an entry-level price point, and leaves some room to pick up a few good drives and still keep the investment under $500. Installation, both physical and software, can be simple but also supports in-depth customization if you so desire. While there were a few physical security concerns, in reality having an non-local storage solution that isn't a budget external USB drive is a huge improvement of its own. The locks mechanisms will likely be enough to deter malicious activity, intentional or not, but if someone really wants in, they'd be able to do it. As mentioned above, the software experience can end at the wizard set-up, establishing a RAID configuration and a few basic shared folders, or it can go beyond to provide directories separated by owner access, cloud backups, or even a few additional functions such as an HTPC. That being said, a lot of the applications on the Thecus "market" are not compatible with this model, which is a bit of a bummer. It is still a great option and should be a contender if you're considering a network-attached solution for your network.