Every time I cover something Mini-ITX I talk about how great it is that we can build these monster PCs in such a small form factor. Even so, considering how sensitive they are to heat and bad wire management it’s not for everyone. If you don’t know about every single part on the market it can be a little harder to pick out your components for a LAN rig as well. You don’t know what will fit with what, larger builds are a lot more forgiving on all of these things. Well MSI might just have the answer to all of those issues. They have put together a Mini ITX barebones for gamers who know they want a small easy to carry rig. Their Nightblade comes with a variation on their Z97i Gaming AC motherboard that I recently reviewed, a case, slim DVD drive, and 600 watt power supply. You just need to bring your SSD/Hard drive, CPU, heatsink, and video card. The question is, does the Nightblade make things easier and also how well does it perform. Today I’m going to take a closer look and put it through a few tests to see what it’s all about.
Product Name: MSI Nightblade Z97
Review Sample Provided by: MSI
Written by: Wes
Pictures by: Wes
|
Specifications |
|
|
CPU |
Support Intel 4th & 5th Gen CPU |
|
Chipset |
Intel® Z97 Chipset |
|
Motherboard |
MSI Z97I Gaming Nightblade |
|
CPU Cooler |
Not included |
|
VGA |
Support up to a two-slot design of graphics card, max 290mm length |
|
Memory (GB) |
DDR3 DIMM x2 Slots, Support up to DDR3 3000MHz, 16GB max. |
|
LAN |
(RJ45) E2205 Killer Gigabit LAN |
|
Communication |
WiFi 802.11 ac/b/g/n, Bluetooth 4.0 and WiDi (controlled by Intel Dual Band Wireless - AC 7260) |
|
Audio |
7.1 Channel HD Audio - Realtek ALC1150 Codec |
|
I/O |
Rear: 2 x e-SATA, 2 x HDMI, 1 x Display Port, 1 x S/PDIF, 1 x PS/2, 1 x Clear, CMOS Button, 2 x Antenna Connectors |
|
USB |
Rear: 2 x USB 2.0, 4 x USB 3.0 / Front: 2 x USB3.0, 2x USB2.0 |
|
HDD/SSD |
Support 1 x 3.5” / 2 x 2.5” (2 x mSATA in one 2.5”) |
|
ODD |
Slim 9.5mm Slot-in DVD SuperMulti included |
|
System Fan |
Rear: 92mm 3600RPM, Side: 120mm 4000RPM (option for R9) |
|
Power Supply |
600W |
|
Power Efficiency Level |
80 PLUS GOLD |
|
Chassis Size |
16 LITERS |
|
Dimensions |
13.61 x 10.92 x 6.92 in. |
Packaging
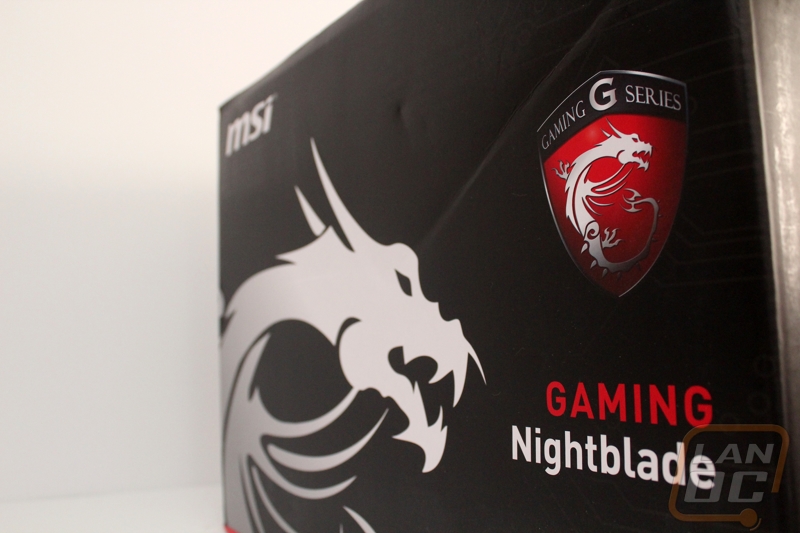
Being an MSI Gaming product I wasn’t shocked at all when the Nightblade came in with its bright red and black theme. What I was surprised to see was an actual photo of the Nightblade right on the front. I love when you can see what you are getting without having to go online to find photos. Becides the photo on the cover you still get a large MSI G Series logo and the product name itself. There is also a Fnatic logo tucked up in the corner as well. Up on top there is a carrying handle and the “Just Game!”.
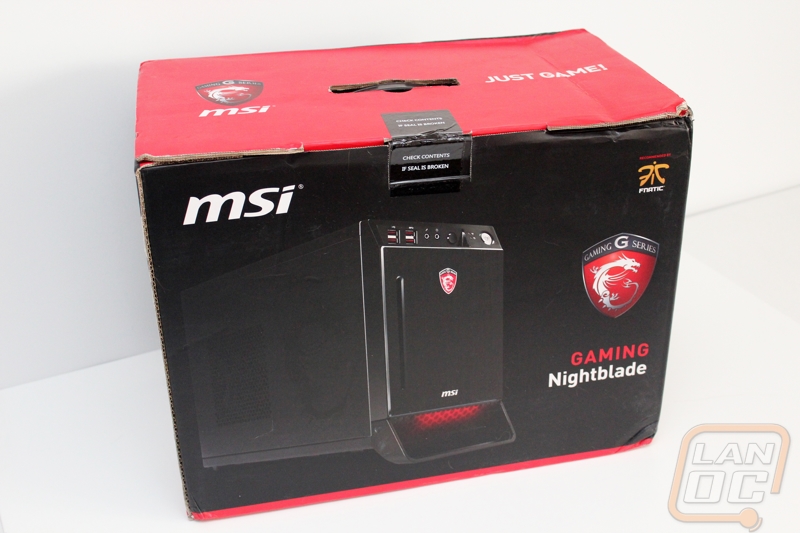

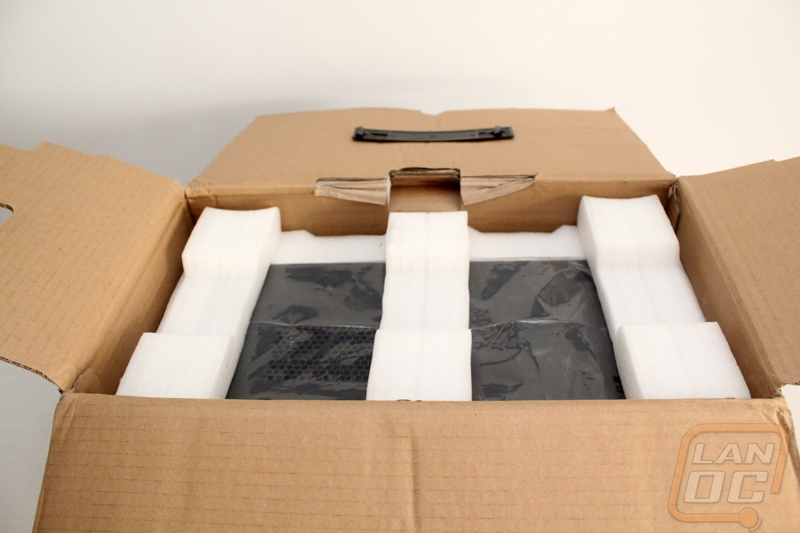
Inside everything is protected with foam as well as a plastic bag around the case to prevent any scratches. All of the accessories come in a keyboard sized box tucked in up under everything else.
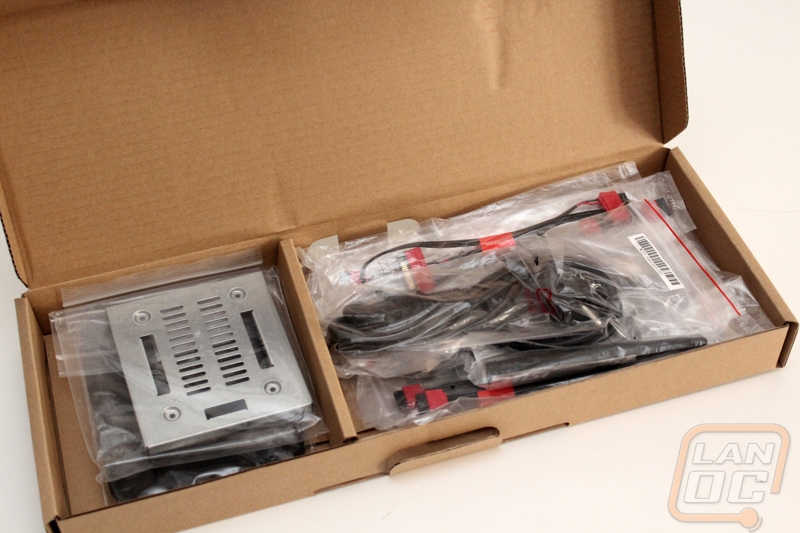
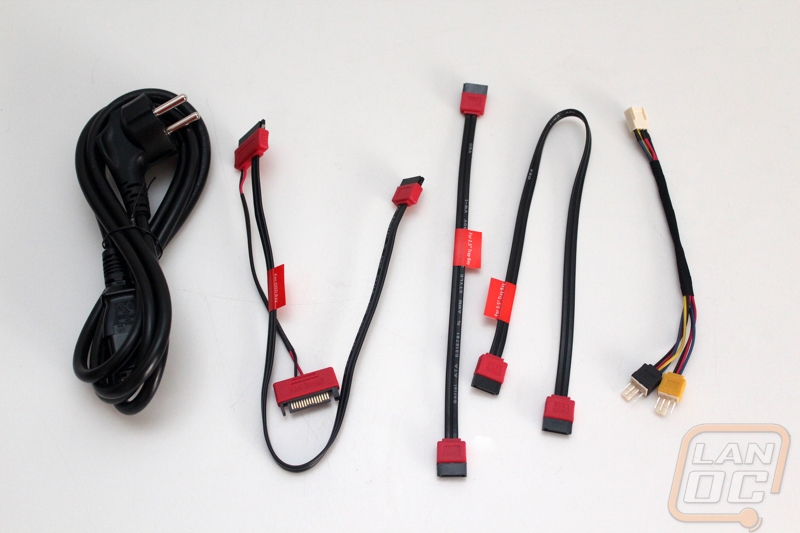
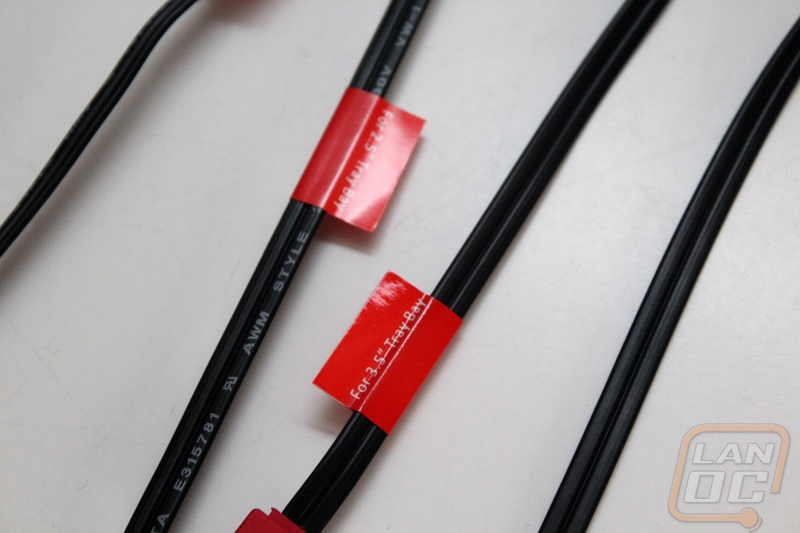
Being a barebones system you are obviously going to get more accessories because we are getting accessories for both the motherboard and the case. Starting with all of the wires that came in the accessory box you get a power cord, a fan splitter, two SATA cables, and a cable to get you power and data to your disc drive. If you look closely you will see a few interesting things in the photo below. For one our power cable doesn’t have a standard north American power connection, this happens from times to time with review sampling because they send them out globally. You can expect the proper cord if you pick one up. MSI also went through the trouble to put nice red labels on each of the cords so you know what each of them is used for. They went as far as to label specific SATA cables for different bays in the case!
MSI bagged up and labeled all of the other small items you will need for the Nightblade. You have hard drive slides and all of the screws individually bagged. You get two antennas for the built in wireless as well. They even went as far as to include the small connection covers that the motherboard would normally come with installed.
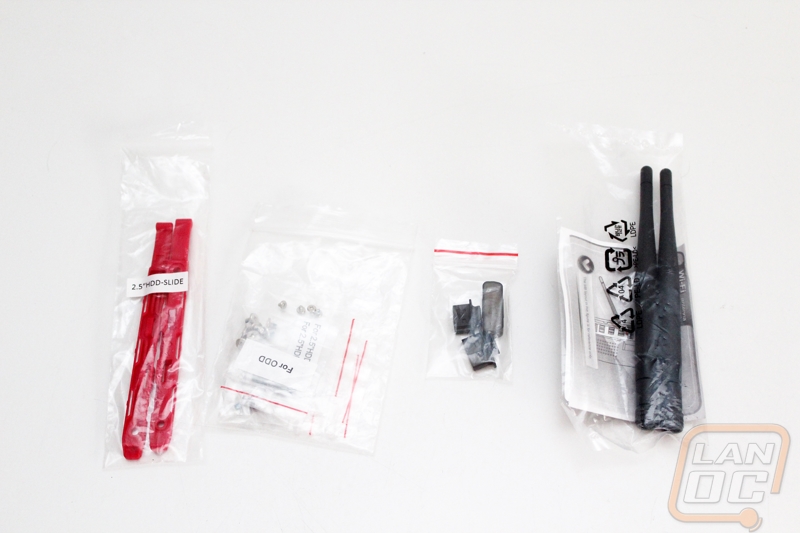
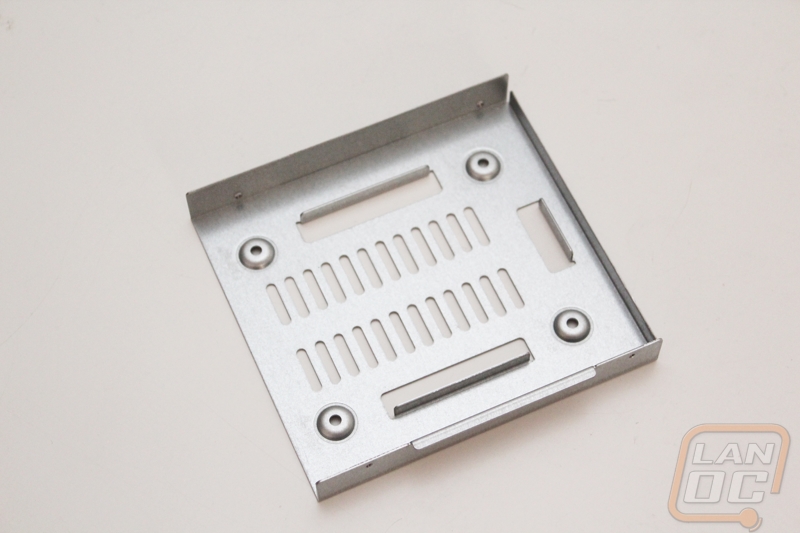
Should you need another 2.5 inch drive bay on top of what you already get they included a 3.5 to 2.5 inch adapter as well.
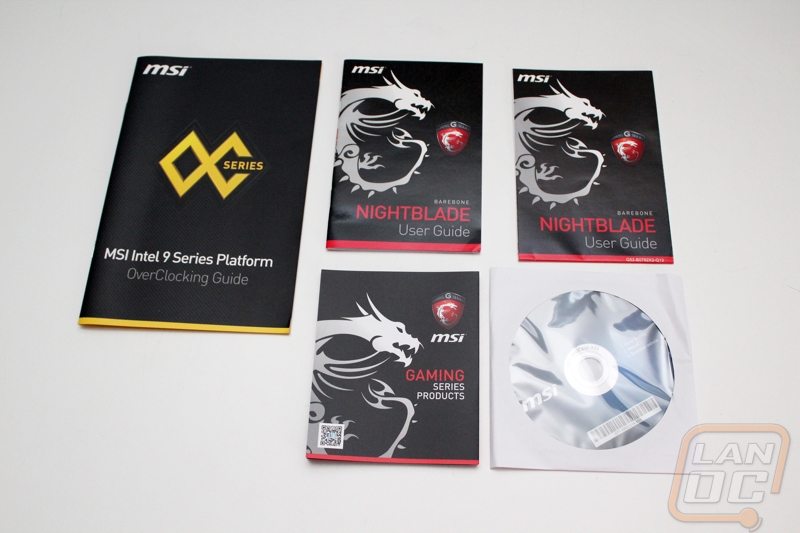
For documentation, you get a whole book. You get a user guide for the barebone and a fold out user guide as well. There is a general Intel 9 Series overclocking guide and also a small info paper on the MSI Gaming Series of products. Then of course, you also get a driver and software disc for when you have everything put together.
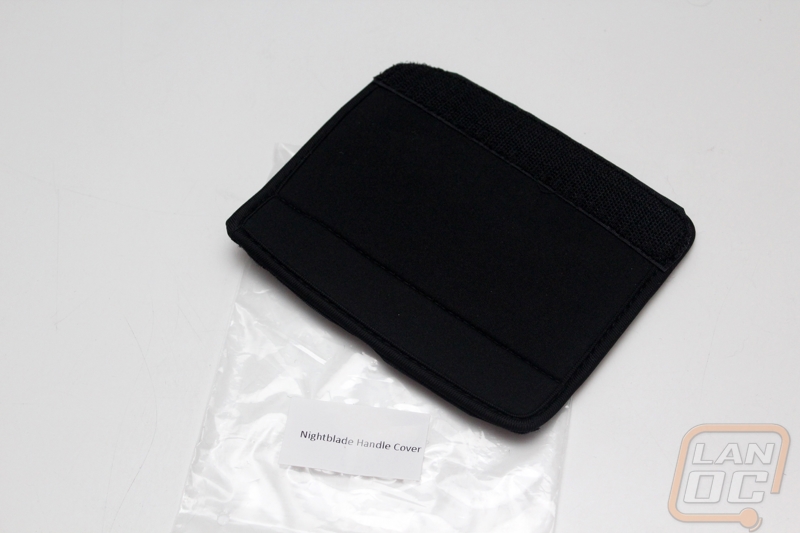
MSI is expecting to see the Nightblade hitting a few LANs from time to time. To help with that they designed it to be carried with it’s built in handle. To make that even easier they include a neoprene handle cover that you can install. The cover uses Velcro to attach around the handle. In addition, if it wasn’t obvious what it was they even labeled the bag!
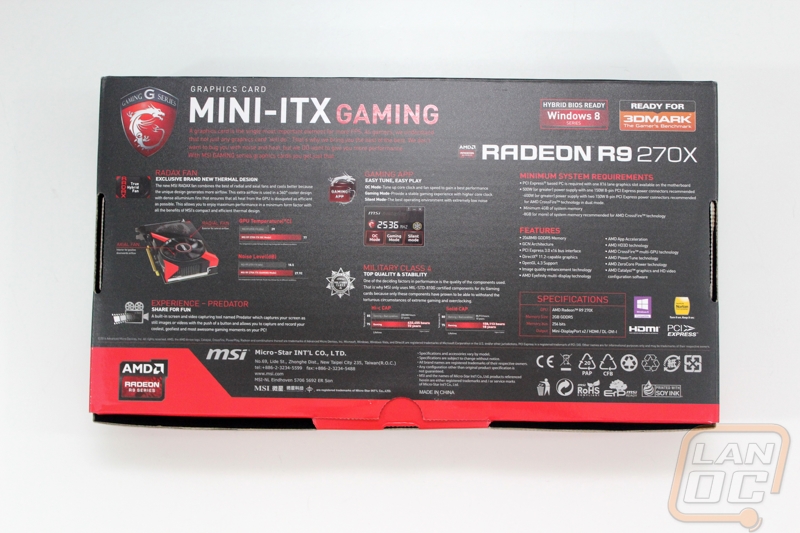
While the Nightblade actually supports a full-length video card, when prepping for the build I decided to use the Mini-TIX Gaming R9 270X that MSI had sent over as well. So while we are looking at packaging let’s take a look at what the video card comes/with. The box itself has the same black and red theme that all MSI gaming products have. The size of the box is MUCH smaller than any of their full sized cards. Even so they were still able to fil the model information on the cover alongside the silver MSI gaming dragon logo. On the back there is a small photo of the actual card alongside information about the cooling design. There is also information about the gaming app for quick overclocking and MSIs Military Class components. There is also a feature and specification listing. The specifications aren’t very big, but it’s nice that they included something at all.

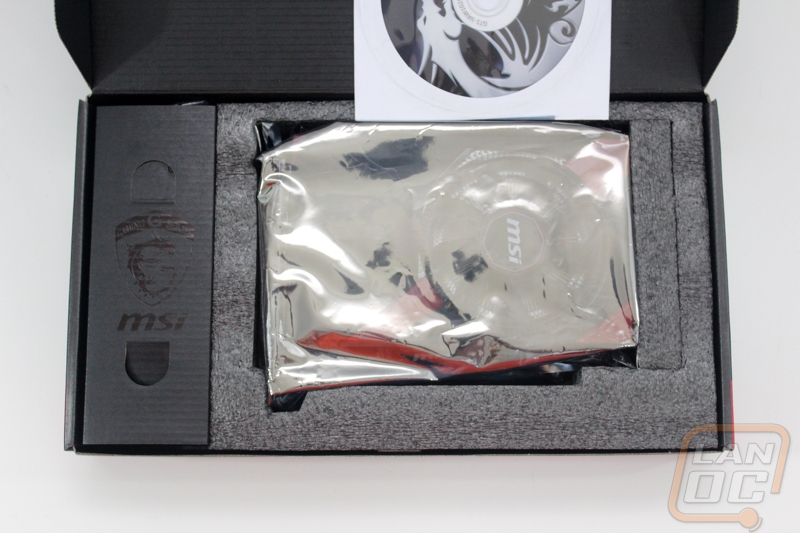
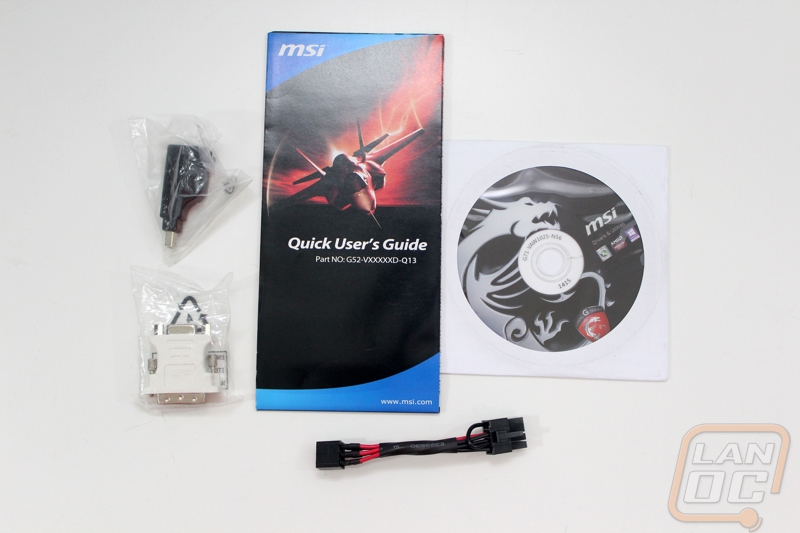
Inside the box, the card is wrapped up in a static bag then protected with foam on all sides. There is a small box for accessories on the side and the user guide and driver disc is sitting on top of the card. For accessories, you get a DVI to VGA adapter, a mini DisplayPort to full sized DisplayPort adapter, and a six pin power to 8 pin power adapter. I love that the power adapter is also all red and black, there is nothing worse looking in a build than the bright multi colored adapters that come with most video cards. Sure you really shouldn’t need to use them if you have a good power supply, but if for some reason you need one it’s nice to have it included.
Nightblade Photos and Features
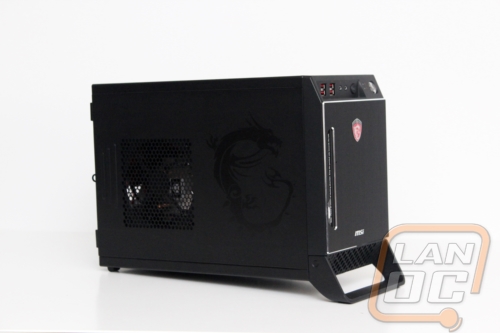
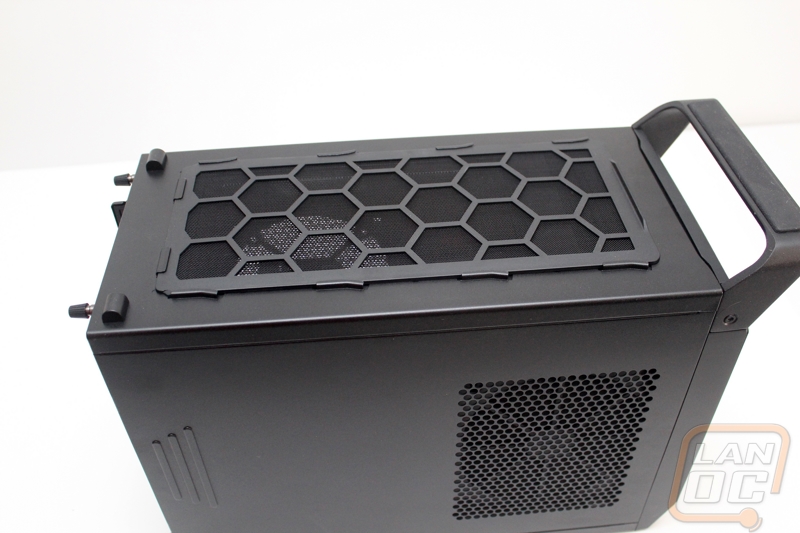
Its interesting, for the Nightblade MSI came up with a completely new case design that still managed to sum up a lot of the MSI styling. The all black styling look great and the light amount of machined aluminum trim around the front are just enough to set things off. The most interesting part is the carrying handle that doubles as the front feet. Overall the Nightblade is slightly larger than my Lunchbox 2 with its Lian Li TU-200 case.
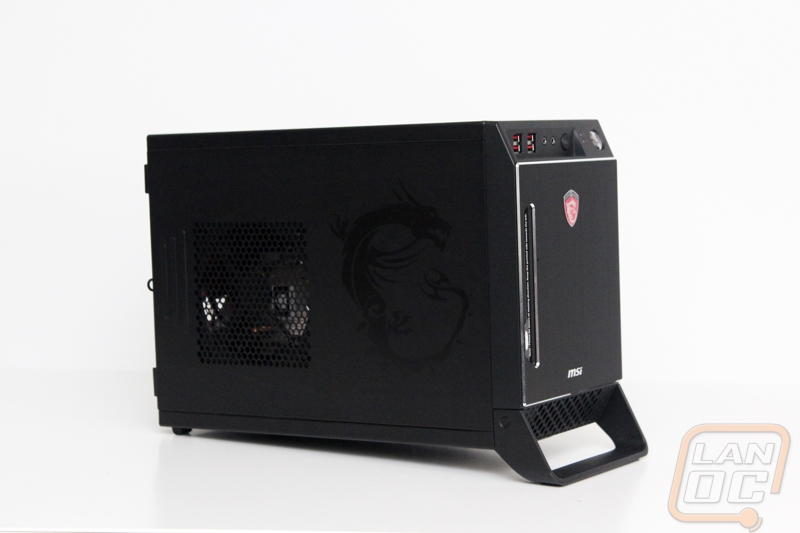
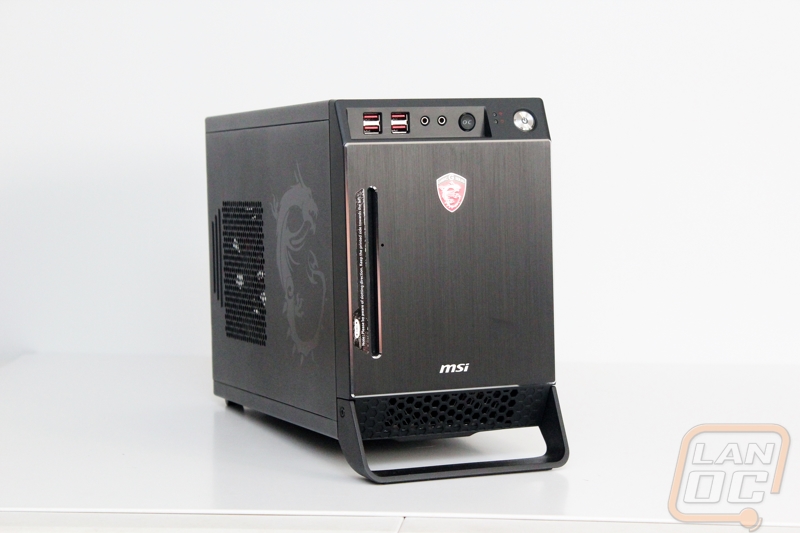
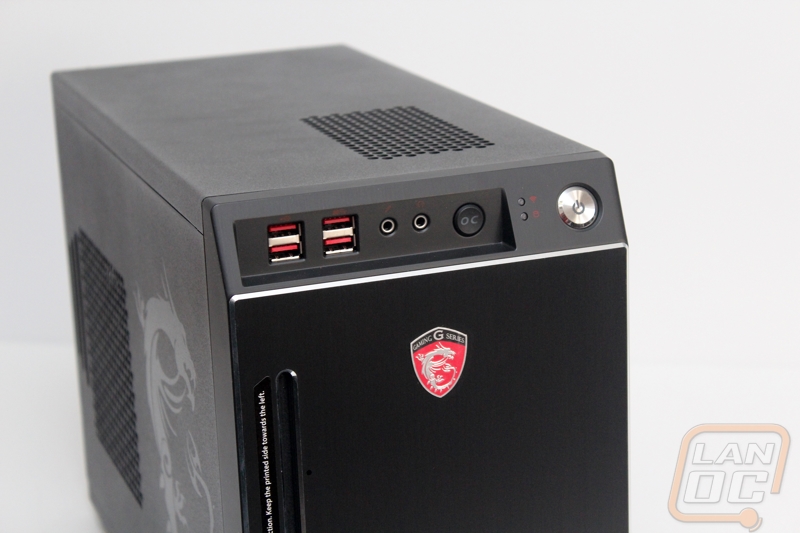
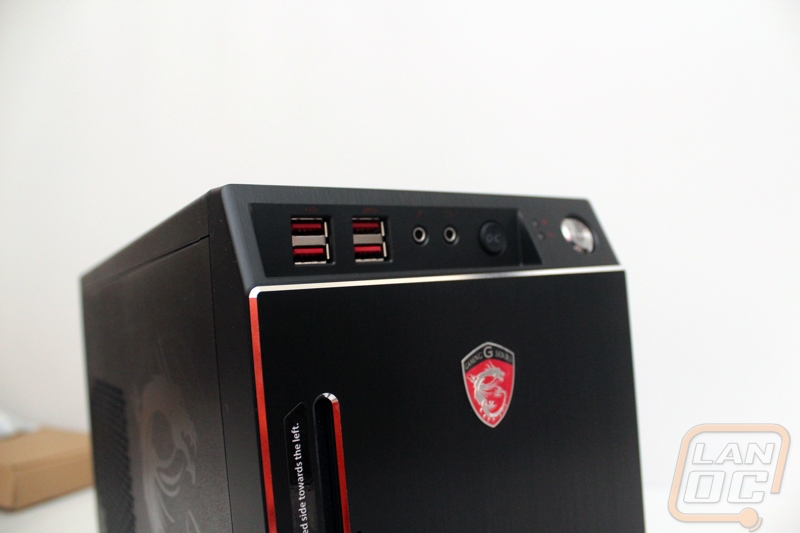
The front of the Nightblade is mostly covered in a black anodized aluminum front panel that only has a slot for the slot loader DVD drive and the MSI G Series logo on it. Everything else going on on the front of the Nightblade is actually up at the top. You get a total of four USB 3.0 connections as well as the standard microphone and headphone ports. I thought this was interesting because the motherboard inside of the Nightblade when sold on its own only has two USB front panel USB 3.0’s supported. When I dig inside I will have to look to see how they managed this. Beyond the connections you get an OC button that works with MSIs OC Genie, a machined aluminum power button and wireless and hard drive activity LEDs.
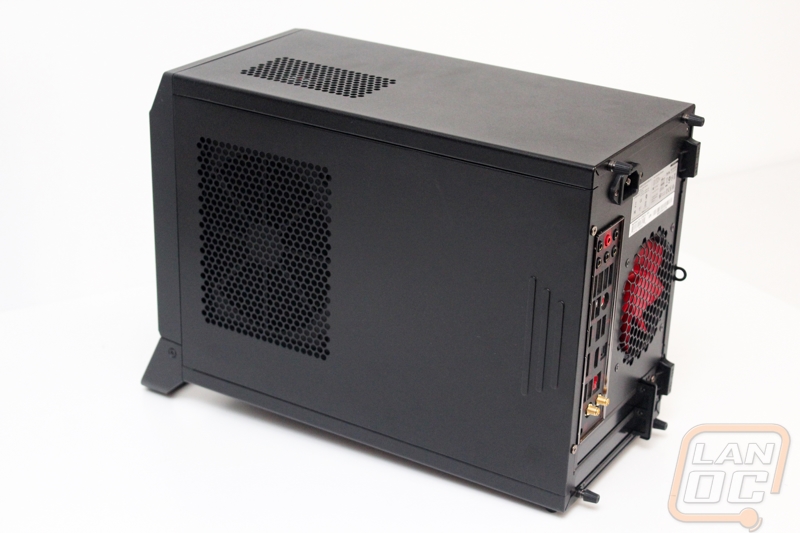
Both the left and right sides of the Nightblade have large perforated vents on them. The left side has its vented area towards the back of the case over top of the CPU heatsink where the right side of the case has it closer to the front. The left side also has the MSI Gaming Series dragon logo panted onto the case in black. Being black on black, you can only see it when the lighting hits it just right.
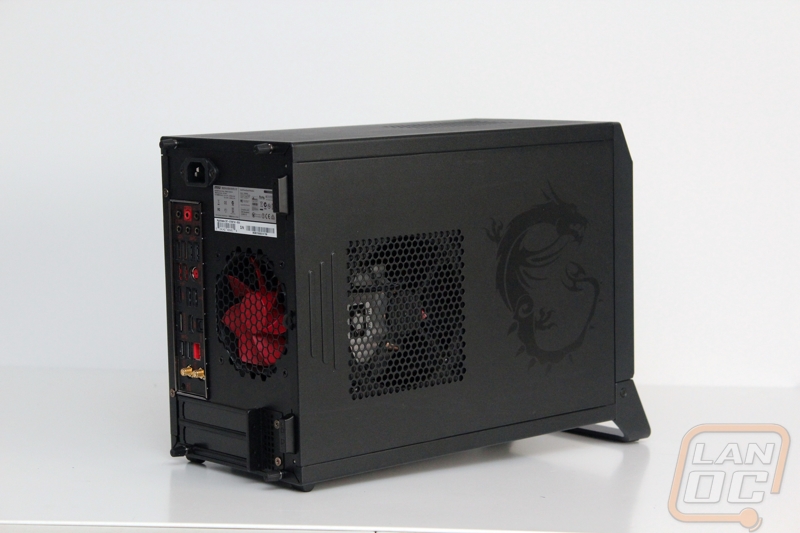
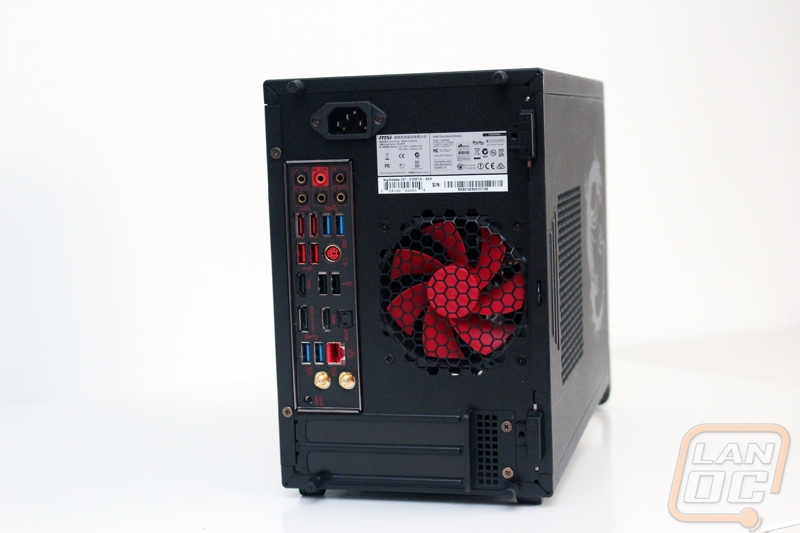
Around on the back of the Nightblade the blacked out theme continues, even the rear I/O panel is mostly black. The red 120mm fan is the cases only exhaust fan, the interesting thing is the fan looks like it is installed backwards but it isn’t the blades are reversed from what you normally see. Down at the bottom you have two PCI slots for a double slotted GPU. Up at the top is the power connection, as you can see the PSU isn’t visible, MSI has it hidden inside of the case with a cable running to the rear.
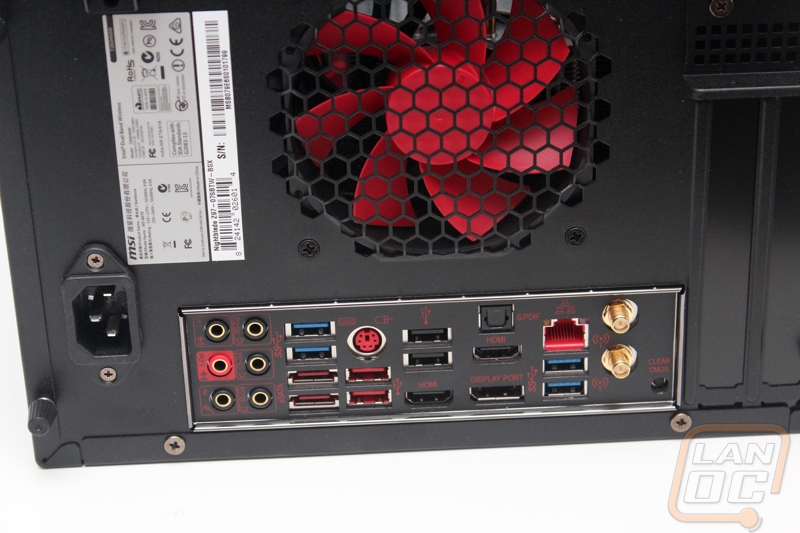
As for the rear I/O panel, we get the same connections that the Z97I Gaming AC had. On the left, you have your six port audio connections including the red port that has the headphone amp built into it. You get four USB 3.0 and four USB 2.0 ports. The two USB 2.0 ports in red and the PS2 port all have an increased amount of gold in the connectors to help extend the life of these connections for gamers who are unplugging and plugging in their keyboard and mouse often when going to LANs and tournaments. If you plan to use the onboard GPU you get an impressive two HDMI ports plus a DisplayPort connection. You also get an S/PDIF connection for hooking up to your stereo. On the right side, you have the red Killer Ethernet connection as well as the wireless antenna plugs for the Wireless AC/Bluetooth adapter. Last but not least, over in the bottom right you get a clear CMOS button.
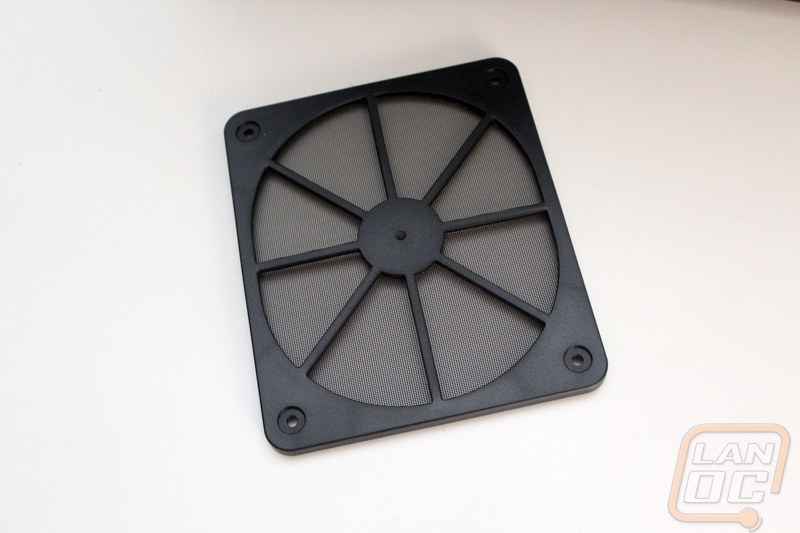
Up under the Nightblade MSI has also included a removable filter for the bottom vent. This is because most video cards will be pulling their air in here, this should help keep the dust down inside of your case.
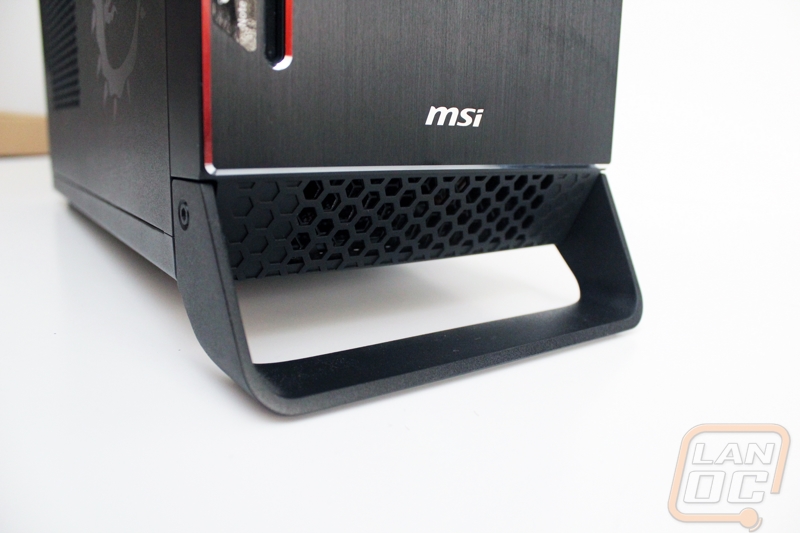
On the bottom front of the Nightblade MSI built in a carrying handle. Typically a handle like this would be on top, but putting the handle here acts as a case foot when you are using it. This lifts the front up a little higher than the rear of the Nightblade, giving room for a little airflow to the bottom of the case. Speaking of airflow there is also a small vent right here on the front of the case in this photo.
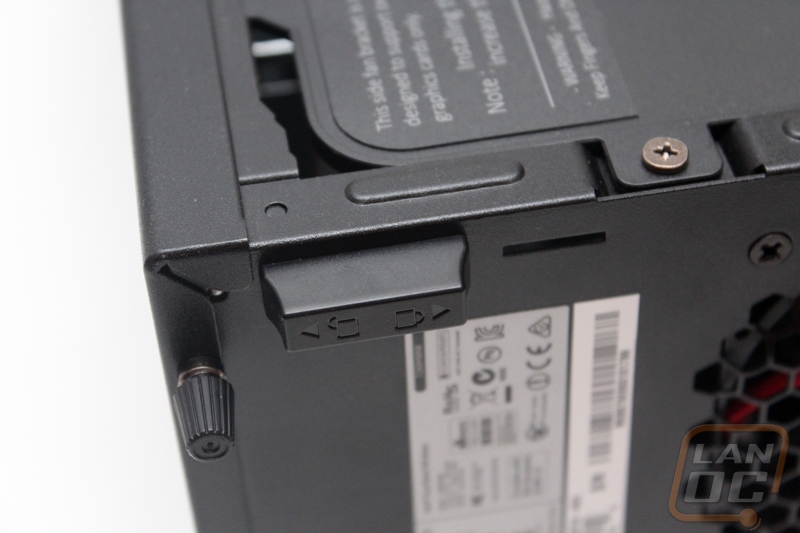
To get inside of the Nightblade I expected thumbscrews or even normal screws, I was pleasantly surprised with the two sliding locks on the back of the case that lock and unlock the side panel to give you tool free access.
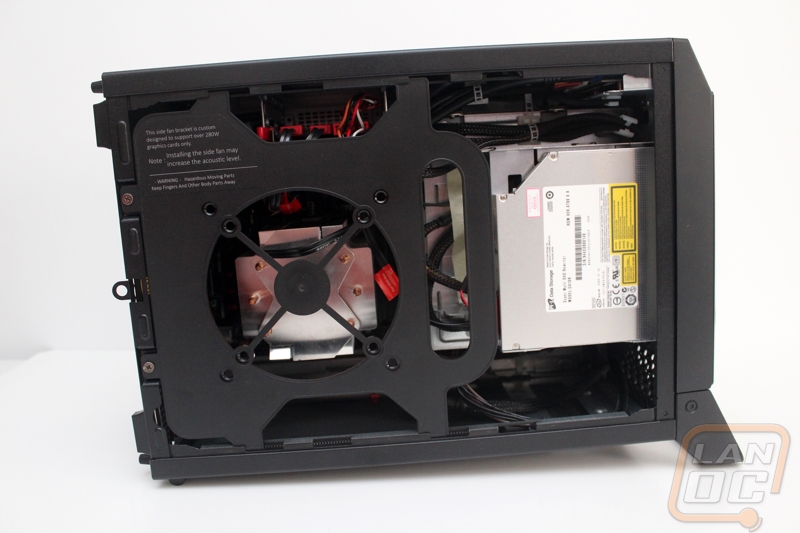
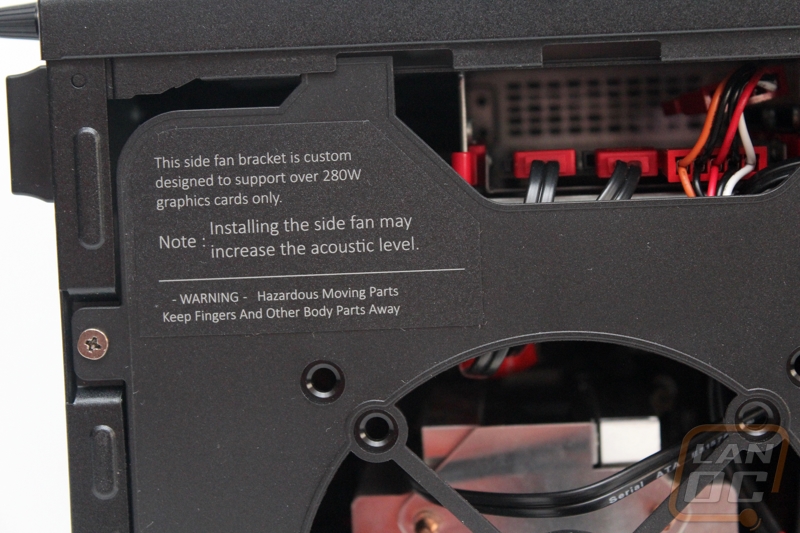
Inside the first thing you are greeted with is a plastic fan mount that allows you to install a 120 or 140mm fan to blow cool air directly on your dedicated video card. MSI put a note on the panel saying that you should use this when using cards that are over 280 watts, that would mainly just be dual GPU cards. To pull the mount out to get into everything else you hae to remove two screws then it slides over and out.
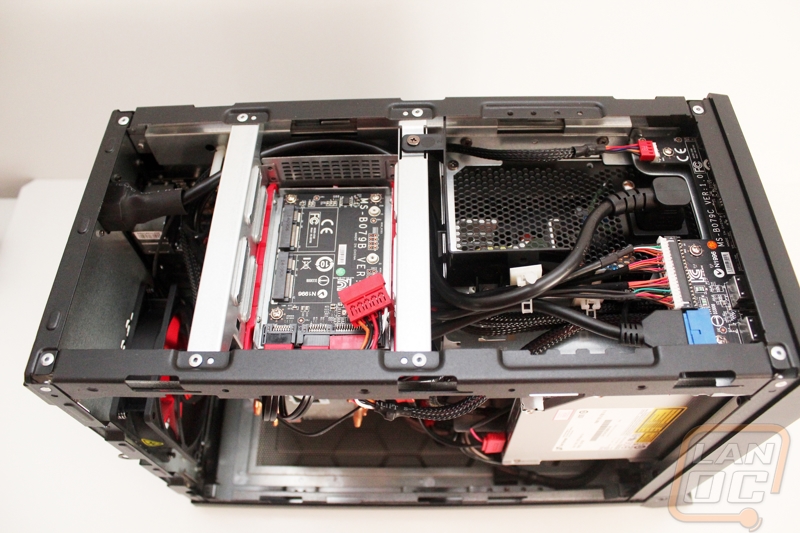
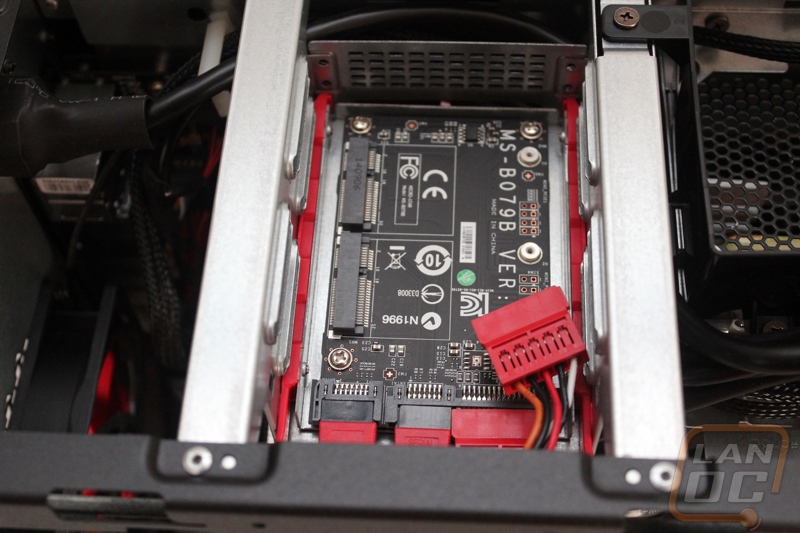
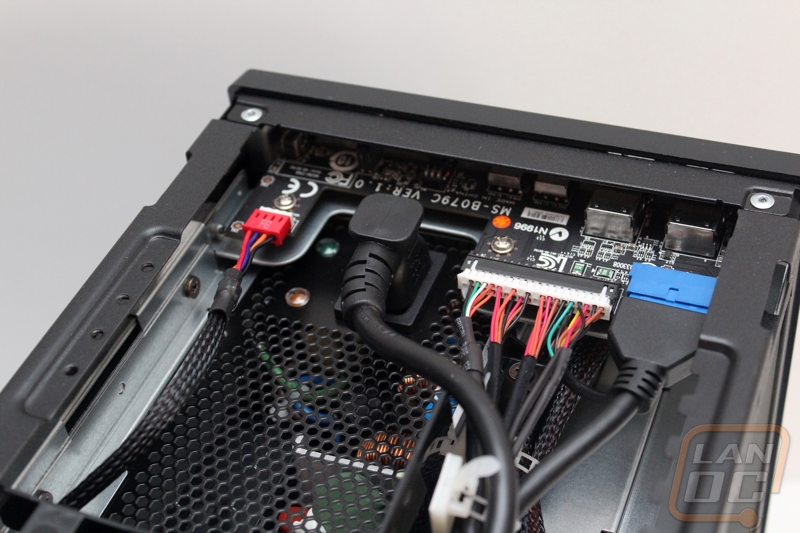
Once inside, up in the top of the case we have a few things going on. First there is a hard drive rack that you can install two 2.5 inch hard drives or SSDs into. Down in the bottom of the tray is an interesting looking PCB though. MSI actually slipped in an adapter that lets you install two mSATA SSD’s into the Nightblade. If that wasn’t enough but the adapter comes installed and already wired up, so installing one or two mSATA drives is as easy as dropping it in and putting in the single screw. Towards the front we can also see the back of the front panel connections. From here we can see that the entire front panel is backed by a full PCB. Here there is a large plug for LED, audio, and button connections. There is just a single USB 3.0 plug when if you remember there are actually four connections on the front. That means that this PCB actually has a USB hub built into it as well, nice!
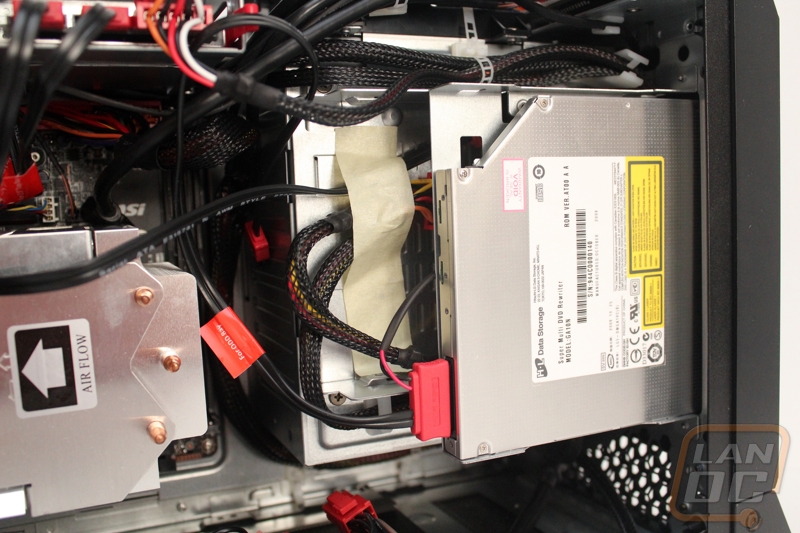
So we have established that when you pick up the Nightblade you get a case, motherboard, and power supply. What else comes with the Nightblade? Well with the original Z87 model they included a heatsink but no DVD drive, leaving you to have to source out a slim slot loading DVD drive. This time around they dropped the heatsink but provided the DVD drive. I’m a little torn on this. Part of me is happy that they don’t force you to have to find the correct DVD drive, but considering how little I use DVD drives I wouldn’t be upset at all if there wasn’t even a place to install one. As for the heatsink, well our engineering sample still had a heatsink in it because they had toyed with the idea of included one. Given that you don’t get a heatsink, I would be sure to budget in a few bucks for a nice Noctua NH-L9i that will keep things cool and open up the inside of the Nightblade even more. The other thing you might not consider with the Nightblade is that MSI has already wired up your entire PC. The motherboard comes with everything hooked up and routed out of the way, the DVD drive is installed and hooked up, and even the video card has its power connections sitting in place waiting for a card to hook too.
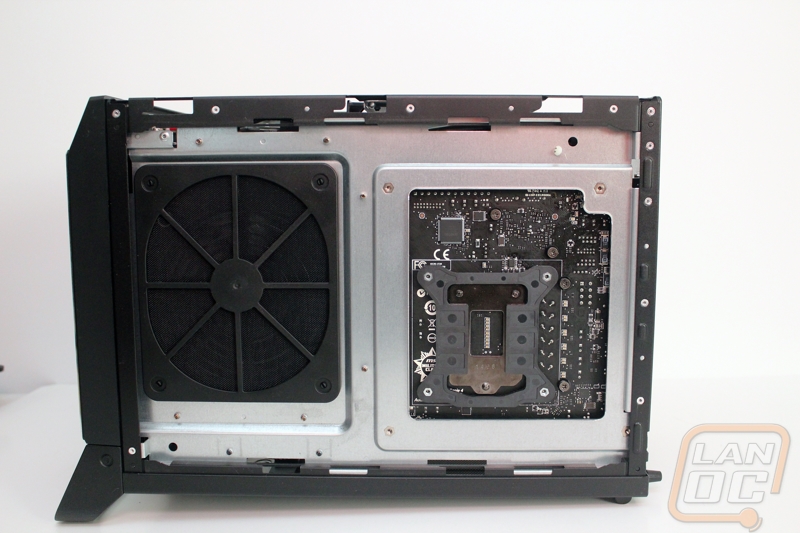
Around on the other side of the Nightblade there isn’t much going on. Here we can see the large access hole for installing your heatsink backplate and then on the left there is a fan filter for the intake fan on the power supply. This explains the placement of the ventilation holes on the side panels as well. The fan filter has clips on each corner that hold it on, but it is easy to pull off and clean. I have a feeling given its location it will be easily forgotten when people are cleaning up their Nightblade though.
When we flip the Nightblade over upside down we can remove this panel as well. While you shouldn’t need to do this to install anything, this does give you better access to the video card area if needed. It also helps give us a sneak peak as just how much room MSI left for video cards in the Nightblade. I’ll give you a hint, it’s a lot! I will touch on that a little more when I get into the installation shortly.
The front panel is held in with just a few plastic clips, so if you hold under it and give it a little tug it will come free. With it off we can see that the front panel connections are all mounted to the metal frame, so they should be really solid. MSI did a nice job with the wiring even here on the front panel as you can see with the wire routed down the middle. The PCB down near the bottom is actually covered in red LED lighting that gives the Nightblade a nice glow on the front.
Mini ITX 270X Photos and Features
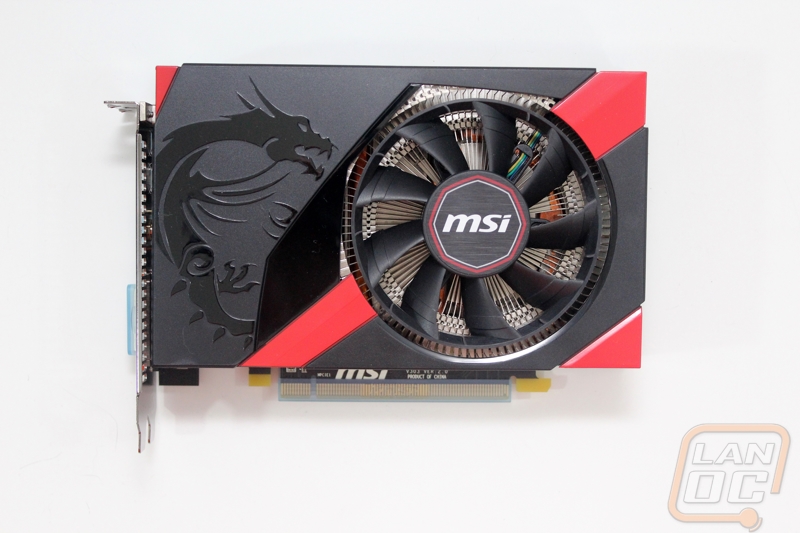
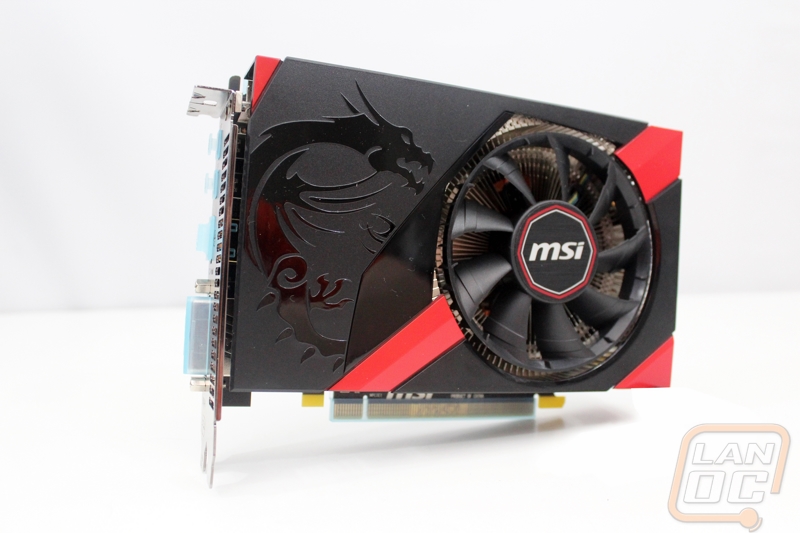
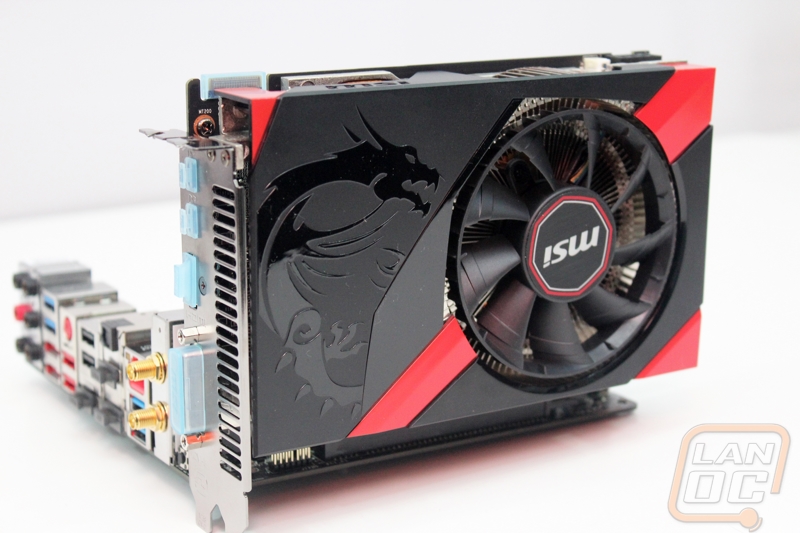
So the ITX Gaming 270X isn’t MSIs first Mini-ITX video card. I took a look at their GTX 760 a while back. This is however their first AMD based card. They took the same overall design and just changed the PCB/GPU. That means on the outside if you were to put them next to each other they would look exactly the same. You have the same red and black fan shroud with the glossy dragon on it. It does still share a lot with the Asus Mini-ITX card as well, just like MSI’s original card. Basically they have given AMD fans a Mini-ITX option rather than forcing them to go with Nvidia.
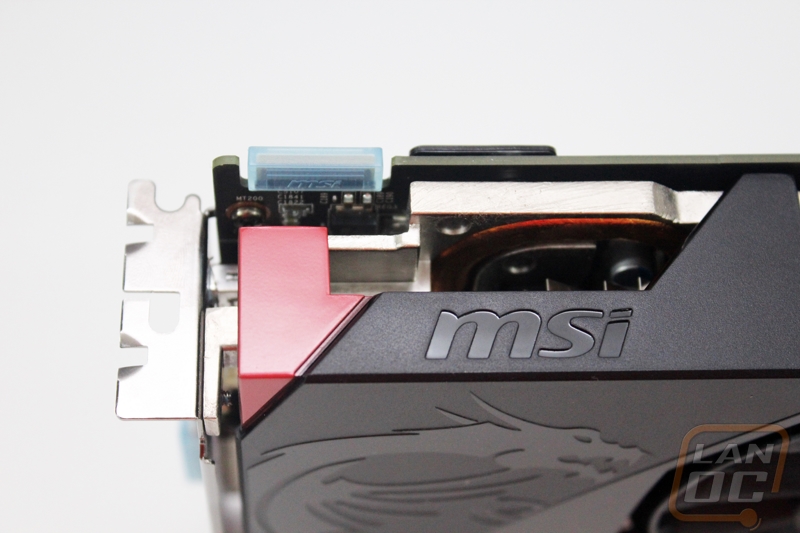
Even though the design is for a Mini-ITX build, MSI still included the Crossfire bridge should you need or want to use the card in a larger motherboard and run Crossfire.
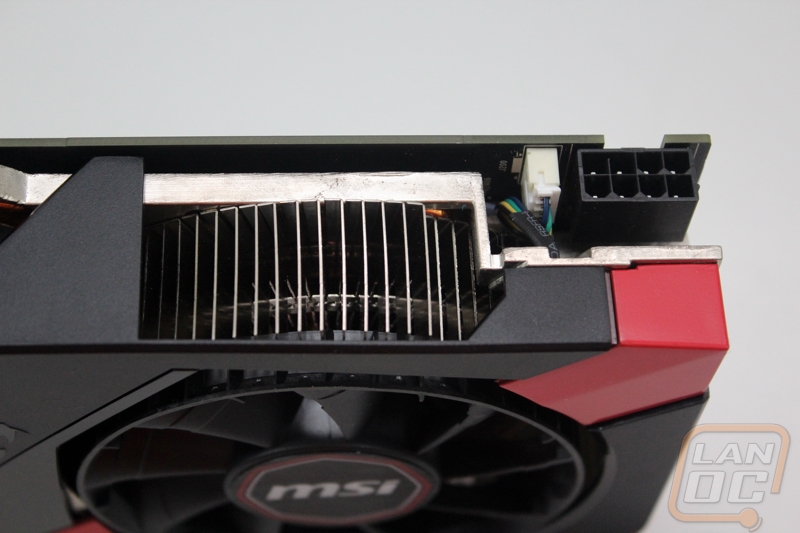
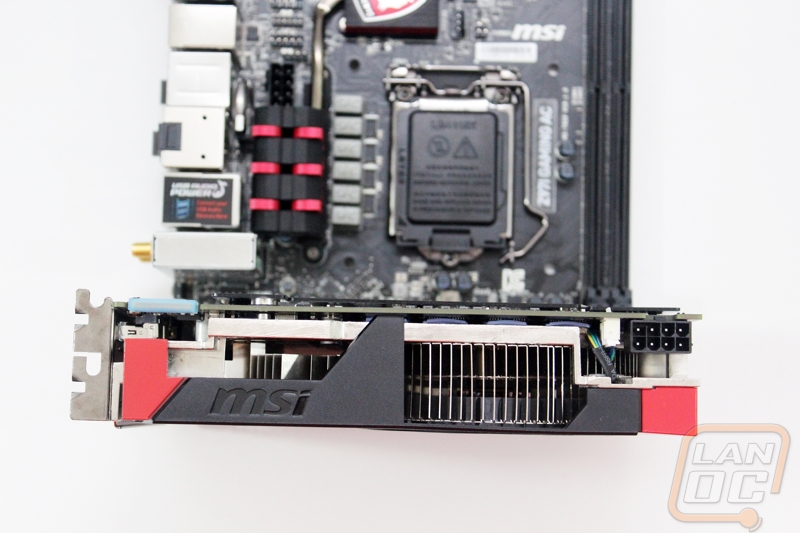
Here is a great look at the overall heatsink design. We can see that they used fins all around the fan, similar to the older Zalman heatsinks. The fins are attached to a plate that covers the entire card to help spread the heat out across the entire heatsink. Also in this photo is the 8 pin power connection. MSI notched the PCB and flipped the power plug around with the clip side toward the PCB to save even more room.
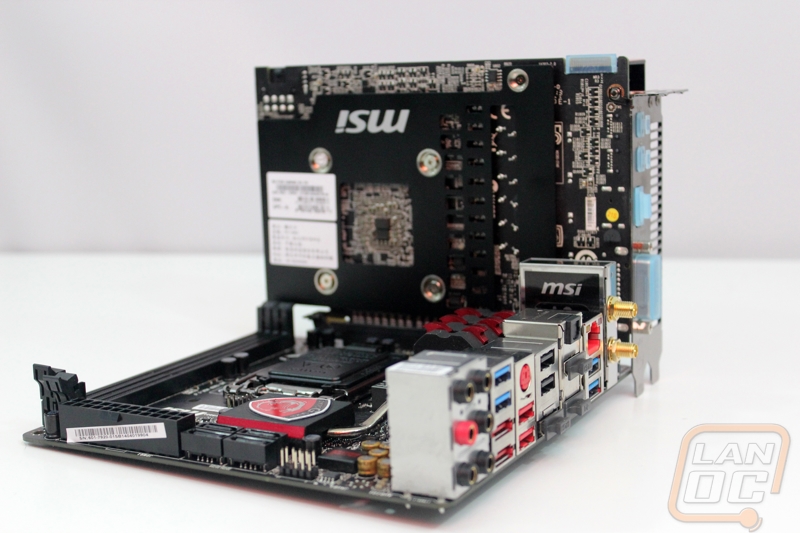
On the back side of the ITX Gaming 270X we have a better look at the flat black PCB. We can also see the backplate that MSI installed to strengthen the card and protect the back of the card. This does take up a little more room, but I think it’s well worth it when you don’t have to worry about bumping anything on the back of the card and damaging it. In extremely small builds there isn’t much room to work in and bumping things is a real possibility.
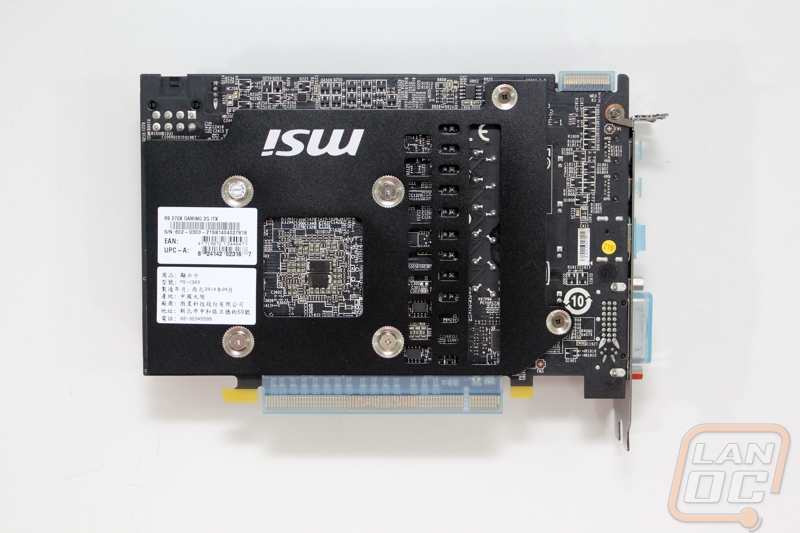
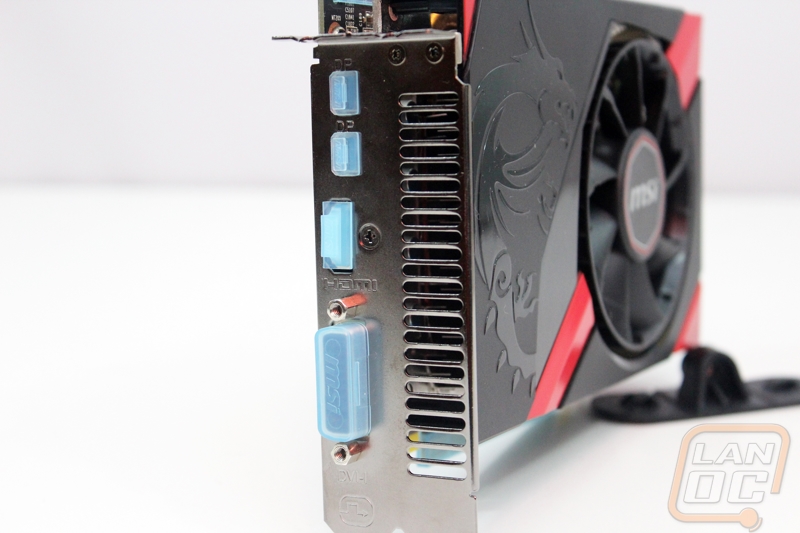
MSI left one half of the PCI slot exclusively for ventilation. The other half has a DVI port, HDMI port, and two mini DisplayPorts. I personally would get more use out of two DVI’s and an HDMI, but with DisplayPort slowly gaining popularity it’s not a bad thing that it is an option.
With the card in an actual Mini-ITX motherboard we can finally see just how small it really is. The ITX Gaming 270X is the exact same length as the motherboard, so assuming you have the power to push the card and two PCI slots you should be able to fit it in any Mini-ITX case.
Installation
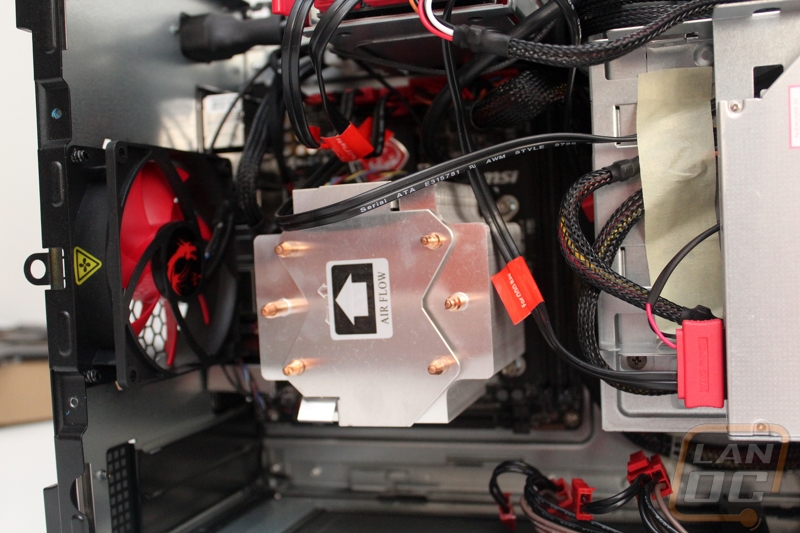
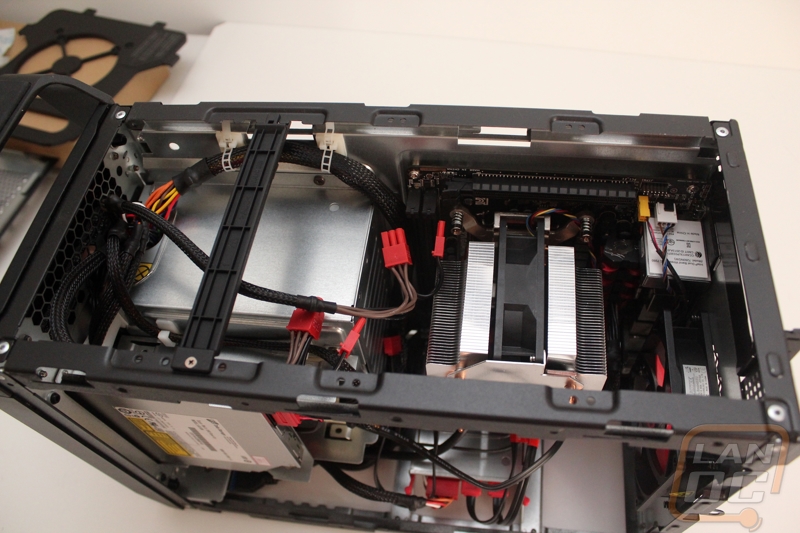
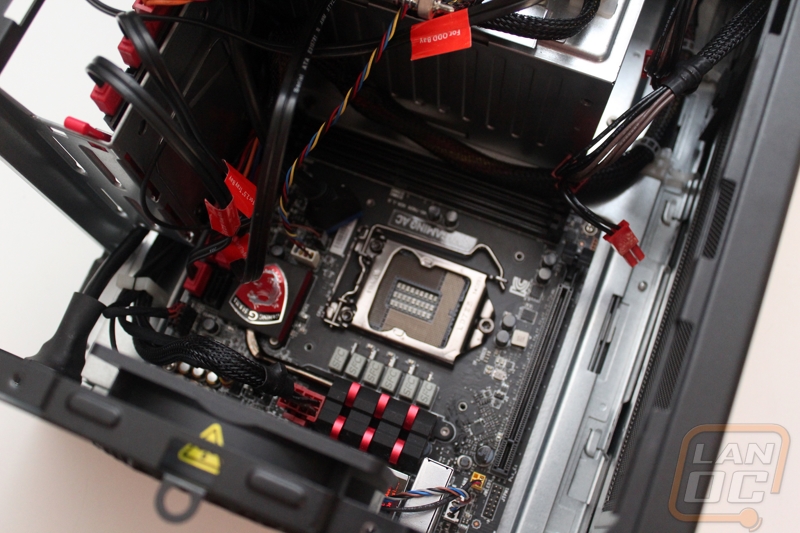
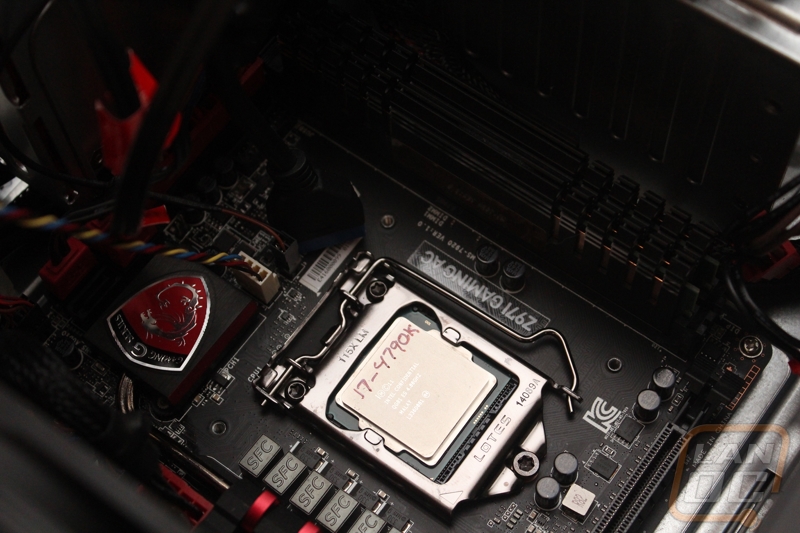
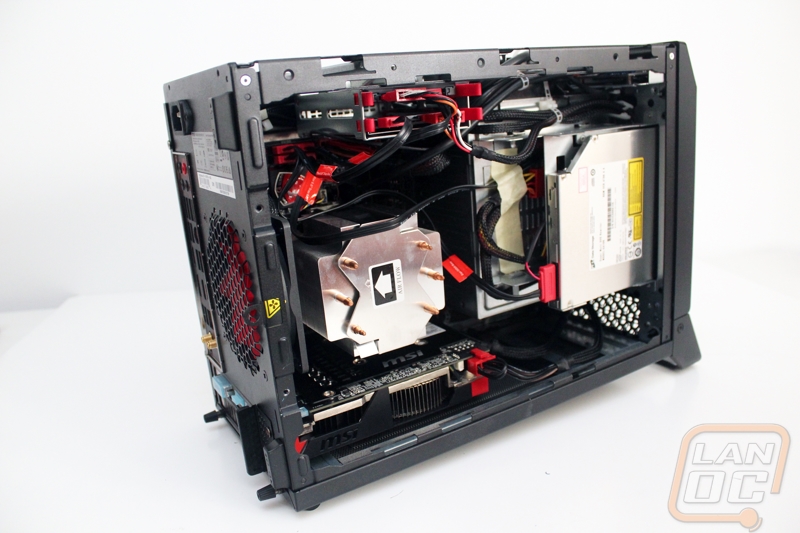
The best part about starting with a barebones is they, in this case MSI, have already put half of the computer together for you. Starting out with the installation we already have everything completely wired, the PSU installed, the DVD drive installed, and the motherboard installed. Really what was left to do is the storage, CPU/heatsink, ram, and video card. I jumped right into the deep end of the Nightblade right away and installed the CPU then RAM. From there installing the heatsink wasn’t much of an issue as well. In my case I didn’t have to worry about installing the backplate for the heatsink but for everyone else there is more than enough room to get at the back of the case for your heatsink installation.
Before you install the heatsink though make sure you double check that you have all of the power and SATA connections you will need for the rest of your build. While there is still a lot of room with the heatsink installed, it is easier to get at the motherboard SATA connections without the heatsink in the way. In my case I didn’t have a problem at all because I had planned to pull one of the SATA cables from the already installed mSATA adapter. Once I confirmed that I was able to dig in and get the CPU fan hooked up and tighten it down.
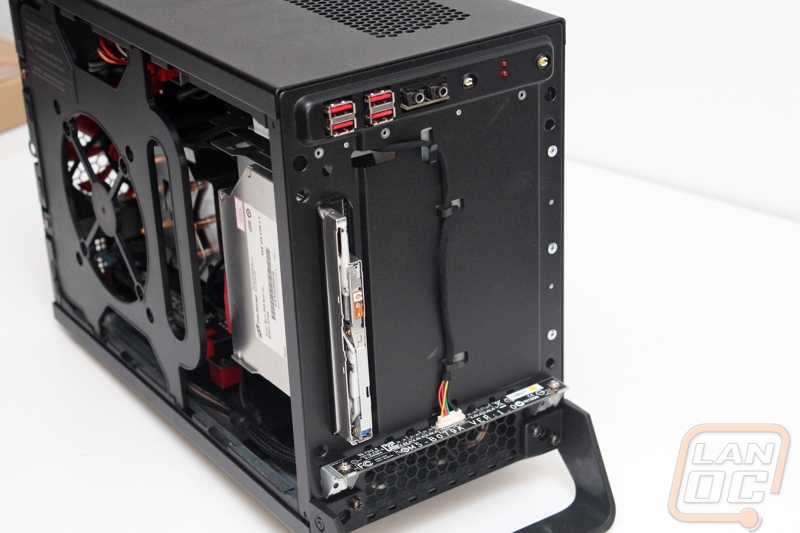
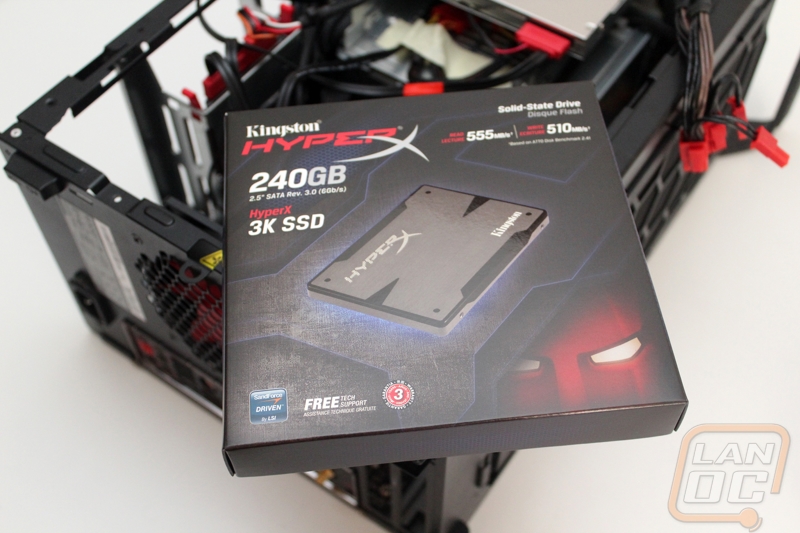
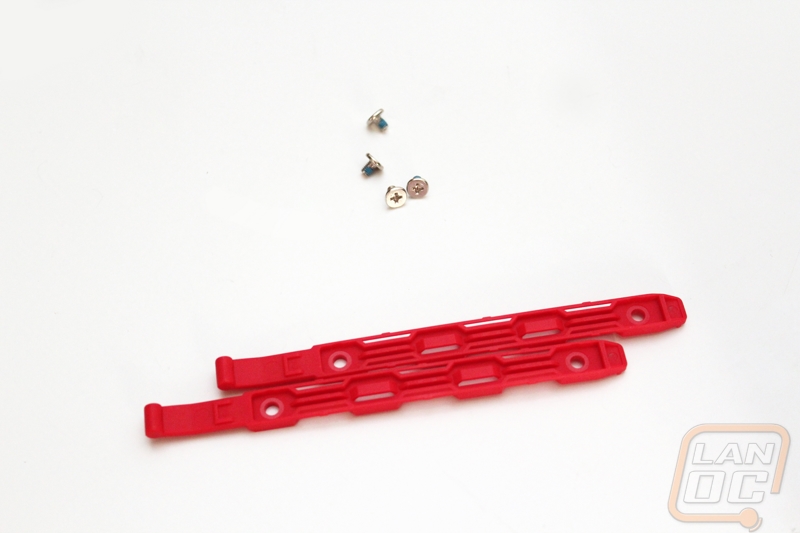
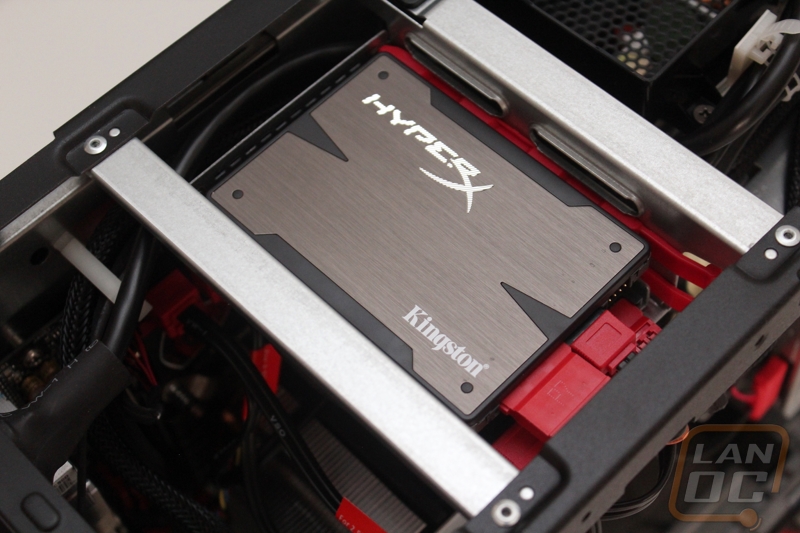
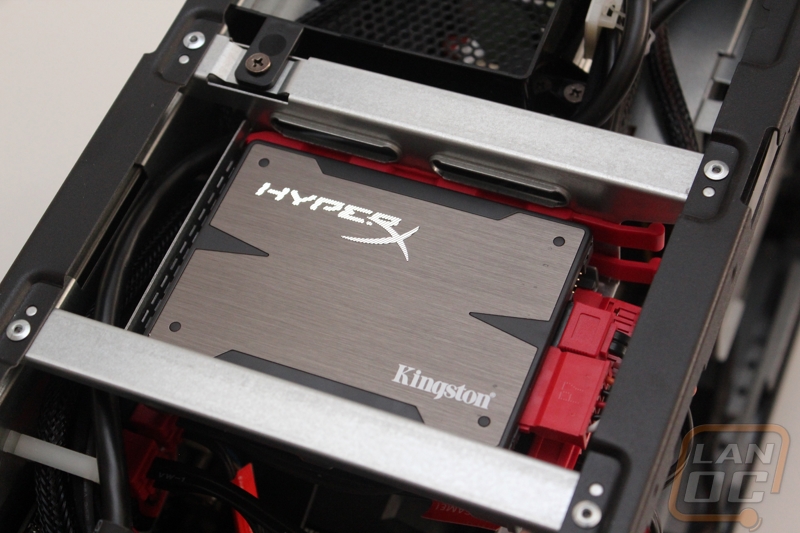
As usual I went with a Kingston HyperX SSD for this build. The 240GB capacity is enough for everything I am planning on using it for. If this is going to be your only PC I would recommend putting in a platter drive along with an SSD just for the extra room. In my case I was planning on using this PC for streaming our LanOC event stream at our LAN and then as a backup for people who might need a PC when they come over and visit. Spontaneous LANs have been known to happen in the LanOC office and they are always the best LANs so I like to be ready. To install the drive I had to bust out the bright red sliders and the small bag of screws that came with the Nightblade. You have to put two small screws in each side then you can just slide the drive right into the drive cage on top of the PC. From there hooking up the power and SATA connections were easy because I had already double checked to make sure I had them right there. I will tell you what, that SSD looks great installed right there on top. It’s a shame we won’t see it at all once I reinstall the side panels.
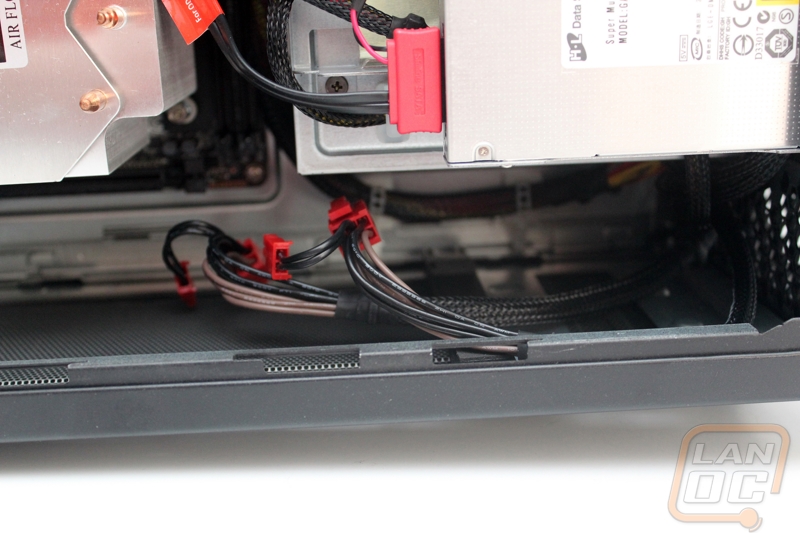
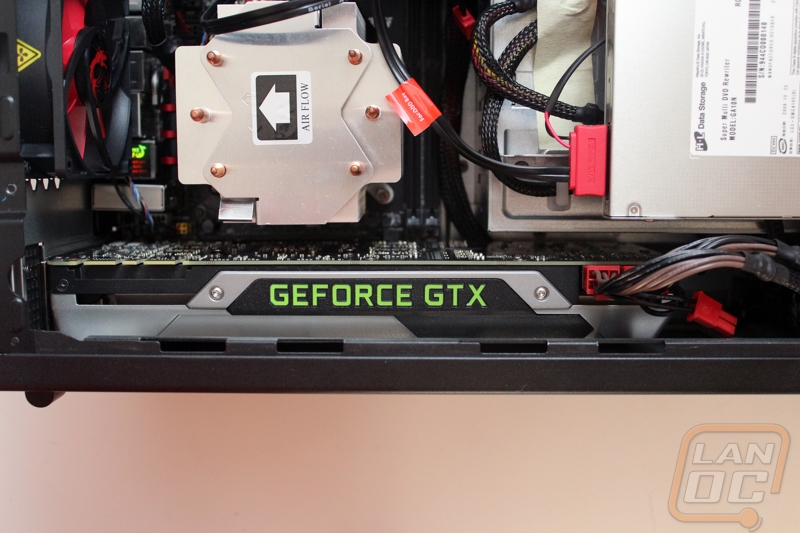
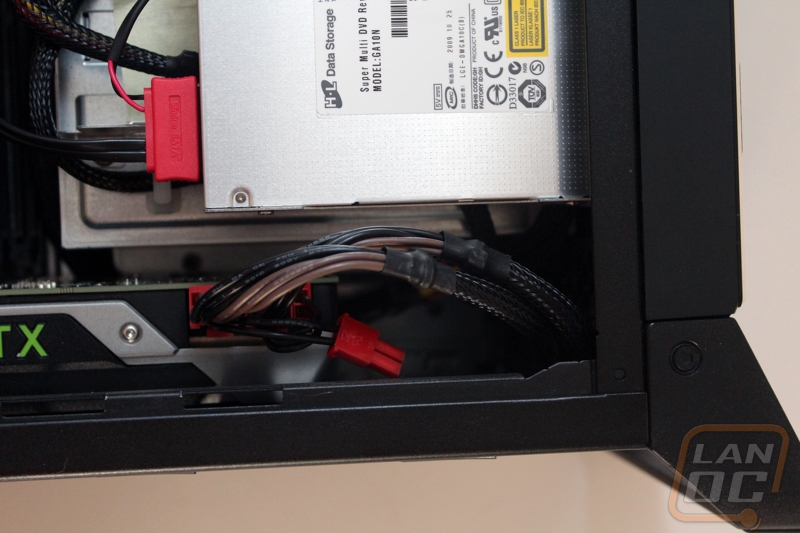
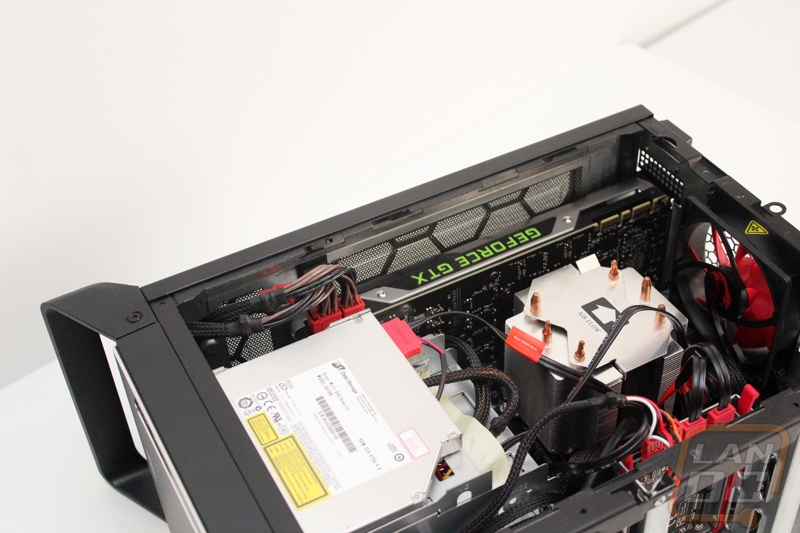
It’s crazy to think that all that is left to be done now is install a video card. Installing the CPU, RAM, heatsink, and SSD took me at most 15 minutes. That included stopping to take photos. Before I install the R9 270X ITX card that I had planned on using in this build I did grab a GTX 780 just to see how well longer video cards are supported. As you can see there is still actually a few inches of room lengthwise. This will leave a little flexibility should longer cards come out (like dual GPU cards) or if your card has its power connections facing the end of the case. Speaking of the power cords, you get two 6+2 plugs so you can run anything small or large on the included 600 watt PSU. Just like with all of the other cables, the connectors were bright red, matching the rest of the build. Should you have a video card like the GTX 780 that has power connections facing up, there is enough room to fit them with the side panel on without putting any strain on the connections.
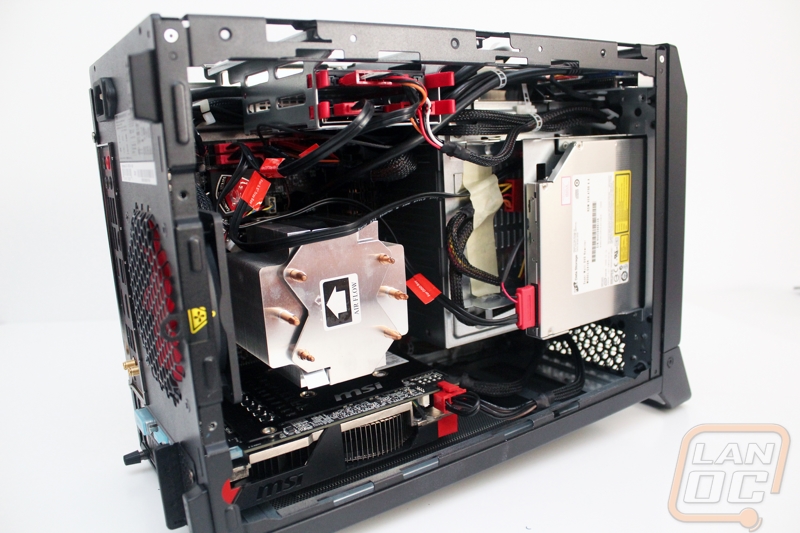
Our ITX card might be a LOT smaller than the Nightblade supports, but it is still more than powerful enough. Here are a couple shots of it installed. After seeing the GTX 780 in the same location it looks tiny.
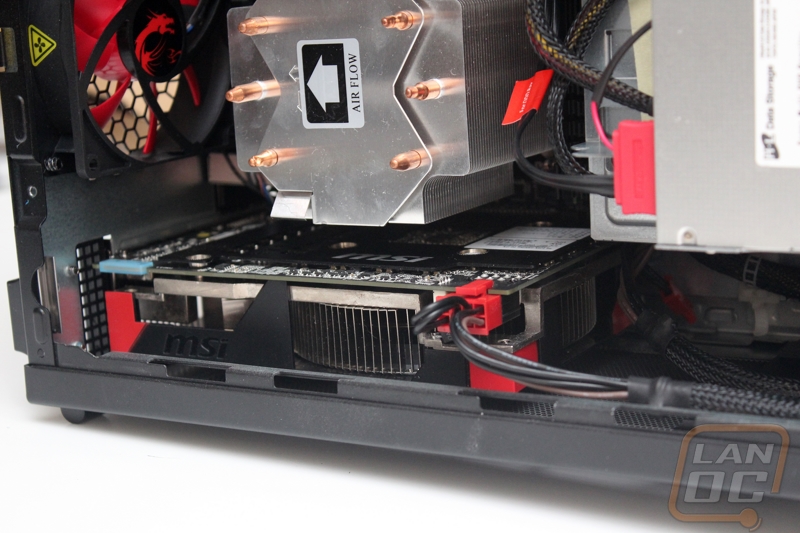
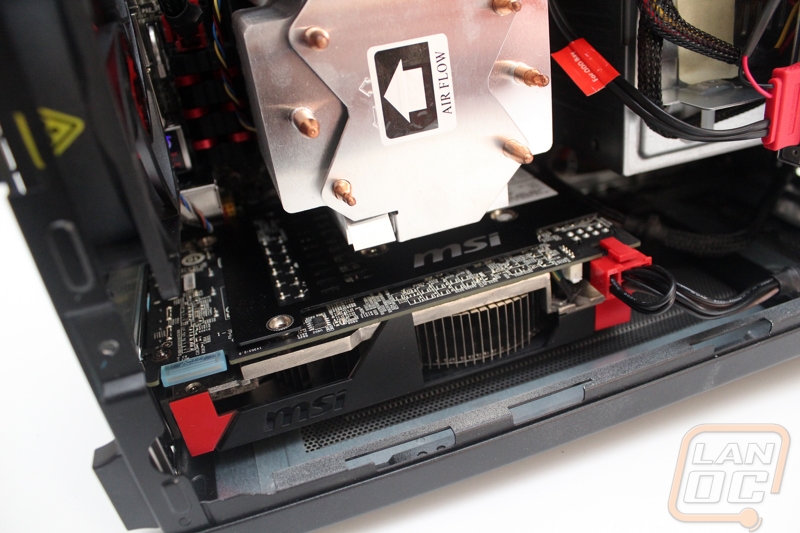
With everything installed and hooked up there is still a lot of room to work in the Nightblade compared to most of the other Mini-ITX builds I have put together. Like I mentioned before, if you use a smaller heatsink like the Noctua the entire case will be open. As always, the more open space you have inside of a case the better potential cooling you will have.
Last but not least, before we can take the Nightblade out to a LAN we have to put the neoprene cover on the feet to make it easier to carry. I tried to carry it around without it and it’s not all that comfortable.

Performance
With this bing a barebones system there are a couple things to consider when it comes to performance testing. For starters, the only thing I can really compare the Nightblade to is the performance of my personal LAN rig, Lunchbox 3. Even still, the performance is completely dependent on the CPU and video card that you decide to go with. Because of that I really want to focus more on the overall experience that you get with the Nightblade, but I will also include performance numbers to show what our specific configuration was capable of.
With the Nightblade all build I actually had the perfect chance to give it a complete test. I packed it up and took it with us to our fall/summer LAN event LanOC V15. This gave me a good chance to see how well the build in handle works and I was extremely impressed. It was easy to grab the Nightblade and move it around as needed with just one hand. I will say that when compared to our two Lunchbox machines it was a little on the heavy side. This is because the case is built out of steel where both of the Lunchboxes use full aluminum cases. It was still a major improvement over a full sized case, so I doubt most of you will notice. Having the neoprene cover on the handle helps as well, it prevents the handle from digging into your hand. I did notice another issue when transporting it as well. The paint finish is a little on the thin side, the Nightblade was packed up near something else and it quickly got a nice war wound on its side panel. After looking at online reviews it seems that a few of the users ran into this as well. Personally I expect my LAN rigs to get a little banged up, but I was a little surprised at how quick it happened.
During the event we used the Nightblade exclusively to run our LanOC event stream so I didn’t really have the chance to put it through its paces as far as gaming goes. Back at the office I had the chance to play a little LoL and HoTS as well as use it for everyday use for about a week. During that time not once did I even hear the fans spool up more than normal. Typically with LAN rigs they are so tight that airflow is an issue but the Nightblade hasn’t have that problem. This gave me the confidence to toy with the OC button on the front of the case without having to worry about overheating anything. It brings me back to the days when we had a turbo button on computers and it makes overclocking as easy as a single button push for anyone who doesn’t know how to do it.
I think what impressed me the most, especially when using the Nightblade for our Twitch stream was the number of USB ports. Not only did it have more than enough on the back of the case, MSI also included enough on the front panel to eliminate the need to even use the back panel ports if you wanted. This was great when hooking up a mouse, keyboard, and multiple webcams. For someone like me who normally has every plug in use it is important to see that they kept USB ports in mind when building the barebones. The other feature that I really liked was the inclusion of the wireless AC adapter. If you guys haven’t used wireless AC yet you really should. You can actually see speeds faster than your wired network in some cases. I wouldn’t use it for everyone at a LAN, but in your house you could get away with dragging the Nightblade around the house to any TV or monitor and gaming without having to worry about Ethernet. The funny thing is the Killer NIC that they include performs well as well, so you have options.
Just like with the motherboard itself, the Nightblade came with a nice software suite from MSI. MSIs Control Panel hits just about everything you should need to tweek and toy with your Nightblade but what I liked the most was their Live Update software. With it you can make sure you keep your BIOS up to date and make sure you have all of the latest software installed. In fact, after installing my OS I basically downloaded Live Update (and the network driver) and then used it to get the rest of my drivers.
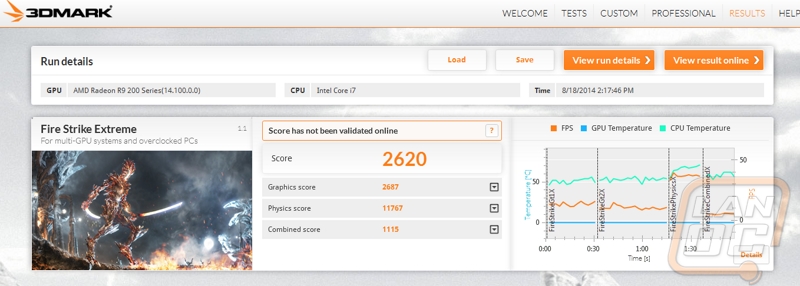
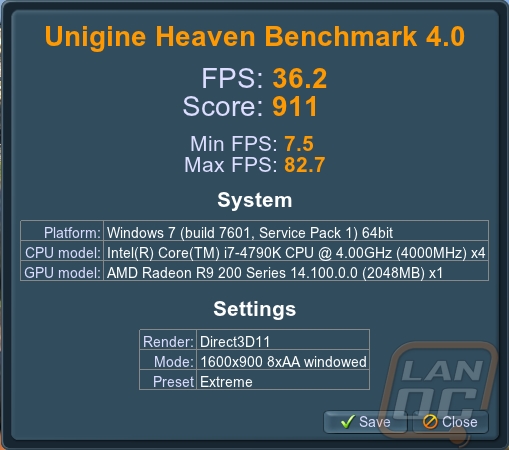
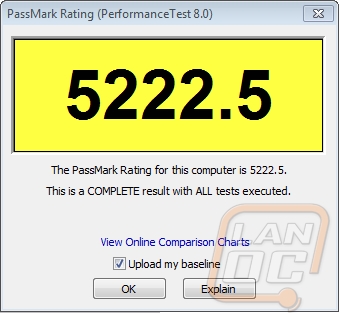
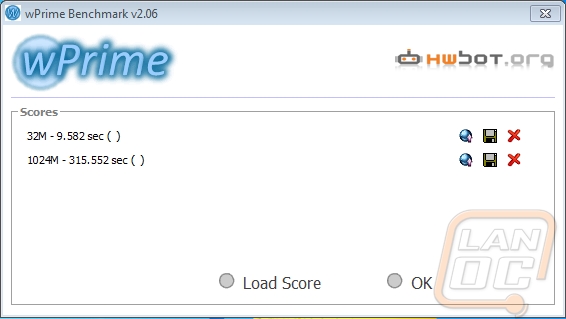
Okay for our performance testing I ran the Nightblade through the same set of tests that I have used on my last few LAN rigs. You can actually see and compare the numbers At the following two links:
Lunchbox 3 (i7-4770K, GTX 670 DriectCU)
MSI ITX (i7-4770K, GTX 760 Gaming ITX)
For comparison we are actually running a new i7-4790K Devils Canyon CPU and the R9 270X compared to the i7-4770 in the other two and they both have Nvidia GPUs. If you are also interested in seeing how the motherboard in the Nightblade performed on an equal platform check out my review of it HERE as well. So how did the Nightblade perform with our setup? Well officially on the GPU side of things it was a little slower than my two other configurations, the R9 270X performs well but was just a little below the 760 and 670 in these tests. With that said, overall anything on the CPU side of things pulled ahead due to the higher clock speed of the i7-4790K. The great thing about the Nightblade is the fact you aren’t limited to an ITX card what I am using here. Not that there is anything wrong with it, because I love them in my smaller rigs, but you have the option of dropping a new GTX 980 in the Nightblade to see even better performance!


Overall and Final Verdict
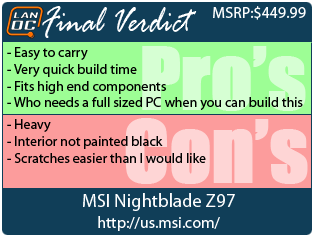
What really sets the Nightblade apart from any other barebones on the market is the fact that this is built specially to be a LAN rig. MSI made it easy to carry with a built in handle and with its large PSU and room in the video card area you can run extremely high end video cards. Most of my personal LAN rigs have to rely on smaller ITX focused video cards, but not being limited to that opens up cheaper and faster options or you can go to the high end and toss in a 290X or GTX 980. Really, when you pair the Nightblade up with a high end video card and an i7-4790 you really shouldn’t even need a full sized PC. When you go to build in the Nightblade you really only need to set aside 20 minutes or so, I built ours in less than a half hour including taking time to photograph everything. As long as you have a good internet connection to download your windows updates and games, you could get this in on a Friday afternoon and be ready to LAN it up that night.
The Nightblade isn’t perfect. It was a little on the heavy side compared to my other Mini-ITX builds for one. This didn’t end up being a huge deal, because it is still an improvement over full sized PCs, but it is worth noting. Although the entire outside of the case is painted black, the interior isn’t. It’s a little weird that they painted so much but skipped out on just a few panels. While there isn’t a window to even look in and see, it would have looked great in combination with the black cables with red connectors on the power supply. Along those same lines, I also found the exterior a little easier to scratch than I would prefer. If you end up taking yours to a lot of events, you can expect to see a fit battle scars on it from use.
So as a barebones, where does the Nightblade fall budget wise? Well to build basically the same PC as what I tested with you are looking at about $1100, with $450 of that going to the Nightblade itself. You could actually save a little money by dropping down to an i5, go with the Nightblade without the DVD drive, slightly cheaper 240GB SSD, and an MSI R9 280 and you would come out almost $200 cheaper and actually have better gaming performance. That puts the total cost there at about $900 + OS, not a bad price if you ask me, especially when you consider that over half of the installation is already done for you.