 This weekend the first motherboard we took a look at was the MSI Z87-G45 Gaming, MSI’s lower priced gaming model. Along with the gaming product line they also have a line they are calling MPower that is focused more on the overclocking community and general enthusiasts. There are two models the Z87 M Power and the Z87 MPower Max, today I am going to dive in and take a look at the Z87 M Power. I’m excited to see what sets it apart from MSI’s gaming boards.
Product Name: MSI Z87 MPower
Review Sample Provided by: MSI
Written By: Wes
Pictures by: Wes
|
Specifications |
|
|
CPU Support |
4th Gen Intel® Core™ / Pentium® / Celeron® processors |
|
CPU Socket |
LGA1150 |
|
Chipset |
Intel® Z87 Express Chipset |
|
Graphics Interface |
3 * PCI-E 3.0 x16 slots with 4th Gen Intel® Core™ processors, AMD CrossFire / NVIDIA SLI Support |
|
Display Interface |
1* DisplayPort, 2 * HDMI - Requires CPU Graphics |
|
Memory Support |
4 DIMMs, Dual Channel DDR3-3000(OC) |
|
Expansion slots |
4 * PCI-E x1 slots |
|
SATA / mSATA |
8 * SATA 6Gb/s, 1 * mSATA |
|
SATA RAID |
RAID 0,1,5,10 - Available at ports SATA1-SATA6 |
|
USB / IEEE 1394 |
8 * USB 3.0, 8 * USB 2.0 |
|
LAN |
Killer™ E2205 Gigabit Ethernet |
|
Wireless |
Wi-Fi IEEE 802.1 b/g/n, Bluetooth 4.0, Intel® WiDi |
|
Audio |
8-channel HD Audio with Sound Blaster Cinema |
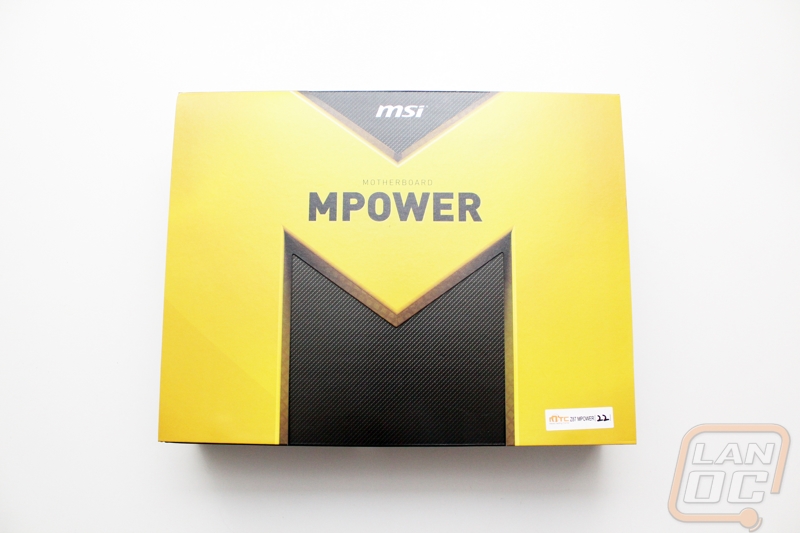
Packaging
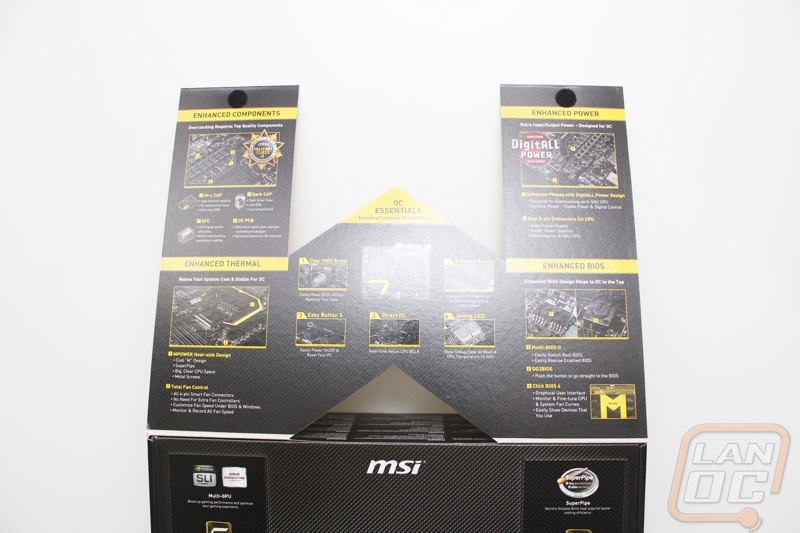
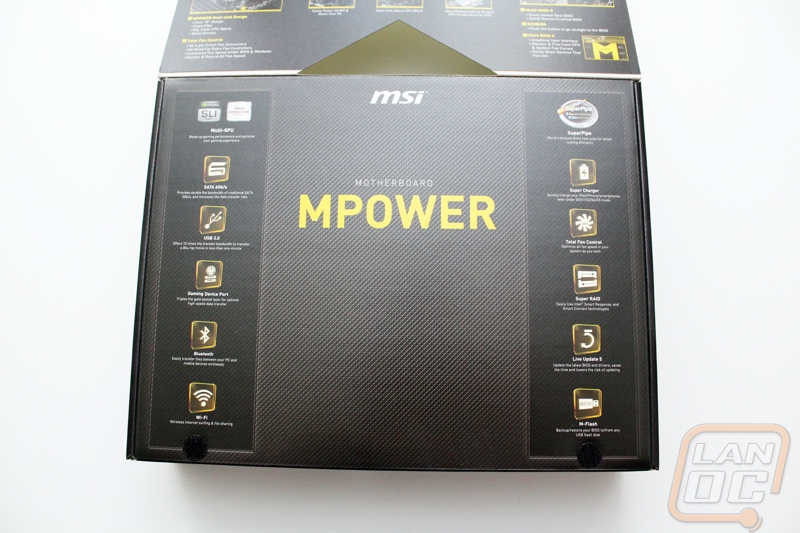
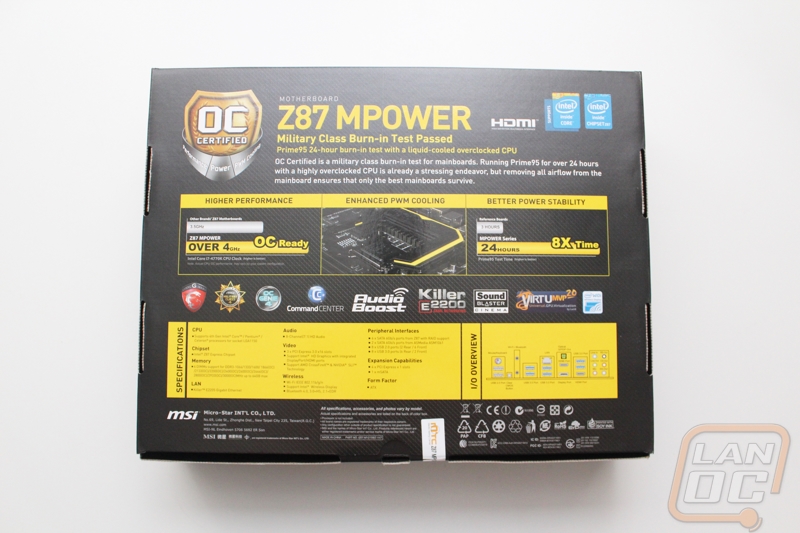
MSI really didn’t want you to miss out on what was inside of the box this time around. The MPower’s packaging on the top is covered completely with a giant bright yellow M. It isn’t until you flip the M up that you find more information including a good portion of the boards features photographed with small descriptions under the photos. For things that aren’t as easy to photograph they are all listed with icons as well. On the flip side of the box there is a section explaining what OC Certified is. OC Certified means an M Power board was stress tested using Prime95 for over 24 hours with a highly overclocked CPU while having no airflow at all. Under all of that there is a photo of the PWM cooling on the board and then a row of icons representing more of the boards features. There is also a full specification listing as well as an I/O overview to help show what rear connections you should expect.
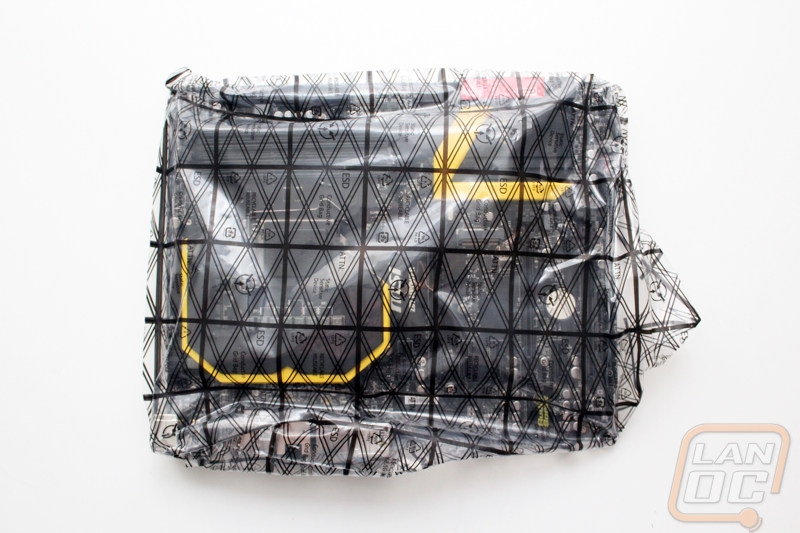
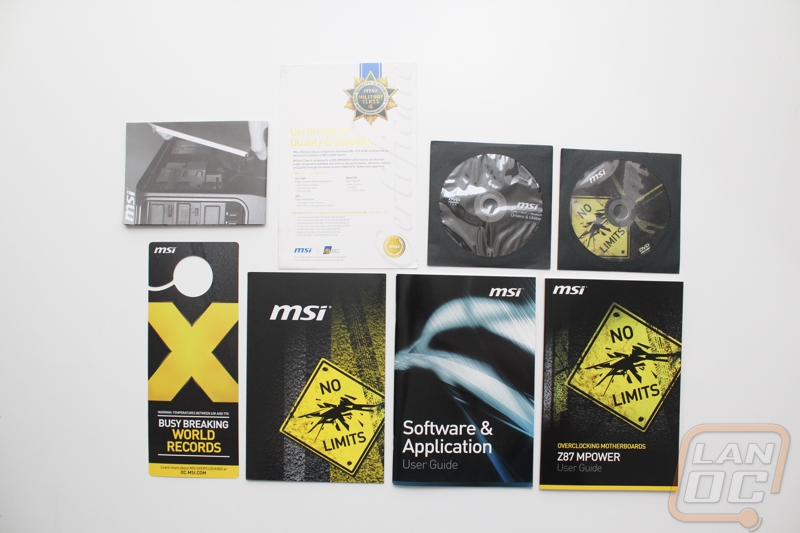
Inside the motherboard is wrapped up in a static protective bag and placed on a cardboard tray that sits overtop of all of the boards accessories. For documentation you get a User Guide, software and application user guide, Certificate of quality and stability, driver and utility discs, and a door hanger that says “busy breaking world records.
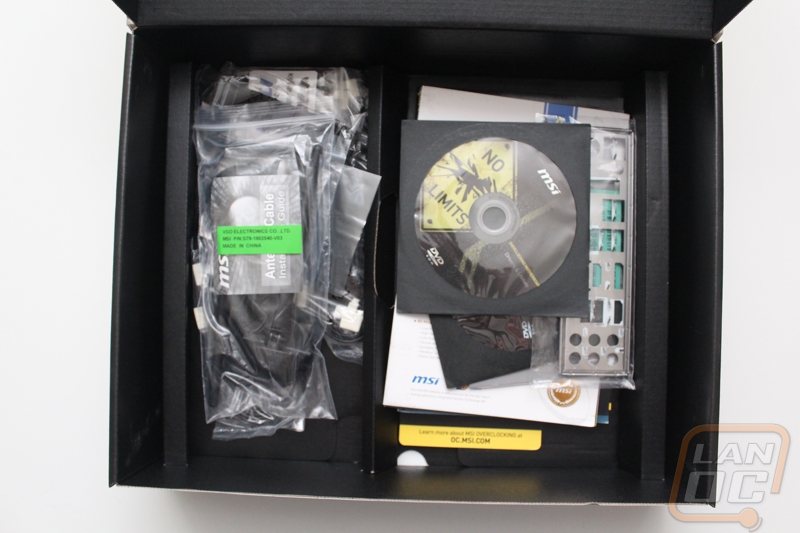
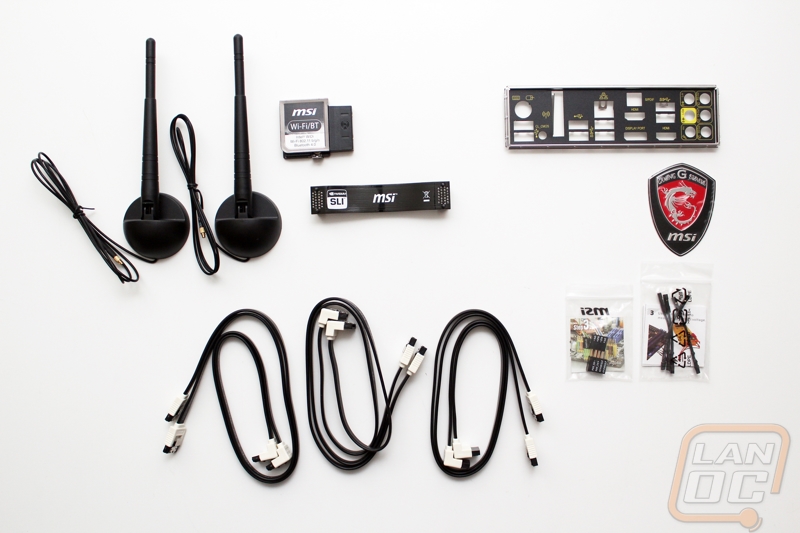
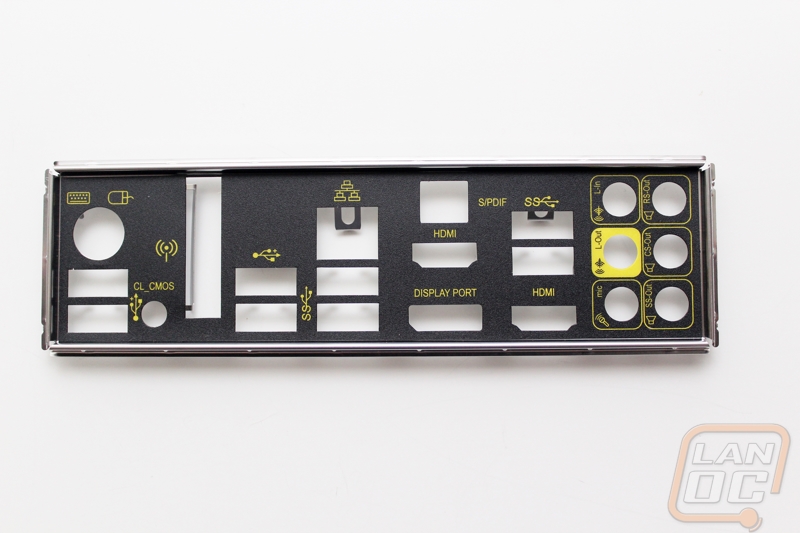
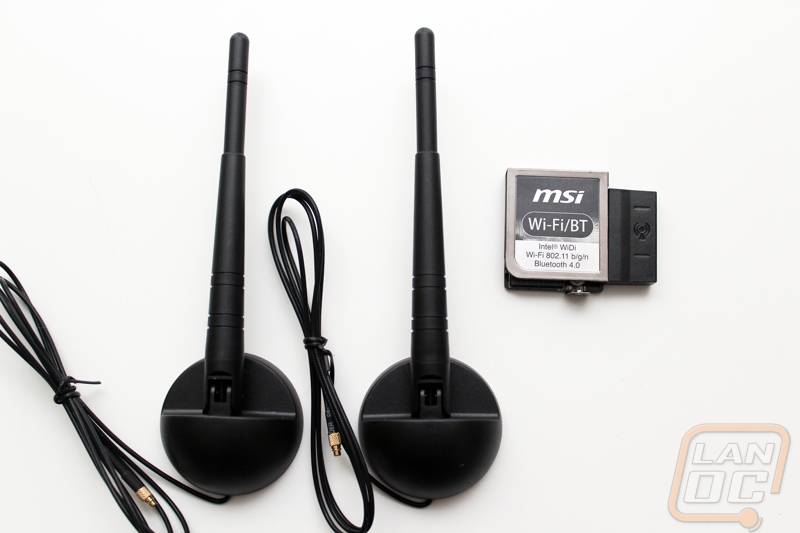
For accessories you get two small baggies, one is filled with small voltage checking leads and the other has something oddly similar to what Asus has had for years with their Q Connectors. The board comes with 6 right angle SATA cables for your hard drives. The SLI bridge that comes with everything is flexible and a nice shade of black that should go perfectly in anyone’s multi card build. You also get the wireless/Bluetooth adapter and two antenna’s to go with it. For a case badge you get an MSI gaming series badge. The rear I/O cover is mostly blacked out with yellow lettering for each label.
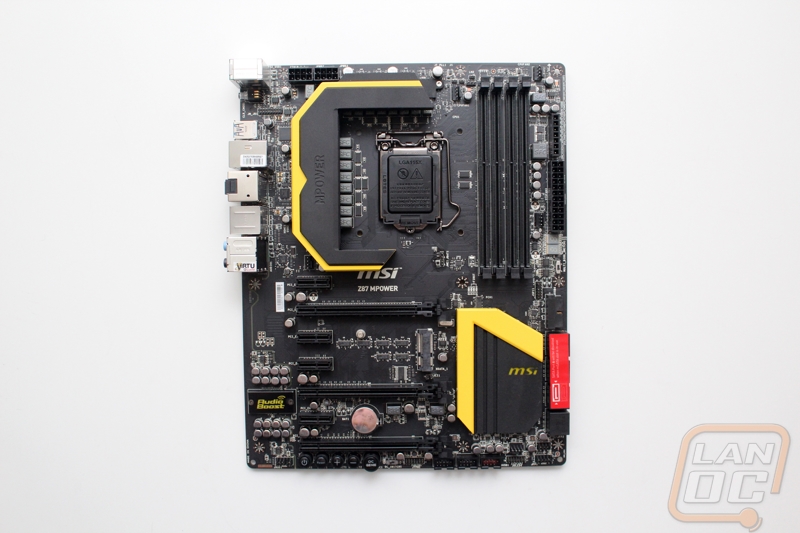
Board Layout and Pictures
I have no idea how many times I will mention this in this review, but this is a great looking board. Not only did MSI really go easy on the froofy stuff around on the board, but they also went out of their way to keep the PCB clean and it shows, it’s rare that we can see the PCB so clearly. Let’s dive into the specifics to see what is hiding on the board from us.
Starting up in the top left corner when you look around the giant yellow and black heatsink and behind the read I/O panel you can find a four pin fan header down on the bottom left as well as a second header up in the top right. One if just for a case fan and the other is for your CPU heatsink fan. You also have, up on the top left, two eight pin CPU power connections. Last but not least we can see our wireless card connection header in the gap of the rear I/O panel.
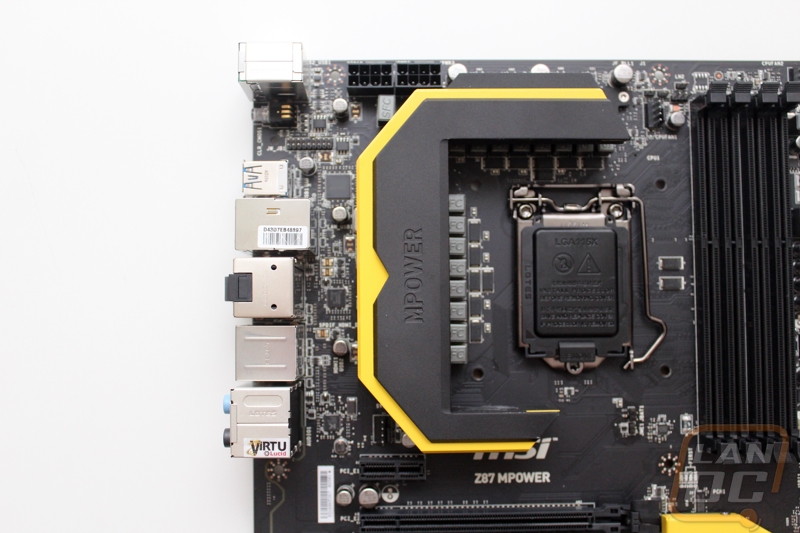
I mentioned the one CPU heatsink fan header previously, but in the picture of the top right corner of the MPower we have two more, one up top and the second next to the 24 pin power connection. The top four pin PWM fan header is a secondary CPU heatsink connection while the other is just another case fan header. Above the 24 pin power connection is the voltage check area, MSI provided small adapters that plug into each hole and work well with checking the voltage on a multimeter. Next we have the boards LED diagnostic display and if you look really close you can see the multi BIOS switch that will let us flip back and forth between BIOS’s.
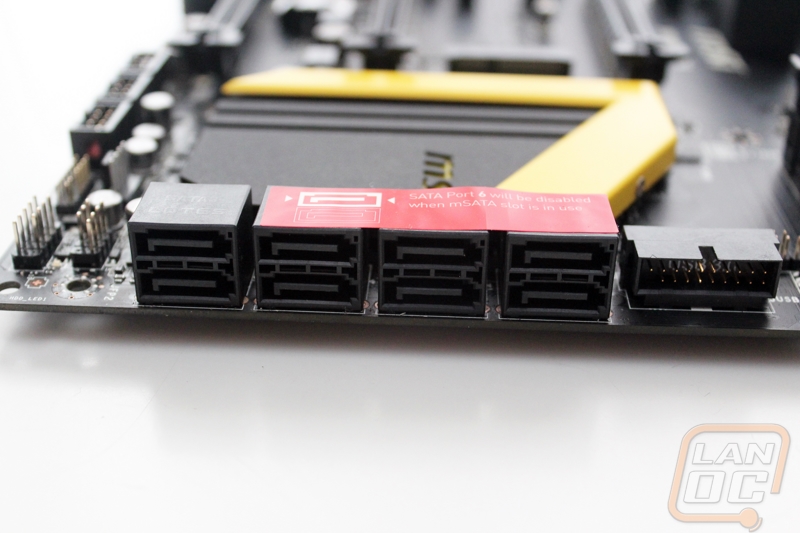
Sliding down a little farther on the right side of the board we found eight SATA 3 connections as well as an internal USB 3.0 header. I love that MSI placed the header at a right angle, this makes wire management MUCH easier when you don’t have that sticking way up, they also tend to come unplugged as well so I am hoping this configuration might help.
In the bottom right corner we have a lot going on. The two headers on the bottom right corner are for our front panel connections. Next you have yet another (fifth so far) PWM fan header. The longer header below it called JDLED4 looks to be for an external device that will show you what is going on during the boot process. You get three internal USB 2.0 headers with one giving extra power for charging devices and it is labeled in red of course. On the far left we have the fast boot button that will take you directly to the BIOS. The header below it is labeled JTPM1 but you might know it better as the TPM or trusted platform module header.

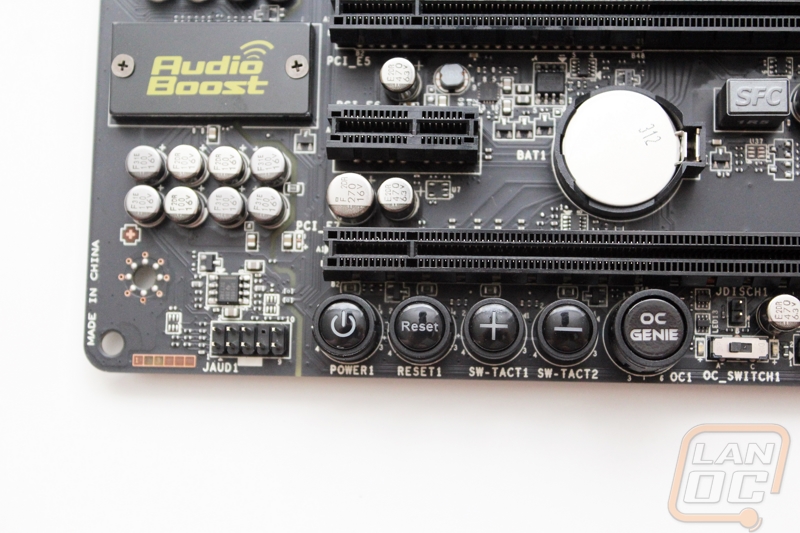
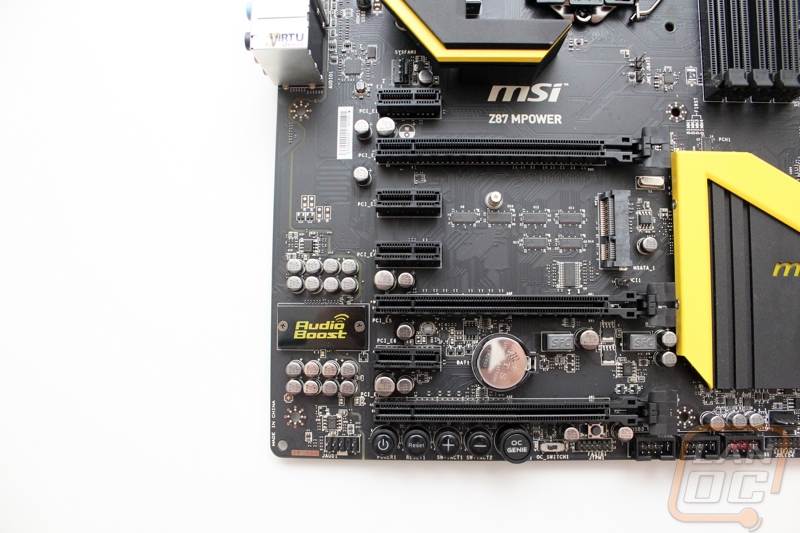
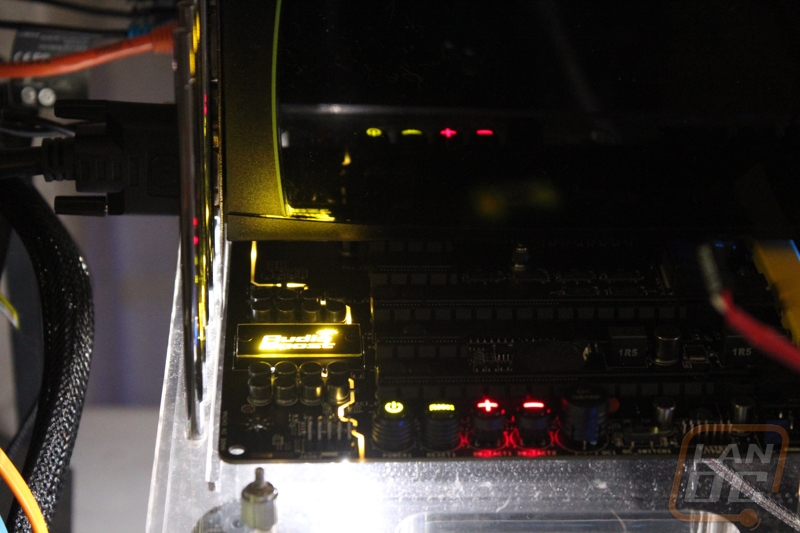
In the bottom left corner of the MPower we can start with the Audio boost and the Realtek ALC1150 on board audio chipset. The setup includes a 600 ohm headphone amplifier for the front panel audio connection (that is at the bottom of the audio card). The Audio Boost box is actually an AMI shield but it also is back lit and glows when the board is up and running. Speaking of glowing, if you look closely you can see the PCB separation that splits the audio card from the motherboard to try to keep any electrical noise down. There are a couple spots in my photo where I can see this isn’t complete separation (beyond power of course). But more importantly as much as I do love this feature, I bet a lot of people at Asus are upset to see this considering this is something they introduced last year on a few of their premium boards. Just like the Asus boards MSI has put LED lighting under the motherboard to let the yellow line glow through.
Under the PCIe slot we have all of our controls. You get a power and reset button, then you have the OC Genie button as well as a plus and minus button that lets you bump your overclock up and down as needed without even jumping into the BIOS.
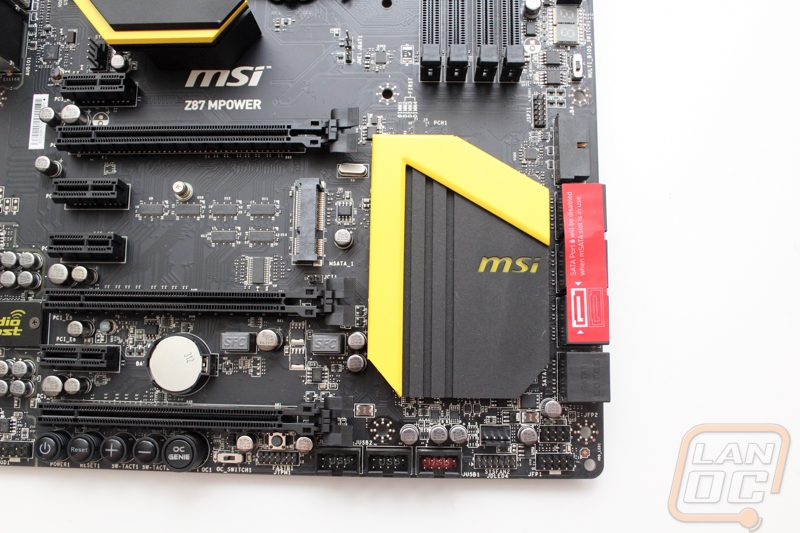
First off I love that all of the PCIe slots are all blacked out, this goes with the rest of the board where MSI blacked everything but the yellow trimming out. For PCIe slots we have four PCIe x1 slots with two of them between the top PCIe x16 slot and the next PCIe x16 slot, this is like what we have seen on most of the premium X87 boards. The three PCIe x16 length slots break down like this. The top slot when the other slots aren’t being used is a x16 but when you are using two devices or video cards it drops down to x8 and the second slot also runs x8. The last slot runs in x4 all of the time even though it looks like a x16 slot. Tucked in just to the right of the two PCIe x1 slots is also an mSTAT location where you can slip in a tiny (in size not capacity) SSD without taking any room in your PC>
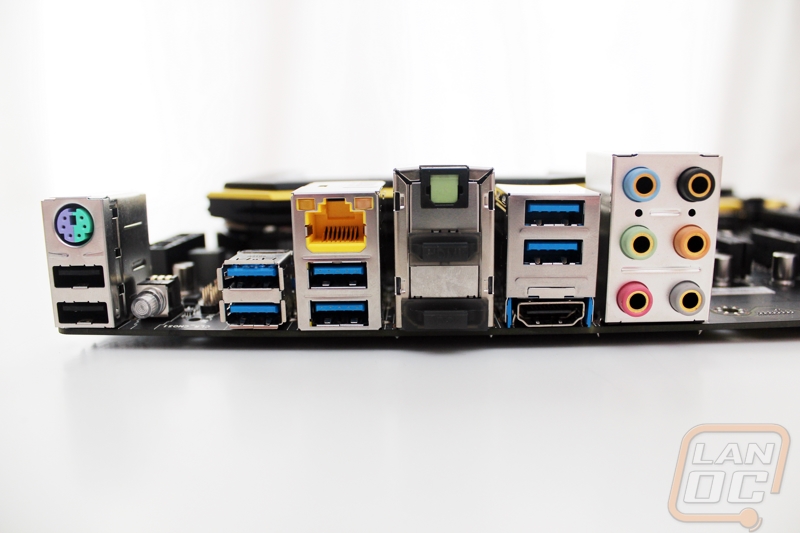
Back on the rear I/O panel we have a total of six USB 3.0 ports spread over all over. There are also two more USB 2.0 ports as well as a PS2 port for peripheral connections. Next to the USB 2.0 ports there is a strange looking button that when the board is powered up glows blue, this is actually the clear CMOS button. I love that the button is easy to spot, even in the dark back behind your PC. For onboard video connections we have one DisplayPort and an interesting two HDMI ports. Last but not least is the Ethernet port that is powered by the MPowers Killer NIC. What you can’t see is the wireless NIC, if you look there is actually a spot for it next to the clear CMOS button, when it is installed you will find both antenna hookups there.
When you flip over the MPower you of course have the dark black PCB as well as a dark tinted CPU socket backplate. But what caught my eye was all of the different logos on the bottom. Even though you will most likely only see the bottom of your motherboard once before installing it into your PC they did make a point to list some of the boards features here. It wasn’t until I saw these that I actually noticed that the top PCB is free from all of the logo clutter other than the single MPower logo, nice job MSI for cleaning up the board and still slipping the “required” logos in there where they aren’t taking away from the boards look.

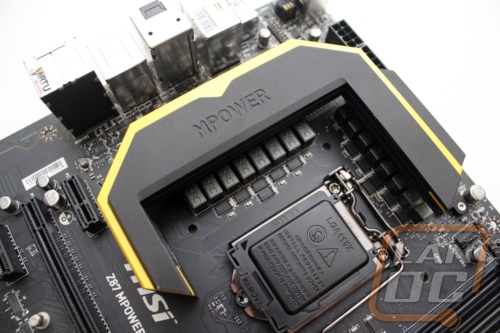
Cooling
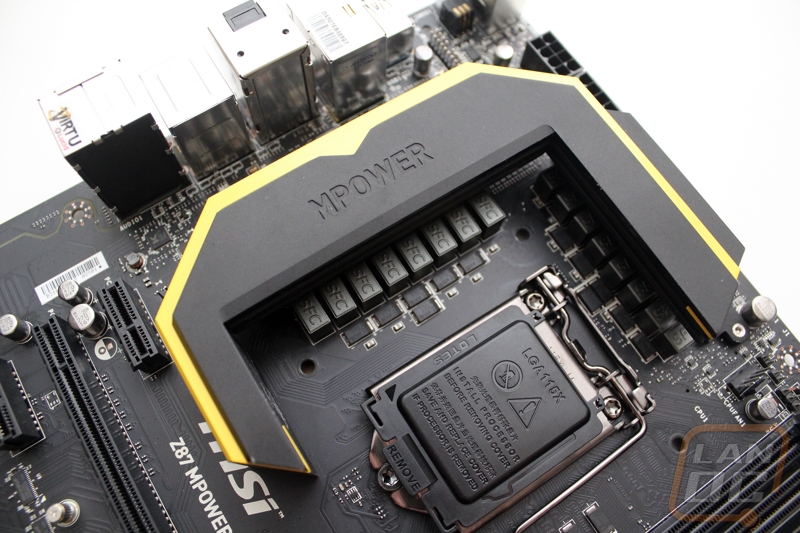
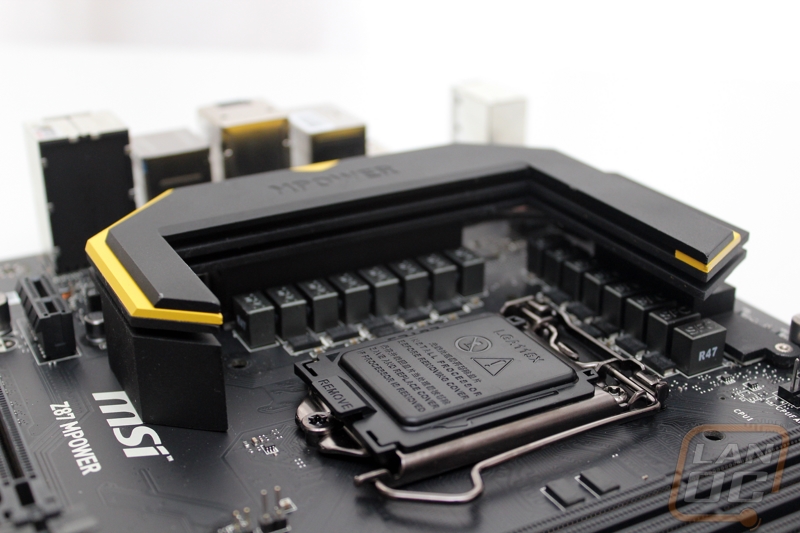
Unlike the Z87-G45 Gaming, there aren’t any dragons or similar on the MPower, MSI went with a more basic design that is pure functionality. This isn’t a complaint at all; it’s nice to see that the MPower is all about its functionality. Ironically this actually gives the MPower a really cool look, especially with the yellow trimming they used. The main heatsink around the CPU socket that cools the PWM forms a large C shape. It is a little tighter around the cooling mounting holes on the left side than some of the other boards tested, but there is still room to get your fingers down in there if needed. Overall this is a very beefy heatsink and I can now see why MSI was talking up the cooling on the back of the box.
Down lower, the chipset cooling has even more yellow trimming. The heatsink is low profile to make sure we have clearance for long video cards on the PCI Express sockets as well. What really sets it off though is the yellow MSI logo in the heatsink that glows when the board is powered up.
UEFI and Software
I spoke a little about MSI’s new Command Center with the Z87-G45 Gaming review, but now that we have had a little more time to play with it I can talk a little more in depth. MSI has finally started to combine all of their various programs into one suite to make installation easier and to keep things simple for the customers.
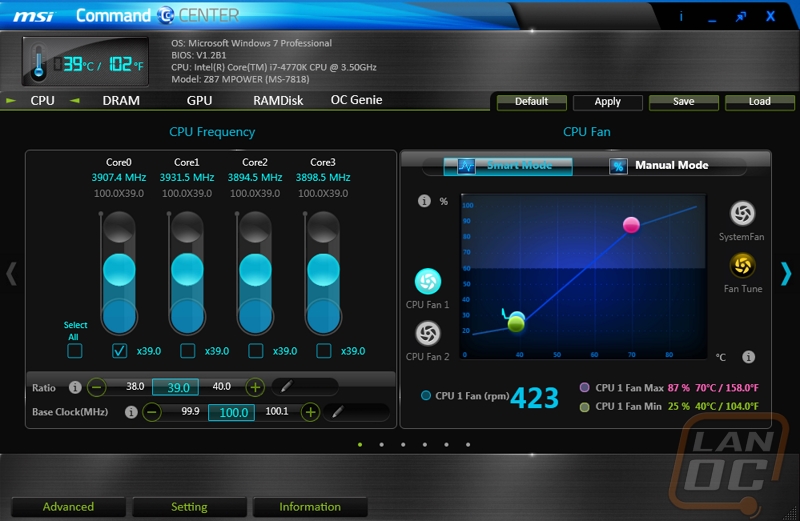
The first page that opens when you boot the program up is the CPU tab where we can adjust each core’s clock speed. Along with that you can adjust the fan speeds or turn on smart mode. On top of being able to adjust the clock speed there is also an option down at the bottom that lets you bump up the CPU ratio as well to get even bigger overclocks.
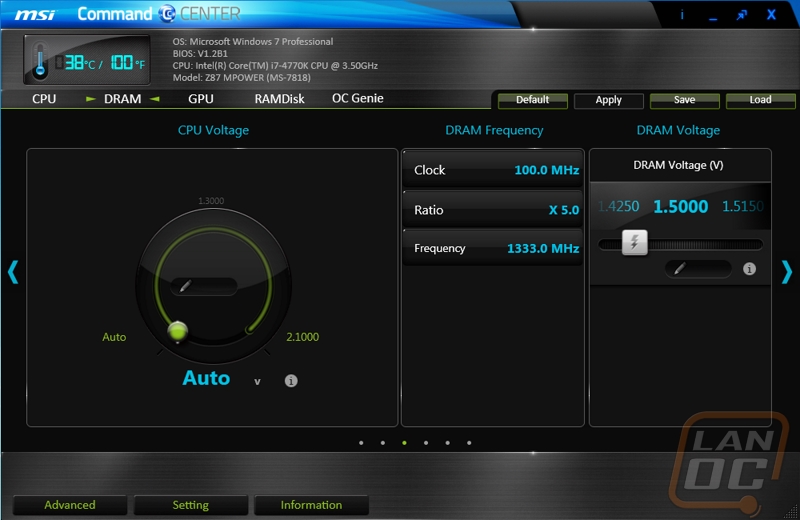
The second tab is the DRAM page, here we can see a remnant from the CPU page where we can adjust the CPU voltage or set it to auto like it is in the photo. The same can be done with the DRAM voltage as well with a power slider.
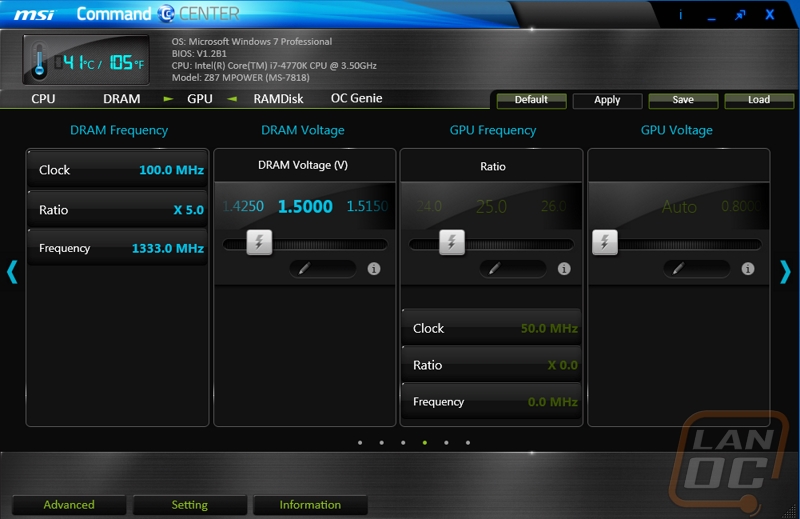
When you click GPU up top it takes us to the GPU Frequency and GPU voltage pages. Here we can actually overclock the onboard GPU just like you would in the BIOS. MSI made it as easy as possible with sliders for both the ratio and voltage, you can’t ask for an easy way to overclock.
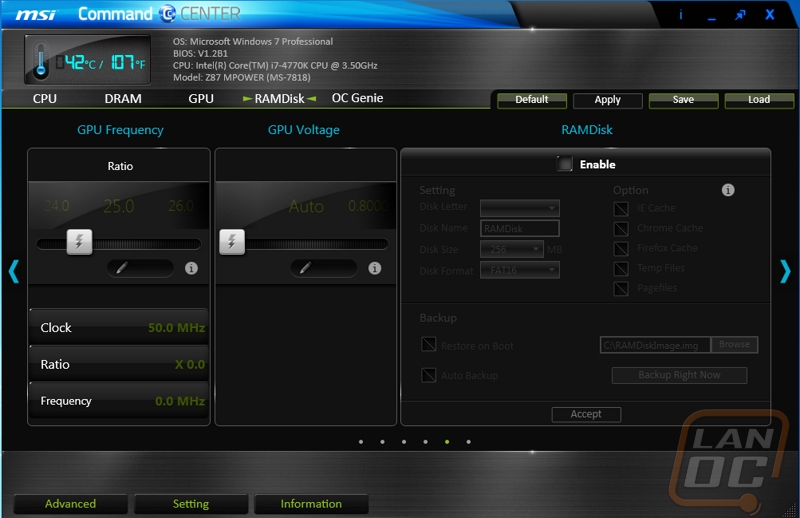
Next is the RAMDisk option. This is what I would call a value add feature of the MPower, this software normally will run you $30-$40 if you are looking to do more than 4 gigs of ram. By packing the software into Command Center you don’t have to buy it and it might even show more people the benefits of using a RAMDisk as a scratch disk when video editing or anything else that requires quick access.
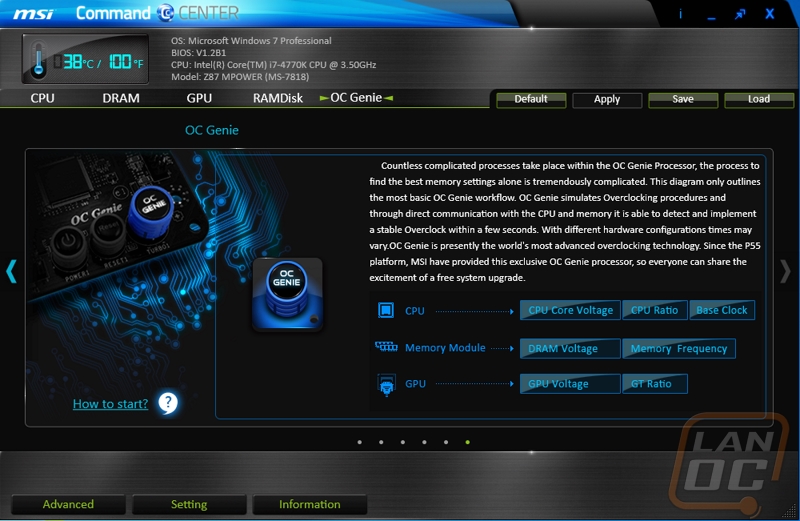
The OC Genie page basically gives you a way to turn on OC Genie without opening up your case to get to the button on the motherboard. All you have to do is click on the button on screen and it will prompt you to reboot your computer for the changes to take effect.
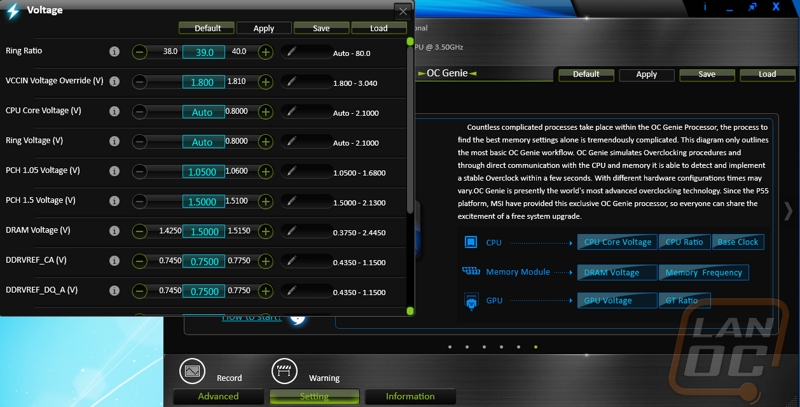
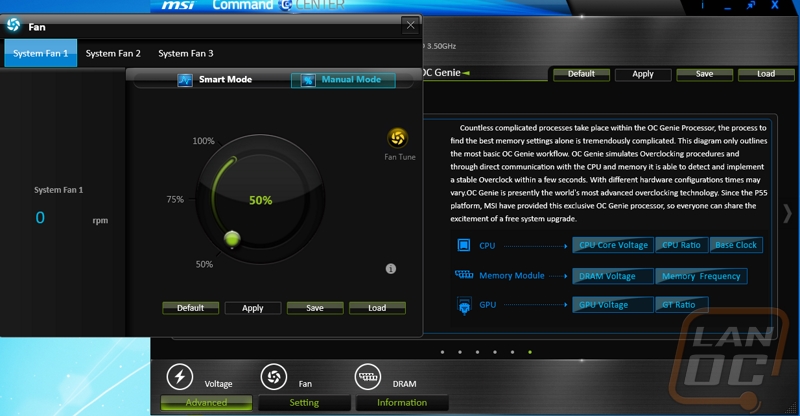
Down on the bottom of the software the is also an advance option. In that option you can open up more advanced selections of voltage, dram, and fan controls where you can tweak your system even more.
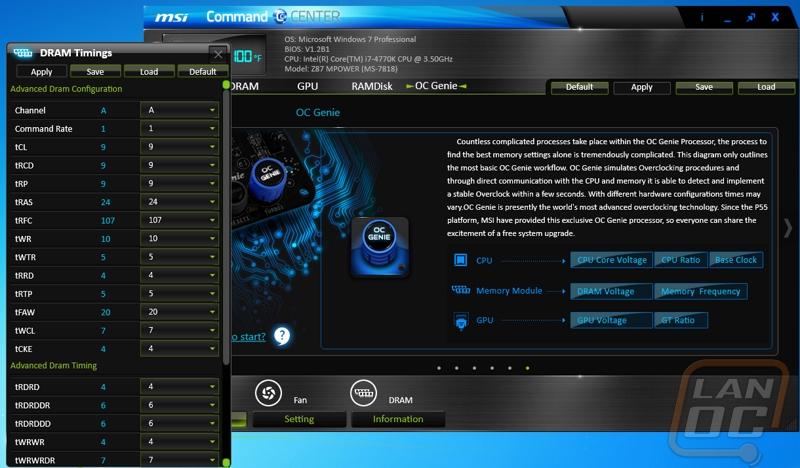
Overall I was really impressed with MSI’s software, I think they are on the right track with combining everything. I do feel the software was a little sluggish at times and I ran into a few issues where I had to reinstall it. I expect to see MSI tweaking the software as time goes on to fix any issues.
For the BIOS we have a video walkthrough of us flipping through all of the options in MSI’s Click BIOS 4. As a whole the design is very similar to what we saw in the G87-G45 Gaming but the coloring is yellow to match the MPower rather than the red.
The MPowers Click BIOS 4 is basically the same as the Z87-G45 Gaming. Rather than try to say the same things differently, part of the following section is the same as from the review of that board.
The top bar of Click BIOS 4 gives you the time and temperatures right up top for you to see while you are adjusting settings on all of the BIOS’s pages. The three options on the left stay open all of the time but the right side of the screen sometimes has three options but when you are adjusting settings the right side shows a short explanation of each option to help you understand what you are looking at.
The UEFI overall worked well with my mouse but if you watch the video you will see that I did have a problem when I get more than one option deep into settings, clicking the back button would take me all the way back to the home page, it was a little frustrating. The other issue I ran into is how the bios reacts to scroll wheel use. As it should, when you scroll it arrows down through the options listed on your screen at the time. My problem was if you move the mouse over those same options while scrolling it stops everything you are doing because mousing over an option overrides whatever location you are currently on. Considering how much room the BIOS options take up, this made scrolling to find the option I need a little difficult. Beyond those two issues though the bios was filled with interesting features like the board diagram that will even show you what hard drives you have plugged into what SATA port visually. I think MSI still needs to tweak the UEFI to make it a little smoother to use, but they have a good UEFI as a base to work from.
Our Test Rig
|
|
Intel LGA1150 Test System |
|
CPU |
Intel i7-4770K CPU |
|
Cooling |
|
|
Memory |
|
|
Storage |
Kingston HyperX 120Gb SSD (OS) Seagate 2TB Hard drive (Steam games) Corsair Force GT 60Gb (USB 3.0 and SATA 3 testing) |
|
Video Card |
|
|
Power Supply |
|
|
Case |
|
|
OS |
Windows is kept up to date while only having the benchmark programs and games needed for our testing installed. |
Our Testing Procedures
|
CPU Testing |
|
|
CINEBENCH is a real-world cross platform test suite that evaluates your computer's performance capabilities. CINEBENCH is based on MAXON's award-winning animation software CINEMA 4D, which is used extensively by studios and production houses worldwide for 3D content creation. The test procedure consists of two main components - the graphics card performance test and the CPU performance test. We only use the total CPU score for our motherboard testing. |
|
|
We now just use the overall CPU mark score that takes into account all of the CPU oriented results |
|
|
Designed by the guys behind PCWorld, Worldbench is a benchmark designed to use applications and utility’s that everyone uses day to day and benchmark their performance. This gives the most accurate REAL world results, something that no other benchmark does. Being fully automated, WorldBench 6's application tests are scripted to run consecutively, and those results are automatically combined and compared against a baseline system. We use their Photoshop and Office tests. |
|
|
Perfect for testing the multithreading of multiple core CPU’s. “wPrime uses a recursive call of Newton's method for estimating functions, with f(x)=x2-k, where k is the number we're sorting, until Sgn(f(x)/f'(x)) does not equal that of the previous iteration, starting with an estimation of k/2. It then uses an iterative calling of the estimation method a set amount of times to increase the accuracy of the results. It then confirms that n(k)2=k to ensure the calculation was correct. It repeats this for all numbers from 1 to the requested maximum.” |
|
|
X264 HD is a CPU encoding benchmark. Using the x264 codec this test encodes a video file and times its performance. |
|
|
Overall Synthetic Benchmarks |
|
|
We run the basic PCMark test suite and use the overall score to get a general idea of system performance. |
|
|
We run the 2013 Fire Strike test using both the normal setting and extreme settings to get an overall system performance number that takes into account gaming focused systems like bandwidth to our test bench’s video card. |
|
|
In Game Tests |
|
|
Using the Adrenaline Action Benchmark Tool we run Bioshock Infinite on the “Xtreme” quality setting. This has a resolution of 1920x1080, FXAA turned on, Ultra Texture detail, 16x Aniso Texture Filtering, Ultra Dynamic Shadows, Normal Postprocessing, Light Shafts on, Ambient Occlusion set to ultra, and the Level of Detail set to Ultra as well. |
|
|
Using the Adrenaline Action Benchmark Tool we run Tomb Raider on the “Xtreme” quality setting. This has a resolution of 1920x1080, Exclusive Fullscreen turned on, Anti-Aliasing set to 2xSSAA, Texture Quality set to Ultra, Texture Aniso set to 16x Aniso, Hair Quality set to TressFX, Shadow set to Normal, Shadow Resolution on High, Ultra SSAO, Ultra Depth of Field, High Reflection quality, Ultra LOD scale, Post Processing On, High Precision RT turned on, and Tessellation is also turned on. |
|
|
Using the Adrenaline Action Benchmark Tool we run Hitman: Absolution on the “Xtreme” quality setting other than the MSAA setting is turned down from 8x to 2x. That setting puts the resolution at 1920x1080, MSAA is set to 2x, Texture Quality is set to High, Texture Aniso is set to 16x, Shadows are on Ultra, SSA is set to high, Global Illumination is turned on, Reflections are set to High, FXAA is on, Level of Detail is set to Ultra, Depth of Field is high, Tessellation is turned on, and Bloom is set to normal. |
|
|
Using the Adrenaline Action Benchmark Tool we run Sleeping Dogs on the “Xtreme” quality setting. That means our resolution is set to 1920x1080, Anti-Aliasing is set to Extreme, Texture Quality is set to High-Res, Shadow Quality is High, Shadow Filter is set to high, SSAO is set to High, Motion Blur Level is set to High, and World Density is set to Extreme. |
|
|
Subsystem Testing |
|
|
We use this to test the on board audio on all motherboard that come in, this gives us an idea of their audio performance beyond subjective testing. When testing we always have our audio set to 24 bit. |
|
|
We use this benchmark for USB 3.0 and SATA speed tests. Testing is done with Crystal Disc Mark with a Corsair Force GT 60 Gb. USB 3.0 testing is hooked up through a Thermaltake BlackX with USB 3.0 support |
|
Performance
As a whole we are changing the way we look at our motherboard testing slightly. The truth is a lot of the standard benchmarks you see in our reviews as well as others aren’t really needed. These tests actually test components like the CPU and video card more than anything else. Because of that we have trimmed down our testing slightly to make it easier for you to take in. We still do some testing though to make sure none of the boards that we test have any glaring issues but overall you should only see a slight variation in numbers. That variation isn’t a big deal; it is only the big variances that we are looking for. Having cleared that up, I would also like to point out that testing like our Audio and storage testing still are important as they are sub systems that the motherboard manufactures have control over, be sure to check out those sections as well.
|
PCMark 7 |
Overall Score |
|
|
MSI Z87-G45 Gaming |
6107 |
|
|
Asus Z87 Pro |
6287 |
|
|
Asus Z87 Plus |
6332 |
|
|
MSI Z87 MPower |
6465 |
|
|
3DMark |
Fire Strike |
Fire Strike Extreme |
|
MSI Z87-G45 Gaming |
4340 |
1955 |
|
Asus Z87 Pro |
4353 |
2086 |
|
Asus Z87 Plus |
4346 |
2018 |
|
MSI Z87 MPower |
4344 |
1961 |
|
Worldbench (low score is better) |
Photoshop |
Office |
|
MSI Z87-G45 Gaming |
222 |
302 |
|
Asus Z87 Pro |
222 |
291 |
|
Asus Z87 Plus |
210 |
290 |
|
MSI Z87 MPower |
206 |
289 |
|
wPrime (low score is better) |
32M |
1024M |
|
MSI Z87-G45 Gaming |
10.658 |
325.787 |
|
Asus Z87 Pro |
10.437 |
325.981 |
|
Asus Z87 Plus |
10.584 |
328.48 |
|
MSI Z87 MPower |
10.657 |
331.992 |
|
Passmark |
CPU Mark |
|
|
MSI Z87-G45 Gaming |
10295 |
|
|
Asus Z87 Pro |
10437 |
|
|
Asus Z87 Plus |
10425 |
|
|
MSI Z87 MPower |
10297 |
|
|
X264 |
Pass 1 |
Pass 2 |
|
MSI Z87-G45 Gaming |
166.9525 |
43.83 |
|
Asus Z87 Pro |
168.2825 |
45.9675 |
|
Asus Z87 Plus |
171.8175 |
45.8775 |
|
MSI Z87 MPower |
170.1025 |
45.9075 |
|
Cinebench |
CPU Score |
|
|
MSI Z87-G45 Gaming |
7.73 |
|
|
Asus Z87 Pro |
8.02 |
|
|
Asus Z87 Plus |
7.94 |
|
|
MSI Z87 MPower |
8.1 |
|
|
Unreal Heaven Benchmark 4.0 |
Average FPS |
|
|
MSI Z87-G45 Gaming |
35.5 |
|
|
Asus Z87 Pro |
34.7 |
|
|
Asus Z87 Plus |
34.7 |
|
|
MSI Z87 MPower |
34.5 |
|
|
Bioshock Infinite |
Average FPS |
|
|
MSI Z87-G45 Gaming |
50.08 |
|
|
Asus Z87 Pro |
48.76 |
|
|
Asus Z87 Plus |
48.76 |
|
|
MSI Z87 MPower |
48.94 |
|
|
Tomb Raider |
Average FPS |
|
|
MSI Z87-G45 Gaming |
30.7 |
|
|
Asus Z87 Pro |
30.6 |
|
|
Asus Z87 Plus |
30.6 |
|
|
MSI Z87 MPower |
30.5 |
|
|
Hitman Absolution |
Average FPS |
|
|
MSI Z87-G45 Gaming |
29.4 |
|
|
Asus Z87 Pro |
30 |
|
|
Asus Z87 Plus |
30 |
|
|
MSI Z87 MPower |
30 |
|
|
Sleeping Dogs |
Average FPS |
|
|
MSI Z87-G45 Gaming |
31.8 |
|
|
Asus Z87 Pro |
31.5 |
|
|
Asus Z87 Plus |
31.2 |
|
|
MSI Z87 MPower |
31.4 |
|
The performance numbers for the MPower are a little interesting to me. They are in line with what we expect but I found it interesting to see that in some cases it out performed the other boards while in other cases it was a little slower. The two Asus boards seemed to be a little more consistent when compared to the MSI boards. Having said that, as I mentioned before these numbers really aren’t going to show big differences between boards. What we want to see is that the performance numbers are on average near what the other boards did and the MPower did just that!
USB 3.0 and SATA 3
Putting the MPower’s USB 3.0 to the test we compared the difference between SATA 3 and USB 3.0 numbers using the same SSD. As you can see the performance we saw was fast, but still not in the same ballpark as Asus’s USB 3.0 when using turbo boost. This is to be expected as the performance we do see is spot on for what the USB 3.0 specification should be capable of, but I hope MSI adds something like Turbo Boost to their new software in the future as well.
|
SATA3 |
Read Speed |
|
MSI Z87-G45 Gaming |
473.4 |
|
Asus Z87 Pro |
471.2 |
|
Asus Z87 Plus |
467.1 |
|
MSI Z87 MPower |
468.7 |
|
USB 3 |
Read Speed |
|
MSI Z87-G45 Gaming |
278.2 |
|
Asus Z87 Pro |
429.8 |
|
Asus Z87 Plus |
431.1 |
|
MSI Z87 MPower |
268.5 |
Audio
|
|
Frequency Response |
|
Noise Level |
Dynamic range |
Total harmonic distortion |
Intermodulation distortion |
Stereo crosstalk |
Intermodulation distortion + noise |
Frequency Response |
|
|
MSI Z87-G45 Gaming |
0.11 |
-.1 |
-83.1 |
83.1 |
0.13 |
0.258 |
-82.8 |
0.324 |
0.1 |
-0.1 |
|
Asus Z87 Pro |
0.2 |
-.06 |
-88.3 |
88.5 |
0.132 |
0.067 |
-80.1 |
0.052 |
0.1 |
0 |
|
Asus Z87 Plus |
0.17 |
-.21 |
-90.2 |
90.2 |
0.253 |
0.21 |
-85 |
0.149 |
0.1 |
-0.2 |
|
MSI Z87 MPower |
0.12 |
-2 |
-90.1 |
89.9 |
0.0069 |
0.013 |
-86.6 |
0.02 |
0.1 |
-0.2 |
MSI without a doubt improved on their onboard audio design over the Z87-G45 Gaming when going to the MPower. I think there is still room to go even farther, I would love to see them drop Realtek all together and go with an even higher end solution in some of their motherboards but frankly the MPower is more about overclocking and less about sound quality. Because of that I was surprised they put the effort into it that they did. The performance numbers speak for themselves and my subjective testing was similar, the audio sounded good and the built in headphone amp helped with that. It’s not going to replace a dedicated sound card, but for those of you who just want good audio but aren’t willing to put down the money for the quality this is perfect.
Overclocking
I have talked about it before but our overclock testing is a little different than you might see around in other places. We feel that max overclock testing is more dependent on the components than on the motherboards so we take a different outlook. What we are comparing below are the results that we saw when using the automatic overclocking functionality built into each of the Z87 motherboards. This could be in the software or in the case of the MPower the OC Genie button right on the motherboard. I know for a fact that the board is capable of overclocking MUCH higher, but what I want to see here is what should someone who knows nothing about overclocking expect for results. Along with that, I want to make sure that the results given aren’t going to cause issues. I can say without a doubt that the overclocks that the OC Genie gave me won’t have anyone overheating on hot days, but I think they could have been a little more aggressive with the overclocks as a whole. The overall process couldn’t be quicker or simpler though, you press the button and it will light up, then boot the PC and you are all set.
|
Motherboard |
Highest Auto Overclock |
|
MSI Z87-G45 Gaming |
4.0Ghz |
|
Asus Z87 Pro |
4.5Ghz |
|
Asus Z87 Plus |
4.5Ghz |
|
MSI Z87 M Power |
4.0Ghz |
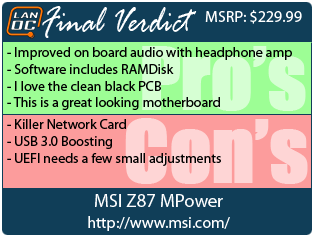
Overall and Final Verdict
In addition to the Z87-G45 Gaming, it’s clear that MSI is looking to change things up in their motherboard lineup. The MPower is a good example of this. While going through the board topology and its features I found myself extremely impressed with what MSI did with the MPower. First the black PCB goes along great with the black and yellow cooling design but what is most impressive is that they removed all of the logos and blacked out everything they could on the board. This looks amazing by itself and is going to look good inside of a case with clean wire management. I even got a chuckle when I found all of the logos on the back of the motherboard because you know somewhere there was someone saying "they never said we had to put the logos on the TOP of the motherboard”.
MSI even took a few tips from Asus when it came to the onboard audio by trying to split it off with PCB separation. On top of that they included a headphone amp, something that I would love to see on every motherboard personally. I do think they hiccupped a little when they went with the Killer Networks network card. Everyone associates this with gaming and because of that we see some premium boards going with it as a feature. But my past experiences with their cards have me a little gun shy as they tend to cause weird issues and fail in every situation that I have used them. I personally would have rather seen them go with an Intel NIC.
MSI also upgraded their software suite to their new Command Center. Command Center was easy to use and gave me quick access to tweaking my overclock right in windows. MSI even bundled RAMDisk in the software as well, this is software that would normally run you $30 to $40 if you had to pick it up. Along with that MSI bundled Norton, Trend Micro SafeSync, and a whole list of free programs as well. The new Click BIOS 4 was packed full of functionality as well. I was really impressed to see its evolution although I did have a couple small issues that I hope they consider fixing in future BIOS updates. The only thing their software suite is missing now is a USB 3.0 boosting application to help push the USB 3.0 performance up to what we have seen from the competition using USB 3.0 boosts.
When it is all said and done I was extremely impressed with the MPower. I think if MSI continues on this path they are going to be finding their way into more and more enthusiast’s PC’s. They are really onto something with the ultra-clean PCB design. A lot of people take into account the styling and how a motherboard will go with their overall build and MSI is recognizing that. In fact I have a few ideas myself that involve this board, I don’t need another PC sitting around but I am seriously considering putting something together just to put this board and my ideas to use.