 Perhaps one of the most daunting tasks after making the decision that you do not wish to purchase an off-the-shelf computer is attempting to figure out which components go in the machine. There are fun aspects, like the graphics card and processor, and then there are the not-so-fun aspects, like the motherboard (at least in my opinion). Why do I think it is a whole lot of not fun? There are so many out there to choose from, with all sorts of features. When shopping you will likely come across the ASUS board that I am going to review today. Arguably, it is one of the better all-around boards out there, with features like good integrated graphics and killer sound. But to a gamer that generally does not mean squat. Does the ASUS P8 Z68-V/GEN3 board have what it takes to function as a serious gaming component? Read on to find out!
Product Name: ASUS P8 Z68-V/GEN3
Review Sample Provided By: ASUS
Words By: Wes
Pictures By: Wes
Specifications
|
CPU |
Intel® Socket 1155 for 2nd Generation Core™ i7/Core™ i5/Core™ i3/Pentium®/Celeron® Processors |
|
Chipset |
Intel® Z68 |
|
Memory |
4 x DIMM, Max. 32GB, DDR3 2200(O.C.)/2133(O.C.)/1866(O.C.)/1600/1333/1066 MHz Non-ECC, Un-buffered Memory |
|
Graphic |
Integrated Graphics Processor |
|
Multi-GPU Support |
Supports NVIDIA® Quad-GPU SLI™ Technology |
|
Expansion Slots |
2 x PCIe 3.0/2.0 x16 (x16 or dual x8) *1 |
|
Storage |
Intel® Z68 chipset : |
|
LAN |
Intel® 82579, 1 x Gigabit LAN Controller(s) |
|
Bluetooth |
Bluetooth V2.1+EDR |
|
Audio |
Realtek® ALC892 8-Channel High Definition Audio CODEC |
|
USB Ports |
ASMedia® USB 3.0 controller : |
|
Overclocking Features |
Overclocking Protection : |
|
Special Features |
ASUS Dual Intelligent Processors 2 with DIGI+ VRM : |
|
Back I/O Ports |
1 x Bluetooth module(s) |
|
Internal I/O Ports |
1 x USB 3.0 connector(s) support(s) additional 2 USB 3.0 port(s) (19-pin, moss green) |
|
Accessories |
User's manual |
|
BIOS |
64 Mb Flash ROM, UEFI AMI BIOS, PnP, DMI2.0, WfM2.0, SM BIOS 2.5, ACPI 2.0a, Multi-language BIOS, |
|
Manageability |
WfM 2.0, DMI 2.0, WOL by PME, WOR by PME, PXE |
|
Support Disc |
Drivers |
|
Form Factor |
ATX Form Factor |
|
Note |
*1: Actual PCIe 3.0 speed varies with the installed CPU type. |
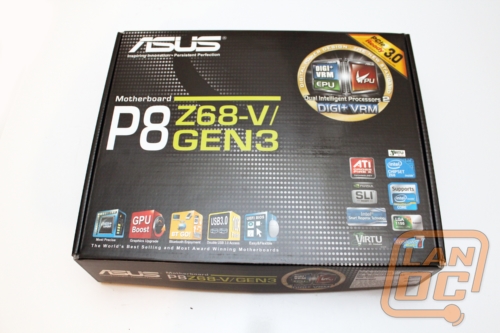
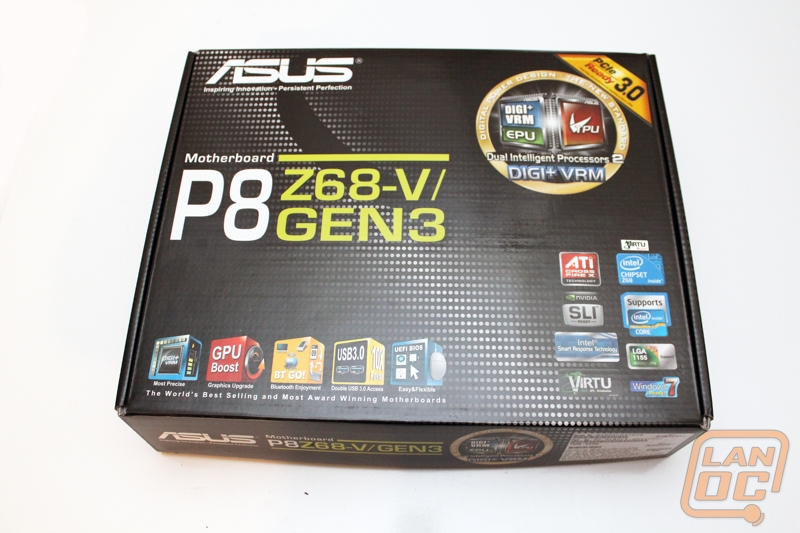
Packaging
Walk into a store like Micro Center, and enter the motherboards and you often see shelves of white boxes (Gigabyte), and shelves of black boxes (ASUS). The box this board comes in is standard fare for ASUS, prominently advertising on the front the UEFI BIOS, the DIGI+VRM support, and that it is PCIe 3.0 Ready.
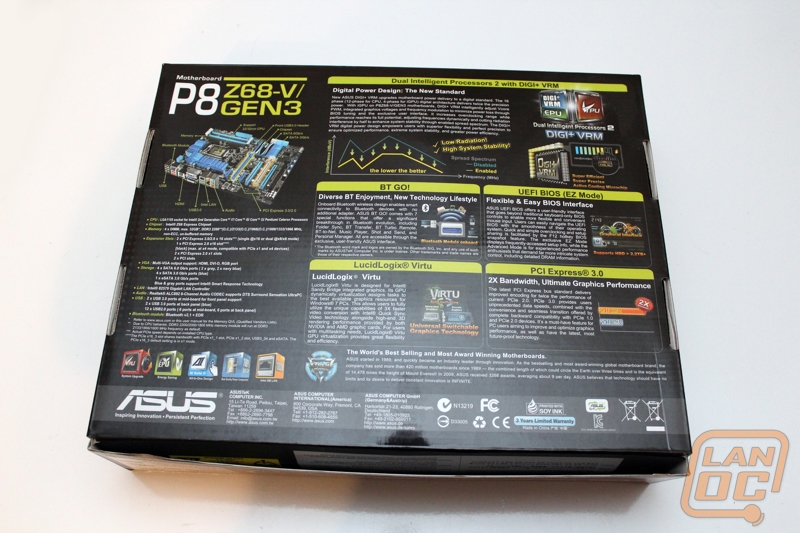
On the back of the box, two nice things about this board are advertised (in my opinion, of course). The UEFI BIOS (EX Mode) is an awesome way to navigate the BIOS. Shamefully, this is my first ASUS board (I have had Gigabyte in the past), so this is my first experience with a mouse and GUI driven BIOS. While it does take a second or two to get used to, it is not difficult to navigate. But we are jumping ahead.
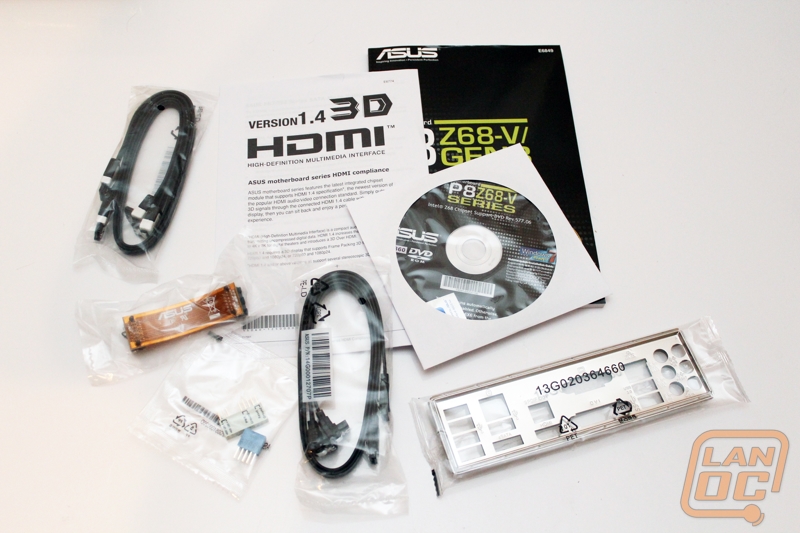
Crack the box and you have a driver CD, I/O Panel, SATA cables and documentation. Since this is a SLI capable board, a SLI bridge is also included.
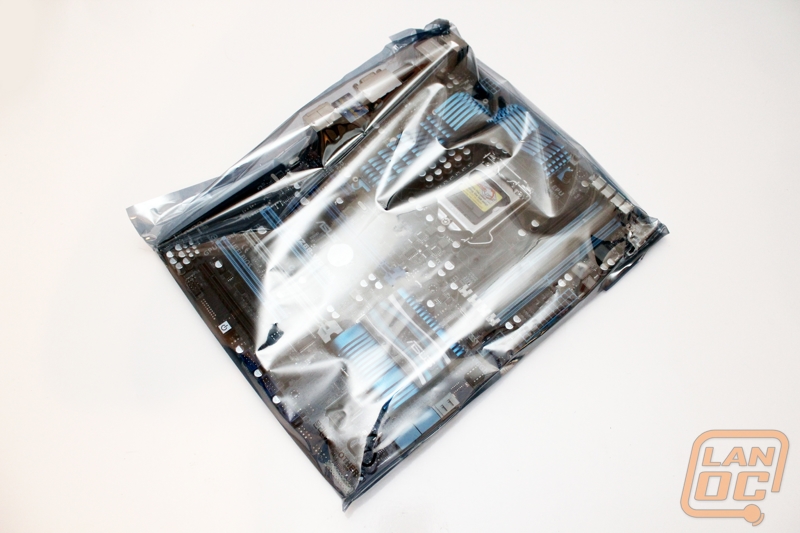
Let us just be honest up front. I love how this board looks. I am a fan of the blue and black treatment and it really shines on this board.
Board Layout
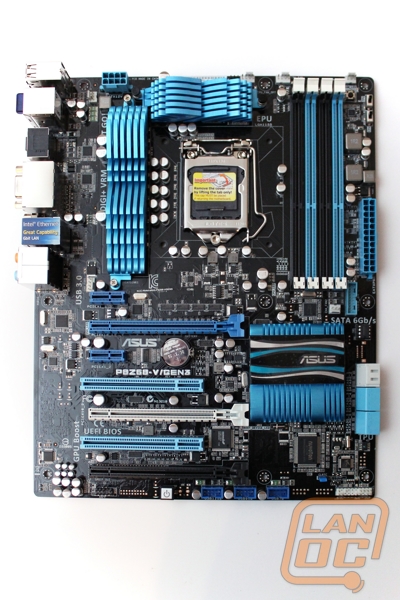
This is an extremely good looing board. Asus may call this a mainstream board but the blue and black style is at home in even the coolest builds. I know for a fact that the LanOC office has a similar board in a custom painted and watercooled rig and it looks amazing.
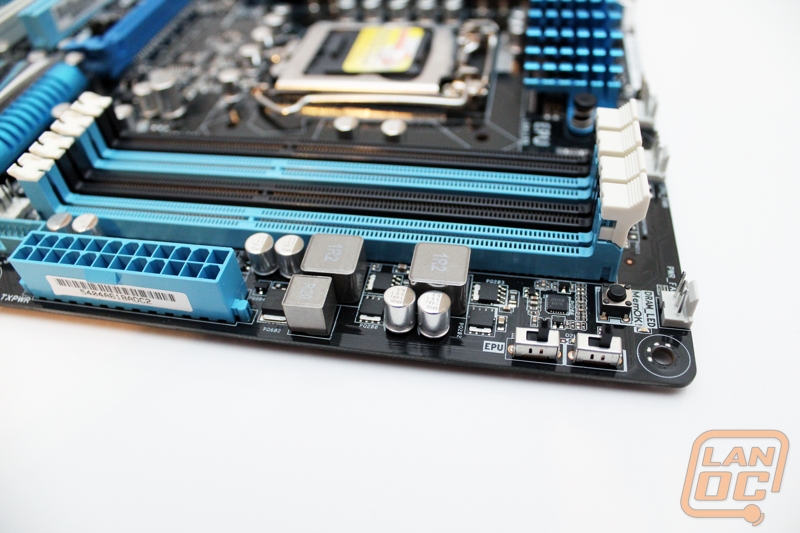
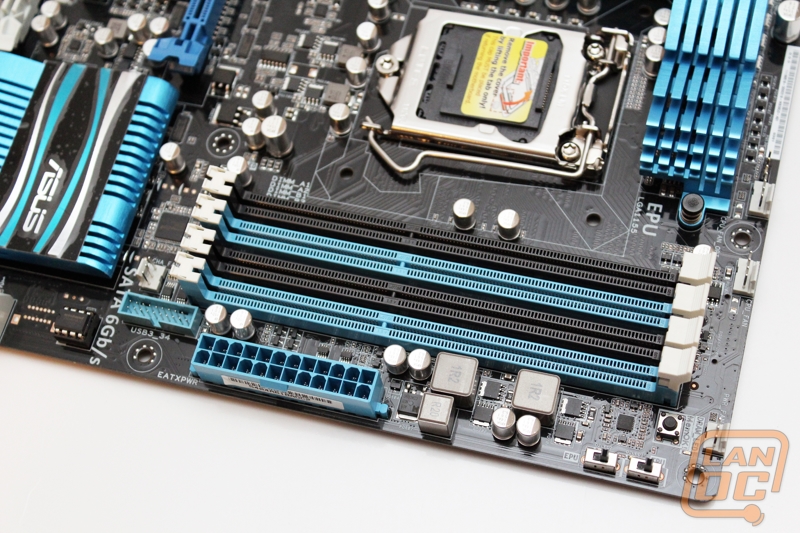
Asus has included the one latch ram hold downs on this board. It takes a while to get used to installing ram in them, but try once having to install ram in a tight spot and you will be very thankful for them. In this photo we can see a few other things including the 24 pin power connection, an internal USB 3.0 header, and Asus's EPU and TPU switches. Next to the switches is a small button for the MemOK functionality, this comes in handy when you install ran and have compatability issues. This will test and turn down your ram to help you get everything booted up.
You have a total of two PCIe x1 slots, two legacy PCI slots, and three PCIe X16 form factor slots. Just like almost every other Sandy Bridge board, they were limited for PCI lanes so we actually end up with a x16/8, x8, and a x4.
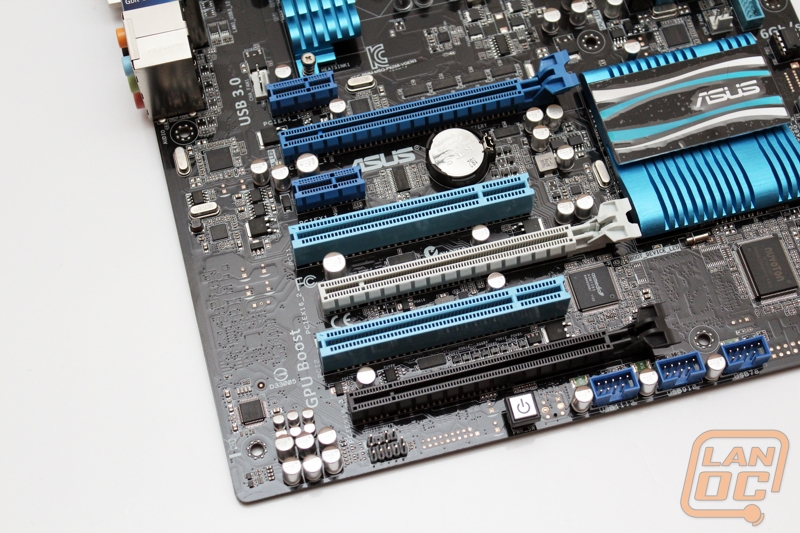
I love that Asus included a back lit power button, I may not have to use it much with my case closed up but when the side panel is off and I am working in side it comes in handy.
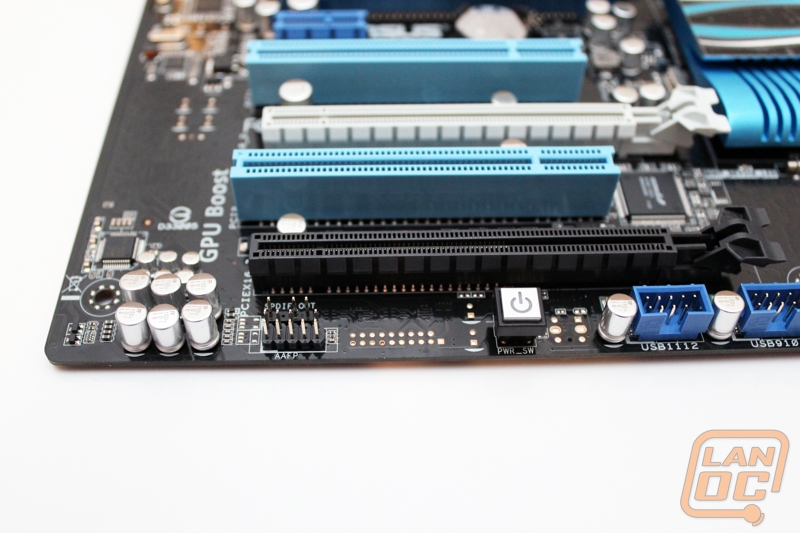
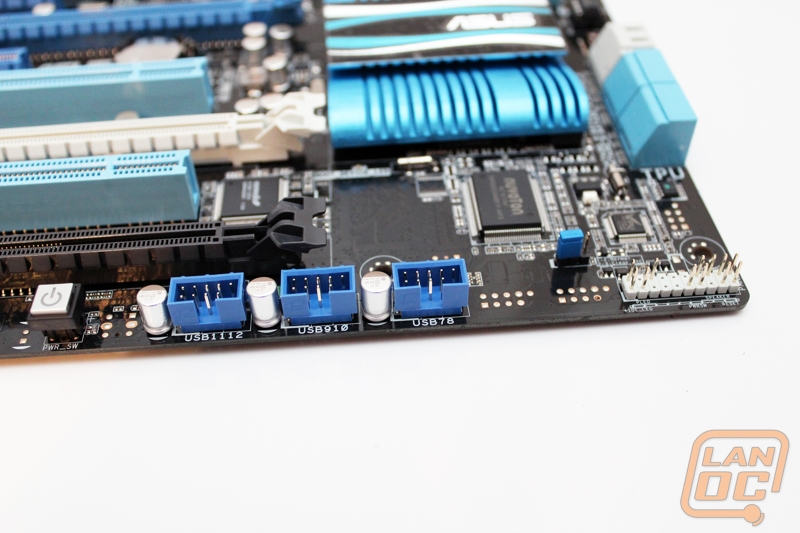
I hate front-panel switches. I hate wiring them. Almost always I will mess-up the polarity on one of them (though I am better now that I have been). What I really do like about this board is that it comes with an adapter that the cables can plug into first (so you can see what you are doing), and then you mount the adapter and cables to the board, making this is relatively painless install. Here you can also see three internal USB 2.0 connections for your front panel use as well as other uses.
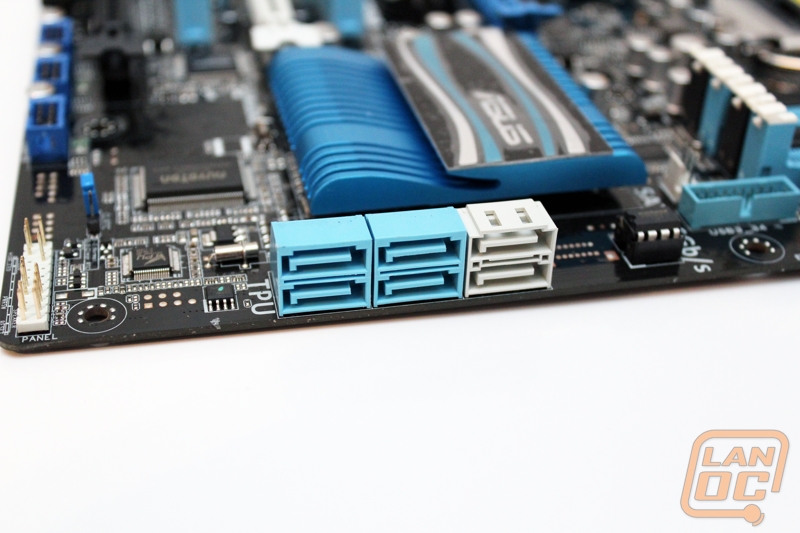
For SATA connections you have a total of 6 with four being SATA 2 and two SATA 3. This is a standard Z68 configuration meaning we only have SATA connections using the chipsets SATA controller, no additional controller needed.
The I/O Panel really is full of options here. If you use the onboard graphics (which are pretty good on this board/CPU), you can connect via VGA or DVI. There is also an HDMI out. Optical audio out and multi-channel out are also present. You will notice Asus has packed in bluetooth right into the board. This is great for sharing files with your phone and hooking up your bluetooth devices directly to your PC, just like you would with your laptop.
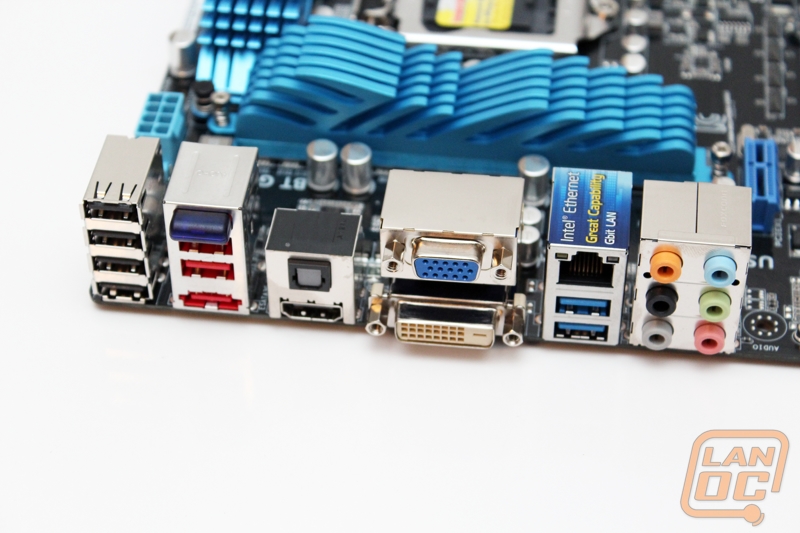
If we are going to pick some nits, I would also like to see more USB 3.0 ports, but for this mainstream board it really probably is not necessary. Heck, I do not really have that many USB 3.0 devices. Asus avoided using an additional controller to add additional USB 3.0 ports. But we still have a total of eight USB ports on the back of the board on top of front panel connections.
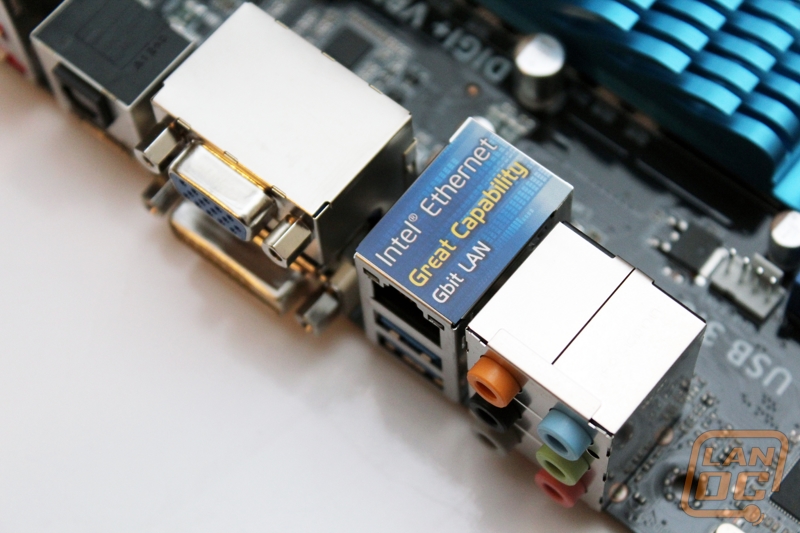
As always Asus is showing the value you get when you are buying their boards. Including an Intel NIC may cost them more money for each board they manufacture, but its details like this that make their boards one of the most popular in the market.
BIOS
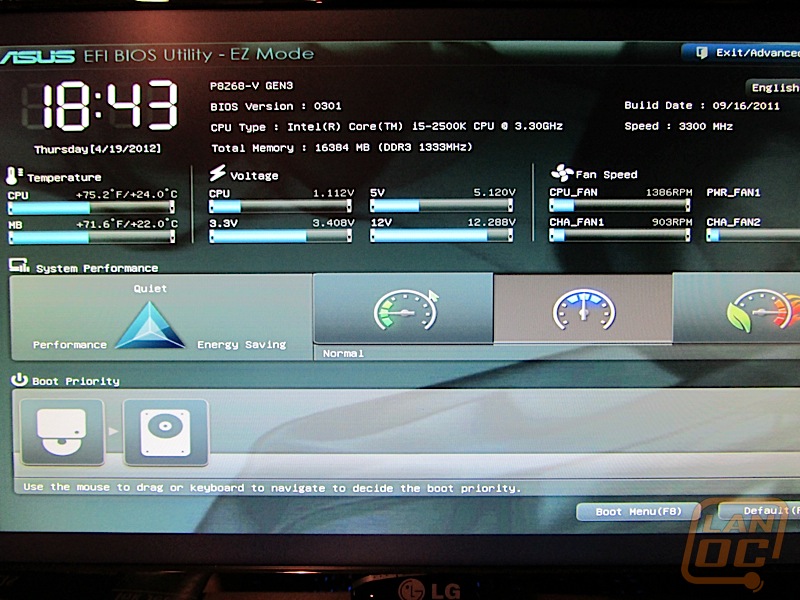
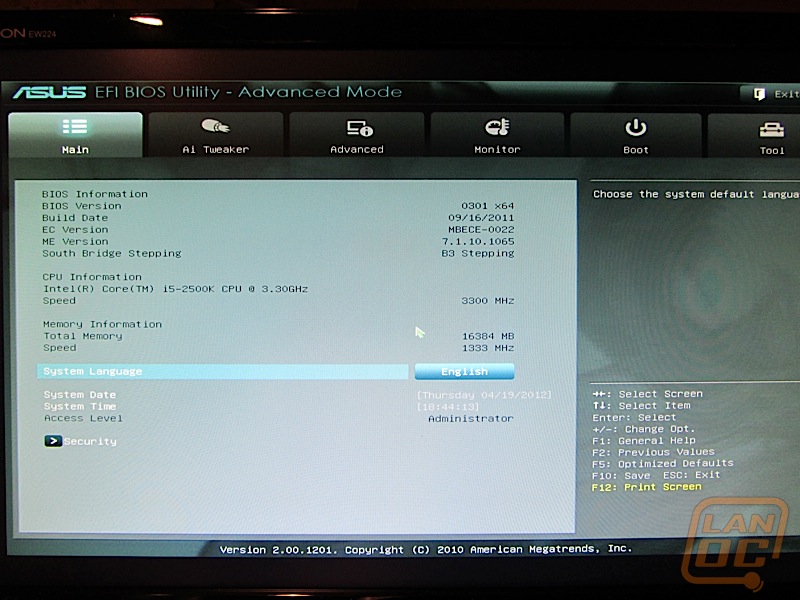
BIOS, EFI, WTF. All of these are acronyms I have used when describing this part of the computer to someone in the past. ASUS call it an EFI BIOS, which nomenclature aside is their attempt to deliver the EFI experience. You might have heard EFI used most often in reference to Intel-based Macs.
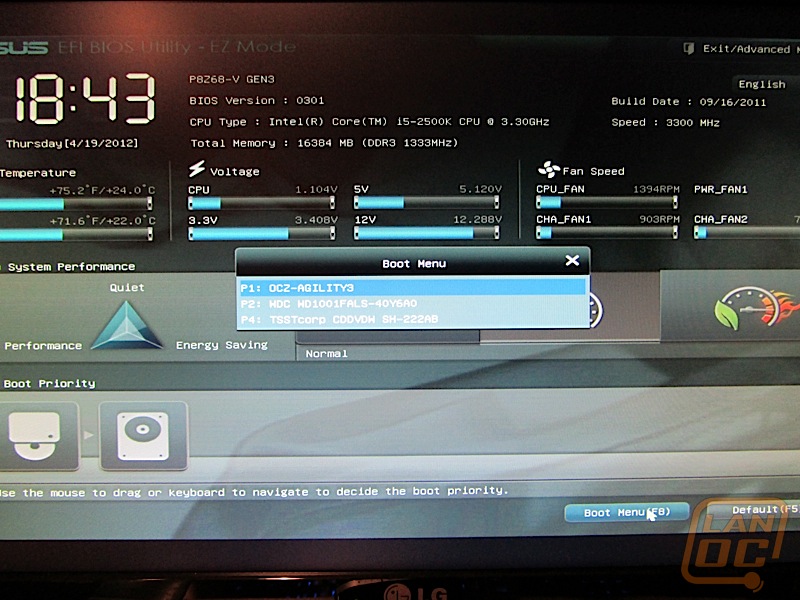
As I mentioned before, with this being my first ASUS board, I am truly impressed with the interface. It loads into a basic mode, and you have full mouse and keyboard control for navigating the interface. I dislike where they hide the “Factory Defaults” option, and they do not label a separate “Optimized Factory Defaults” and “Safe-Mode Factory Defaults” like on some boards (they are all Optimized on the ASUS), but overall it is a significant improvement over the way we have interacted with the BIOS for decades.
Software
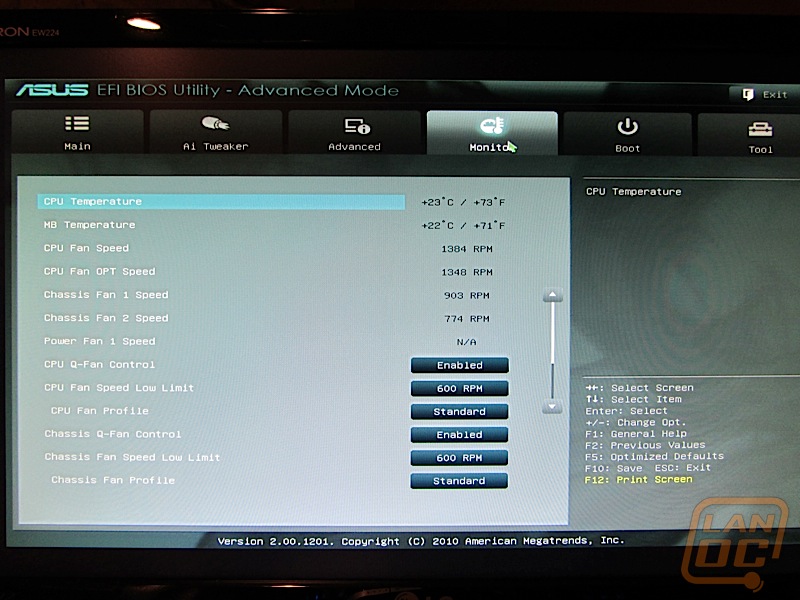
This review is going to be a little different than some of the other board reviews on this site, but I will briefly mention the AI Suite II software that comes with the board. From this software you can monitor system fan speeds, temperatures, and literally change every single motherboard setting from within Windows (meaning you probably will never really have to see the fancy EFI BIOS at boot).

As Wes has covered in the past, this software packs in all of its functionality into one suite unlike other board manufactures. From AI Suite II you can adjust everything down to the fan curve for each of the boards fan headers. This actually gives you more functionality than you can get from the UEFI BIOS.
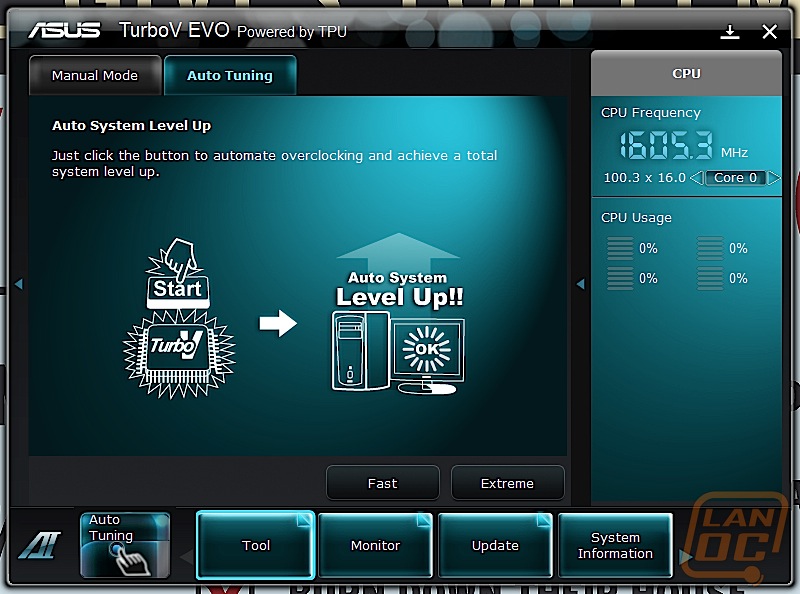
I will mention the Auto Tune results later in the article, but it is worth mentioning that in Windows is where you set the software to overclock the machine, and this is also where it runs the stress testing for making sure the system runs reliably at the overclocked settings.
Living with the Board
You have seen the specifications and stats. You have seen the board from every conceivable angle. But what is the board like to live with? This is the same setup that I brought to LanOC v.10 and let me tell you, I am super satisfied with the results. My current build is dubbed “Defiant”, after the ship in Star Trek: Deep Space Nine that really did fight way above its weight class. Here are the components that this board is working with;
- ASUS P8 Z68-V/GEN3
- Intel i5-2500k
- Patriot Memory PC3-15000 (1866MHz) 16GB DD3
- OCZ Vertex SSD (120GB)
- EVGA GeForce 550ti (SLI enabled)
- NVidia GeForce 550ti (SLI enabled)
- 1TB Western Digital Black HDD (Apple OEM)
- 4x Noctua 120MM Fans
- Antec Kuhler 620
- CoolerMaster CSX (case)

Before the system would auto tune, it shows you the target number that it will be running at after the reboot.
I previously had a Gigabyte board in the machine, and the tuning software was pretty decent for it. When you chose the “Extreme” setting it would bump the multiplier up on the processor to 4.2GHz and it would run under 40C day in and day out. The auto tuning software that comes with the ASUS is different. Unlike the Gigabyte where it only changes the multiplier, the ASUS software also adjusts the voltage (to the processor, and RAM noticeably) to overclock the machine.
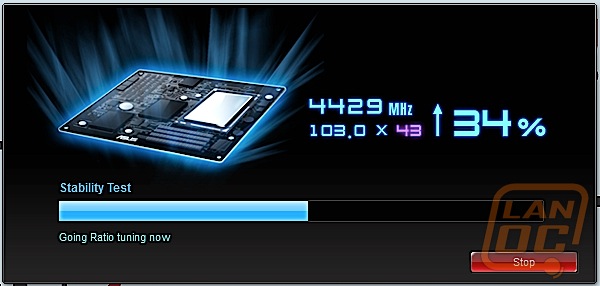
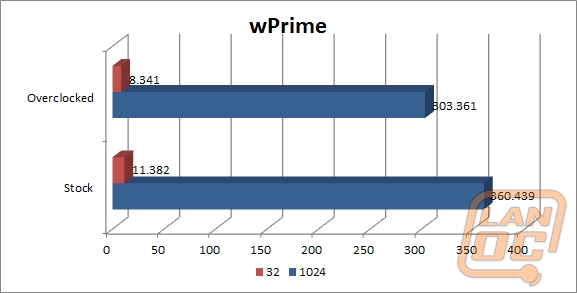
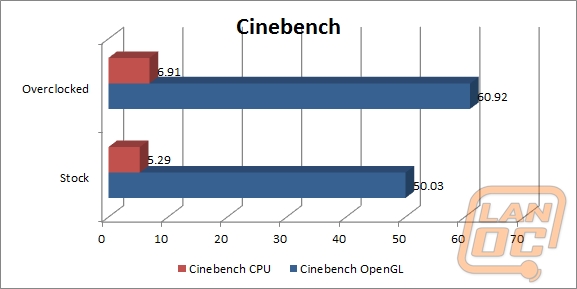
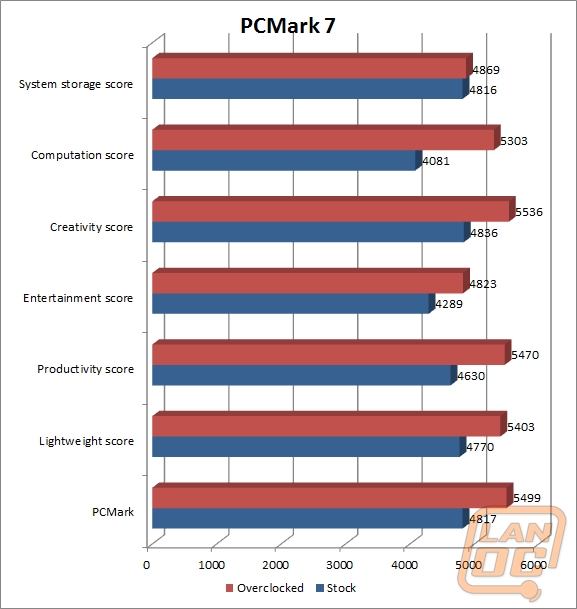
What I really like about the software is that it will choose a target point, reboot the machine, and run a stress test with those settings. If the machine does not crash, then it ups the settings and runs the stress test again. Basically, this will continue until the machine crashes. The software then dials it back just a bit so you can run stable at the overclocked settings. Cooling issues aside, this setup generated just over 4.6GHz with the exact same hardware. The results are shown below.
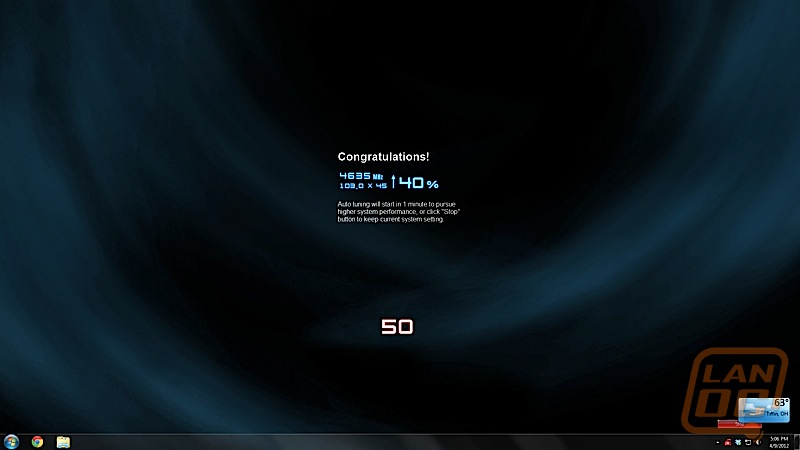
But what happens when you turn up the voltage? You also turn up the heat. Whereas the Gigabyte board would run super-cool at less than 40C the ASUS software monitor quickly points out that it is running at 83C shortly after running anything that would stress the machine.
For my "non extreme gaming friends" they still place some stock in the Windows Experience Index score, so basically for bragging rights when I show them this article, I will include the before and after screenshots here.
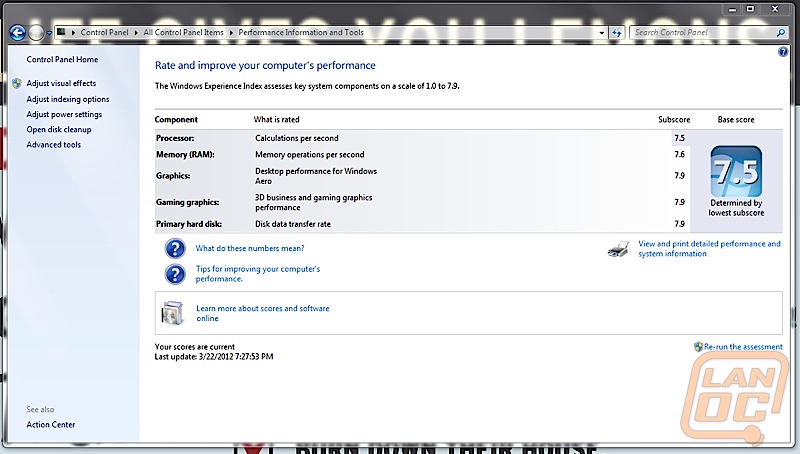
Before (above), and after (below).
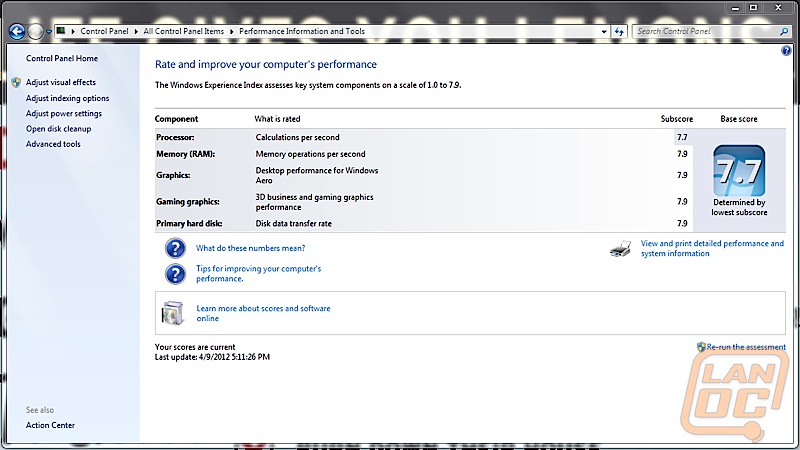
The processor is still the weak link, but with everything else a 7.9 that is a nice improvement on the memory!
But wait, you are saying "Show me the REAL benchmarks!" I say, "Read on my friend!"
Benchmark Results
In case you missed it in the last section, this is the test system for the benchmarks;
- ASUS P8 Z68-V/GEN3
- Intel i5-2500k
- Patriot Memory PC3-15000 (1866MHz) 16GB DD3
- OCZ Vertex SSD (120GB)
- EVGA GeForce 550ti (SLI enabled)
- NVidia GeForce 550ti (SLI enabled)
- 1TB Western Digital Black HDD (Apple OEM)
- 4x Noctua 120MM Fans
- Antec Kuhler 620
- CoolerMaster CSX (case)

Overall and Final Verdict
First off, for the overclocking novice, I do not believe that this board’s software is the greatest. But didn’t I go on about how great I thought it was earlier? Yes, but the auto tuning software increases voltage to the RAM and processor, and without proper cooling it is easy to get in trouble. But if you go in to “Manual Mode” there is no explanation (without Googling) about what some of the settings are. The Gigabyte overclocking solution did not deliver as high of results, but the software also only changed the multiplier on the processor, increasing the speed without bringing on the added heat. The ASUS software is a more robust solution, and I do like it better, but at the end of the day for novices I think it could be possible for someone to get into a bit of trouble.
But when comparing software, the ASUS suite is a nice single download from the ASUS website instead of so many different pieces on an ASUS board. But one issue that I did discover is when I attempted to download a firmware update for the board (or check to see if one is available, more importantly), the download would fundamentally time out but not tell me if it was downloading one of if there was not one available.
The board was painless to install, and since I already knew how to install the Antec Kuhler 620 with that cumbersome install process, I was able to get everything up and running quickly.
At $179.99, the board may seem "pricier" than what you are looking for to in a budget build board, and granted it does have some features that I will never use. But looking at it all, the onboard graphics are a great option, especially if I need to cannibalize this board for other functions. But really, when you look at everything as a whole, it is a great buy for a good board. Though it has not been mentioned, the USB boost is a great add on that in lab testing has shown a significant improvement on USB 3.0 speeds. Also, and the reason why I ended up with the board, is the ability to support SLI. Many boards support Crossfire, and I understand why, but it is nice to have a board that'll do both, and this will definitely accomplish that.
The ASUS should also be a better quality board, but I will reserve complete judgement on this board in that arena until a later date. However, ASUS does make good stuff, and they have been making it for milennia, so no worries there. Why? Because they warrant the board for 3 years, which is awesome!
It's not a perfect board, but it is awefully darn good at what it does. As time progresses I hope to play around with it more to better tweak the performance.