Budget builds have become more and more popular as the economy sees more falls and the industry sees more rises into the world of PC gaming. Regardless of if you have an entry level build or an enthusiast, cutting corners to save dollars only ends up costing you more in the end. There are several companies that strive to provide quality performance matched with affordable price-points, and XtremeGear has sent us such a piece: the HP1216B.
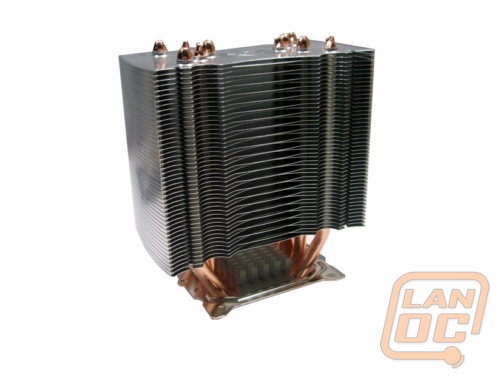
Product Name: HP1216B
Review Sample Provided by: XtremeGear
Review and Pictures by: Adam
| Dimensions (L x W x H) |
5.16" x 4.06" x 6.02" (131mm x 103mm x 153mm) |
| Weight | 730g ± 10% |
| Bearing Type | Hydraumatic |
| Rated Voltage | 12 VDC |
| Rated Current | 0.38 Amp (MAX.) |
| Air Flow | 55.6~80.1CFM |
| Noise | 215~25 db ± 10% |
| Speed | 1,000 ~ 2,000 RPM ± 10% |
| Life | 30,000 hours |
| Thermal Resistance | 0.92 (°C/W) |
| CPU Compatibility | Intel LGA775: Core2 Duo / Celeron / Pentium 4 / Pentium D Intel LGA1366: Core i7 AMD AM2 / AM3 / 754 / 939 / 940: Sempron / Athlon 64 / Athlon X2 / Phenom 64 |
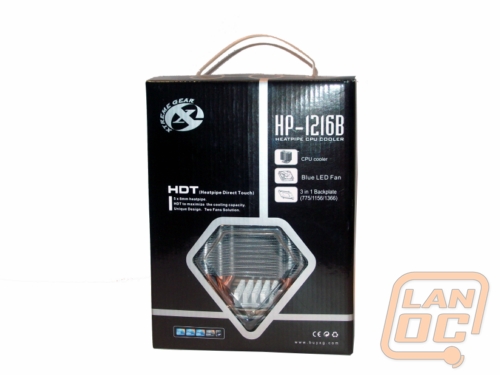
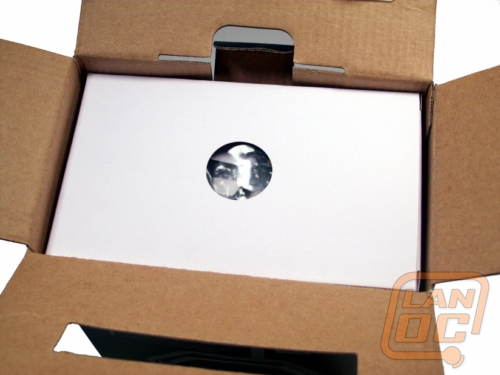
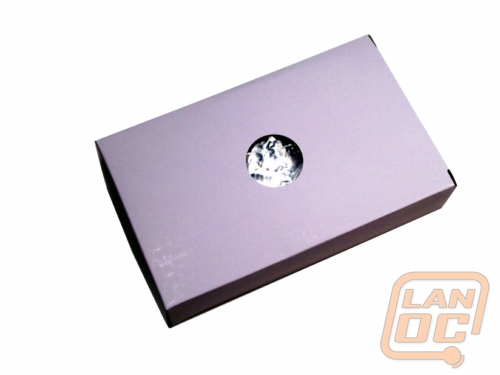
Packaging
The HP-1216B comes packaged in a black carrying box, with a diamond-shaped plastic window allowing a direct look on the product's fin, base, and heatpipes from the front. Callout images also outline some of the including parts, such as the cooler itself, a blue LED fan, and the backplate, as well as some of the cooler's unique heatpipe technology.
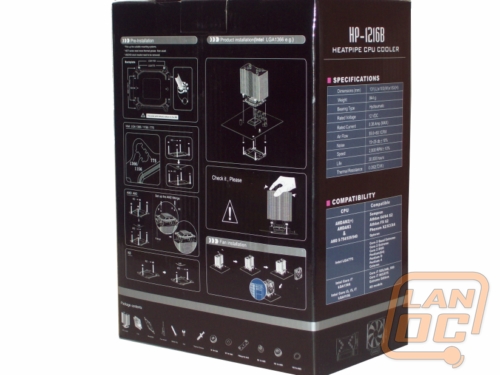
On the reverse side is a quick reference for installing the cooler, complete with some really nice black-on-white images of the steps and each including component. On the side you'll find the product's specification and compatibility tables.
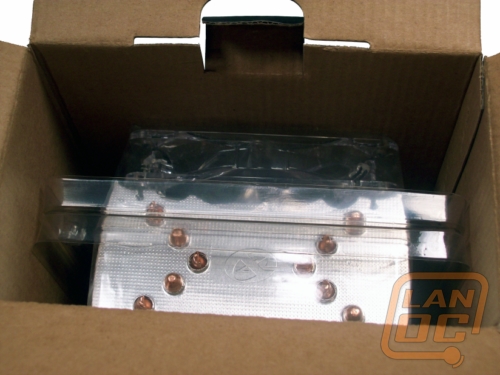
Inside, an accessory box sits atop of the cooler, protect by an enveloping plastic container sealed with a punch-crimp in each corner. Removing the plastic shell, you can see the cooler in all it's glory, as well as the included fan uninstalled, but positioned in the general area its destined for. Simply snapping apart the corners will allow access to the prize inside.
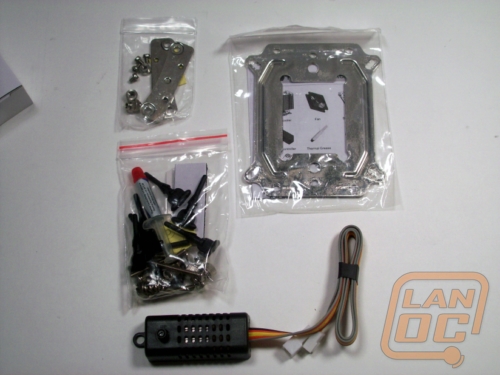
The accessory box includes several goodies, including that 3-in-1 back plate, fan controller, thermal paste, and all the screws you could hope for including some rubber screws for fan installation. Also included is a more mobile pamphlet version of directions.
Installation
Heatsinks with a backplate can be a pain in general to install; I know that, you know that, your significant other who woke up to your cursing when you install them knows that. Xtreme Gear truly tries their best to make this necessary evil as painless as possible.
The backplate is pre-assembled with each of the bolts and tightend with nuts to ensure that all for corners aren't wobblying between the three socket options (we'll be using the 1366 Intel Socket, the furthest hole of the corners). From the reverse side of the motherboard or the tray (depending on if you have a CPU cut-out in your case), the four corners slide into the four holes respectively.
Here's where the beast shows it's fangs. The screws need to have their full length on the front of the motherboard, since the head nut has a few coils of suspensions before the threading of the screw begin. So, if you don't have enough length on the bolt, the coil will simply rest on the plate with no way to tighten.
If you're installing on a removed motherboard, this can be somewhat simpler since you can rest the backplate flat on a surface and ensure it won't move. However, if you're installing in a case with a cut-out, as was my situation, it can really be a pain. The idea of the suspension nuts are a good idea, but really create some frustration if you're not approaching this in the best way.
Obviously you want to stary be removing the plastic seal from the base of the cooler and applying the thermal paste, which is included. Then comes mounting and securing the cooler.
I had two options: install with the tower standing up-right, or lay it on it's side. Up-right works well at first, allowing one hand to keep the back plate steady and the other to place the heatsink on the bolts. But now, you need one free hand, if not two, to hold the heatsink and secure it with the nuts. If you remove your hand from the backplate, when you go to place tighten the nut, since some pressure is need to obviously screw the nut on the bolt, the bolt is going to move without support behind it. If you use your hand that was supporting the heatsink itself, its going to move and may even fall off, making it impossible to tighten any nut and creating a nice mess with thermal grease in the process.
So, let's trying laying it down. If your case is like any other, its designed for a side panel to slide in and out and cover the reverse side of the mobo tray, as well as help with some wire routing, Long story short, if you lay it down the bracket isn't going to be what's laying flat on the surface, the border of the case is. So, in order to keep the backplate from falling to rest on the surface, loosing that essential bolt length in the process, a nice contraption of small books and game cases was created the McGuyver would be jealous of.
Once you have the bolts at proper length and the motherboard at a postion where you can tighten the screws, the actual securing is almost ironically simple. Even if you have a CPU cut-out, it may be less troublesome to just remove the mobo and install the cooler outside the case.
This is perhaps even more recommandalbe when you consider mounting the fan, which has to be done after the cooler is secured since it will cover the bolts on one side. You thought it was hard getting your hand between the rear of your case and the heatsink to tighten that corner screw? Wait until you had another inch or two to that, and need to pull a rubber screw through it.
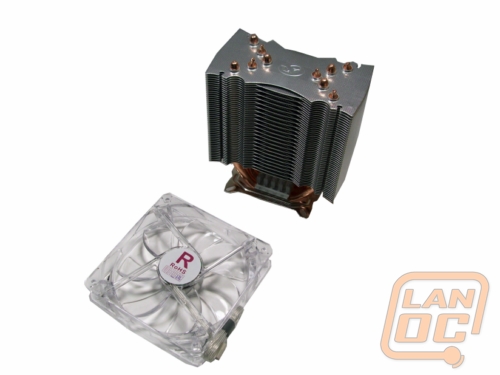
The finish product looks pretty sharp, with a nice blue glow and the ability to be mounted vertically or horizontally for the fan to blow out either top or rear case exhaust fans.
Performance
Test Rig:
Intel i7 920
Gigabyte EX58-UD3R
Ultra X4W PSU
1GB x 3 Triple Channel OCZ DDR3 RAM
Western Digital 1TB/Seagate 750GB
Nvidia GeForce 9500 GT
NZXT Tempest Mid-Tower
Windows 7
Despite some shaky installation, which is mentionably due in part to the tower and not entirely the fault of the cooler, the HP1216b looked sturdy and had a nice simplicitic attraciveness.
After celebrating the success of installing the HP1216b, it was time to put the cooler to the test. I ran Prime95 to stress the system for a duration of an hour, measuring using RealTemp 2.5. Cooler fans were set to maximum, room temperature measured at a consistent 69 degrees Farenheit.

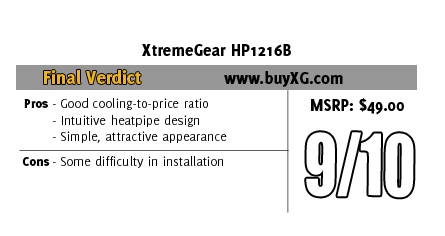
Overall
Installation of the HP1216b suffers from the the tedious nature of the heatsink beast, but the combination of spring-equipped nuts and fastening them from the top as opposed to behind on the backplate seem to overcomplicate the situation. There are only a few models that match the cooling-to-price ratio that XtremeGear has captured here, creating a situation of preference and style.