Noise Testing, Fitment, and Lighting
|
Cooler |
Height |
Width |
Depth |
Fits Tall Memory |
|
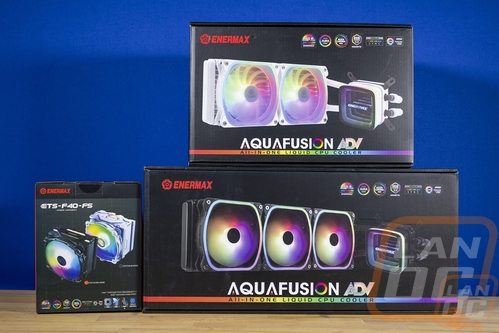
Enermax ETS-F40-FS ARGB |
140 mm |
158 mm |
93 mm |
Yes |
|
AIO Cooler |
Fan Configuration |
Radiator Thickness |
Water block height |
|
Corsair H100i Elite LCD Display |
2x 120mm |
27mm |
57mm |
|
Enermax Aquafusion Adv 240 White |
2x 120mm |
27mm |
54.5 mm |
|
Enermax Aquafusion Adv 360 Black |
3x 120mm |
27mm |
54.5 mm |
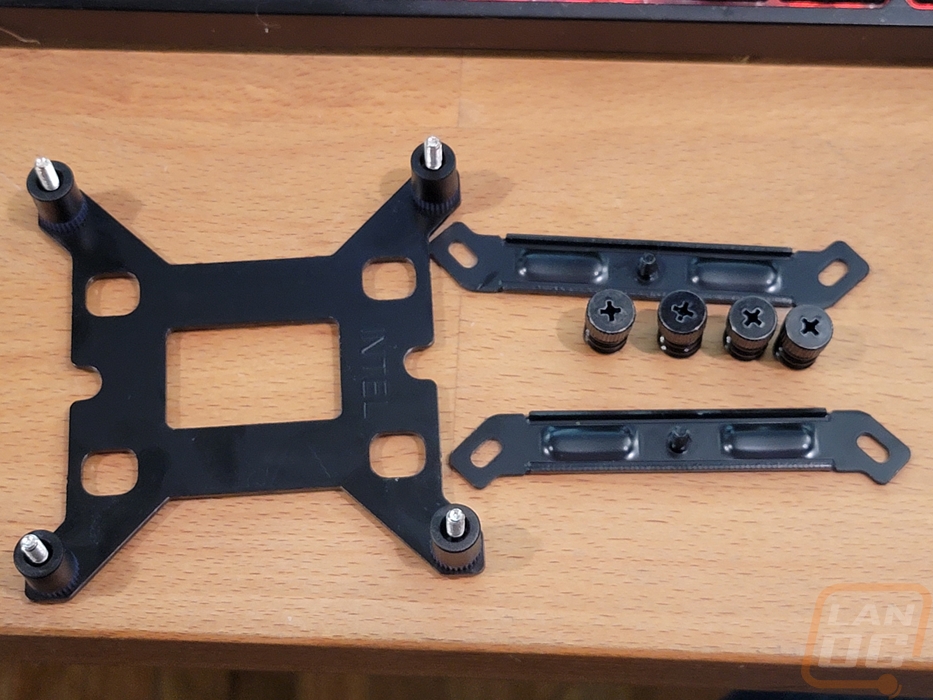
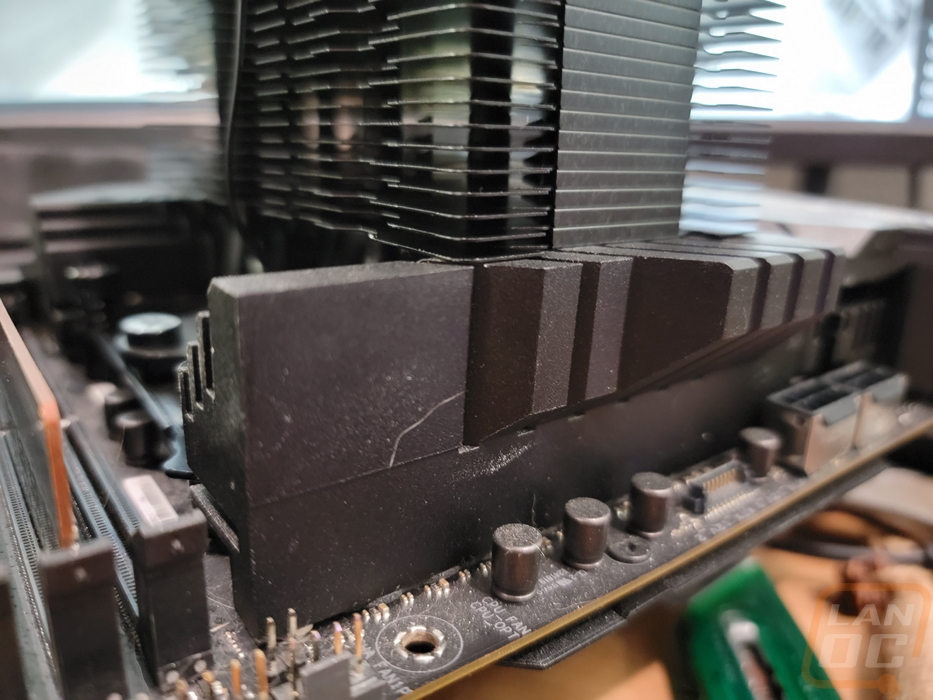
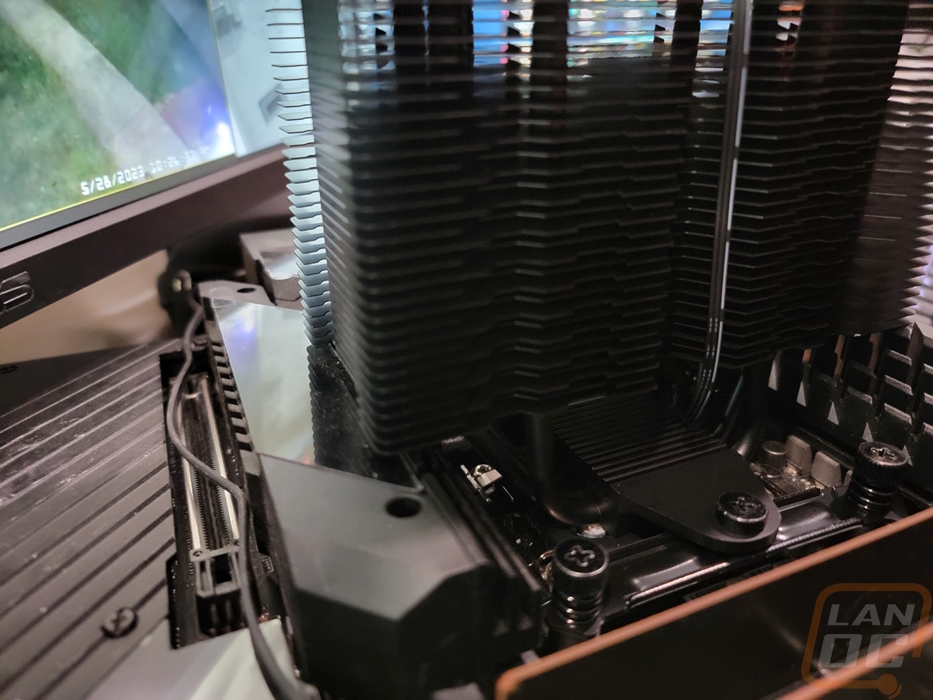
Before getting into noise testing, I did have to get everything installed and up and running. The ETS-F40-FS ARGB being an air cooler was less complicated than the rest. Its bracket design is very similar to what some of the Noctua coolers have. For our Intel LGA 1700 install you have your base back bracket and you have to get the correct standoffs, which you have two to pick from. Then with the standoffs, two different orientations help cover all of the socket sizes. We needed the silver standoffs and the bulge on the outside. Once those are installed you have plastic washers that fit snug that slide on them to hold them in place. You slide that up from the back and then on the top of your motherboard, you have plastic spacers you slide on. Then you attach the two wing-like brackets up on top with the spring-loaded nuts. There is one big downside to this, you do have to hold the bracket in place until you get things bolted together. Our test bench is running an Asus Z790 Extreme and the fitment was tight but I thought it worked. I found out in our testing that wasn’t the case. You could make this work with the first layer of fins bent, but you do want to make sure you have clearance if you are looking at the ETS-F40-FS ARGB, most motherboards don’t go as crazy with the VRM heatsinks and the M.2 cooler so it should be fine. But this is the first cooler I have run into issues with on this board. As far as memory clearance, the ETS-F40-FS ARGB is good unless you decide to mount it sideways which would put it up over most memory slots and we know that if it doesn’t clear the motherboard heatsinks here anything beyond bare PCB memory might be an issue.
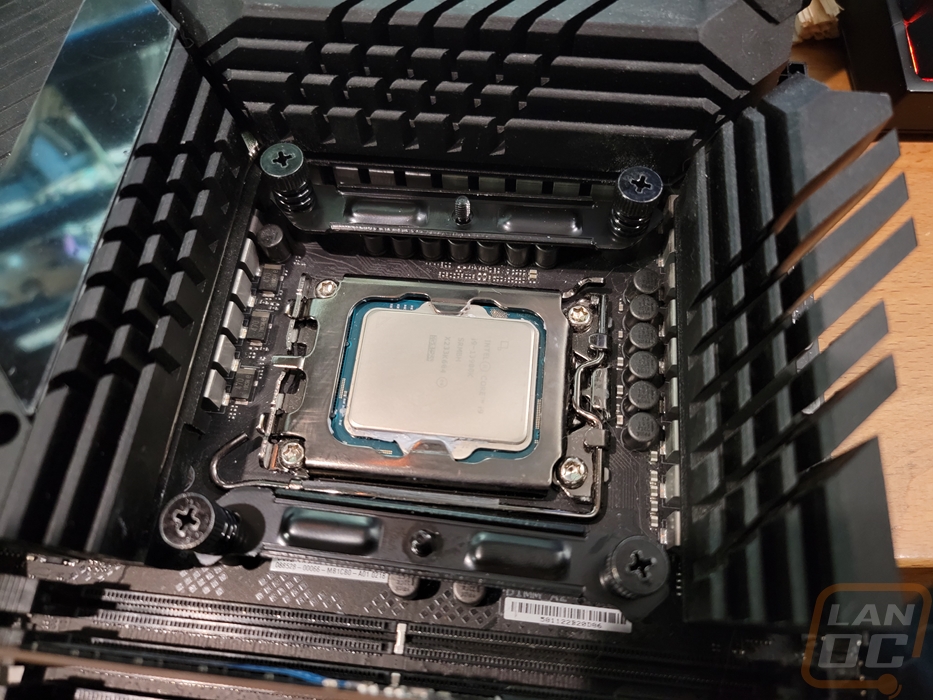
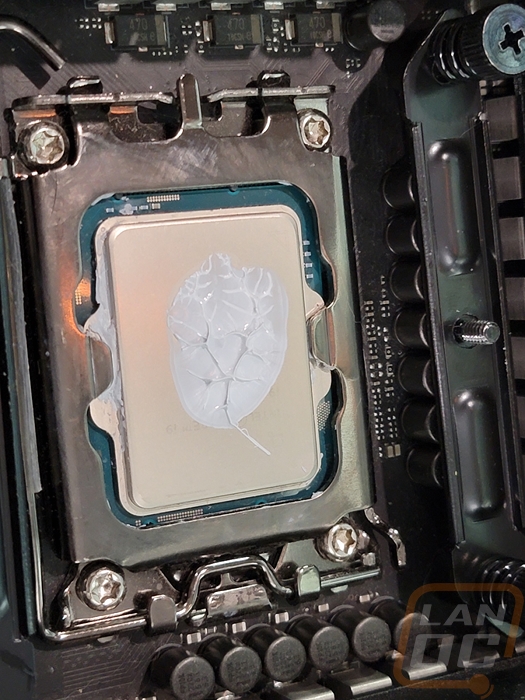
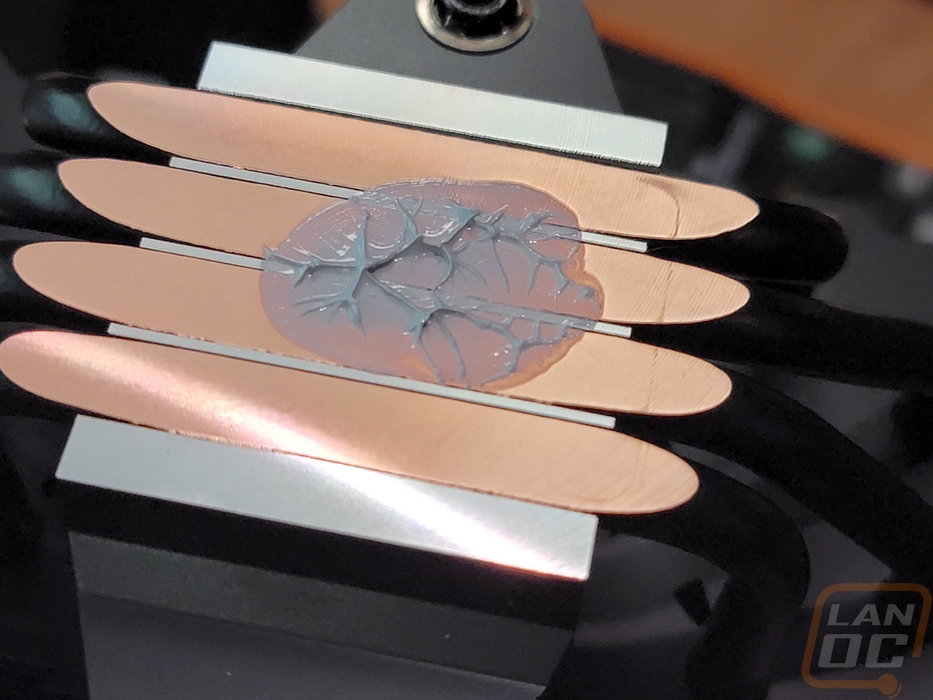
If you were curious how close the fitment was, here is the contact that we had with the CPU. It's enough for some cooling and for a big AIO cooler or a low-end CPU that would be enough to get the job done but cooling a 13900K with ANY air cooler needs perfect contact.
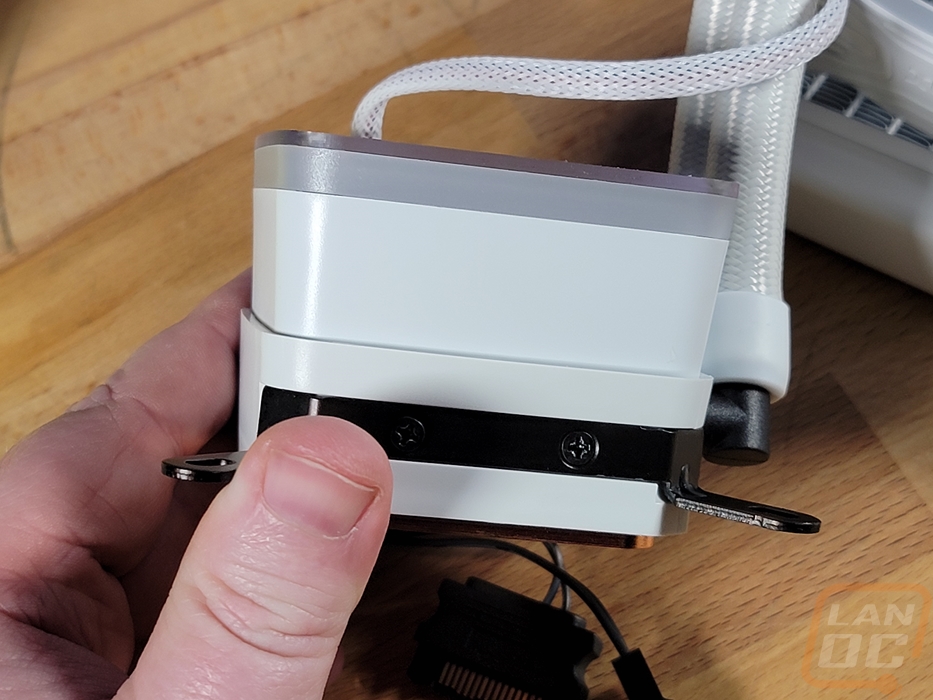
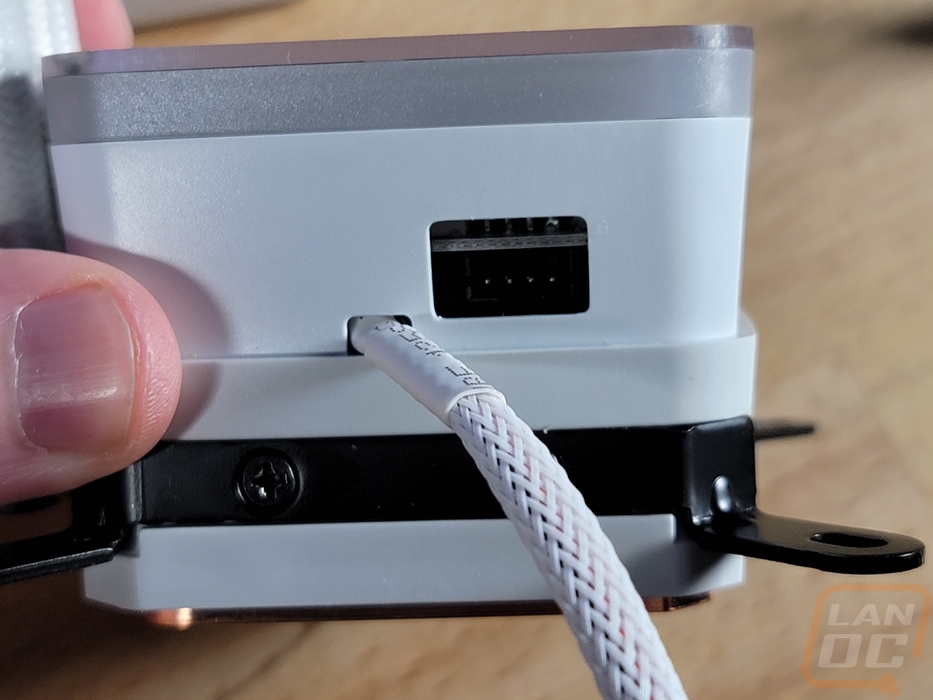
The installation of the two Aquafusion Adv coolers was similar to the ETS-F40-FS on our LGA 1700 motherboard but they do have a differently shaped Intel backplate but it uses the same standoff design. The downside that the air cooler had where you have to hold the bracket from the back until you have everything attached is a bigger deal here because you aren’t just holding it until you get the top bracket installed like on the air cooler. This time around you have to get the pump in place and then the nuts go on. A design where the bracket is all locked into place and then you install the pump to that would be nicer and is how most AIO coolers do it. The Aquafusion Adv installation does require getting the fans installed on the radiator, which you can do ahead of time and they do include smaller screws as well to mount the radiator to your case. I noticed that the fans are especially susceptible to breaking on their mounting tabs. I use a powered screwdriver with a clutch to make sure I never over tighten screws and even on the lowest setting I had tabs bend and make cracking noises, even doing it by hand there was almost no room between being loose and being overtightened and breaking.

Beyond that, you have to install the mounting brackets to the pump and while it is a small detail I was surprised that the all-white model still has all-black brackets and hardware. Normally I would complain that a white kit ended up with chromed hardware, but with the mirrored pump top and white for every other small detail even the plastic around the white sleeving on the lines the black hardware seems out of place. White would be best, but a traditional chromed finish could go with it as well.
For noise testing, I have kept things simple. For each of the four devices tested, I tested at 50% fan speed, 100% fan speed, and then under load. For under load, this is with the AIDA64 CPU workload which is a little less demanding and more like an in-game workload. I did the noise testing 18-24 inches away from the radiator. For the Corsair, because it has its own software for load testing it was set to balanced and everything else is using the “standard” profile from the Asus motherboard. The ETS-F40 did well which is helped by having just one fan and that fan also only runs at up to 1200 RPM. The two Aquafusion Adv coolers both have fans that are faster, running up to 2000 RPM at 100% fan speed and that shows in those tests where they were louder than the H100i. While under load however the Aquafusion Adv both were quieter than the H100i which is the only result that really matters unless you plan on cranking your fans up for the fun of it.
|
Noise Testing |
50% Fan Speed |
100% Fan Speed |
Under Load |
|
Corsair H100i Elite LCD Display |
35.9 |
46 |
45.9 |
|
Enermax ETS-F40-FS ARGB |
32.1 |
37.2 |
37.2 |
|
Enermax Aquafusion Adv 240 White |
38.6 |
50.5 |
42.1 |
|
Enermax Aquafusion Adv 360 Black |
39.8 |
52.4 |
45.1 |
|
Enermax Aquafusion Adv 360 Black Retest |
39.8 |
52.4 |
41.8 |
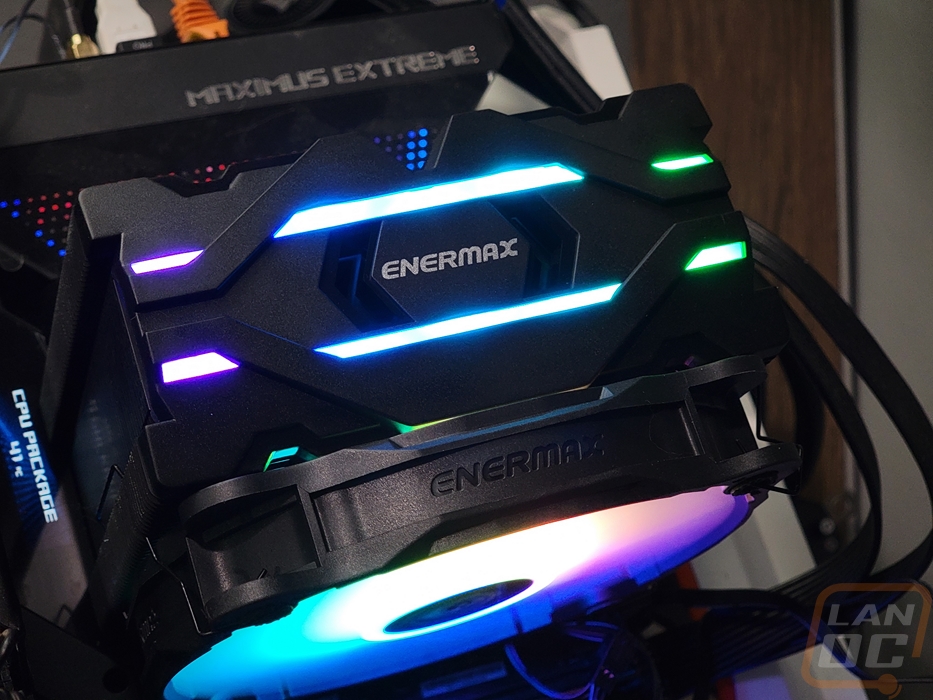
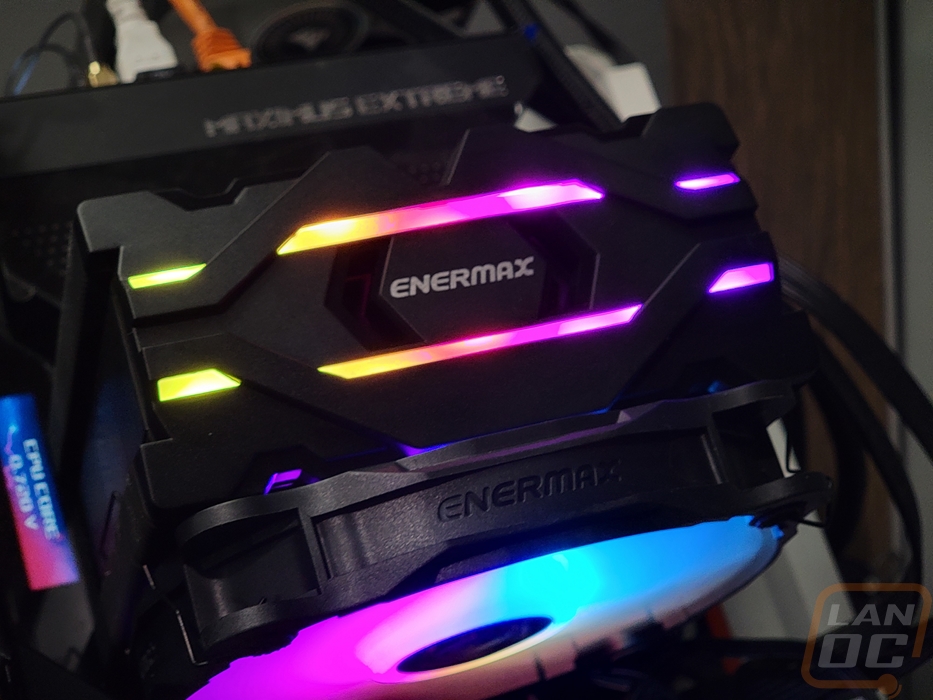
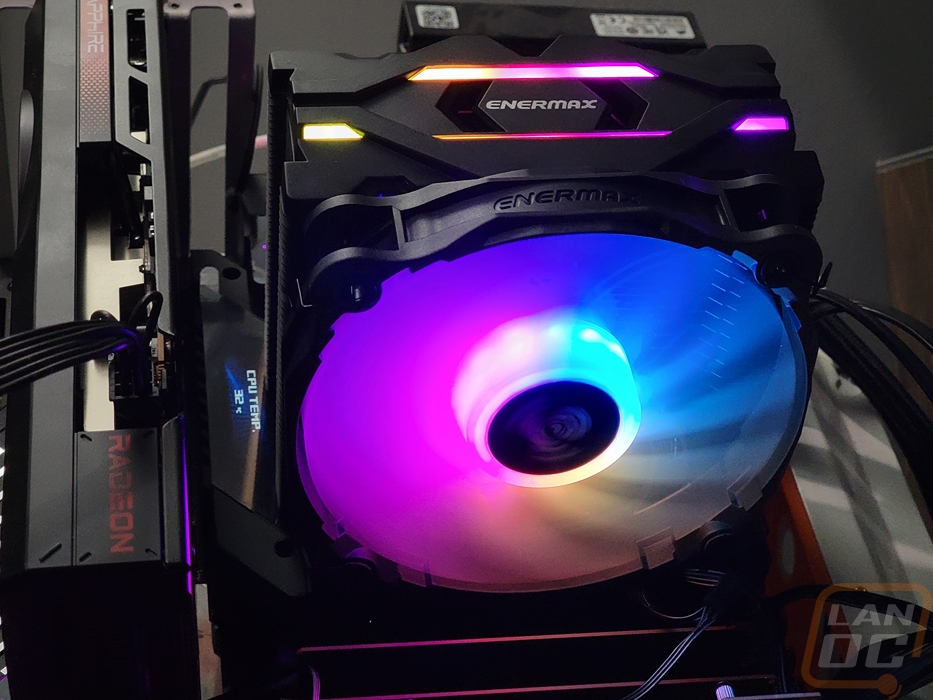
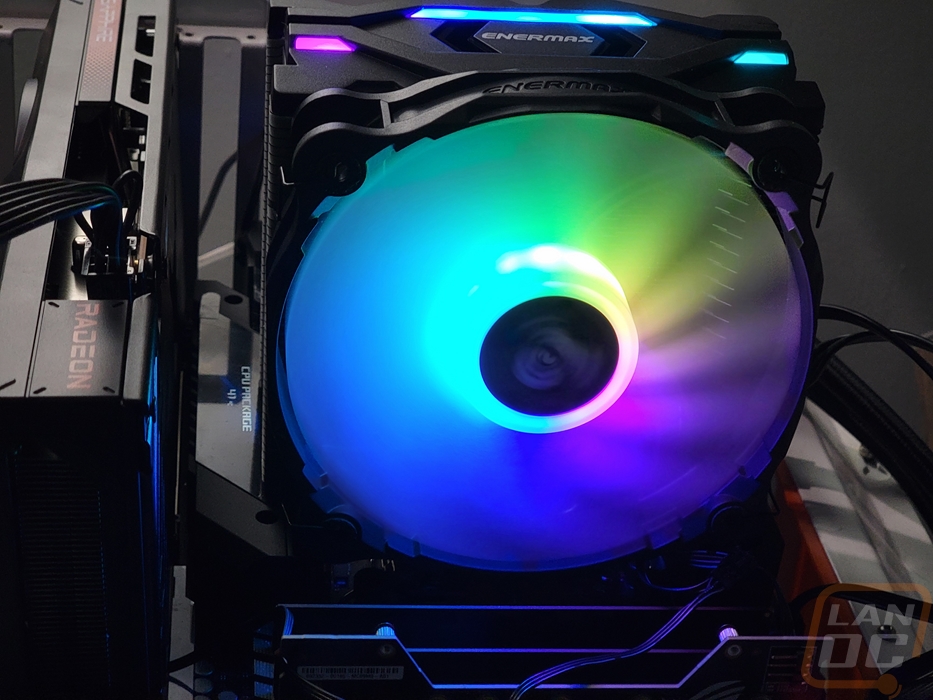
For lighting, the ETS-F40-FS ARGB which has dual lightbars across the top of the cooler and the single fan isn’t anywhere close to the same as what they have going on with both of the Aquafusion Adv coolers. But for an air cooler I do like that Enermax tied in the heatsink itself, not just the fan like most RGB air coolers have. Of course, if you don’t want lighting, they do have the original models without it.
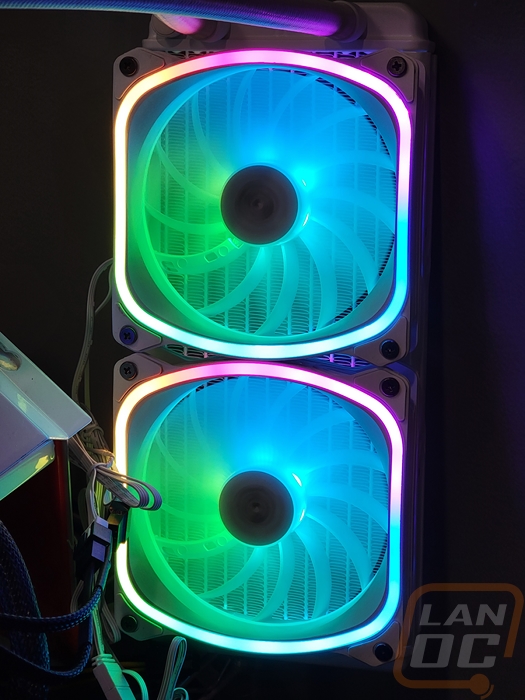
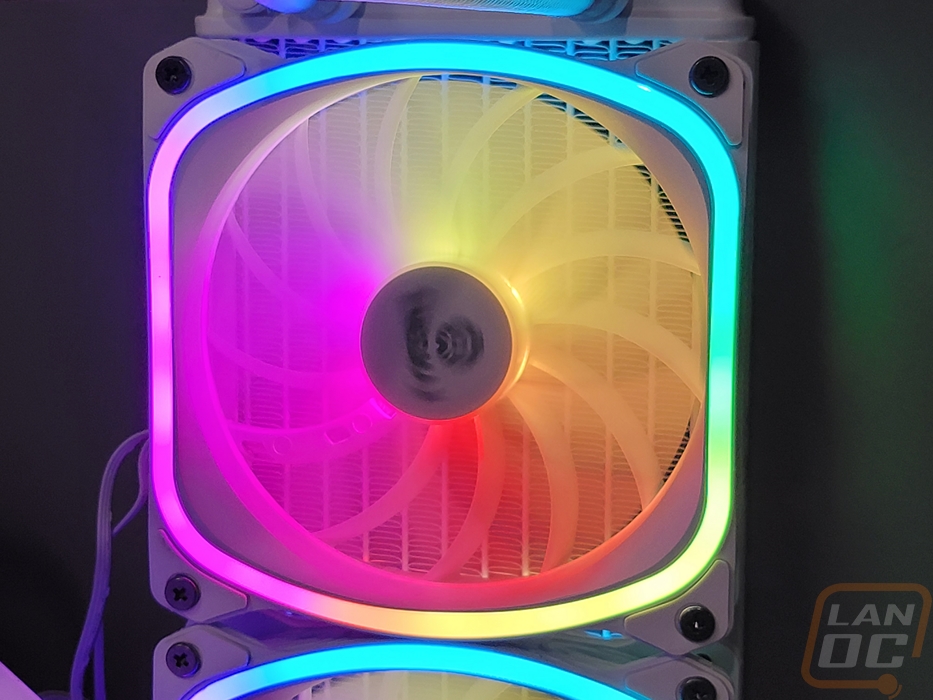
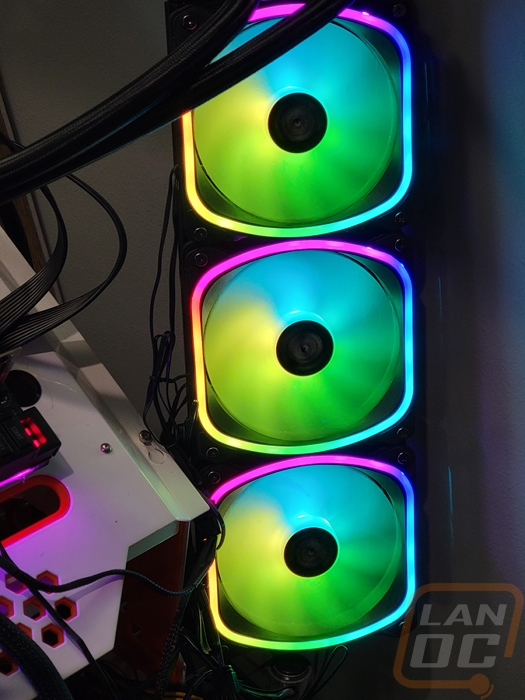
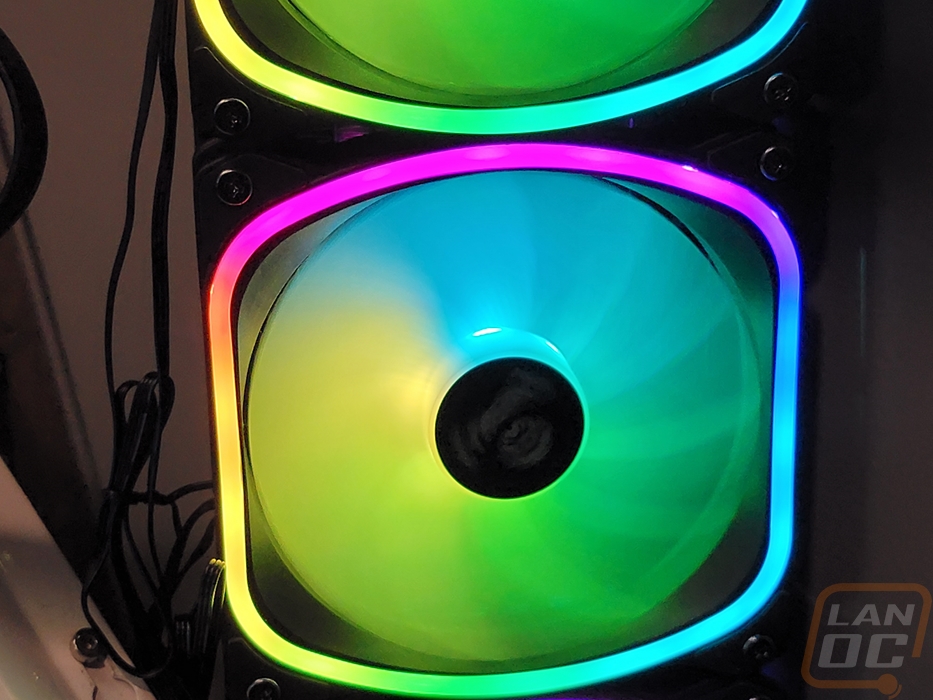
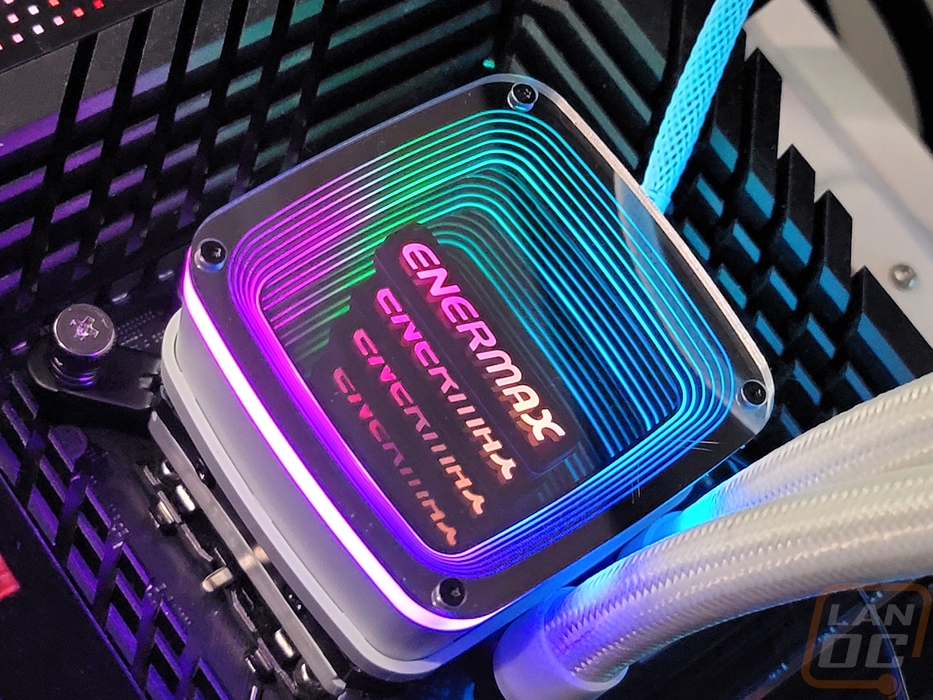
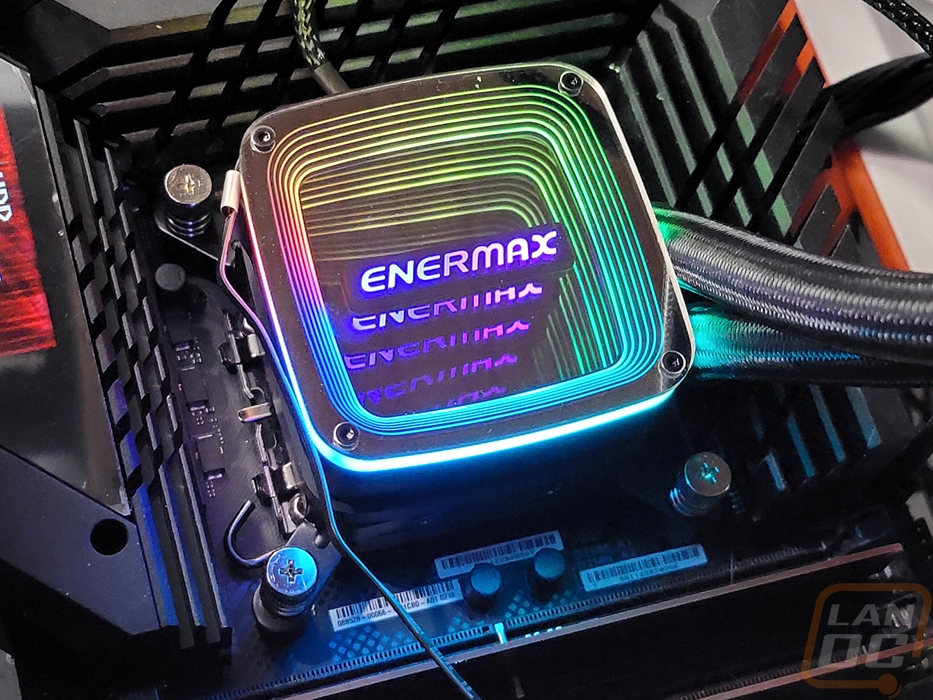
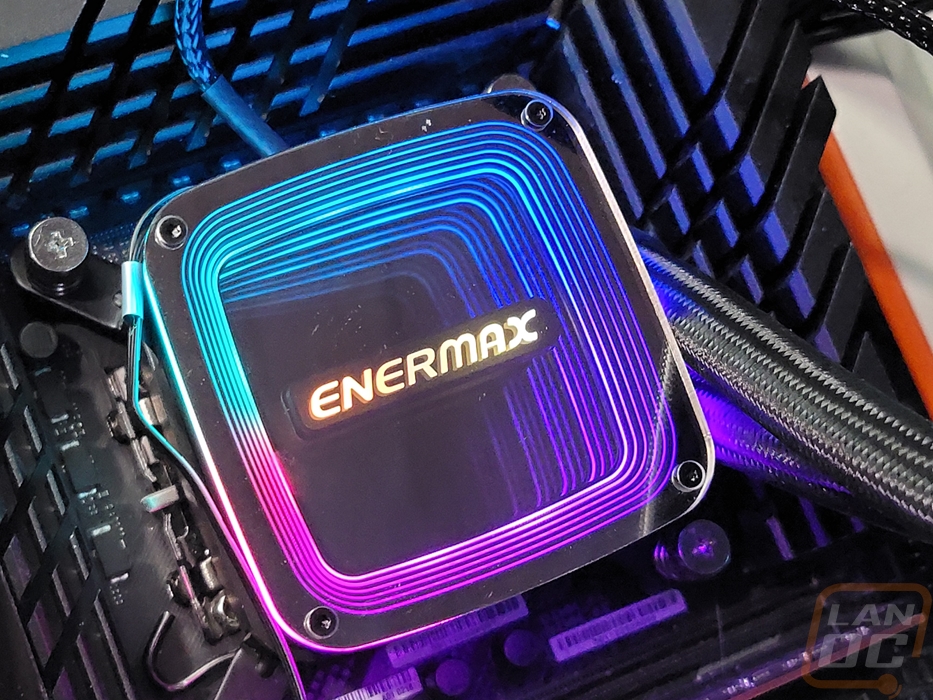
As for the Aquafusion Adv coolers their RGB lighting is split into two sections. You have the lighting on the pump and then the fans. We are fortunate to be able to check out what the lighting looks like on both the black and white models. For the pump, they have a mirrored infinity effect which gives you six thin rings around the outside on the inside of the infinity effect as well as the Enermax logo in the middle looking like it is floating. The outer rings get smaller for each layer which gives the infinity effect a unique look. The pump does also have one big ring around the outside as well.
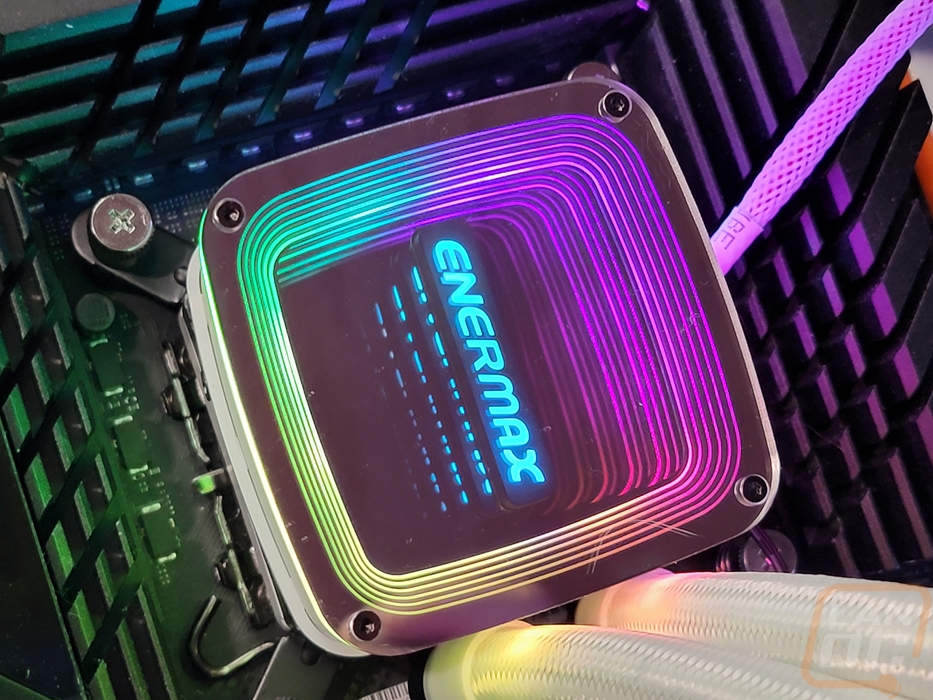
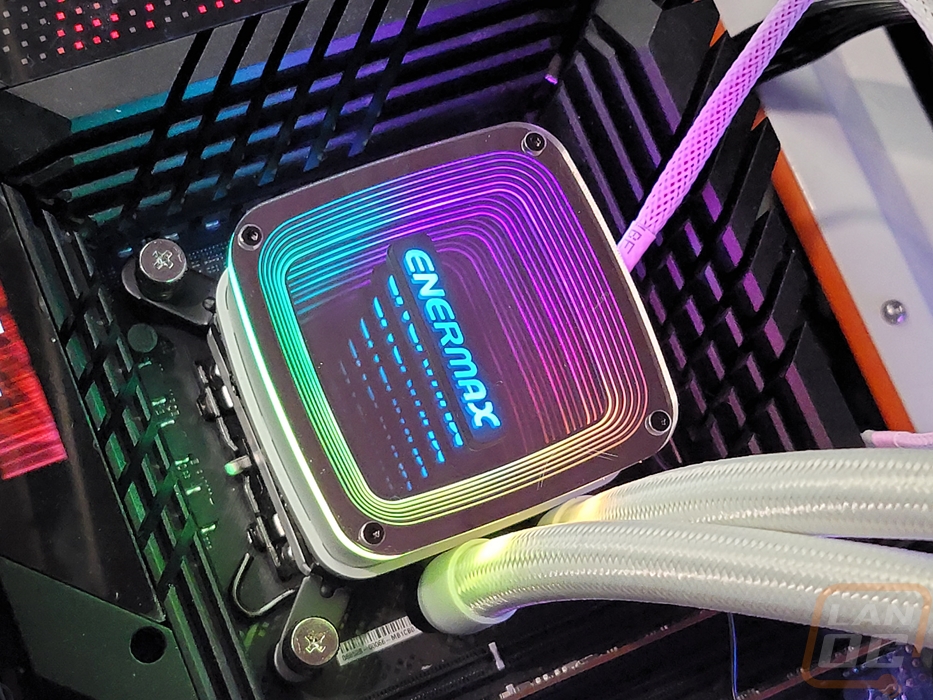
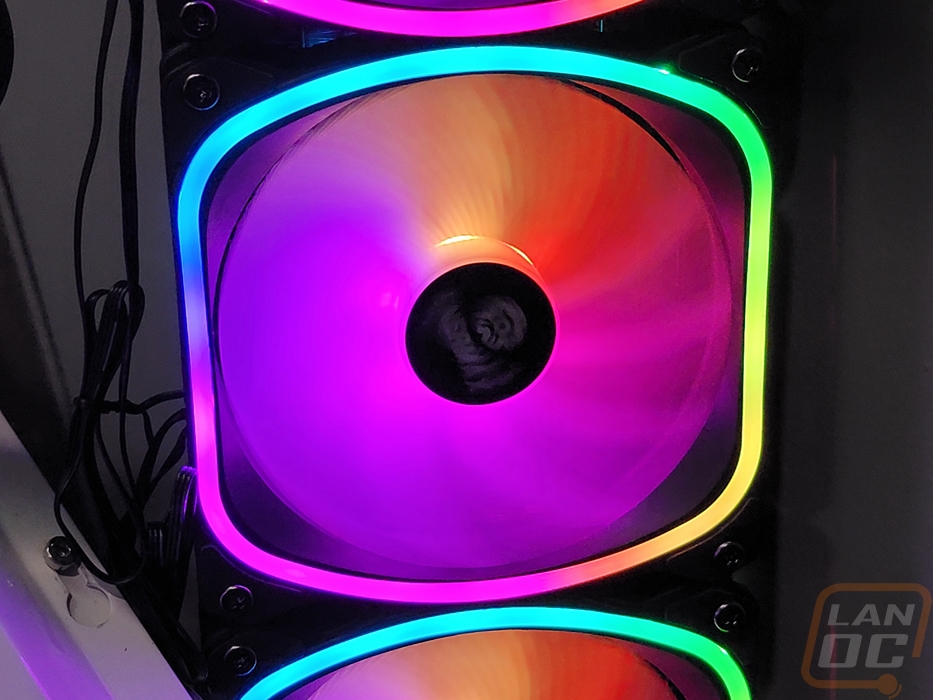
As much as I like the infinity design of the pump on the Aquafusion Adv, I like the fan design even more. The fan blades are made in a translucent white for both the white and black models which is then lit up from the center to give the blades a nice blended effect. But the ring around the front of the fan is the main event, with that ring being brighter and it has a much higher LED count which allows it to get the full spectrum around the ring all at once. This does also highlight the unique shape fans which are flat on the sides, with rounded corners but also rounded on the top and bottom. With it being lit up, it looks a lot closer to the Cooler Master logo shape than I’m sure Enermax would want to admit lol. All together the Aquafusion Adv lighting is unique and looks great. I’m surprised the design doesn’t have its own lighting controller to get all of the unique effects, but in the end, I prefer having everything tied in together with my motherboard and other components which is what Enermax is doing here. It helps keep costs down as well, which is a nice bonus.