Having recently reviewed a cadre of big block, multi-heat pipe air coolers it is about time to switch things up and today that is exactly what we will do by taking a look at an AIO water-cool solution enthusiasts have been anticipating. Back in July, many were troubled by the news that Swiftech would be ceasing sales on its popular H220 AIO/DIY hybrid cooling kit due to a patent dispute. While some chose to import units, others simply took the news in stride and searched elsewhere for their cooling hardware. Today is the day that all ends as Cooler Master have partnered with Swiftech to bring us a spiritual successor in the form of the Glacer 240L.
Product Name: Glacer 240L Liquid CPU Cooler
Review Sample provided by: Cooler Master
Review by: Debo
Pictures by: Debo
|
Specifications |
|
|
Cooler Unit |
|
|
Model Number |
RL-G24L-24PK-R1 |
|
Socket Compatibility |
Intel: LGA 775/1155(1150)/1156/1366/2011 AMD: AM2(+)/AM3(+)/FM1/FM2 |
|
Radiator |
|
|
Dimensions |
269 x 127 x 29mm |
|
Material |
Copper / Brass |
|
Fill-port Thread |
G1/4 |
|
PWM Fans |
|
|
Dimensions |
120 x 120 x 25mm |
|
Speed |
600 – 2400 RPM (PWM) |
|
Airflow |
86.15 CFM |
|
Static Pressure |
0.31 – 4.16 mmH2O |
|
Noise Level |
19 – 40.33 dB(A) |
|
Lifetime |
40,000h |
|
Pump |
|
|
Speed |
1200 – 3500 RPM |
|
Voltage |
12V |
|
Power |
13W |
|
Flow Rate |
165 L/hr |
|
Head |
2650 mmH2O |
|
MTBF |
60,000h |
|
Tubing |
|
|
Material |
PVC |
|
Dimensions |
5/8” x 3/8” (16/10mm) |
|
Length |
420mm |
Packaging and Overview
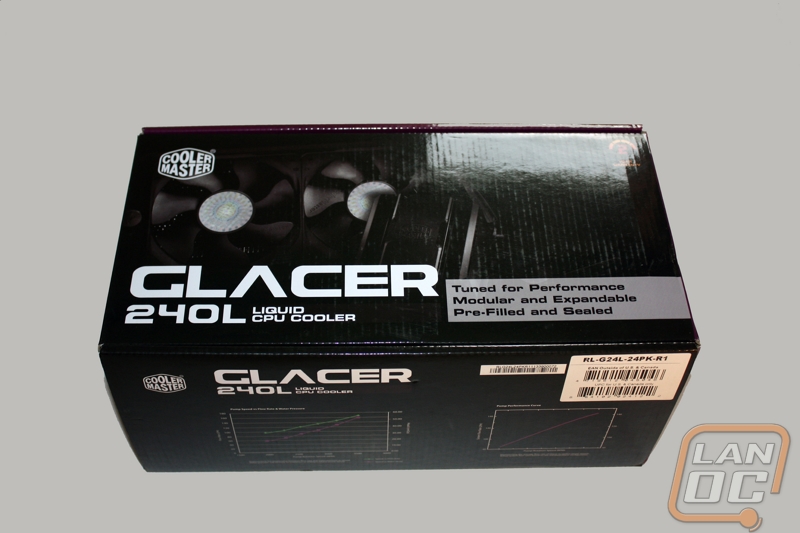
A sneak peek of what is to come later is found on the front of the box with a not so revealing shot of the radiator, fans and Cooler Master branded pump. Those words in the small grey box confirm that the 240L intends to be every bit the AIO/DIY hybrid the H220 was. The underside of the package shows us a few performance graphs related to the newly tuned Cooler Master pump.
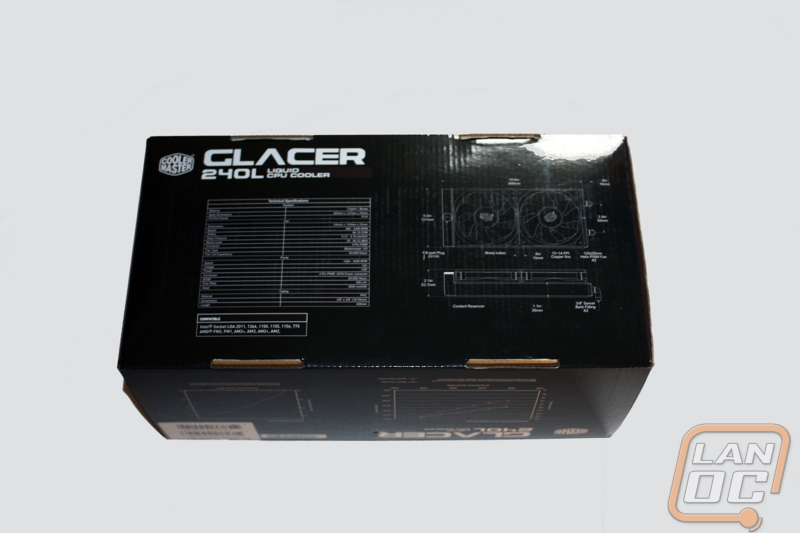
The reverse is where we find all the specifications and a no frills line drawing that lays out the reservoir by both component and measurement.
My favorite part is next as we peel off the lid and are greeted immediately by the coolant tubing and radiator as well as the quick one page install guide. After some of our previous cooler installs it looks like I might get a break this time around.
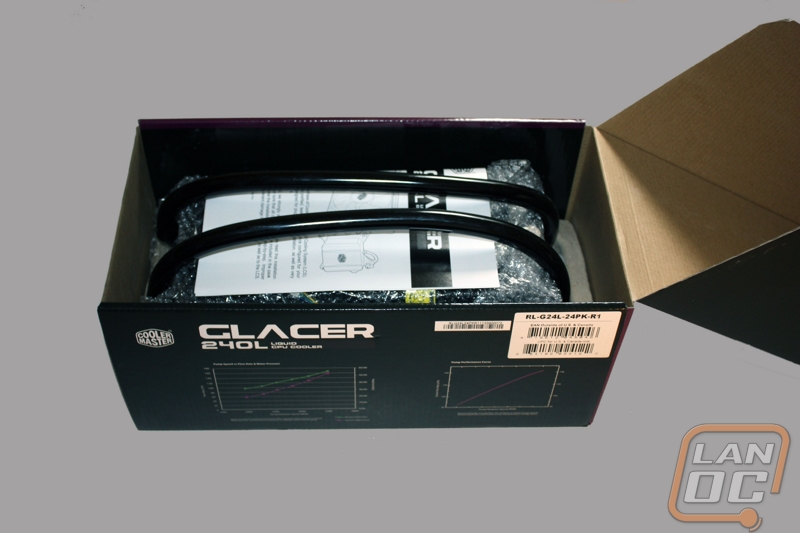
First things first though, the Glacer 240L is packaged with quite a few mounting accessories. The included thermal compound is enough for a few installs if you mind your usage and has a performance that lies somewhere between Cooler Master’s Essential E1 and E2 products. We also find mounting brackets for AMD sockets and heavier spring screws for LGA2011 installs and, of course, 8 mounting screws for the radiator.
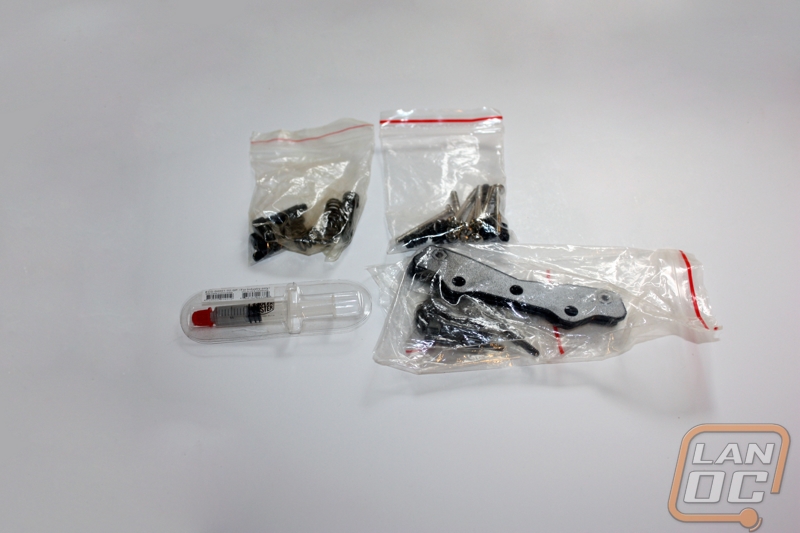
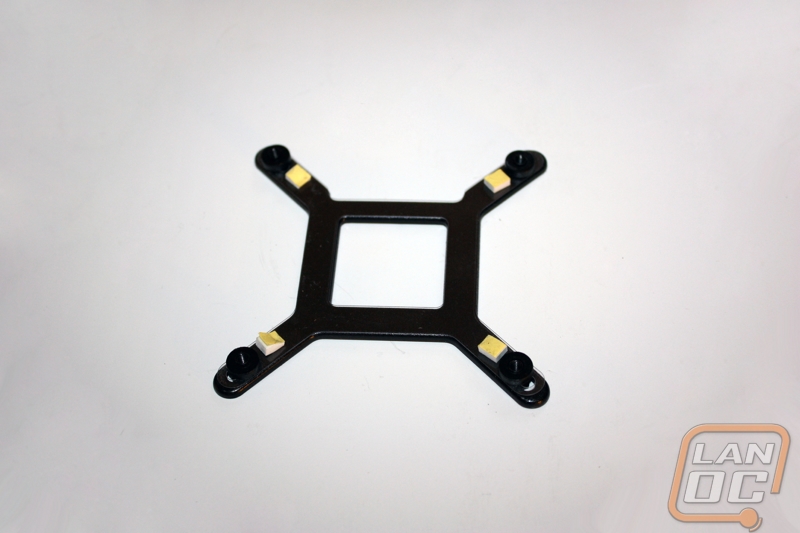
The last additional item is the Intel backplate which right now looks unassuming enough with its four little adhesive pads.
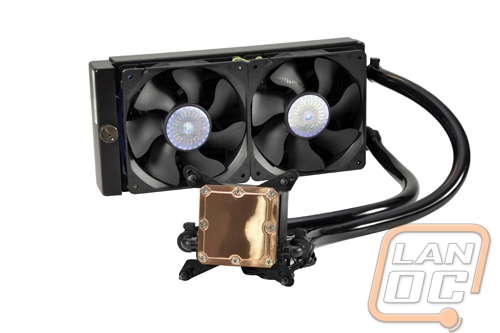
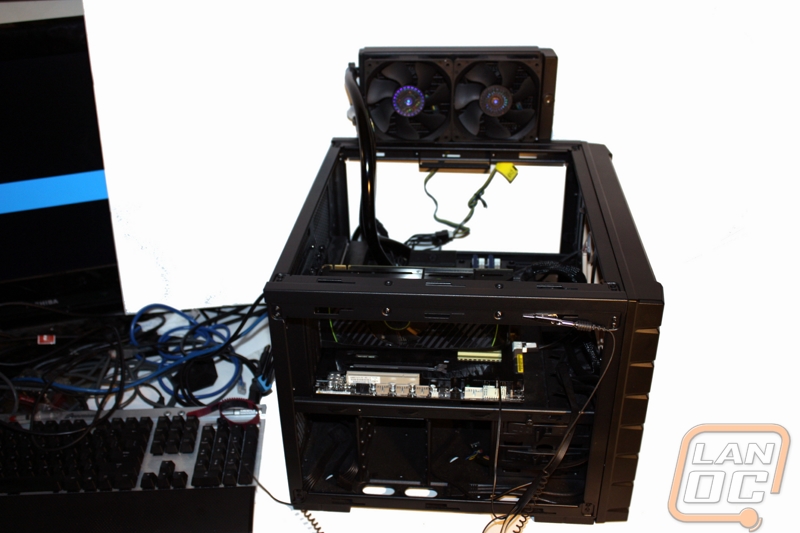
Now to take a look at the cooler as a whole and we see in its complete form that it is indeed an AIO on a massive scale.
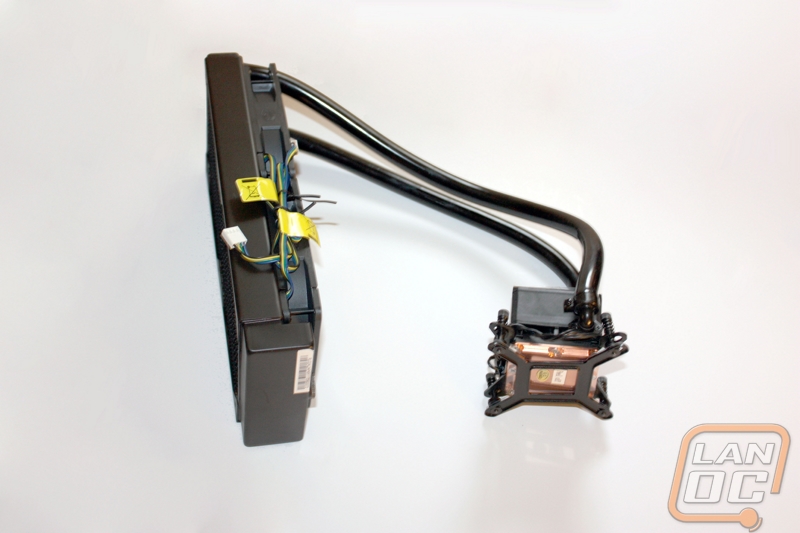
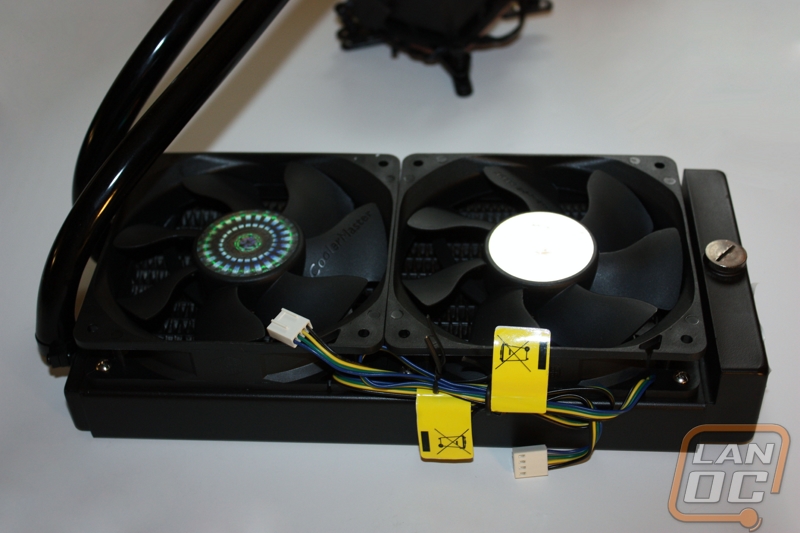
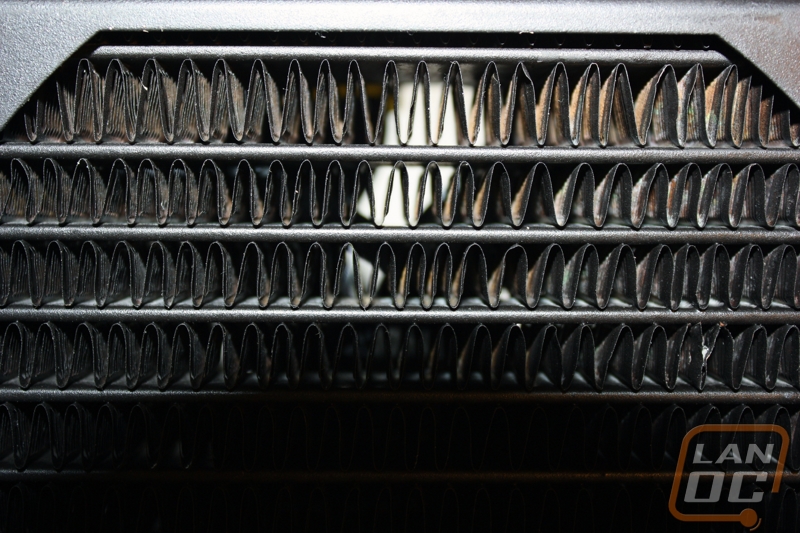
The Glacer 240L comes already equipped with a pair of Cooler Master’s own BladeMaster 120 high RPM fans but this pair have gone through a bit of extra tuning to increase their RPM potential by an extra 20% for even more air flow across the radiator. The reverse side of the rad is drilled for direct mounting or the ever popular push-pull configuration and the fins are made of pure copper after closer inspection. The fill-port plug is G1/4 threaded which already starts to give us a glimpse and possible down the road customization.
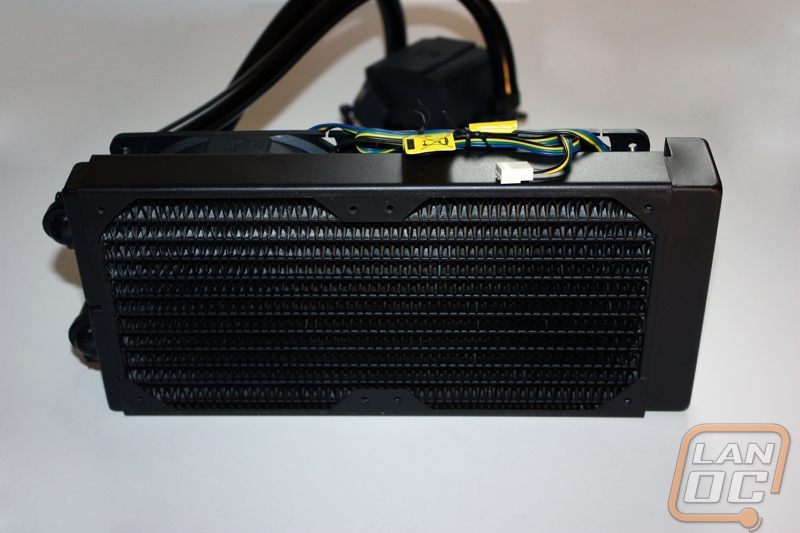
We continue our tour down the black PVC tubing to the pump and waterblock where we find our SATA powered brains of the whole operation. This pump has been specifically tuned for Cooler Master and is rated to move 165 liters per hour meaning that theoretically you have enough here to add even more to the loop should you wish.
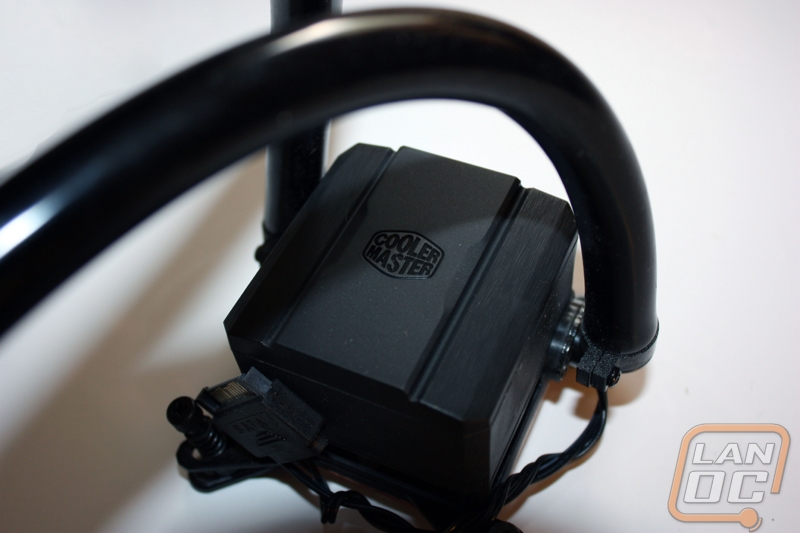
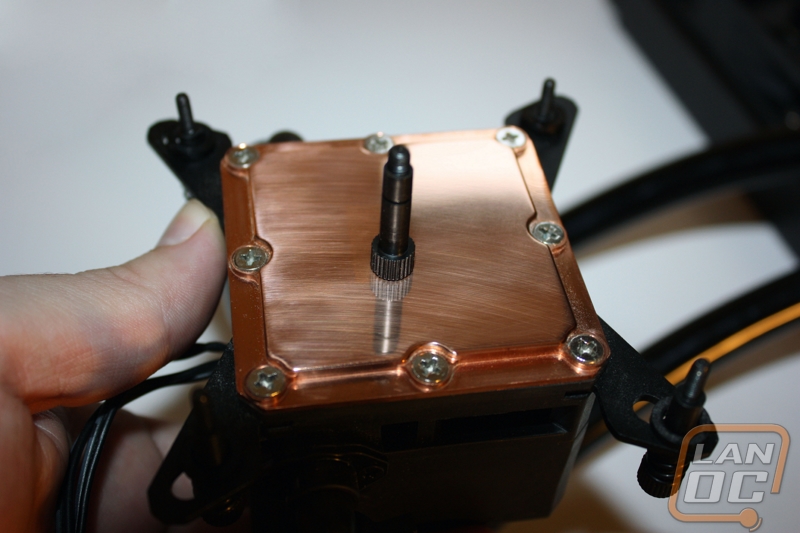
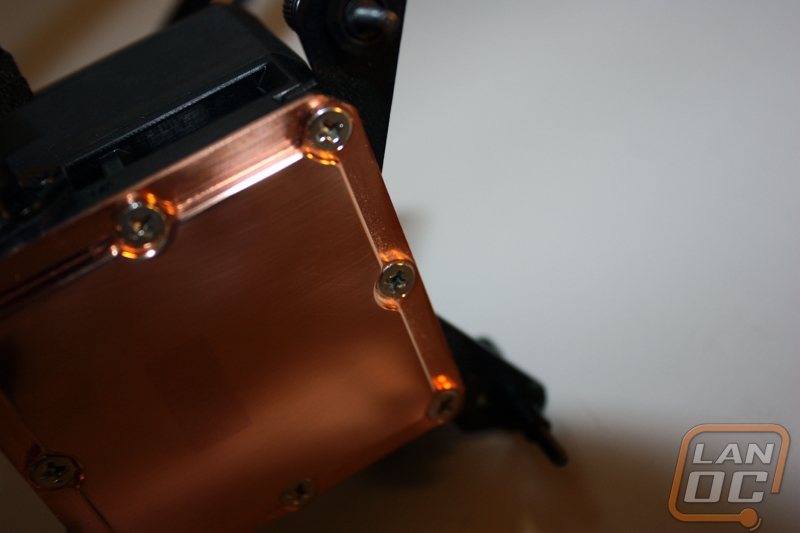
The waterblock is made of pure copper, machined to a mirror finish and completely removable for maintenance or, as mentioned earlier, additions to the cooling loop.
Testing Methodology
Our testing rig is as follows:
- Processor: Intel Core i5-2500 @3.3GHz
- Motherboard: Asus Sabertooth P67
- HDDs: Seagate Barracuda ES.2 1TB
- RAM: 8GB Kingston DDR3 1600
- Video Card: NVIDIA GeForce GTX 560 Ti
- Case: CoolerMaster xB
- OS: Windows Home Premium x64
A total of two tests will be run. These tests are as follows:
- A Peak Test with the supplied cooler and fan setup running Prime95 for a total of 30 minutes.
- A Real World Test using the supplied cooler and fan setup running 3DMark 11 for a total of 30 minutes.
The Peak Test is meant to test the absolute worst case scenario you could throw at your perspective cooler and will both be conducted with the CPU fans running at 100% RPMs under load. The real world test is something a bit less stressful, meant to give you an idea of the coolers performance in a more day-to-day sense.
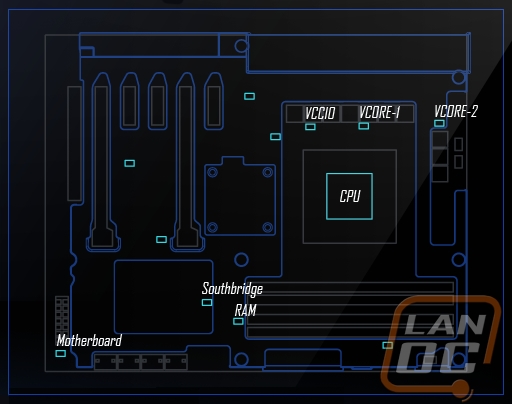
All tests will be performed using Noctua NT-H1 thermal paste in order to eliminate that variable from testing. CPU temperature reading will be taken using RealTempGT, RAM DIMM temperatures will be taken with a non-contact infrared thermometer and the remaining temperature results will be taken using the Sabertooth P67’s own temperature sensors using the following layout.
The Peak test will also be subject to noise level measurements taken with a digital sound level meter every 10 minutes throughout the test to be averaged into an overall comparison score during both load and idle timeframes.
Installation
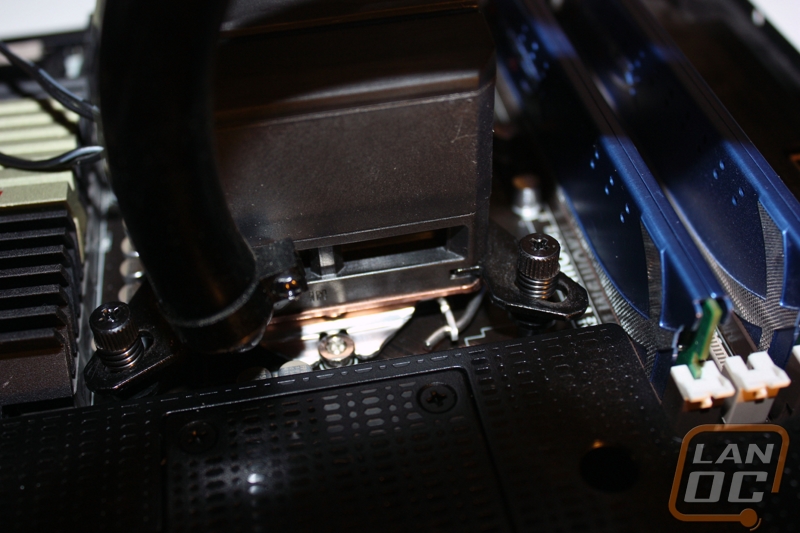
Fair warning, this is about to be our shortest installation to date because, thanks to Cooler Master, this AIO cooler is a breeze to install on any supported socket. We will, of course, be following the instructions for an LGA1155 install.
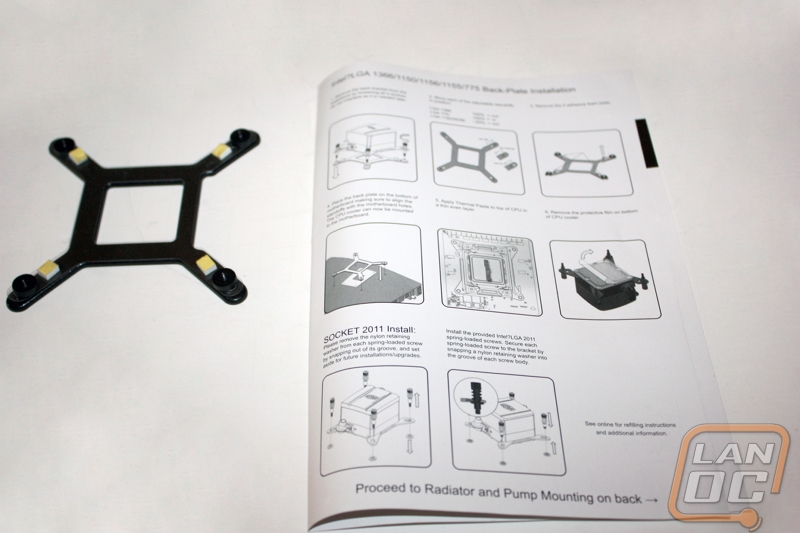
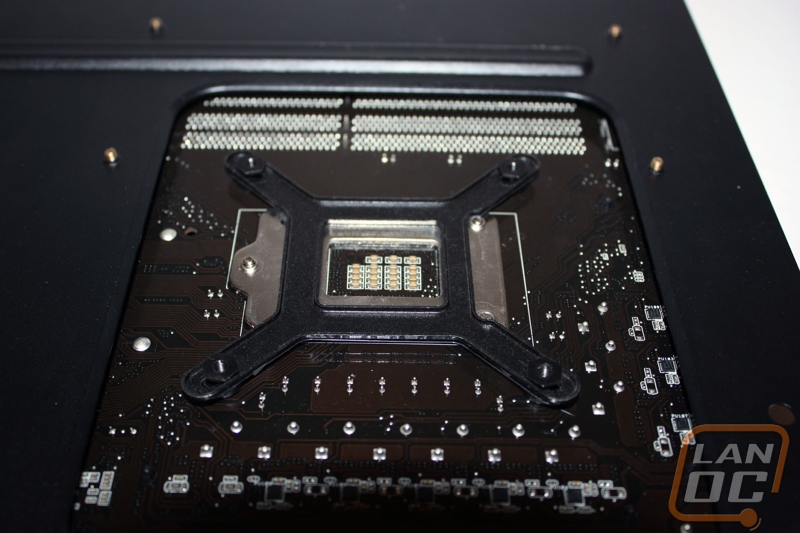
The backplate is as simple as peeling off the yellow covers from the adhesive patches and attaching it to the back of your motherboard. After that it isn’t very hard to line up the bracing holes with the mounting screw holes though I do feel some way to lock them in place afterwards would be a welcomed edition to later revisions.
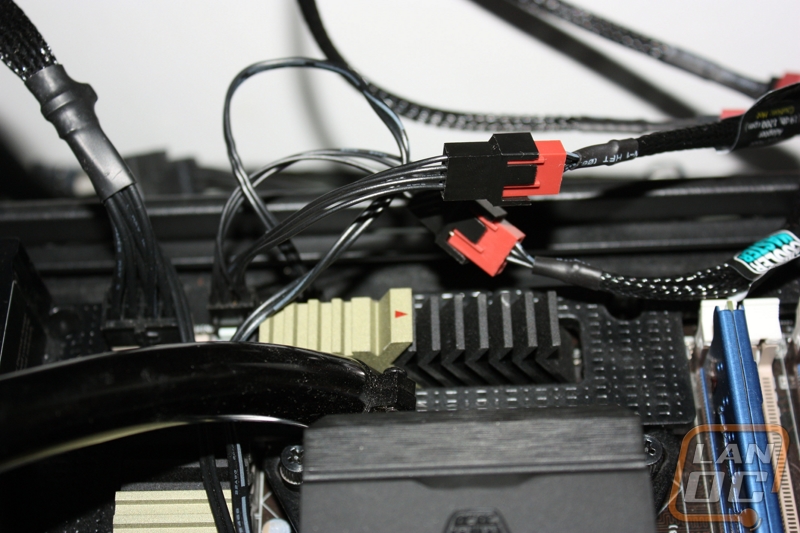
The only thing left after that is tightening down the spring screws to secure the block to the CPU. The whole ordeal is as simple as peel, place, and then tighten down four screws. All-in-all the whole installation took me less time than finding a way to plug in everything. Be wary of that as the pump requires a SATA power and 4-pin power by itself then you are left to find a place to power your radiator fans. A PWM splitter or some way to reduce cabling is would be recommended if you want to do anything more with this cooler than just the basic out of the box install.
Performance
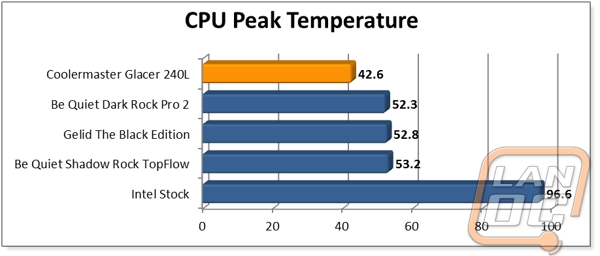
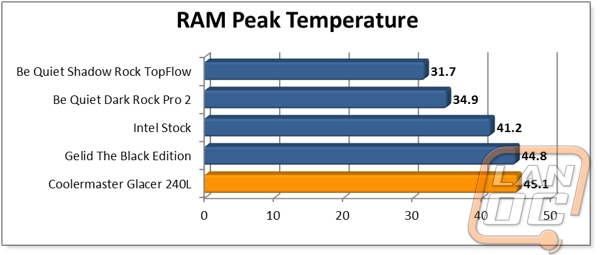
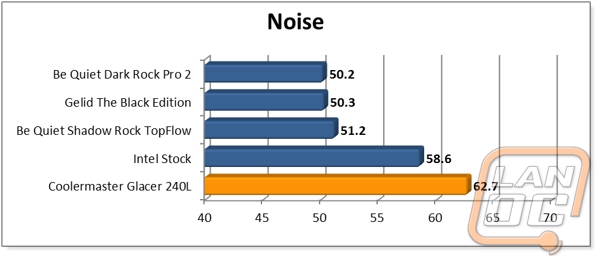
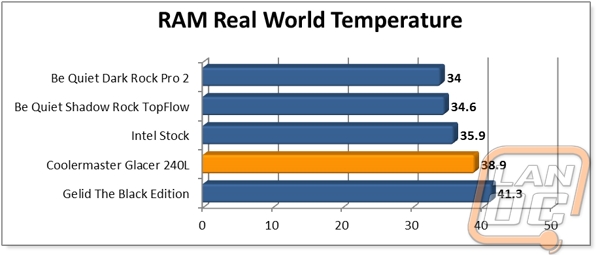
Now for the big question, does it all work? The first thing we did after making sure we had a solid install was hit the Glacer 240L with our Peak test for thirty minutes. Thermally we were not disappointed. And the gap between air-cool and water-cool is quite apparent. As expected with the design though, there was little to no air running over the RAM DIMMs so temperatures similar to the Black Edition test, where the same conditions were present, occurred. I was expecting a bit of increased noise after seeing the max decibel rating of the tuned BladeMaster 120 fans was a whopping 40.33 dB(A) but nothing prepared me for how loud that actually was. It is not entirely unexpected though with a 120mm fan spinning at 2400 RPM.
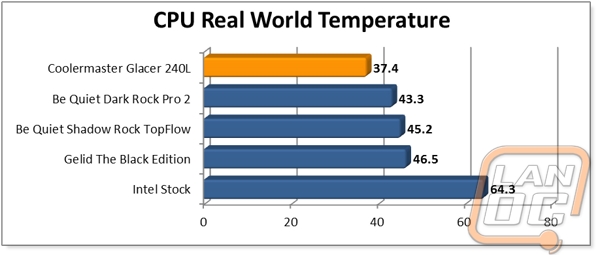
After a brief cooldown period where we experienced processor temps slightly under ambient the Glacer was tasked to tackle our Real World test. Again the 240L did not disappoint as far as keeping our CPU chilled and RAM temperature test were a wash yet again. I will speak for the noise this time around as when allowed to be PWM controlled as opposed to running at 100% the noise level was at least bearable though still noticeably louder than some may like.
Overall and Final Verdict
The Glacer 240L did not disappoint as far as cooling is concerned and its promises of versatility through expandability are for real. Handling the unit and going over the components make you feel like you have just received a watercooling kit professionally assembled out of the box and when you couple that with the incredibly easy install it leaves a feeling of satisfaction in the quality Cooler Master has brought to the table.
The unit, of course is not without its flaws. While the pump is powerful and not that loud, it does add to the power load of your system quite significantly. Finding a place to plug everything in with just a pull configuration was a task and would almost assuredly require extra equipment should you wish to attempt push-pull. The BladeMaster 120 fans are better in every performance category when compared against the Helix120 fans Swiftech included with the H220 but are undeniably loud on the level that I would suggest looking for quieter alternatives after purchase.
Still none of the problems lie with actual performance and the 240L accomplishes what it set out to do, proving AIO water coolers can be more than just one off systems needing to be replaced every 2-3 years. With the power to expand with you, the Glacer 240L gets my stamp of approval.