Software and Installation
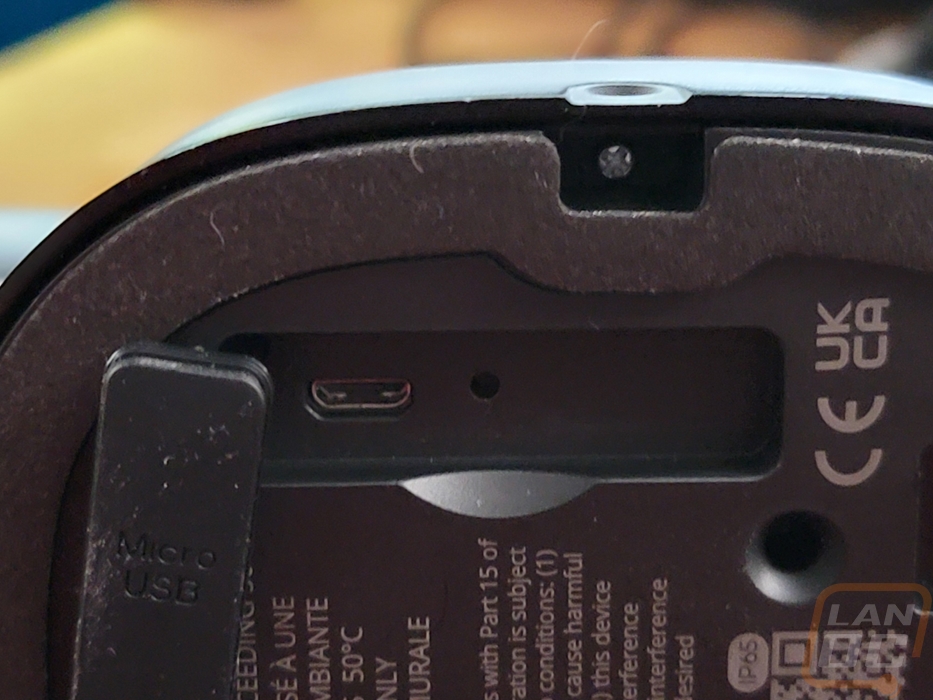
There are two main parts to getting any of the eufy cameras set up and that isn’t any different with the S100 Wired Wall Light Cam. You have to set up the camera portion of things first before then installing the light. When setting up the camera you need to download the eufy security app which if you have seen any of our past reviews of their cameras a lot of that hasn’t changed but there are a few things specific to the S100. Setting up ahead of time is why the S100 comes with a USB cable and why there is a Micro-USB connection on the back behind the rubber plug. This powers it up so you can link it to the app. So to start off plug the USB in and also install the app on your preferred device.
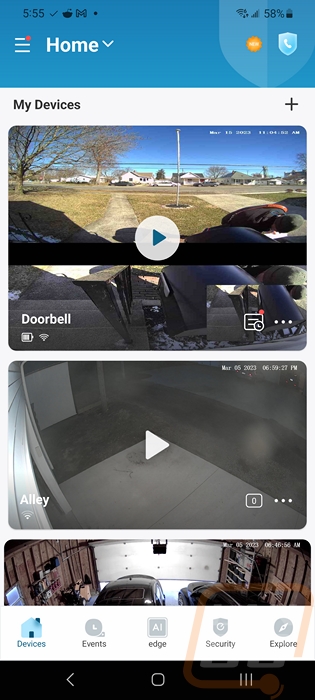
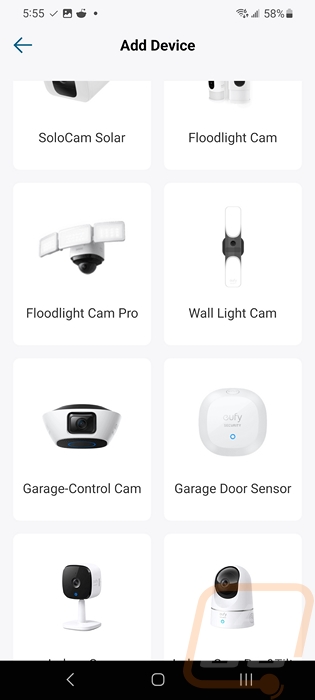
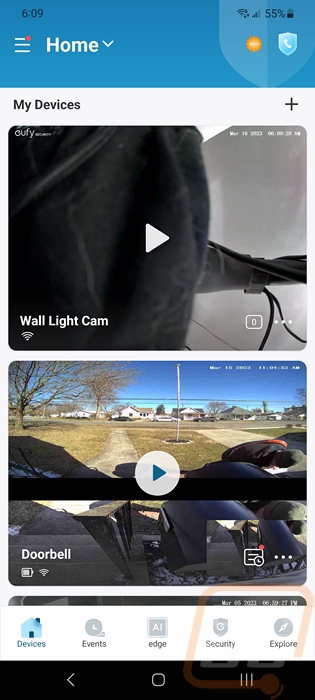
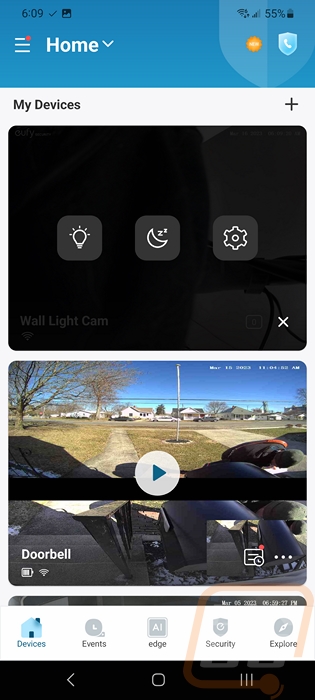
The landing page for the eufy security app will show all of your cameras including a picture of the camera's view the last time you opened it up. Then in the top right corner, there is a plus sign pressing this is where you add a new device. That will open up a list of eufy devices with pictures and the S100 is listed there under Wall Light Cam. Once you click that it will open up your camera so it can scan the QR code on the back of the S100. From there you will be asked to input your wireless settings and press the sync button. Then the app will open its own QR code which you put in front of the camera and that will tell the camera your wireless info and get it logged in and linked to your account.

Once attached the first thing it will do is check for firmware updates which ours did have an update from version 1.0.5.8 to 1.0.7.4. Sadly the app gives room for them to show you what the update includes but eufy just put “fixed some bugs” which I see from them a lot and drives me crazy as it is nice to be able to know what is being fixed in case it is an issue you have been having.

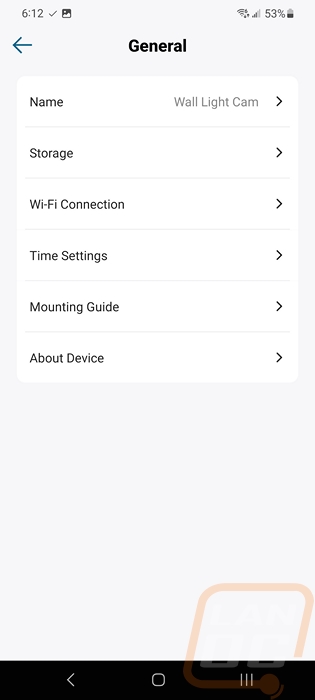
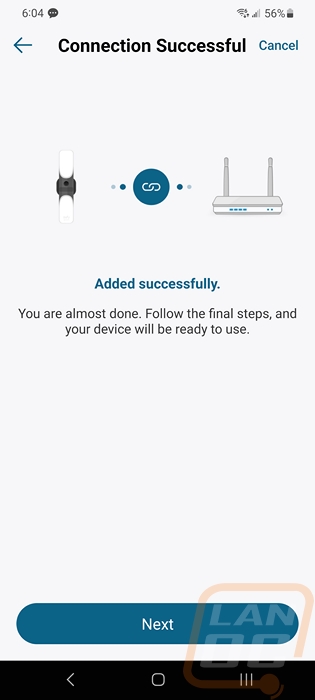
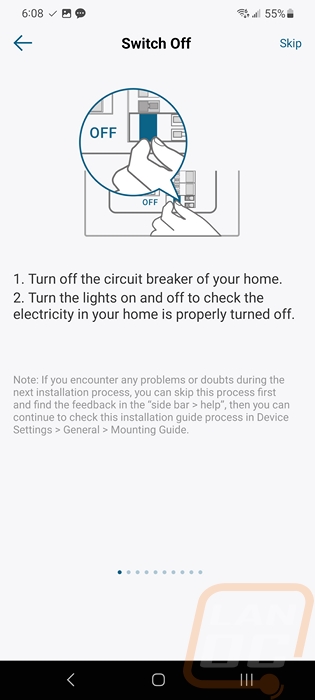
Once the update is done the app then will show you installation instructions for mounting the light. They start by letting you know to turn the power off and then walk you through each of the steps. The paper instructions also have mounting instructions but having it in the app like this means you can get updates if someone has found an issue and you can flip through them on your phone when installing the light outside which is nice. Once you get through the instructions the light will then show up on the home page. You can also go back to the instructions under the device settings in the app under general.
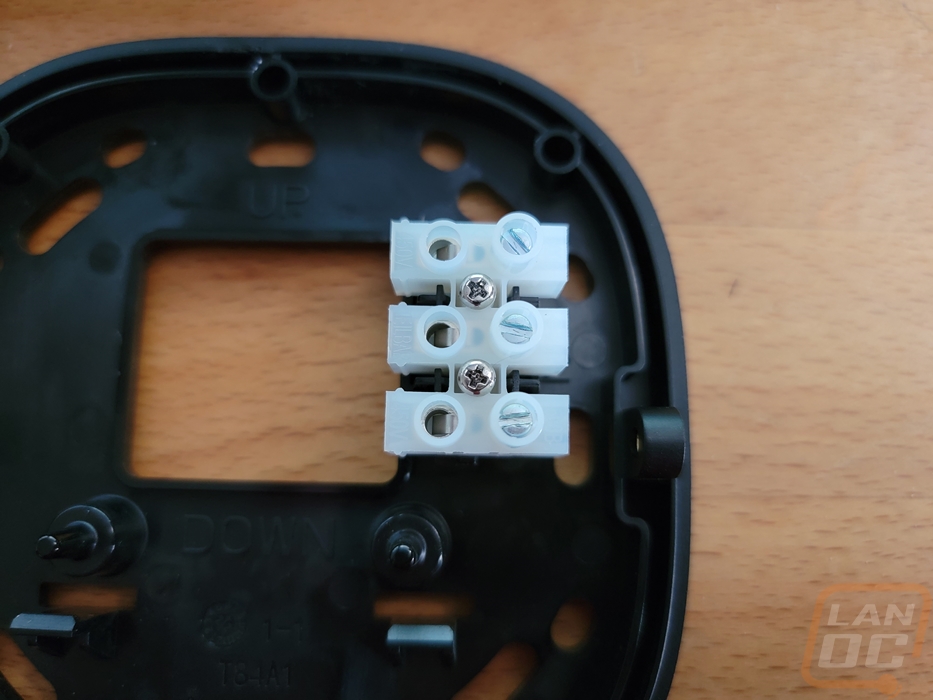
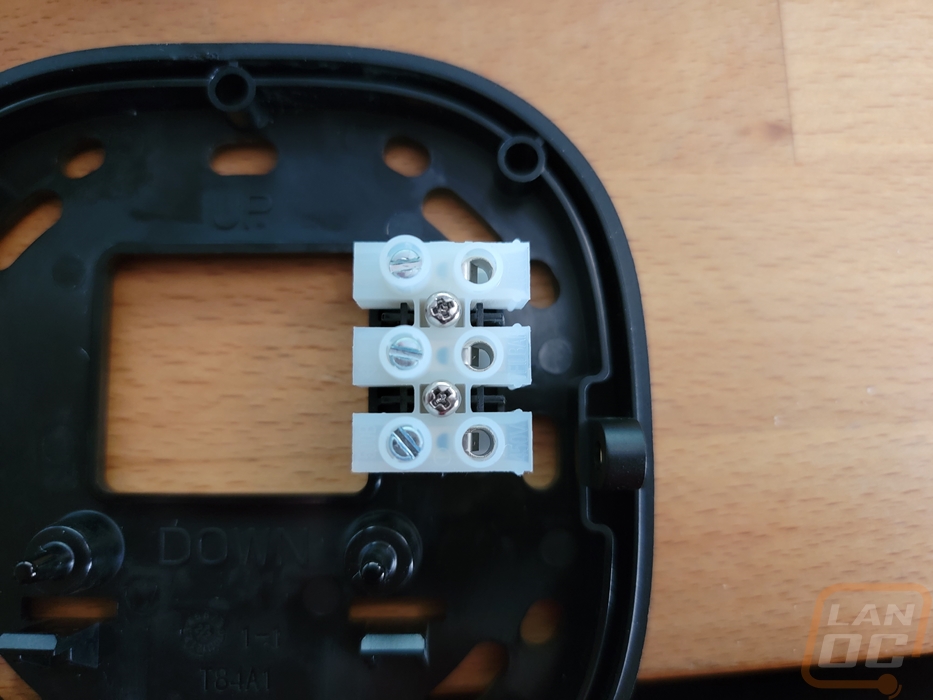
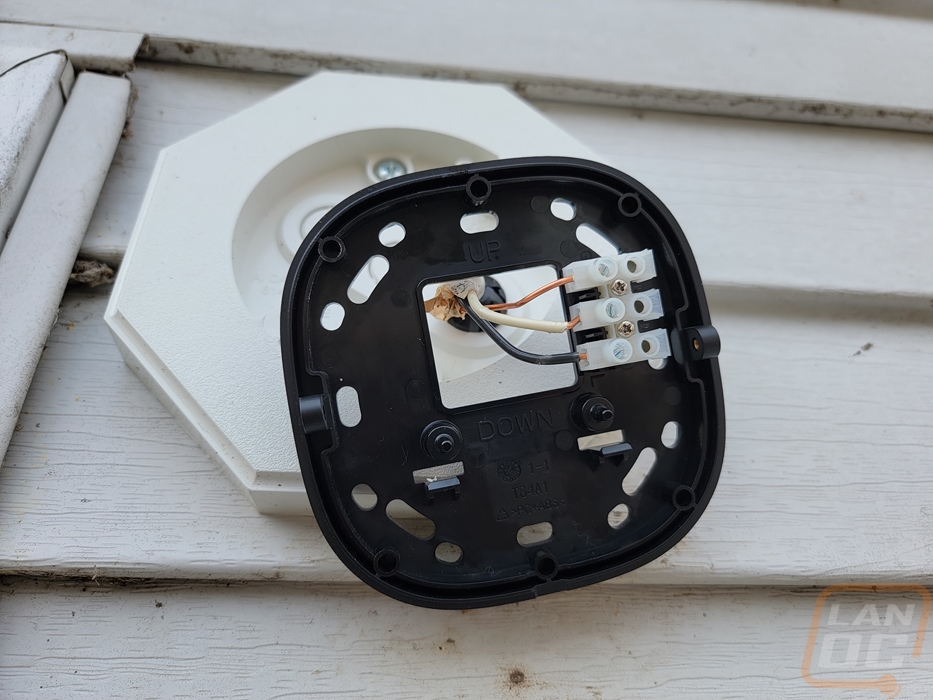
Before I went outside to install the Wired Wall Light Cam I did notice an issue when I was taking a closer look at the mounting base. The three mounts are intended to have the wires coming in from the left through the middle hole but on our light, the mount is installed backward where the wires would need to come in on the right side. More importantly, that also means that the pins on the light itself wouldn’t work. This would be a hard stop for some people but I was able to remove the two screws and flip the block around. That said it's clearly a manufacturing mistake.
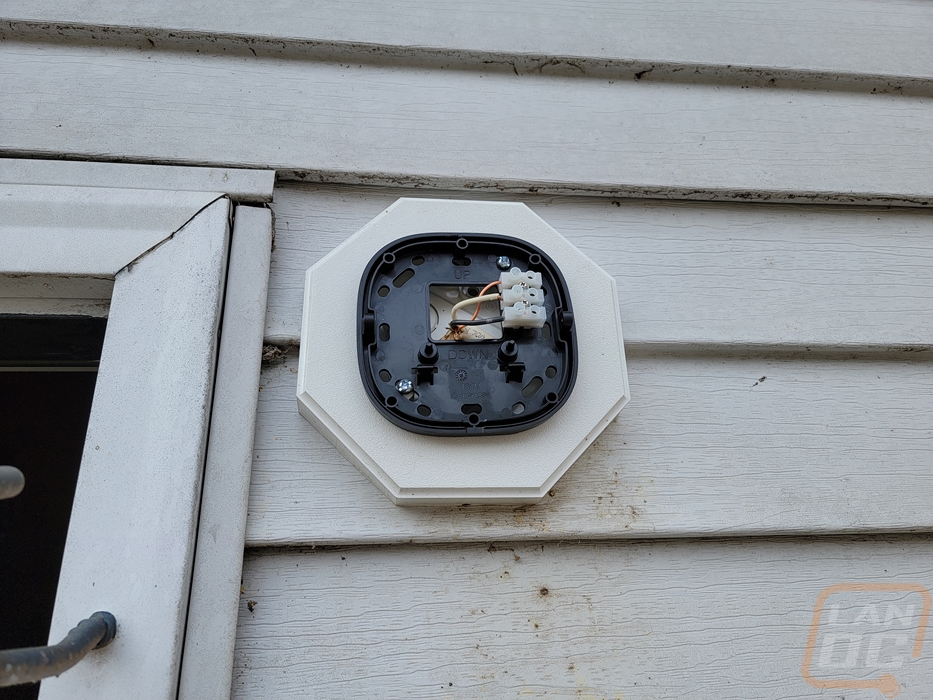
For my installation, I would be mounting the S100 to our garage which has a siding mounting box. Because this light was previously installed and was the jelly jar style of light it is mounted up higher than some wall lights. This would be great for the “standard” barn light or lantern light that are what you find in most hardware stores but with the modern design of the S100, it is a little too high. Eufy also has specific heights recommended and if too high they mention that it may not pick up motion on the ground in front of the light so we have to keep that in mind. Also, don’t judge too much on how dirty our siding is, we normally clean it in the spring which by the time this is posted we would be in the first few days of spring. But Ohio spring is more like 3rd winter for at least another month, it's snowing right now in fact.
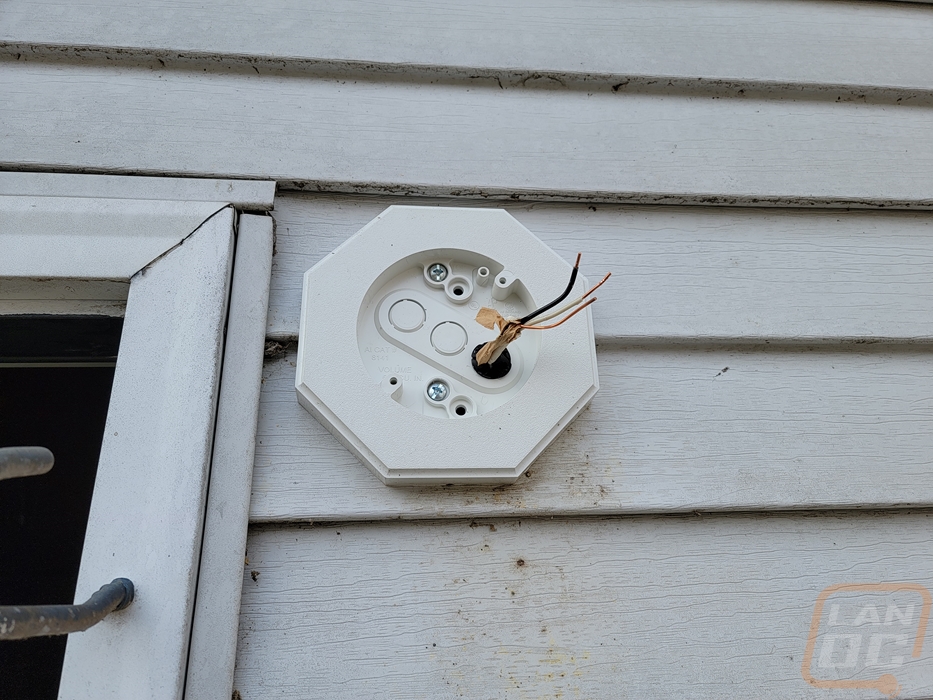
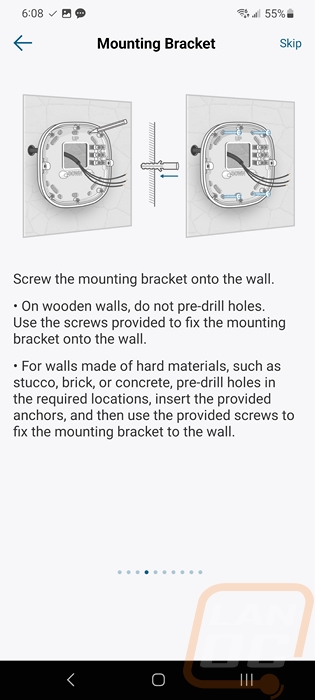
Installing the mounting base was extremely simple. You have to connect the three wires up or two if you don’t have a ground and then you attach the base to your box or directly to the wall with the included screws. The only thing you need to worry about here is getting the wiring pushed down directly next to the mounting block as the S100 does surround the mounting block. Even in the picture below where I had those wires going no higher than the screw mount location when installing the light, I had to push them down much farther. You want to right angle them right into the plug.
From there you have two tiny screws that hold the light in place, one on the left and the other on the right. These are the hardest part of the entire installation because they are small and you have to press the light down very tight to get the screws started at all. This is because you have to compress the foam gasket. Thankfully they do give you four screws for the two that you need, you really want to have the correct screwdriver size for this one or they will fall out easily. I lost one even with a good fitting screwdriver and dropped them a few other times.
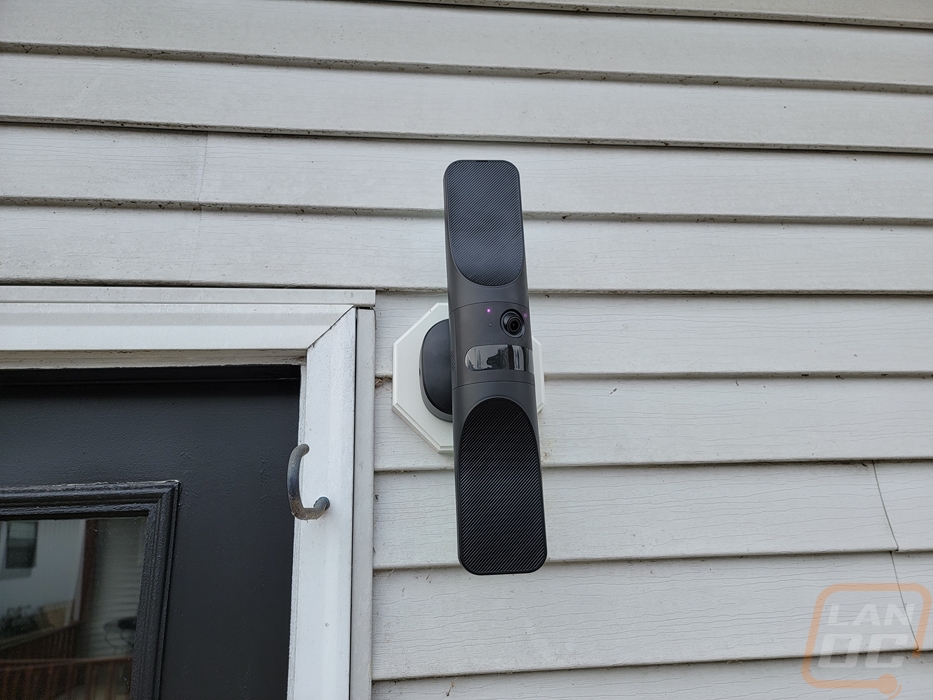
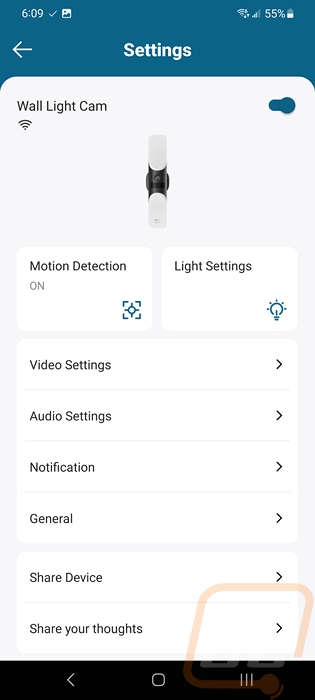
Once everything is installed you can turn the power back on and if you have a light switch you will want to keep that on. Once powered up we can take a closer look at the features that the app offers. To get to the settings you can click on the camera on the home page and the three buttons and that gets you to the menu below. Clicking the gear opens the settings. If you have the camera open the gear in the top right does the same thing. The main settings menu has an on and off option up top and shows the wireless connection speed. Then you have a picture of the light. Below that the motion and light settings pages are the main features so they are up top. Then you have the rest of the settings pages in a list along with the option to share the device to another eufy security account down at the bottom for sharing it with a roommate or family member.
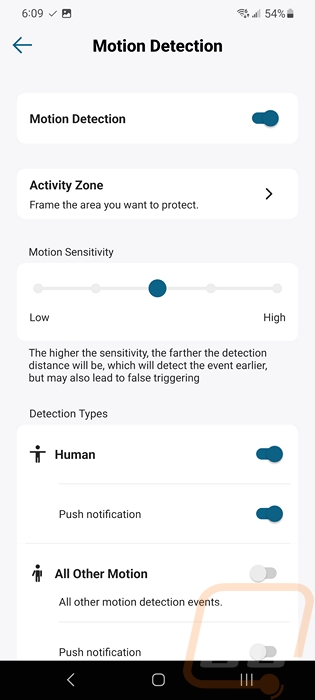
The motion detection page starts with the option to turn motion detection on or off. When off the rest of the options all vanish. You can set an activity zone which allows you to set areas where you don’t want motion to work. This is good if the camera faces out beyond your property or if you are close to a road. You can set the sensitivity. Then down at the bottom, you can set it if you want it to pick up humans and other motion. I like that this time eufy gives you the option to pick what you want notifications on. On the Flood Light Pro 2, you can only turn notifications on or off. This way you can record all motion but only get notifications for when it picks up a person.
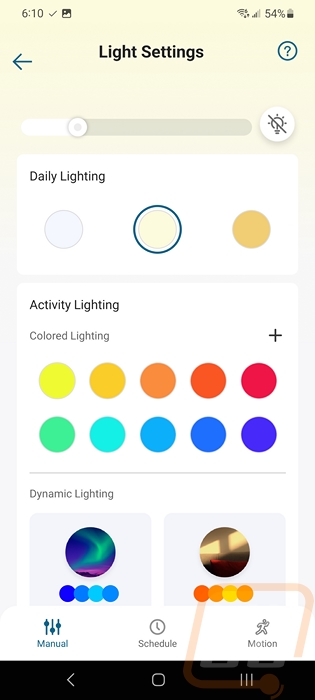
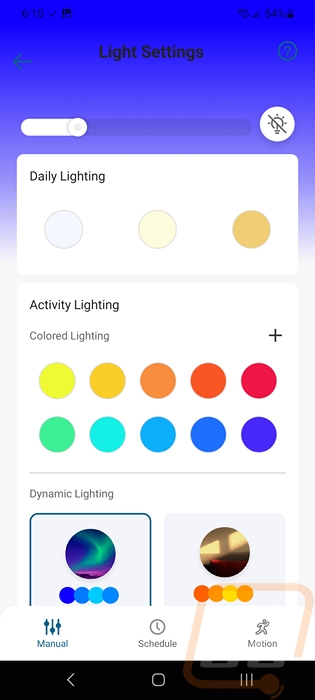
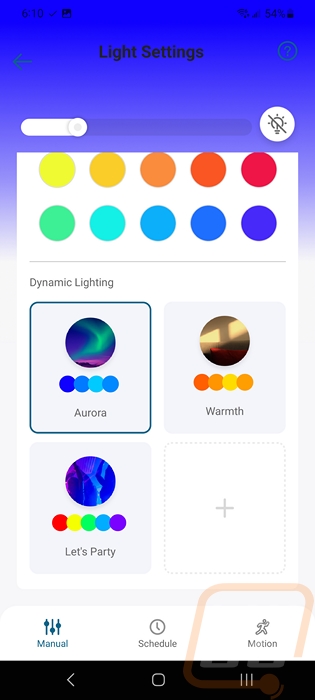
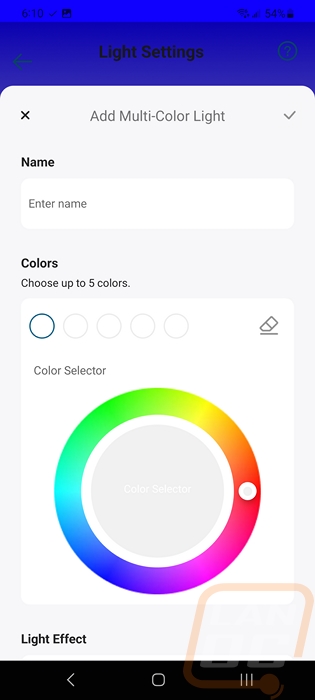
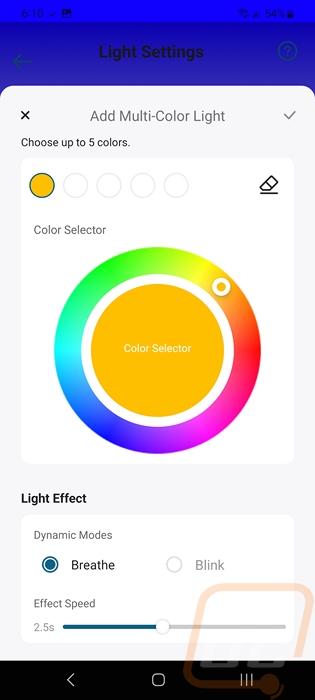
While the camera portion of the S100 Wired Wall Light Cam is one of its big selling features. You do also have full control of how the lights work as well and that isn’t just how bright the lighting is like on the floodlights. The S100 has full RGB lighting something we have done on our outside lighting to match our RGB landscape lighting by using fixtures that use a traditional bulb and then using smart bulbs. The integrated LEDs for the S100 cover all of that. The main page you start on has the lighting brightness up top along with a manual control button to turn it on. The background of the page also matches the current lighting color. You can pick from different color temperatures up top with a blueish light on the left and yellow on the right and a standard temp in the middle. Then below that you can get into soldo colors with 10 different options for quick picking or the plus sign will open up a color wheel to pick a new color. Then down at the bottom when you scroll down, you have dynamic lighting options. These have 4-5 colors and I thought that it might be like PC lighting where there are five sections on the light that you pick the colors but as it turns out the dynamic lighting rotates through the colors. You have three to pick from or you can make your own including deciding the effect and speed of the transition between colors.
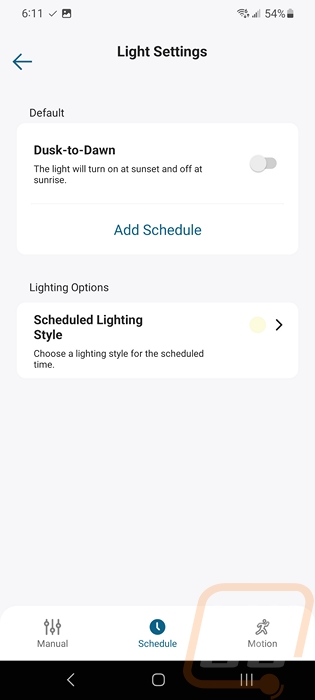
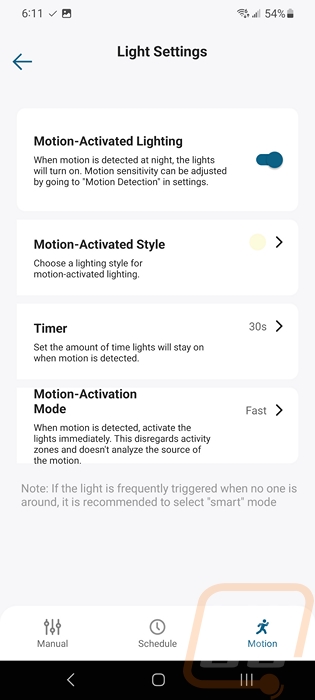
Then down at the bottom on the lighting page, you also have schedule and motion options which open up their own pages. The schedule page is where you can turn on dusk to dawn lighting or create your own lighting schedule. You also can pick the lighting color or effect which gives you the full options that were on the previous page. Then the motion lighting is its own lighting altogether. This is from when it picks up any motion. You can pick any color of effect once again but this also has a timer for how long the lighting will stay on after motion is detected. You can also pick fast or smart activation modes which will turn the lighting on right away if the PIR picks up motion or if you want it to be more careful the smart option will wait and confirm that it is a human before turning the light on to have fewer activations.
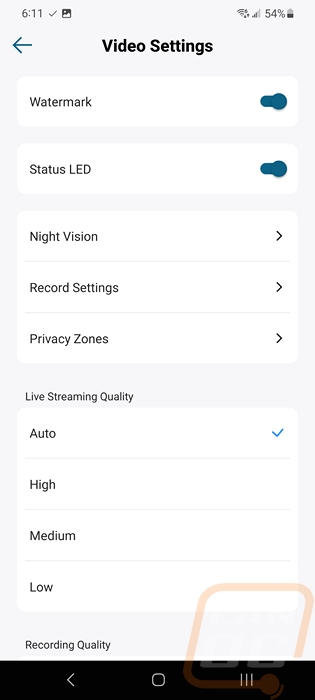
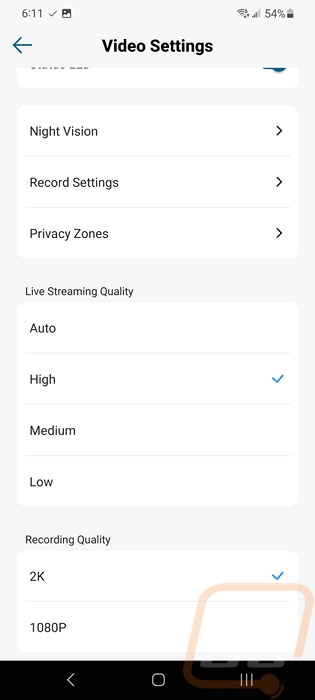
Next down the settings list was the video settings page. This starts with the watermark switch where you can turn the watermark off. Below that is the status LED which is a small LED on the front of the light, this will turn that off if you want it to be more discrete. The night vision page has just one option on it and I have no idea why it has its own page. That option is “auto night vision” which automatically turns to black and white in low light conditions. The record settings also has just one option and doesn’t need to be behind another page. This just will end the recording clip early if the motion stops. Turning it off then lets you set a default clip length instead. Then privacy zones will open up a live view of the camera and let you block our specific areas for neighbor privacy. As you scroll down the video settings page you then can pick the live streaming quality which is auto by default and at the bottom, you set the recording resolution from 2k or 1080p. The 1080p option would mostly be useful if you get a lot of recordings and want to cut back on space to have more days of storage, especially given the fixed storage amount and no expansion option.
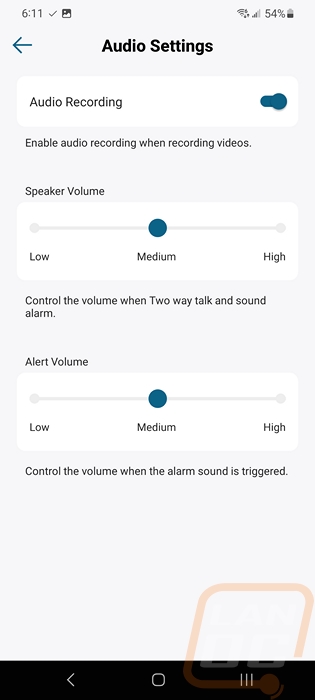
The auto settings page is where you decide if you want to record audio. By default, this was off I believe. With it on you can control the speaker volume for when you two-way talk and you can also change the alarm volume level.
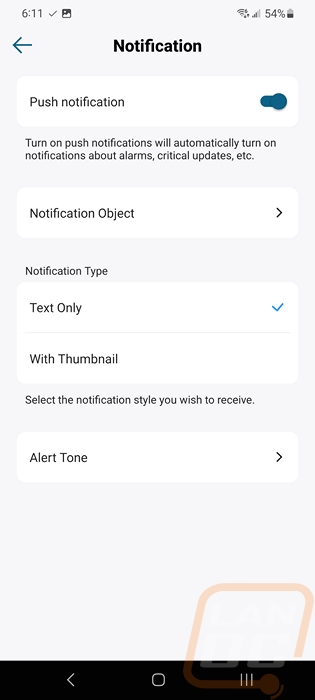
The notification page is where you decide if you want push notifications. Then because some of those settings were on the motion page the notification object option will take you back to the motion settings page. The main thing here is you can pick text only or with a thumbnail image. Eufy does note that the image setting does mean that picture will be temporarily uploaded to amazon cloud servers for you to be able to see it on the notification page on your phone. Then at the bottom, you can pick the audio alert noise.
The general settings page is where everything else is hidden away. You can rename the light which can be important if you have more than one. You can see your storage options which interestingly is ONLY the built-in storage. On top of not having a microSD card slot, there is no option to add eufy cloud storage or my personal favorite RTSP storage which will let you stream the feed to your own security camera server. But none of those options are included this time around which is a big bummer, especially with the S100 being powered all of the time. I understand why streaming is an issue with battery-powered cameras but RTSP works well with our eufy inside cameras and the eufy garage control camera as well. You can change wi-fi settings if needed or change the time zone. Then in the about device section, you can see the serial number, firmware version, IP address, mac address, and check for new firmware updates.