In our first look at our latest project build Project, Icyu which is a rack-mounted upgrade to our Blue Iris security camera server setup I dove into some of the issues that I’ve been running into and some of the goals for the new build. I also started putting the hardware together for the build with the case, hard drive storage, the power supply, and the rack rails and got all of that set up and installed in our server rack. Today I want to continue on that and get into cooling and noise by checking out what I’m going with to keep the CPU cool, the case cool, and hopefully keeping noise levels for the system overall down. To do that I’ve partnered up with Cooler Master and Noctua which we have worked with a lot in the past.
Title: Project Icyu– Blue Iris Build Part 2
Written by: Wes Compton
Build Sponsors/Supporters: Silverstone, Intel, Noctua, Cooler Master, MSI, Kingston
Amazon Affiliate links:
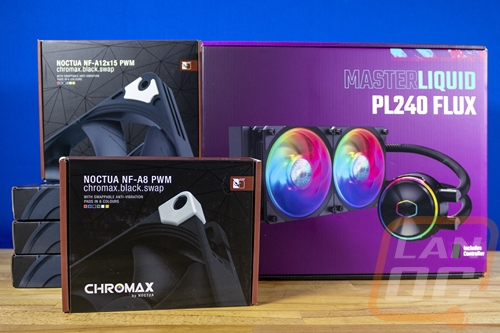
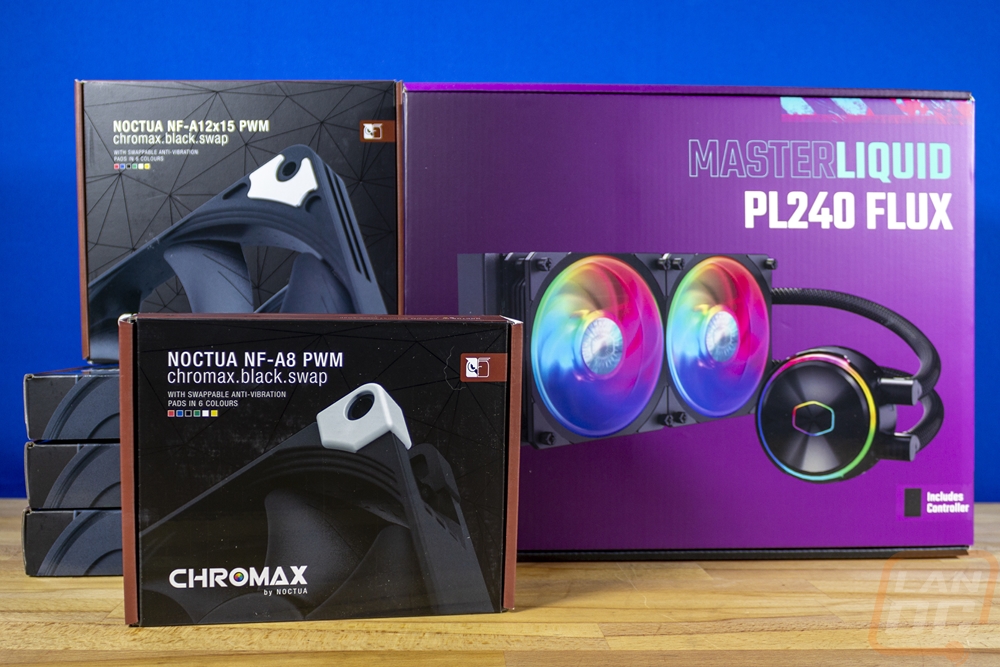
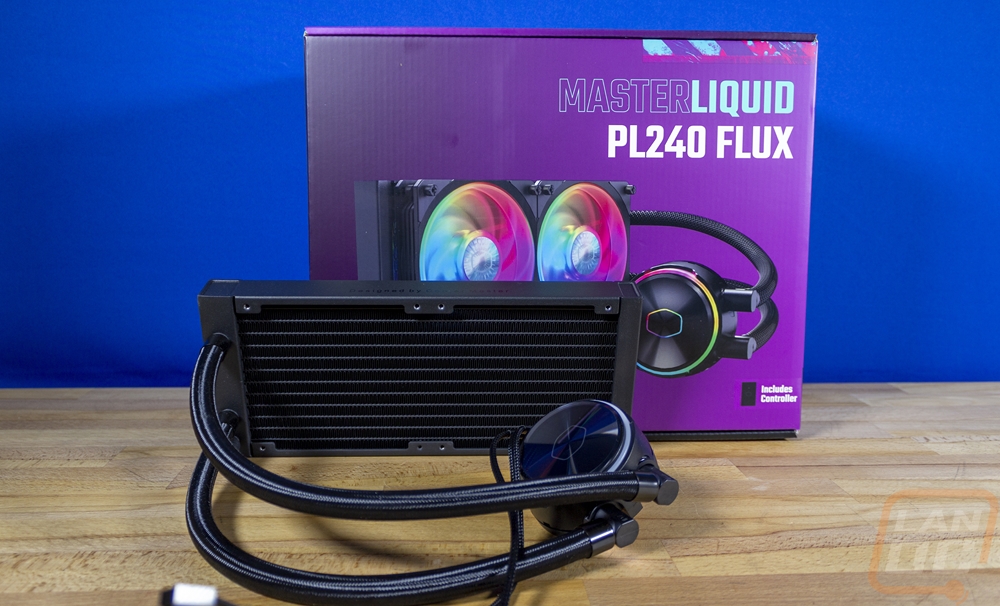
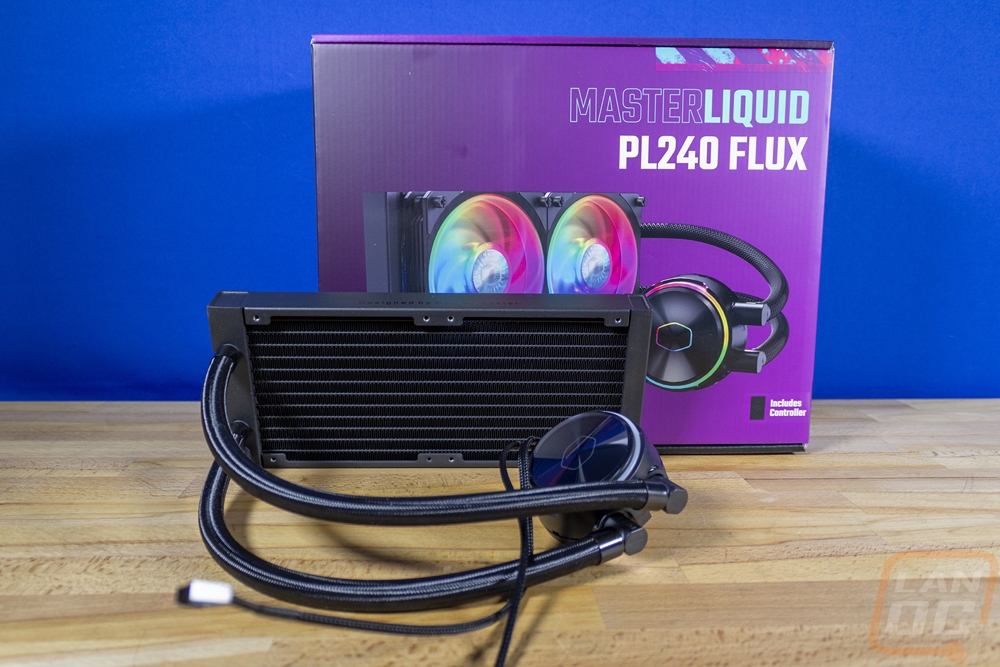
Cooler Master MasterLiquid PL240 Flux
Noctua NF-A12x15 PWM chromax.black.swap
Noctua NF-A8 PWM chromax.black.swap
Links to the rest of the project: Part 1 - Part 2 - Part 3 - Part 4
Our AIO Cooler
Our previous system held up surprisingly well over the years given that it was a 7700K running at nearly full CPU usage 24 hours a day in a small form factor case with a thin SFF CPU cooler. This time around I wanted to avoid that and keep things cool which is why I went with the Silverstone RM42-502 for our case which has a lot of space and can support a full 240 mm All-In-One cooler which is good because even before locking down what CPU or even what socket we would be running I didn’t have to worry about not having enough cooling if we went with something especially hot. I just needed to focus on the water cooler itself and with plans to also swap out the fans, my main goals were to make sure the cooler was 240 mm, was simple, didn’t need a controller or have a built-in screen, and would be reliable. I also needed to make sure that it would support any socket including Intel’s newer LGA 1700. I reached out to Cooler Master because I have always had good luck with their coolers, I’m running one in my own PC right now even and they sent over the MasterLiquid PL240 Flux which I reviewed earlier this year. When I tested it previously it performed well and was quiet and even though it has RGB in the pump housing it doesn’t require a controller unless you don’t have RGB headers on your motherboard or in our case I could keep the RGB unhooked if I want.
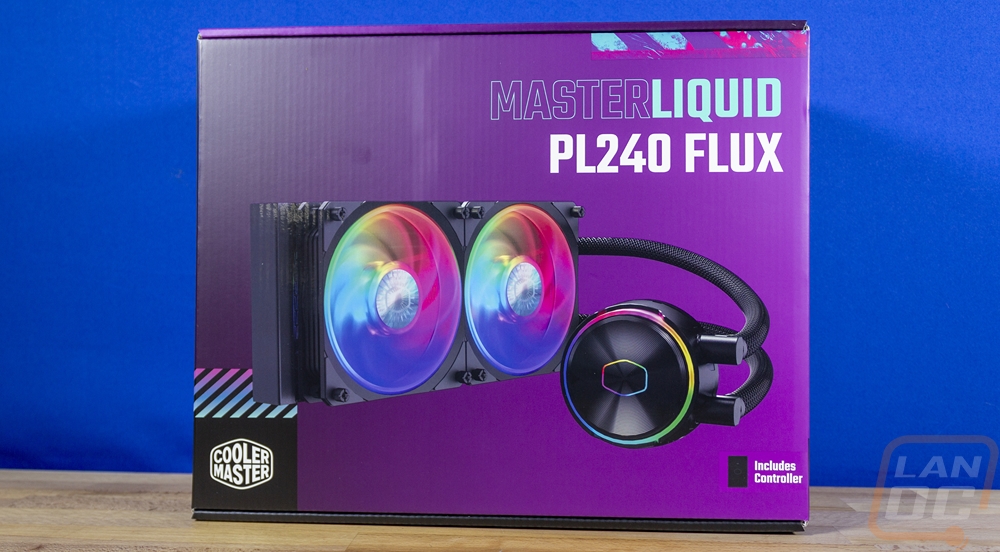
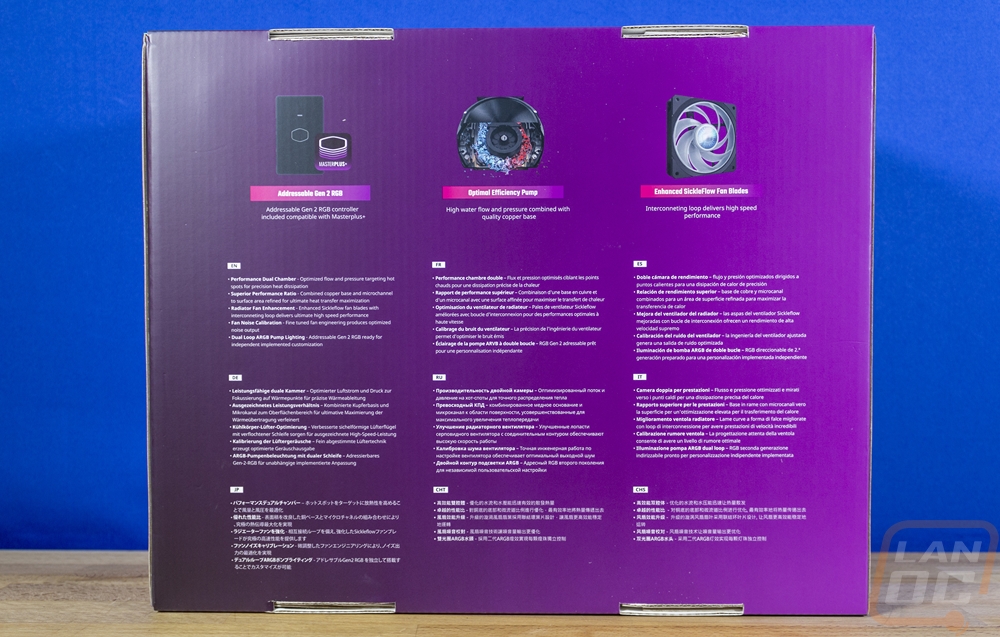
The Cooler Master MasterLiquid PL240 Flux box has a bright purple fading into the black for its background, which isn’t too big of a surprise given that Cooler Master uses that purple often on their lineup. The front of the box is simple, but I like everything they have going on. There is a picture of the cooler in the center which also has the fans and the pump lit up with their addressable RGB lighting. Then in the top right corner, they have the model name in a large and easy-to-read font. Then the Cooler Master logo is small and down in the bottom left corner. For the model name and for a few accents on the box they use turquoise which is bright and goes perfectly with the purple. They have the AIO cooler’s specifications on the side of the box. Then for the back, they break down the controller included, the pump, and the fan to talk a little about each of their features which are then repeated multiple times in other languages.

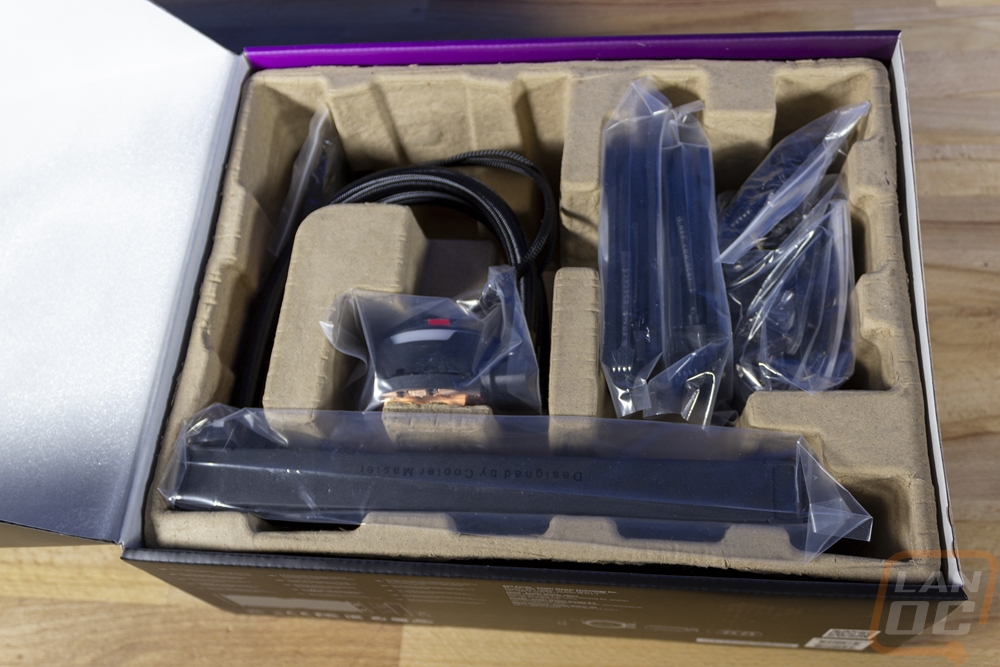
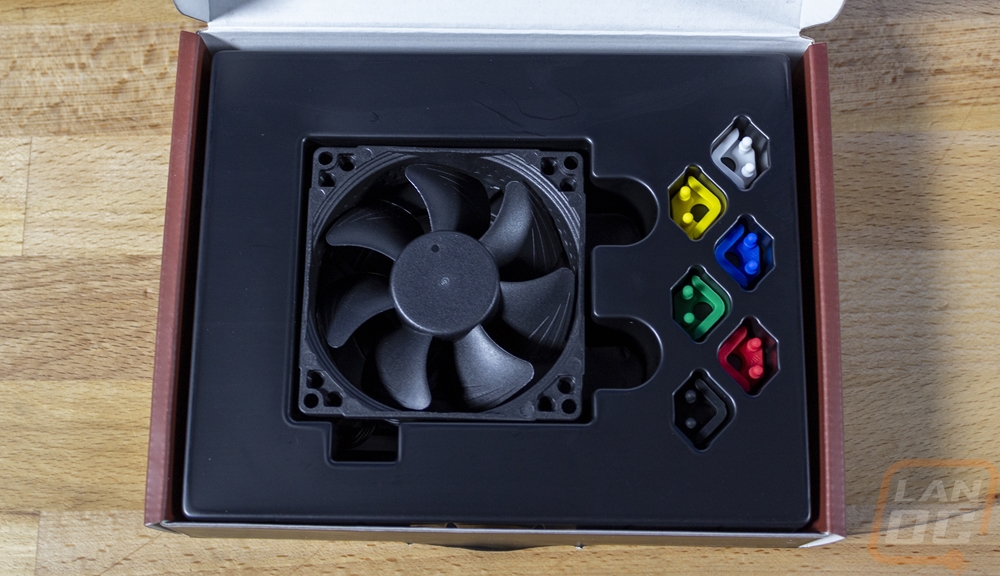
Once you get inside the box, there is a sheet of foam that sits across the top of everything. Then under that, a cardboard tray was formed to fit each component individually. Everything is wrapped up in plastic other than the accessories which are all in a cardboard box.
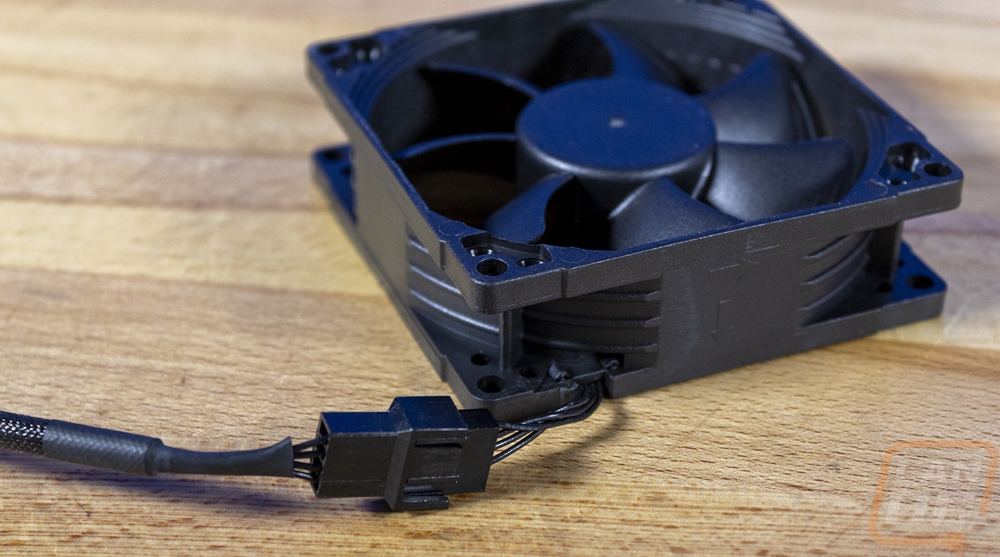
So the MasterLiquid Flux kit is available in the PL240 that we are using here (and that I reviewed previously) and a PL360 kit, both are 120mm fan kits with one having two fans and the other three fans. The includes fans are a new PL-Flux fan series which have been redesigned now with a new interconnected blade design that helps add more structure and strength to give the blades more stability at high speeds. I was surprised with the overall quality feel of these fans. The housing feels more solid than your average AIO cooler kit fan. They have rubber anti-vibration mounts on each corner on both sides. They run from zero to 2300 RPM with a max airflow according to Cooler Master specs at 72.37 CFM and a max pressure of 2.96 mmH20. They have a life expectancy of 160,000 or more hours and use loop dynamic bearings which are the same bearings that Cooler Master used on their Silencio fans. The blades are translucent white which helps transmit the addressable RGB lighting that they have built in the center section. They have the standard two cables, one for the 4-pin PWM fan control and the other for the 3-pin addressable RGB lighting cable, and both cables have a black sleeving on the outside. The side profile of the fans is interesting as well because the housing has a ribbed design.
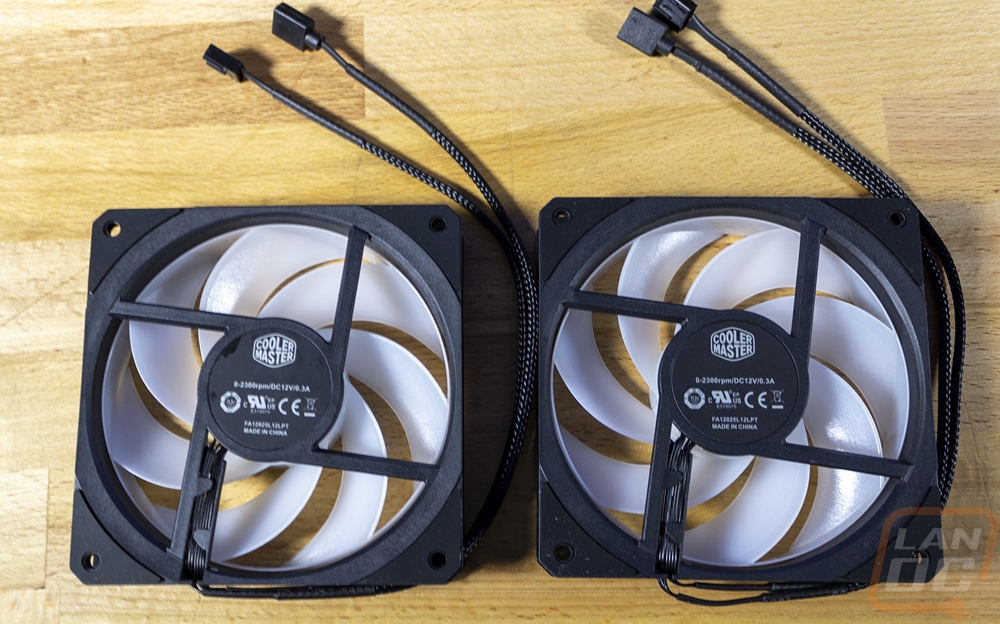

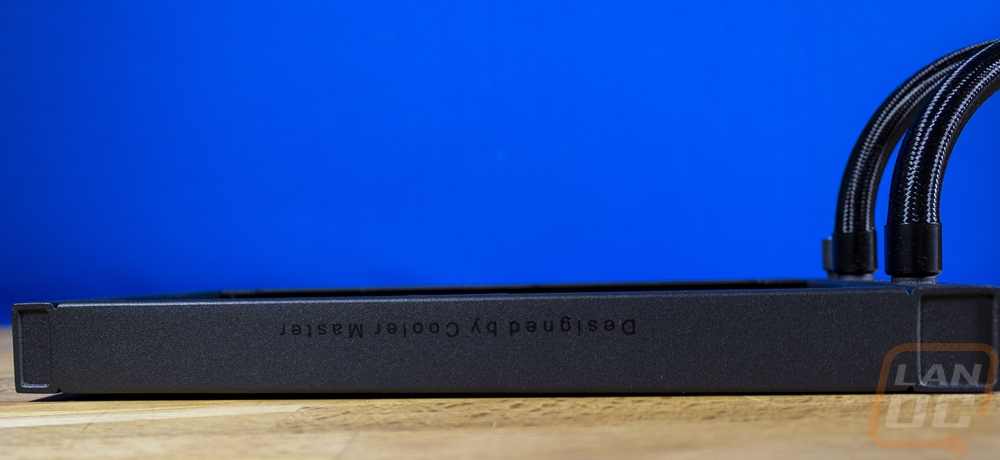
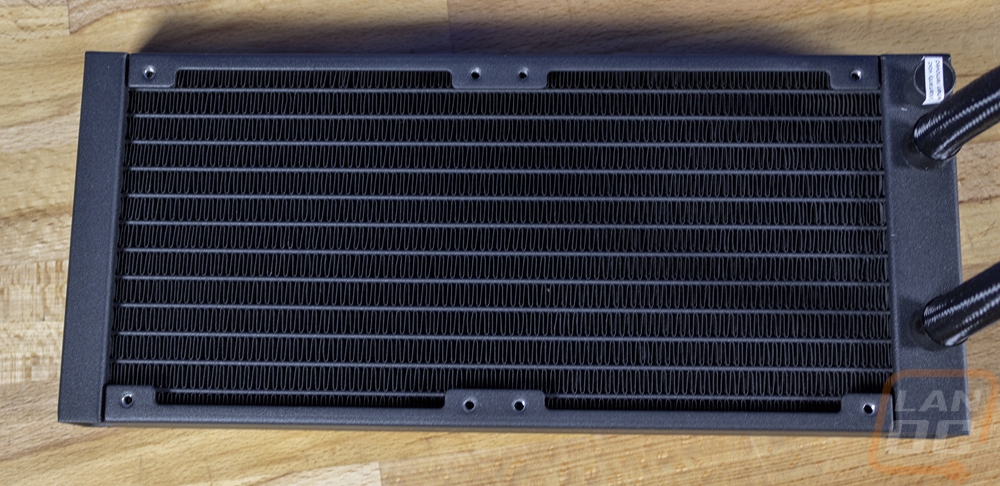
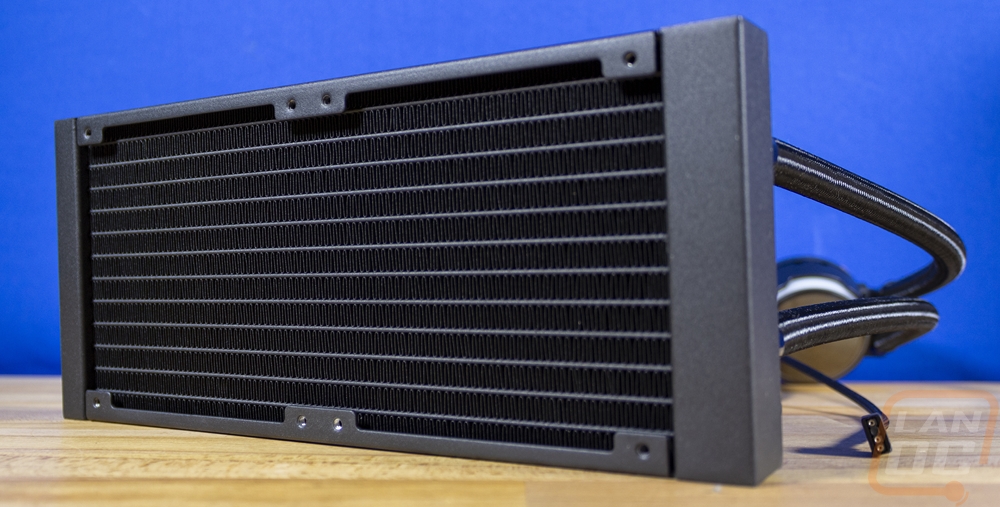
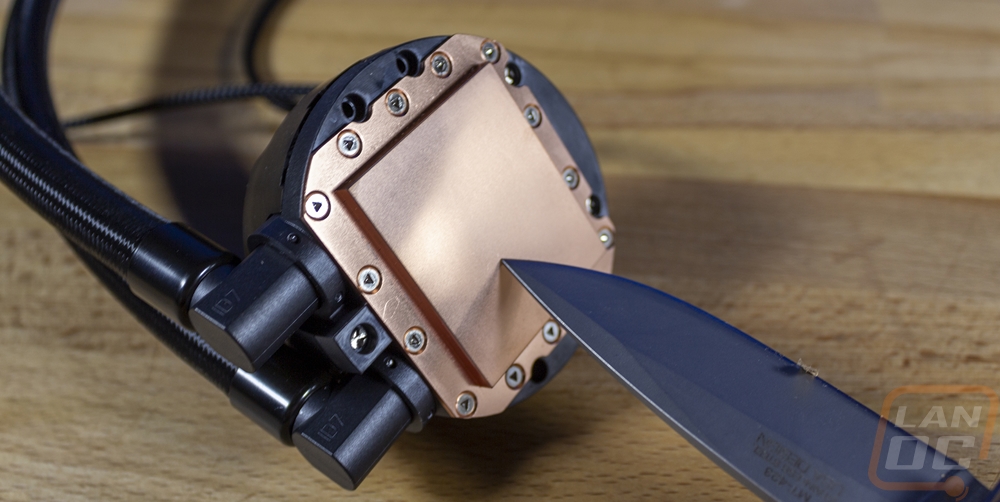
The radiator for the MasterLiquid PL240 Flux is the standard boxy AIO radiator that we have been seeing on a lot of kits recently. I think these look a lot better than the older rounded end radiators but performance wise there isn’t anything that makes these stand out. Ours did come with a few dings and dents in the fins, but it also was a prelaunch kit. I like the textured black finish and on the edges, they are also printed in a gloss black “designed by Cooler Master” which not a lot of companies can even say given that most stick with the standard AIO OEM. Overall it is 27.2mm thick and 277mm long and 119.6mm tall to fit the 120mm fans.
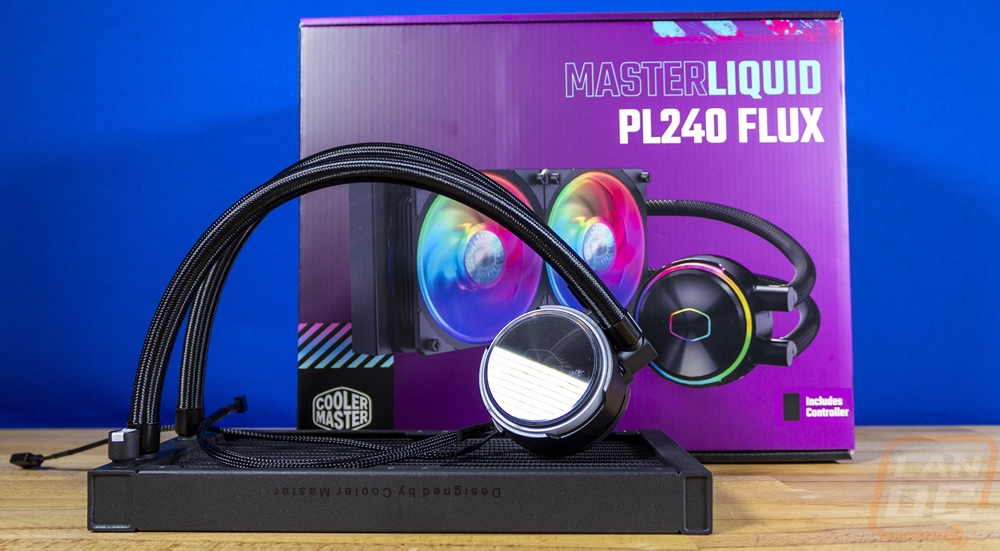
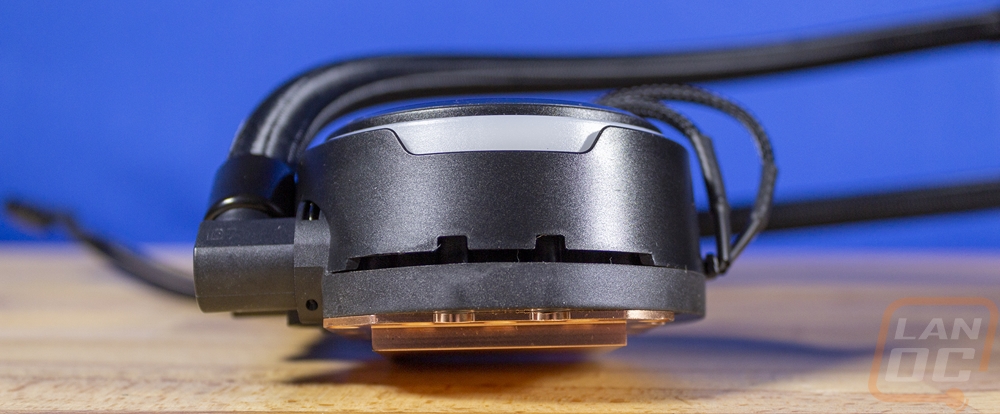
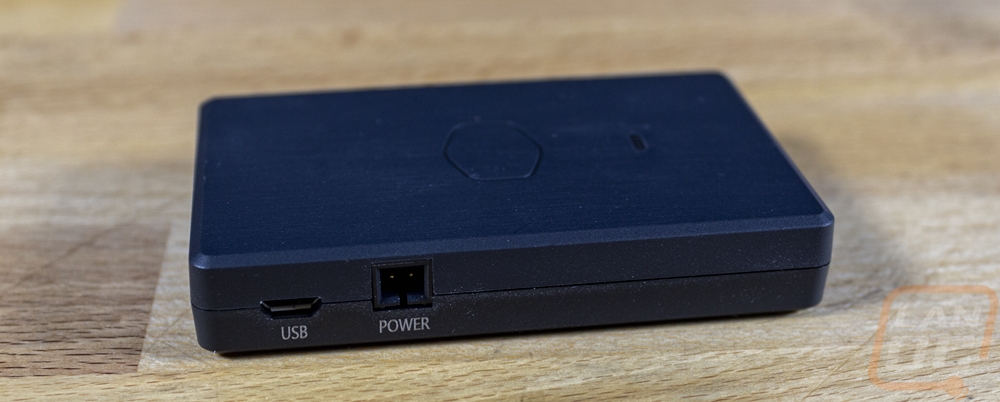
Then for what drives everything, the MasterLiquid PL240 Flux has a pump and water block combo. They use a dual-chamber design like all of the Cooler Master AIO kits. The pump itself has ceramic bearings which give it an MTTF of over 210,000 hours. This helps with the MasterLiquid PL240 Flux’s overall warranty which is a healthy 5 years. The Cooler Master specs have the pump height at 40mm but our measurement looked closer to 39mm which isn’t low profile like some Asetek designs but isn’t bad at all considering that they do have to stick with dual-chamber designs and that includes leaving room for the built-in addressable RGB lighting. The RGB lighting is integrated into the mirrored top finish with the Cooler Master logo outline as well as a ring around the outside that is also visible on the sides. So I say the top of the pump has a mirror finish, but it is a machined metal finish that you can still see the circular machine marks in, and the finish is tinted for a cool style. The pump, like the fans, has two cables coming from it as well. One is a PWM fan header that powers the pump and controls its speed then the other is a 3-pin addressable RGB plug for the lighting.


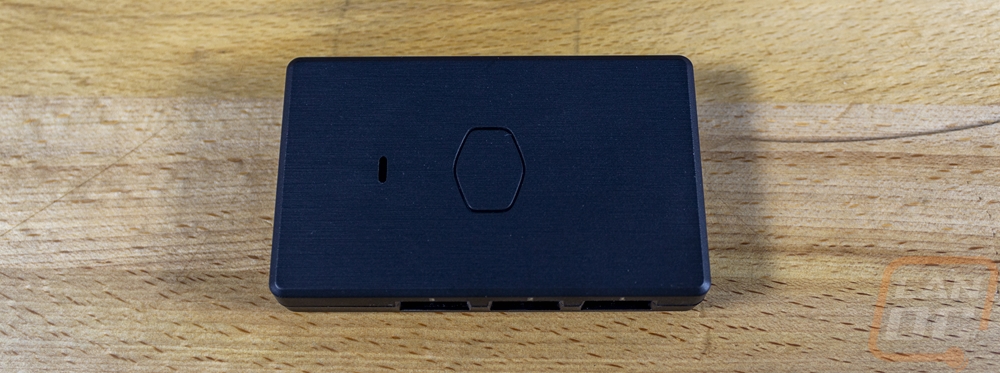
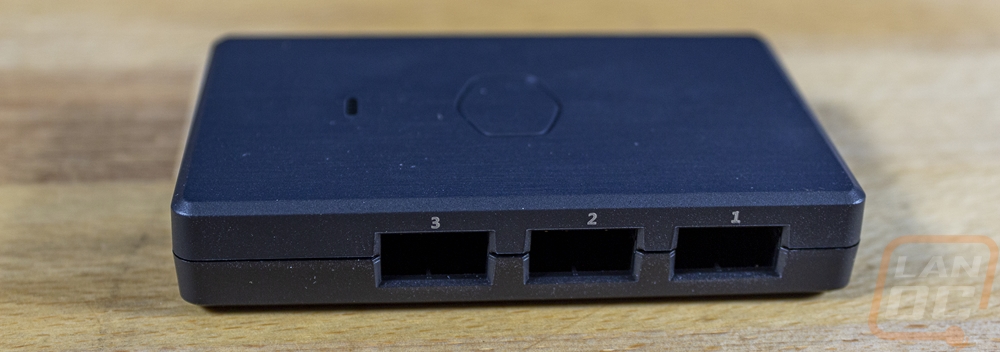
So the MasterLiquid PL240 Flux does come with its own controller even though I won’t be using it for this build. I know some of the kits I have been seeing recently skip out on including their own lighting controller and I don’t blame them. They add complications and most importantly also mean you need to maintain software. Cooler Master was able to tie the MasterLiquid PL240 Flux in with their Masterplus software which they already use for peripherals. This controller is only for the RGB lighting however, I know some other kits like from Corsair that like to bring the control of everything all together. You will still need to hook the fan and pump plugs into your motherboard. But for the lighting, you can plug everything in here. The controller has three RGB headers but they also include an adapter so that you can string the two fans and pump for the MasterLiquid PL240 Flux all together and only take up one of these plugs. They aren’t CM-specific as well, so you can use the extra plugs to handle anything with a 3-pin addressable RGB connection. On the other side, the controller has a micro USB plug and a 2-pin power connection. The cables included give you power from a SATA plug and the USB runs on a USB 2.0 internal header. It has a light on top to let you know it is working as well as the Cooler Master logo outline. Then on the bottom, it has two rubber feet and room for double-sided sticky tape which you would think would be included but I didn’t see in our kit at all.
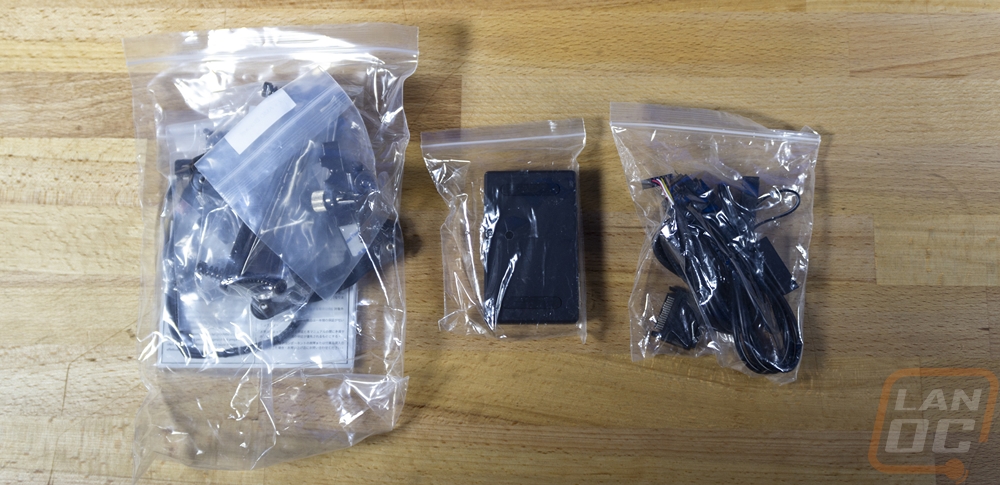
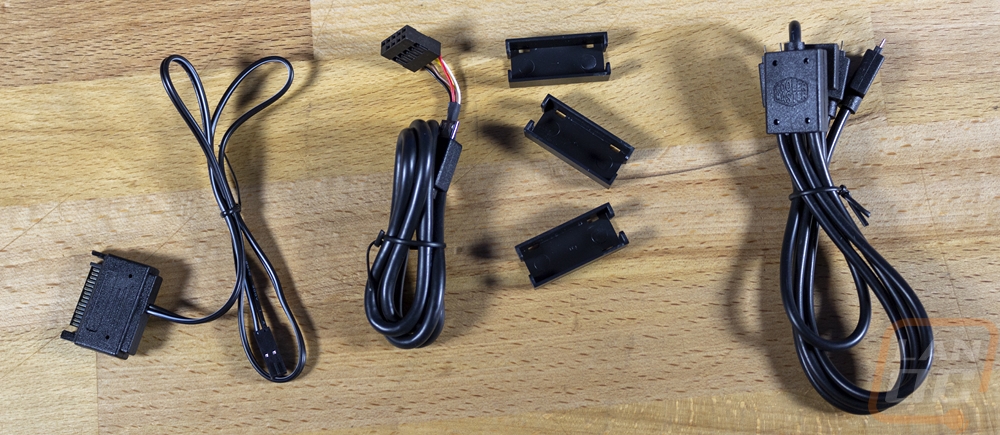
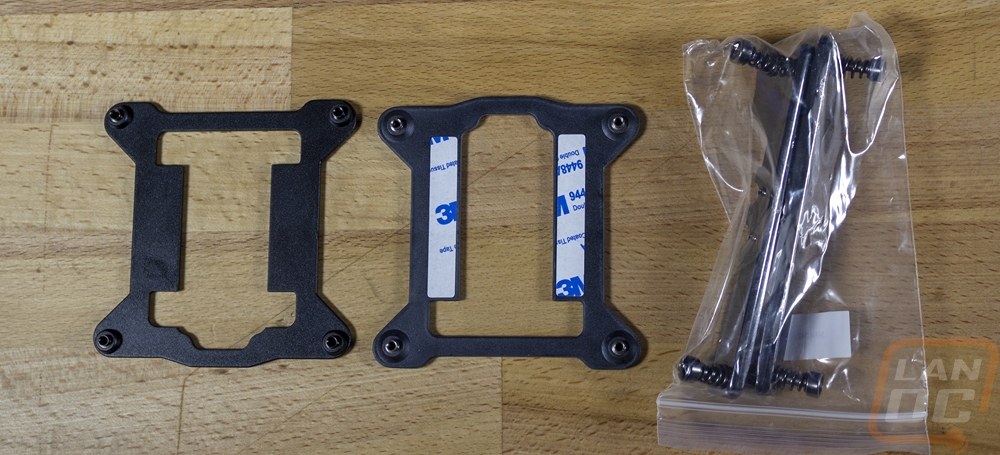
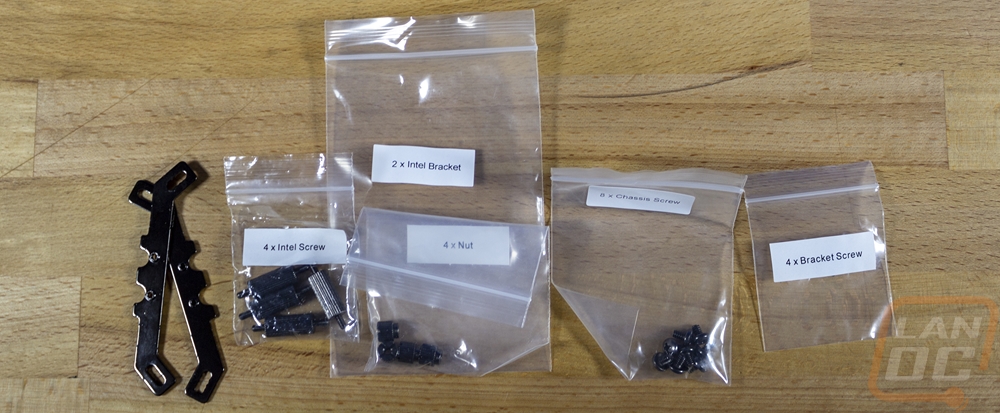
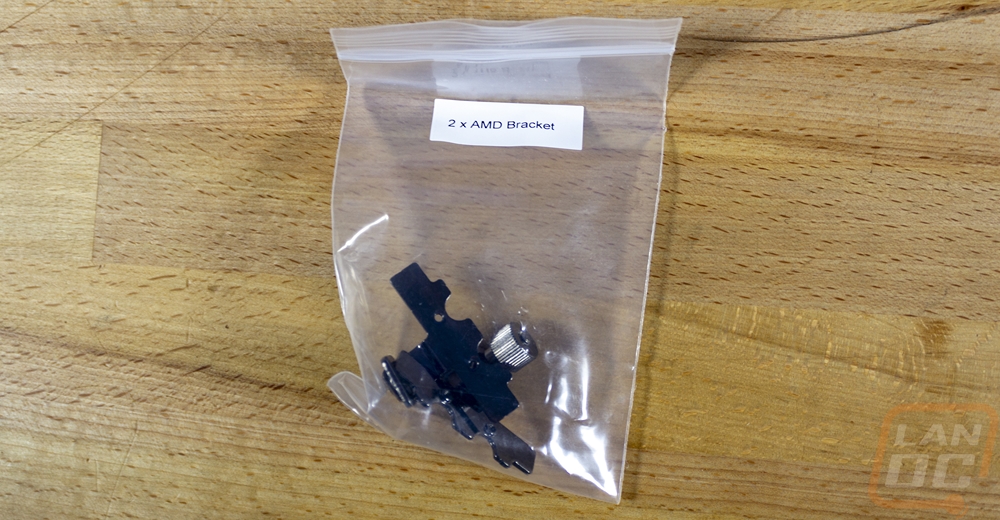
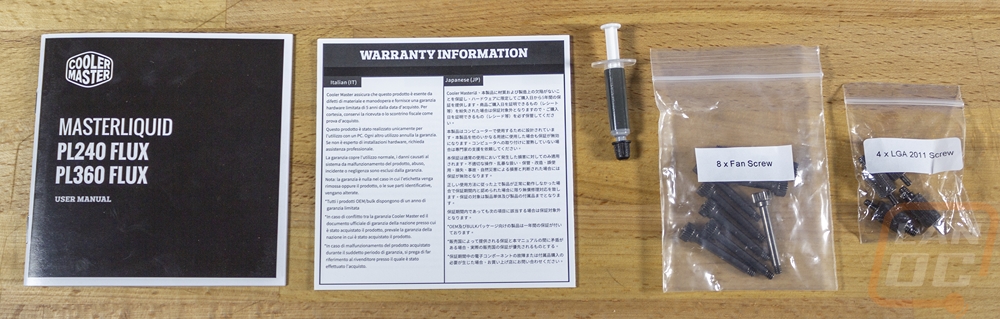
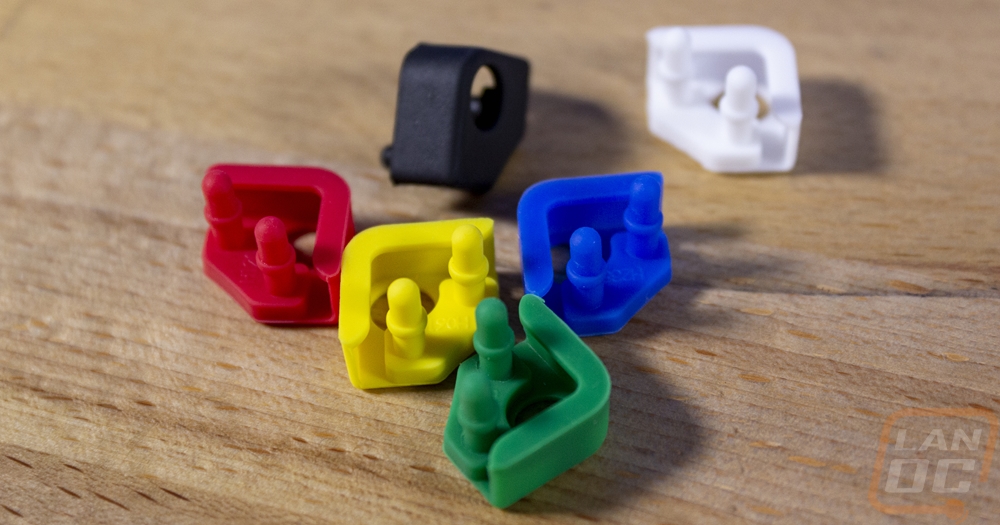
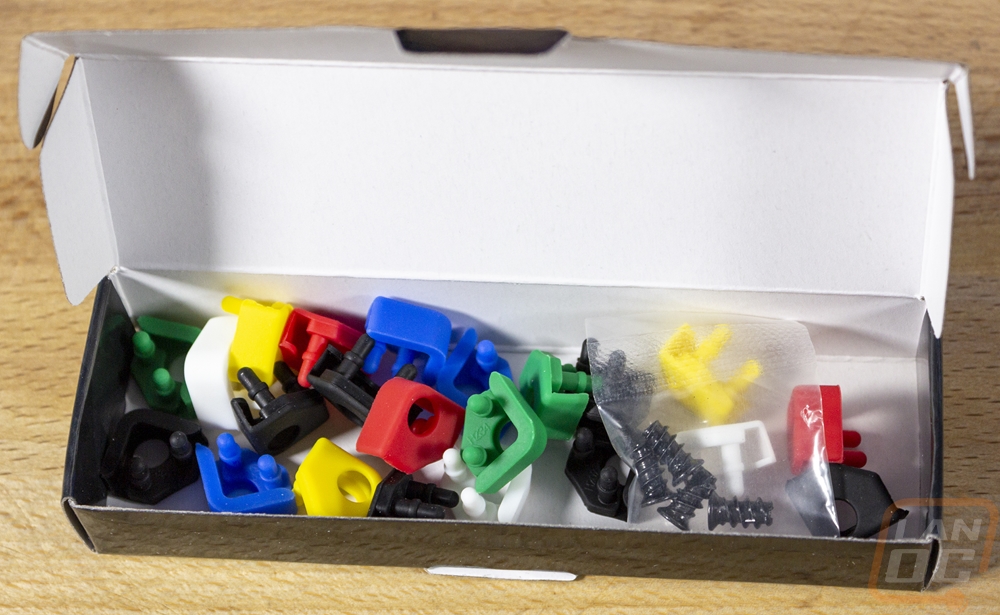
For accessories included with the MasterLiquid PL240 Flux kit. You start with three bags of hardware for the installation with one of those having multiple bags inside. I like that each is labeled and you can see that you have bags for the Threadripper bracket and the AMD bracket. There are two back brackets, one for the older Intel sockets and then the other is for the new LGA 1700 Intel bracket. For documentation, there is a user manual and one warranty book. There is a bag of fan screws and even standoffs for the LGA 2011 socket. They include a very small tube of thermal paste and a fan cable splitter. I mentioned the power and USB cables for the controller earlier and the RGB cable that ties all of the RGB lighting onto one loop. That cable comes with one extra plug for the larger 3 fan model as well. The small black clips in that same picture are unique in that they help lock those RGB connections together to prevent problems in the future.
Fans
The MasterLiquid PL240 Flux that Cooler Master provided has great fans, but for a server build I wasn’t really looking for flashy RGB on the front of our case and I did also want to put fans in the back of our system to help exhaust the air as well. The Silverstone RM42-502 came with one 80 mm fan for the back but for redundancy and for the best possible cooling I wanted to have two fans. I also want to keep noise down to a minimum. With everything, we have in the rack already it is far from quiet, but anything I can do to not contribute more to the noise the better it would be. The best option was obvious, we have been running Noctua fans in just about every build for 12+ years and in that time I have only had one fan fail or have a problem and that was an issue from the factory not an issue after extended use.
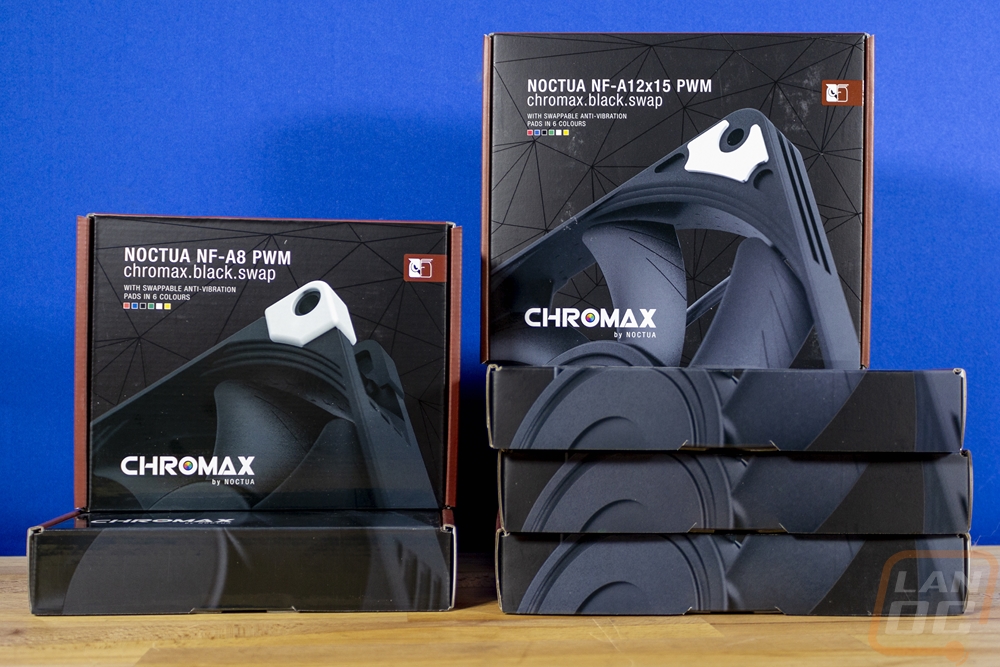
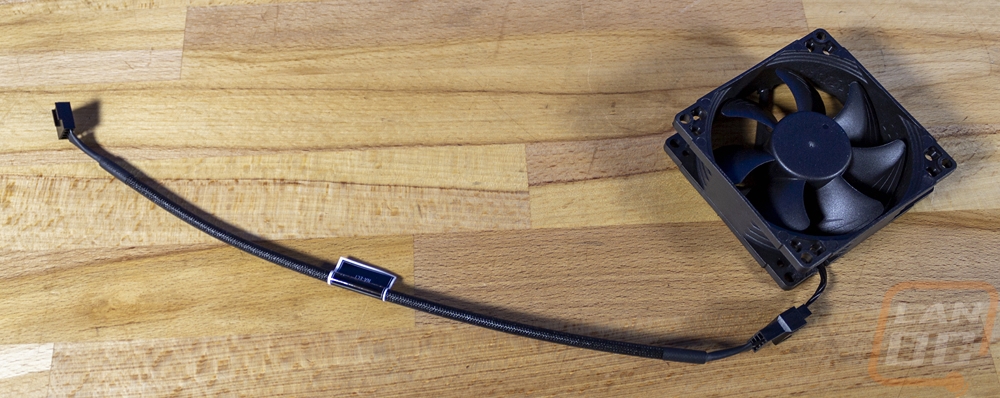
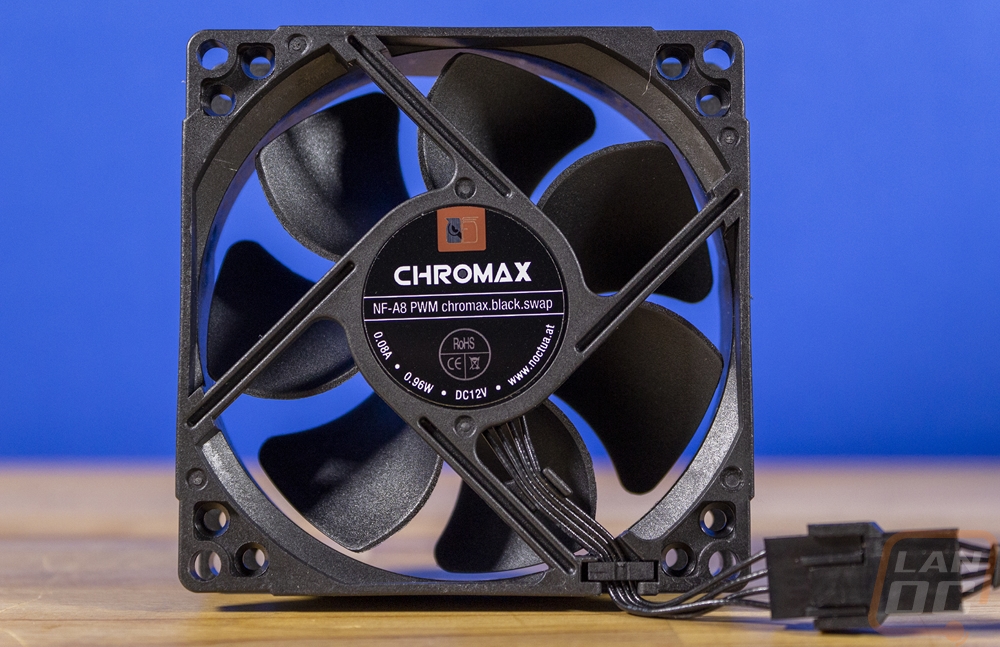
I reached out to Noctua and they were happy to be involved and they sent over a few different fans to get the job done. For the rear of the case to exhaust things they sent over two NF-A8 PWM chromax.black.swap which is their only 80 mm fan option currently available in their Chromax lineup. I could have gone with a standard brown fan and being a server it would have worked just as well, but they look great in black!
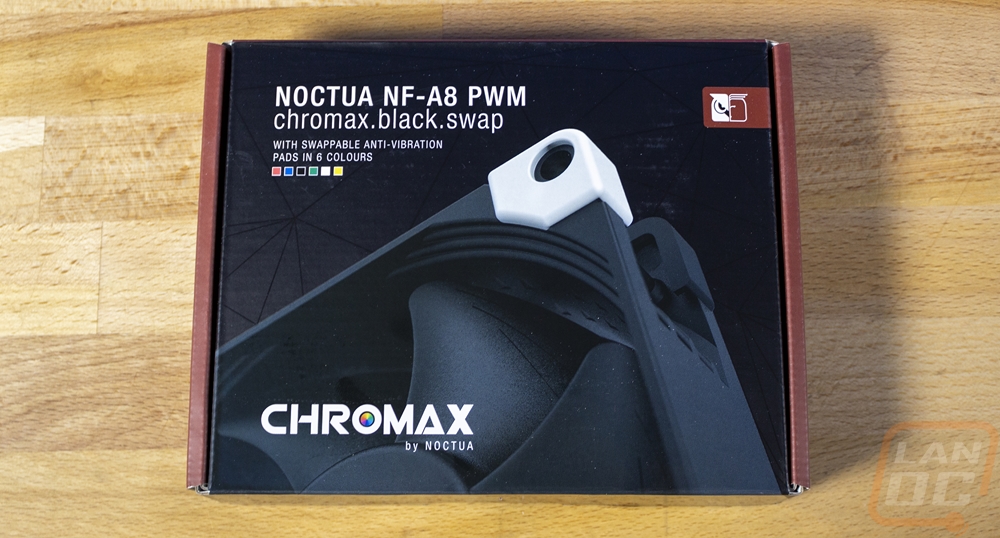
The packaging for the NF-A8 PWM chromax.black.swap, like other Chromax line fans, comes in a blacked-out box but Noctua does include a little of their signature brown for the trim on the sides on the front. The box has a zoomed-in photo of the NF-A8 PWM chromax.black.swap with white vibration pads on the front and the Noctua logo in a small brown strip. The full model name is up in the top left corner and below that they let you know that it does come with anti-vibration pads in 6 different colors. Then around back, they have another picture of the NF-A8 PWM chromax.black.swap but this time with red pads on the front and back on the back and next to it there is a line of the other pad colors. The back has a basic specification listing and Noctua talks a little about the pad color options in two different sections.
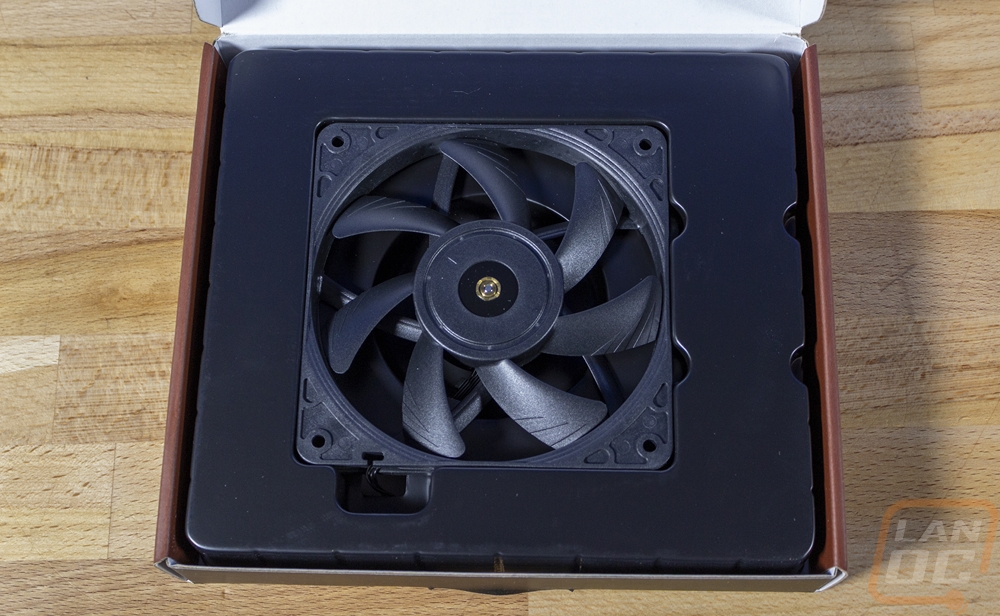
When you open the box up for the NF-A8 PWM chromax.black.swap the fan sits in a plastic tray with one of each of the vibration pad options also having their own spots. The fan wire is tucked away behind everything as are all of the extra anti-vibration pads which come in a small box that is hidden up under the tray. That box also comes with the fans four mounting screws which are also black. I should point out though that overall you get a full set of 8 pads in black but for the rest of the colors you only get 4, the expectation is that you will use the black pads on the back and then your bright color on the front. You can buy more pads in any color you want if you want to do both sides, you just need to look for the NA-SAVP5 chromax.yellow and replace yellow with the color you need.
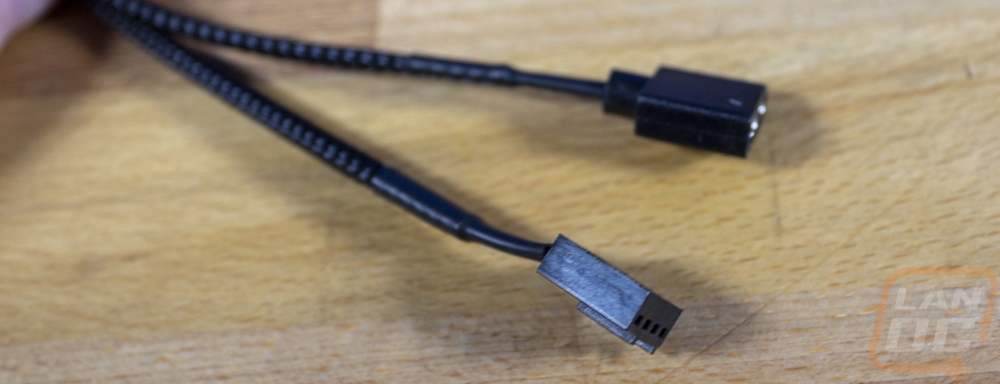
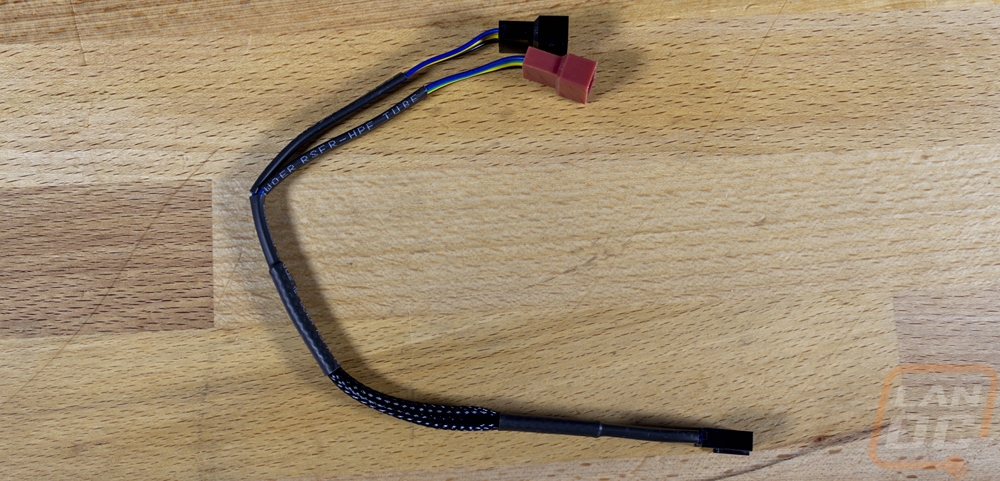
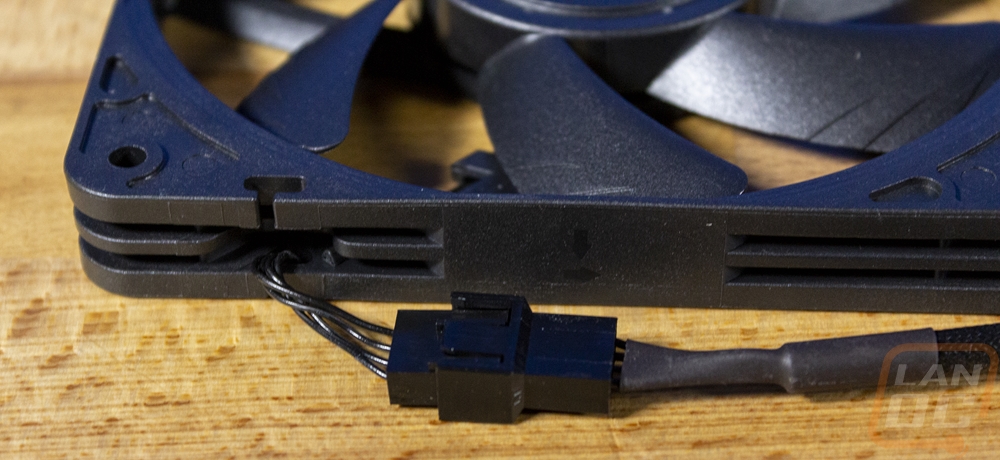
Another great feature that Noctua does with their Chromax fans is the main fan cable is extremely short and then it comes with a sleeved extension. Noctua sells matching color extensions if you want some of the bright colors but for me, I like the idea that you can make or use a shorter cable extension to avoid having any extra wiring to try to hide or if you are using a splitter you could plug it directly into the fan.
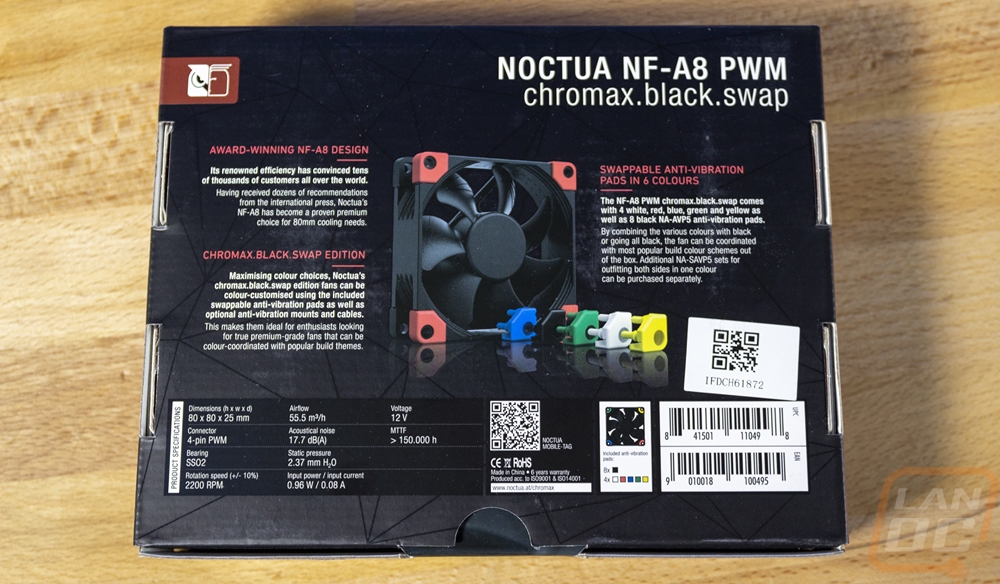
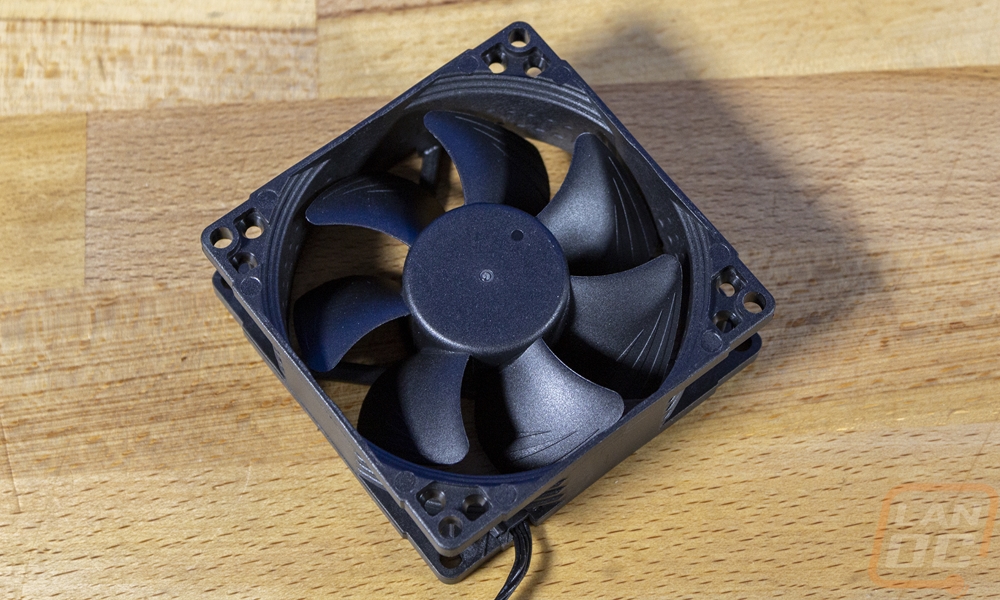
The NF-A8 PWM chromax.black.swap has the same performance as a normal NF-A8 which means it runs at 2200 RPM and Noctua has it rated at 17.7 decibels and pushes 55.5 m³/h. It has their AAO or advanced acoustic optimization frame design and they use their SSO2 bearing which means self stabilizing oil pressure bearing. It has 7 fan blades and being Chromax the blade and the entire frame is all blacked out except for a touch of brown behind the Noctua logo on the sticker on the back.
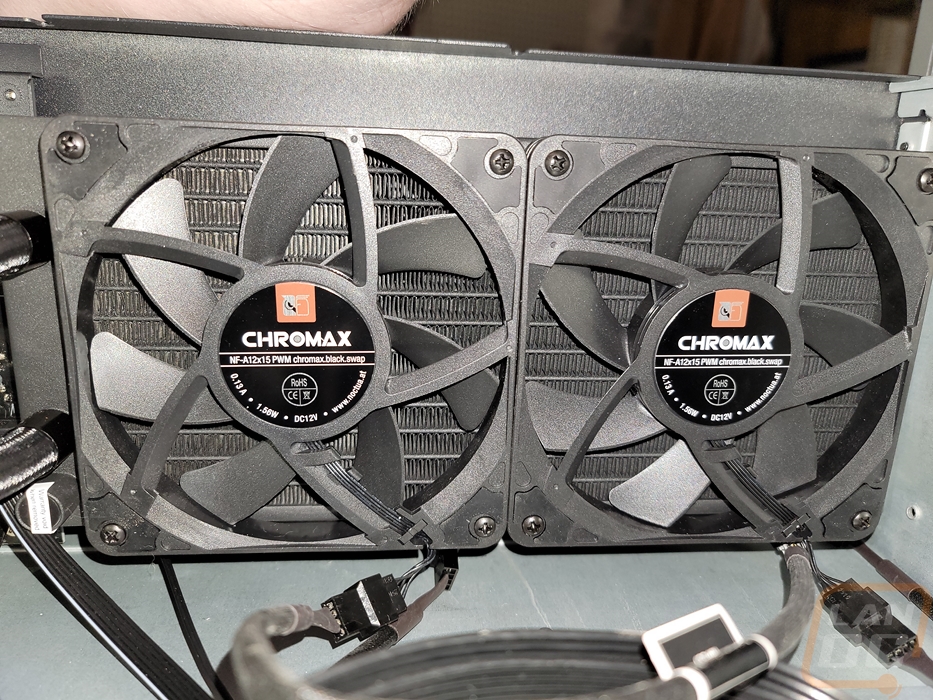
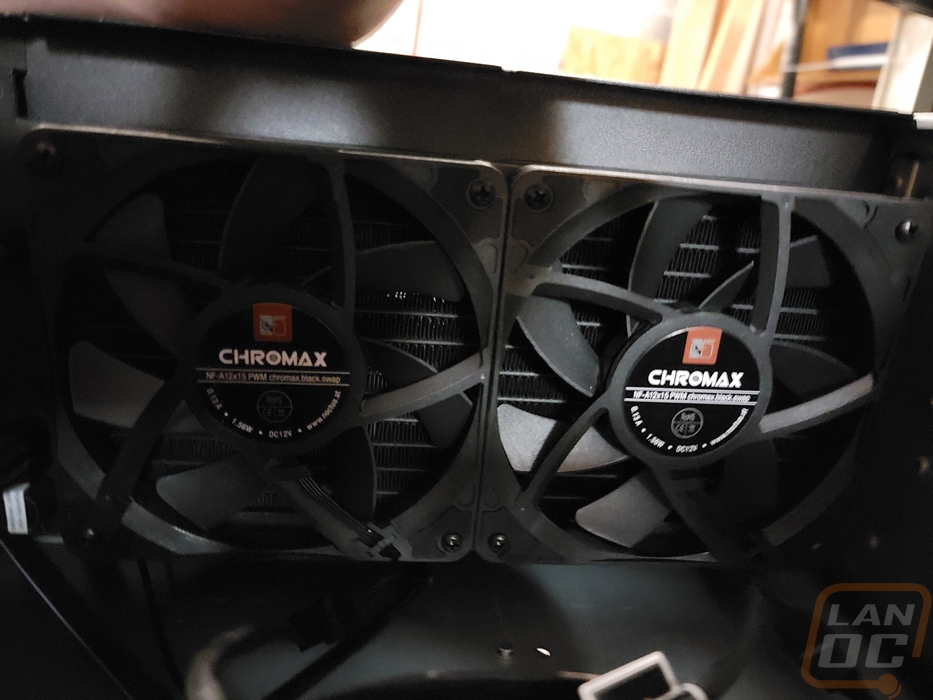
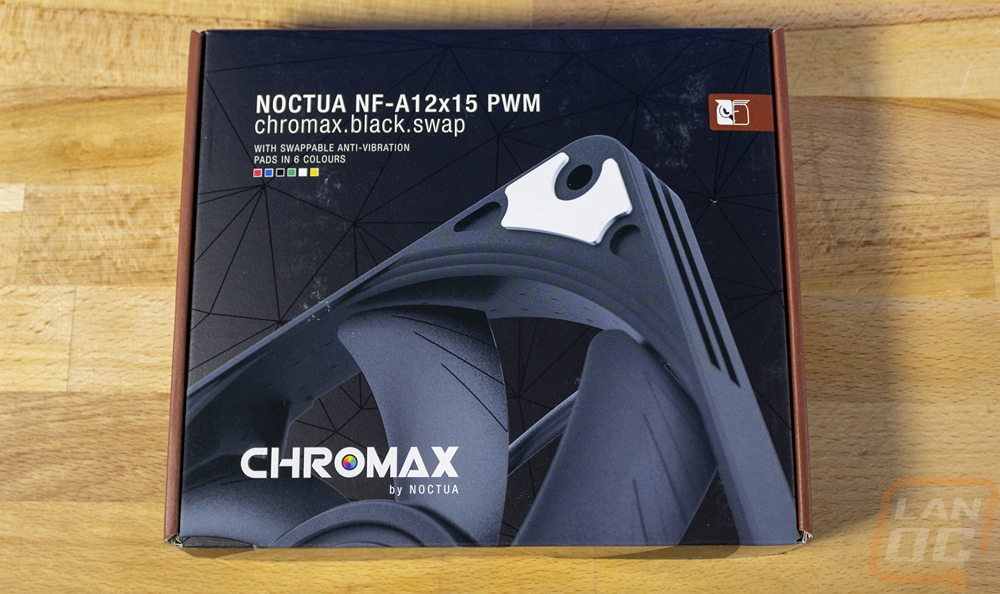
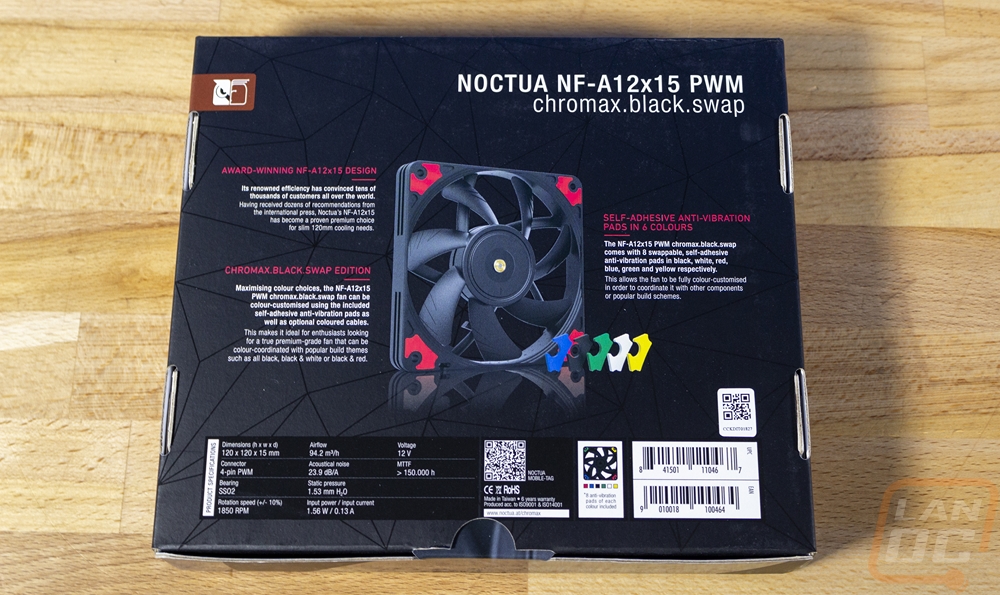
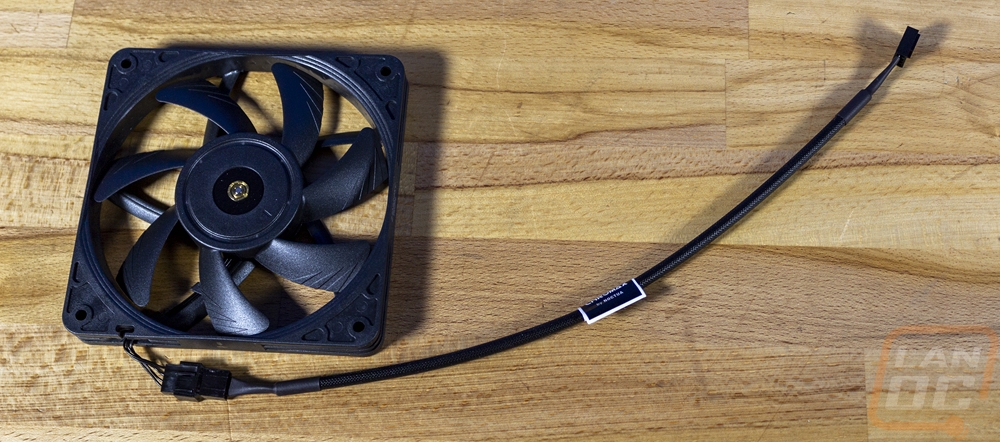
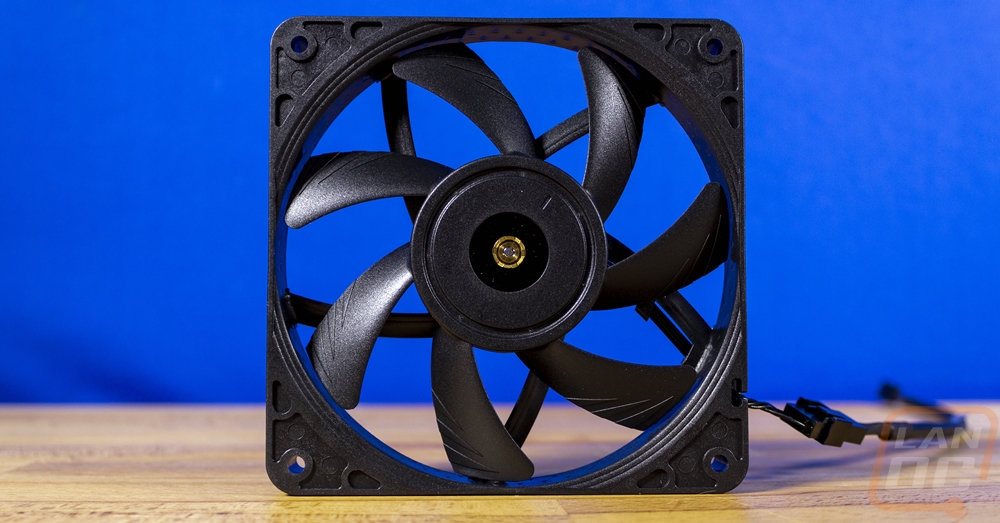
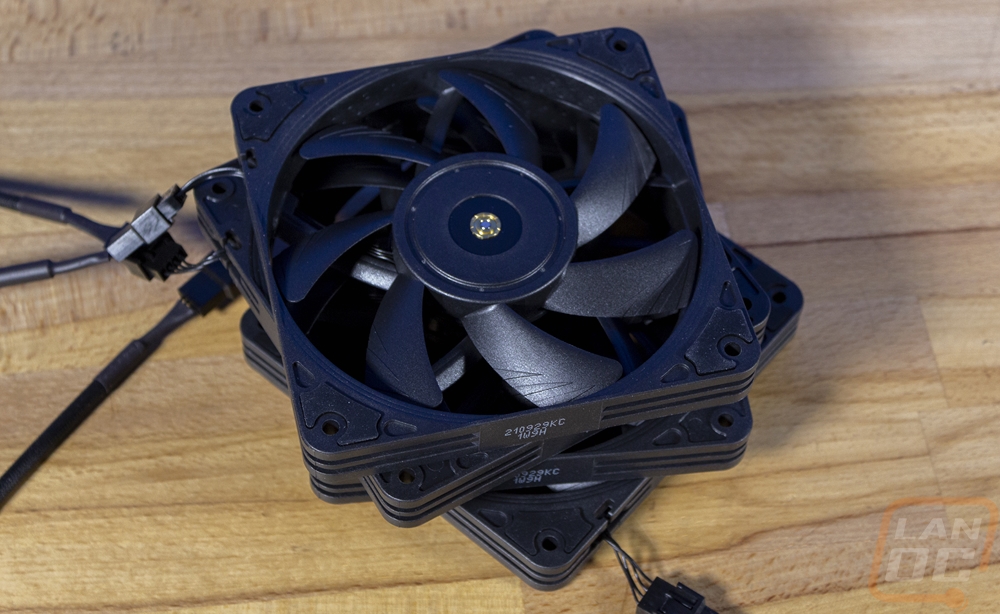
For the front fans, Noctua sent over four of their NF-A12x15 PWM chromax.black.swap fans. Even as I write this I’m not 100% sure if I’m going to go with a push/pull setup on the AIO because I don’t think it will fit unless I remove the GPU stabilizer bracket and I don’t know if we are going to use a GPU. But I wanted the option to get the best possible cooling and the thinner 15 mm thick NF-A12x15 PWM chromax.black.swap is a way to save space. The NF-A12x15 PWM chromax.black.swap comes in a blacked-out box just like the NF-A8 PWM Chromax did only this box is larger to fit the larger 120 mm fan. They again have the zoomed-in picture of the fan on the front with the brown trim on the sides and behind the Noctua logo. Then the model name in the top left corner and a note about all 6 of the anti-vibration pad color options. The basic specification listing is on the back along with a picture like before. The only thing changed here is that the information about the anti-vibration pads notes that they are self-adhesive for this model.
The NF-A12x15 PWM chromax.black.swap, like the NF-A8 chromax, has the same short main cable for the PWM fan cable and then an extension cable comes preattached that you can replace with chromax options.
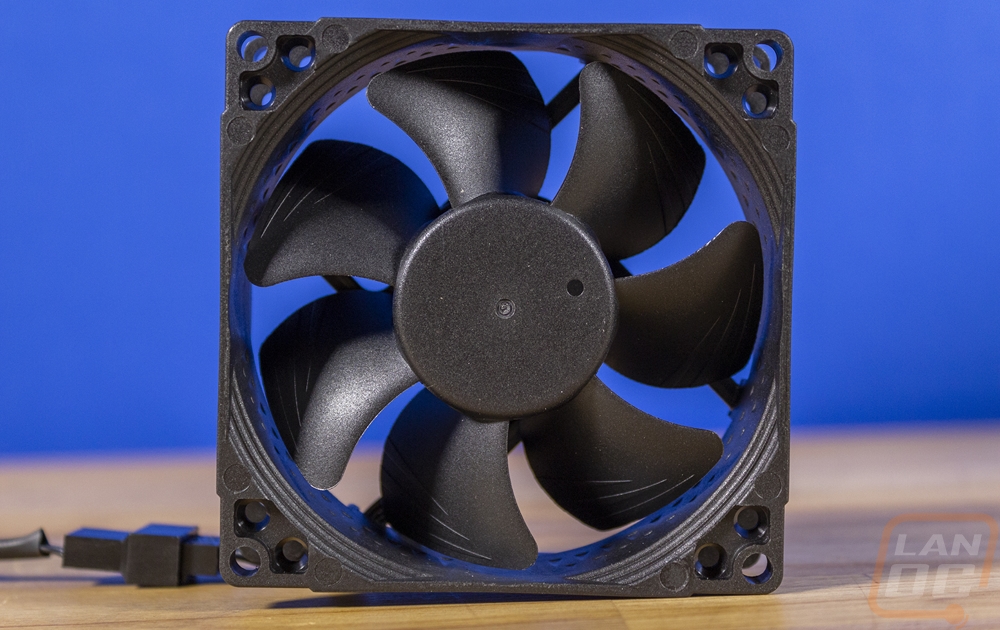
The biggest feature of the NF-A12x15 PWM chromax.black.swap is its overall thickness. Like the 15 in A12x15 would indicate this is a 15 mm thick fan which is 10 mm less than your standard fan's thickness. Noctua has it set to run at 1850 RPM and they have it listed to have a decibel level of 23.9. For comparison a similar NF-A12x25 PWM chromax.black.swap runs at 2000 RPM and is a touch quieter at the higher RPM at 22.6 dB. The NF-A12x15 PWM chromax.black.swap pushed 94.2 m³/h of air which is nearly twice what our rear 80mm fans can do. It has the same SSo2 bearing design as well and has 7 fan blades. The front of the blade has the bearing exposed like on the non-chromax model and being Chromax the blades and the frame are both blacked out. On the back, it does have the one touch of brown behind the logo on the information sticker but that’s it.


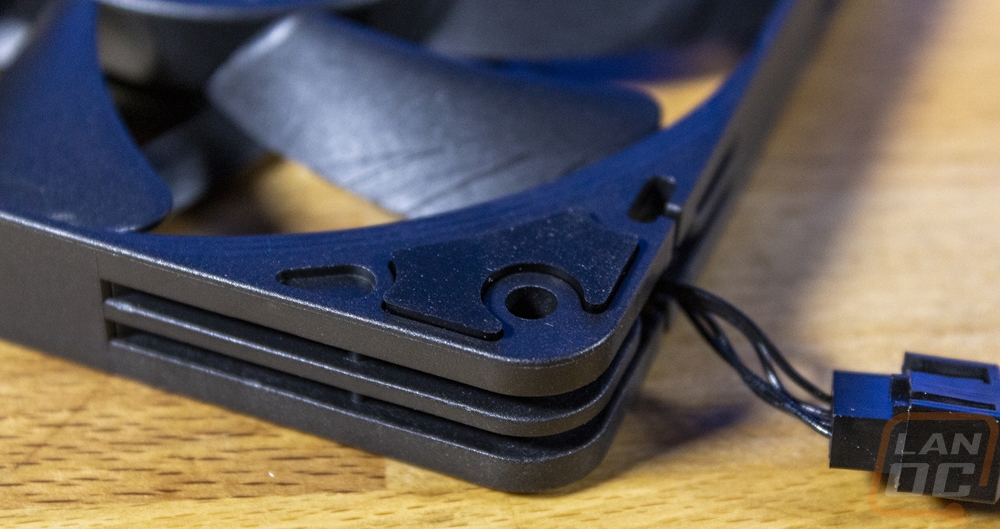
To keep the thickness down and because of the thinner design the NF-A12x15 PWM chromax.black.swap doesn’t have the same anti-vibration pad design that most other Noctua fans have. Most of their fans have pads that have two small tabs that will stick through holes on the fan frame and hold it in place but with the NF-A12x15 there isn’t room for that. Like with NF-A9x14 Noctua had to go with stick-on pads but with this Chromax model, they had to include all six colors. One of the benefits of this however is that they were able to give all 8 of each color so you can get your preferred color on both sides. You also get a set of black mounting screws as well. As for installation, other than trying to not get any hair in the stick-on pads they installed easily and look great.
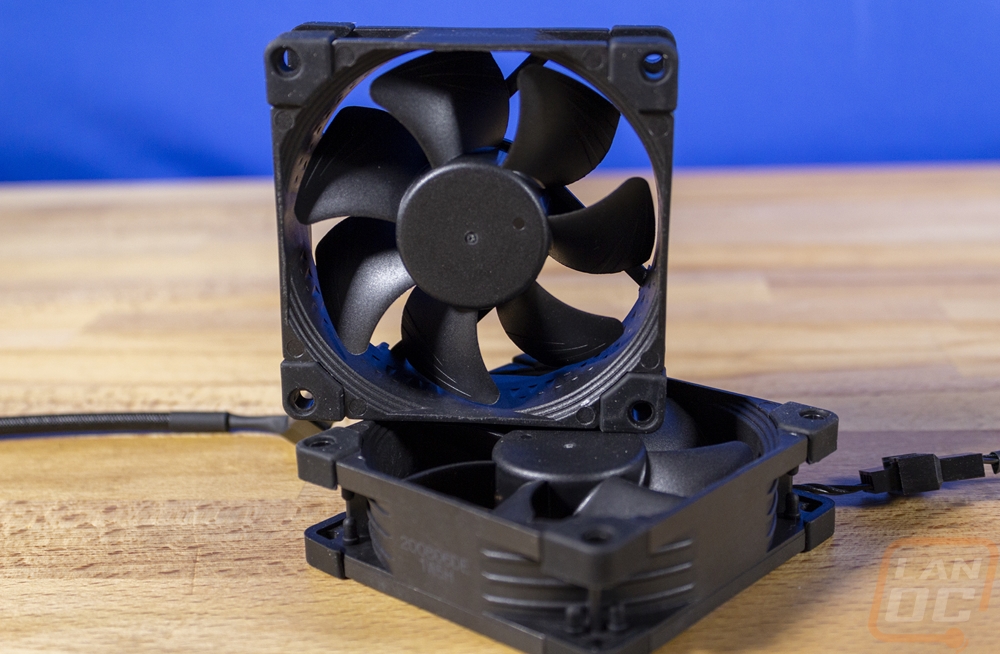
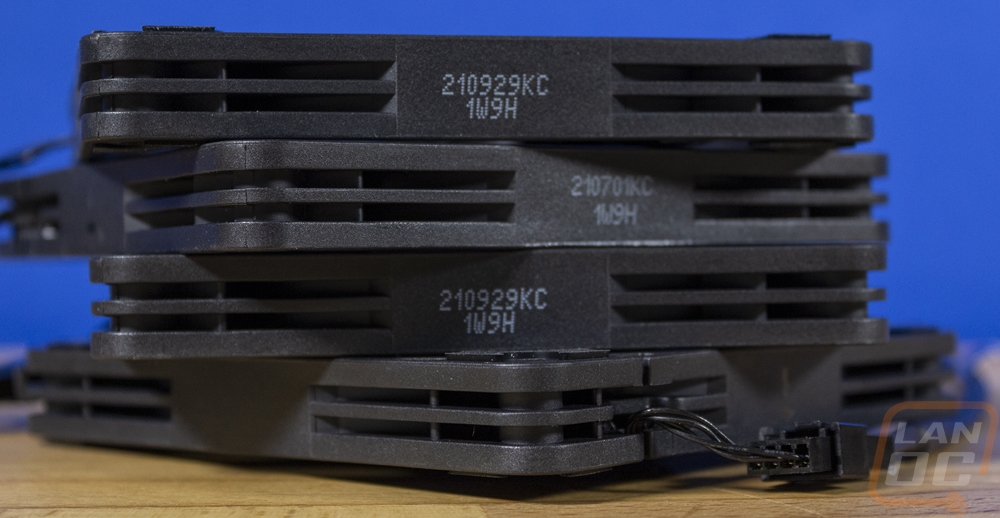
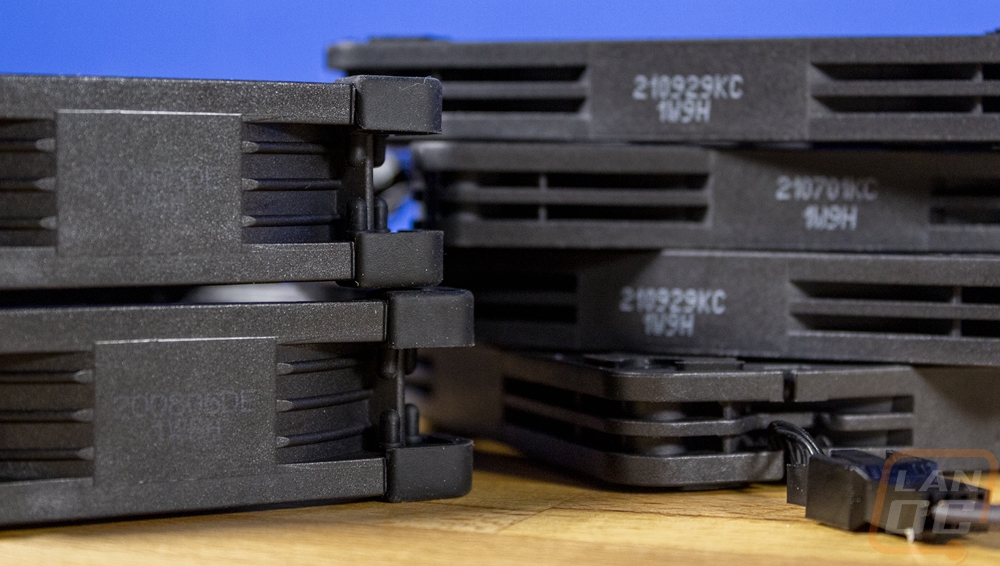
Because I don’t think that just mentioning that the NF-A12x15 PWM chromax.black.swap is only 15 mm vs 25 mm of most traditional fans shows how big of a difference that makes. I did put the NF-A12x15 PWM chromax.black.swap’s together alongside the two NF-A8 PWM chromax.black.swap’s that we are using at the back of the case and you can see how the four fans compare to the two. The NF-A12x15s are spun around in a way where their anti-vibration pads aren’t touching like on the NF-A8 but even without that you can fit three NF-A12x15s in the space of two NF-A8 and still have 5mm of space left.
Installing the cooling
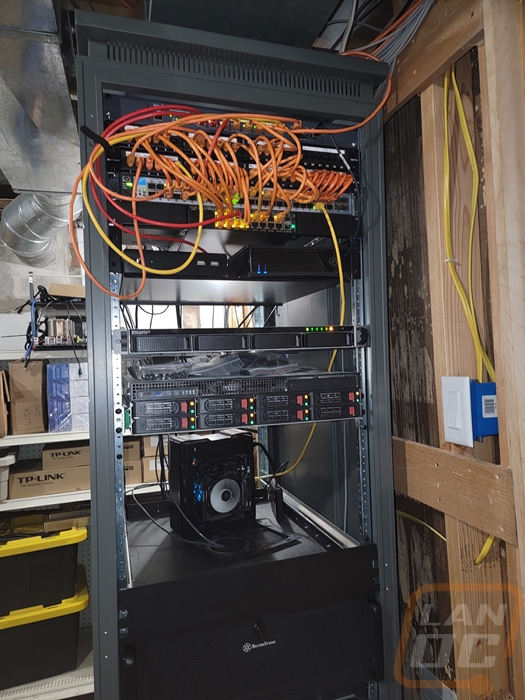
Before getting the cooling installed I did take a run at cleaning up more of the wiring on our network rack. I installed our new EnGenius ECS2512 into the back of the rack and connected it to our main backbone switch at 10G, this is hidden in the back just to wire up servers and devices that need 2.5G or 10G but don’t need POE. That cleaned up a few wires. Then I went through and replaced more of our longer cables with shorter patch cables to get those short connections out of the way and when doing that I cleaned up the routing on the longer cables as well. Overall it isn’t perfect but much cleaner. I also picked up a few 1u fill plates to clean up a few of the gaps.

Once I’m able to get rid of our old server which is still running on that drawer things are going to look great.
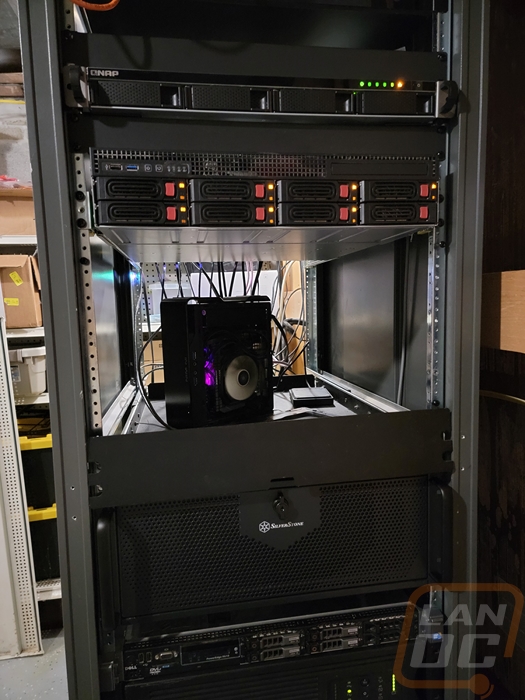
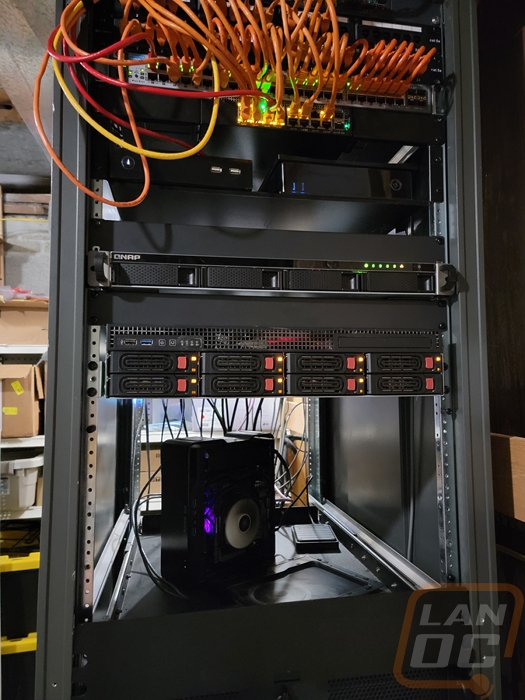
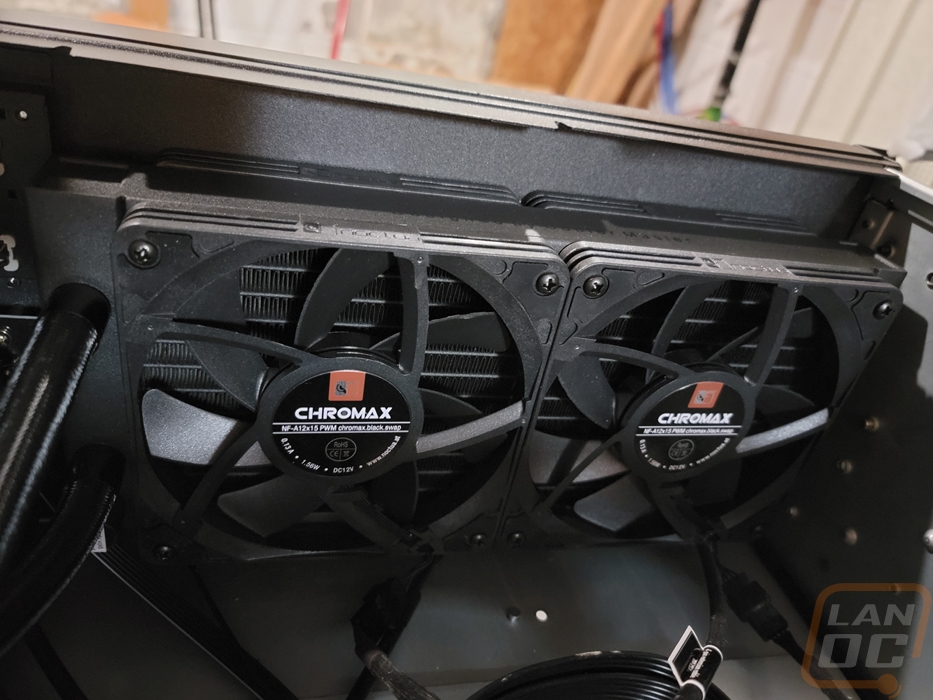
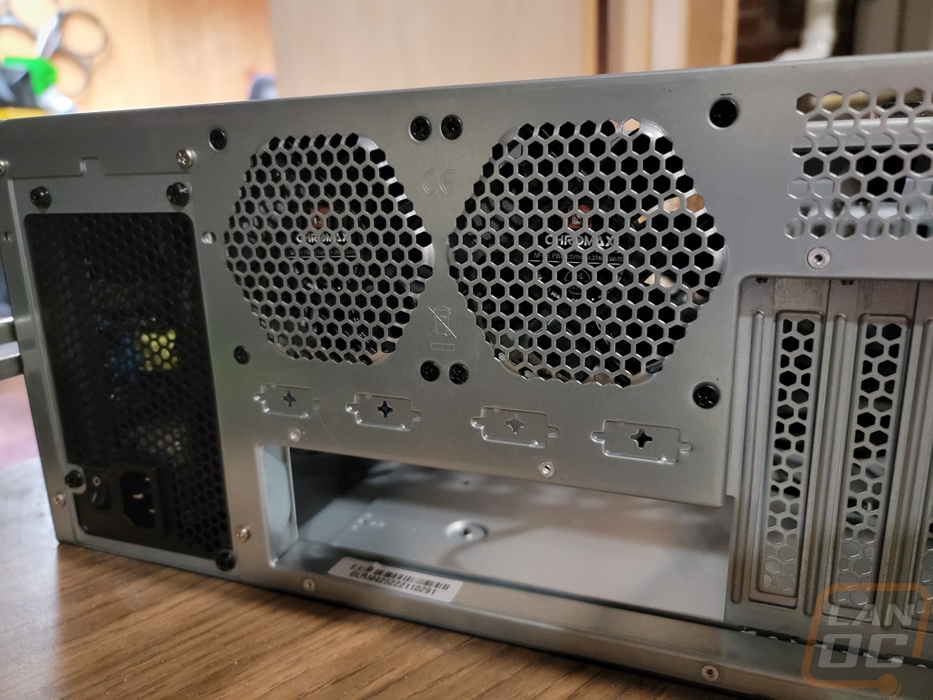
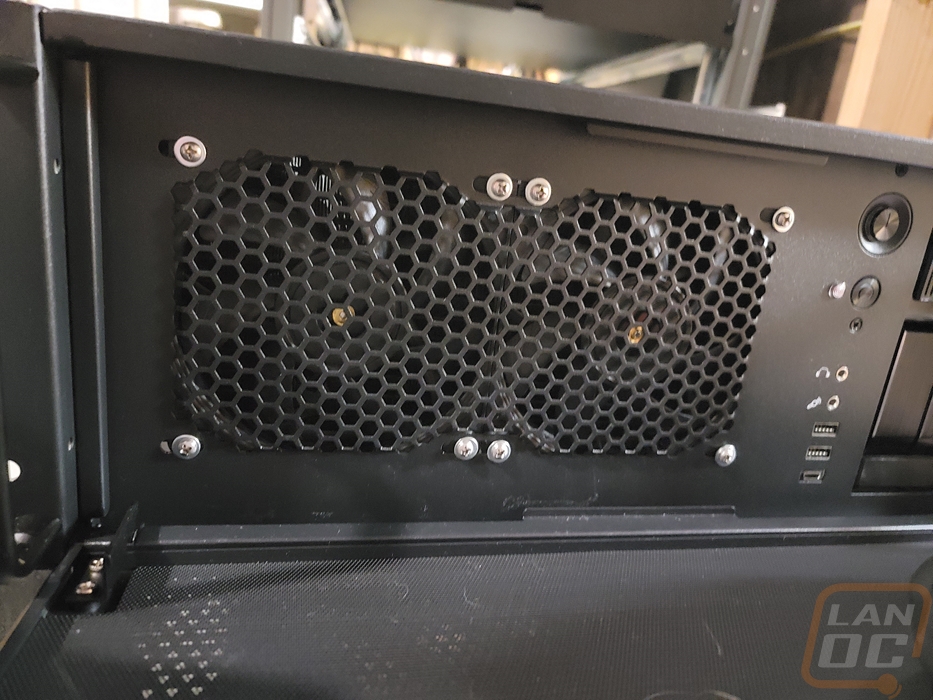
With our rack cleaned up, I pulled the Icyu server out and off of the rails so I could remove the top cover and work inside. First up I had to remove the 80mm fan that Silverstone preinstalled in the case and then with the included mounting screw I installed the two Noctua NF-A8 PWM chromax.black.swap fans. Both are set up in an exhaust configuration with them blowing out of the back of the case.
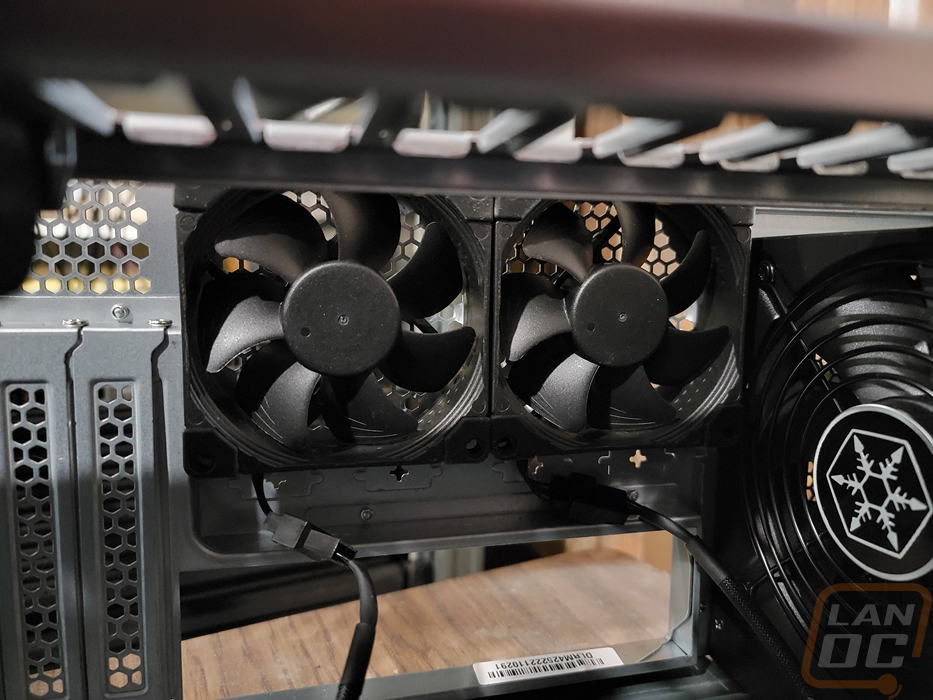
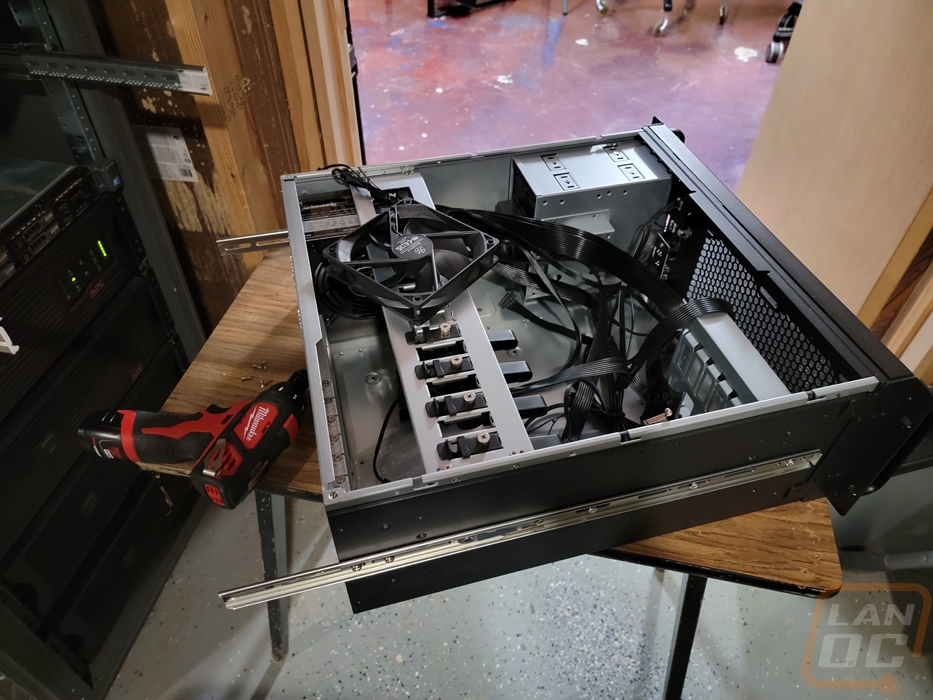
Next up I wanted to install both the Cooler Master MasterLiquid PL240 Flux and the Noctua NF-A12x15 PWM chromax.black.swap fans as well. I removed the preinstalled Silverstone fan from the front and went to install the front fans and the radiator when I realized that with the NF-A12x15 fans I would need shorter screws than the screws that came with the PL240 Flux. After doing some research I found 18mm 6-32 screws listed as the solution and I ordered a pack from Amazon. A few days later they came in and I went to get things finished up only to figure out that 18mm wasn’t long enough to go through the front of the case as well, not to mention our screws were a tiny bit short as well. Tired of waiting I ended up getting 6-32 1-inch screws from the hardware store along with washers to deal with any extra length. I wanted to have black screws to match everything but that wasn’t an option locally and after a week of waiting I wasn’t going to wait any longer.
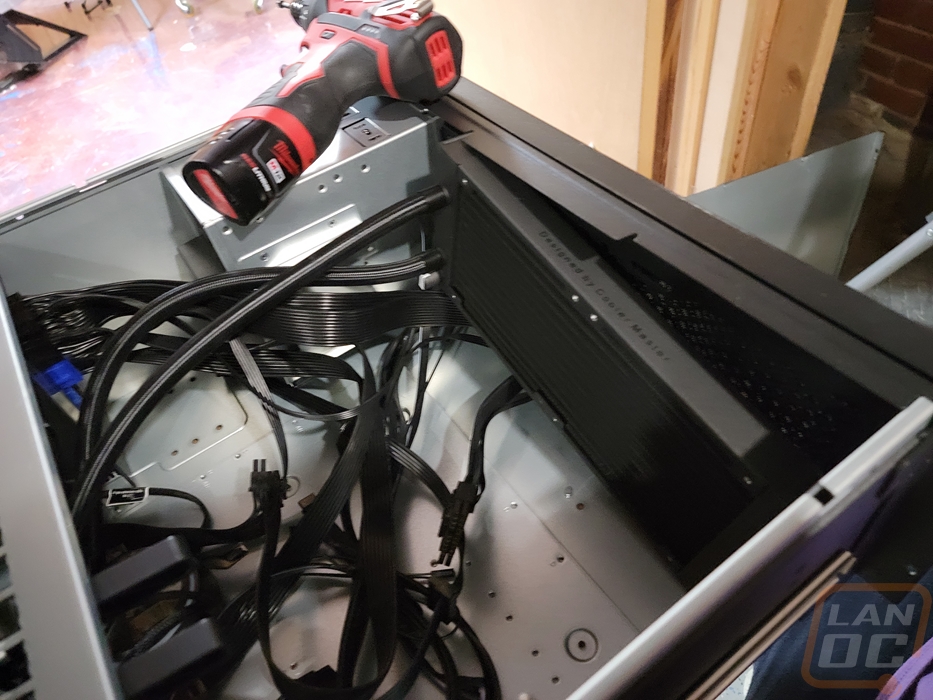
If you were curious how the shorter 15mm fans fit in the Silverstone RM42-502 with a front-mounted radiator you can see that they do leave a small gap between the radiator and the GPU support bracket. I was hoping I would be able to fit the push-pull fans with the 15mm fans while still keeping that bracket and I was close but I ended up deciding to get rid of the support bracket, mostly so it wouldn’t block airflow.
Installing the rear fans wasn’t an issue though I do recommend that you install them to the radiator before you mount it and the front fans just so you don’t have to fight with getting at the screws on the bottom. I did go ahead and get the mounting brackets for our CPU socket ready on the PL240 Flux which I will talk about next time about those components once our motherboard comes in which is the main hold up. I ended up being able to use the shorter 18mm long screws for these rear fans because I didn’t have the added thickness of the case but they just barely were long enough.