
At CES earlier this year Corsair’s biggest introduction was their new CAPELLIX RGB’s which drop the conventional package that PC LEDs have been using to create a much smaller, brighter, and energy efficient LED. Now smaller means the potential for much higher density and energy efficiency could mean you could see them used more in wireless devices. But the first product they introduced with CAPELLIX LEDs was the Dominator Platinum RGB memory kits. So in addition to being the first Corsair RGB kit to come into the office, I’m also excited to see what the CAPELLIX LEDs can do. I will also talk a little more about the benefits later as well.
Product Name: Corsair Dominator Platinum RGB 16GB 3000MHz
Review Sample Provided by: Corsair
Written by: Wes Compton
Pictures by: Wes Compton
Amazon Affiliate Link: HERE

Packaging
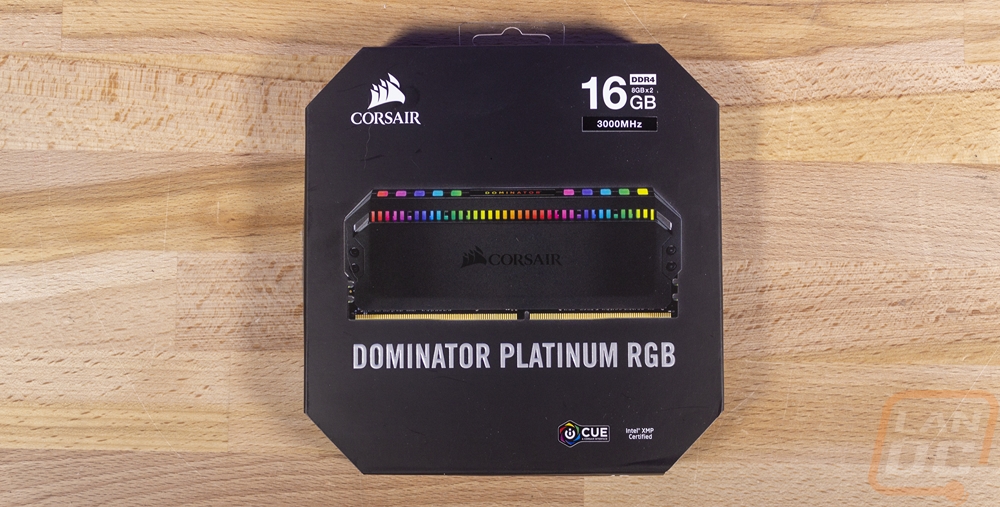
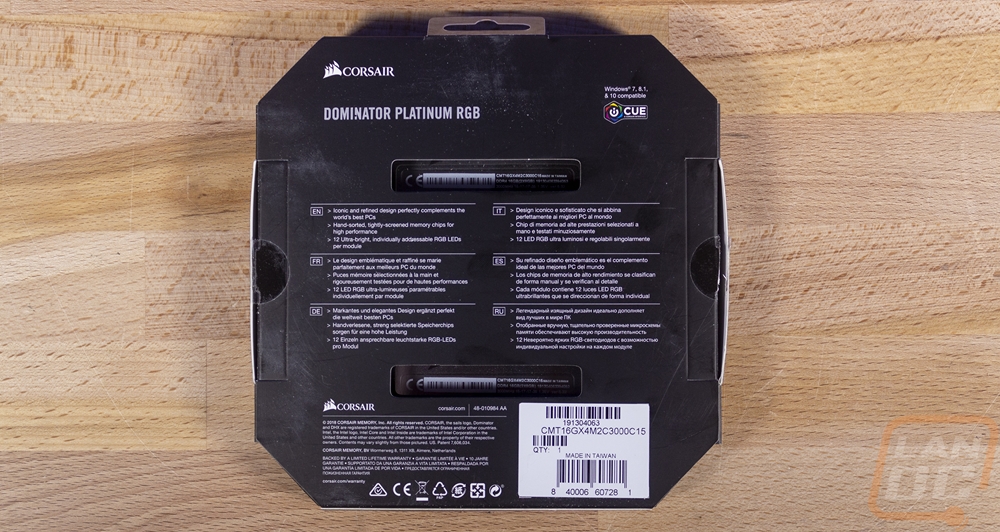
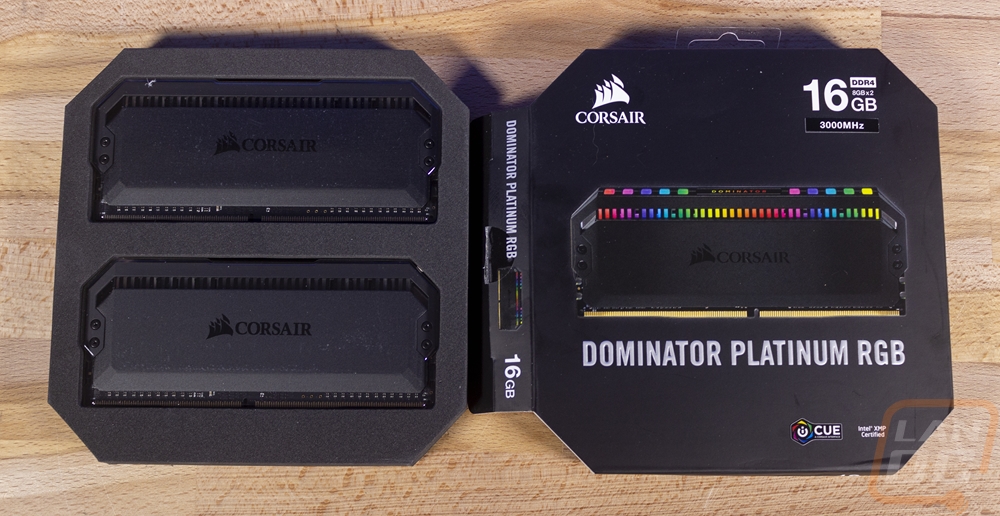
Corsair ships the Dominator Platinum RGB kit in a nice blacked out package that has a color picture of one of the sticks on the front as well. The Dominator Platinum RGB branding is big on the front as well as the Corsair logo up in the top left corner. Also on the front are logos for Corsairs iCue software and the Intel XMP logo. Then in the top right corner, the model details are all together including the capacity and density, DDR4, and the memory speed which our kit is the slower 3000MHz kit. They have kits all the way up to 4800Mhz. Around on the back of the box, there isn’t too much information other than a short feature list that is repeated in six different languages. There are two holes that let you peek through and see the serial number and bar code as well as the ram details so you can make sure nothing has been switched out.
Inside there wasn’t any documentation or anything with the memory. They come in a foam tray that keeps each stick from moving around.
Photos and Aesthetics
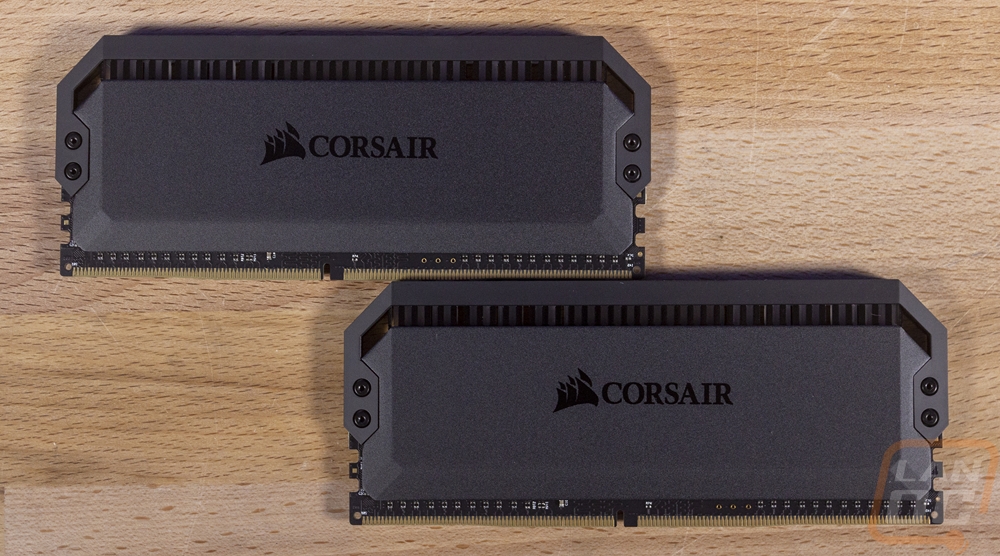
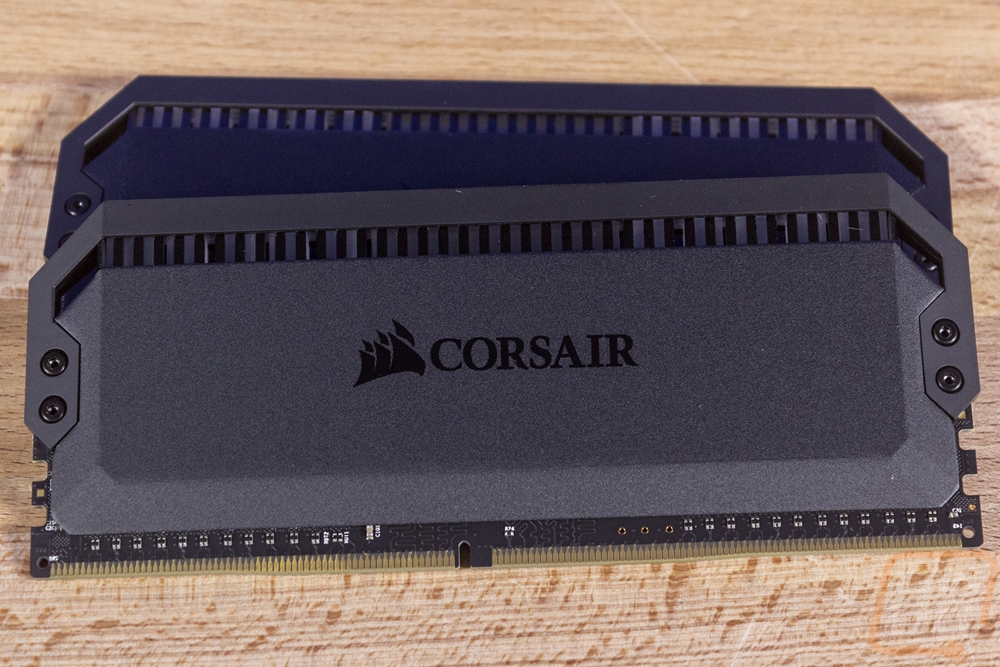
After pulling the Dominator Platinum RGB memory out of its packaging but before getting it in our test bench I wanted to check them out. The first thing I can say is the Platinum name made me think that they might be silver or white but the kit is completely blacked out. They have the standard Dominator styling from the side profile which includes the mostly smooth sided heatspreaders and a machined bar across the top. The sides do have a slight bevel to them on the outside edges that ramps up to the flat sides. The sides have a textured finish with a gloss black Corsair logo in the middle. The side profile also gives you a peek at the clear plastic lighting tubes that carry the light from the CAPELLIX LEDs up to the top of the memory. The side benefit to this design is it also gives a little lighting to the side profile which is great if you have a none standard case layout that shows the sides more than normal.
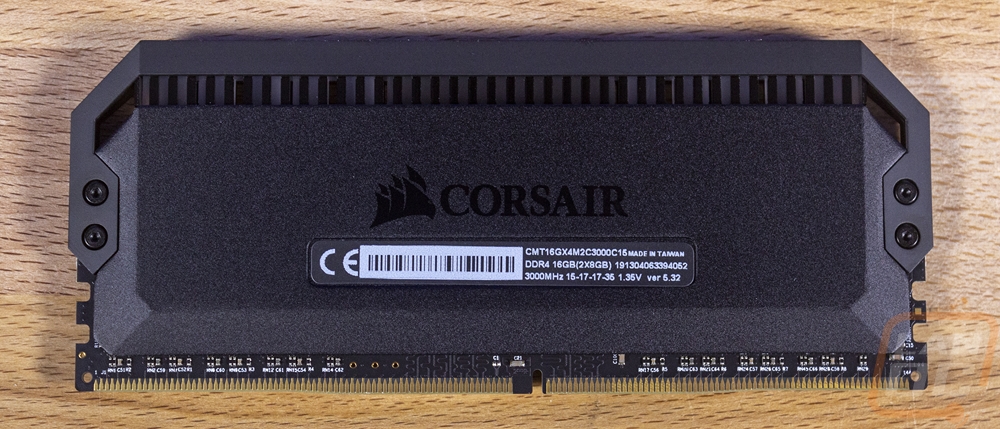
The back of the sticks have the same heatspreader shape, color, and finish with the exception of a small area that is dented in for the sticker placed on each stick. The sticker has the serial number bar code, model number, memory size, memory density and configuration (in this case 2x8GB), the memory clock speed, timings, and even the voltage. This is the same sticker you can see through the window on the packaging. I love that this sticker is as small as possible to not take too much away from the otherwise amazing looking memory and I also like that it wasn’t just tossed on, they obviously planned for the exact location with the heatspreader having a sticker sized spot recessed slightly.
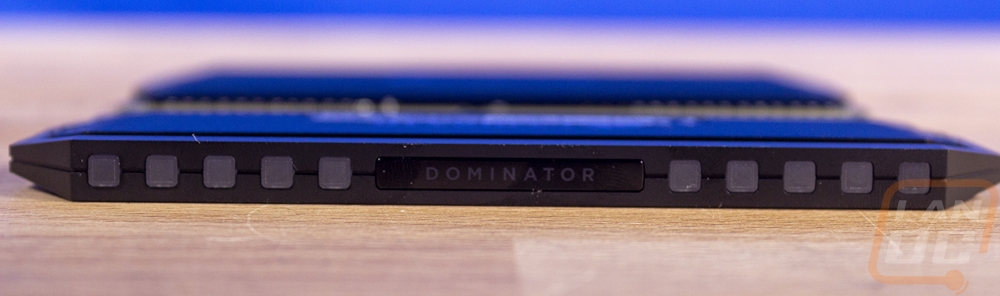
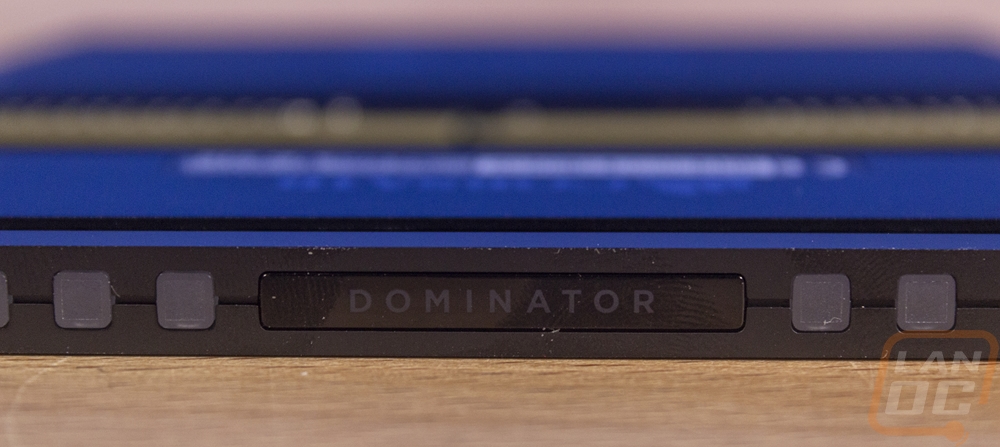
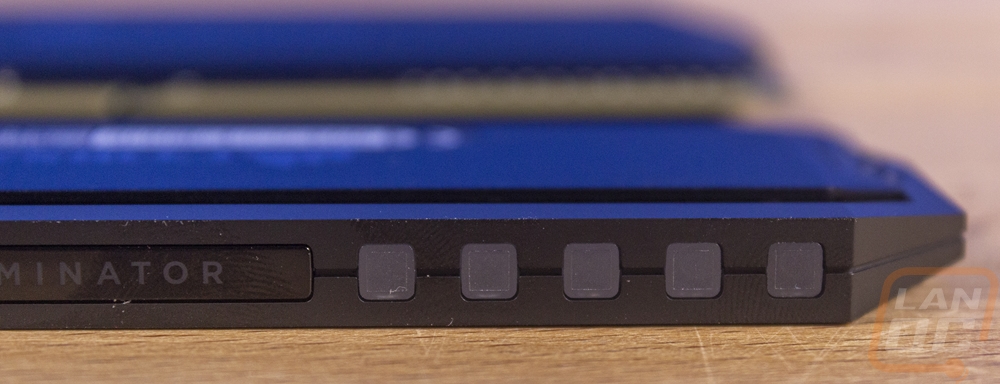
The top edge of the Dominator Platinum RGB memory is the biggest departure from both past Dominator memory and other RGB memory from Corsair. In the past, the Vengeance line has been the RGB memory and with those Corsair used a full-length diffuser across the top which adds a lot of light into your build but now almost all of the RGB memory kits do the same. This configuration ends up a little unique with this touch. So Corsair only went with 12 total CAPELLIX LEDs to the Dominator Platinum sticks. The base reason for this was the same reason they haven’t done RGB Dominator memory before. LEDs pull power and there is a limited amount of power available through a DIMM slot. The new LEDs are a lot more power efficient and also put out more light finally allowing them to use them on their flagship Dominator kits without sacrificing performance but they did have to keep the LED count down. You can see one LED for each square diffuser and there are two behind the middle where they have the Dominator name backlit.
Software and Lighting
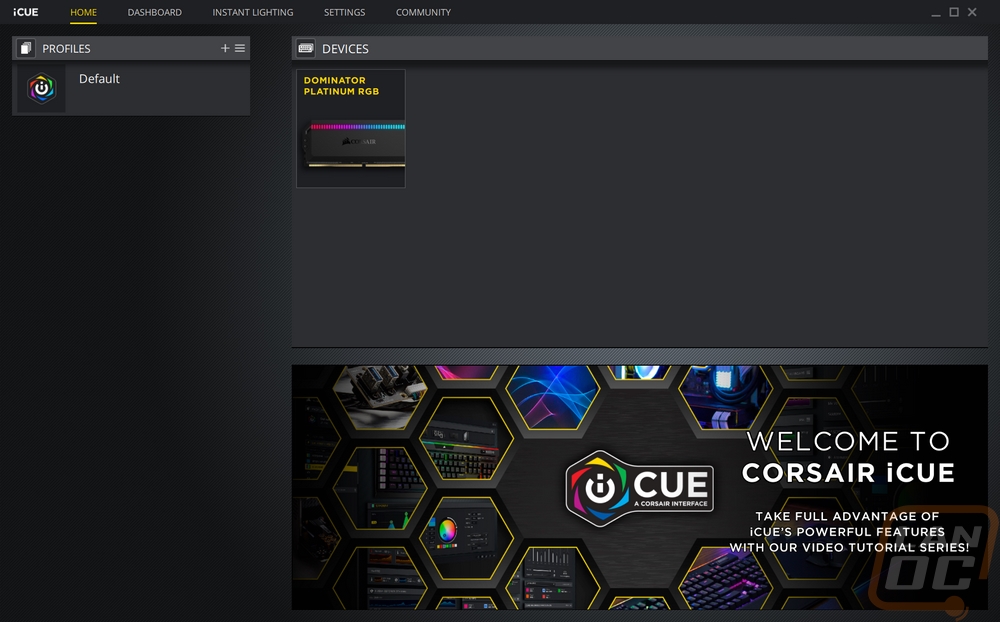
Software and lighting for Dominator RAM? Well, there is always something new right. Corsair has tied the lighting for the Dominator Platinum RGB memory in with their iCue software which I just took a look at with the K83 Keyboard. The software, like most of the peripheral companies, is designed to work with a lot of products by listing everything that is plugged in or in this case installed. From there you can click on the device and open up the options. If you buy big into the Corsair ecosystem having this option is great, one program for all of your hardware. The first page is a basic one that just shows you which memory you have installed and you need to select the slot configuration of your motherboard then make sure they are displayed in the correct order. This is mostly just for how things look in the software but it also works with effects.
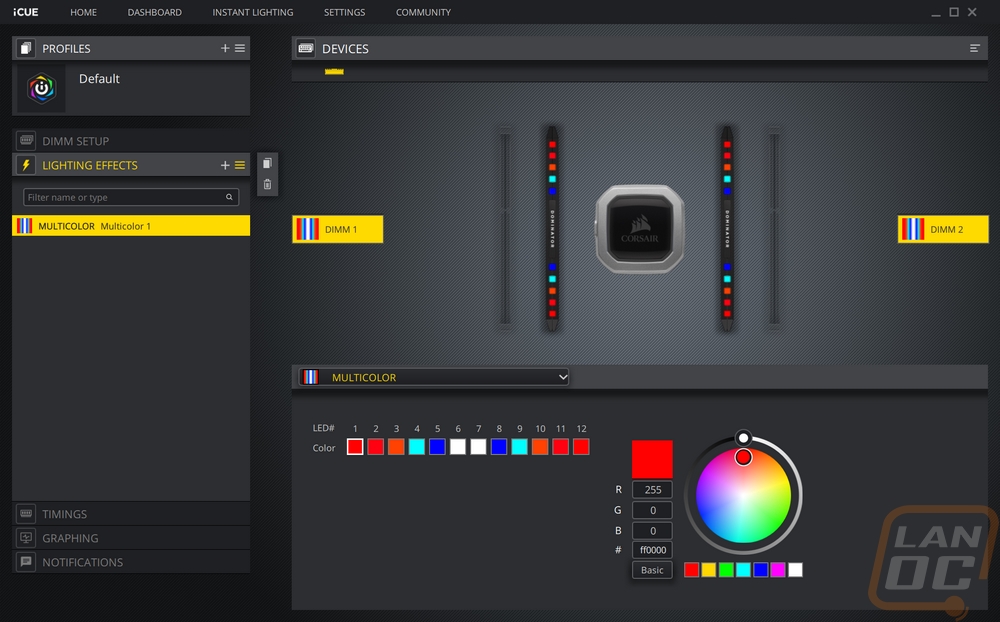
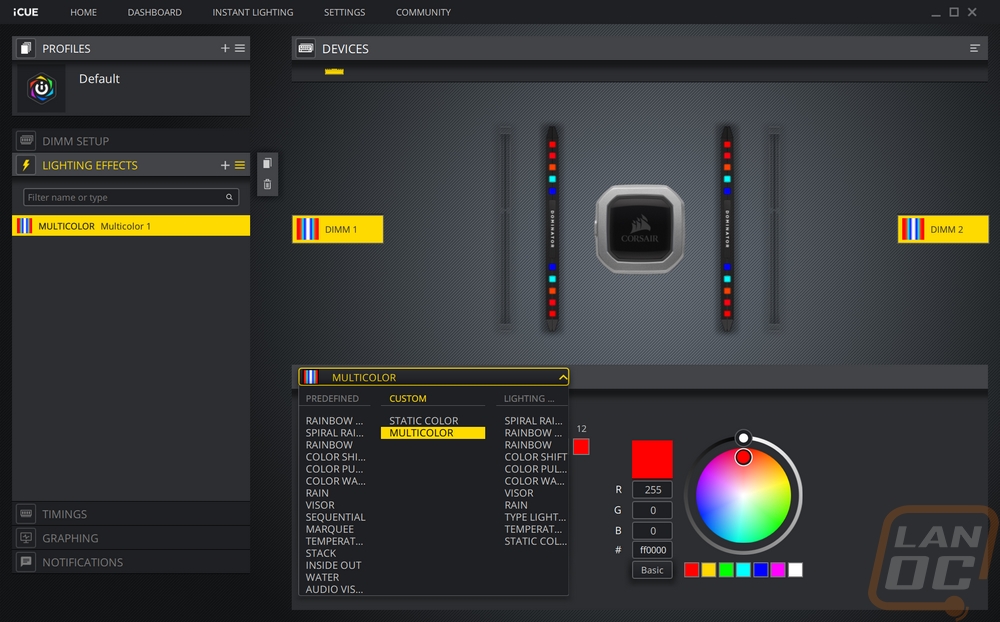
The page most people will spend all of their time on is the lighting effects page. Here you can see the memory in the top right quarter of the software. Then below that, you can make changes to the lighting. Obviously, there are basic things like static lighting with just one color or you have the option to set each of the individual LEDs to a different color. You can use number codes or R, G, and B values or use the color picker. The white to black dial controls brightness as well so you can tone down or turn them all the way off if needed. The dropdown has a whole list of predefined effects as well and a lot of those have options that you can change from picking colors in Marquee to setting effect speed and directions on others.
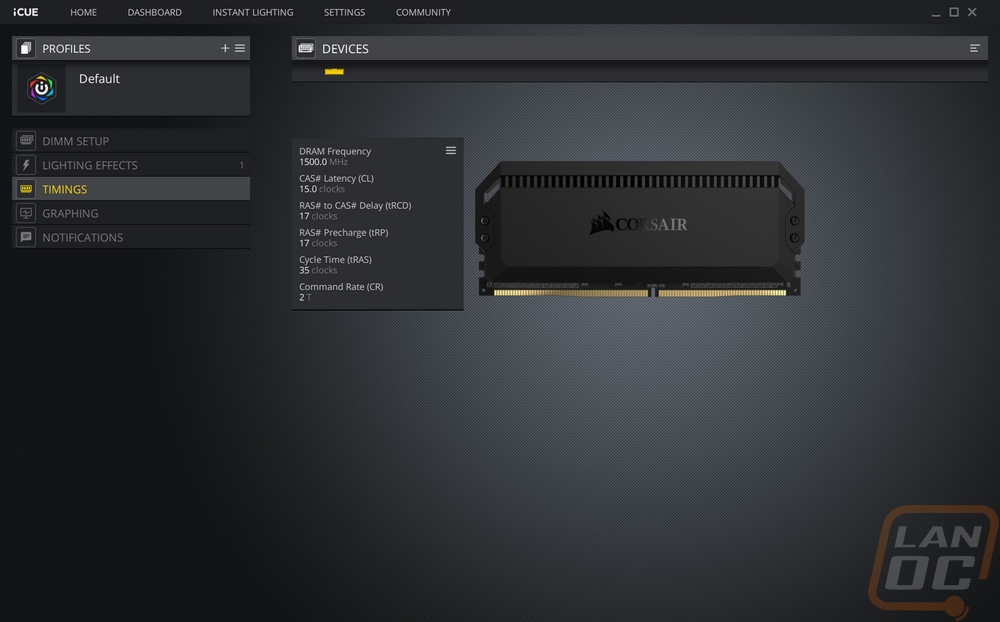
The timings tab is simple and to the point really. It lists the memory clock speed and all of the timings. There aren’t any options here, just a picture of the memory and that listing.
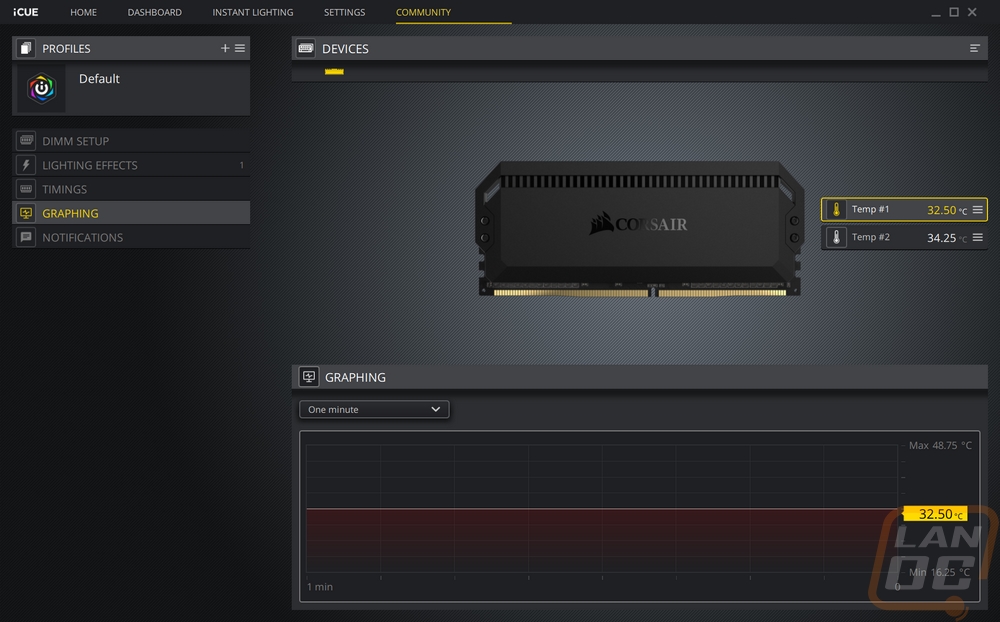
Graphing is exactly that as well, a tab with a graph on it. You can see the temperatures of both or all sticks installed and it graphs out those temperatures over time. You can set that time from one minute up to much longer depending on what you are hoping to see.
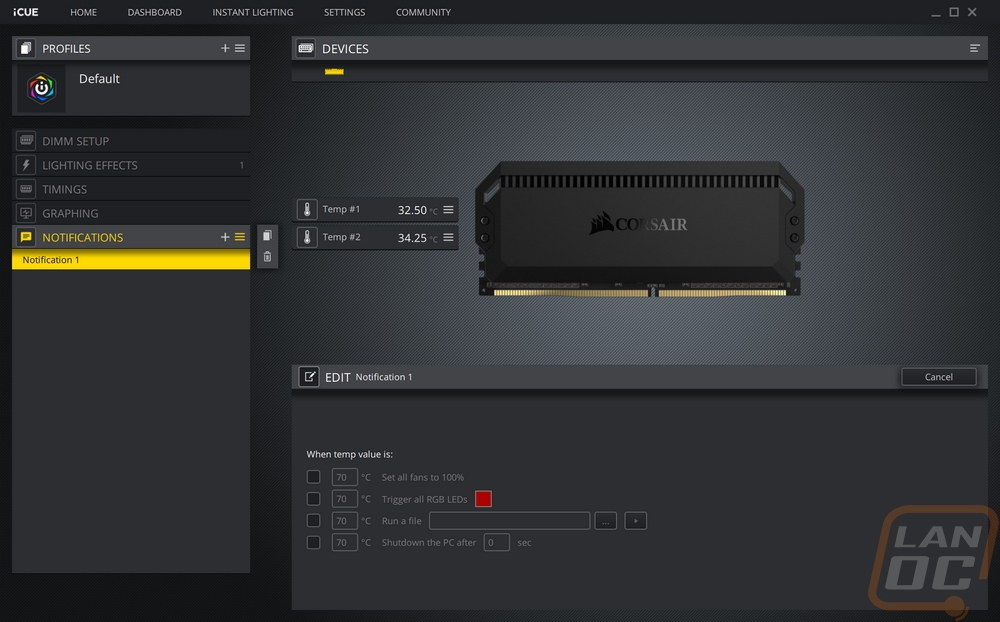
The Notifications tab lets you add one or more notifications. This tracks the memory temperatures again and you can set the software to do a few things when they reach a set point. You can turn the fans up to 100%, switch the lighting to any color you want, run a file, or turn your PC off altogether or a mix of all of those.
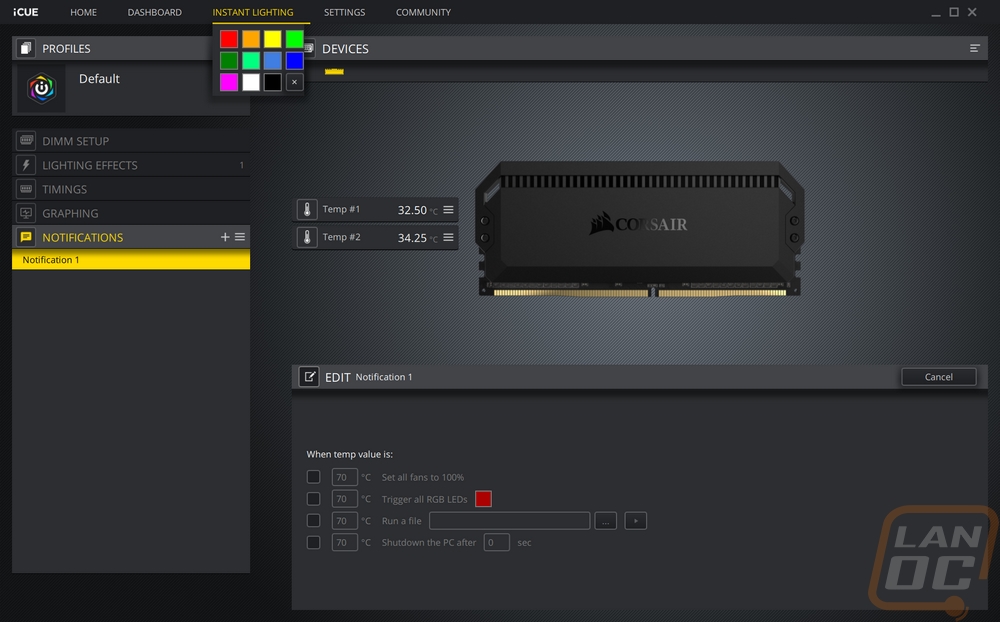
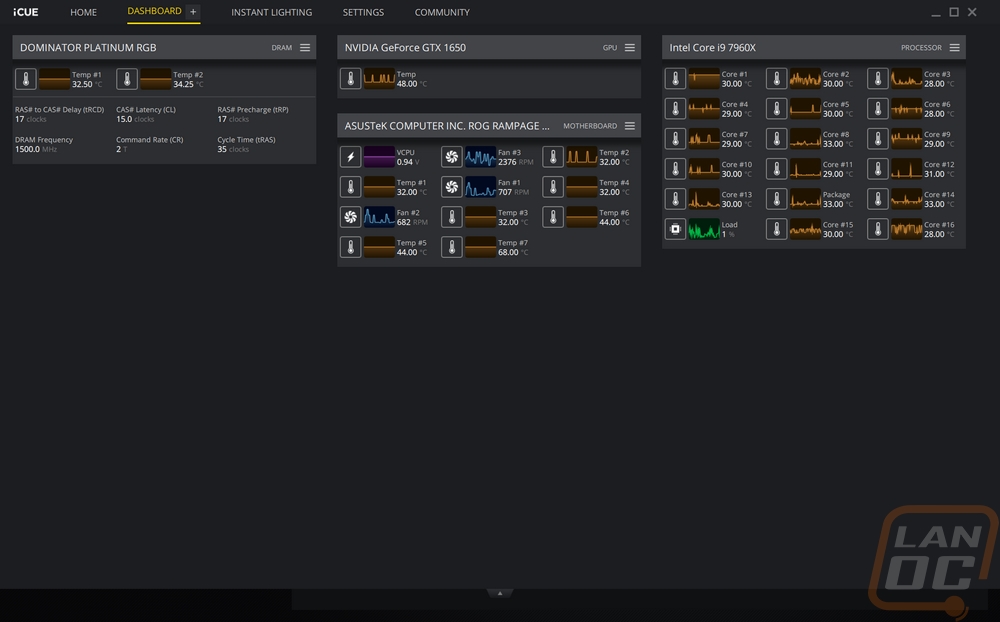
iCue has a few options, not in the hardware specific tabs like up top where you can turn on instant lighting to a few set colors. This will switch ALL of your Corsair devices to that same color which is really cool when you have this memory combined with case fans or lighting. There is also a dashboard where you can pull up a lot more PC information. Our test bench allowed the software to pull all of the temperature and fan speeds of our ROG motherboard, each core temp for the CPU, and temperatures for the video card installed at the time. It also pulled up the temps for each Dominator stick as well as the timing info. The more Corsair products can add even more, for example on my own PC it showed voltages, fan speed, efficiency, power in, power out, and temperatures for the HX850i in my build. The 2080Ti also showed individual fan speeds as well as the temperatures that I saw on our test bench. A lot of people struggle to find software to find some of this information and Corsair has it put together in a nice way.
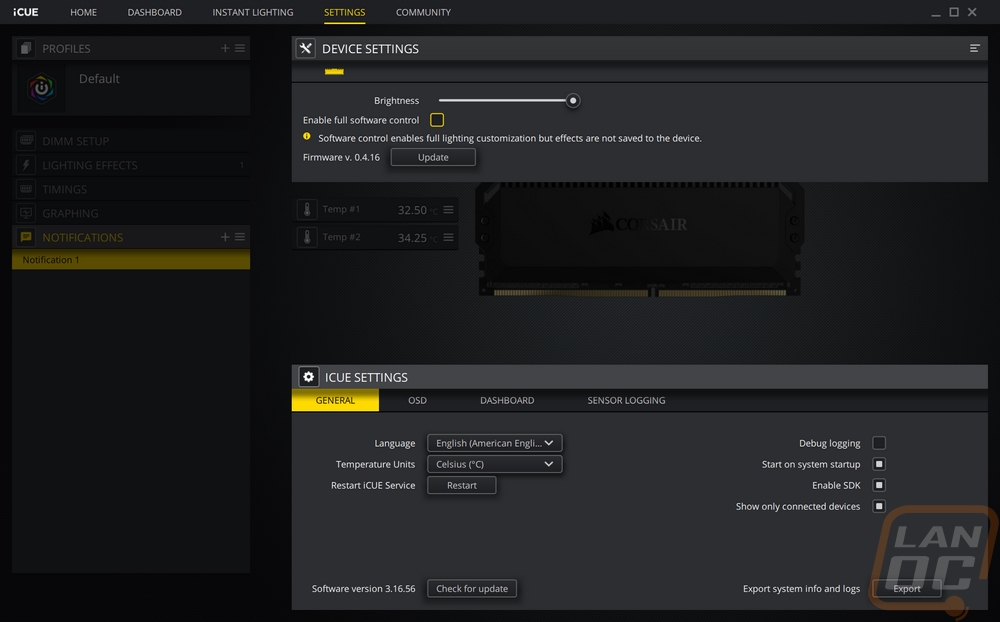
You can also get into the device settings page but for the Dominator Platinum RGB kit this really only allows for brightness control and an update firmware button. The full software control option is there as well meaning you stop saving the lighting settings on the memory all together and let the software handle it but I don’t like doing that anyhow.
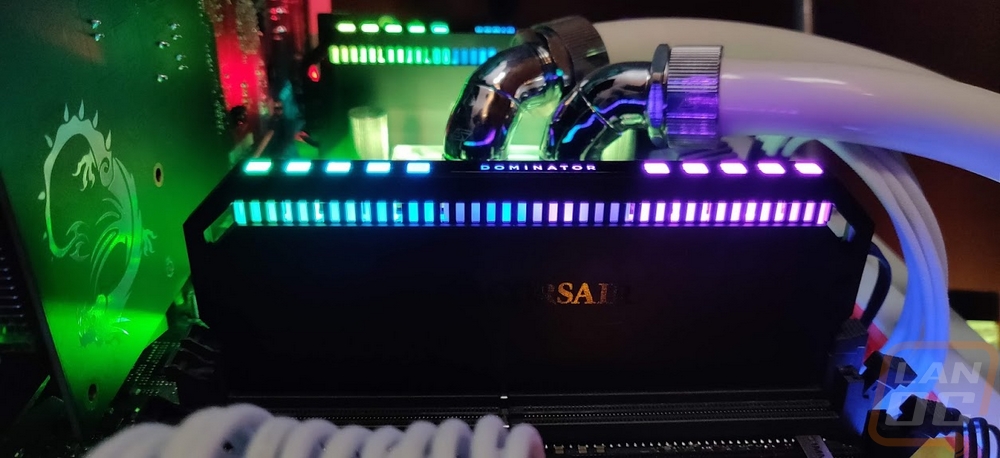
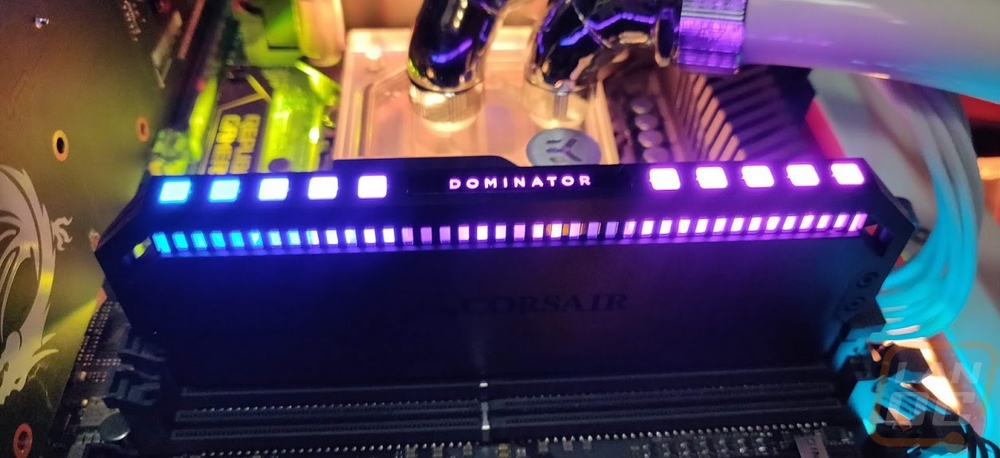
I can’t look at the lighting control options in the software without looking at the lighting itself on the Dominator Platinum RGB kit right? I did play around with the lighting effects a little, but as far as photos go I have pictures of the kit running through its default rainbow mode and then a static layout I put together with red, orange, blue, white, and aqua. Showing the brightness of the lighting is a little hard but I made sure to have the lighting on the motherboard and the EK water cooling to give some comparison and this kit with the lighting turned up is bright, even with just 12 LEDs in total.
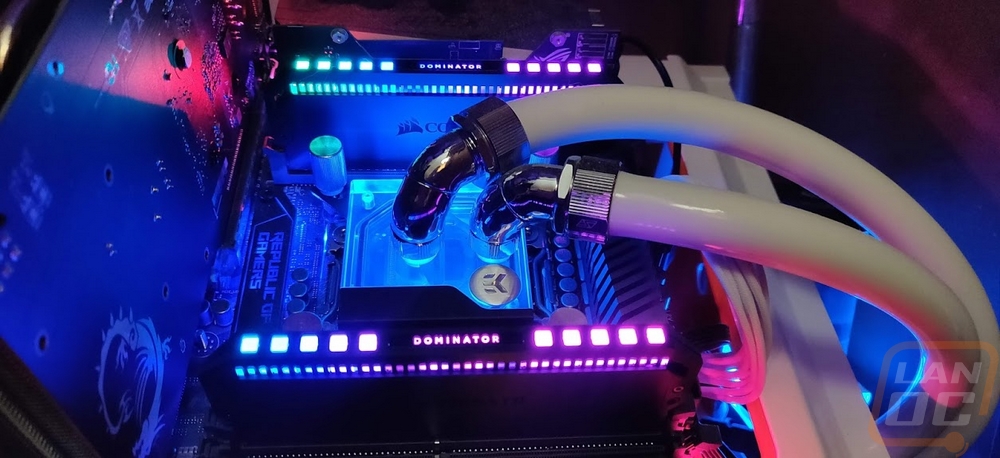
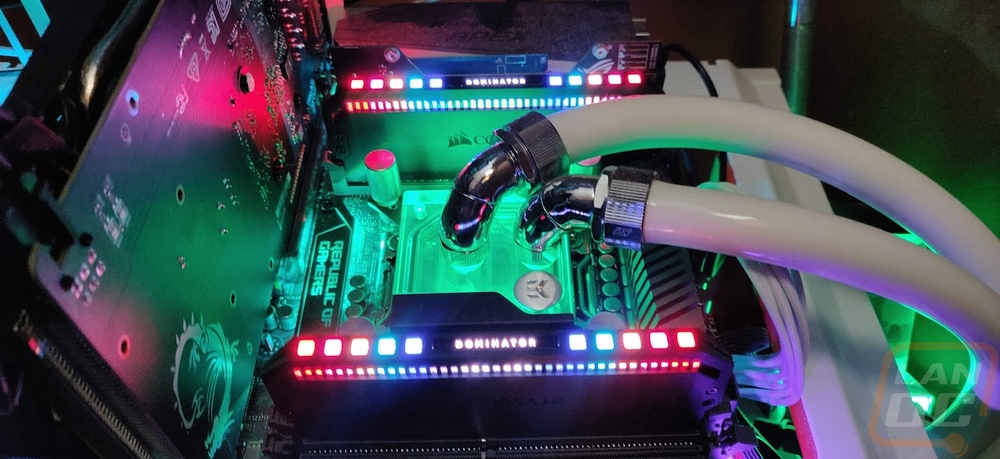
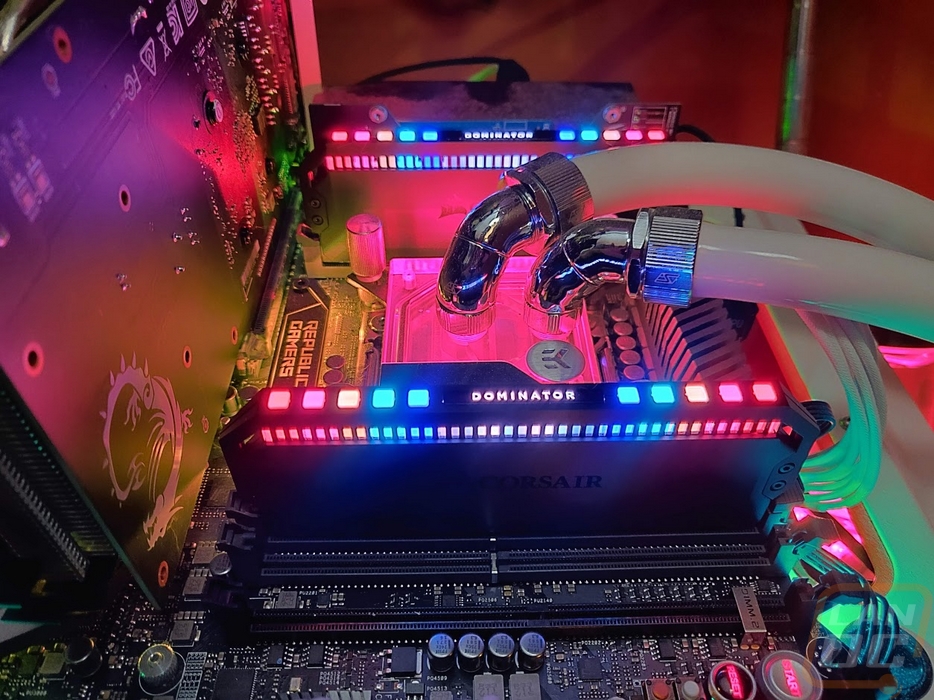
My favorite part without a doubt is the side profile view where those diffuser tubes show the lighting out both sides. It also gives more of a blend between each color where the top view has one diffuser per LED and the space between them is covered.
Performance and Thermals
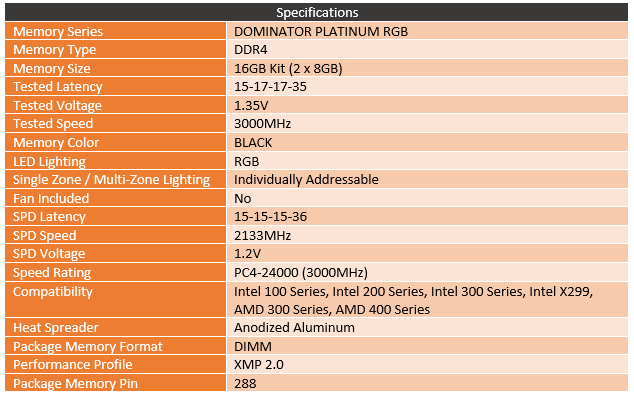
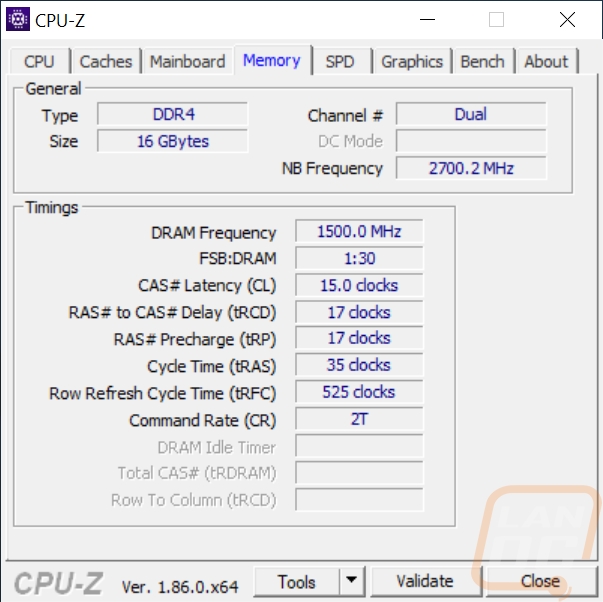
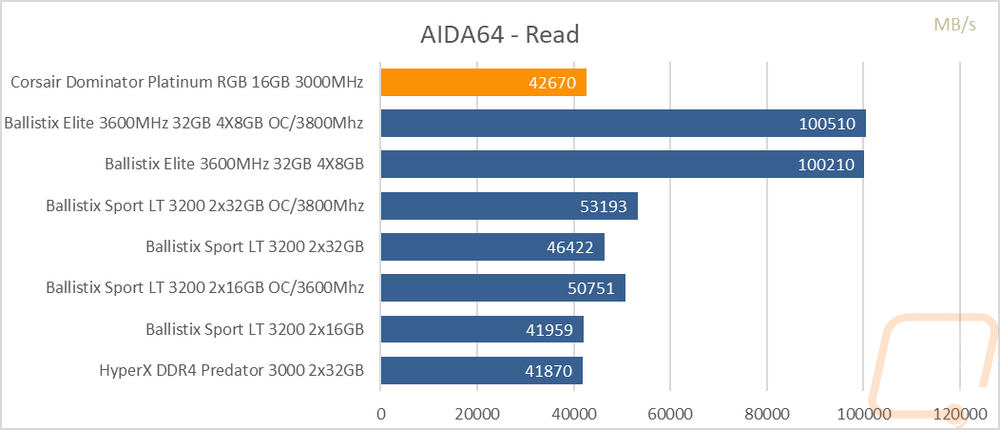
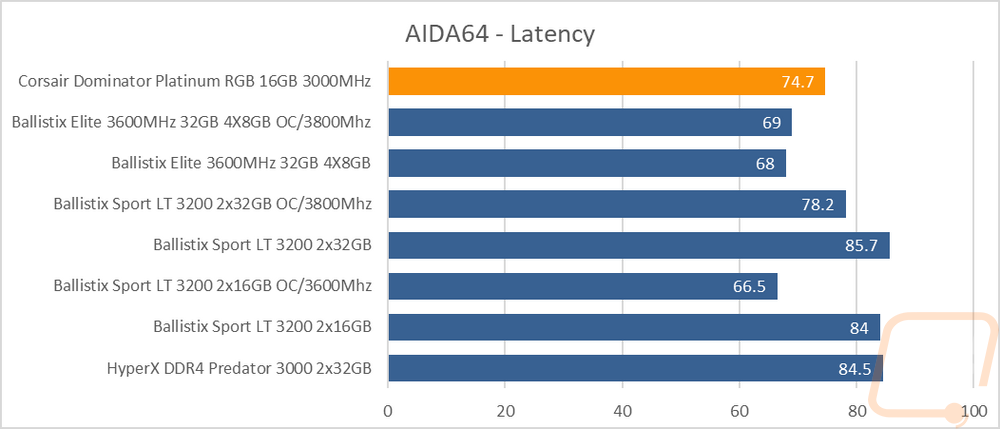
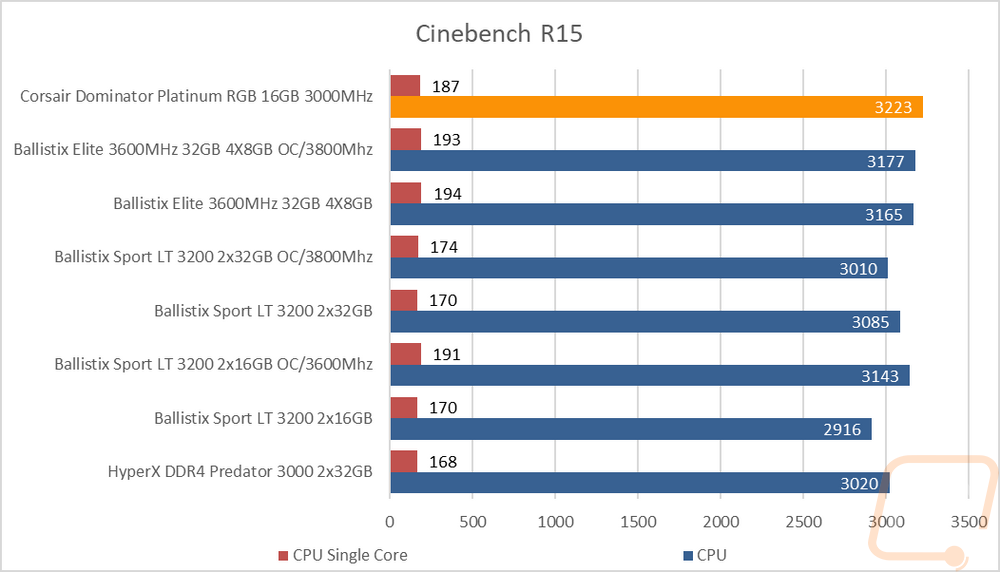
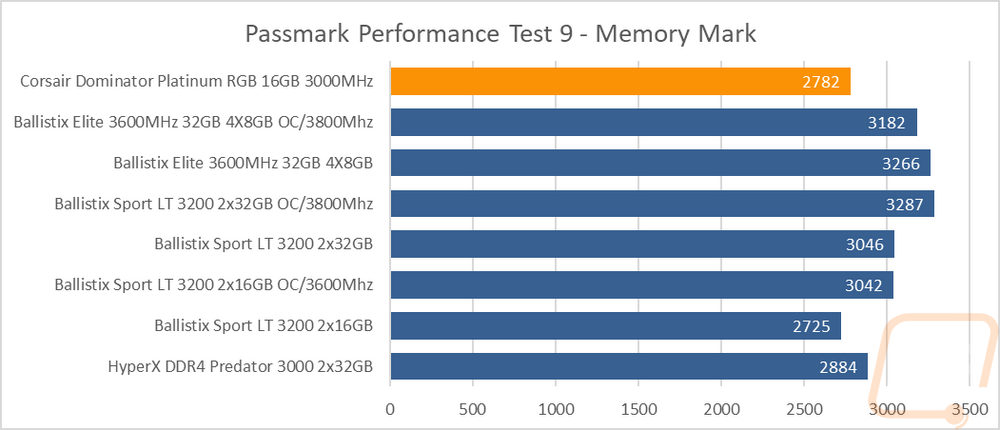
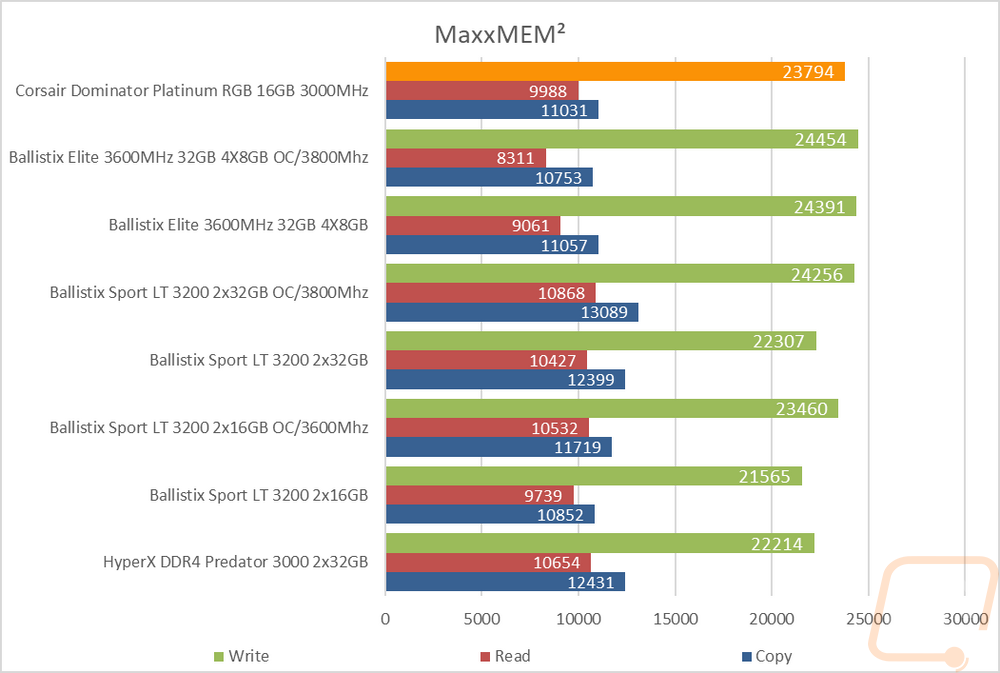
For performance testing, I ran the Dominator Platinum RGB kit through our normal benchmark suite. Memory when it comes to performance testing is mostly a numbers game. The clock speed and timings make most of the difference with the capacity and number of sticks play roles as well, especially when it comes to jumping up to quad channel kits on X299 and Threadripper. What I’m saying is at stock speeds there aren’t any big surprises. The kit we were sent is a 16 GB kit in dual channel 8GB sticks and is running at 3000MHz. This is actually the slowest Dominator Platinum RGB kit that Corsair sells when it comes to clock speed but it is also one of the most realistic when it comes to what people will be shopping for unless you are doing a very high-end build. This kit has a Cas latency of 15 and 17-17-35 timings. The clock speed might be the lowest for the Dominator line but it isn’t too bad for memory overall, 3000-3200MHz is the benchmark for a good build.
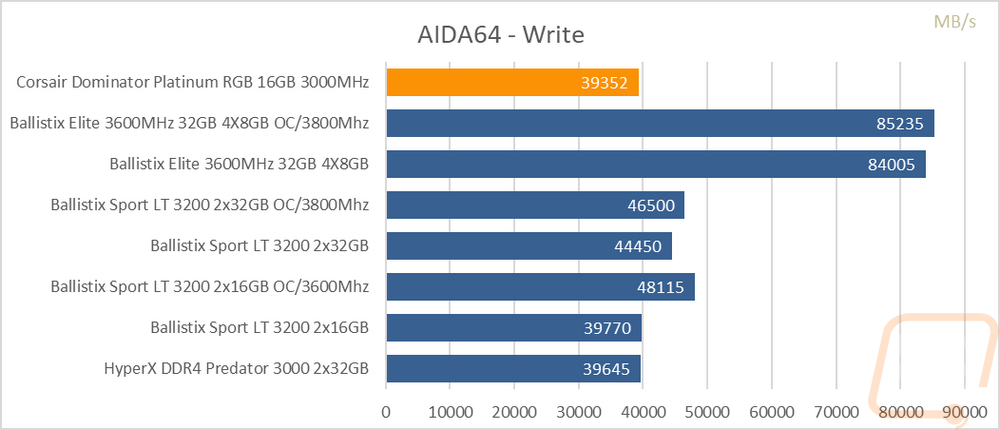
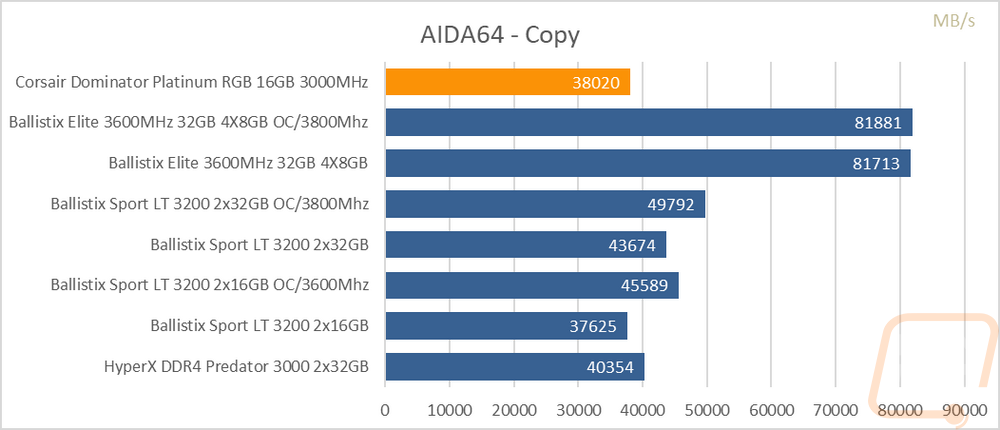
Sadly for my results, most of the kits I have tested recently are 3600MHz and 3200MHz and in the case of the Ballistix Elite kit, it is also a quad channel kit. You can see how that makes a difference in the read, write, and copy tests. Overall though the Dominator Platinum RGB kit held its own, especially compared to the Predator kit which was also running at 3000MHz.
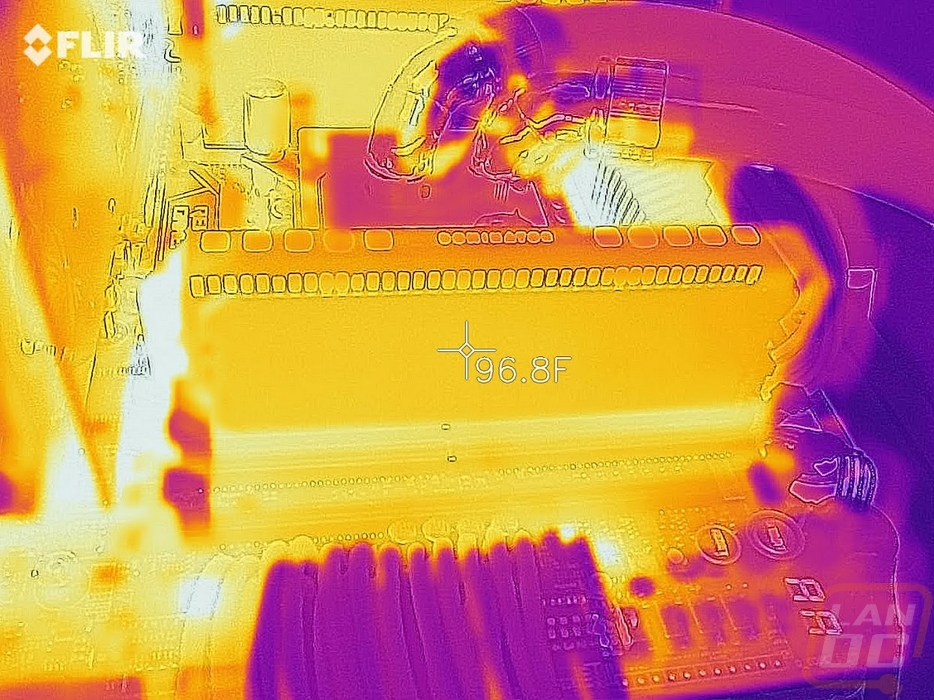
Memory mostly has to worry about temperatures when overclocking but I was curious to see how the Dominator Platinum RGB kit would handle the heat. To do this I used AIDA64’s stress test set to load the memory. I ran this test for almost 2 hours while waiting for the temperatures to level off using the iCue software’s ram temperature readouts. Once they didn’t go any higher I snapped this thermal image to see how the kit was handling things. You can see the heatspreader has most of the heat in it with just a small differential between it and the small amount of PCB showing. The classic Dominator top bar is pulling some heat up into it but it runs the coolest. Most importantly though, even after that long, the memory was running at 96.8 degrees Fahrenheit at the hottest spot in a room temperature of 74f without any fans on it. Heat, at least at these speeds, isn’t a problem. I would be curious to see how the 4800Mhz kit would compare though.
Overall and Final Verdict
Like I said at the start, this was a kit I was excited to get in. I haven’t had any of the Dominator memory kits in the office, just the Vengeance lineup so I was curious about checking them out. Getting to check out Corsairs new CAPELLIX RGB LEDs as also a nice bonus as well. So did they live up to my expectations? Well, this is without a doubt the best-looking memory kit I’ve seen. The all blacked out look itself is great, I would be happy with that alone without any lighting. The heatspreader design is simple and clean though you do have to remember this is a taller kit if you are running air cooling, not every heatsink is going to fit over that top bar. But then again why would you want to cover up the top where the lighting is most visible. The CAPELLIX lighting is bright if not too bright and it hit the colors I wanted it to do easily.
It wasn’t my first time using the iCue software but I was impressed again with it after seeing how Corsair integrated memory into it. Lighting controls are simple and easy to use and if you use any other Corsair products you can control those using the same program which is great to not have 10 programs open all of the time pulling CPU cycles and memory. But I also loved the dashboard where you can see all of your PCs temperatures, fan speeds, and other information depending on what products you are using. Some people are downloading temperature programs that are hard to use and here is Corsair making it all easy to see, read, and use.
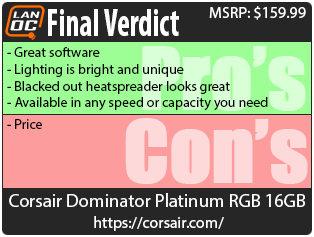
Now the Dominator Platinum RGB kit that Corsair sent over wasn’t one of their flagship kits with crazy high clock speeds or a 128GB 8 stick kit. But you have those options, the Dominator Platinum RGB is available in just about any configuration that you might want which is great. A lot of nicer memory kits don’t even bother to do mid-range speeds like this 3000MHz kit. Pricing on the kits ranges a lot depending on what model you are looking at. That 128GB kit running at 3800MHz has a $1794.99 MSRP for example. But for this case, I only compared this kit with other kits that at 2x8GB running at 3000MHz. I took a look at kits without RGB and kits with RGB lighting. I wanted to get an idea of what kind of premium you are paying for with the lighting. Lucky for us Corsair sells a Dominator Platinum kit without the lighting. The premium between the kits didn’t end up being too bad. The MSRP of the RGB kit is $159.99 but it is available for sale on Newegg and Amazon at around $139.99 right now where the non-RGB kit sells for $129.99, for $10 more you get the lighting and the all blacked out look. That is worth it to me.
I didn’t leave things alone at that though, there are a lot of 3000MHz kits that sell for a lot less so I was curious if any had similar timings to the Dominator kits. Oddly enough Corsair sells a Vengeance kit with the same timings, capacity, and speed. The CMK16GX4M2B3000C15 kit is at least right now selling for $79.99 on Newegg. This complicated things a little. Honestly, the Dominator Platinum RGB kit is priced right in line with other RGB kits with similar timings. But I put the price down only because if you want the same performance you can spend over $50 less and get it. Corsair also has a Vengeance RGB Pro kit that is a good deal as well with the same configuration. In other words, this Dominator Platinum RGB kit is at a bit of a premium because you get good timings, a higher end heatspreader design, as well as the lighting. Is it worth it? Well if you are like me and love the styling and the unique side profile lighting then yes. If not though Corsair has a few other really good options that don’t compromise speed in this configuration.

Live Pricing: HERE


